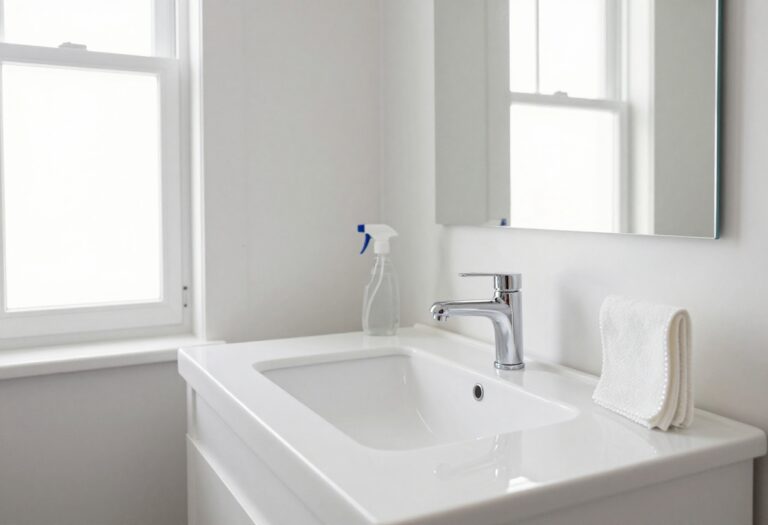
17 Cleaning Mold in Shower Grout Tips for Fresh Tile
Your shower grout starts looking dingy no matter how much you scrub. Mold creeps into those porous lines, and before you know it, your fresh tile looks old and grimy. The good news?
You don't need harsh chemicals or expensive services to fix it. These 17 tips tackle mold at every stage—from a simple baking soda paste to deep steam cleaning—using tools you already have. Each method is practical, tested, and designed to restore your grout without back-breaking effort.
Ready to make your shower look new again? Let's jump into the first tip.
1. Start with a Baking Soda Paste
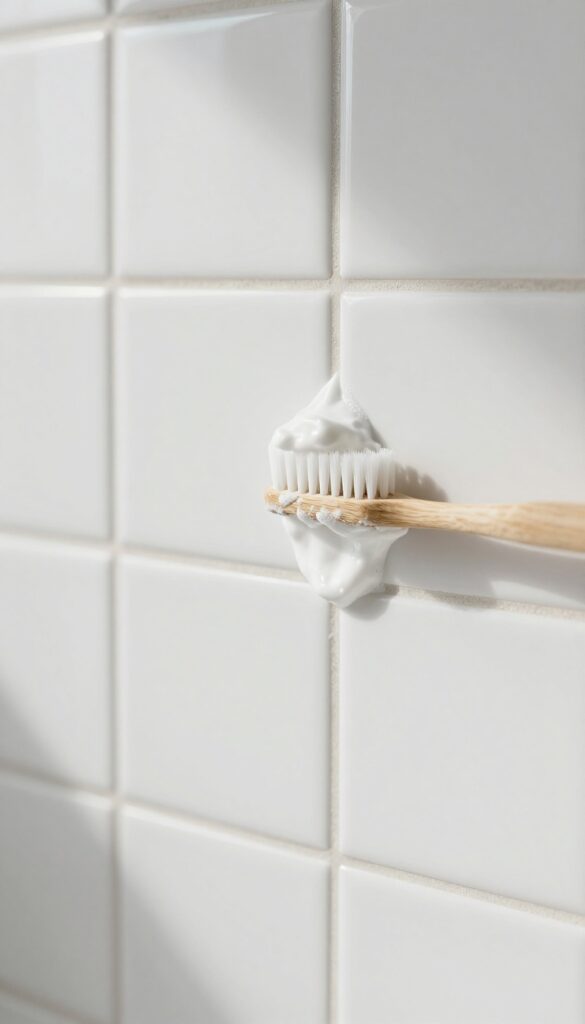
Baking soda is a mild abrasive that lifts grime without scratching tile. Mixed with water, it forms a paste that clings to vertical grout lines and breaks down light mold on contact. This method is perfect for regular maintenance or when you spot the first signs of discoloration.
Mix three parts baking soda with one part water until it reaches a spreadable consistency. Apply the paste directly onto the grout lines using an old toothbrush or your finger, making sure to push it into the pores. Let it sit for about 10 minutes—this gives the baking soda time to loosen the mold.
Then scrub in a circular motion with a damp toothbrush. Rinse with warm water and wipe away residue with a microfiber cloth. For tougher spots, add a splash of white vinegar to the paste, but test on a hidden area first since vinegar can etch some stone tiles.
Why Baking Soda Works So Well
Baking soda is alkaline, which helps neutralize the acidic compounds in mold. Its fine grit provides gentle scrubbing power that won't damage glazed tile or grout. Plus, it's non-toxic and safe for households with kids or pets.
When To Use This Method
This paste is ideal for light mold or routine cleaning. If you see heavy black growth or deep stains, you'll need a stronger approach. But for weekly upkeep or catching mold early, baking soda is your go-to.
Pro Tips For Best Results
Use a dedicated grout brush or an electric toothbrush for less elbow grease. Work in small sections so the paste doesn't dry out. Rinse thoroughly—any leftover residue can attract dirt.
2. Use White Vinegar Spray
White vinegar is a go‑to cleaner for moldy grout because it’s acidic enough to kill most mold spores without bleaching or damaging tile. It also cuts through soap scum and hard water deposits that feed mold. Best of all, it’s cheap, non‑toxic, and already in your pantry.
Why Vinegar Works On Grout
Vinegar’s acetic acid breaks down the cell walls of mold and mildew, killing them on contact. It also dissolves the mineral buildup that traps moisture in grout, making it harder for mold to return. Unlike bleach, vinegar penetrates porous grout instead of just whitening the surface.
How To Apply It Right
Fill a spray bottle with undiluted white vinegar. Spray the moldy grout lines until they’re saturated but not dripping. Let it sit for 15 minutes—don’t rush this step.
The vinegar needs time to work into the pores. After the wait, scrub with a stiff nylon brush (avoid metal brushes that can scratch tile). Rinse with warm water and wipe dry.
When To Skip Vinegar
Don’t use vinegar on natural stone tiles like marble, travertine, or limestone. The acid can etch and dull the surface. For those materials, stick to a pH‑neutral cleaner or a baking soda paste.
Also, never mix vinegar with bleach or hydrogen peroxide—it creates toxic fumes.
Boost The Power With Baking Soda
For stubborn mold spots, make a paste of baking soda and a little water. Apply it to the grout, then spray vinegar over the paste. The fizzing action lifts grime and loosens mold deep in the pores.
Scrub after the fizzing stops, then rinse. This combo is gentle enough for weekly maintenance.
3. Try Hydrogen Peroxide for Stubborn Spots
When baking soda and vinegar fall short, hydrogen peroxide steps in as a gentle yet effective mold killer. It's a colorless liquid that fizzes on contact with organic matter, breaking down mold without the harsh smell of bleach. Plus, it's safe for most grout types and won't yellow over time.
For spots that resist regular cleaning, hydrogen peroxide offers a simple solution. Its bubbling action lifts mold from deep within the grout pores, while its whitening properties restore brightness. Unlike bleach, it doesn't produce toxic fumes, making it a safer choice for enclosed bathrooms.
How To Apply It
Pour 3% hydrogen peroxide directly onto the moldy grout lines. Let it sit for about 10 minutes—you'll see it fizz as it works. Then scrub with a stiff brush, rinse with water, and wipe dry.
For extra stubborn spots, repeat or add a sprinkle of baking soda to the peroxide before scrubbing.
Why It Works Better Than Bleach
Hydrogen peroxide kills mold by oxidizing it, which destroys the cell walls. It's less corrosive than bleach, so it's gentler on grout and tile. Plus, it doesn't produce harmful fumes, making it ideal for small, poorly ventilated showers.
It also whitens without causing yellowing over time.
Safety Tips
Always test on a hidden area first to ensure no discoloration. Avoid mixing with vinegar or ammonia, as that can create toxic gases. Wear gloves to protect your skin, and keep the bathroom ventilated.
Store hydrogen peroxide in a dark bottle away from light to maintain its potency.
4. Bleach Dilution for Heavy Mold
When mold has settled deep into the grout and gentler cleaners aren't cutting it, a bleach solution can deliver the knockout punch. It's strong enough to kill stubborn mold and whiten the grout lines, but it has to be used correctly to avoid damaging your tiles or your lungs. The key is getting the dilution right and taking proper safety precautions.
For heavy mold infestations, a bleach solution is one of the most effective options. It penetrates porous grout and kills mold at the root, restoring a clean, bright appearance. However, it's not suitable for all grout types—especially colored grout, which can be bleached unevenly.
Always test in a small, hidden area first.
Mix It Right
Combine one part bleach with three parts water in a spray bottle. This concentration is strong enough to kill mold but not so harsh that it damages tile or grout. Avoid using full-strength bleach, which can be too aggressive and cause discoloration or etching on some tile surfaces.
Apply And Wait
Spray the solution directly onto the moldy grout lines until they are thoroughly wet. Let it sit for about 10 minutes to allow the bleach to penetrate and kill the mold. Do not let it dry on the surface, as that can leave residue or damage the grout.
Rinse Thoroughly
After 10 minutes, rinse the area with plenty of warm water. Use a showerhead or a bucket of water to wash away all bleach residue. Any leftover bleach can continue to react with the grout or cause irritation.
Dry the area with a clean towel or squeegee to prevent new mold growth.
Safety First
Always work in a well-ventilated area when using bleach. Open a window or turn on the bathroom fan to avoid inhaling fumes. Wear rubber gloves to protect your skin, and avoid getting the solution on your clothes or eyes.
Never mix bleach with ammonia or other cleaners, as this can create toxic gases.
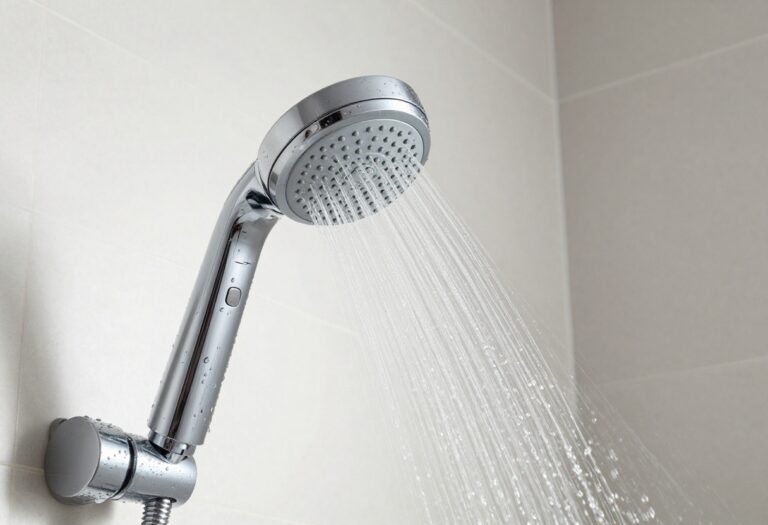
5. Steam Clean for Deep Grout Lines
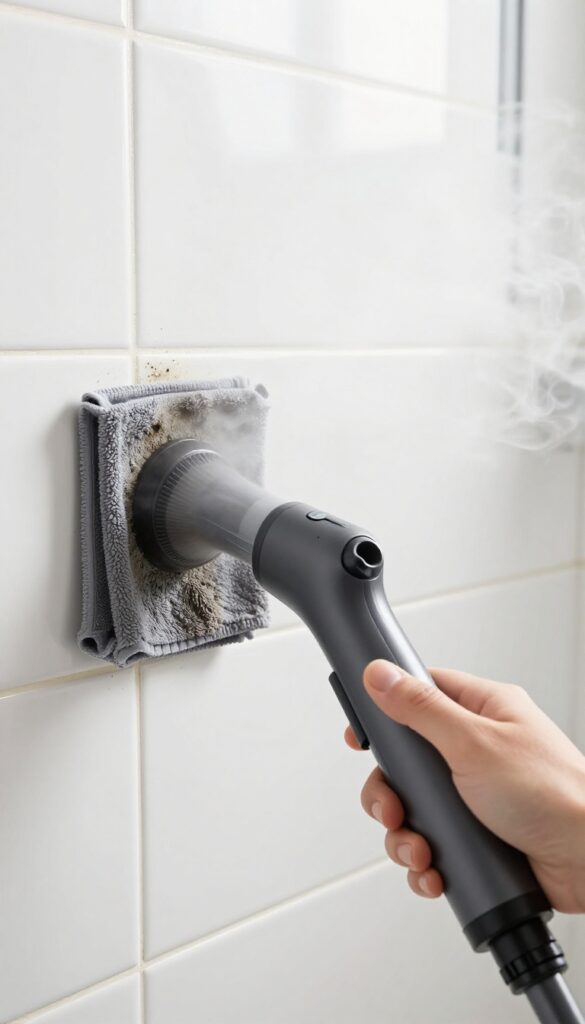
Sometimes scrubbing just doesn't cut it—especially when mold has burrowed deep into the grout. That's where steam cleaning comes in. A handheld steamer uses high-temperature vapor to penetrate porous grout, loosening mold and dirt without any chemicals.
It's a game-changer for both regular upkeep and tackling stubborn buildup.
Steam cleaning is one of the most effective ways to sanitize grout without harsh chemicals. The heat kills mold spores on contact, while the pressure forces dirt out of tiny crevices. It's also gentle on tile and grout, making it safe for regular use.
Best of all, you can do it yourself with a portable steamer—no need to hire a pro.
Why Steam Works So Well On Grout
Grout is porous, which means mold and grime can settle deep inside. Steam's high temperature (typically above 200°F) kills mold and mildew instantly, while the vapor pressure flushes out debris. Unlike bleach, steam doesn't damage grout or leave behind harmful residues.
It's also fast—you can cover a standard shower in under 15 minutes.
How To Steam Clean Your Shower Grout
Start by sweeping or vacuuming loose debris from the grout lines. Fill your steamer with water and let it heat up. Attach a small brush nozzle—the bristles help agitate the grout.
Work in small sections, holding the nozzle against the grout for a few seconds. Wipe away the loosened grime with a microfiber cloth. Repeat if needed, and finish by drying the area with a clean towel.
Steam Cleaning Vs. Chemical Cleaners
Steam cleaning is a chemical-free alternative that's just as effective—if not more so—for deep-set mold. It's ideal for households with kids, pets, or anyone sensitive to strong fumes. While chemical cleaners can bleach or weaken grout over time, steam is safe for all grout types.
The only downside is the upfront cost of a steamer, but it pays for itself by eliminating the need for multiple cleaning products.
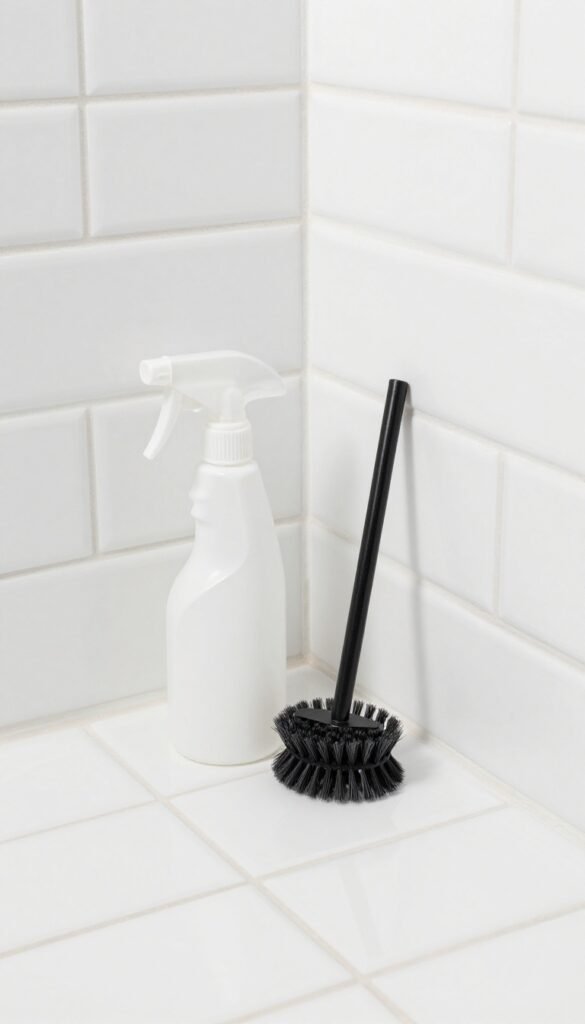
6. Scrub with an Old Toothbrush
Sometimes the best tool for the job is already sitting in your bathroom. An old toothbrush with stiff bristles can reach deep into grout lines where sponges and cloths can't. It's precise, easy to control, and perfect for tackling stubborn mold spots.
Grab a toothbrush with firm bristles—soft ones won't do much against mold. Dip it in your chosen cleaner (baking soda paste, vinegar, or hydrogen peroxide all work well) and scrub in small circular motions. Focus on one section at a time, rinsing the brush often to avoid spreading grime.
For extra stubborn areas, let the cleaner sit for a few minutes before scrubbing.
Why A Toothbrush Works Best
Toothbrushes are designed to clean tight spaces, making them perfect for grout. Their small head and angled bristles let you apply pressure exactly where it's needed. Plus, they're gentle enough not to scratch tile but firm enough to dislodge mold.
Technique Tips For Better Results
Work in small sections and scrub with the grain of the grout if possible. Rinse the brush frequently in warm water to keep it effective. For really tough mold, dip the brush in undiluted hydrogen peroxide and let it sit for 10 minutes before scrubbing.
Don't Forget The Corners
Mold loves hiding in corners and along edges where the grout meets the tile. Use the tip of the toothbrush to get into those tight spots. A quick scrub once a week can prevent buildup and keep your shower looking fresh.
7. Use a Grout Brush for Larger Areas
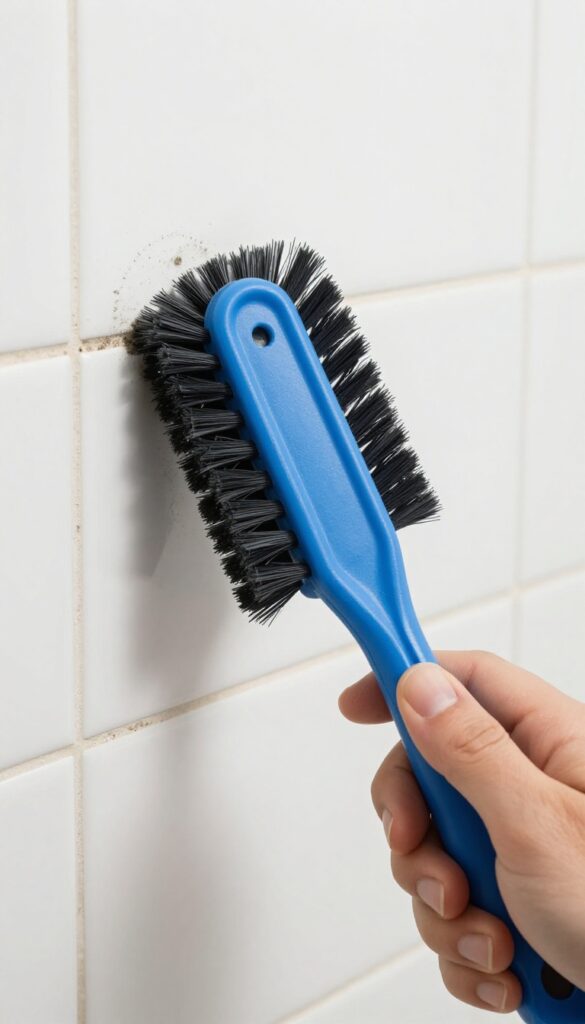
When you're facing a full-size shower with mold creeping along every grout line, a toothbrush just won't cut it. A dedicated grout brush—with its angled bristles and sturdy handle—lets you cover more ground in less time. It's a simple swap that makes a big difference in both effort and results.
Why A Grout Brush Works Better
Standard scrub brushes have flat bristles that glide over grout lines, missing the deep grooves where mold hides. A grout brush features firm, angled bristles that dig into the porous surface without scratching your tile. The long handle also keeps your hand away from the grime, making the job more comfortable.
How To Use It Effectively
Apply your chosen cleaner—vinegar, baking soda paste, or a commercial grout cleaner—and let it sit for a few minutes. Then scrub in a back-and-forth motion along each grout line, letting the bristles work into the pores. Rinse with warm water and repeat if needed.
For tough spots, a little extra pressure helps.
Choosing The Right Brush
Look for a brush with a comfortable grip and stiff, nylon bristles that won't scratch. Some come with a built-in scraper on the end for lifting stubborn debris. Avoid wire brushes—they can damage grout and tile.
A good grout brush costs around $10 and pays for itself in saved time.
8. Try a Magic Eraser for Surface Mold
If your mold problem is mostly on the surface—think light gray patches or faint black spots—a Magic Eraser can be a quick fix. These melamine foam sponges work like super-fine sandpaper, lifting mold without heavy scrubbing. Just dampen one, squeeze out excess water, and gently rub the grout lines.
You'll see the grout brighten almost instantly.
The magic is in the abrasion. Melamine foam creates friction that breaks the bond between mold and grout, so the mold particles cling to the sponge instead. It's great for maintenance cleaning between deeper treatments.
However, it won't reach mold that has soaked into the porous grout. For that, you'll need a stronger cleaner or a steam tool.
When To Use A Magic Eraser
Reach for a Magic Eraser when you catch mold early—within a week or two of it appearing. It's also perfect for spot-treating corners or edges where mold tends to gather. Avoid using it on old, cracked grout, as the abrasion can worsen damage.
How To Get The Best Results
Wet the sponge until it's damp but not dripping. Rub each grout line with light pressure in one direction—back and forth can spread mold. Rinse the sponge often to avoid redepositing mold.
Afterward, wipe the area with a dry cloth to remove leftover moisture.
Limitations To Keep In Mind
Magic Erasers are not disinfectants. They lift mold but don't kill spores. For thorough mold removal, follow up with a spray of white vinegar or hydrogen peroxide.
Also, the sponge wears down quickly, so have a few on hand for larger jobs.
9. Apply a Commercial Mold Remover
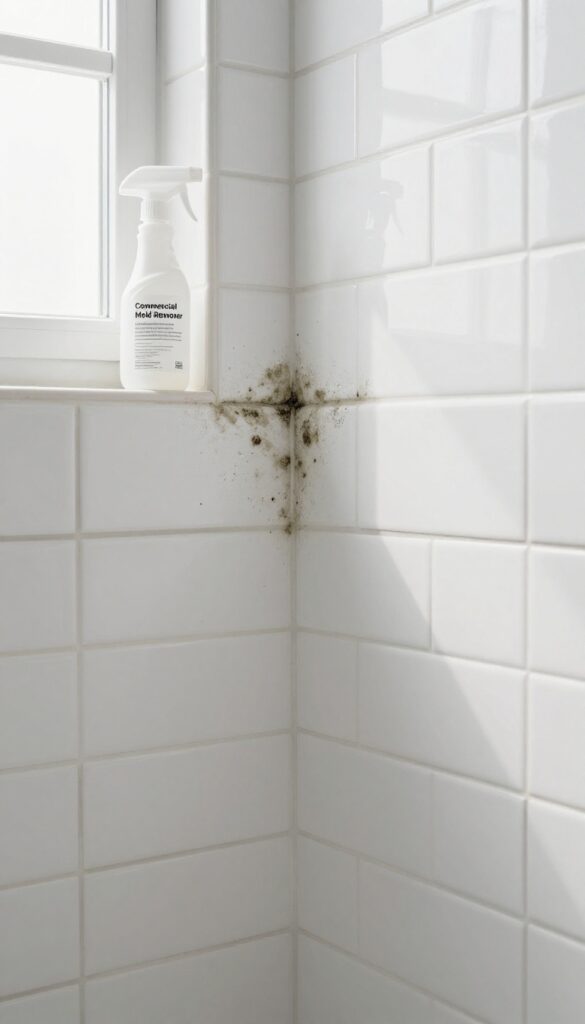
Sometimes DIY mixes just don't cut it, especially when mold has been hanging around for a while. That's when a dedicated bathroom mold remover can save the day. Products like Tilex or Clorox Clean-Up are formulated specifically for bathroom mold and mildew, so they work faster and more thoroughly than homemade solutions.
Commercial mold removers contain powerful ingredients like bleach or hydrogen peroxide that penetrate grout and kill mold at the root. They're a no-nonsense option when you want results without mixing or measuring. Just spray, wait, and rinse—but always follow the label instructions for safety, especially regarding ventilation and skin contact.
Choose The Right Product
Not all mold removers are the same. Look for one labeled for bathroom use and safe on grout. Tilex Mold & Mildew Remover and Clorox Clean-Up are popular picks.
Avoid using toilet bowl cleaners or harsh drain openers—they can damage grout or discolor tile.
How To Apply For Best Results
Spray the product directly onto the moldy grout lines until they're wet but not dripping. Let it sit for the time recommended on the bottle—usually 5 to 10 minutes. Don't let it dry out; if it does, reapply.
Then scrub gently with a soft brush and rinse thoroughly with warm water.
Safety First
Always wear gloves and open a window or turn on the exhaust fan. These products contain strong chemicals that can irritate skin and lungs. Keep the bathroom door open and avoid mixing with other cleaners, especially ammonia-based ones, which can create toxic fumes.
10. Seal Grout After Cleaning
You've scrubbed, rinsed, and dried your grout until it looks brand new. But without a protective layer, that fresh surface is a magnet for moisture and mold. Sealing is the final step that locks in your hard work and keeps mold from coming back fast.
A good sealer fills the tiny pores in grout, creating a barrier that water beads up on instead of soaking in. This makes future cleaning much easier because mold can't take hold as easily. Most sealers are easy to apply with a small brush or applicator bottle, and they dry clear so your tile color stays true.
Choose The Right Sealer
Not all sealers are the same. For shower grout, look for a penetrating sealer—it soaks into the grout rather than sitting on top. Avoid film-forming sealers that can peel or yellow over time.
A silicone-based or water-based impregnating sealer works well in wet areas.
Apply It Carefully
Wait at least 24 hours after cleaning for grout to dry completely. Use a small foam brush or a sealer applicator pen to work the sealer into the grout lines. Wipe off any excess from the tile surface immediately with a clean cloth, or it can leave a hazy residue.
Reapply As Needed
Sealer doesn't last forever. In a shower that gets daily use, plan to reseal every 6 to 12 months. You can test if it's time by dripping a few drops of water on the grout—if they soak in quickly, it's time to reseal.
If they bead up, the sealer is still working.
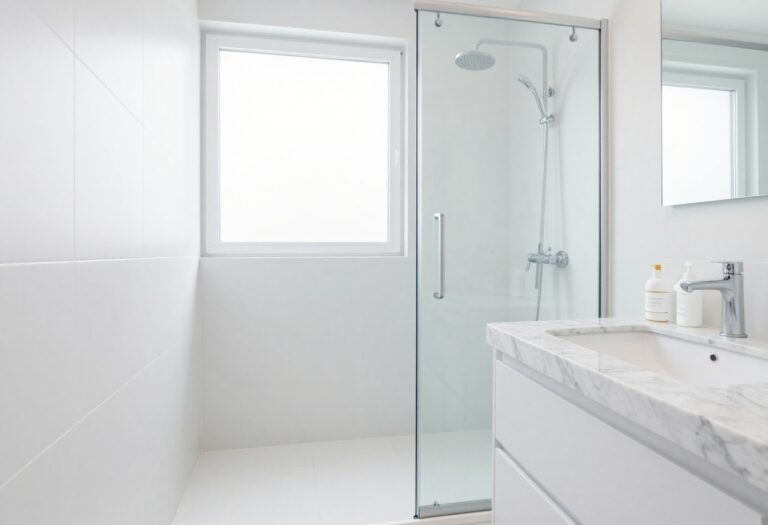
11. Improve Bathroom Ventilation
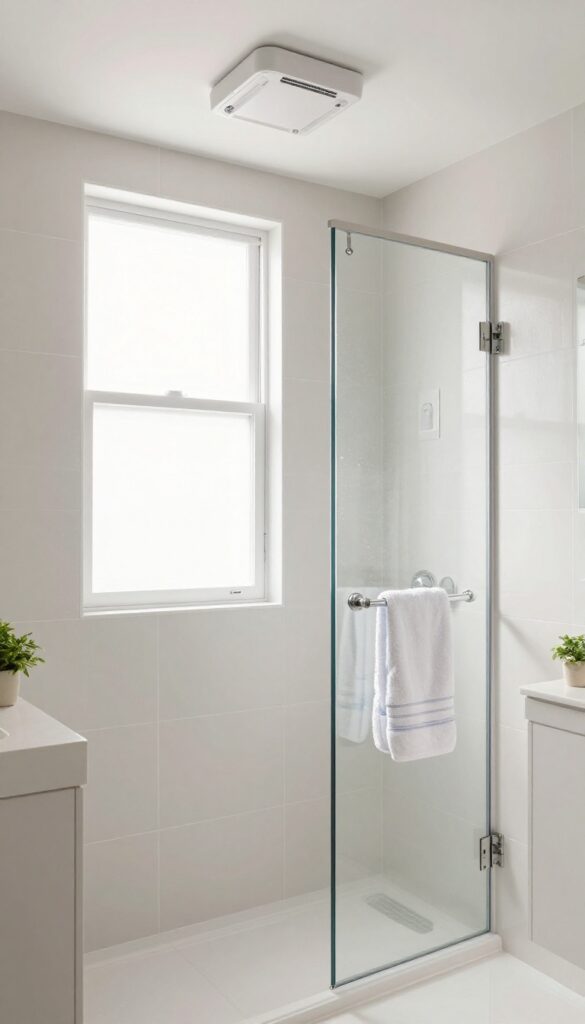
You've scrubbed, rinsed, and dried your grout until it looks brand new. But if your bathroom stays damp, that mold will be back before you know it. The real secret to keeping grout clean is stopping moisture from hanging around in the first place.
Running an exhaust fan during and after showers for at least 20 minutes is one of the simplest ways to prevent mold regrowth. High humidity creates the perfect breeding ground for mold spores, so reducing moisture levels in the air makes a huge difference. If your fan is weak or noisy, consider upgrading to a more powerful model or installing a timer switch so it runs long enough without you having to remember.
Check Your Fan's Cfm Rating
Not all bathroom fans are created equal. Look for a fan with a CFM (cubic feet per minute) rating that matches your bathroom size. A good rule of thumb is 1 CFM per square foot of bathroom area.
For example, a 100-square-foot bathroom needs at least a 100 CFM fan. If your current fan is underpowered, replacing it can dramatically improve moisture removal.
Use A Timer Or Humidity Sensor
It's easy to forget to turn off the fan, or to turn it off too soon. A timer switch lets you set the fan to run for 20, 30, or 60 minutes after you leave. Even better, a humidity-sensing fan automatically turns on when moisture levels rise and shuts off when the air is dry.
This takes the guesswork out of ventilation.
Keep The Door Open After Showering
After your shower, crack the bathroom door and leave the fan running. This helps circulate air and speeds up drying. If your bathroom has a window, open it for a few minutes to let fresh air in.
Every bit of airflow helps keep mold from settling back into your clean grout.
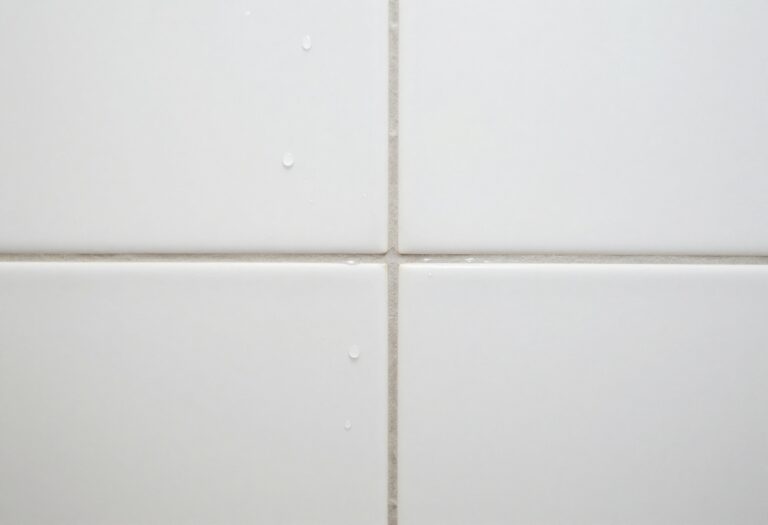
12. Squeegee Walls After Each Shower
One of the easiest ways to prevent mold is to stop moisture from hanging around. After you finish your shower, grab a squeegee and run it over the tiles. This simple habit removes the excess water that mold loves, and it takes less than a minute.
You'll be surprised how much of a difference it makes.
Squeegeeing is a low-effort, high-reward habit. By removing water from the grout lines, you eliminate the damp environment where mold thrives. It also prevents soap scum and mineral deposits from building up, keeping your shower looking cleaner for longer.
Make it part of your post-shower routine, and you'll notice less scrubbing needed over time.
Why It Works
Mold needs moisture to grow. When water sits on grout, it seeps into the porous material and creates a breeding ground. A squeegee wipes away the surface water before it can soak in, cutting off mold's water supply.
This is especially effective in showers with poor ventilation.
Best Squeegee For The Job
Look for a squeegee with a rubber blade and a comfortable handle. A wider blade covers more area quickly, but a smaller one is easier to maneuver around corners. Some models come with a hook for hanging inside the shower, so it's always within reach.
How To Build The Habit
Keep the squeegee in your shower at all times. Right after you turn off the water, spend 30 seconds running it over the tiles. Start from the top and work your way down.
If you forget at first, try leaving a sticky note on the shower door as a reminder.
13. Use a Daily Shower Spray
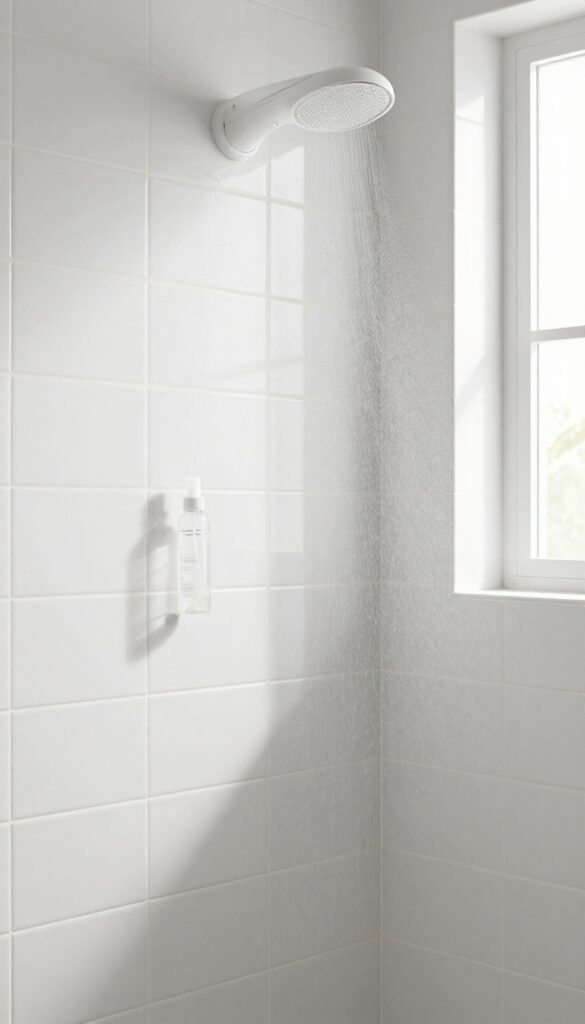
A daily shower spray is one of the simplest ways to keep mold at bay between deep cleans. You can whip up a batch in minutes with ingredients you probably already have in your kitchen. The key is consistency—a quick mist after every shower makes a huge difference over time.
The Magic Mix
Combine one part white vinegar with four parts water in a spray bottle. Add about 10 drops of tea tree oil—it's a natural antifungal that gives the spray extra punch. Shake well before each use.
Tea tree oil has a strong scent, but it fades quickly once dry.
When And How To Spray
Right after your shower, while the tiles are still wet, give the grout a light misting. Focus on the lines and corners where moisture lingers. No need to rinse—just let it air dry.
The vinegar and oil work together to break down residue and discourage mold spores from settling.
Safety And Storage Tips
Store the spray in a cool, dark place to keep the tea tree oil potent. Label the bottle clearly so no one mistakes it for a cleaner. Avoid using it on natural stone tiles, as vinegar can etch the surface.
For stone, swap vinegar for rubbing alcohol.
14. Replace Grout if Mold Persists
Sometimes no amount of scrubbing or bleaching can save grout that's been overtaken by deep mold. If you've tried every cleaner and the dark stains keep coming back, it's time to accept that the grout itself is the problem. Replacing it might sound daunting, but it's actually a straightforward weekend project that gives you a completely fresh start.
When mold penetrates the porous structure of grout, surface cleaning only removes the visible part. The roots remain embedded, and they'll resurface within days or weeks. Replacing the grout eliminates the mold's home entirely, so you're not just treating symptoms—you're solving the root cause.
This is especially important in showers with poor ventilation or ongoing moisture issues, where mold tends to thrive despite your best efforts.
How To Know When It's Time
Look for grout that crumbles when touched, has deep black or green stains that resist cleaning, or feels soft and damp even after drying. If you notice a musty smell that lingers after scrubbing, that's another sign the mold has colonized the grout. Don't wait until the tile itself starts to loosen—replace the grout as soon as you suspect deep infestation.
Tools You'll Need
A grout saw or oscillating multi-tool with a grout removal blade makes quick work of old grout. You'll also need new grout (sanded for joints wider than 1/8 inch, unsanded for narrower ones), a grout float, a sponge, and a bucket of water. Wear safety glasses and a dust mask—old grout dust can contain mold spores and silica.
Step-by-step Replacement
Start by removing the old grout to a depth of about half the tile thickness. Vacuum out all dust and debris, then wipe the joints with a damp cloth. Mix the new grout according to package instructions and press it firmly into the joints with a float.
After 15–20 minutes, wipe away excess grout with a damp sponge, being careful not to drag grout out of the joints. Let it cure for 24–48 hours before exposing it to water.
Seal Immediately After Curing
Once the new grout is fully cured, apply a high-quality penetrating sealer. This step is non-negotiable—sealed grout resists moisture and mold far better than unsealed grout. Reapply the sealer every year or as recommended by the manufacturer to keep your fresh grout mold-free for the long haul.
15. Try Oxygen Bleach for Colored Grout
If you have colored grout, chlorine bleach is a no-go—it'll strip the color and leave you with blotchy, faded lines. Oxygen bleach, like OxiClean, is a gentler alternative that still kills mold and whitens without the harsh fumes. It's also safer for your lungs and the environment.
Oxygen bleach works by releasing oxygen bubbles that lift dirt and kill mold spores. It's non-toxic and won't damage colored grout, making it a top choice for anyone who wants to avoid chemical smells. Just mix it with warm water to form a paste or solution, apply it to the grout, let it sit for 10-15 minutes, then scrub with a soft brush and rinse thoroughly.
For stubborn mold, you can leave it on longer or repeat the process. It's also great for routine maintenance—use it weekly to keep grout fresh without worrying about discoloration.
How To Mix And Apply
Mix oxygen bleach powder with warm water according to package directions (usually 1-2 tablespoons per cup of water). Stir until dissolved, then apply to grout lines using a spray bottle or sponge. Let it sit for 10-15 minutes—you'll see bubbles working.
Scrub gently with a grout brush or old toothbrush, then rinse with clean water.
Why It's Better For Colored Grout
Chlorine bleach can react with pigments in colored grout, causing fading or yellowing. Oxygen bleach is color-safe and won't damage the grout's finish. It's also less irritating to your skin and respiratory system, so you can use it without worrying about strong fumes.
When To Use It For Best Results
Use oxygen bleach for light to moderate mold and mildew. For heavy, deep-set mold, you may need to repeat applications or combine with a stiff brush. It's also excellent for regular weekly cleaning to prevent buildup.
Avoid using it on unsealed grout too often, as it can gradually wear down the surface.
16. Use a Toothbrush and Baking Soda Paste for Detail Work
When you're dealing with intricate tile patterns or tight corners, a big sponge just won't cut it. That's where a humble toothbrush and a simple baking soda paste come in. This duo lets you target mold exactly where it hides—along edges, in grout lines, and around fixtures—without scratching delicate surfaces or missing the spots that matter most.
This method is all about precision. Unlike harsh scrubbing pads or bleach sprays that can damage tile finishes, a soft toothbrush paired with a gentle abrasive paste gives you control. The baking soda gently lifts mold and grime while the bristles work into crevices that a cloth can't reach.
It's especially effective for decorative tiles, mosaic patterns, or any area where you need to be careful not to scratch or discolor the surface.
Make The Perfect Paste
Mix three parts baking soda with one part water in a small bowl. Stir until it forms a thick, spreadable paste—think toothpaste consistency. For extra cleaning power, add a splash of white vinegar, but be ready for fizzing.
Apply the paste directly to the moldy grout lines using an old toothbrush or a small spatula.
Scrub With Gentle Pressure
Dip the toothbrush into the paste and work it into the grout using small circular motions. Focus on corners, edges, and any intricate tile patterns where mold tends to hide. The soft bristles won't scratch glazed tiles, but they'll dislodge mold from porous grout.
Let the paste sit for 5–10 minutes before scrubbing again for stubborn spots.
Rinse And Repeat If Needed
After scrubbing, rinse the area thoroughly with warm water. Use a spray bottle or a damp cloth to remove all residue. Check your work—if you still see dark spots, reapply the paste and let it sit longer before scrubbing again.
This method is safe to repeat as often as needed without damaging your tile.
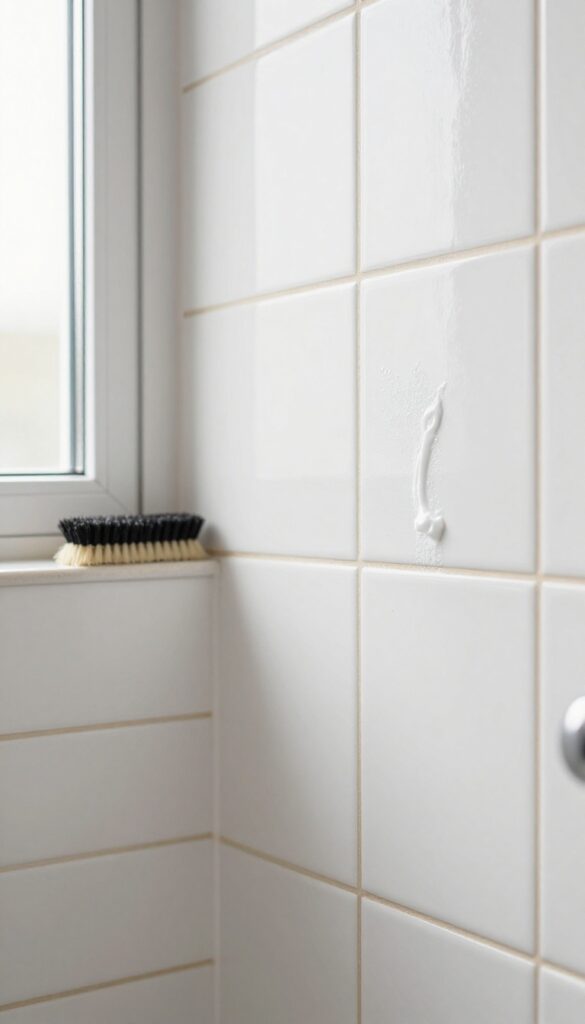
17. Schedule Monthly Deep Cleaning
Set a recurring reminder on your phone for the first Saturday of each month. That consistent deep clean is your best defense against mold taking hold. It's much easier to spend 20 minutes on routine maintenance than to battle a full-blown mold invasion later.
Monthly deep cleaning keeps grout looking fresh and prevents mold from establishing deep roots. By sticking to a schedule, you avoid the need for harsh chemicals or heavy scrubbing later. Consistency is the secret to low-effort, high-impact grout care.
Why Monthly Matters
Mold spores are always present, but they need moisture and time to grow. A monthly deep clean disrupts their life cycle before they can penetrate the porous grout. Think of it as a reset button for your shower.
What A Monthly Deep Clean Looks Like
Start by spraying a cleaning solution (like vinegar and water or a grout-specific cleaner) all over the grout lines. Let it sit for 10 minutes, then scrub with a stiff brush. Rinse thoroughly and dry with a microfiber cloth.
That's it—no marathon sessions needed.
Tools To Keep Handy
Keep a dedicated grout brush, a spray bottle with your chosen cleaner, and a microfiber cloth in your shower caddy. Having everything ready makes it easy to stick to your monthly routine without hunting for supplies.
FAQ
Can I use bleach on colored grout?
Bleach can discolor colored grout. Instead, use oxygen bleach or a mild cleaner like vinegar and baking soda to avoid fading.
How often should I clean shower grout?
Light cleaning every week and deep cleaning once a month helps prevent mold buildup. Daily squeegeeing also reduces moisture.
Is mold in grout dangerous?
Yes, mold can cause respiratory issues and allergies. It's important to clean it promptly and maintain good ventilation.
What's the best natural mold killer?
White vinegar is effective for most mold. For tougher spots, hydrogen peroxide or baking soda paste works well without harsh chemicals.
Do I need to seal grout after cleaning?
Yes, sealing grout after cleaning helps repel moisture and mold. Reapply sealer every 6-12 months for best protection.
Conclusion
Mold in shower grout is stubborn, but with these tips, you can keep it under control without spending hours scrubbing. Pick the method that fits your schedule and grout type, then stick with it.
A quick weekly wipe-down and proper ventilation make all the difference. Your shower will stay fresher longer, and you'll avoid the hassle of deep cleaning sessions down the road.