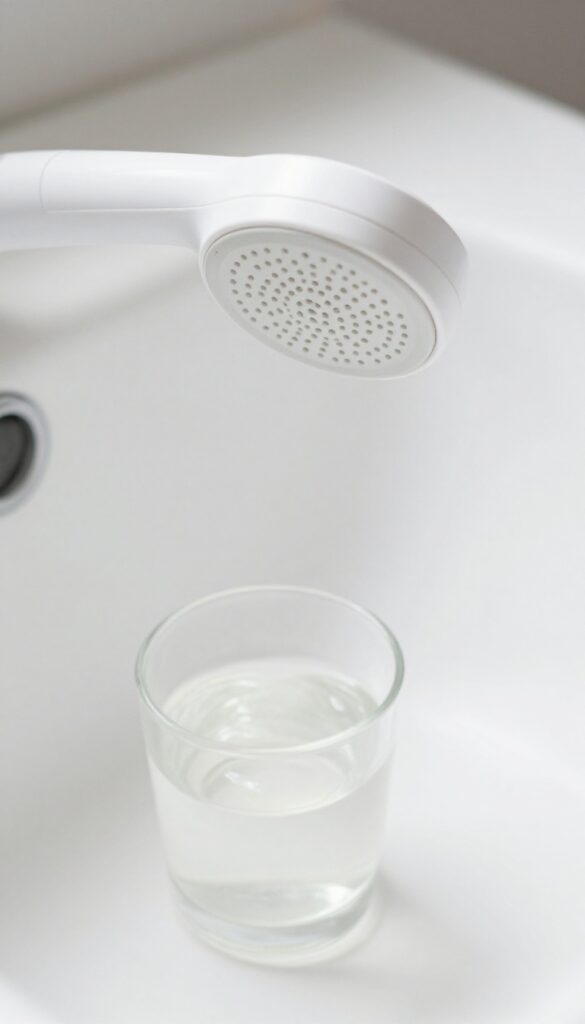
15 Cleaning Shower Head Tips for Better Water Flow
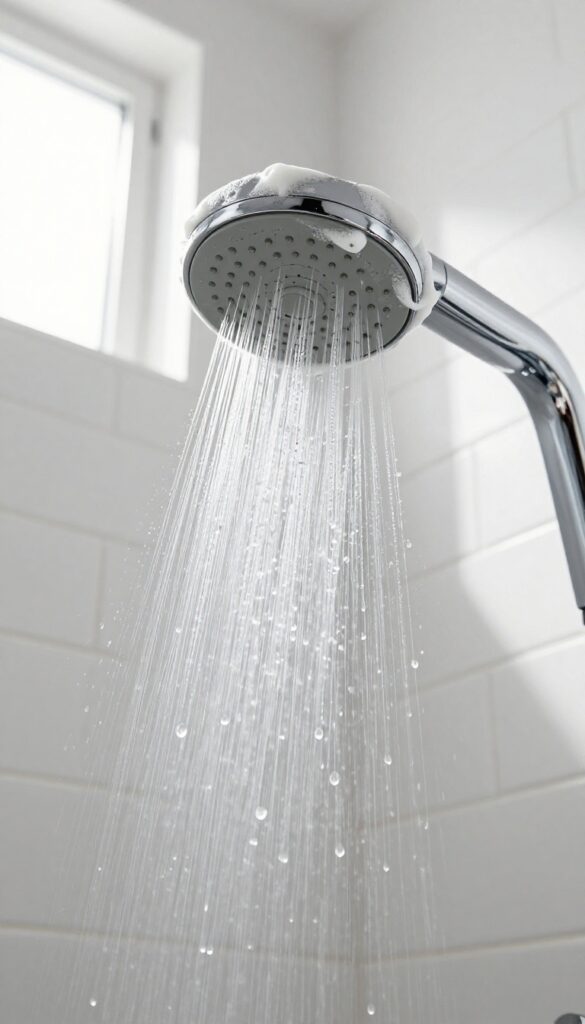
A weak, uneven shower spray can ruin your morning routine and signal hidden buildup inside your shower head. Over time, mineral deposits and grime clog the nozzles, reducing water flow and wasting energy.
These 15 cleaning tips target every type of shower head and buildup level, from quick fixes to deep descaling. You'll find solutions using common household items like vinegar, baking soda, and even a simple pin.
No need for expensive cleaners or professional help—just practical steps to restore strong, consistent water pressure. Let's get your shower back to full power.
1. The Classic White Vinegar Soak

White vinegar is the go-to solution for dissolving hard water deposits because it's acidic enough to break down calcium and lime without damaging metal or plastic. This method works best for handheld or detachable shower heads you can easily submerge. For fixed heads, you'll use a plastic bag secured with a rubber band.
What You'll Need
Grab a quart of white vinegar, a large resealable plastic bag (or a bowl for handheld heads), and a rubber band or zip tie. If your shower head has stubborn buildup, an old toothbrush helps scrub away loosened residue.
Step-by-step Soak
Fill the bag halfway with vinegar and carefully place it over the shower head, ensuring the nozzles are fully submerged. Secure the bag with a rubber band or zip tie so it doesn't slip off. Let it soak for at least 2–3 hours, but overnight is best for heavy deposits.
Rinse And Scrub
Remove the bag and run the shower for a minute to flush out dissolved minerals. If some nozzles remain clogged, use a soft toothbrush or a pin to gently dislodge remaining debris. Repeat the soak if water flow isn't fully restored.
2. Baking Soda Paste for Stubborn Grime
When vinegar alone doesn't cut it, baking soda steps in as a gentle abrasive. It lifts caked-on grime without scratching chrome, plastic, or brass. This method works best for shower heads with visible crusty deposits that resist liquid cleaners.
Mix three parts baking soda with one part water to form a thick, spreadable paste. Apply the paste generously over the shower head, focusing on clogged nozzles and crusty areas. Let it sit for 15–20 minutes so it can penetrate the buildup.
Then scrub gently with an old toothbrush, using circular motions to dislodge debris. Rinse thoroughly with warm water and wipe dry. For extra stubborn spots, add a splash of vinegar to the paste to boost its cleaning power.
Why Baking Soda Works
Baking soda is mildly alkaline, which helps neutralize acidic mineral deposits. Its fine grit provides physical scrubbing power without scratching. Combined with moisture, it creates a chemical reaction that loosens tough grime.
Best Application Techniques
Use a soft toothbrush or a small sponge to apply the paste. For hard-to-reach nozzles, a clean mascara wand or a dedicated nozzle brush works well. Avoid metal brushes or abrasive pads that can damage the finish.
When To Use This Method
This paste is ideal for shower heads that haven't been cleaned in months or have visible white or greenish crust. It's also safe for handheld and fixed models. If your shower head is heavily scaled, follow up with a vinegar soak for best results.
3. Lemon Juice for a Fresh Scent
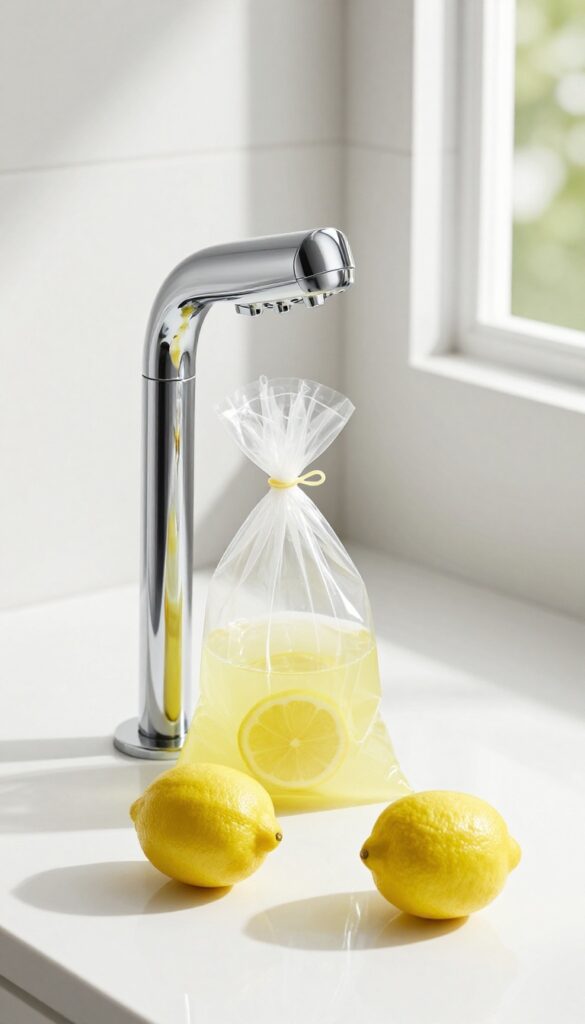
If the sharp smell of vinegar puts you off, lemon juice is a fantastic alternative that leaves your bathroom smelling like citrus. The citric acid in lemons is just as effective at breaking down mineral deposits, so you don't sacrifice cleaning power for fragrance. Plus, it's a natural disinfectant that leaves a fresh, clean scent.
How Lemon Juice Works
Lemon juice contains citric acid, which reacts with calcium carbonate and other minerals found in hard water. This reaction dissolves the buildup, making it easy to rinse away. The acidity is strong enough to tackle moderate limescale but gentle on most shower head finishes.
Simple Lemon Soak Method
Fill a plastic bag with enough lemon juice to submerge the shower head. You can use bottled lemon juice or squeeze fresh lemons. Tie the bag around the shower head with a rubber band or zip tie, ensuring the head is fully immersed.
Leave it for 30 minutes to an hour, then remove the bag and run hot water for a few minutes to flush out the loosened deposits.
Lemon And Salt Scrub For Stubborn Spots
For shower heads with visible crusty deposits, cut a lemon in half and dip the cut side in coarse salt. Scrub the nozzles directly with the lemon half. The salt acts as a mild abrasive while the lemon acid works on the minerals.
Rinse thoroughly afterward.
Precautions And Tips
Avoid using lemon juice on brass or uncoated metal shower heads, as the acid can tarnish the finish. Test on a small area first. For best results, use this method monthly to prevent heavy buildup and keep your shower smelling fresh.
4. The Plastic Bag Method for Fixed Heads
If your shower head is fixed in place and can't be removed for soaking, the plastic bag trick is a game-changer. It lets you submerge the head in cleaning solution without any disassembly. All you need is a sturdy plastic bag, some white vinegar, and a rubber band or zip tie.
This method works especially well for chrome or stainless steel heads that have stubborn mineral buildup.
The plastic bag method is simple, effective, and requires zero tools. It's perfect for renters or anyone who doesn't want to mess with plumbing. First, fill a gallon-sized plastic bag about halfway with white vinegar.
If your buildup is severe, you can use undiluted vinegar; for lighter deposits, a 50/50 mix with water works fine. Carefully lift the bag over the shower head so the head is fully submerged in the vinegar. Secure the bag tightly around the neck of the shower arm with a rubber band, zip tie, or even a strong hair tie.
Make sure the seal is snug enough that the bag won't slip off. Leave it for at least 4–6 hours, but overnight is best for heavy buildup. In the morning, remove the bag and run the shower for a few minutes to flush out any loosened debris.
Use an old toothbrush to gently scrub any remaining residue from the nozzles. This method is safe for most finishes, but avoid using it on brass or gold-plated heads, as vinegar can damage the coating. If you're unsure, test a small area first.
Why Vinegar Works So Well
White vinegar is mildly acidic, which makes it excellent at dissolving calcium carbonate and other mineral deposits found in hard water. It's cheap, non-toxic, and safe for most shower head materials. Unlike harsh chemical descalers, vinegar won't release fumes or require gloves.
It's a kitchen staple that doubles as a powerful cleaning agent.
Tips For A Leak-free Seal
A tight seal is crucial to keep the bag from slipping. Use a heavy-duty freezer bag, double up the rubber bands, or wrap the bag's opening around the shower arm before securing. If the bag still drips, place a small towel underneath to catch any spills.
You can also use a plastic grocery bag with handles—tie the handles around the arm for extra grip.
When To Skip This Method
Avoid this technique if your shower head has a decorative finish like oil-rubbed bronze or antique brass. The vinegar can strip the protective coating and cause discoloration. For those finishes, use a gentle soap-and-water wipe-down instead, or try a commercial cleaner specifically designed for delicate surfaces.
5. Toothbrush Scrubbing for Detail Work
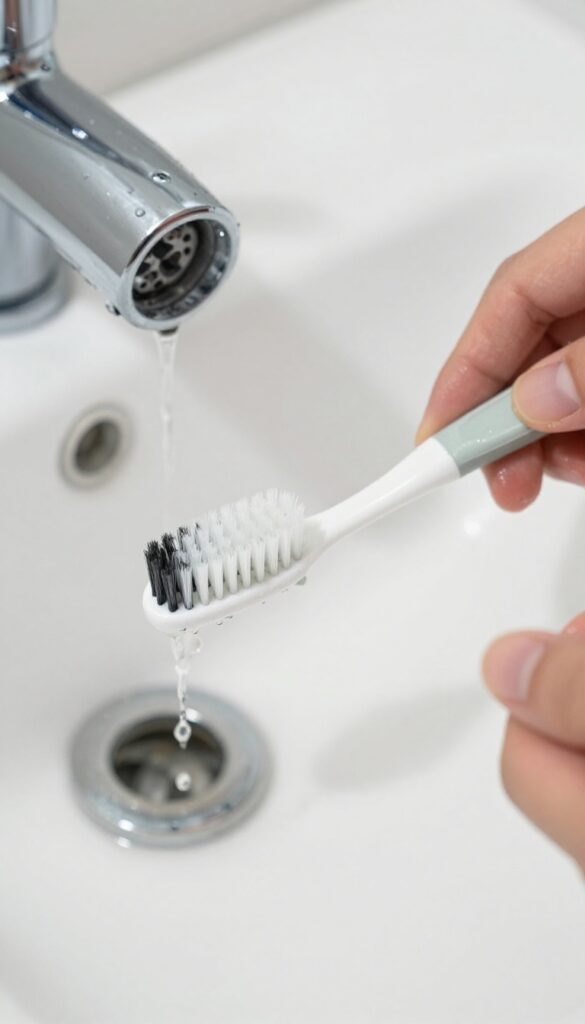
After soaking, some stubborn debris may still cling to the nozzles. That's where a simple toothbrush comes in. An old toothbrush with soft bristles is perfect for reaching into small crevices and dislodging anything the soak missed.
Why A Toothbrush Works Best
A toothbrush's small head and angled bristles let you target individual nozzles without scratching the surface. The soft bristles are gentle enough for chrome, plastic, or brass finishes, but firm enough to scrub away mineral deposits and biofilm.
Step-by-step Scrubbing Method
After removing and soaking your shower head, rinse it under running water. Dip the toothbrush in a 50/50 vinegar-water solution or plain water. Gently scrub each nozzle in a circular motion.
Pay extra attention to nozzles that are still clogged. Rinse thoroughly afterward.
When Scrubbing Isn't Enough
If scrubbing doesn't clear a nozzle, use a pin or toothpick to poke through the opening before brushing again. For rubber nozzles, you can also rub them with your fingers to loosen debris. Always finish with a rinse to remove any loosened particles.
6. Pin or Paperclip for Clogged Nozzles
Sometimes, even after a good soak, a few nozzles stay stubbornly blocked. That's when a simple pin or paperclip becomes your best friend. This manual method targets individual clogged holes that chemical soaking might miss.
Why This Works
Hard water deposits can crystallize deep inside the nozzle. Soaking loosens them, but poking physically breaks up the remaining plug. It's quick, precise, and works on any shower head with rubber or metal nozzles.
How To Do It Safely
Use a straight pin, sewing needle, or unfolded paperclip. Gently insert it into each clogged hole and wiggle slightly. Avoid using too much force to prevent scratching the finish.
For rubber nozzles, you can also rub them with your thumb to dislodge debris.
Best For Stubborn Spots
This technique is ideal for shower heads with many small nozzles where buildup is uneven. It's also great for spot-treating after a vinegar soak. Combine with a quick rinse to flush out the dislodged particles.
7. Descaling Solution for Heavy Buildup
When white vinegar or baking soda just won't cut it, it's time to bring out the heavy artillery. Commercial descaling solutions are formulated to dissolve thick, stubborn mineral deposits that have hardened over months or years. These products are especially useful for shower heads in areas with extremely hard water, where regular cleaning still leaves a chalky residue.
For severe scaling, a dedicated descaling product can save you time and elbow grease. Look for ones specifically labeled for shower heads or bathroom fixtures—they're designed to be safe on chrome, stainless steel, and plastic finishes. Always read the label: some require dilution, while others are ready to use.
Follow the soak time exactly; leaving the solution on too long can damage the finish. After descaling, rinse thoroughly and run the shower for a minute to flush out any leftover chemicals. This method restores water flow fast when all else fails.
Choosing The Right Product
Not all descaling solutions are the same. For heavy buildup, pick a product with a higher concentration of acids like sulfamic or phosphoric acid. Avoid products with bleach or harsh abrasives if your shower head has a painted or coated finish.
Check online reviews for real-world results on your specific shower head type.
Step-by-step Application
Remove the shower head if possible and place it in a bowl. Pour enough descaling solution to fully submerge the head. Let it soak for the time recommended on the bottle—usually 15 to 30 minutes.
For fixed heads, fill a plastic bag with the solution and secure it around the head with a rubber band. After soaking, scrub gently with a soft brush, then rinse thoroughly with water.
Safety Precautions
Wear gloves and work in a well-ventilated area. Keep the solution away from your eyes and skin. Never mix descaling products with other cleaners, especially bleach, as toxic fumes can form.
Rinse all parts completely before using the shower again.
8. Remove and Soak the Entire Head
For a truly deep clean, nothing beats taking the shower head off and giving it a proper bath. This method reaches every internal nook and cranny that surface cleaning misses. It's especially effective for fixed or handheld models that can be unscrewed easily.
Removing the entire shower head lets you tackle buildup from the inside out. Soaking dissolves mineral deposits lodged deep in the passages, restoring full flow. This method works best for metal or plastic heads that can withstand acidic solutions.
Check Compatibility First
Before you start, make sure your shower head is removable. Most are attached with a simple threaded connection that unscrews by hand or with pliers (wrap the jaws with tape to avoid scratches). If you have a fixed arm or a model with a locking mechanism, consult the manual.
Also, avoid soaking heads with chrome or painted finishes in strong acids for too long—limit to 30 minutes.
Choose Your Soaking Solution
White vinegar is the go‑to because it's cheap and effective. Heat it up (but don't boil) for faster action. For a stronger descaling, use a commercial cleaner like CLR or a citric acid solution.
If the smell bothers you, lemon juice works too. Fill a bowl deep enough to submerge the head completely.
Soak And Rinse Thoroughly
Submerge the shower head and let it soak for at least an hour, or overnight for heavy buildup. After soaking, use an old toothbrush to scrub the nozzles and any visible grime. Rinse thoroughly with warm water to remove all residue.
Reattach and run the water for a minute to flush out any loosened debris.
9. Clean the Shower Arm and Filter
Most people focus on the shower head itself, but the arm and internal filter can also trap mineral deposits and debris. If you've cleaned the nozzles and still notice weak flow, the problem might be hiding upstream. Taking a few minutes to clean these components can make a big difference.
Check For A Built-in Filter
Many modern shower heads have a small mesh filter where the arm meets the head. Over time, this filter gets clogged with sediment and scale. Unscrew the shower head, locate the filter (often a rubber or metal disc), and rinse it under running water.
Use an old toothbrush to gently scrub away stubborn particles. If the filter is damaged or heavily corroded, replace it with a new one.
Clean The Shower Arm Itself
The curved pipe extending from the wall can also accumulate scale inside. While you can't easily scrub the interior, you can flush it out. Remove the shower head, then pour a cup of white vinegar into a plastic bag and secure it over the arm with a rubber band.
Let it soak for 30 minutes, then remove the bag and run hot water through the arm for a minute to rinse. This dissolves any mineral deposits inside.
Inspect For Debris After Cleaning
After cleaning the arm and filter, reattach the shower head and test the water flow. If it's still weak, there may be debris lodged deeper in the pipe. Turn off the water, remove the shower head again, and use a small wire or pipe cleaner to gently probe the arm opening.
Flush with water afterward. This final step often resolves persistent flow issues.
10. Use a Water Softener to Prevent Buildup
Hard water is often the real culprit behind those stubborn mineral deposits that clog your shower head. If you live in an area with high calcium or magnesium levels, no amount of cleaning will keep the nozzles clear for long. A water softener or a dedicated shower head filter can tackle the problem at its source by reducing the mineral content before it reaches your fixture.
Installing a whole-house water softener is the most effective long-term solution, but it's a significant investment. For a more budget-friendly option, try a shower head filter that screws on between the pipe and your shower head. These filters use activated carbon or KDF media to trap minerals and sediment, and they're easy to replace every few months.
You'll notice less buildup, better water pressure, and even softer skin and hair.
How Hard Water Affects Your Shower Head
Hard water contains dissolved calcium and magnesium that precipitate out as white, crusty limescale when heated. This buildup narrows the nozzle openings and reduces flow over time. In severe cases, it can permanently damage the shower head's internal components.
Choosing Between A Water Softener And A Shower Filter
A whole-house water softener exchanges calcium and magnesium for sodium, benefiting all taps and appliances. A shower head filter is cheaper and easier to install, but only protects that one fixture. If you rent or have a tight budget, a filter is a practical compromise.
Installation And Maintenance Tips
Shower head filters typically screw on without tools—just unscrew your existing head, apply plumber's tape if needed, and attach the filter. Replace the cartridge every 3 to 6 months, depending on water hardness and usage. For water softeners, follow the manufacturer's salt refill schedule.
11. Try a Mixture of Vinegar and Baking Soda
When vinegar alone isn't cutting through the grime, pairing it with baking soda creates a fizzy reaction that can dislodge stubborn deposits. This dynamic duo works especially well on shower heads with heavy mineral crust or soap scum buildup. The bubbling action helps lift debris from deep inside the nozzles without harsh scrubbing.
For a paste, mix baking soda with just enough vinegar to form a thick, spreadable consistency. Apply it generously over the shower head, focusing on clogged nozzles. Let it sit for 15–20 minutes, then scrub gently with an old toothbrush before rinsing.
Alternatively, for a soak, fill a plastic bag with equal parts vinegar and water, add a tablespoon of baking soda, and secure it around the shower head. The fizz will help loosen deposits as it soaks for 30 minutes.
Why This Combo Works
Vinegar's acidity dissolves mineral deposits like calcium and lime, while baking soda's mild abrasiveness helps scrub away grime. The chemical reaction produces carbon dioxide bubbles that physically push debris out of small openings. Together, they tackle both chemical and physical buildup more effectively than either alone.
Best Application Methods
For removable shower heads, create a paste and apply it directly, letting it sit before scrubbing. For fixed heads, use the bag method: mix 1/2 cup vinegar, 1/4 cup baking soda, and 1 cup warm water in a bag, then attach it to the head with a rubber band. Let it fizz and soak for 30 minutes, then remove and run water for a minute to flush out residue.
When To Use This Method
This technique is ideal for moderate to heavy buildup that hasn't responded to vinegar alone. It's also great for plastic or chrome shower heads, as it's gentler than harsh chemical cleaners. Avoid using it on brass or unsealed metal, as the acidity may cause tarnishing.
12. Clean Rubber Nozzles by Rubbing
Not all shower heads need a soak or a scrub. Some models have flexible rubber nozzles that let you clean them with nothing more than your fingers. It's the quickest trick in the book—no tools, no chemicals, just a minute of your time.
Many modern shower heads, especially those with anti-clog features, use rubber nozzles instead of metal or plastic ones. These are designed to flex, so mineral deposits don't get a permanent grip. A simple rub can break the scale loose and flush it out with the next spray.
This method works best as a weekly maintenance step, not a deep clean. If you haven't done it in months, you might need to start with a vinegar soak first, then keep up with the rubbing routine.
How To Do It
Just use your thumb or the palm of your hand to rub firmly across the nozzle face. You'll feel small grains or flakes coming off. Do this while the water is running, or right before a shower, so the dislodged debris gets washed away immediately.
For stubborn spots, use an old toothbrush.
When To Do It
Add this to your weekly cleaning routine. It takes less than a minute and prevents buildup from hardening. If you live in a hard water area, a quick rub every few days can keep your shower head flowing like new.
Why It Works
Rubber is naturally non-stick, so scale doesn't bond as strongly as it does on metal. The flexing action cracks the brittle mineral deposits, and the water pressure pushes them out. It's a low-effort, high-reward habit.
13. Use a Descaling Spray for Quick Maintenance
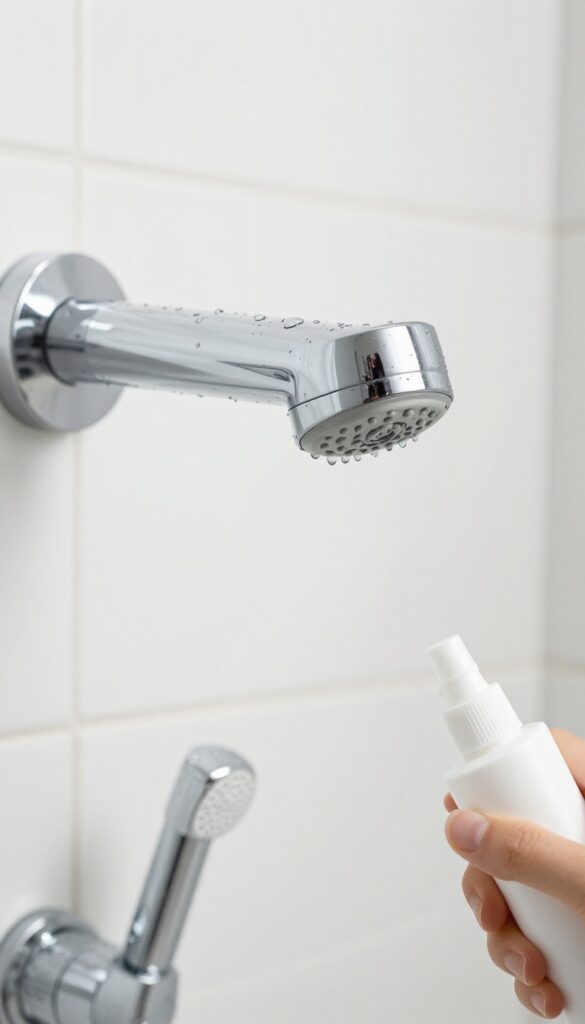
Between deep soaks, a quick descaling spray can stop mineral deposits from taking hold. It's the easiest way to keep your shower head flowing freely without any disassembly or waiting. Just a few seconds of spraying and a quick wipe—that's all it takes to maintain good water pressure.
A dedicated descaling spray is a lifesaver for busy households. Unlike vinegar soaks that require removing the shower head, this method works in place. You simply spray the solution directly onto the nozzles and let it sit for a few minutes.
The acidity breaks down calcium and lime scale on contact. After the wait, wipe the shower head with a damp cloth or rinse it with the shower running. No tools, no soaking, no hassle.
Use it weekly or bi-weekly depending on your water hardness. The key is consistency—a quick spray after every few showers prevents buildup from becoming stubborn.
How To Choose A Descaling Spray
Look for sprays specifically formulated for bathroom fixtures. Many are safe for chrome, stainless steel, and other common finishes. Avoid harsh acids that might damage coatings—stick with products labeled for daily or weekly use.
If you prefer a DIY option, mix equal parts white vinegar and water in a spray bottle. Add a drop of dish soap to help it cling to vertical surfaces.
Application Tips For Best Results
Spray generously, making sure every nozzle is covered. Let it sit for 3–5 minutes—longer if buildup is visible. For stubborn spots, use an old toothbrush to gently scrub after spraying.
Rinse thoroughly by running hot water for a minute. Always follow with a dry wipe to prevent water spots.
When To Use Descaling Spray Vs. Deep Clean
Descaling spray is perfect for maintenance between deep cleans. If you notice reduced flow or visible white deposits, a spray can often fix it. But if the shower head hasn't been cleaned in months, a full vinegar soak or disassembly might be needed.
Use spray as a preventive measure—once a week for hard water areas, every two weeks for moderate water.
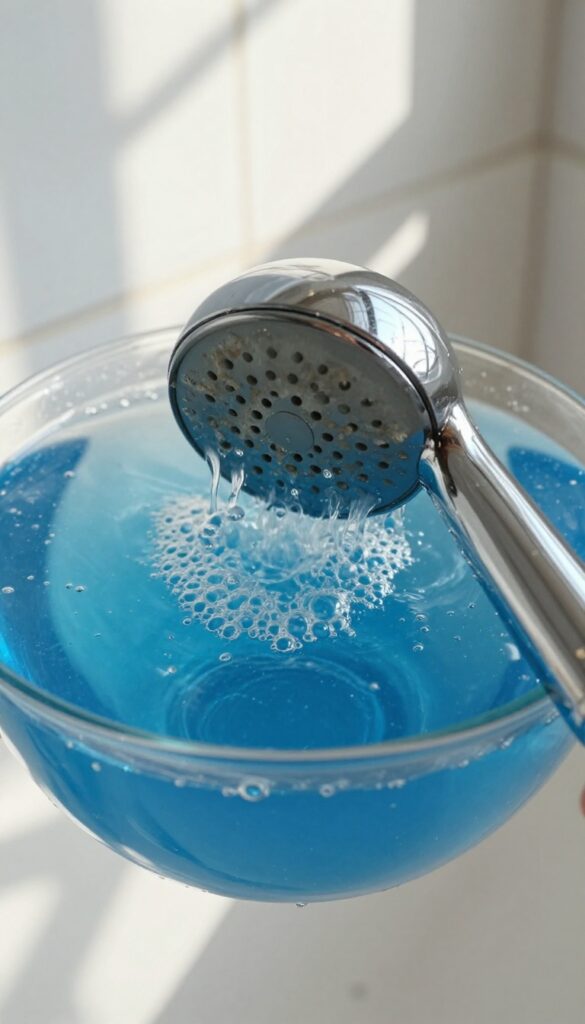
14. Soak in Coca-Cola for a Fizzy Clean
You might not think of soda as a cleaner, but Coca-Cola's phosphoric acid makes it surprisingly effective at dissolving mineral deposits. If you've got a tough buildup that vinegar isn't touching, this fizzy hack is worth a try. Just make sure you're ready for a thorough rinse afterward.
Why Cola Works
Phosphoric acid in cola breaks down calcium and limescale, similar to commercial descaling products. The carbonation also helps loosen debris. It's not as strong as some cleaners, but for moderate buildup, it's a handy alternative.
How To Do It
Remove the shower head and place it in a bowl or bag filled with enough cola to fully submerge the nozzles. Let it soak for 2–3 hours. For extra stubborn deposits, leave it overnight.
After soaking, scrub with an old toothbrush and rinse thoroughly with water.
Rinse Thoroughly
Cola leaves a sticky sugar residue that can attract grime if not rinsed well. Run warm water through the shower head for a minute or two after cleaning. Wipe the exterior with a damp cloth to remove any sticky film.
15. Regular Monthly Cleaning Routine

Even the best deep clean won't last forever if you don't stay on top of maintenance. A quick monthly routine prevents mineral deposits from building up in the first place, keeping your shower head flowing freely without the need for heavy scrubbing or descaling sessions.
Consistency is the secret to a shower head that always performs at its best. Spending just five minutes once a month can save you from dealing with clogged nozzles and weak pressure down the road. The key is to make it a habit—tie it to something you already do monthly, like paying bills or changing air filters.
The Quick Vinegar Soak
Once a month, fill a plastic bag with white vinegar and secure it around your shower head with a rubber band or zip tie. Let it soak for 30 minutes to an hour—no need for an overnight soak unless you've noticed buildup. After soaking, remove the bag and run the shower for a minute to flush out any loosened deposits.
Wipe-down Method For Sensitive Finishes
If your shower head has a brushed nickel, chrome, or other delicate finish, vinegar can damage the coating over time. Instead, mix a solution of equal parts water and vinegar, dip a soft cloth in it, and wipe down the nozzles. Use an old toothbrush to gently scrub each nozzle, then rinse thoroughly with water.
Check And Clean The Screen Filter
Many shower heads have a small mesh screen where the hose connects. This screen catches sediment from your water supply, and when it clogs, water pressure drops significantly. Once a month, unscrew the shower head, remove the screen, and rinse it under running water.
If it's heavily clogged, soak it in vinegar for 15 minutes before reinstalling.
FAQ
How often should I clean my shower head?
For best results, clean your shower head every 1-3 months, depending on your water hardness. Monthly maintenance prevents heavy buildup.
Can I use bleach to clean my shower head?
Bleach is not recommended as it can damage metal finishes and rubber seals. Stick to vinegar, baking soda, or mild descaling solutions.
Why is my water pressure still low after cleaning?
Low pressure may be due to issues beyond the shower head, such as clogged pipes, a faulty pressure regulator, or a water heater problem. Check other fixtures to compare.
Will vinegar damage my shower head finish?
Vinegar is generally safe for most finishes, but prolonged soaking may harm some coatings. Test on a small area first, and avoid soaking for more than 8 hours.
How do I clean a handheld shower head?
Detach the handheld head and soak it in a vinegar solution. Use a toothbrush to scrub the nozzles. Rinse thoroughly before reattaching.
Conclusion
Keeping your shower head clean doesn't have to be a hassle. Just a few of these tips—like a vinegar soak or a quick wipe-down—can restore strong water flow and prevent mineral buildup. Pick the methods that fit your schedule and stick with them.
Consistency is what keeps that steady stream going strong. Start with one or two fixes this week, and you'll notice the difference every time you step in. A better shower is just a few simple habits away.