20 Shower Cleaning Ideas for a Fresh Sparkling Space
Stepping into a shower that gleams can set a positive tone for your whole day. But keeping glass doors, tiles, and fixtures spotless often feels like a losing battle against soap scum and hard water stains.
These 20 practical ideas focus on real solutions—from daily habits that prevent buildup to deep-cleaning tricks that restore sparkle. You'll find methods using common household staples like vinegar and baking soda, plus a few smart tools that cut your scrubbing time.
No need to overhaul your routine overnight. Pick the tips that match your biggest shower frustrations and watch the transformation happen.
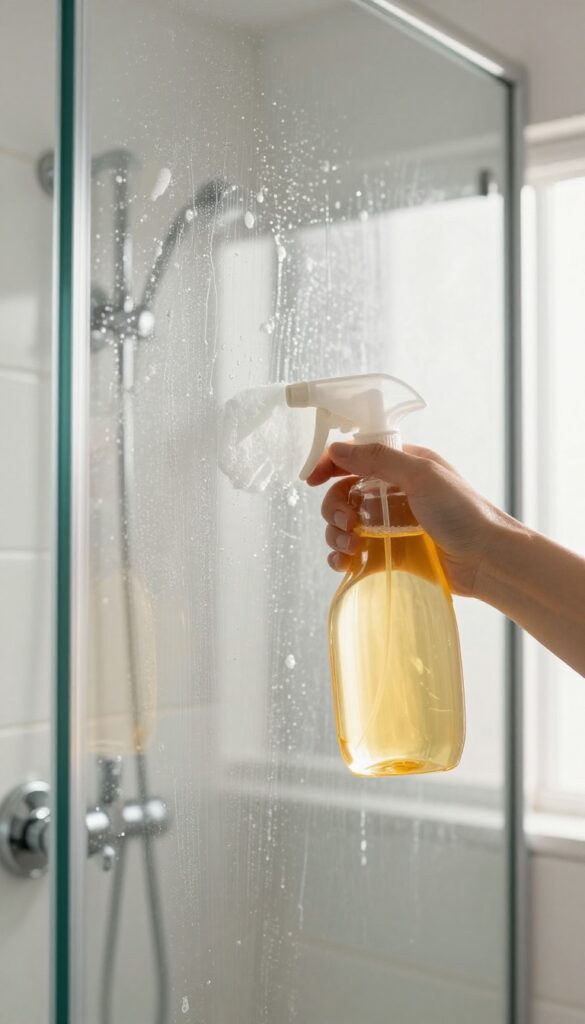
1. Use a Daily Shower Spray
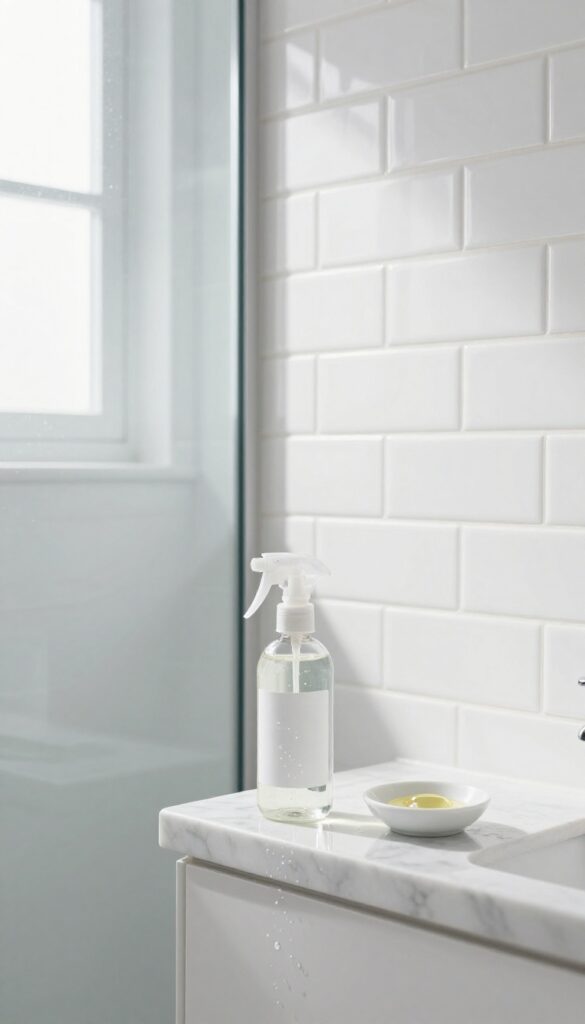
A daily shower spray is the easiest way to keep your shower fresh without heavy scrubbing. This simple DIY solution cuts down on soap scum and mildew before they become stubborn stains. Just a few spritzes after each use can make a big difference.
Mix equal parts water and white vinegar in a spray bottle, then add a few drops of dish soap. Shake gently to combine. After your shower, spray the solution on all wet surfaces—tiles, glass doors, and fixtures.
Let it sit for a few minutes, then rinse or let it air dry. The vinegar breaks down soap residue, while the dish soap helps lift grime. Use it daily to prevent buildup and keep your shower sparkling.
Why It Works
Vinegar is mildly acidic, which dissolves mineral deposits and soap scum. Dish soap cuts through grease and oils. Together, they create a powerful but gentle cleaner that's safe for most surfaces.
Using it daily stops grime from hardening, so you avoid elbow grease later.
Best Practices
Store the spray in a cool, dark place to maintain potency. Avoid using it on natural stone like marble or granite, as vinegar can etch the surface. For glass doors, a squeegee after spraying can prevent water spots.
Reapply every few days if you skip a day—consistency is key.
Customize Your Spray
Add a few drops of essential oil like tea tree or lavender for a fresh scent and extra antimicrobial power. Tea tree oil fights mold, while lavender adds a calming aroma. Just shake well before each use, as oils can separate.
2. Squeegee the Walls and Door
You might think a squeegee is just for windows, but it's a shower game-changer. Keeping one hanging in your shower and using it after every wash prevents water spots and soap scum from ever setting in. It takes less than a minute and saves you from heavy scrubbing later.
The key is consistency. After you turn off the water, quickly run the squeegee over glass doors and tiled walls. Start at the top and pull down in overlapping strokes.
For curved or textured surfaces, use a smaller squeegee or a microfiber cloth to catch drips. This habit alone can cut your deep-cleaning frequency in half.
Why It Works So Well
Hard water contains minerals that leave white spots when water evaporates. Soap residue bonds to these spots, creating stubborn scum. By removing water immediately, you eliminate the breeding ground for buildup.
Plus, less moisture means less mold and mildew growth in grout lines.
Best Squeegee Options
Look for a squeegee with a rubber blade that's soft but firm—hard blades can scratch glass. A stainless steel or plastic handle with a hook makes it easy to store inside the shower. Some models have a built-in squeegee and scrubber combo for extra versatility.
Quick Maintenance Tips
Rinse the squeegee blade after each use to prevent soap film from building up on it. Replace the rubber blade every few months when it starts leaving streaks. Wipe the handle occasionally to keep it clean.
That's it—minimal effort for maximum payoff.
3. Deep Clean with Baking Soda Paste
When everyday sprays aren't cutting it, reach for baking soda. This gentle abrasive can tackle grout lines and stubborn soap scum without harsh chemicals. Mixing it into a paste gives you control over where it goes and how long it sits, making it perfect for spot treatments.
The best part? You probably already have it in your pantry. No fancy products needed, just a little elbow grease and patience.
Baking soda paste is a versatile cleaner that works wonders on shower surfaces. It's especially effective on grout, which tends to trap dirt and mildew. The paste clings to vertical surfaces, allowing the baking soda to break down grime while you wait.
For best results, apply it generously and let it sit for a full 10 minutes before scrubbing. Use an old toothbrush or a grout brush to work the paste into crevices, then rinse thoroughly. You'll see a noticeable difference, especially on lighter colored grout.
Making The Perfect Paste
Start with about half a cup of baking soda in a small bowl. Add water a tablespoon at a time, stirring until you get a thick, spreadable consistency. It should be like frosting, not runny.
If it's too thin, add more baking soda; too thick, add a few more drops of water. You can also add a squirt of dish soap for extra grease-cutting power, but it's optional.
Targeting Stubborn Stains
For tough spots like rust rings or hard water deposits, let the paste sit longer—up to 20 minutes. If the stain is particularly stubborn, sprinkle a little dry baking soda on top of the paste before scrubbing for extra abrasion. After scrubbing, rinse with warm water and wipe dry.
For grout, you may need to repeat the process a couple of times for heavily soiled areas.
Rinsing And Preventing Residue
Baking soda can leave a white film if not rinsed thoroughly. Use a spray bottle filled with water to mist the area after scrubbing, then wipe with a damp cloth. Follow up with a squeegee or microfiber towel to prevent water spots.
This step ensures your shower looks clean, not chalky.
4. Tackle Mold with Hydrogen Peroxide
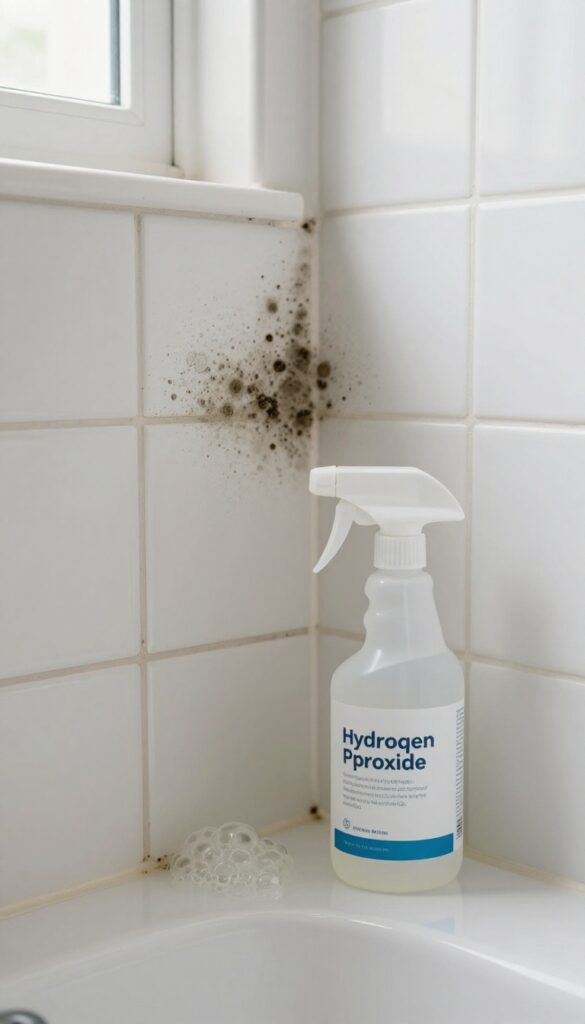
Mold loves the damp corners of your shower, but you don't need harsh chemicals to fight it. Hydrogen peroxide is a gentle yet powerful alternative that kills mold spores without leaving behind toxic fumes. It's also safe for most surfaces, including grout and caulk.
Using hydrogen peroxide is straightforward. Grab a spray bottle with 3% hydrogen peroxide (the standard brown bottle from the pharmacy). Spray it directly on any moldy spots—corners, grout lines, or caulk seams.
Let it sit for about 10 minutes so it can penetrate and kill the mold. Then scrub with a soft brush or sponge and rinse well. The peroxide will bubble as it works, which is normal.
For stubborn mold, you can repeat the process or let it sit longer. Unlike bleach, hydrogen peroxide doesn't produce strong fumes, making it ideal for small, enclosed bathrooms.
Why Hydrogen Peroxide Works
Hydrogen peroxide is a natural disinfectant that breaks down into water and oxygen, so it's environmentally friendly. It kills mold by oxidizing the cell walls, which destroys the spores. It's also a mild bleach, so it can help lighten stains without damaging colored grout or tiles.
Where to Use It
Focus on areas where mold tends to hide: along the bottom of shower curtains, in the corners of the shower pan, around the drain, and on caulk lines. It's also great for shower curtains—just spray and let it sit before tossing them in the wash. Avoid using it on unsealed natural stone like marble or granite, as it can etch the surface.
Safety Tips
Keep hydrogen peroxide away from your eyes and skin, and don't mix it with vinegar or bleach—that creates harmful gases. Store it in a dark bottle away from light, as light breaks it down. Always test on a small hidden area first to make sure it won't discolor surfaces.
5. Clean Showerheads with Vinegar Soak
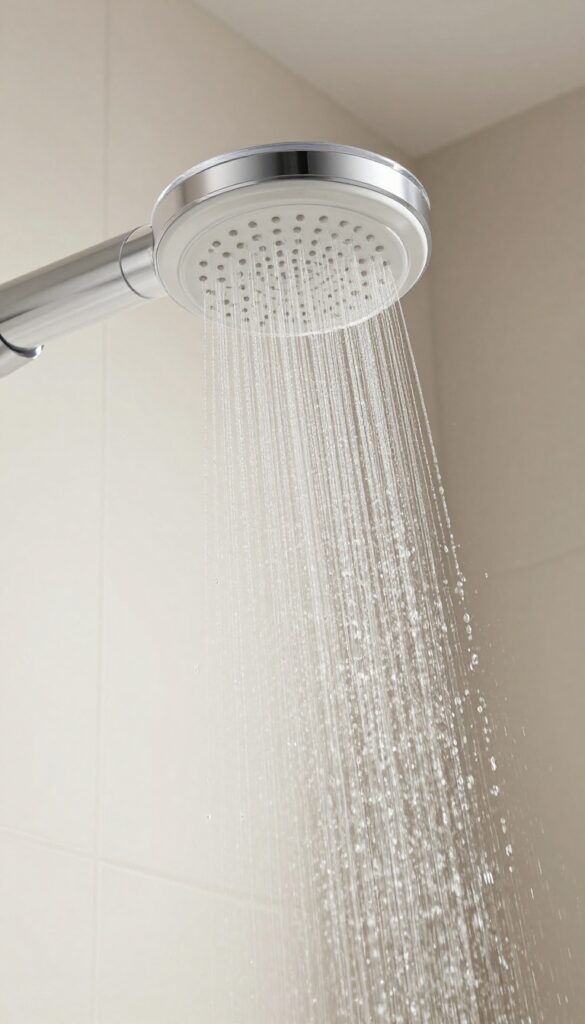
A clogged showerhead can ruin your morning with a weak, uneven spray. Mineral buildup from hard water is usually the culprit, but you don't need a plumber to fix it. A simple overnight vinegar soak restores full pressure and leaves the fixture looking like new.
Why Vinegar Works
White vinegar is mildly acidic, which dissolves calcium and lime deposits that accumulate inside showerhead nozzles. It's cheap, non-toxic, and far safer than harsh descalers. For stubborn buildup, a longer soak or a second treatment may be needed.
Step-by-step Soak Method
Fill a sturdy plastic bag with enough white vinegar to fully submerge the showerhead. Tie the bag securely around the neck of the showerhead using a rubber band or twist tie. Let it soak overnight (at least 6–8 hours).
In the morning, remove the bag and run the shower for a minute to flush out loosened debris.
Alternatives For Fixed Or Handheld Heads
If your showerhead is fixed and can't be bagged easily, you can detach it and soak it in a bowl of vinegar. For handheld models, simply submerge the head in a container of vinegar. After soaking, use an old toothbrush to gently scrub any remaining residue from the nozzles.
Prevent Future Buildup
To keep your showerhead flowing freely, wipe it dry after each use to reduce mineral deposits. For extra protection, install a showerhead filter that removes hard water minerals before they reach the fixture. A quick monthly vinegar soak can also prevent serious clogs.
6. Use a Magic Eraser on Glass Doors
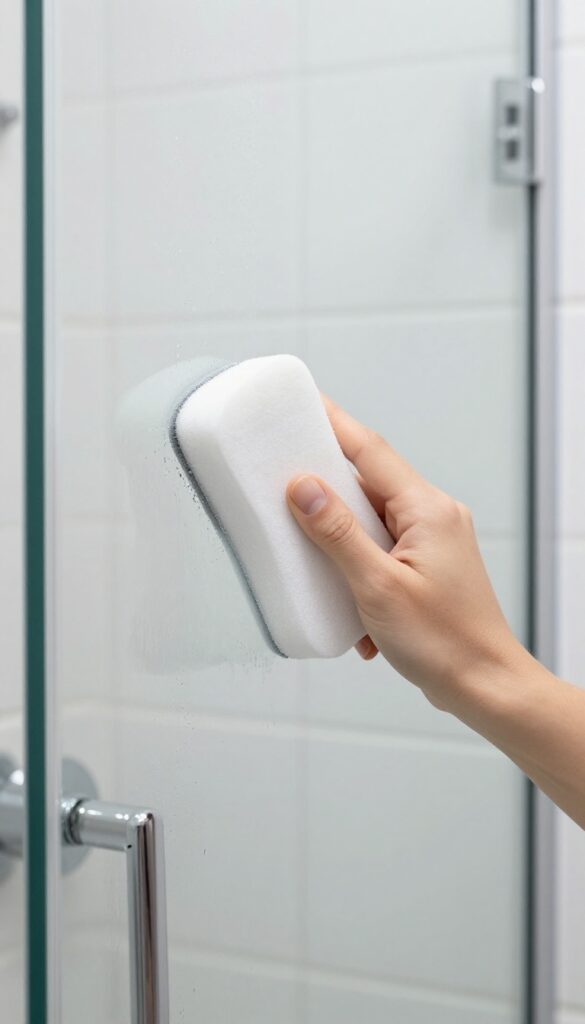
Glass shower doors look beautiful when clean, but hard water stains and soap scum can make them look cloudy and neglected. A melamine foam eraser, often sold as a Magic Eraser, is a surprisingly effective tool for restoring clarity without harsh chemicals or heavy scrubbing. The key is to use it correctly so you don't damage the glass or leave residue.
Dampen the eraser until it's soft but not dripping, then gently scrub the glass in circular motions. The foam works like micro-fine sandpaper to lift mineral deposits and soap film. Rinse thoroughly with water and dry with a microfiber cloth to prevent streaks.
For tough stains, let the eraser sit on the spot for a minute before scrubbing. Avoid using it on etched or frosted glass, as it can dull the finish.
Why It Works So Well
Melamine foam creates a gentle abrasive action that breaks down calcium and soap residues without scratching smooth glass. Unlike liquid cleaners that just dissolve surface grime, the eraser physically lifts and traps particles, leaving a streak-free shine.
Tips For Best Results
Always test a small hidden area first. Use a fresh eraser for each cleaning session to avoid spreading dirt. Pair with a squeegee after every shower to keep doors cleaner longer.
If you have stubborn hard water rings, try a vinegar soak before using the eraser.
7. Refresh Grout with a Bleach Pen
Grout lines can go from bright white to dingy gray in no time, especially in a high-moisture shower. A bleach pen offers a simple, targeted fix that doesn't require mixing or scrubbing the entire floor. Just trace along the lines, let the bleach work its magic, and rinse for noticeably cleaner grout.
A bleach pen is essentially a gel bleach in a marker-like applicator. It lets you apply bleach precisely where you need it—along grout lines—without splashing onto tiles or fixtures. This makes it ideal for spot-treating stained or discolored grout between shower tiles.
The gel clings to vertical surfaces too, so it works on walls as well as floors. For best results, apply the gel in a continuous line, let it sit for 5–10 minutes (check the product instructions), then scrub lightly with a small brush and rinse thoroughly. The difference is often dramatic, especially on white grout.
Why A Bleach Pen Works So Well
Unlike liquid bleach that can run and pool, a bleach pen's thick gel stays put. This means you can treat grout lines without worrying about bleaching your tile or shower pan. The precision tip also helps you avoid over-application, saving product and reducing fumes.
Plus, it's a one-handed operation—no mixing, no gloves required (though gloves are still a good idea).
Step-by-step Application Tips
Start with dry grout for best adhesion. Squeeze the pen to release gel, then draw a steady line along the grout. Don't worry about perfect coverage; the gel will spread slightly.
Let it sit for the recommended time—usually 5–10 minutes. Use an old toothbrush or grout brush to work the gel into any stubborn stains. Rinse with warm water and wipe away residue with a damp cloth.
Repeat on heavily stained areas if needed.
Safety And Precautions
Always ventilate the bathroom when using bleach products. Wear gloves to protect your hands, and old clothes in case of splashes. Avoid getting the gel on colored grout or natural stone tiles, as bleach can cause discoloration.
Test on an inconspicuous spot first. Keep the pen away from children and pets, and store it upright to prevent leaks.
8. Try a Steam Cleaner for Deep Grime
If you've been scrubbing grout lines and glass doors with little to show for it, a steam cleaner might be the upgrade you need. These handheld devices blast hot steam at high pressure, loosening dirt, soap scum, and mildew without any chemicals. The heat also kills bacteria and mold spores, making your shower not just clean but truly sanitized.
Steam cleaning is especially effective on textured surfaces like grout, tile, and shower mats where scrubbing brushes can't reach. It's also safe for glass doors—just avoid rapid temperature changes on cold glass. Best of all, you only need water, so there's no rinsing or worrying about residue.
How It Works
A handheld steam cleaner heats water to around 200°F and releases it as a focused jet of steam. The combination of heat and pressure breaks down grime on contact. For best results, hold the nozzle an inch or two from the surface and move slowly.
On vertical surfaces, work from top to bottom so the steam doesn't drip onto already-cleaned areas.
Where to Use It
Steam cleaners excel on grout lines, where dirt gets embedded in the porous material. They also work wonders on glass shower doors—the steam cuts through soap scum and hard water spots. Use them on showerheads, faucets, and even the shower floor.
Just avoid steam on loose caulk or damaged seals, as the pressure could worsen them.
Pro Tips For Best Results
Always follow the manufacturer's instructions for water type—distilled water prevents mineral buildup. For extra-stubborn grout, let the steam sit for a few seconds before wiping with a microfiber cloth. Use a nylon brush attachment for textured surfaces.
After steaming, wipe surfaces dry to prevent water spots.
9. Install a Shower Filter
Hard water is a silent enemy of a clean shower. Those white mineral deposits on your glass door and fixtures? That's calcium and magnesium from your water supply.
A shower filter tackles the problem at its source, reducing the minerals that cause buildup in the first place. It's a preventive upgrade that pays off every time you clean.
Installing a shower filter is one of the smartest long-term investments for a sparkling shower. By removing harsh minerals and chlorine, you not only prevent stubborn stains but also protect your skin and hair from dryness. The result is less scrubbing and a shower that stays fresh longer between deep cleans.
How A Filter Reduces Buildup
Shower filters typically use a combination of activated carbon, KDF (kinetic degradation fluxion), and sometimes ceramic beads to trap minerals and impurities. As water passes through, calcium and magnesium ions are captured before they can land on your shower surfaces. This means less soap scum, fewer white spots on glass, and easier wipe-downs after each use.
Choosing The Right Filter
Not all filters are created equal. Look for one that specifically targets hard water minerals, not just chlorine. A filter with a high sediment retention capacity will last longer and require less frequent replacement.
Also check if it's compatible with your showerhead type—most are universal, but some require an adapter. A quality filter will pay for itself in reduced cleaning time and fewer harsh chemical purchases.
Installation And Maintenance Tips
Installation is straightforward: unscrew your existing showerhead, screw on the filter, then attach the showerhead to the filter. Most filters need replacement every 6 to 12 months, depending on your water hardness. Set a calendar reminder so you don't forget.
After installation, you'll notice a difference in water feel and a gradual reduction in new mineral deposits.
10. Use a Toothbrush for Tight Spots
Not every nook in your shower is easy to reach with a sponge or cloth. Faucet bases, corners, and the edges of your shower caddy collect grime that a regular scrubber just can't get into. That's where an old toothbrush becomes your best friend.
Its small bristle head fits into tight gaps and lets you target buildup with precision, making those neglected areas sparkle again.
Grab a retired toothbrush (or a dedicated cleaning brush with a similar shape) and pair it with your favorite cleaner. Dip the bristles in a baking soda paste or a mild bathroom spray, then work it into the crevices around faucet handles, along the rim of soap dishes, and where the shower caddy meets the wall. A few quick passes dislodge soap scum and mildew that sponges leave behind.
Rinse well afterward, and you'll see a noticeable difference in those hard-to-reach spots.
Targeting Faucet Bases
The area where your faucet meets the tile or surround is a prime spot for grime buildup. Spray a little all-purpose cleaner or vinegar solution onto the toothbrush bristles, then scrub in a circular motion around the base. Pay extra attention to the underside where water tends to pool.
Finish by wiping away any loosened residue with a damp cloth.
Cleaning Shower Caddy Edges
Shower caddies often have tiny ledges and wire intersections that trap soap residue and hard water deposits. Use the toothbrush to brush along each bar and into the corners where the caddy connects to the showerhead or wall. For stubborn spots, dip the brush in a paste of baking soda and water before scrubbing.
Rinse the caddy with warm water to remove any leftover paste.
Reviving Grout Corners
The corners where tile meets tile or where tile meets the tub can develop dark mold or soap scum. A toothbrush is ideal for these tight angles. Apply a bleach-based grout cleaner or a hydrogen peroxide paste, scrub firmly along the grout lines, then let it sit for a few minutes before rinsing.
Regular maintenance with a toothbrush keeps these corners bright and prevents mildew from taking hold.
11. Make a DIY Glass Cleaner
Commercial glass cleaners can be pricey and full of chemicals you might not want around. A simple homemade solution works just as well and costs pennies to make. Mix 1 cup rubbing alcohol, 1 cup water, and 1 tablespoon white vinegar in a spray bottle.
Shake gently to combine, then spray onto your shower glass and wipe with a microfiber cloth for a streak-free shine. The alcohol evaporates quickly, the vinegar cuts through soap scum, and the water dilutes everything to a safe strength.
This DIY cleaner is perfect for daily or weekly use on glass shower doors. It's gentle enough for frequent application but strong enough to tackle light buildup. For best results, use a clean, dry microfiber cloth and wipe in one direction—like from top to bottom—to avoid streaks.
Avoid using paper towels, which can leave lint behind.
Why It Works
Rubbing alcohol evaporates fast, leaving no residue. White vinegar is a mild acid that dissolves soap scum and hard water minerals. Together, they create a powerful cleaner that's safe for glass and mirrors.
The water helps dilute the solution so it's not too harsh on surfaces or your skin.
How To Use It
Spray the cleaner generously onto the glass, then immediately wipe with a microfiber cloth. For stubborn spots, let it sit for 30 seconds before wiping. Work in small sections to prevent the cleaner from drying before you wipe.
If you notice streaks, your cloth might be dirty—switch to a fresh one.
Storage And Safety Tips
Store the solution in a labeled spray bottle out of reach of children. Keep it away from heat sources, as rubbing alcohol is flammable. Shake the bottle before each use, as the ingredients may separate over time.
This cleaner can also be used on mirrors, chrome fixtures, and ceramic tiles, but test on an inconspicuous area first.
12. Clean Shower Curtains in the Washing Machine
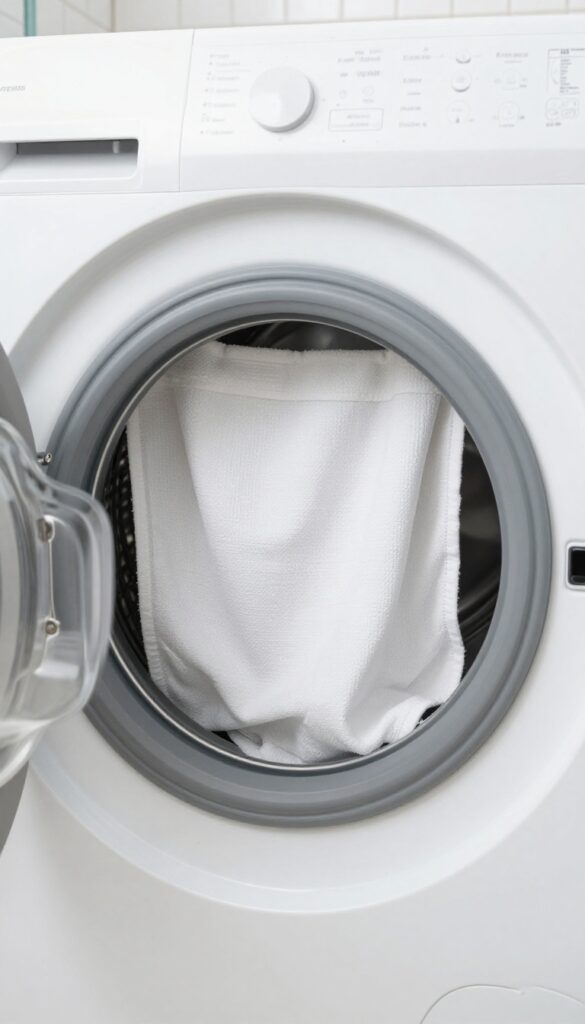
Shower curtains and liners collect soap scum, mildew, and grime over time. Instead of scrubbing them by hand, toss them in the washing machine for an effortless refresh. This method works for both fabric and plastic liners, saving you time and elbow grease.
Remove your shower curtain or liner from the hooks and place it in the washing machine. Add a cup of white vinegar to the detergent dispenser and a small amount of mild detergent. Run a gentle cycle with warm water.
For extra cleaning power, throw in a few towels to help scrub the curtain. After the cycle, hang the curtain back up immediately to air dry. Do not put it in the dryer, as heat can damage plastic liners or shrink fabric ones.
This simple wash removes buildup and prevents mildew from forming.
Why Vinegar Works
White vinegar is a natural disinfectant and deodorizer. It breaks down soap scum and kills mildew without harsh chemicals. Adding it to the wash ensures your curtain comes out fresh and free of musty odors.
Drying Tips
Always hang the curtain to dry fully after washing. If you leave it bunched up, moisture gets trapped and mildew returns quickly. Spread it out on the shower rod and let air circulate.
For fabric curtains, you can tumble dry on low heat if the care label allows, but air drying is safest.
13. Use a Pumice Stone on Hard Water Rings
Hard water stains on toilet bowls and shower floors can look stubborn, but a pumice stone makes quick work of them. This natural volcanic rock is abrasive enough to scrub away mineral deposits without scratching porcelain or ceramic surfaces. The trick is to wet the stone thoroughly before use and keep it wet while you work.
How A Pumice Stone Works On Hard Water
Pumice is a porous, lightweight stone formed from volcanic lava. When wet, its abrasive texture gently grinds away calcium and lime deposits without damaging the underlying surface. Unlike harsh chemical cleaners, it relies on physical action, so there's no risk of toxic fumes or etching.
It's especially effective on toilet bowl rings and shower floor buildup.
Step-by-step Technique For Best Results
Start by soaking the pumice stone in water for a few minutes. Then, wet the stained area as well. Gently rub the stone over the hard water ring using light pressure—let the stone do the work.
You'll see the stain lift away as a fine powder forms. Rinse the area frequently to check progress and avoid scratching. Never use a dry stone, as that can cause damage.
Where To Use It (and Where To Avoid)
Pumice stones are safe on porcelain toilets, ceramic tiles, and glazed shower floors. Avoid using them on acrylic, fiberglass, or any glossy or painted surface, as the abrasiveness can leave scratches. Stick to hard, non-porous materials for best results.
Also, don't use the same stone on toilet bowls and shower floors—dedicate one for each to prevent cross-contamination.
14. Apply a Protective Coating to Glass
Glass shower doors and enclosures are magnets for water spots and soap scum. A protective coating creates an invisible barrier that makes these surfaces much easier to maintain. Think of it like waxing your car—the same principle applies to your shower glass.
Commercial glass sealants or automotive wax can be applied to clean, dry glass. The coating fills microscopic pores, preventing water from bonding to the surface. Water beads up and rolls off, taking soap residue with it.
This means less scrubbing and fewer streaks between deep cleans.
Choose The Right Product
Look for a sealant specifically designed for shower glass, like Rain-X or a dedicated glass coating kit. Some are spray-ons, others require buffing. Avoid products with harsh chemicals that could damage tile or grout.
Application Tips
Clean the glass thoroughly first, removing all existing soap scum and hard water stains. Apply the coating in a well-ventilated area, following the manufacturer's instructions. Typically, you spray or wipe it on, let it haze, then buff off with a microfiber cloth.
Reapply As Needed
Most coatings last several weeks to a few months, depending on water hardness and usage. When you notice water no longer beading up as much, it's time for a fresh coat. Regular reapplication keeps the glass looking pristine.
15. Clean Shower Caddies and Shelves
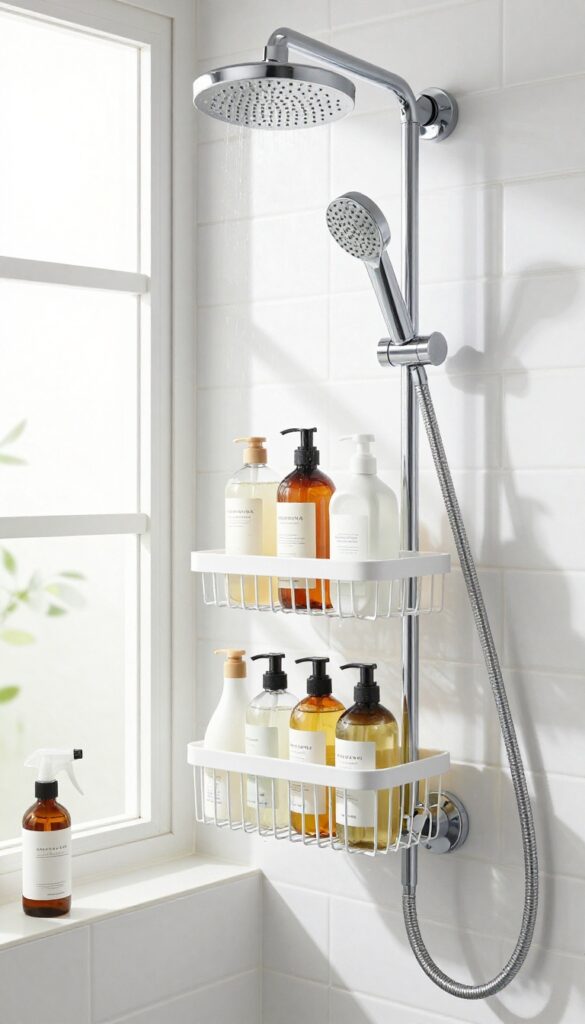
Shower caddies and shelves are magnets for grime. Bottles leak, soap scum builds up, and before you know it, your organizer looks dirtier than the shower itself. Giving them a proper clean not only improves hygiene but also makes your shower feel more put-together.
Start by removing everything from the caddy or shelf. Wipe down the surface with a disinfectant spray or all-purpose cleaner to kill mildew and bacteria. For plastic caddies, soak them in a mixture of equal parts white vinegar and warm water for 30 minutes.
This dissolves soap scum and hard water deposits without harsh scrubbing. Rinse thoroughly and dry before replacing bottles.
Tackle Stubborn Residue
If your caddy has built-up crust, sprinkle baking soda on a damp sponge and scrub gently. The mild abrasive lifts residue without scratching plastic or coated metal. For wire shelves, use an old toothbrush to reach crevices where grime hides.
Prevent Future Buildup
After cleaning, give your caddy a quick rinse with hot water once a week. If you notice rust on metal shelves, apply a thin coat of clear nail polish to exposed spots to seal them. Also, consider using a shower squeegee on bottles to reduce drips.
16. Use a Grout Sealer After Cleaning
Grout is porous, so even after a deep clean, it's vulnerable to moisture and stains. Applying a sealer locks in that just-cleaned look and makes future upkeep much easier. It's a simple step that pays off for months.
Sealer acts like a shield, preventing water and soap scum from soaking into the grout. Without it, grout darkens and grows mold faster. Most sealers are easy to apply with a small brush or applicator bottle—just wipe it on, let it penetrate, and wipe off excess.
Reapply every six months to keep protection strong.
Why Sealing Matters
Unsealed grout absorbs moisture like a sponge, leading to discoloration and mildew. Sealing creates a barrier that repels water and stains, so your grout stays light and clean longer.
How To Apply Sealer
Clean and dry grout thoroughly first. Apply sealer with a small brush or squeeze bottle, working it into the lines. Wait 5-10 minutes, then wipe away excess from tile surfaces.
Let it cure for 24 hours before exposing to water.
When To Reapply
Check grout every six months. If water beads up on the surface, the sealer is still working. If it soaks in and darkens the grout, it's time to reseal.
High-traffic showers may need more frequent applications.
17. Try a Vinegar and Dish Soap Scrub
Soap scum can feel nearly impossible to shift, especially on glass doors and tile. A simple homemade scrub using vinegar and dish soap cuts through that grime without harsh chemicals. The combination works because vinegar breaks down mineral deposits while dish soap lifts grease and soap residue.
Heat 1 cup of white vinegar in the microwave until warm, then mix it with 1 cup of liquid dish soap in a spray bottle. Shake gently to combine. Spray the mixture generously onto soap scum buildup, let it sit for 10–15 minutes, then scrub lightly with a non-abrasive sponge.
Rinse thoroughly with warm water. The solution works best on glass, ceramic, and porcelain surfaces. Avoid using it on natural stone like marble or granite.
Why This Combo Works
Vinegar's acidity dissolves hard water minerals and soap residue, while dish soap's surfactants trap and lift oils. Together they create a powerful degreaser that's safe for most shower surfaces. The heat helps activate the vinegar, making it more effective.
Application Tips For Best Results
For tough buildup, let the solution sit longer or apply a second coat. Use a soft sponge or microfiber cloth to avoid scratching. Rinse well to prevent any sticky residue.
This mixture is also great for cleaning shower caddies and shelves.
18. Use a Microfiber Cloth for Drying
Drying your shower after every use might sound like a chore, but it's one of the easiest ways to keep things sparkling. A microfiber cloth is the perfect tool for the job because it absorbs water quickly and traps particles without scratching surfaces. Just hang it nearby and give the walls and doors a quick wipe after your last rinse.
Microfiber cloths are a game-changer for shower maintenance. Unlike regular towels, they don't leave lint behind, and they grab onto water spots before they have a chance to dry into stubborn stains. The result is less scrubbing and a consistently fresh look.
The Right Cloth For The Job
Not all microfiber cloths are the same. Look for a high-GSM (grams per square meter) cloth, around 300-400 GSM, which is dense and absorbent. A dedicated shower cloth can be stored on a hook inside the bathroom, so it's always ready.
Quick Wipe Technique
Start at the top of the shower walls and work your way down. Use a side-to-side motion on glass doors to avoid streaks. For tile, a simple downward swipe works best.
Don't forget the door handle and any metal fixtures—these spot easily.
When To Wash Your Cloth
Microfiber needs regular washing to stay effective. Toss it in the laundry after three or four uses, or sooner if it smells musty. Avoid fabric softener, which clogs the fibers and kills absorbency.
Air dry or tumble dry on low heat.
19. Clean Shower Drains with Baking Soda and Vinegar
A slow-draining shower is a clear sign that hair and soap residue have built up inside the pipe. Before you reach for harsh chemical drain cleaners, try a simple, eco-friendly method using baking soda and vinegar. This fizzy combination breaks down organic matter without damaging your plumbing.
Pour 1/2 cup baking soda down the drain, followed by 1/2 cup white vinegar. The mixture will foam and bubble as it works to loosen hair and soap scum. Let it sit for 15 minutes, then flush with hot water for about 30 seconds.
Repeat monthly to keep drains clear and odor-free.
Why This Works
Baking soda is a mild abrasive that scrubs away buildup, while vinegar's acidity dissolves soap scum and mineral deposits. The chemical reaction creates carbon dioxide gas, which helps dislodge debris from pipe walls.
Prevent Future Clogs
Install a mesh drain cover to catch hair before it goes down. Empty it after each shower. Also, avoid pouring grease or oil down the drain, as they can solidify and trap other particles.
When To Call A Pro
If your drain remains slow after this treatment, or you notice standing water, the clog might be deeper. In that case, a plumber's snake or professional help may be needed to avoid pipe damage.
20. Schedule a Monthly Deep Clean

Even with the best daily habits, showers need a reset. A monthly deep clean tackles the buildup that regular wiping misses. Setting aside just 30 minutes once a month keeps your shower looking new and prevents stubborn stains from taking hold.
What To Include
Focus on the areas that accumulate grime over time: scrub tiles and grout with a stiff brush and a baking soda paste, clean glass doors with a vinegar solution or a dedicated glass cleaner, and descale fixtures with a lemon or vinegar soak. Don't forget the showerhead—soak it in vinegar to remove mineral deposits.
Tools That Help
A grout brush, a microfiber cloth, and a spray bottle are essentials. For tough soap scum, a squeegee after each use reduces the deep-clean workload. Consider a steam cleaner for heavy buildup—it cuts through grime without harsh chemicals.
Make It A Habit
Pick a consistent day, like the first Sunday of the month, and add it to your calendar. Set a timer for 30 minutes and work through the tasks systematically. Over time, this routine becomes automatic and keeps your shower sparkling with minimal effort.
FAQ
How often should I clean my shower?
For best results, do a quick daily spray and squeegee, then a deeper clean once a week. Monthly deep cleaning of grout and drains helps maintain freshness.
What's the best natural cleaner for showers?
A mix of white vinegar and water works well for most surfaces. For tough stains, use baking soda paste or hydrogen peroxide.
How do I prevent mold in the shower?
Keep the bathroom ventilated, use a squeegee after showers, and clean regularly with mold-killing solutions like hydrogen peroxide or vinegar.
Can I use bleach on colored grout?
Bleach can discolor colored grout. Instead, use a mild cleaner or a paste of baking soda and hydrogen peroxide for safe cleaning.
How do I clean a glass shower door without streaks?
Use a DIY glass cleaner (rubbing alcohol, water, vinegar) and wipe with a microfiber cloth. Avoid paper towels, which leave lint.
Conclusion
Keeping your shower clean doesn't have to be a chore. With these 20 ideas, you can mix and match what fits your lifestyle—from quick daily habits to monthly deep cleans. The key is consistency and using the right tools for each task.
A sparkling shower makes your bathroom feel like a retreat, and these simple tricks ensure it stays that way with minimal effort. Try a few this week and see the difference for yourself.