15 Kitchen Cleaning Ideas for a Grease Free Cooking Space
Grease buildup in the kitchen can turn even the most enthusiastic cook into a reluctant cleaner. You scrub and scrub, but that sticky film seems to cling to every surface. The good news?
You don't need harsh chemicals or endless elbow grease to get things sparkling. These 15 kitchen cleaning ideas use everyday ingredients and clever techniques to cut through grease fast. From your range hood to your cabinet doors, each method targets a specific problem area with minimal effort.
Ready to reclaim your cooking space without the struggle? Let's dive into these game-changing tips.
1. Degrease Your Range Hood Filter with Baking Soda
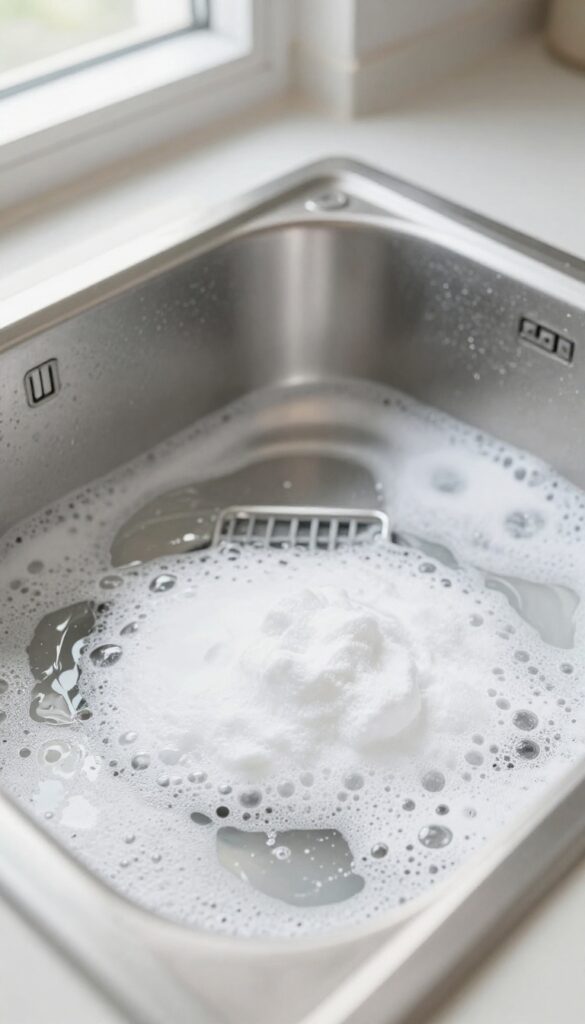
Range hood filters trap a shocking amount of grease. Over time, that sticky layer blocks airflow and makes your hood work harder. Instead of scrubbing endlessly, let a simple baking soda soak do the heavy lifting.
Pull out the metal filter and place it in a large pot or sink filled with hot water. Add 1/2 cup baking soda and a few squirts of dish soap. Let it soak for 15–20 minutes.
The baking soda reacts with the grease, breaking it down so it rinses away clean. For stubborn spots, a soft brush can help, but most of the grime will slide off on its own.
Why Baking Soda Works Best
Baking soda is mildly alkaline, which helps dissolve acidic grease molecules. Combined with hot water and dish soap, it creates a powerful but gentle degreaser. Unlike harsh chemical sprays, it won't damage the filter's coating or leave toxic residue near your cooking area.
How Often To Clean The Filter
Aim for every one to three months depending on how often you cook. If you fry food regularly, monthly cleaning keeps the hood efficient. A quick visual check is easy—if the filter looks coated or feels tacky, it's time for a soak.
Drying And Reinstalling
After rinsing, shake off excess water and let the filter air dry completely. Placing it on a dish rack or towel works well. Make sure it's bone dry before putting it back to avoid rust or mold.
A dry filter also traps grease better.
2. Use Vinegar and Water for Streak-Free Windows
Kitchen windows and glass surfaces are magnets for grease splatters and cooking fumes. A simple 50/50 vinegar-water mix cuts through that grime without leaving streaks. It’s cheap, non-toxic, and works better than many commercial glass cleaners.
Mix equal parts white vinegar and warm water in a spray bottle. Spritz onto the glass, then wipe with a microfiber cloth or crumpled newspaper. For stubborn grease, let the solution sit for a minute before wiping.
Avoid paper towels—they leave lint.
Why Vinegar Works On Grease
Vinegar’s acidity breaks down the fatty acids in grease, lifting it off glass easily. Unlike ammonia-based cleaners, vinegar doesn’t leave a residue that attracts more grime. It also deodorizes, cutting through cooking smells.
Best Tools For Streak-free Results
Use a microfiber cloth or a squeegee for the cleanest finish. Microfiber traps grease and dirt without scratching. For windows, wipe vertically on one side and horizontally on the other—you’ll spot any streaks instantly.
Extra Tips For Tough Grease
For heavily greased glass, add a drop of dish soap to the vinegar-water mix. The soap helps emulsify the grease. Follow with a plain water rinse and a dry microfiber cloth to avoid soapy residue.
3. Tackle Stovetop Grime with a Pumice Stone
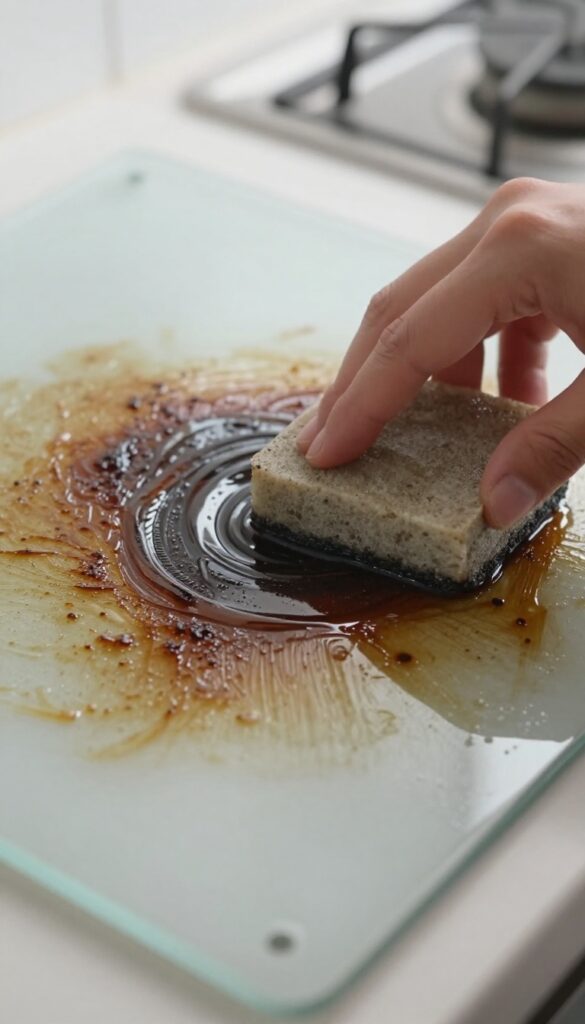
Burnt-on grease on your stovetop can feel impossible to remove without harsh scrubbing that risks scratching the surface. A pumice stone offers a surprisingly gentle solution for ceramic and glass cooktops. When used correctly, it lifts even the most stubborn residue without damaging the finish.
Why A Pumice Stone Works
Pumice is a porous volcanic rock that acts as a fine abrasive. When wet, it becomes soft enough to remove burnt-on grease without scratching glass or ceramic. The key is to keep the stone and the surface wet at all times—dry pumice can cause scratches.
Step-by-step Application
First, make sure your stovetop is cool. Wet the pumice stone thoroughly, then rub it gently over the greasy spots using circular motions. Rinse the stone frequently to remove residue and keep it wet.
Wipe the stovetop clean with a damp cloth afterward.
Safety Tips
Always test the pumice stone on a small, inconspicuous area first. Avoid using it on painted or coated surfaces, as it may remove the finish. Store the stone dry after use to prevent it from breaking down.
4. Clean Greasy Cabinet Doors with Oil Soap
Cabinet doors take the brunt of cooking splatters, and wood finishes are especially tricky. Harsh degreasers can strip the paint or dull the stain, leaving you with a bigger problem. A mild oil-based soap, like Murphy's Oil Soap, lifts grease without damaging the surface.
It's a gentle but effective solution that restores your cabinets' natural shine.
Why Oil Soap Works
Oil soap is formulated to break down grease without harsh chemicals. The oil in the soap bonds with the greasy residue, making it easy to wipe away. Unlike all-purpose cleaners, it won't dry out or discolor wood.
It's safe for finished, painted, or stained cabinets, as long as the finish is intact.
How To Apply It
Mix a small amount of oil soap with warm water according to the label instructions. Dip a soft cloth or sponge into the solution, wring it out so it's damp not dripping, and wipe down each cabinet door. Work in sections, rinsing your cloth frequently.
Avoid soaking the wood—excess moisture can cause warping. For stubborn spots, let the solution sit for a minute before wiping.
Drying And Polishing
After cleaning, go over the doors with a dry microfiber cloth to remove any leftover moisture. This step prevents water spots and streaks. For extra shine, you can follow up with a small amount of furniture polish or a dab of oil soap on a dry cloth.
Your cabinets will look refreshed and grease-free.
5. Steam Clean Your Microwave with Lemon Water
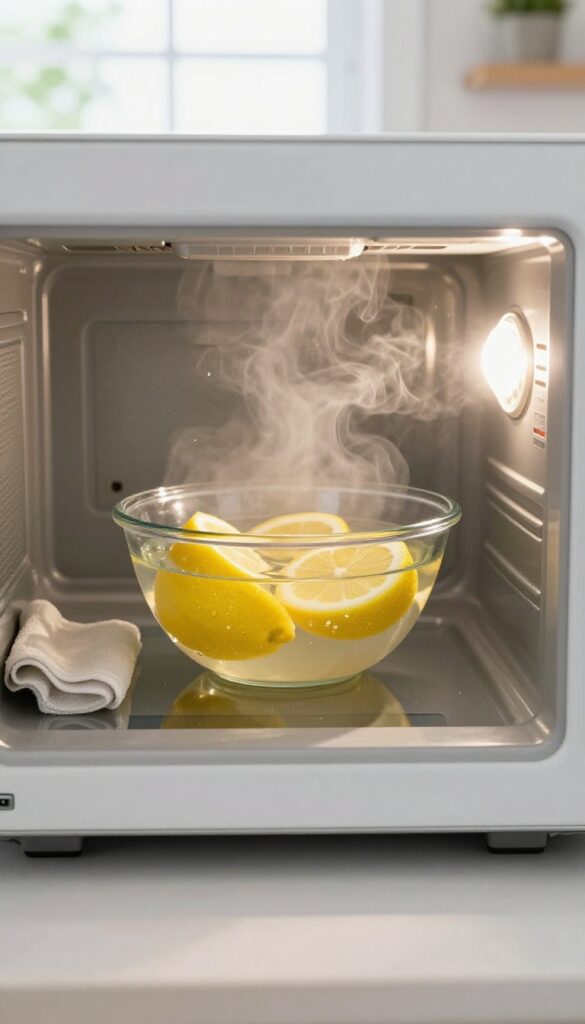
Microwaves collect grease and food splatters faster than almost any other appliance. The heat and steam from cooking cause grease to bake onto the interior walls, making it tough to wipe off later. Instead of scrubbing with abrasive cleaners, you can use steam power to loosen everything in minutes.
This method uses a simple bowl of water and lemon slices to create steam that softens grease and food residue. The lemon also leaves a fresh, clean scent behind. After steaming, a quick wipe with a damp cloth is all it takes to restore your microwave to a spotless condition.
Why Lemon Water Works So Well
Lemon contains natural citric acid, which helps break down grease and neutralize odors. When heated, the water turns to steam that condenses on the microwave walls, soaking into dried-on food and grease. The combination of heat, moisture, and acid makes this one of the most effective no-scrub cleaning methods.
Step-by-step Instructions
Fill a microwave-safe bowl with 1 cup of water. Add 2–3 lemon slices or a few tablespoons of lemon juice. Microwave on high for 5 minutes.
Let the bowl sit inside with the door closed for another 2–3 minutes so the steam can continue working. Carefully remove the bowl (it will be hot) and wipe down the interior with a soft sponge or cloth. The grease and food bits should come off easily without any scrubbing.
Extra Tips For Stubborn Spots
If your microwave has heavy buildup, extend the steaming time to 7–8 minutes. For stuck-on food, use a plastic scraper or the edge of a spatula after steaming. To prevent future buildup, wipe down the microwave interior after each use with a damp cloth.
You can also place a bowl of water with lemon inside after cooking strong-smelling foods to freshen the air.
6. Scrub Oven Racks with Ammonia in a Bag
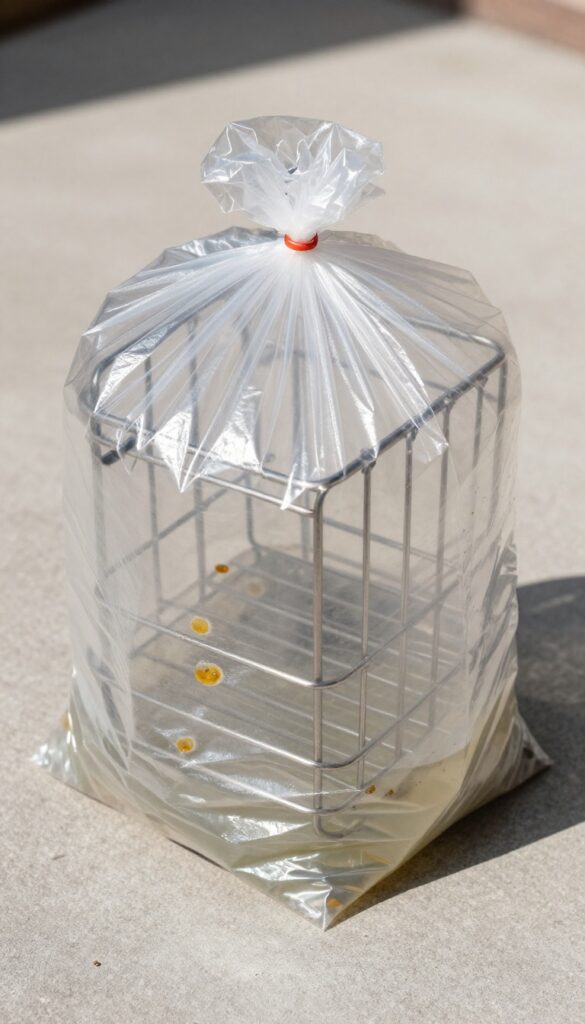
Oven racks are notorious for collecting baked-on grease and grime that no amount of scrubbing seems to budge. But there’s a trick that does the hard work for you: ammonia. This simple method lets the fumes do the heavy lifting, so you can rinse away the mess with minimal effort.
Place your oven racks inside a large, heavy-duty trash bag. Pour about 1/2 cup of household ammonia into the bag, then seal it tightly. Let it sit overnight—ideally in a well-ventilated area or outdoors.
The ammonia fumes will break down the grease, and by morning, you can simply rinse the racks with warm water and a sponge. Wear gloves and work in a ventilated space, and you’ll have sparkling clean racks without the elbow grease.
Why Ammonia Works So Well
Ammonia is a powerful degreaser that reacts with baked-on fats and oils. The fumes penetrate the grease layer, softening it so it releases from the metal. Unlike scrubbing, this method doesn’t risk scratching the racks’ finish.
Safety Tips For Using Ammonia
Always work in a well-ventilated area or outdoors. Wear rubber gloves and avoid inhaling fumes. Never mix ammonia with bleach or other cleaners.
Seal the bag tightly to contain the smell.
Alternative: Dishwasher Pods
If you don’t have ammonia, try a similar bag method with a few dishwasher detergent pods. Add hot water, seal the bag, and let it soak for a few hours. Rinse well afterward.
7. Wipe Down Backsplash with Rubbing Alcohol
Your kitchen backsplash takes a beating from grease splatters, especially behind the stove. Tile and grout trap oily residue that can look dull and feel sticky. Rubbing alcohol is a surprisingly effective solution that cuts through grease without leaving streaks or residue.
Rubbing alcohol (isopropyl alcohol) is a powerful degreaser that evaporates quickly, so you don't have to worry about wiping it dry. It's safe for most tile, glass, and metal backsplashes, and it kills bacteria too. Just pour some into a spray bottle, mist the backsplash, and wipe with a microfiber cloth.
For tough spots, let it sit for a minute before wiping.
Why Rubbing Alcohol Works So Well
Alcohol breaks down grease molecules on contact, dissolving the sticky film that water alone can't remove. It also evaporates rapidly, preventing water spots and streaks. Unlike vinegar, it doesn't leave a lingering smell, and it's safe on sealed grout.
How To Use It Safely
Always test on an inconspicuous area first, especially if you have painted or unsealed backsplashes. Use 70% or 91% isopropyl alcohol. Spray lightly, wipe with a clean cloth, and buff for extra shine.
Avoid using on acrylic or laminate surfaces as it may cause damage.
Pro Tips For Best Results
For baked-on grease, add a drop of dish soap to the alcohol spray. Use a soft sponge instead of a cloth for textured tile. Clean your backsplash weekly with this method to prevent buildup from becoming stubborn.
8. Deodorize and Degrease the Garbage Disposal
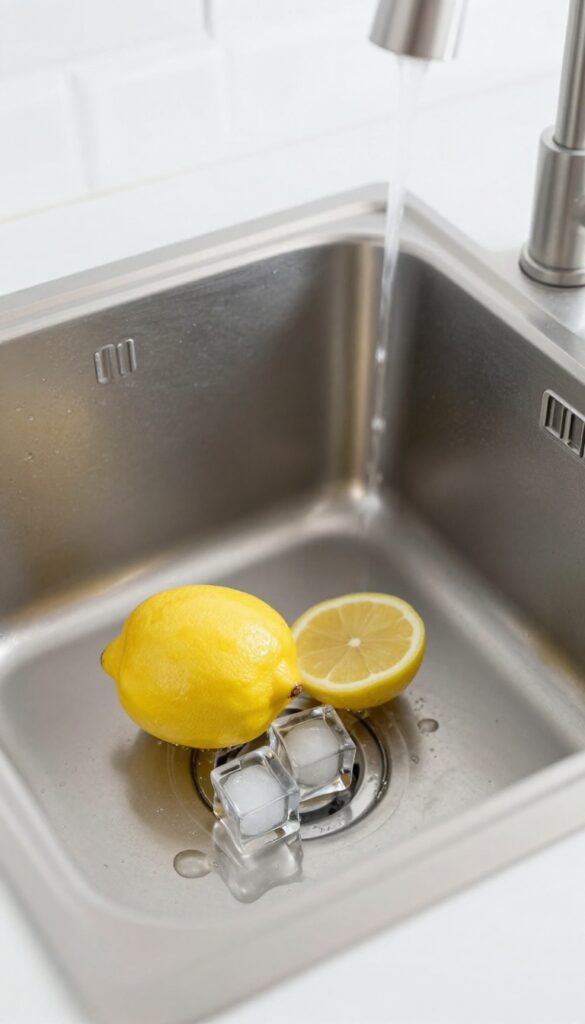
Your garbage disposal works hard grinding up food scraps, but grease and odors can linger long after the last dish is rinsed. Over time, fatty residues build up on the blades and inner walls, creating a less-than-fresh smell that spreads through your kitchen. The fix is surprisingly simple and uses items you probably already have in your fridge.
Ice cubes and lemon peels make a powerful cleaning combo. The ice helps knock off stuck-on grease and food particles as the blades spin, while the lemon peels release natural oils that cut through grime and leave a fresh citrus scent. This method is safe for your disposal and avoids harsh chemicals.
Why Ice And Lemon Work
Ice cubes are abrasive enough to dislodge grease without damaging the blades. As they grind, they scrape away residue. Lemon peels contain d-limonene, a natural degreaser that breaks down oily buildup.
The combination cleans and deodorizes in one step.
Step-by-step Cleaning Routine
Start by running a stream of cold water. Drop a handful of ice cubes (about a cup) into the disposal, followed by a few lemon peels. Turn on the disposal and let it grind for 30 seconds.
Finish by running cold water for another 15 seconds to flush everything through.
When To Do This
Aim to clean your disposal this way once a week. If you notice a greasy smell sooner, don't wait. You can also toss in leftover citrus peels from oranges or limes for variety.
Avoid using this method if you have a septic system—citrus oils can disrupt the bacteria balance.
9. Use a Squeegee on Greasy Countertops
Countertops collect grease and grime from cooking, but a rag often just smears it around. A squeegee, on the other hand, pulls everything into one neat line for quick disposal. This trick works especially well on smooth surfaces like quartz, granite, or laminate, leaving them streak-free with minimal effort.
Start by spraying your countertops with a degreaser or a simple vinegar-water solution. Let it sit for a minute to break down the grease. Then, instead of wiping with a cloth, use a squeegee to drag the liquid and loosened grime toward the sink or a waiting towel.
The squeegee's rubber blade collects everything without pushing it into crevices. Finish by rinsing the blade and wiping the edge of the countertop. This method cuts cleaning time in half and prevents the smeary residue that rags often leave behind.
Why A Squeegee Works Better
A squeegee creates a tight seal against the countertop, lifting grease rather than spreading it. Cloth fibers can trap and redeposit oil, but the smooth rubber blade glides over the surface, pushing debris into a single line. It also dries faster, reducing water spots and streaks.
Best Surfaces And Tools
This technique shines on non-porous countertops like quartz, granite, solid surface, and laminate. Avoid it on unsealed marble or textured tile, as the blade may scratch or get caught. Use a small, handheld squeegee with a soft rubber blade, and keep it dedicated to cleaning tasks.
Step-by-step Quick Clean
- Spray degreaser generously over the countertop. 2.
Let it sit for 30–60 seconds. 3. Starting at the far end, pull the squeegee toward the sink or edge in overlapping strokes.
- Wipe the blade clean after each pass. 5.
Collect the residue with a paper towel or rinse down the sink. 6. For stubborn spots, repeat with a second pass.
10. Clean Exhaust Fan Blades with Denatured Alcohol
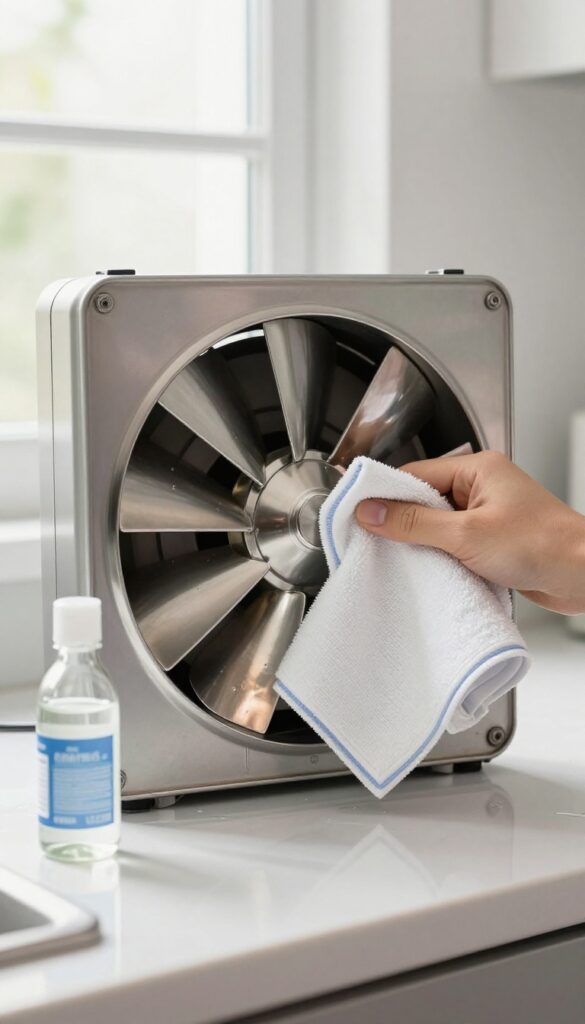
Exhaust fan blades are grease magnets. Over time, they collect a thick, sticky layer that not only looks gross but also reduces airflow. Denatured alcohol cuts through that grime like nothing else, evaporating quickly and leaving zero residue.
No soapy film, no streaks—just clean, efficient blades.
Denatured alcohol is a powerful solvent that dissolves heavy grease on contact. Unlike all-purpose cleaners, it doesn't leave a sticky residue that attracts more dust. Use it in a well-ventilated area and keep it away from open flames.
Why Denatured Alcohol Works Best
Denatured alcohol breaks down the molecular bonds in grease, turning it into a liquid that wipes away easily. It evaporates completely, so you don't have to rinse or dry afterward. This makes it ideal for fan blades, where moisture can damage the motor over time.
Step-by-step Cleaning Method
First, turn off the fan and place a drop cloth or newspaper underneath to catch drips. Remove the fan cover if possible and soak it in warm, soapy water. For the blades, dampen a microfiber cloth with denatured alcohol (don't soak it) and wipe each blade from the center outward.
Use a cotton swab dipped in alcohol for tight spots around the motor housing.
Safety Tips For Using Denatured Alcohol
Denatured alcohol is flammable, so keep it away from heat sources and open flames. Wear gloves to protect your skin, and work in a well-ventilated area. Never mix it with bleach or other cleaners.
Store the bottle tightly sealed and out of reach of children.
How Often To Clean Fan Blades
For heavy-duty cooking, clean the fan blades every two to three months. If you cook less frequently, once a season is enough. Regular cleaning keeps the fan running efficiently and prevents grease from dripping onto your stovetop.
11. Remove Grease from Stainless Steel with Baby Oil
Stainless steel appliances look sleek, but they show every fingerprint and grease smear. Commercial cleaners can be pricey and full of chemicals. Baby oil offers a surprisingly effective and affordable alternative that leaves surfaces spotless and shiny.
Baby oil works because it dissolves grease and creates a protective barrier that repels future smudges. Simply apply a few drops to a soft microfiber cloth and buff the stainless steel in the direction of the grain. The oil fills in microscopic scratches, reducing the appearance of streaks and giving a mirror-like finish.
It's safe for most stainless steel surfaces and leaves a pleasant, subtle scent.
Why Baby Oil Works On Grease
Baby oil is mineral oil, a lightweight hydrocarbon that effectively breaks down cooking grease and oils. It also leaves a thin, invisible layer that repels moisture and fingerprints, keeping your appliances cleaner for longer. Unlike some harsh cleaners, it won't damage the protective coating on stainless steel.
Step-by-step Application
Start by wiping the surface with a damp cloth to remove loose debris. Apply 3-4 drops of baby oil onto a clean, dry microfiber cloth. Rub the oil onto the stainless steel in the direction of the grain using small circular motions.
Then, buff with a dry section of the cloth until the surface gleams. For heavy grease, let the oil sit for a minute before buffing.
Pro Tips For Best Results
Use a dedicated microfiber cloth to avoid lint. Test on an inconspicuous area first, especially on matte finishes. Don't overapply—too much oil can attract dust.
For stubborn spots, mix a drop of dish soap with the baby oil. This method works beautifully on refrigerators, dishwashers, range hoods, and even stainless steel sinks.
12. Deep Clean the Sink with Baking Soda and Hydrogen Peroxide
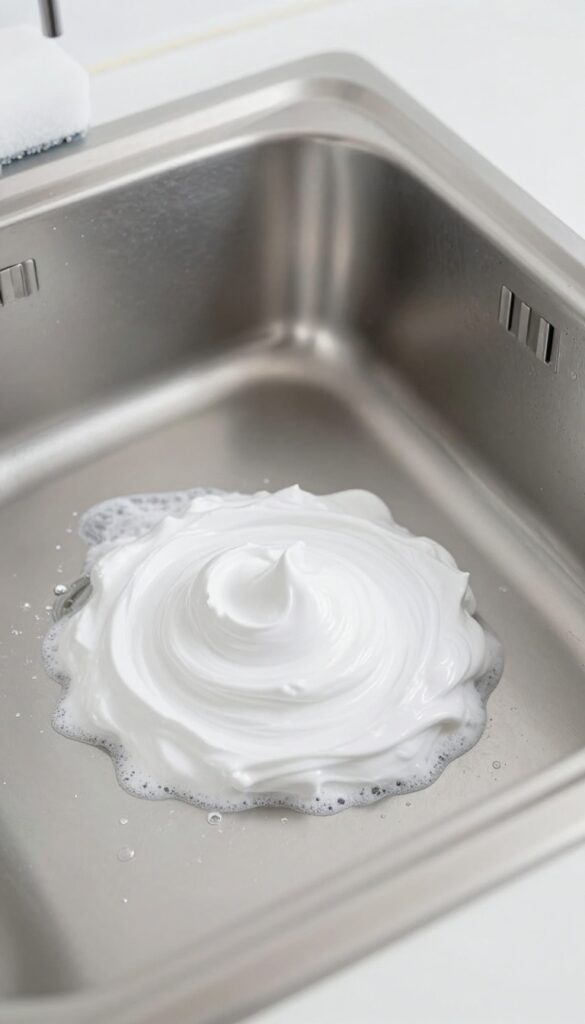
Your kitchen sink sees a lot of action—from greasy pans to coffee stains. Over time, that grime builds up, leaving a dull film and sometimes a funky smell. A simple paste of baking soda and hydrogen peroxide can scrub away grease and sanitize the surface without harsh chemicals.
This method works wonders on stainless steel, porcelain, and composite sinks. The baking soda acts as a gentle abrasive to lift stuck-on grease, while hydrogen peroxide disinfects and whitens. It’s a quick, affordable way to restore your sink’s shine.
How To Make And Apply The Paste
Mix about ½ cup of baking soda with 2–3 tablespoons of hydrogen peroxide to form a thick paste. Spread it over the sink surface, focusing on greasy areas and the drain. Let it sit for 5–10 minutes so the peroxide can work on stains and bacteria.
Scrubbing And Rinsing
Use a soft sponge or a brush to scrub in circular motions, paying extra attention to corners and the drain rim. Rinse thoroughly with warm water. For stubborn spots, sprinkle a little extra baking soda directly on the paste while scrubbing.
Finishing Touches For Extra Shine
After rinsing, wipe the sink dry with a microfiber cloth to prevent water spots. For a final polish, rub a drop of olive oil on stainless steel sinks with a soft cloth—this helps repel future grease and fingerprints.
13. Use a Magic Eraser on Grease Spots on Walls
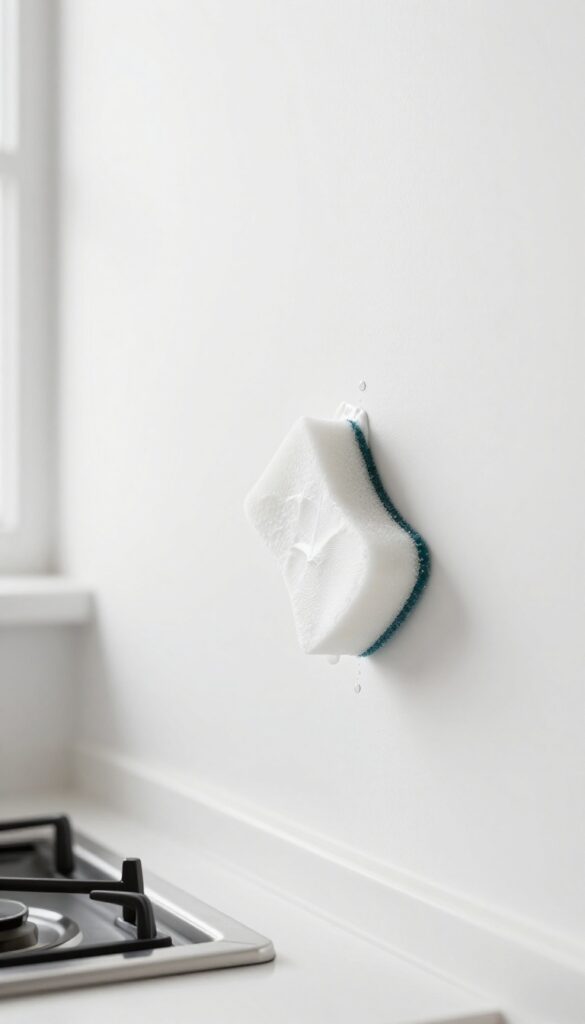
Kitchen walls take a beating from cooking splatters, especially around the stove and sink. Grease spots can build up into stubborn stains that regular wiping won't budge. A melamine sponge—often called a magic eraser—is a surprisingly effective tool for this job.
When you dampen a melamine sponge, it creates a mild abrasive action that lifts grease without scratching painted surfaces. This makes it ideal for removing those tiny, sticky splatters that seem to appear out of nowhere. Just wet the sponge, squeeze out excess water, and gently rub the spots in a circular motion.
The foam will break down the grease, and you'll see the wall return to its original color. No harsh chemicals needed, and the sponge is disposable, so you don't have to worry about cross-contamination.
Why Melamine Sponges Work So Well
Melamine foam has a unique open-cell structure that acts like ultra-fine sandpaper when wet. It's hard enough to lift grease but soft enough not to damage paint, as long as you don't scrub too hard. The sponge essentially erodes away the top layer of grime, leaving a clean surface underneath.
How To Use It Safely
Always test on an inconspicuous area first, especially if your walls have a matte or satin finish. Dampen the sponge—never use it dry, as that can cause scratches. Use light pressure and avoid rubbing in one spot for too long.
Rinse the sponge frequently to remove trapped grease, and replace it once it starts to crumble.
When To Skip This Method
Avoid using melamine sponges on glossy or high-sheen paints, as they can create a dull patch. Also, steer clear of textured walls or wallpaper, where the sponge might snag or peel the surface. For those cases, stick to a gentle degreaser and a soft cloth.
14. Clean Under Appliances with a Crevice Tool
Out of sight doesn't have to mean out of mind, especially when it comes to the grime lurking under your refrigerator, stove, and dishwasher. Over time, dust, food crumbs, and grease-laden debris collect in those tight spaces, creating a breeding ground for bacteria and odors. A vacuum crevice tool is your secret weapon to reach deep into those gaps and suck away the mess without moving heavy appliances.
Start by unplugging the appliance if possible. Attach the crevice tool to your vacuum and slide it along the floor under the appliance, angling it to catch debris stuck to the bottom edges. For stubborn grease buildup, spray a degreaser onto a microfiber cloth and wipe the floor before vacuuming again.
Repeat this every few months to keep your kitchen truly clean.
Why This Spot Gets So Grimy
Cooking releases airborne grease particles that settle on every surface, including floors under appliances. Combined with dust and food spills, this area becomes a sticky trap. The narrow gap makes it hard to reach with a mop or cloth, so debris accumulates unnoticed.
Step-by-step Cleaning Method
First, pull the appliance out slightly if it's on wheels (for safety, have someone help with heavy units). Use the crevice tool to vacuum along the entire perimeter. For stuck-on grime, wipe with a damp microfiber cloth and a gentle all-purpose cleaner.
Let the area dry completely before pushing the appliance back.
Preventive Tips For Longer-lasting Cleanliness
Place a thin mat or tray under appliances to catch spills and make future cleaning easier. Also, check under appliances when you do your monthly deep clean—it only takes a few minutes and prevents buildup from becoming a major chore.
15. Prevent Grease Buildup with a Stovetop Shield
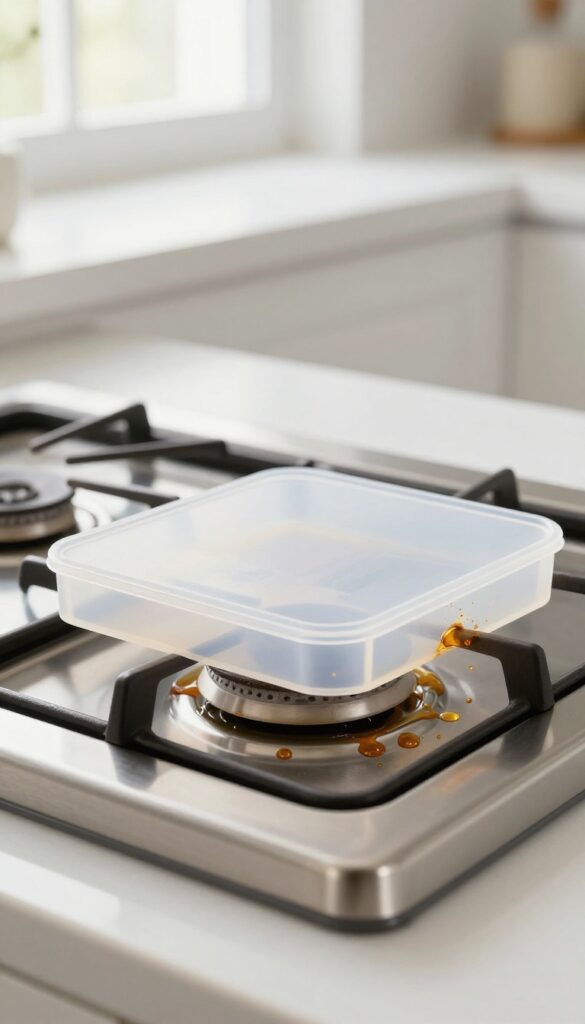
A stovetop shield is one of those tools you didn't know you needed until you try it. This clear silicone barrier sits around your burners and catches every splatter and splash while you cook. After dinner, just lift it off and wipe it clean—no scrubbing baked-on grease from the stovetop surface.
Using a stovetop shield is a simple habit that saves you serious cleanup time. It's especially helpful when frying or sautéing, where oil tends to jump everywhere. The shield protects your burners, grates, and the surrounding cooktop from sticky residue.
Most shields are heat-resistant up to 500°F, so they won't melt or warp during normal cooking. They also fold flat for easy storage when not in use.
Why It Works So Well
The shield creates a physical barrier that traps grease before it can land on hard-to-reach areas. Unlike paper towels or foil, it's reusable and doesn't create waste. The silicone material is non-stick, so splatters slide right off with a quick rinse or wipe.
Plus, it keeps your stovetop looking cleaner for longer between deep cleans.
How To Choose The Right Shield
Look for a shield that matches your stovetop size and burner configuration. Many come in adjustable sets that fit gas, electric, or induction cooktops. Make sure it's made from food-grade silicone and is dishwasher-safe for easy cleaning.
Clear or translucent options are best because they let you see the burners underneath.
Tips For Best Results
Place the shield before you start cooking, especially when using oil or butter. After cooking, let it cool slightly, then remove and wash with warm soapy water or toss it in the dishwasher. For stubborn residue, a quick soak in hot water does the trick.
Store it flat or rolled loosely to prevent creases.
FAQ
What is the best natural degreaser for kitchen surfaces?
A mixture of equal parts white vinegar and water works well for light grease, but for heavy buildup, baking soda paste or a few drops of dish soap in hot water are more effective.
How often should I clean my range hood filter?
Clean the filter every 1 to 3 months, depending on how often you cook. If you fry foods frequently, clean it monthly to prevent grease buildup and maintain airflow.
Can I use bleach to remove kitchen grease?
Bleach is not a degreaser; it disinfects but doesn't cut grease effectively. Stick to degreasing agents like dish soap, vinegar, or baking soda for grease removal.
How do I remove grease from wooden cabinets without damaging them?
Use a mild oil-based soap like Murphy's Oil Soap diluted in water. Apply with a soft cloth, then wipe dry. Avoid harsh chemicals or excessive water that can warp the wood.
What is the fastest way to clean a greasy oven?
Use the self-cleaning cycle if available, or apply a baking soda and water paste overnight, then wipe clean. For quick results, spray with a commercial oven cleaner and let sit for 15 minutes.
Conclusion
A grease-free kitchen isn't about perfection—it's about finding a few methods that actually stick. Start with the ideas that target your biggest trouble spots, like the stovetop or microwave, and build from there. Even small changes, like wiping down surfaces daily, prevent buildup from becoming a major chore.
The key is consistency, not intensity. Choose two or three hacks from this list and make them part of your routine. Your kitchen will stay cleaner with less effort, and you'll spend more time enjoying your cooking space instead of scrubbing it.