12 Smart Gas Cylinder Storage in Kitchen Ideas That Keep Everything Easy to Find
Storing gas cylinders in the kitchen often feels like a juggling act between safety, space, and style. The right setup not only keeps everything easy to find but also protects your home from potential hazards.
You don't need a full remodel to make a big difference—small, thoughtful changes can turn a cluttered corner into a secure, organized zone. From clever built-ins to simple rolling carts, these 12 ideas cover different layouts and budgets.
Whether you cook daily or just want peace of mind, there's a solution here that fits your space. Let's explore practical ways to store your cylinder safely and neatly.
1. Built-In Cabinet with Ventilation
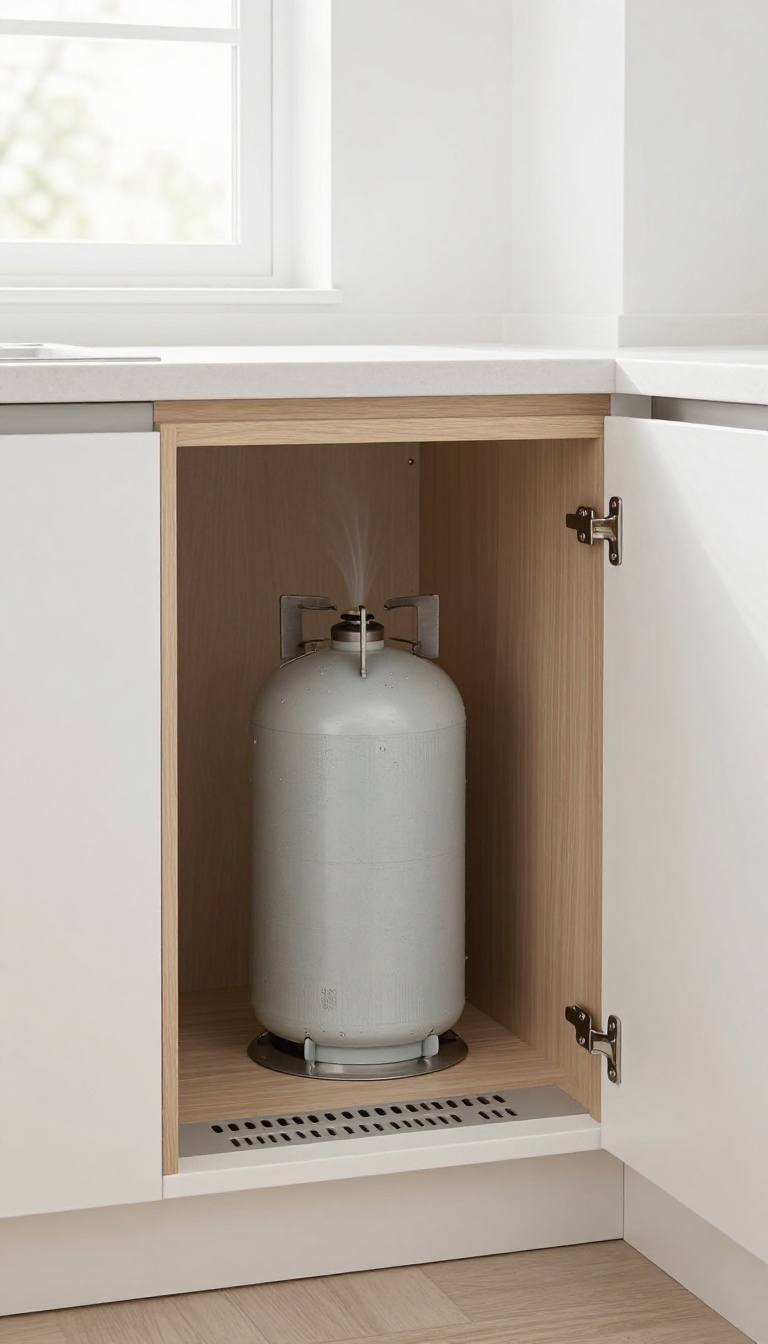
A built-in cabinet might sound like a big project, but it’s one of the smartest ways to tuck a gas cylinder out of sight while keeping it safe. The key is ventilation—without proper airflow, a small leak could turn into a real hazard. By adding vents at the bottom and top, you create a natural draft that pushes any gas outside, giving you peace of mind every time you cook.
This setup works best if you’re planning a kitchen remodel or have a spot where you can add a custom cabinet. It’s not just about hiding the cylinder—it’s about making it easy to reach and check. You’ll want the cabinet to be deep enough to fit the cylinder comfortably, with a sturdy shelf or base to keep it upright.
Add a simple latch or magnetic catch so the door stays closed but opens easily when you need to turn the valve on or off.
Why Ventilation Matters
Gas cylinders can develop tiny leaks over time, and without proper airflow, that gas can accumulate in an enclosed space. Vents at the bottom and top of the cabinet create a natural chimney effect, drawing fresh air in from below and pushing any leaked gas out above. This simple design keeps the area around the cylinder safer and also helps prevent musty odors from building up.
Choosing The Right Cabinet Location
Place the cabinet near an exterior wall or window if possible, so any vented gas can easily escape outside. Avoid putting it right next to heat sources like the stove or oven, and make sure the cabinet isn’t blocking any walkways. A corner spot often works well, as it keeps the cylinder out of the main cooking zone but still within arm’s reach.
Diy Or Custom-built?
If you’re handy, you can build a simple cabinet using plywood and a pre-made door, then install vent grilles yourself. For a more polished look, a custom cabinet maker can match your existing kitchen cabinetry perfectly. Either way, the cost is often lower than you’d expect, especially when you consider the safety and convenience you gain.
2. Slide-Out Tray for Easy Access
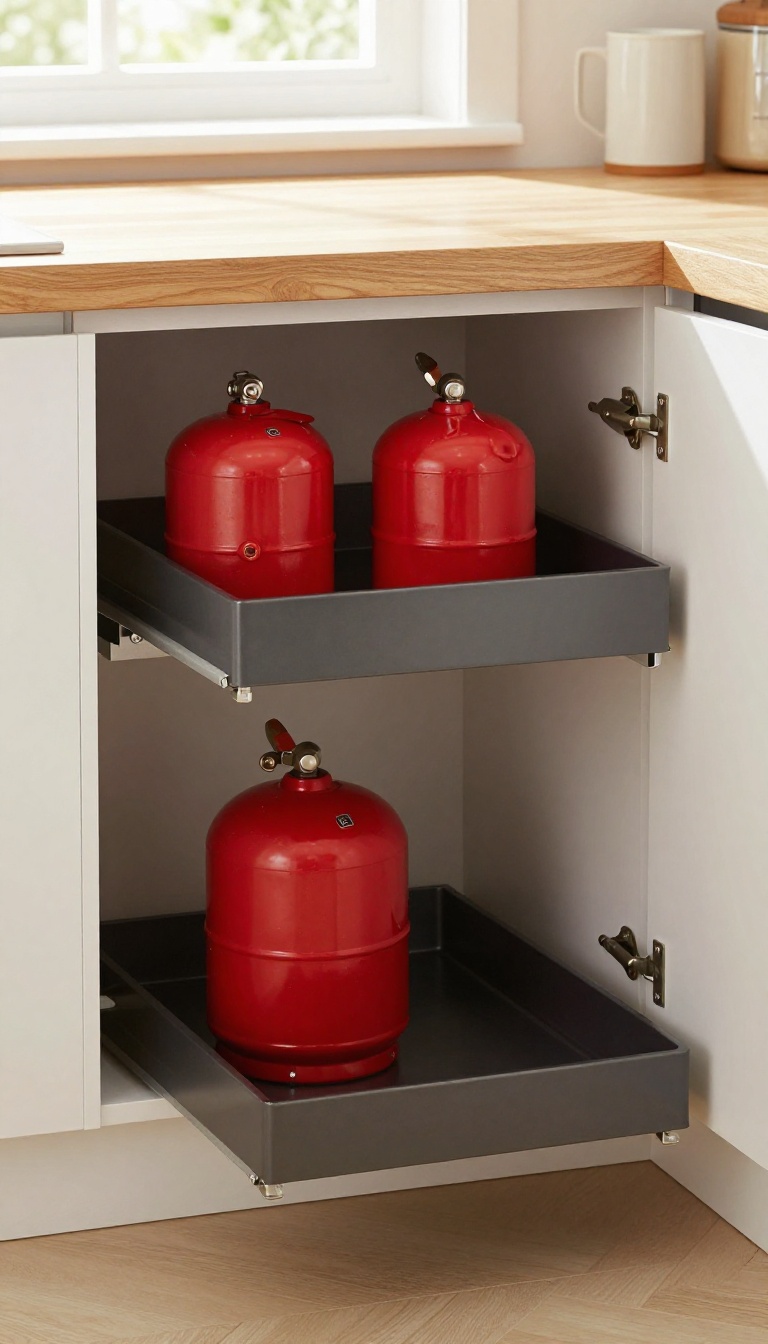
Reaching behind a gas cylinder to connect or disconnect the regulator is never fun, especially in tight corners. A slide-out tray solves that by letting you pull the cylinder forward whenever you need to work on it. It's a simple upgrade that makes a big difference in daily convenience.
Mounting your gas cylinder on a sturdy slide-out tray is a game-changer for kitchens with limited space. The tray glides smoothly, bringing the cylinder right to you, so you can easily check connections, clean around it, or swap tanks without contorting yourself. This idea works especially well in cabinets or under counters where the cylinder would otherwise be buried.
What To Look For In A Slide-out Tray
Not all trays are created equal. You need one that can handle the weight of a full cylinder—usually 30 to 50 pounds. Look for heavy-duty slides with ball bearings and a locking mechanism to keep the tray from rolling open unexpectedly.
The tray itself should have a raised lip or non-slip surface to keep the cylinder stable.
Installation Tips For A Smooth Fit
Measure your cabinet’s interior carefully before buying. The tray should fit with a little clearance on each side. Attach the slides securely to the cabinet floor, not just the sides, for extra support.
If you’re handy, you can build a simple plywood tray with drawer slides from a hardware store. Otherwise, ready-made kits are available online.
Safety First: Locking And Ventilation
Always ensure the tray locks in both the open and closed positions to prevent accidental movement. Keep the area around the cylinder well-ventilated, even if it’s inside a cabinet—add small vents or leave the door slightly ajar when not in use. This keeps any potential gas leak from building up.
3. Corner Storage Nook
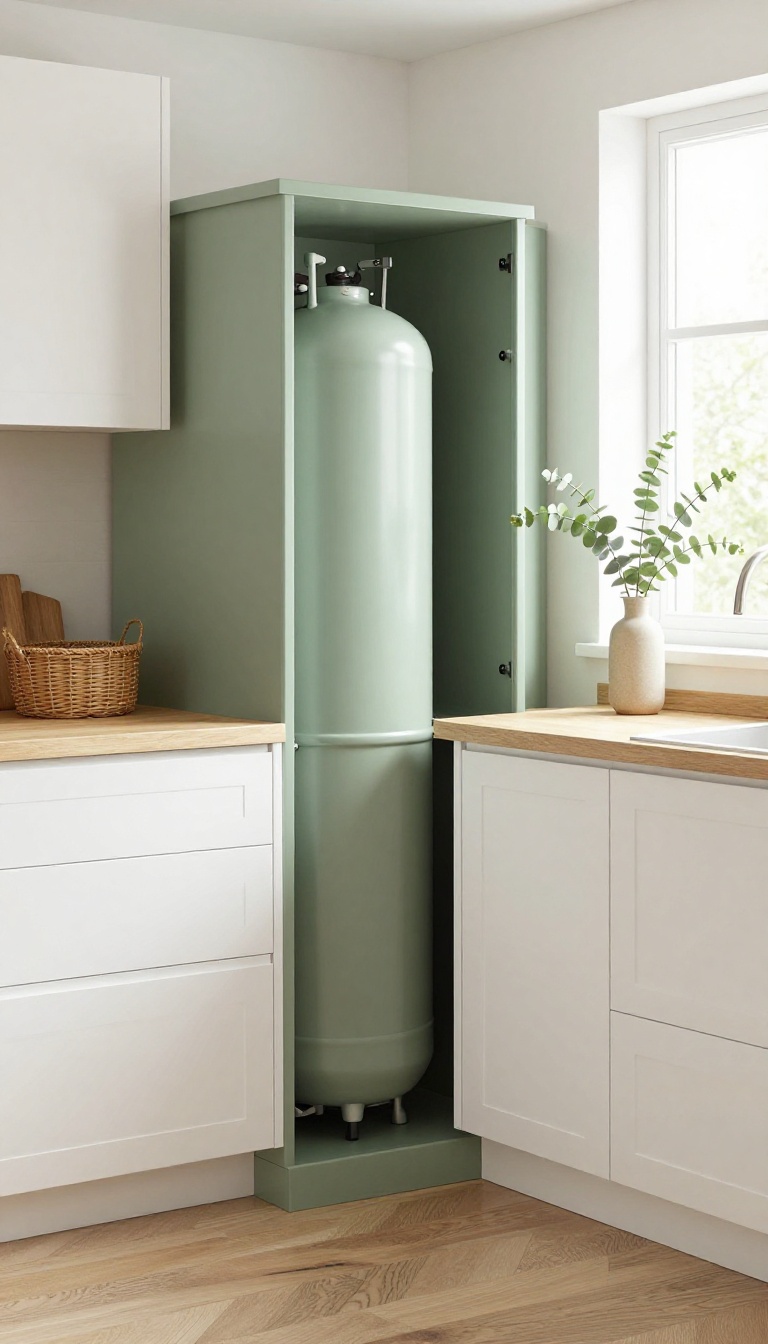
Corners often end up as dead space, but they’re perfect for a gas cylinder that doesn’t need much depth. A custom nook can turn that awkward spot into a neat, accessible storage zone. You can build it yourself or hire a carpenter, and the result feels intentional rather than makeshift.
A corner nook works best when the cylinder is tucked away but still easy to pull out for maintenance or replacement. The key is to measure your cylinder’s height and diameter, then design the nook with a little extra clearance for airflow. Add a hinged door or a curtain to hide it when not in use, and you’ve got a clean look without sacrificing convenience.
Measure First, Build Smart
Before you start, measure your cylinder’s exact dimensions, including the valve and regulator. Leave at least 2 inches of space around the sides and top for ventilation and easy access. If you’re not handy, a simple frame with plywood sides and a front panel works fine.
Just make sure the nook is sturdy enough to hold the cylinder securely.
Door Or Curtain?
A hinged door gives a polished, built-in look and keeps dust off the cylinder. Use a magnetic latch or a simple push-to-open mechanism so you don’t need a handle. If you prefer a softer touch, a curtain rod with a fabric panel is cheaper and easier to install.
Either way, make sure the opening is wide enough to slide the cylinder in and out without scraping.
Safety First
Even though the cylinder is hidden, you still need proper ventilation. Don’t enclose it completely—leave a vent near the top or bottom to let any gas escape in case of a leak. Also, keep the nook away from heat sources like ovens or direct sunlight.
If you’re unsure about local codes, check with a professional before building.
4. Under-Sink Compartment
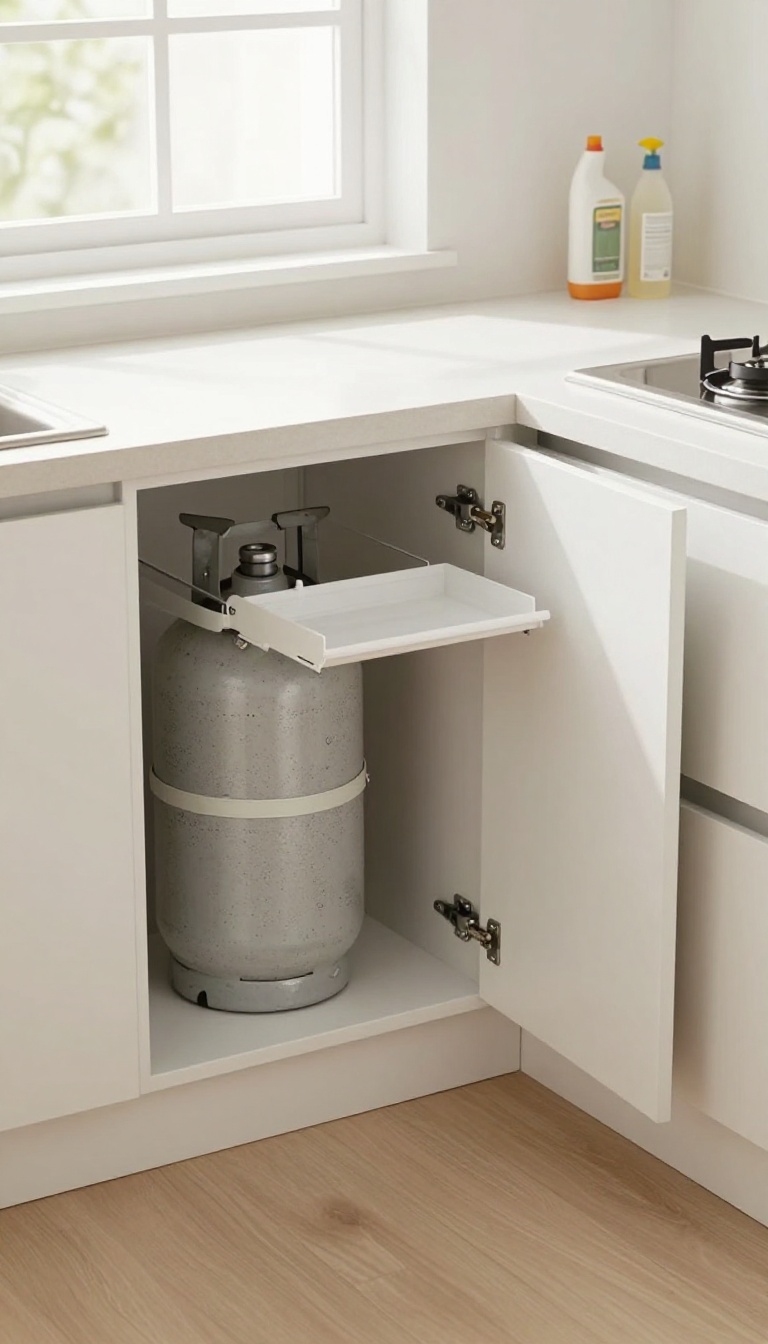
That space under the sink is usually a jumble of cleaning supplies and forgotten sponges. If you have enough room, turning part of it into a dedicated gas cylinder compartment can be a game-changer. It hides the cylinder away from busy walkways while keeping it within easy reach for cooking.
Creating a dedicated under-sink compartment isn't just about stashing the cylinder—it's about doing it safely. The key is to ensure proper ventilation and easy access for connections. Here’s how to make it work without turning your kitchen into a hazard zone.
Why It Works
This setup keeps the cylinder out of sight, which is great if you prefer a clean, uncluttered look. It also frees up floor space and reduces the risk of accidental knocks in high-traffic areas. Plus, it’s a smart way to use an otherwise awkward nook.
Ventilation And Safety First
Before you start, check that the compartment has some airflow. A small vent or a gap in the door allows gas to escape if there’s a leak. Also, make sure the cylinder is upright and secured to prevent tipping.
If the cabinet is near a heat source, reconsider—this isn’t the place for it.
Making It Work In Your Kitchen
Measure the space under your sink first—cylinders come in different sizes. You might need to remove a shelf or two. Use a lockable door if you have kids or pets, and keep the area clear of any flammable items.
A simple pull-out tray or slide-out base can make connecting and disconnecting the regulator much easier.
5. Outdoor Ventilated Cage
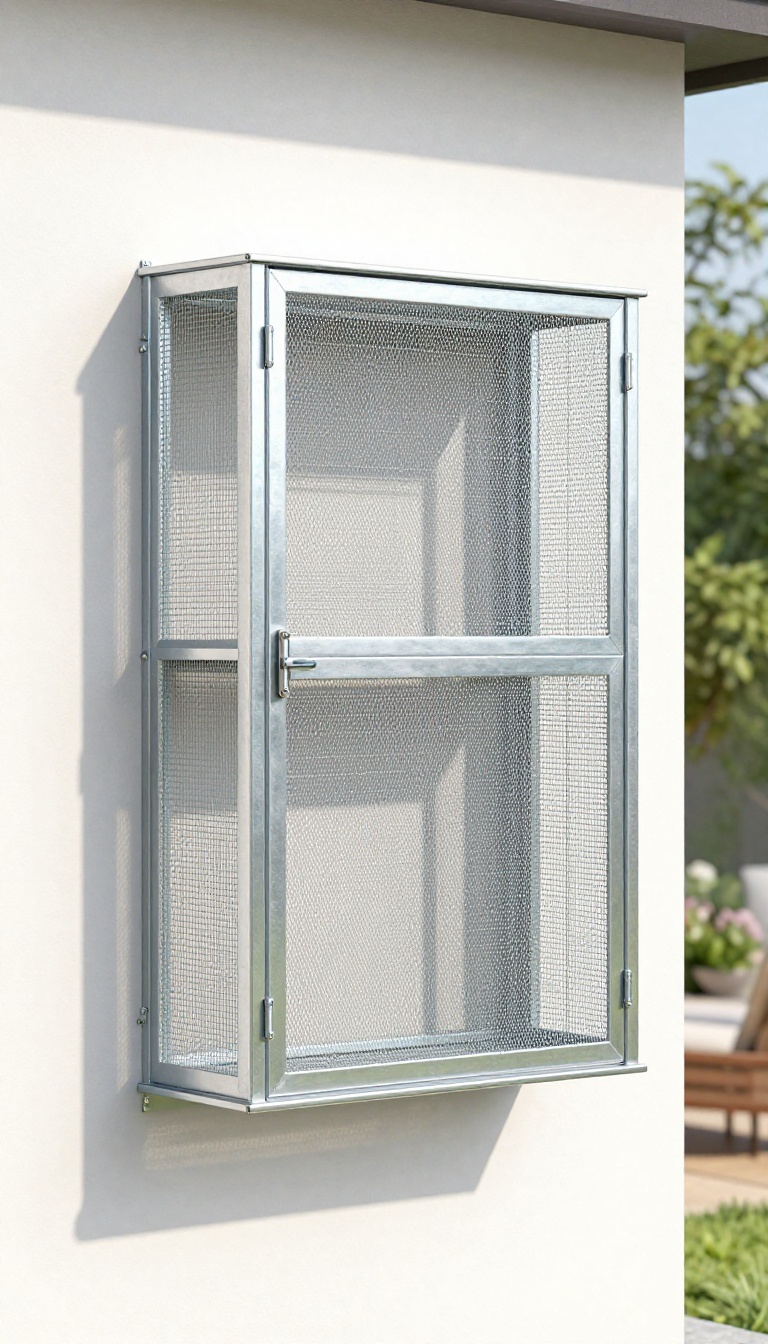
Taking the cylinder outside is a smart move for many kitchens, especially when indoor space is tight. A ventilated metal cage mounted on an exterior wall keeps the tank within easy reach while removing it from your cooking area. This setup also shields the cylinder from rain, sun, and little hands, so you get both safety and convenience.
An outdoor cage solves several problems at once. It frees up valuable floor space inside, keeps fumes away from your cooking zone, and adds a layer of protection against weather and curious kids. Plus, it's a straightforward project that doesn't require major construction—just a sturdy wall, a few brackets, and a lockable cage.
Choosing The Right Cage
Look for a cage made of galvanized steel or powder-coated metal to resist rust. It should have wide mesh or slats for good airflow, and a door that locks securely. Measure your cylinder's height and diameter before buying, and make sure there's enough clearance for the regulator and hose.
Some cages come with a built-in shelf for small accessories, which is a nice bonus.
Mounting And Placement
Attach the cage to an exterior wall that's close to your kitchen but away from windows, doors, and vents. Use heavy-duty masonry anchors or lag bolts, depending on your wall type. Keep the cage at least a foot off the ground to avoid water splashes and make it easier to connect the hose.
If you live in a windy area, position it so the prevailing wind doesn't blow fumes toward your home.
Safety And Maintenance
Check the cage regularly for rust, loose bolts, or damage. Keep the area around it clear of leaves and debris, and make sure the ventilation holes stay unblocked. Always close the cylinder valve when not in use, and consider adding a weatherproof cover for extreme conditions.
This setup keeps your cylinder safe and accessible, giving you peace of mind every day.
6. Decorative Screen or Panel
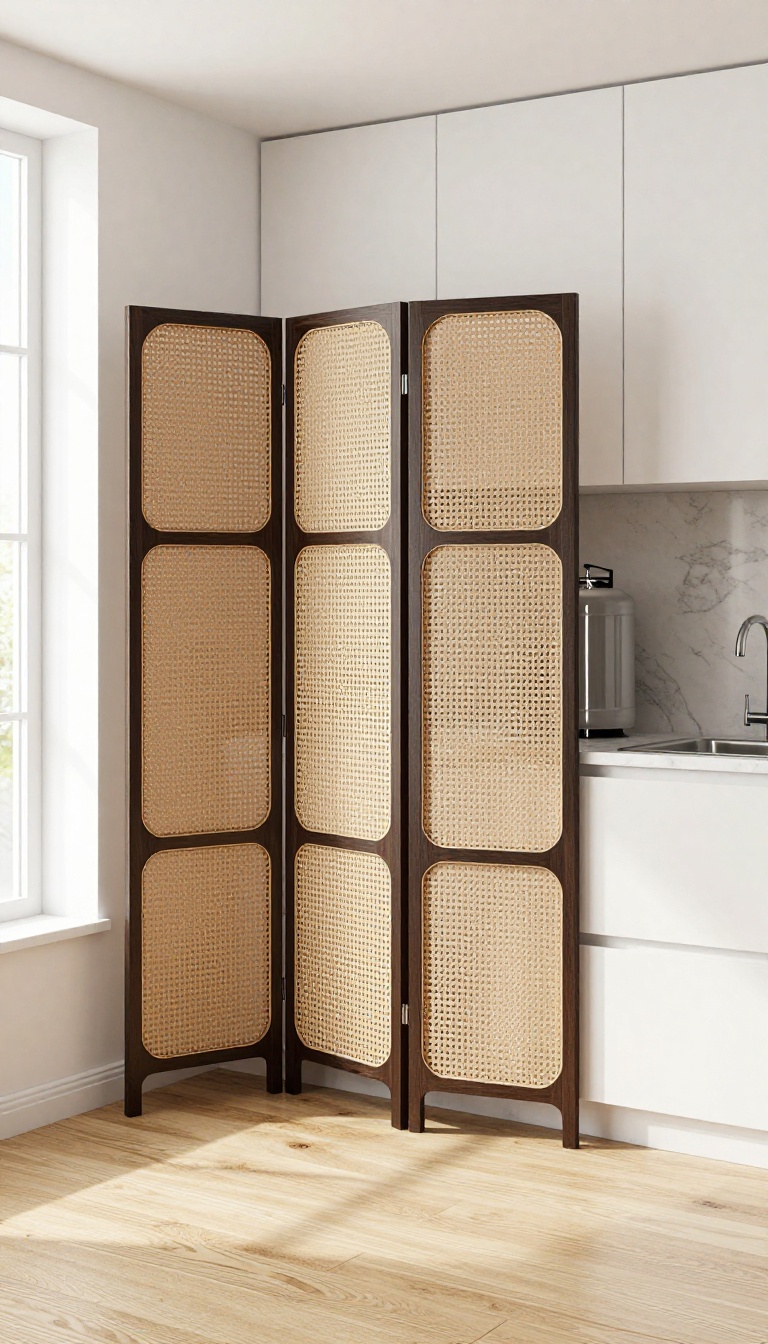
A decorative screen or sliding panel can turn a functional necessity into a design feature. Instead of letting the cylinder dominate the room, you can hide it behind something that adds texture, color, or pattern to your kitchen. This approach works especially well in open-plan spaces or kitchens where you want to maintain a clean, uncluttered look.
When you place a gas cylinder in a corner or along a wall, a freestanding screen or a mounted sliding panel can conceal it without making it hard to reach. You can choose a material that complements your kitchen—think bamboo, wood, metal, or even a fabric panel on a track. The key is to make sure the screen or panel can be moved aside easily when you need to change the cylinder or check the regulator.
Pick A Screen That Matches Your Style
A folding screen is the simplest option—no installation needed. Look for one with a sturdy frame and a design that blends with your cabinetry or backsplash. If you prefer a more permanent look, a sliding panel mounted on a ceiling track or a floor guide can be custom-cut to fit your space.
For a modern touch, consider a perforated metal panel that allows airflow while hiding the cylinder.
Keep Safety And Ventilation In Mind
While a screen adds style, it must never block airflow around the cylinder. Gas cylinders need proper ventilation to prevent pressure buildup, so choose a screen with gaps or a design that doesn't enclose the cylinder completely. Also, make sure the screen or panel doesn't interfere with the valve or regulator—you should be able to reach them without moving the cylinder.
Diy Ideas For A Custom Look
If you're handy, you can build a simple wooden frame and attach fabric, lattice, or even old window shutters. A sliding barn door on a small track can also work as a functional panel. Just remember to use non-combustible materials near the cylinder and keep the area around it clear of anything flammable.
7. Pull-Out Drawer with Safety Lock
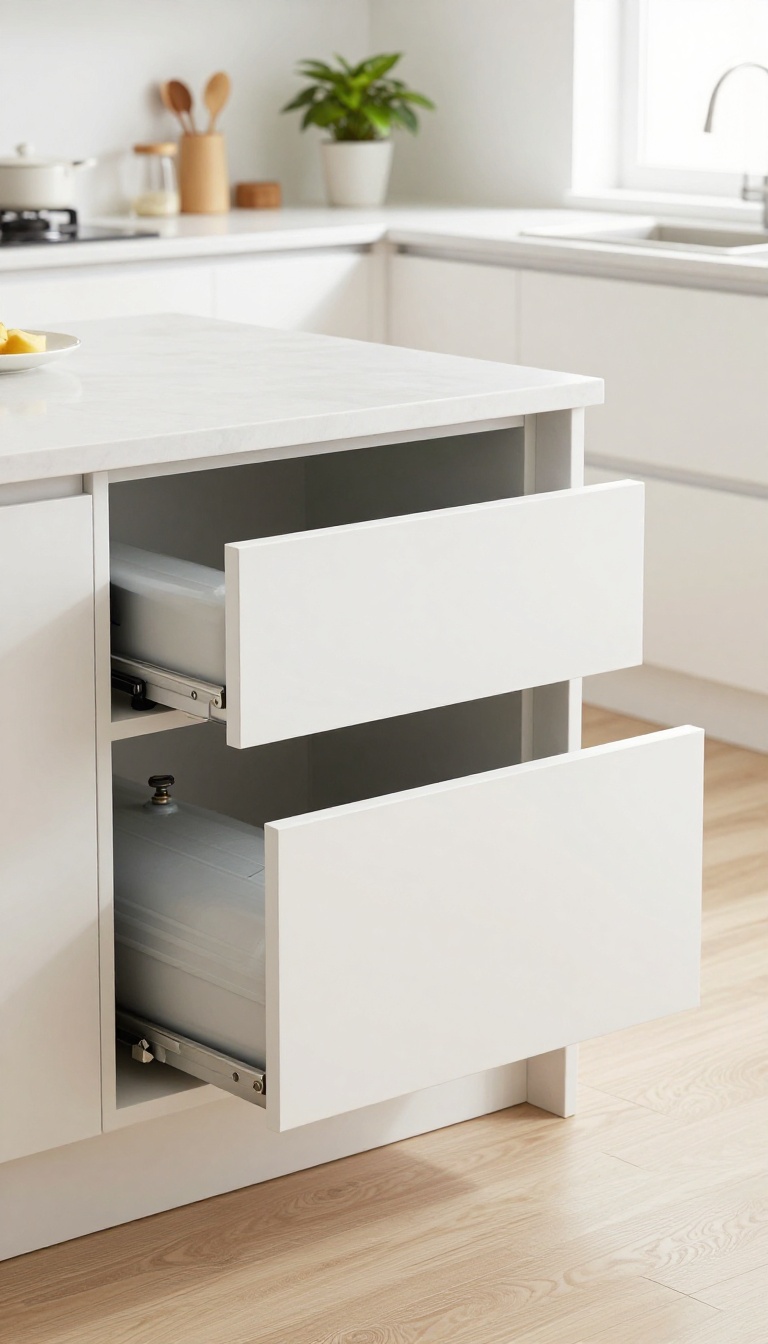
If your kitchen has an island or a peninsula, you might think there's no good spot for a gas cylinder. But a pull-out drawer with a safety lock changes that completely. It tucks the cylinder out of sight, keeps it upright, and still lets you reach it without crawling or stretching awkwardly.
This setup feels custom because it is—you build it to fit your exact cylinder size and your cabinet depth.
A pull-out drawer is a smart upgrade for kitchens where floor space is tight but you still want the cylinder close at hand. The key is to make it heavy-duty and lockable, so the cylinder stays put and kids or pets can't open it. You'll need a drawer slide rated for at least 100 pounds, a solid base, and a lock that's easy for adults but tough for curious little hands.
Once installed, you can slide the cylinder out, connect the regulator, and push it back in—no bending, no reaching behind other stuff.
Why A Safety Lock Matters
A gas cylinder is not something you want accessible to everyone. A safety lock adds a layer of protection, especially in homes with children. Choose a lock that's simple to operate—like a push-to-open magnetic catch or a spring-loaded latch—but still requires a deliberate action.
You don't want a lock that's so complicated you avoid using it. The lock also prevents the drawer from sliding open during an earthquake or if someone bumps into it, keeping the cylinder stable and secure.
Building The Drawer Right
The drawer needs to be sturdy, not a flimsy cabinet box. Use 3/4-inch plywood for the sides and bottom, and reinforce the corners with metal brackets. The slide should be a full-extension, heavy-duty model rated for at least 150 pounds to handle the cylinder's weight plus the drawer itself.
Make the drawer deep enough to hold the cylinder vertically, and add a non-slip mat or a wooden cradle at the bottom to keep it from rolling. Also, drill a small hole in the back of the drawer for the hose to pass through, so you can connect the regulator without pulling the cylinder all the way out.
Ventilation And Safety Checks
Even though the drawer is enclosed, you need proper ventilation to avoid gas buildup in case of a leak. Install a small vent grille on the drawer front or the cabinet side, and make sure the area around the cylinder stays clear. Periodically check the hose and regulator for wear, and always test the lock to ensure it works smoothly.
If you ever smell gas, open the drawer slowly, turn off the valve, and ventilate the room before doing anything else.
8. Wall-Mounted Bracket System
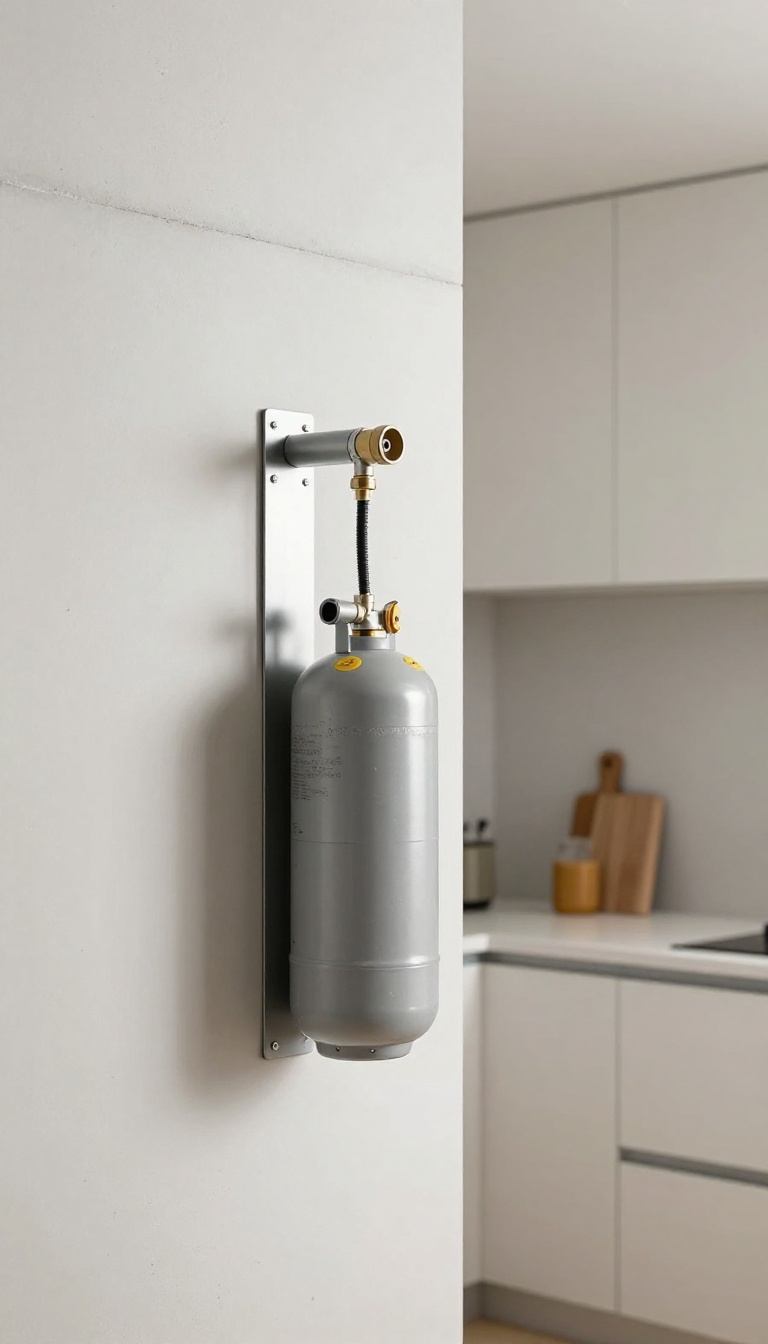
When floor space is at a premium, look up. A wall-mounted bracket system secures the cylinder against a wall, freeing up valuable square footage for other kitchen essentials. This works especially well in utility areas or garages adjacent to the kitchen, keeping the cylinder out of the way but still within easy reach.
Mounting a gas cylinder on the wall is a practical solution that many homeowners overlook. It not only clears the floor but also keeps the cylinder stable and less prone to accidental knocks. The key is to choose a bracket that is rated for the weight of your cylinder and to install it on a solid wall, preferably one with studs or concrete backing.
Once mounted, you can easily connect the hose and regulator, and the cylinder stays put, making it safer and more convenient.
Choosing The Right Bracket
Not all wall brackets are created equal. Look for one that is specifically designed for gas cylinders, with a sturdy metal construction and a secure locking mechanism. Check the weight capacity to ensure it can handle your cylinder size.
Also, consider the distance from the wall—you want the cylinder to sit flush but still allow for the valve to be accessible. A bracket with adjustable straps or a cradle can provide a custom fit.
Installation Tips
Proper installation is crucial for safety. Use a stud finder to locate solid wall studs, and mark the holes accordingly. Drill pilot holes and use heavy-duty anchors if you're mounting on drywall.
Make sure the bracket is level and firmly attached before placing the cylinder on it. If you're unsure about the wall's integrity, consult a professional. Once installed, test the stability by gently pushing the cylinder to ensure it doesn't wobble.
Safety Considerations
While wall-mounted brackets save space, they also require extra care. Ensure the cylinder is secured tightly and cannot be easily dislodged. Keep the area around the bracket clear of flammable materials.
Also, make sure the cylinder is not exposed to direct sunlight or heat sources. Regularly check the bracket for signs of wear or loosening, and tighten any screws as needed. This setup is ideal for areas where you don't have to move the cylinder frequently.
9. Rolling Cart with Chain Restraint
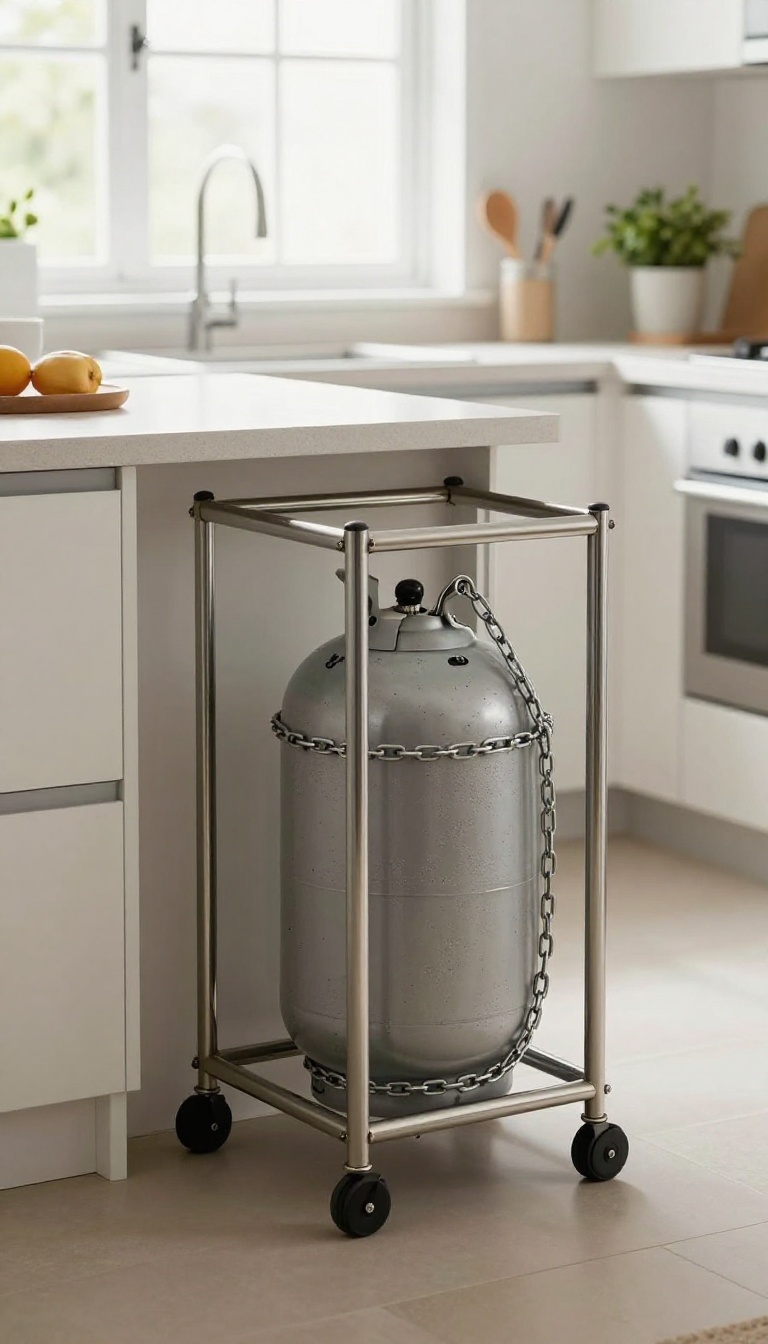
Sometimes the best solution is the one that moves with you. A rolling cart gives you the flexibility to shift the cylinder out of the way when you need counter space, then roll it back into place for cooking. The key is keeping it secure—a simple chain or strap prevents any scary tipping, especially if you have kids or pets zooming around.
A rolling cart is a practical pick for kitchens where the cylinder needs to be accessible but not permanently fixed. You can tuck it under a counter, beside the stove, or even in a pantry, and wheel it out when you're cooking or need to check the gauge. The chain restraint is non-negotiable—it keeps the cylinder upright during movement and in everyday use, so you're not chasing a runaway tank across the floor.
Choosing The Right Cart
Look for a cart with a sturdy base and wheels that lock. A metal frame with a lip or raised edge helps keep the cylinder centered. Make sure the cart's weight capacity exceeds your cylinder's weight, and opt for wheels that roll smoothly on tile or hardwood.
If you have a larger cylinder, a cart with a handle makes steering easier.
Setting Up The Chain Restraint
Attach a heavy-duty chain or strap to the cart's frame, wrapping it around the cylinder and securing it with a buckle or clip. Adjust it so the cylinder sits snugly without wobbling. Test the restraint by gently pushing the cylinder—it shouldn't move more than an inch.
You can also add a rubber mat under the cylinder for extra grip.
Where To Park The Cart
Keep the cart in a spot that's out of high-traffic areas but still easy to reach. A corner near the stove or an unused gap between cabinets works well. Just make sure the cart isn't blocking a doorway or walkway.
If you're short on space, consider a slim cart that fits into narrow gaps.
10. Under-Counter Drawer with Vent
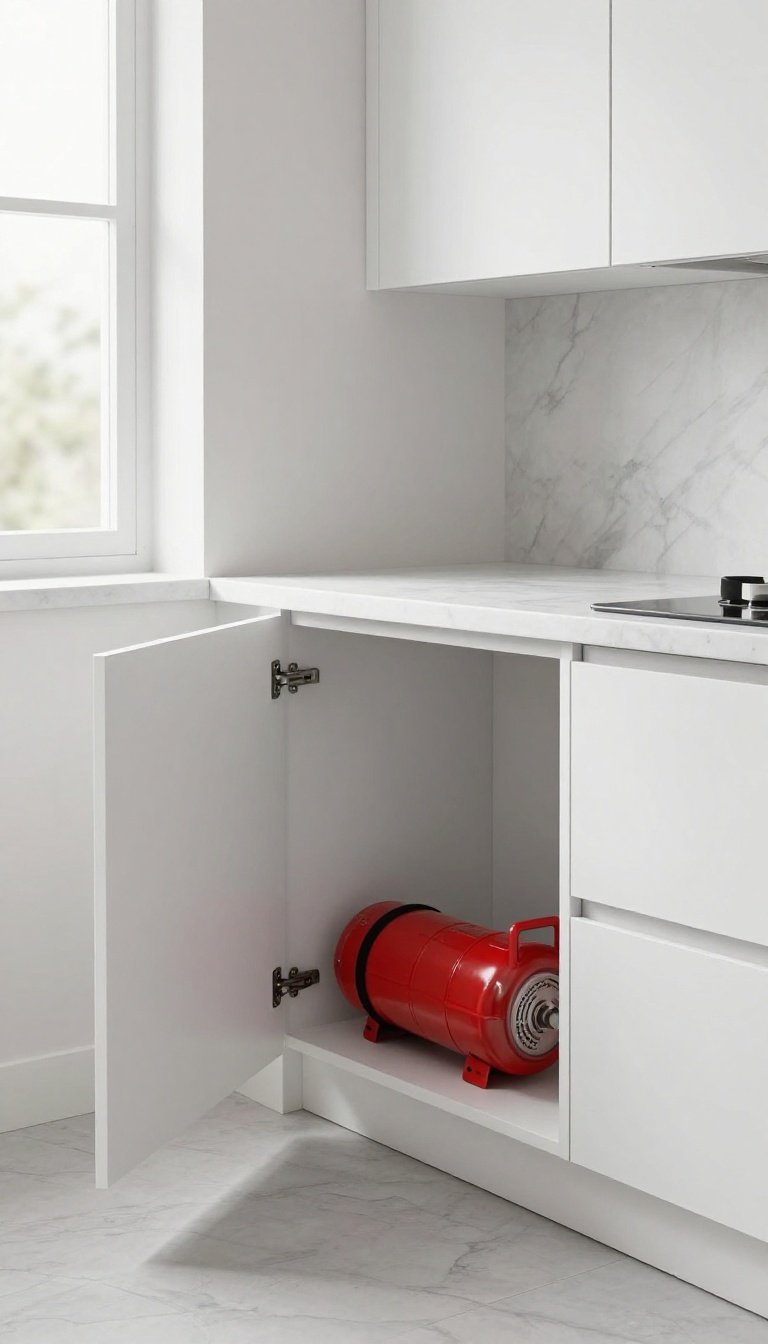
If your kitchen is tight on floor space, an under-counter drawer can be a game-changer. This clever solution tucks the cylinder away horizontally, freeing up valuable room for other essentials. With a vent at the back, you keep airflow moving and safety in check, all while maintaining a clean, uncluttered look.
This idea works best in kitchens with a spare base cabinet that isn't used for plumbing or major storage. The drawer itself is wide and shallow, designed to hold the cylinder on its side. A vent at the back ensures proper airflow, which is crucial for gas safety.
You'll need to measure your cylinder's dimensions and work with a professional to install the drawer and vent correctly.
Measure And Plan
Start by measuring your cylinder's length and diameter. The drawer needs to be slightly wider and longer than the cylinder, with a little extra room for easy access. Also, check the cabinet's depth and height to ensure the drawer can slide out smoothly without hitting pipes or other obstacles.
Ventilation Matters
A vent at the back of the drawer is non-negotiable. It allows any gas leak to disperse rather than accumulate. Install a grill or louvered vent that connects to the outside or to a well-ventilated area.
This meets safety codes and gives you peace of mind.
Safety First
Always secure the cylinder inside the drawer to prevent it from rolling or shifting. Use a strap or a custom cradle. Also, keep the drawer away from heat sources like ovens or dishwashers, and ensure the vent is never blocked.
Regular checks for leaks are a must.
11. Custom Enclosure with Magnetic Catch
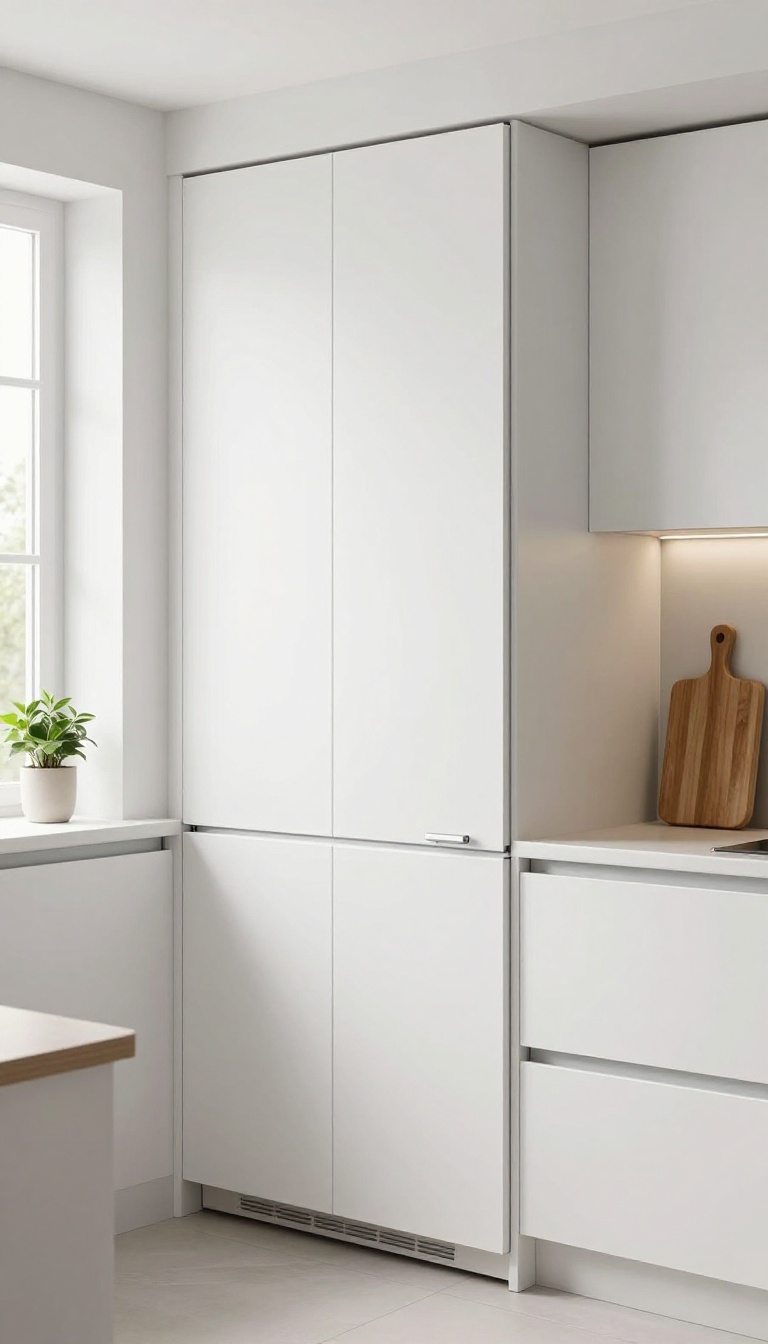
A custom enclosure might sound like a big project, but it's actually one of the most satisfying ways to hide a gas cylinder. You get a clean, built-in look that matches your kitchen, and the magnetic catch makes access effortless. This idea works especially well if you have a corner or an unused gap that's just begging for a purpose.
Building an enclosure doesn't have to be complicated. You can use plywood or MDF to create a simple box that fits around the cylinder, then paint or stain it to match your cabinets. The key is the magnetic catch—a small piece of hardware that keeps the door closed but opens with a gentle push.
No handles, no latches, just a smooth, seamless front that blends right in.
Why A Magnetic Catch Works
A magnetic catch is more than just a clever closure. It keeps the door snug against the frame, so there are no gaps or rattles. And because it opens with a push, you don't need a handle that sticks out and ruins the clean look.
It's also super easy to install—just screw the magnet to the frame and the metal plate to the door.
Design Tips For A Seamless Look
To make the enclosure disappear, match the door's style to your existing cabinets. Use the same wood tone, paint color, or even add a panel that mimics your cabinet doors. If your kitchen has shaker-style doors, replicate that with simple trim.
The goal is for someone to walk by and not even notice there's a cylinder behind that panel.
Safety And Ventilation Considerations
Gas cylinders need proper ventilation to prevent gas buildup in case of a leak. Make sure your enclosure has small vents—either at the top or bottom—to allow air to circulate. You can use a decorative grille or a series of small holes that don't compromise the look.
Also, keep the enclosure away from heat sources and ensure the cylinder is secured inside to prevent tipping.
12. Elevated Platform with Step
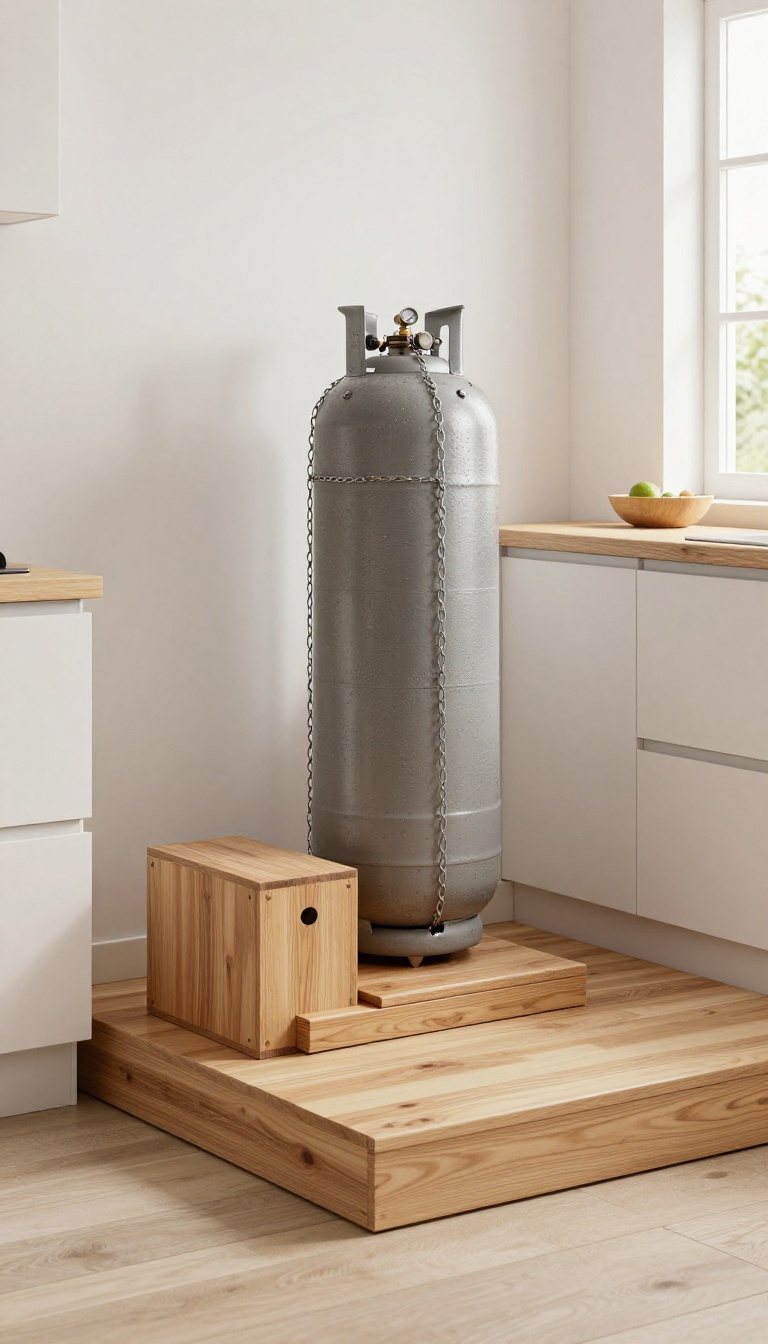
Bending down to fiddle with the valve or gauge on a floor-level cylinder can be a real pain, especially if you have back or knee issues. An elevated platform with a small step brings the cylinder up to a comfortable working height, so you can see and reach everything without straining. It's a simple DIY or ready-made solution that makes daily use much more pleasant.
This setup works particularly well in kitchens with a bit of spare floor space, or even in a pantry or utility area. The platform itself can be a sturdy wooden box or a metal frame, and the step is just a lower ledge that lets you climb up safely. You'll want to make sure the platform is stable and non-slip, and that the cylinder is secured with a chain or bracket to prevent tipping.
Why Elevate?
Elevating the cylinder reduces the need to crouch or kneel every time you need to check the flame or turn the gas on and off. It also makes it easier to spot leaks or damage, since you can see the whole cylinder at eye level. Plus, if you have limited mobility, this small change can make a big difference in your daily routine.
Building Your Own Platform
You can build a simple platform from plywood or solid wood, with a cutout for the cylinder base and a step attached to the front. Make sure the platform is wide enough to support the cylinder's footprint, and add a lip or raised edge to keep it from sliding off. Seal the wood with a waterproof finish to protect against spills and moisture.
Safety First
Always secure the cylinder to the platform with a strap or chain, especially if you have kids or pets around. The step should have a non-slip surface, and the whole unit should be placed away from heat sources and direct sunlight. Check local regulations to ensure an elevated setup is allowed in your area.
FAQ
Is it safe to store a gas cylinder inside a kitchen cabinet?
Yes, but only if the cabinet is properly ventilated and the cylinder is secured upright. Ensure there are vents at the top and bottom to allow any gas leak to dissipate, and never store it near heat sources.
What are the legal requirements for gas cylinder storage indoors?
Regulations vary by region, but generally, cylinders must be stored upright, secured, and in a well-ventilated area. Check local fire codes and consult a professional if unsure.
How often should I check my gas cylinder for leaks?
It's a good practice to check for leaks every time you connect or disconnect the cylinder. Use a soapy water solution on the connections and look for bubbles. Also, inspect the hose and regulator regularly for wear.
Can I store a spare gas cylinder in the kitchen?
Storing spare cylinders indoors is generally discouraged due to safety risks. If you must, keep them in a well-ventilated area away from ignition sources, and never in the same cabinet as the connected cylinder.
What is the best way to hide a gas cylinder in a small kitchen?
For small kitchens, consider a slide-out tray or a built-in cabinet with ventilation. These options save space and keep the cylinder accessible without taking up too much room.
Conclusion
Finding the right spot for your gas cylinder doesn’t have to be a headache. These storage ideas focus on keeping things safe, tidy, and within easy reach when you need them most. Start with one or two that fit your kitchen layout and daily flow.
Small changes like a sturdy stand or a labeled corner can make a big difference. Once you set up a system that works, you will wonder how you managed without it.