15 Deck Patio Combo Ideas for One Seamless Outdoor Space
The best outdoor spaces don’t just look good—they work hard. A deck and patio combo can turn a plain backyard into a versatile retreat that handles everything from morning coffee to weekend parties.
But pulling off that seamless look takes more than just laying down some wood and concrete. It’s about connecting levels, materials, and purpose so the whole area feels like one intentional space.
Whether you’re starting from scratch or reimagining what you have, these 15 ideas will help you blend the best of both worlds. Expect practical tips, design inspiration, and a few clever tricks to make your outdoor area feel bigger, more functional, and undeniably inviting.
1. Multi-Level Deck with a Sunken Patio
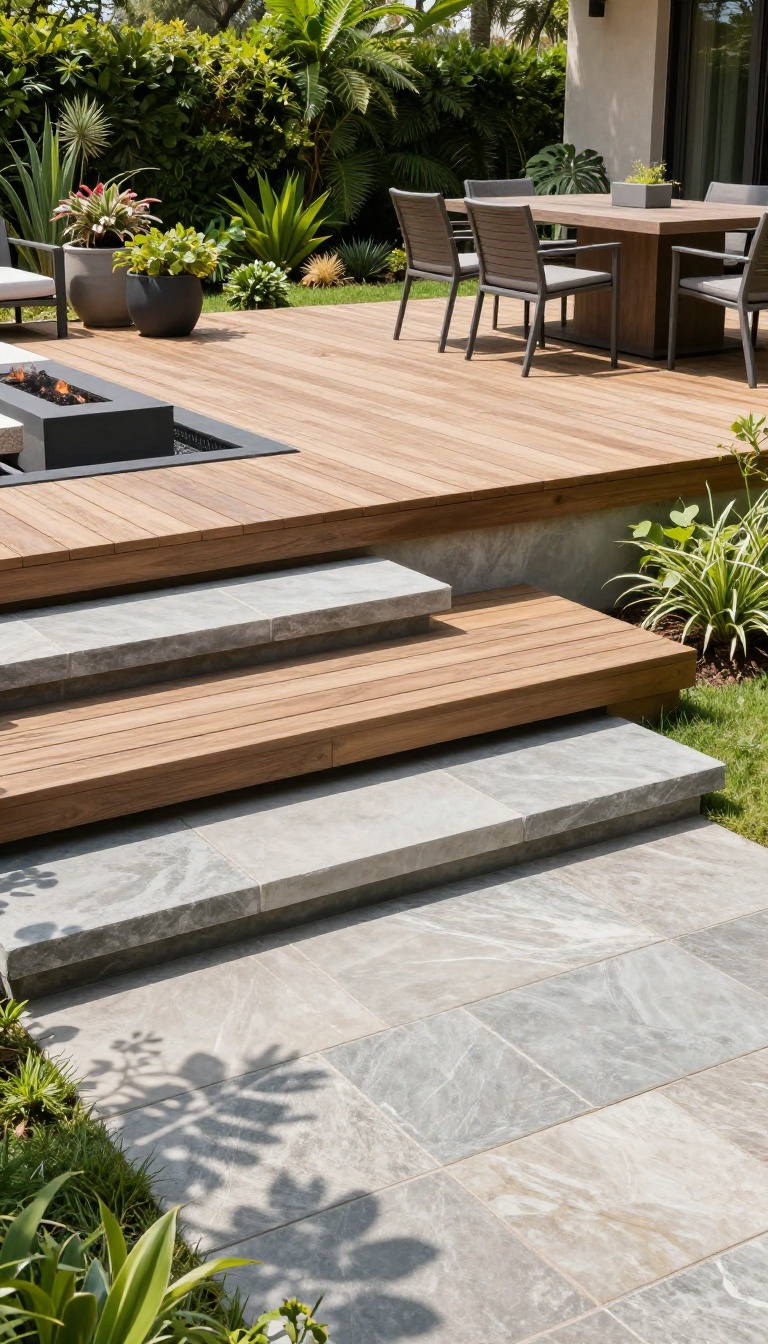
One of the most effective ways to add depth and function to your outdoor space is by playing with levels. A multi-level deck paired with a sunken patio creates a natural separation between different activities without putting up walls or fences. The elevation change adds visual interest and makes each area feel distinct yet connected.
Whether you're hosting a barbecue or enjoying a quiet evening, this layout gives you the flexibility to use every square foot of your yard.
Start by planning the layout so the deck and patio complement each other. The deck can be raised a few steps above the patio, which sits slightly lower than ground level. This setup works especially well on sloped lots, where you can use the natural terrain to your advantage.
The sunken patio feels cozy and intimate, while the deck offers an open, elevated view of the rest of the yard. To keep the flow seamless, use the same railing style or repeat a material like stone or wood on both levels.
Separate Zones With Purpose
The beauty of this design is that it naturally divides your space into two functional zones. Put the dining area on the deck, where you can enjoy a breeze and a broader view. Then, sink the patio below for a lounge or fire pit area that feels snug and protected.
This way, you can have a lively dinner party on the deck while guests can move down to the patio for quieter conversations or a nightcap.
Connect With Steps And Pathways
Wide, gentle steps are key to making the transition between levels feel inviting. Use materials that match or complement both surfaces, like stone treads on a wooden deck. Add built-in lighting along the steps for safety and ambiance.
If space allows, consider a curved path that winds from the deck to the patio, adding a soft, organic feel to the overall design.
Maximize The Sunken Effect
To really make the patio feel sunken, build it a few inches below ground level and add a low retaining wall around the edge. This wall can double as extra seating or a place to set drinks and plants. The contrast between the raised deck and the lower patio creates a dramatic effect that makes the space feel larger than it is.
Just be sure to plan for proper drainage to keep the patio dry and functional.
2. Covered Deck with an Open Patio
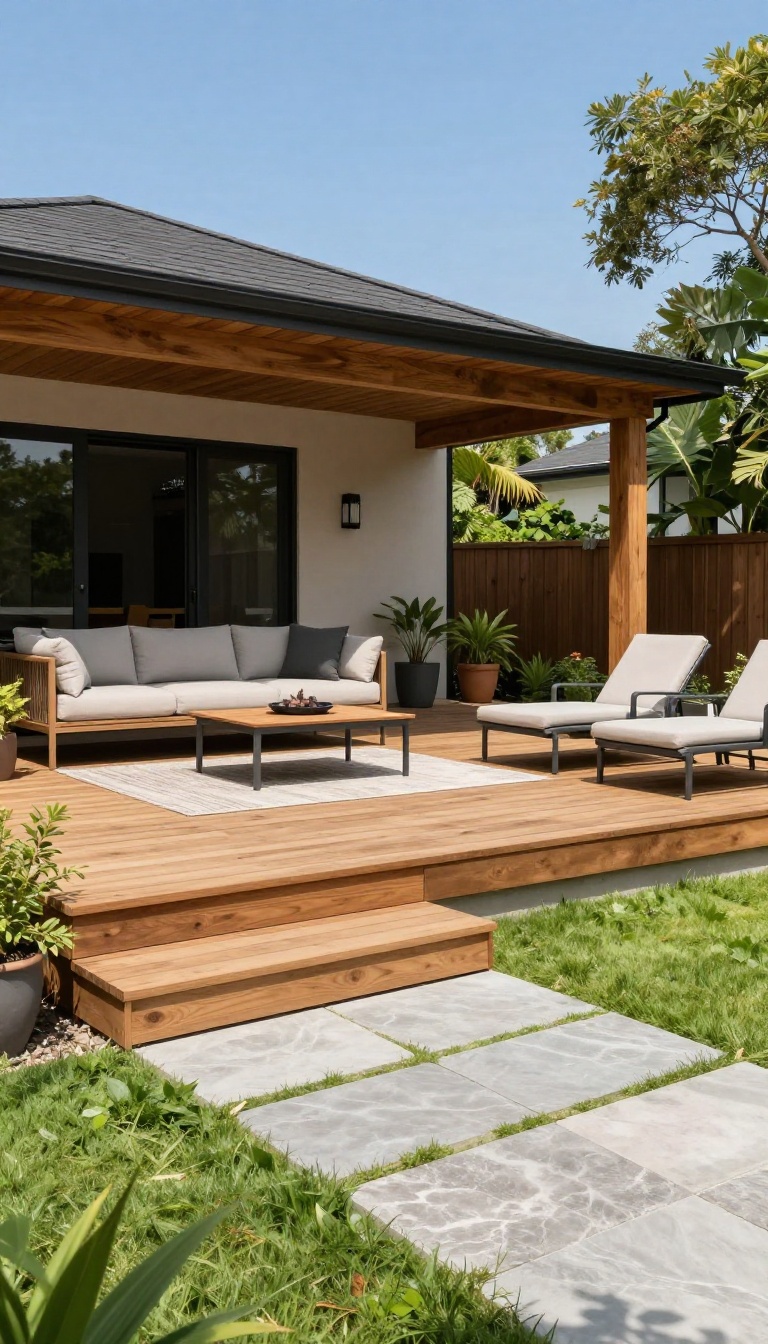
Sometimes you want to soak up the sun, and other times you need a break from it. A covered deck paired with an open patio gives you both. The deck becomes your shady retreat for hot afternoons or light rain, while the patio stays open for full-sun lounging and starlit evenings.
It’s a simple setup that adapts to your mood and the weather, making your outdoor space usable more hours of the day.
The key is to position the two areas so they flow naturally. Put the covered deck near the house for easy access, then let the patio extend outward into the yard. Use the same flooring material or complementary tones to keep the look unified.
Add a few steps or a gentle transition to connect them, and you’ve got a space that feels intentional, not patched together.
Choose The Right Cover
Your deck cover can be as simple as a retractable awning or as permanent as a solid roof. A pergola with a canopy offers dappled shade and a lighter feel, while a solid roof gives full protection from rain and harsh sun. Think about how you’ll use the deck—if you plan to dine out there, a solid cover might be worth the investment.
Define Each Zone
Even without walls, you can visually separate the deck and patio. Use an outdoor rug on the deck to anchor seating, and place potted plants or a low planter along the edge to mark the transition. On the patio, arrange loungers or a fire pit to encourage relaxation.
This way, each area has a clear purpose without feeling disconnected.
Plan For Weather And Light
Think about the sun’s path and prevailing winds. Position the covered deck where it will block the harshest afternoon sun, and leave the patio open to catch morning light. Add string lights or lanterns on both levels to extend evening use.
If you live in a rainy area, make sure the deck cover has proper drainage to avoid puddles.
3. Wrap-Around Deck with a Stone Patio
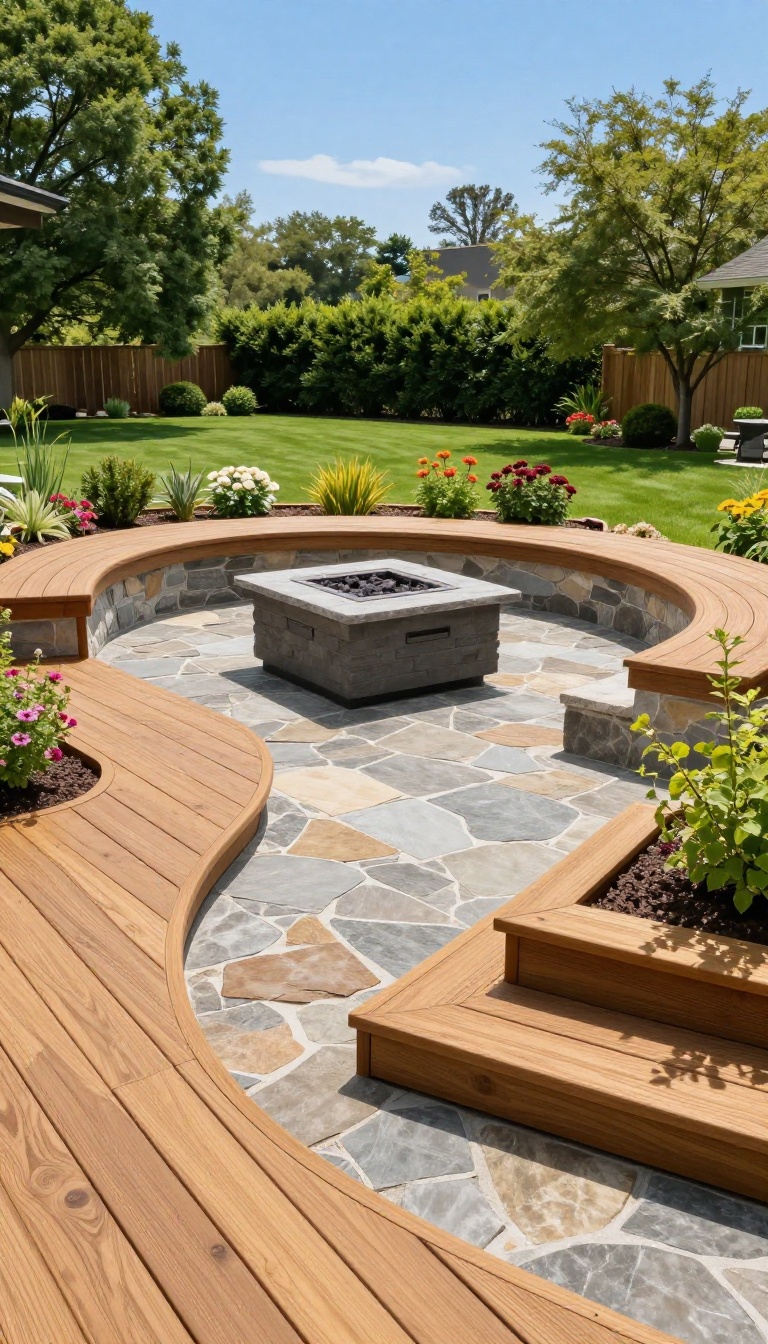
When your yard wraps around the house, a single deck can feel limiting. A wrap-around deck that transitions into a natural stone patio solves that problem by giving you two distinct zones that flow together effortlessly. The mix of wood and stone adds texture and makes the space feel organic and grounded, like it grew there naturally.
This combo works especially well on corner lots or homes with L-shaped layouts. The deck can hug one side for dining or lounging, while the stone patio extends into a sunnier or shadier spot for a fire pit or outdoor kitchen. The key is to keep the transition smooth—use the same level or a gentle step, and let the materials complement rather than compete.
Why This Combo Works
Wood brings warmth and a classic deck feel, while stone adds durability and a natural, earthy vibe. Together, they create visual interest without looking busy. The wrap-around design also maximizes your usable space, letting you follow the sun or shade throughout the day.
Plus, the stone patio is perfect for high-traffic areas like a grill station or seating cluster, where wood might wear faster.
Design Tips For A Seamless Transition
Keep the deck and patio at the same height to avoid a jarring step. Use a curved or angled edge where the two meet, rather than a straight line, to soften the transition. Repeat a color tone from the wood in the stone (like warm grays or browns) to tie them together.
Add a low planter or a row of shrubs along the seam to blend the materials naturally.
Material And Layout Ideas
For the deck, consider composite or cedar for longevity. For the stone, choose flagstone, travertine, or pavers that suit your climate and style. Arrange the patio in a freeform shape that echoes the deck's lines.
Place a pergola over part of the deck for shade, and leave the stone area open for sun. This gives you options for different activities and times of day.
Practical Considerations
Think about drainage and grading where the deck meets the patio—you don't want water pooling. Use a proper base for the stone to prevent shifting. If the deck is elevated, plan the transition with a few steps that match the stone's color.
Also, check local building codes for railings and permits, especially for wrap-around designs.
4. Deck with Built-In Planters and Patio Garden
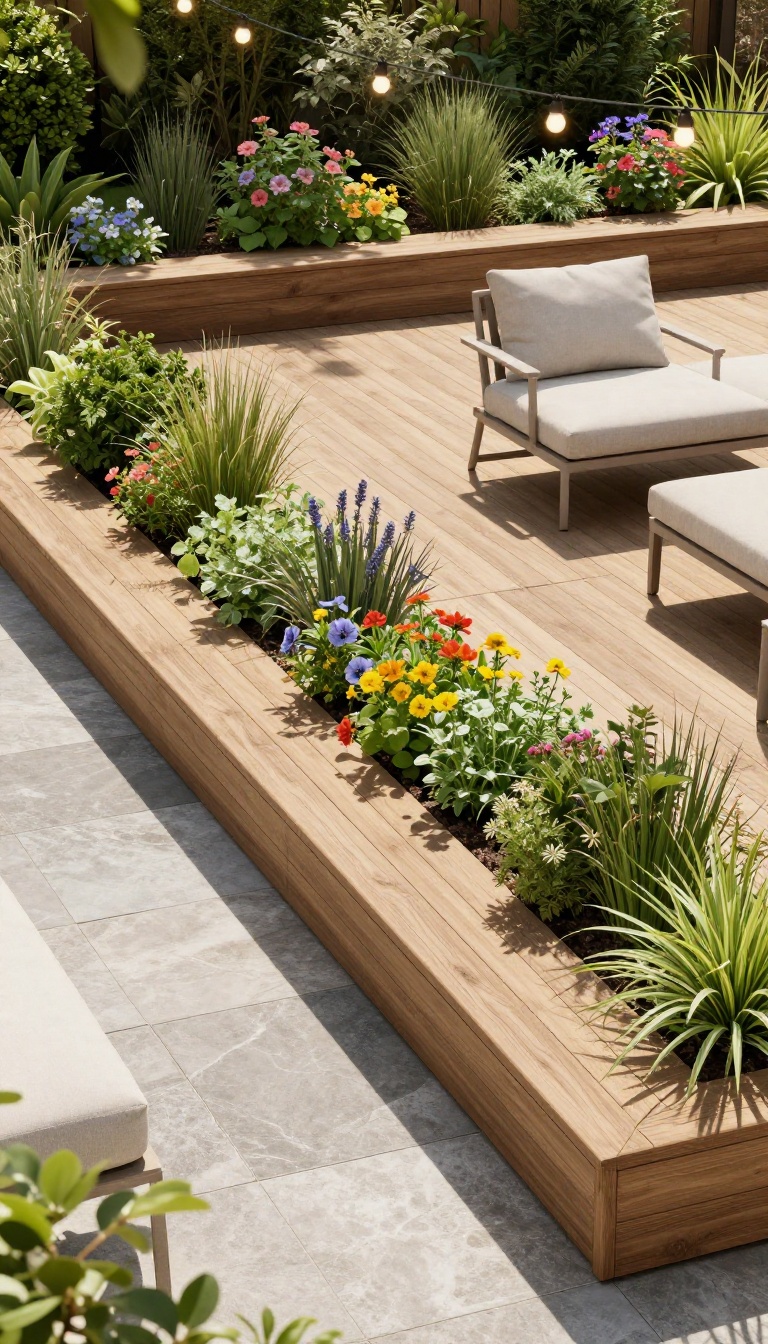
Hardscaping can sometimes feel a bit stark, especially when you've got large expanses of wood or stone. Adding greenery directly into the structure softens the look and brings life right up to your seating area. This idea combines built-in planters on the deck with raised garden beds around the patio, creating a lush, cohesive outdoor room that feels like a private retreat.
Integrating planters into your deck design not only saves space but also creates a seamless transition between the hardscape and the garden. You can build them along the edges, use them as dividers between the deck and patio, or even incorporate them into the steps. On the patio side, raised beds add height and structure, making it easy to grow flowers, herbs, or even small shrubs without bending over.
This combo gives you the best of both worlds: a clean, functional space for lounging and dining, plus a vibrant, living backdrop that changes with the seasons.
Designing Planters That Blend In
The key is to make the planters feel like they belong, not like an afterthought. Match the material and finish of your deck—if it's composite, use the same for the planter faces. For a more natural look, consider corten steel or stone veneer that complements the patio.
Think about the scale: large, deep planters work best for shrubs and small trees, while shallow ones are perfect for herbs and annuals. Also, plan for drainage and irrigation so your plants thrive without constant fuss.
Choosing Plants For Year-round Appeal
Aim for a mix that gives you color, texture, and interest in every season. Evergreens like boxwood or dwarf conifers provide structure, while ornamental grasses add movement and softness. Perennials like lavender or salvia attract pollinators and smell great.
Don't forget trailing plants like ivy or petunias to spill over the edges and soften the lines. If you want to grow veggies, raised beds on the patio are perfect for tomatoes, peppers, and leafy greens—just ensure they get enough sun.
Making It Feel Like A Garden Room
To create that cozy, enclosed feel, use taller planters or trellises with climbing vines to add privacy. Add outdoor lighting, such as string lights or path lights, to highlight the greenery in the evening. Consider a small water feature or a wind chime to bring in soothing sounds.
The goal is to make the space feel like an extension of your home, a place where you can relax and connect with nature without leaving your backyard.
5. Two-Level Deck with a Fire Pit Patio
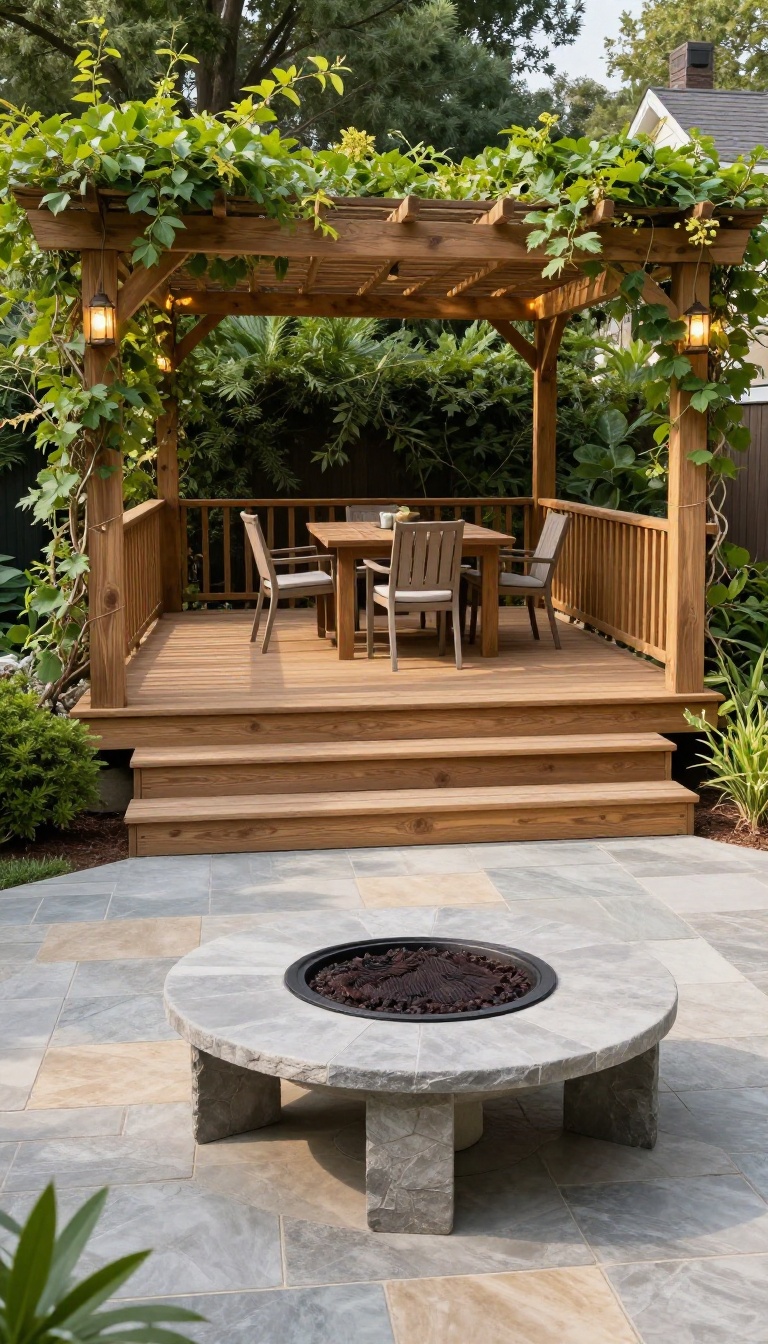
A raised deck for dining and a lower patio for a fire pit seating area is a classic combo for a reason. The change in level defines the zones naturally, making the fire pit the obvious gathering spot. This setup works especially well on sloped yards, but you can also build it on flat ground with a few steps.
The key is to make the transition between levels feel intentional. Use the same material for the deck and patio, or echo the deck's wood tones in the patio's stone. Add built-in seating on the retaining wall or along the edge of the deck to create a seamless flow.
Why Two Levels Work
Separating dining and lounging areas makes both more functional. The raised deck keeps food and drinks away from the fire pit's smoke, while the lower patio feels cozy and protected. The visual break also adds architectural interest to a flat backyard.
Design Tips For A Smooth Transition
Use wide steps with low risers to encourage movement between levels. Add lighting along the steps and under the deck railing for safety and ambiance. Consider a pergola over the deck to define the dining area, and leave the patio open to the sky.
Materials And Safety
Choose slip-resistant materials for the patio, especially near the fire pit. Keep the fire pit at least 10 feet from the deck and any structures. Use a spark screen and check local fire codes before installing.
6. Deck with Pergola and Paver Patio
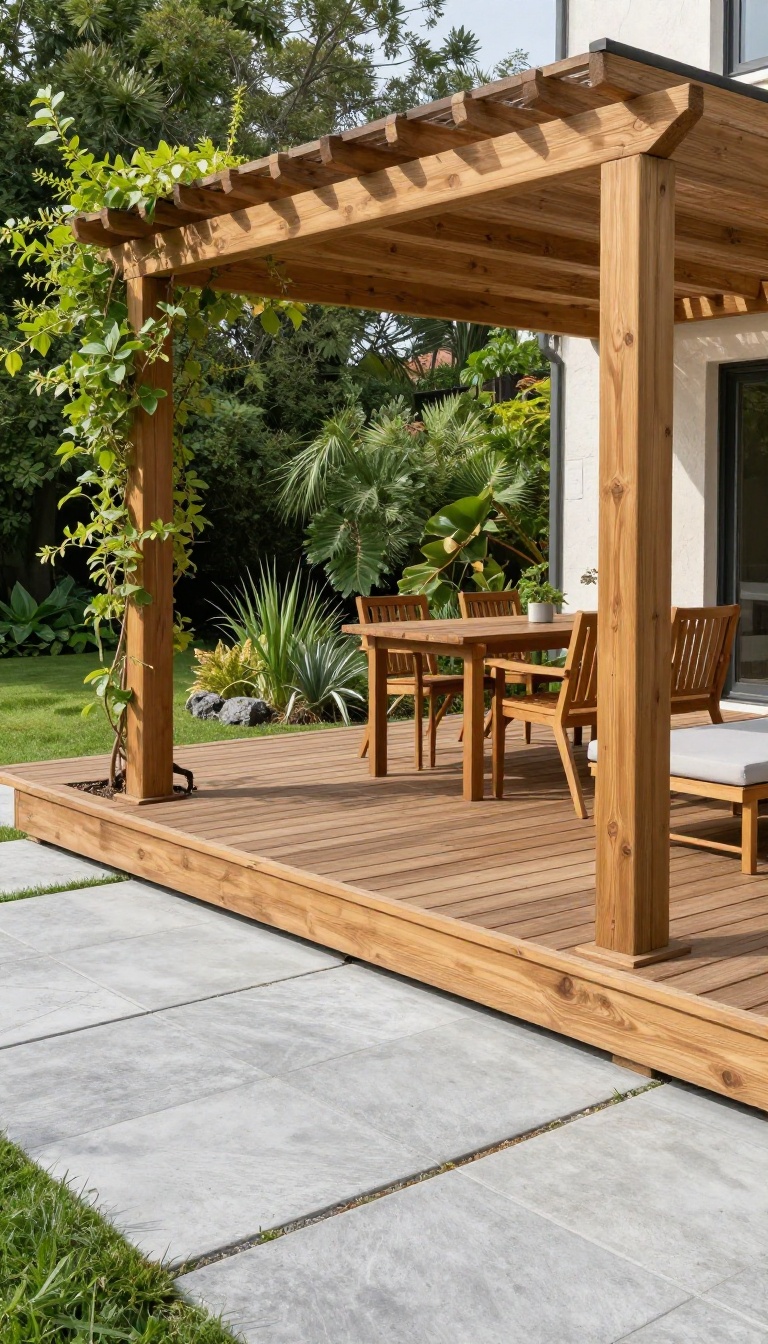
A pergola does more than just look pretty—it defines the space above your deck while offering a break from the sun. Pair that with a paver patio below, and you get a combo that feels both structured and relaxed. The contrast between wood and stone adds texture, while the pavers keep maintenance low and durability high.
This setup works especially well if you have a deck that sits a few steps above the ground. The pergola anchors the deck visually, and the paver patio extends your living area without competing for attention. You get the warmth of wood underfoot and the cool, stable surface of stone for high-traffic zones.
Why This Combo Works
The pergola adds vertical interest and partial shade, making the deck more comfortable during peak sun hours. Meanwhile, the paver patio offers a durable surface that handles heavy foot traffic, furniture, and weather without much fuss. Together, they create a natural flow from one area to the next.
Placement And Flow
Keep the pergola centered over the deck to define a seating or dining zone. Then, let the paver patio extend outward, either directly adjacent or a step down. Use the same paver color as an accent in the deck border or steps to tie the two materials together visually.
Material And Design Tips
Choose a pergola material that complements your deck—cedar, metal, or vinyl all work. For pavers, go with a permeable option to help with drainage. Add outdoor curtains or climbing plants to the pergola for extra shade and a softer look.
Keep the paver pattern simple, like a running bond or herringbone, to avoid visual clutter.
7. Screened Porch Deck with Open Patio
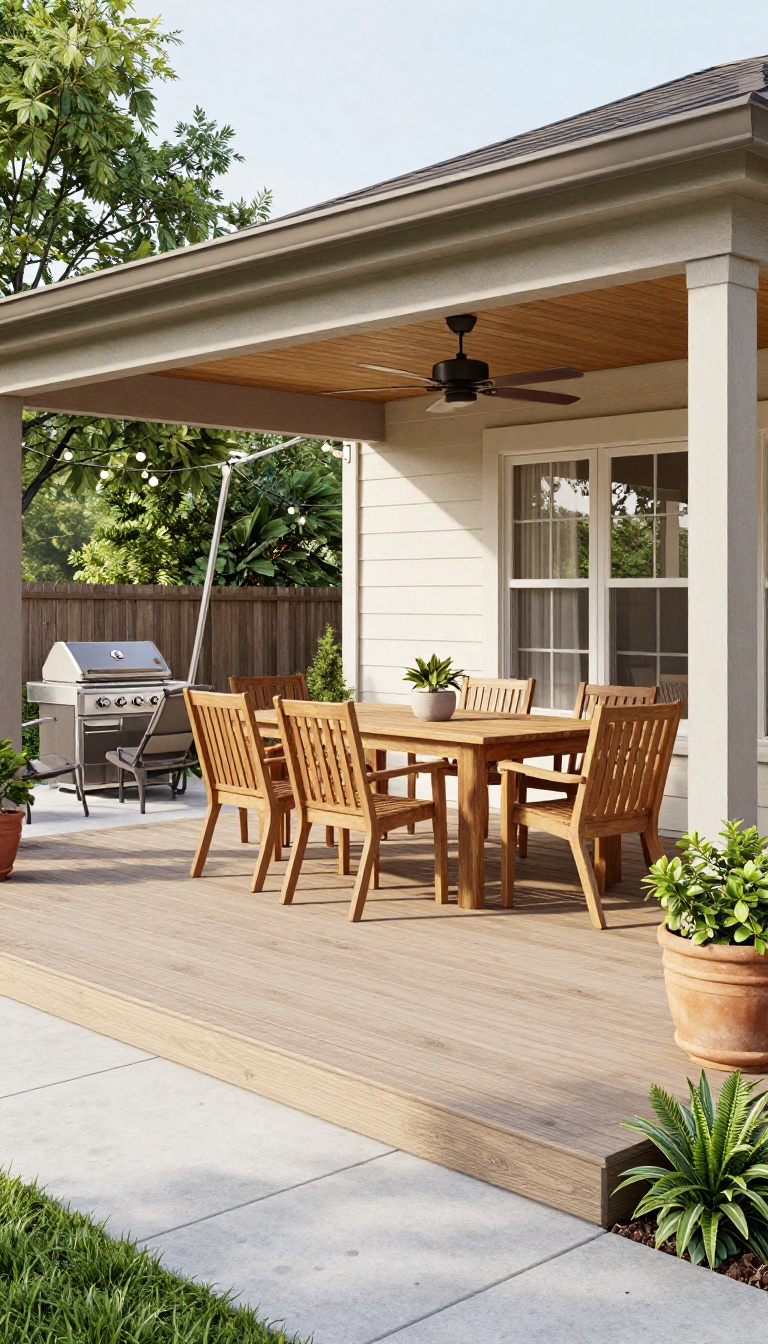
Mosquitoes and midday sun don't have to dictate how you use your outdoor space. A screened porch deck paired with an open patio gives you a protected spot for dining or relaxing, plus a sun-soaked area for grilling or lounging. The key is designing both zones so they flow together naturally.
Start by placing the screened porch deck adjacent to the house, with the open patio just a step away. Use the same flooring material for both areas to create a visual connection, or choose complementary tones that tie them together. A wide opening between the two—like a double door or a large pass-through window—keeps the spaces feeling connected and makes moving between them effortless.
Plan The Layout For Flow
Think about how you'll use each zone. Put the dining table inside the screened porch for bug-free meals, and position the grill and seating on the open patio. Leave a clear path between them so you can easily carry food and drinks.
If the patio sits lower, add a few steps that double as extra seating.
Match Materials And Colors
Choose materials that work together—like composite decking in a warm gray for the porch and matching concrete pavers for the patio. Repeating the same railing style or trim color on both structures helps unify the look. This way, the two areas feel like one intentional design rather than two separate additions.
Add Comfort And Function
Equip the screened porch with ceiling fans and outdoor curtains for extra shade and privacy. On the open patio, add a retractable awning or umbrella for those times you want relief from the sun. String lights across both zones to tie them together and create a cozy evening atmosphere.
8. Deck with Outdoor Kitchen and Patio Dining
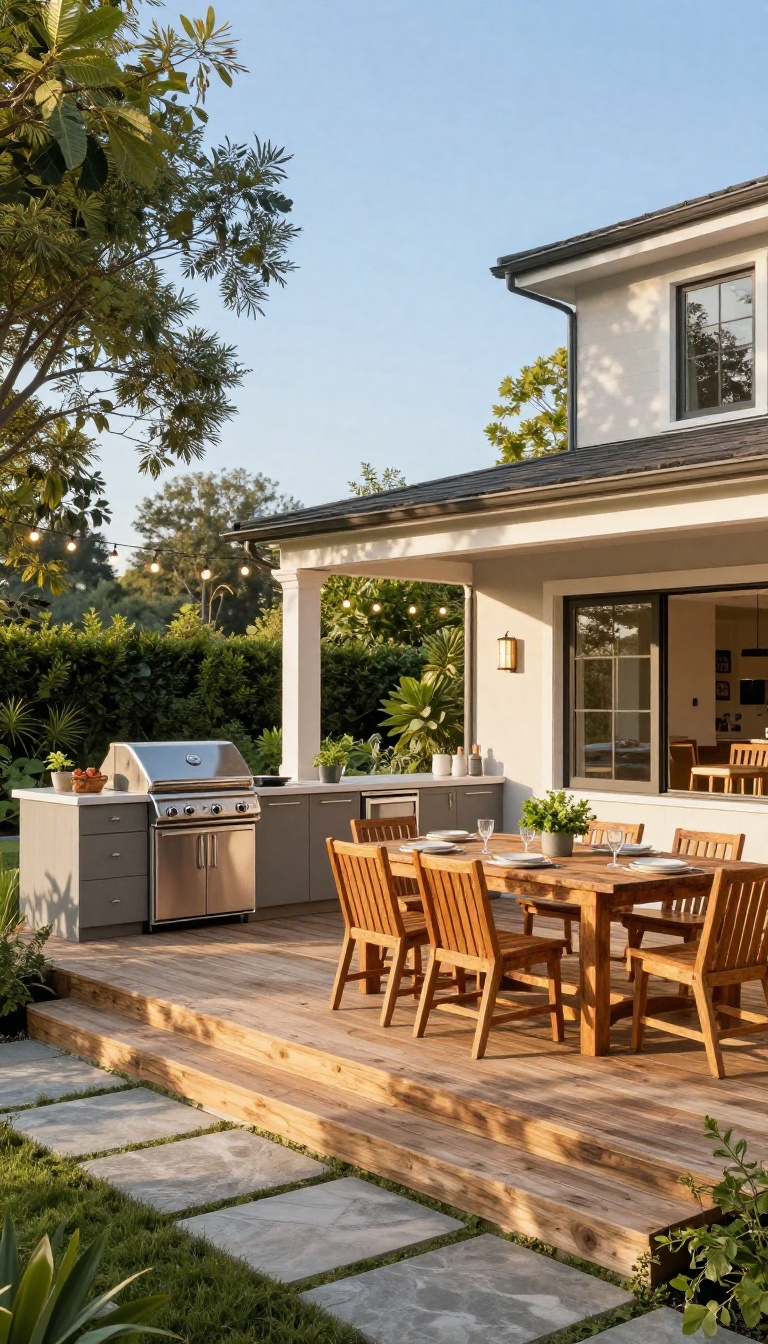
Cooking and eating are two sides of the same coin when you entertain. Placing the outdoor kitchen on the deck and the dining set on the patio below creates a natural workflow that keeps the chef in the conversation and the food within arm's reach. This setup also solves the smoke-and-sparks problem.
Grills and pizza ovens stay on the elevated deck, while the patio becomes a clean, comfortable zone for plates, drinks, and guests. The slight level change adds visual interest and helps define each area's purpose without walls or dividers.
When you put the kitchen on the deck and the dining area on the patio, you get the best of both surfaces. The deck handles heat, grease, and heavy equipment, while the patio offers a cooler, more relaxed spot for long meals. This separation also keeps foot traffic flowing—people can grab a drink or a plate without crowding the cook.
Think about the traffic pattern before you commit. You want a clear path between the grill and the table, ideally with a few steps and a landing that feels natural. If the deck is right off the kitchen, that’s even better for bringing food out and dirty dishes back in.
And don’t forget lighting—string lights over the patio and task lighting on the deck will keep the whole area usable after sunset.
Design The Layout For Easy Flow
Start by mapping out the work triangle: grill, prep counter, and serving area. Place these on the deck in a straight line or an L-shape so you’re not walking back and forth. Then position the dining table on the patio directly below or just off to the side.
Leave at least three feet of clearance around the table for chairs and movement. If the deck is more than a foot higher than the patio, consider adding a wide step or a small landing to make carrying dishes safer and easier.
Choose Materials That Work Together
Match the deck and patio materials so the two levels feel connected. Use the same railing or baluster style on the deck, and repeat the patio’s stone or concrete color in the deck’s flooring or trim. For the kitchen, go with stainless steel or marine-grade materials that handle weather well.
The dining area can be more casual—teak, aluminum, or all-weather wicker all work. A rug under the table can soften the stone and tie the colors together.
Add Practical Extras For Entertaining
A small counter or bar top on the deck edge gives guests a spot to perch while you cook. Add an outdoor-rated mini fridge under the counter for drinks, and keep a trash bin tucked nearby. On the patio, a sideboard or cart can hold plates, utensils, and condiments so you’re not running upstairs mid-meal.
If you have the space, a ceiling fan on the patio or a misting system can keep everyone comfortable in summer.
9. Floating Deck with Gravel Patio
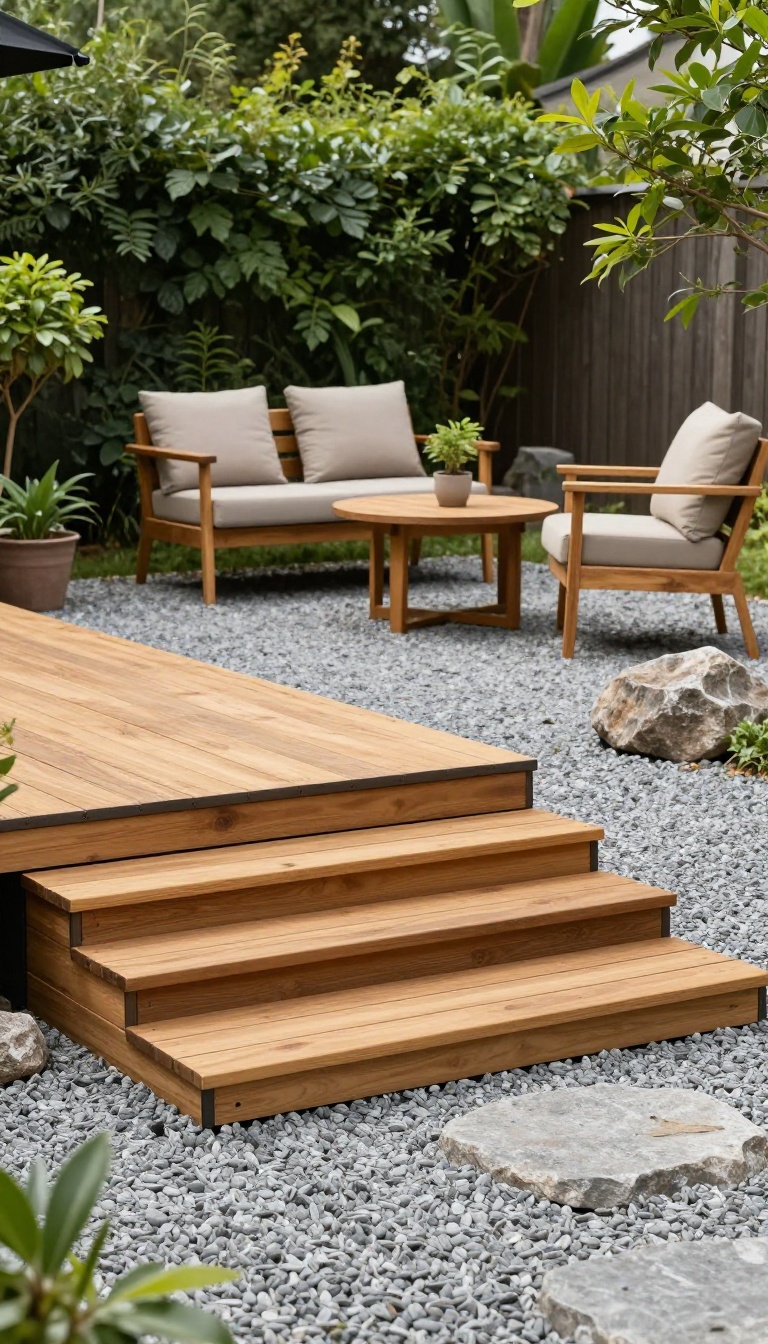
A low-profile floating deck paired with a gravel patio is a match made in budget-friendly heaven. The deck sits close to the ground, so it feels open and airy, while the gravel patio extends your living space without the cost of a full hardscape. It’s a combo that’s easy to install, easy on the eyes, and even easier to maintain.
Why This Combo Works
The floating deck adds a solid, comfortable spot for seating or dining, while the gravel patio provides a soft, permeable surface that drains rainwater naturally. That means less puddling and less mud tracking onto the deck. Plus, the contrast between warm wood and cool gray stone creates a relaxed, natural look that fits almost any backyard style.
Design Ideas To Steal
Keep the deck low—just a step or two above the gravel—so the transition feels seamless. Use the same wood tone for the deck and any built-in benches to tie the space together. For the gravel, choose pea gravel or decomposed granite for a smoother feel underfoot, and edge it with metal or stone to keep it contained.
Add a few large boulders or potted plants to break up the expanse and give the area a more intentional look.
Installation Tips For A Smooth Build
Start by leveling the ground and laying landscape fabric under the gravel to prevent weeds. For the deck, use concrete deck blocks or a simple gravel base—no need for a deep foundation. Make sure the deck is slightly higher than the gravel to keep it dry and allow for drainage.
If you’re in a rainy area, add a small trench or channel to direct runoff away from the deck.
10. Deck with Water Feature and Patio Lounge
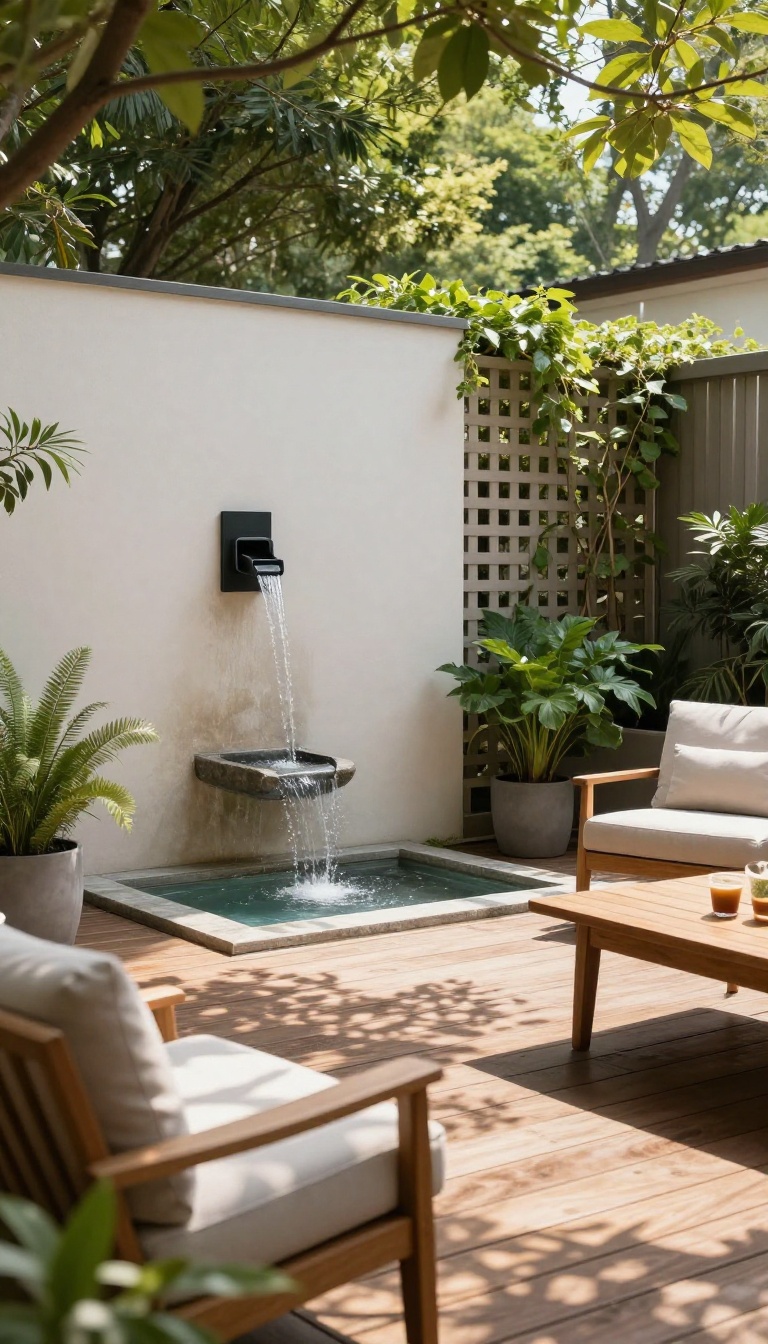
Water has a way of making any outdoor space feel more alive. Adding a small fountain or pond to your deck creates a calming focal point, while the patio nearby becomes the perfect spot for lounging. The gentle sound of water masks street noise and adds a layer of tranquility that's hard to beat.
Pairing a water feature with a lounge area is all about balance. The deck holds the water element, and the patio provides a dry, comfortable place to relax and listen. This setup works well in both small and large yards, and you can customize the water feature to match your style and budget.
Choosing The Right Water Feature
A wall-mounted fountain saves space and adds a modern touch. A preformed pond liner can create a natural look with aquatic plants and fish. For a low-maintenance option, consider a self-contained container fountain that's easy to install and move.
Lounge Arrangement Tips
Position lounge chairs so they face the water feature but leave a clear path for walking. Use weather-resistant cushions and add a small side table for drinks. If space allows, include a hammock or a daybed for ultimate relaxation.
Sound And Privacy Considerations
The sound of water should be pleasant, not overpowering. Adjust the flow rate to a gentle trickle. If privacy is a concern, plant tall grasses or install a lattice screen near the water feature to create a secluded feel.
11. L-Shaped Deck with Corner Patio
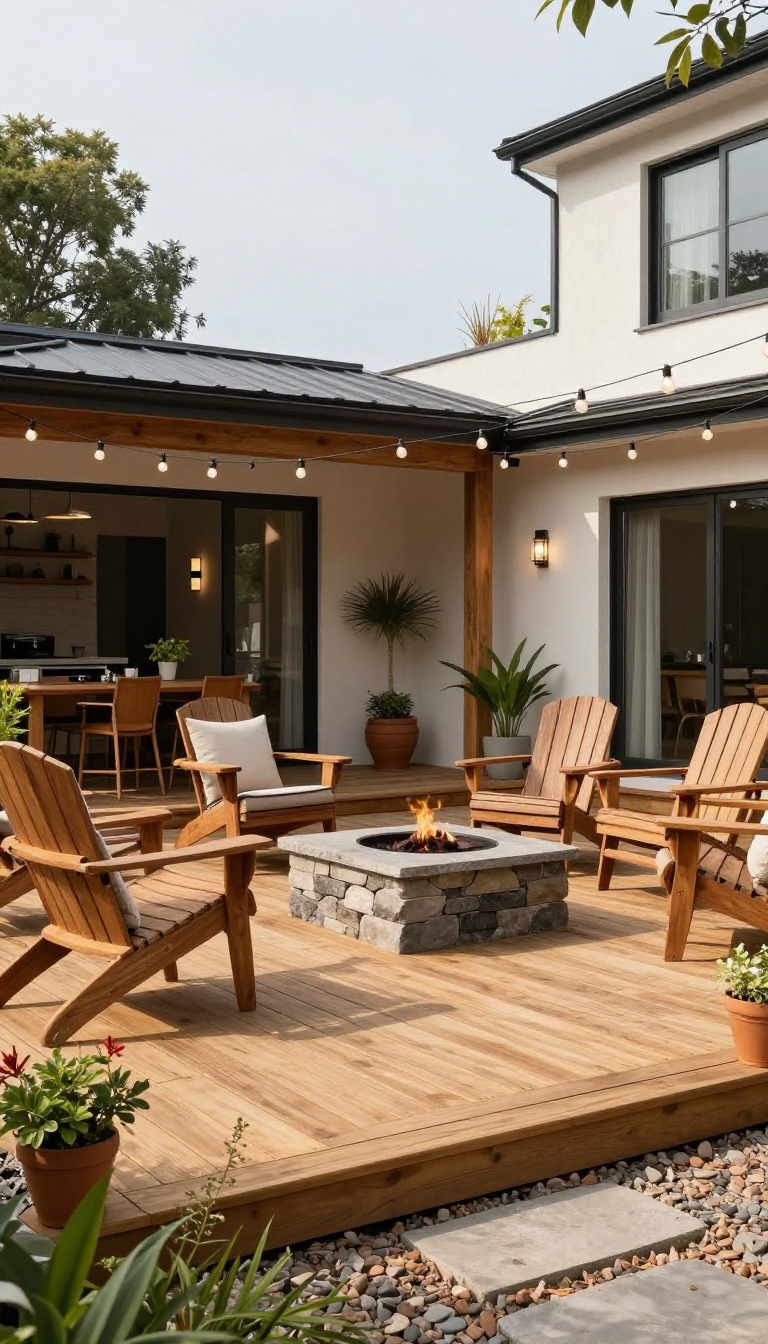
An L-shaped deck isn’t just about extra square footage—it’s about creating zones. Wrapping the deck around a corner naturally carves out a nook that’s perfect for a cozy patio below. This layout is a smart pick for smaller yards where every inch counts, and it makes the transition from deck to patio feel effortless.
The beauty of this design is how it uses the corner to separate spaces without walls. The deck becomes the elevated dining or lounging area, while the patio tucked beneath offers a shaded spot for a fire pit or a quiet reading corner. Because the two areas are connected by a few steps or a gentle slope, you get a continuous flow that makes the whole yard feel larger.
Why This Layout Works
An L-shape is a natural space-saver. It hugs the corner of your house or yard, leaving the center open for lawn or garden. The corner patio fills the gap under the deck, turning what might be wasted space into a functional hangout.
Plus, the change in level adds visual interest without breaking the sightline.
Designing The Transition
The key is making the deck and patio feel like one unit. Use the same color palette or complementary materials—like warm wood with earthy pavers. A wide set of steps or a gentle ramp makes the transition easy and inviting.
Add built-in planters along the edge to soften the change and keep the eye moving.
Furnishing The Corner
On the deck, keep furniture low and open to avoid blocking the view. On the patio, go for a bistro set or a couple of Adirondack chairs around a fire pit. String lights overhead or lanterns on the steps to tie the two areas together.
This setup is perfect for morning coffee up top and evening cocktails below.
12. Deck with Outdoor Bar and Patio Seating
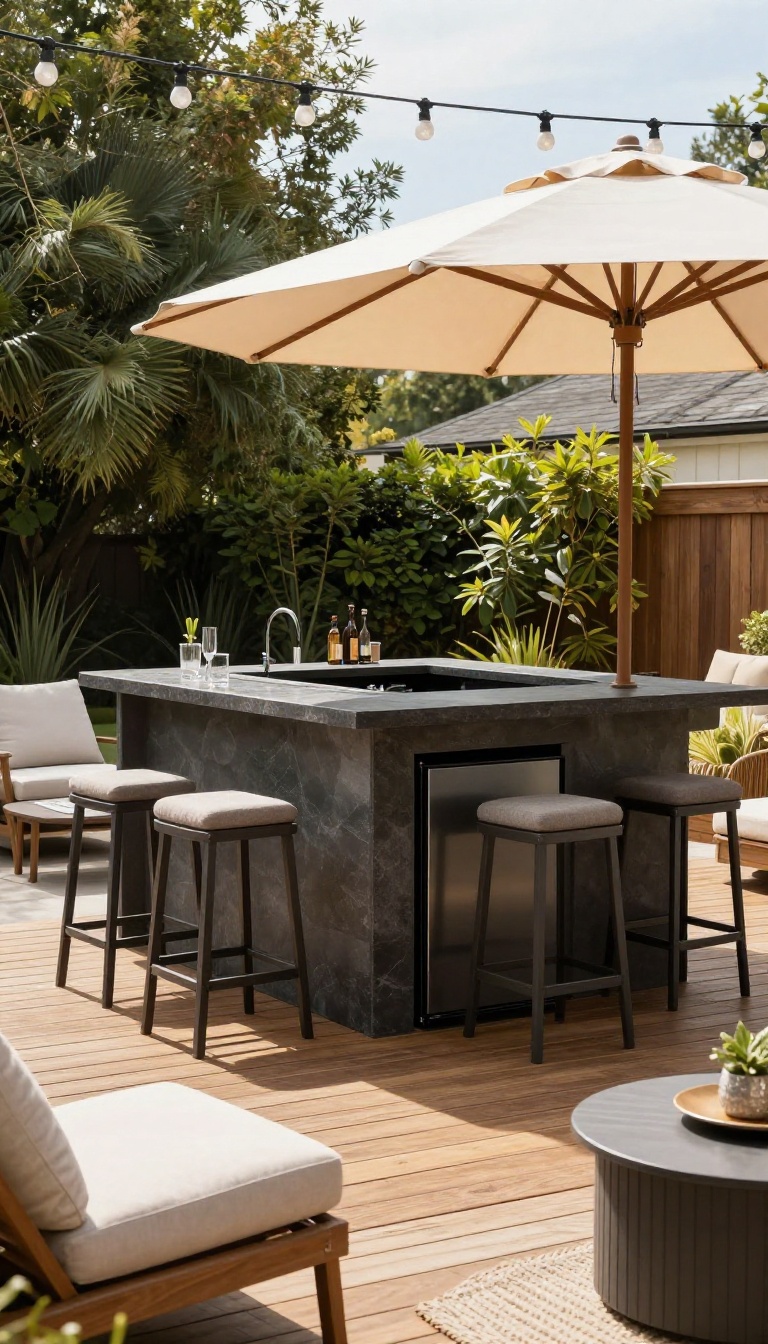
When the party starts flowing, you don't want to be stuck behind a grill or shuffling through a crowd to grab drinks. An outdoor bar built into the deck edge solves that neatly. It gives you a dedicated spot for serving and chatting, while the patio below offers plenty of room for guests to sit or stand comfortably.
The beauty of this setup is how it naturally divides the space without closing it off. The bar becomes a social hub, and the patio seating keeps the conversation going on both sides. Whether you're hosting a summer barbecue or just enjoying a quiet evening drink, this combo makes everything feel more organized and inviting.
Building a bar along the deck edge is a smart way to maximize both function and flow. You can use the deck as the serving area and the patio as the lounge zone, creating a natural gathering point that encourages mingling. The bar height also adds visual interest, breaking up the monotony of a flat deck and giving the space a more dynamic feel.
To make it work, think about materials and weather resistance. A sturdy countertop that can handle spills and sun is key. You'll also want to consider the height carefully—standard bar height is around 42 inches, but you might adjust based on your own comfort and the stools you choose.
Adding a small shelf underneath or a mini fridge on the patio side can take convenience to the next level. Lighting and shade are often overlooked but make a big difference. String lights overhead or a few lanterns on the bar create a warm evening vibe.
If the sun hits that spot hard, a cantilever umbrella or a pergola extension can keep both the bar and the seating comfortable. With the right touches, this idea turns your outdoor area into a favorite hangout spot.
Choosing The Right Bar Height And Materials
Bar height should feel natural when you're standing or sitting on a stool. Standard bar height is around 42 inches, but you can go a bit lower if you prefer a more casual feel. For materials, consider weather-resistant options like treated wood, composite decking, or stone tile.
A solid surface that's easy to clean and won't warp in the sun is a must. You'll also want to think about the edge—rounded corners are safer and more comfortable when guests lean against it.
Seating That Keeps The Conversation Flowing
Bar stools on the patio side are the obvious choice, but don't just pick any stool. Look for ones with comfortable seats and footrests, and make sure they're the right height for your bar. Swivel stools can be nice for easy movement, but they might take up more space.
If you have room, a mix of stools and a small bench or low chairs on the patio gives people options. The goal is to make it easy for people to sit, stand, and chat without feeling cramped.
Adding Convenience With Storage And Lighting
Storage makes the bar more functional. A shelf underneath can hold glasses, bottles, or serving trays. If you have power nearby, a mini fridge or an ice bin keeps drinks cold without trips inside.
Lighting sets the mood—string lights above the bar or small LED strips along the edge work well. You can also add a few lanterns or candles for a softer glow. Just make sure any electrical elements are rated for outdoor use and properly protected from the elements.
13. Deck with Hot Tub and Patio Sunbathing Area
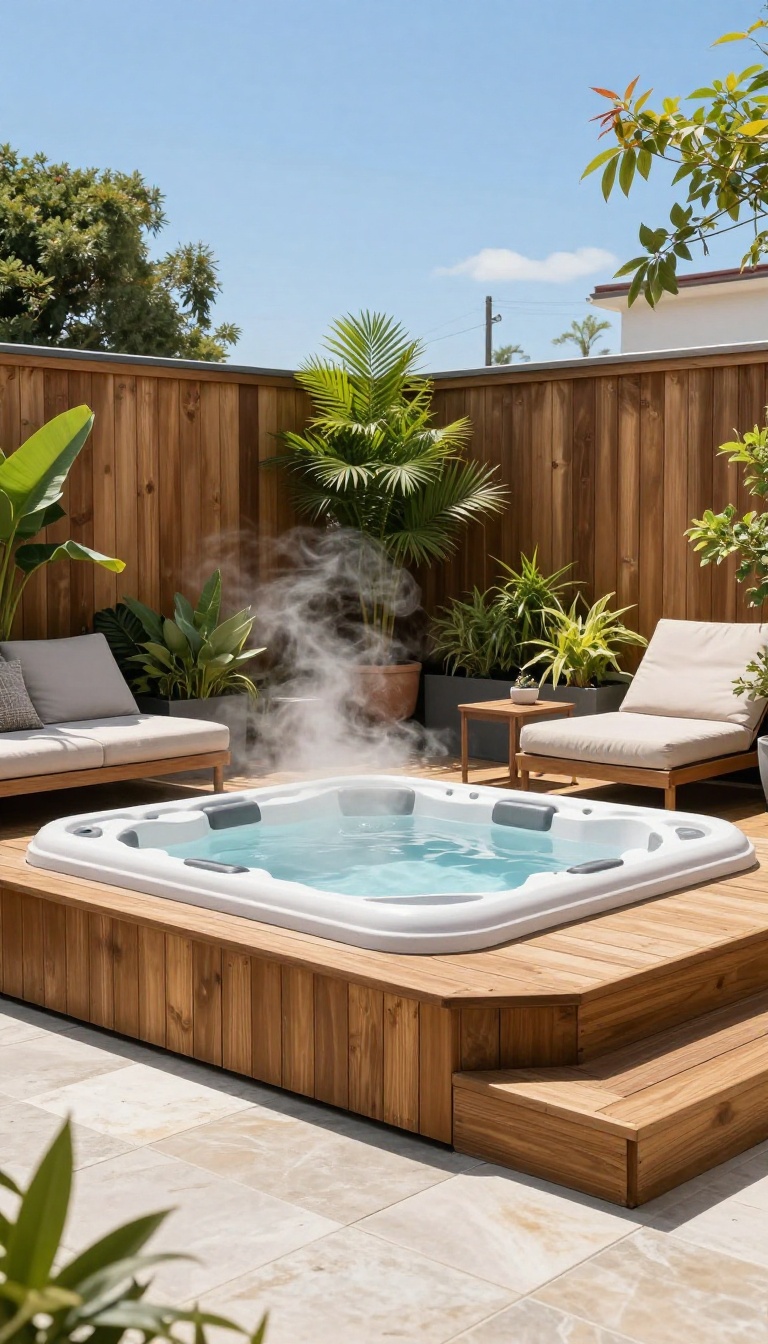
There's nothing quite like stepping from warm, bubbling water onto a sun-warmed patio. Combining a deck hot tub with a dedicated sunbathing patio creates a private wellness retreat that feels resort-level without leaving home. The key is separating the wet zone from the dry zone while keeping them visually connected.
Place the hot tub on the deck for a spa-like feel, and use the adjacent patio for lounging, drying off, and soaking up the sun. This setup keeps the deck from getting constantly wet and gives you a dry, comfortable spot to relax between soaks. The contrast between the elevated wood deck and the cool stone or concrete patio adds visual interest and defines each function clearly.
Designing The Transition
The transition between deck and patio should feel smooth and intentional. Use the same railing style or matching materials to tie them together. A wide step or a small landing between the two levels makes the change feel natural.
Consider adding a pergola over the hot tub for shade and privacy, while leaving the sunbathing area open to the sky.
Choosing The Right Hot Tub
Size and placement matter more than you might think. Measure your deck's load capacity before buying, and leave at least 18 inches of clearance around the tub for easy access and maintenance. If you're tight on space, a smaller two-person tub can still feel luxurious.
Place it near the patio so you can hop out and grab a towel without dripping through the house.
Sunbathing Patio Essentials
The sunbathing area should be all about comfort and convenience. Use weather-resistant loungers with thick cushions, and add a small side table for drinks and sunscreen. A privacy screen or tall plants can block neighbors' views without blocking the sun.
If you're worried about the ground getting too hot, choose light-colored paving stones that reflect heat instead of absorbing it.
Lighting And Evening Ambiance
When the sun goes down, the right lighting turns this combo into a cozy evening retreat. String lights overhead or install dimmable LED strips along the deck steps. Path lights along the patio edge keep the area safe and inviting.
Add a few lanterns or candles on the patio for a warm, flickering glow that makes the whole space feel magical.
14. Deck with Retractable Awning and Patio
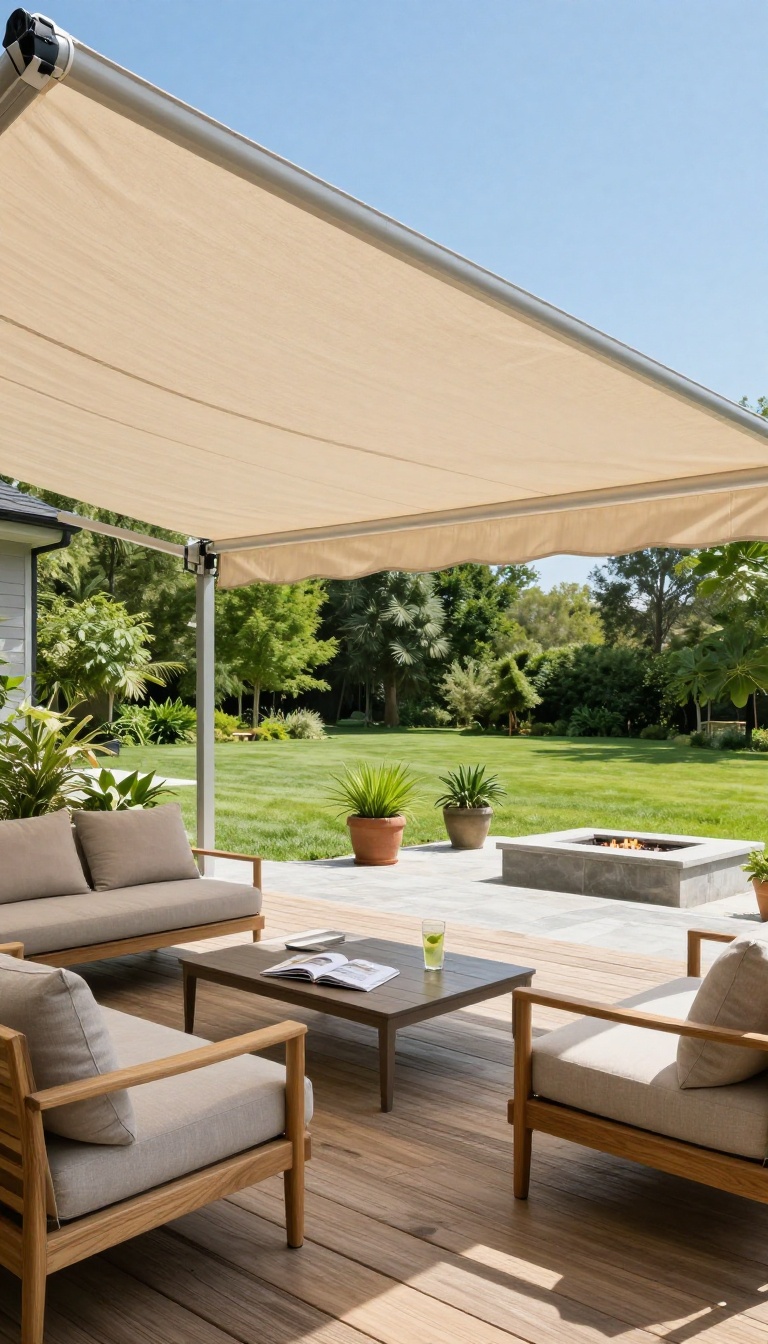
A retractable awning is the ultimate flexible friend for a deck-and-patio combo. You get shade exactly when and where you need it, without committing to a permanent roof or pergola. This setup keeps your deck open and airy on sunny days, then covers it in seconds when the sun gets intense or a light drizzle rolls in.
The patio below stays open for seating, planters, or a fire pit, so you're not losing any usable space. It's a smart way to add comfort and control to your outdoor area, and it works beautifully with both modern and traditional designs.
Retractable awnings give you the best of both worlds: the openness of an uncovered deck and the protection of a covered one. You can extend the awning over the deck for meals or reading, then retract it to let the sun warm the space. The patio remains flexible, so you can rearrange furniture or host a larger gathering without being boxed in by a fixed roof.
This idea is especially great for decks that face west or south, where afternoon sun can be brutal. Instead of baking on the deck, you pull the awning out and instantly create a comfortable lounge area. And because the awning is fabric, it adds a soft, warm feel that contrasts nicely with hard materials like concrete or stone on the patio.
Another bonus: retractable awnings are easier to install than a permanent structure and can be removed or replaced if you change your mind. That makes them a low-commitment upgrade that still delivers big on comfort and style.
Choosing The Right Awning Size And Fabric
Measure your deck carefully before buying an awning. You want it to cover the main seating or dining area without overwhelming the space. Look for fabrics that are UV-resistant, waterproof, and fade-proof—acrylic or solution-dyed polyester are great choices.
Pick a color that complements your home's exterior and patio materials, like a neutral beige or a deep navy for contrast.
Placement Tips For Maximum Shade
Mount the awning on the house wall above the deck, angled so it blocks the sun when it's at its hottest. If your deck is freestanding, you can use posts or a wall-mounted bracket. Consider the sun's path throughout the day—you might want a model that tilts or has a sensor to auto-retract in high winds.
Keep the patio area clear so the awning can extend fully without obstruction.
Pairing With Patio Furniture And Decor
Since the deck is the focus, use comfortable outdoor sofas or a dining set that can slide under the awning. On the patio, add low-maintenance plants, a fire pit, or a small water feature to create a distinct zone. Use outdoor rugs and cushions in coordinating colors to tie the two areas together.
This way, the deck feels like a shaded retreat, while the patio stays open and inviting.
15. Deck with Outdoor Fireplace and Patio Seating Wall
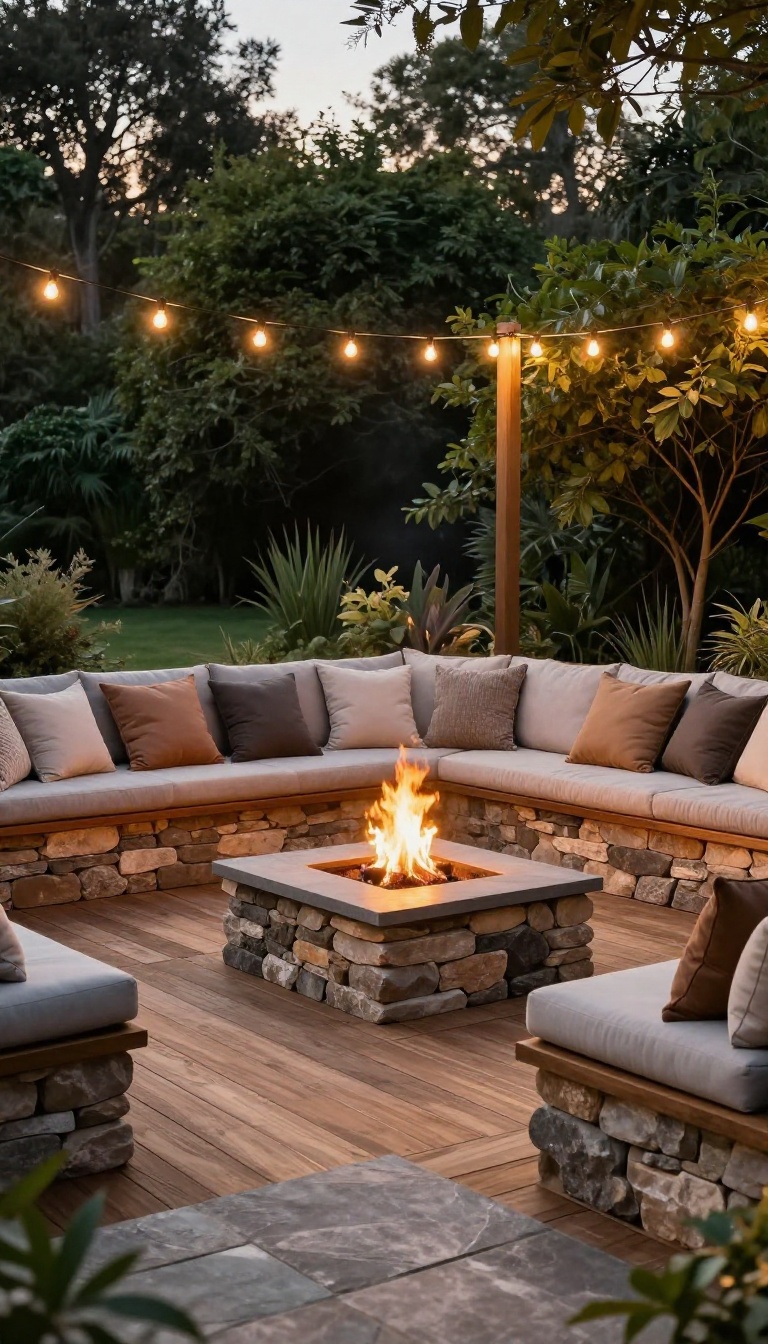
An outdoor fireplace turns a deck and patio combo into a year-round gathering spot. The key is pairing it with a low seating wall that wraps around the patio, giving you plenty of places to sit without dragging out chairs. This setup feels intentional and cozy, especially when the temperature drops.
The seating wall does more than just provide extra seats—it defines the patio area and creates a natural boundary between the deck and the rest of the yard. You can build it from the same materials as the deck or use a contrasting stone for visual interest. Add cushions on top for comfort, and you've got a built-in lounge that invites people to stay a while.
Designing The Seating Wall
When planning the seating wall, think about height and depth. A typical seat height is around 18 inches, with a depth of 18 to 20 inches to sit comfortably. You can make it curved or straight, depending on your space.
If you're handy, a simple block wall with a cap is doable; otherwise, hire a mason to ensure it's sturdy and level.
Choosing The Fireplace
The fireplace should be the focal point, so pick a style that matches your home's architecture. A wood-burning model gives that authentic crackle, while gas is easier to maintain and start. Consider a built-in unit with a stone or brick surround to tie it into the seating wall.
Make sure it's placed safely away from any structures and check local codes for clearance.
Making It Comfortable
Add weather-resistant cushions in a durable fabric like Sunbrella to make the wall inviting. Throw pillows and a few blankets in a basket nearby keep things cozy on cool nights. You might also add a low table or two for drinks and snacks, so people don't have to balance plates on their laps.
FAQ
What is the best material for a deck and patio combo?
The best material depends on your climate, budget, and style. Composite decking is low-maintenance and durable, while natural wood offers classic beauty. For patios, pavers or concrete are versatile and long-lasting.
Choose materials that complement each other and your home's exterior.
How do I transition between a deck and a patio?
Use a smooth, level transition to avoid tripping hazards. Options include a step down, a flush threshold, or a gradual slope. Adding a border of pavers or gravel can help blend the two surfaces seamlessly.
Can I build a deck and patio combo on a budget?
Yes, you can save money by using cost-effective materials like pressure-treated wood for the deck and gravel or concrete for the patio. Consider a simpler design with fewer levels and features. DIY installation can also reduce costs significantly.
How do I make a small deck and patio combo feel larger?
Use light colors for surfaces and furniture, and keep the design uncluttered. Incorporate mirrors or vertical planters to add depth. Choose multi-functional furniture and avoid oversized pieces.
A seamless transition between deck and patio also helps the space feel more expansive.
Do I need a permit for a deck and patio combo?
Permit requirements vary by location. Generally, decks over a certain height or attached to the house require a permit. Patios may also need permits depending on size and materials.
Always check with your local building department before starting construction.
Conclusion
Creating a seamless deck and patio combo is all about balancing function and style. Whether you choose a multi-level design or a simple floating deck with a gravel patio, the key is to make the transition feel natural and intentional. These 15 ideas offer a starting point to spark your creativity and help you design an outdoor space that truly works for your lifestyle.
So grab a sketchpad, measure your yard, and start planning your perfect backyard retreat. With a little thought and effort, you’ll have a space that’s both beautiful and practical for years to come.