11 Patio Floor Ideas on a Budget That Feel Custom Made
A great patio floor sets the tone for your entire outdoor space, but you don’t need a designer budget to get a custom look. With a little creativity and some smart material choices, you can transform a plain concrete slab or tired deck into something that feels intentional and polished.
Whether you’re starting from scratch or refreshing an existing patio, these budget-friendly ideas prove that style doesn’t have to come with a hefty price tag.
From paint tricks to clever tile alternatives, you’ll find plenty of ways to make your patio floor the star of your backyard.
1. Painted Concrete with a Geometric Twist
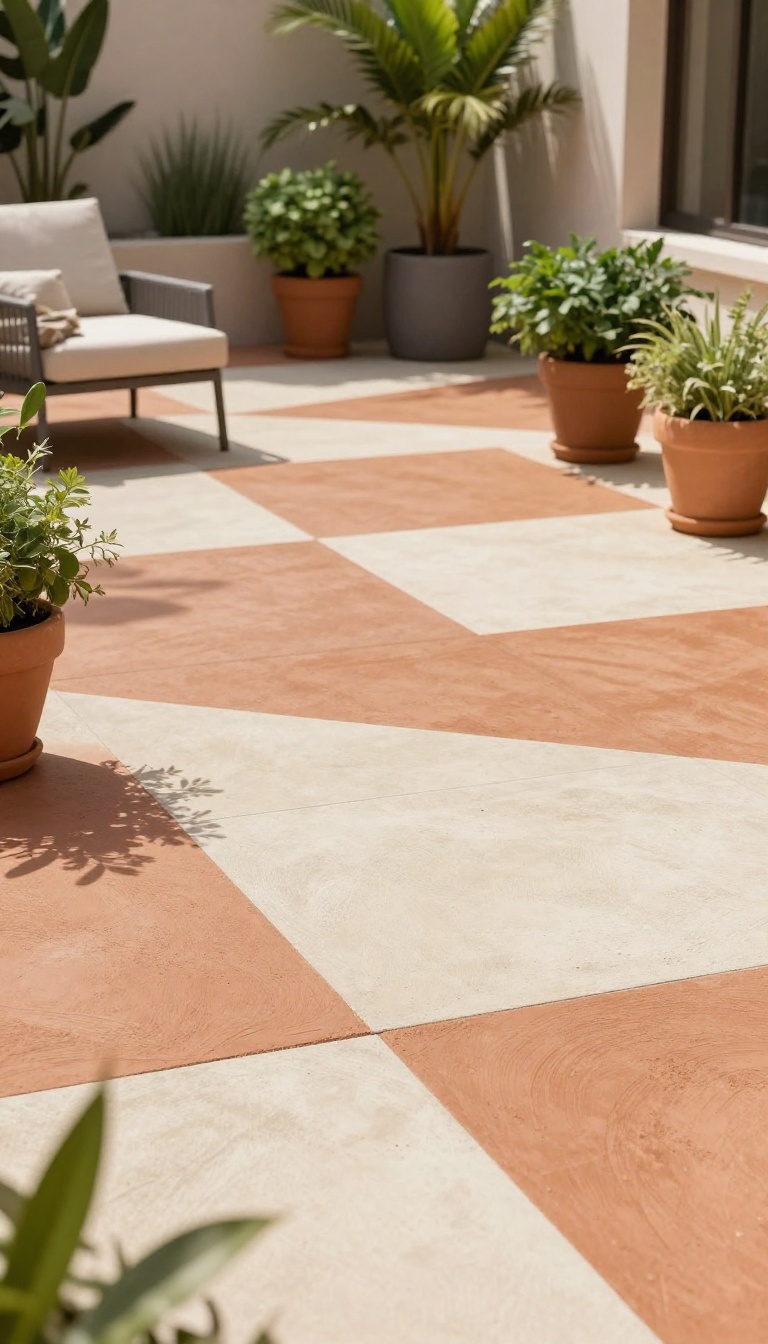
Concrete doesn’t have to stay plain gray. A fresh coat of paint and some tape can turn it into a statement piece that looks like it cost a fortune. This is one of the most affordable ways to get a designer look, and you can choose colors that match your outdoor decor.
Start by cleaning the concrete thoroughly and letting it dry completely. Then, use painter’s tape to map out your geometric pattern—think triangles, chevrons, or a simple grid. Paint the exposed areas with concrete paint, let it dry, and carefully remove the tape.
Seal it with a concrete sealer to protect it from weather and foot traffic. The result is a custom floor that’s easy to refresh when you want a new look.
Pick A Pattern That Fits Your Space
Geometric patterns can make a small patio feel larger or add energy to a large one. For a subtle look, go with a simple stripe or border. For something bolder, try a diamond or herringbone design.
Use a chalk line or a straightedge to keep your lines crisp, and don’t be afraid to mix scales—large shapes work well on big patios, while smaller patterns suit cozy corners.
Choose Colors That Pop Or Blend
Your color choice sets the mood. Light neutral tones like beige or soft gray keep things airy, while deep blues or terracotta add warmth. If you want a high-contrast look, pair a dark base with a light pattern.
For a more cohesive feel, pick colors that echo your outdoor furniture or plants. Remember, you can always repaint later if you change your mind.
Seal It For Longevity
A good sealer is your best friend. It protects the paint from UV rays, moisture, and heavy use. Apply two coats of a high-quality concrete sealer, letting each coat dry completely.
This not only extends the life of your design but also makes cleaning easier—just hose it down and it looks fresh again.
2. Peel-and-Stick Tile That Looks Like Stone
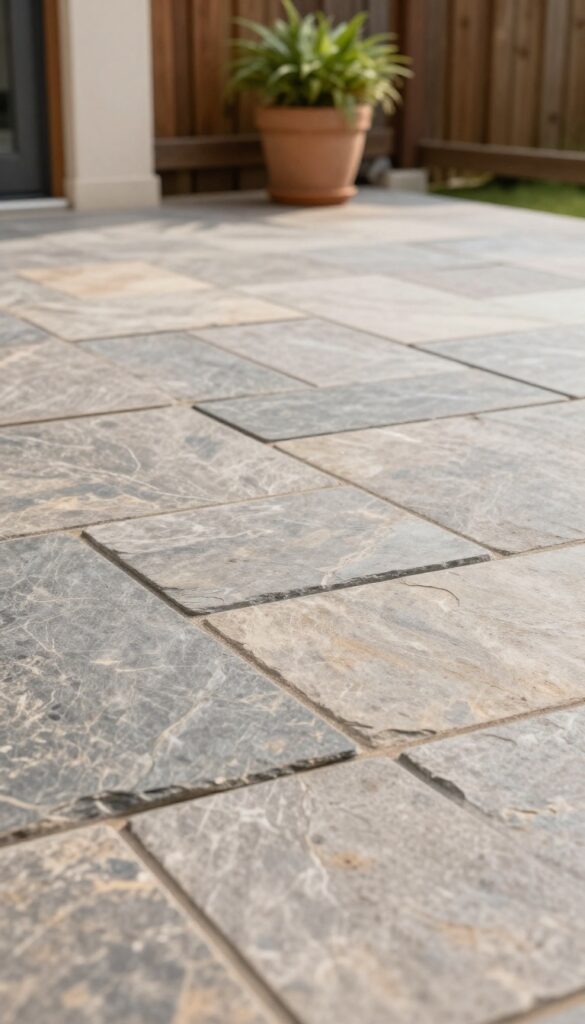
If you want the look of natural stone without the weight on your wallet, peel-and-stick tiles are a game-changer. These adhesive-backed tiles come in a variety of realistic stone and wood patterns, and they’re surprisingly durable when you pick the right kind. They’re also a weekend project you can actually finish—no mortar, no grout, no special tools.
Peel-and-stick tiles have come a long way from the flimsy vinyl squares of the past. Today’s versions are thicker, more textured, and designed to withstand the elements. The trick is to choose tiles specifically rated for outdoor use, since not all peel-and-stick options can handle sun, rain, and temperature swings.
Once you’ve got the right tiles, installation is as simple as cleaning your patio surface, peeling off the backing, and pressing them into place. You can create a herringbone pattern, a classic grid, or even a random layout that mimics natural stone—all without calling in a professional.
Why Stone-look Tiles Work Outdoors
Stone-look tiles give you that high-end, earthy aesthetic without the cost or maintenance of actual stone. They’re lightweight, easy to cut with a utility knife, and won’t crack or chip like real tile might. Plus, they’re slip-resistant when you choose a textured finish, which is a big plus around pools or in wet climates.
How To Choose The Right Peel-and-stick Tile
Look for tiles labeled “outdoor” or “weatherproof” and check the thickness—thicker tiles (around 1mm or more) tend to last longer. Also, pay attention to the adhesive: some are stronger than others, and a strong adhesive is key for staying put through heat and cold. Finally, order a sample or two before committing to a full box, so you can see the color and texture in your actual outdoor light.
Installation Tips For A Long-lasting Result
Start by sweeping and mopping your patio to remove any dirt or grease, then let it dry completely. If your concrete has cracks or uneven spots, fill them with a patching compound and sand smooth. When you lay the tiles, press firmly from the center outward to squeeze out any air bubbles.
Use a roller or a heavy object to ensure good adhesion, and avoid walking on the area for at least 24 hours.
3. Stenciled Concrete for a Tile Effect
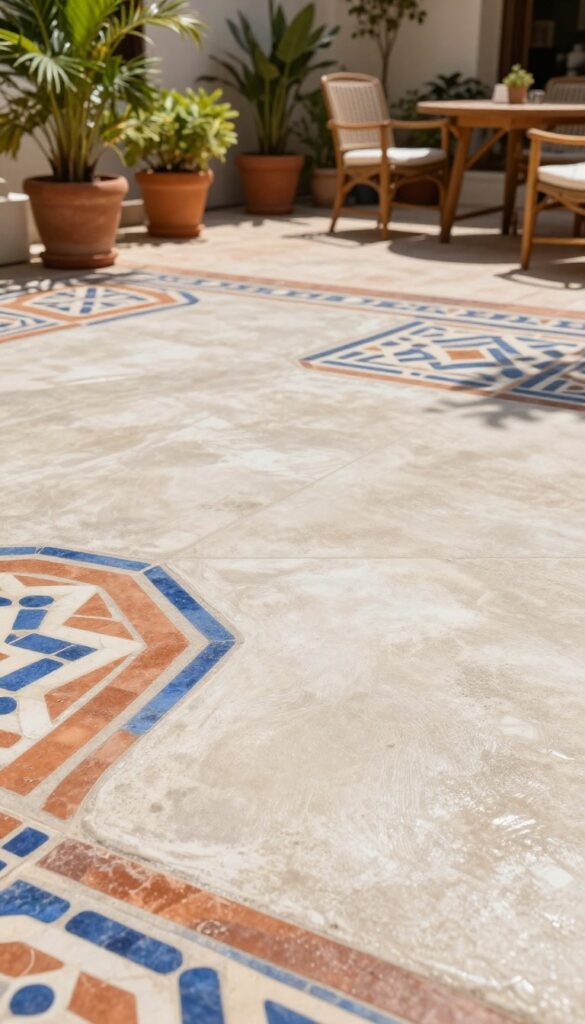
Plain concrete can feel a little blah, but a stencil and some concrete stain can change that fast. You get the look of expensive tile without the cost or the hassle of actual grout lines. It’s a weekend project that makes a big visual impact.
Stenciling concrete is like giving your patio a temporary tattoo that looks permanent. You can create a geometric pattern, a classic herringbone, or even a Moroccan-inspired design. The key is to use a good stencil and a high-quality concrete stain or paint that’s made for outdoor use.
Pick The Right Stencil
Look for a stencil that’s durable and easy to clean. Plastic or Mylar stencils work well because they can be reused and wiped down. Choose a pattern that matches the vibe of your home—simple squares for a modern look, or something more ornate for a Mediterranean feel.
Prep The Surface
Before you start, make sure the concrete is clean and dry. Fill any cracks and let the surface cure completely if it’s new. A little bit of prep goes a long way, and it helps the stain stick better and last longer.
Apply The Stain
Use a roller or a brush to apply the concrete stain over the stencil. Work in small sections so the stain doesn’t dry before you move the stencil. You can also use a sprayer for a more even coat, but a roller is easier to control.
Let it dry completely before you walk on it.
Seal It For Protection
Once the stain is dry, apply a concrete sealer to protect the pattern from foot traffic and weather. A sealer also adds a subtle sheen that makes the stenciled design pop. Reapply the sealer every couple of years to keep it looking fresh.
4. Gravel and Paver Combo
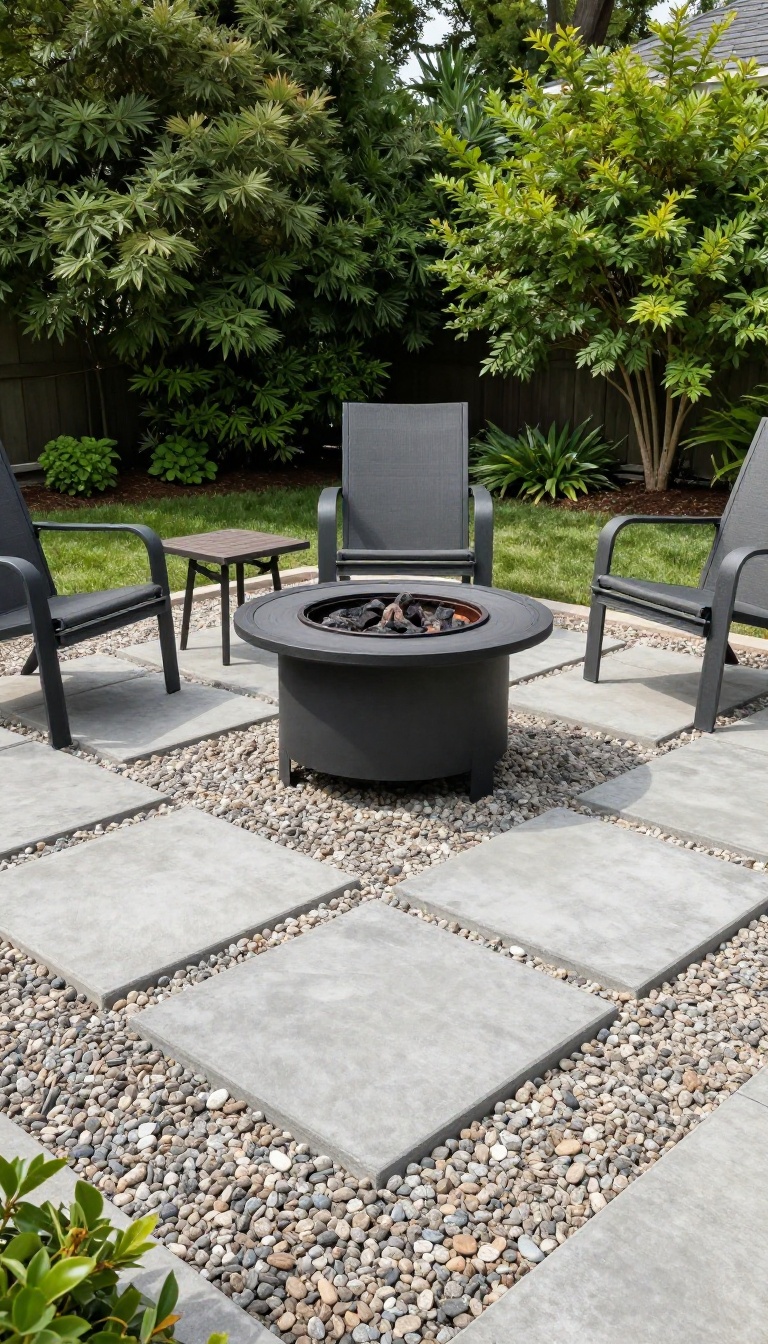
Gravel might not be the first thing that comes to mind for a patio floor, but it’s surprisingly versatile and budget-friendly. When you mix it with a few large pavers, you get a floor that looks intentional and feels great underfoot. The contrast between the soft gravel and the solid stone adds texture and visual interest without much effort.
This combo works especially well for casual seating areas, pathways, or around a fire pit. The gravel drains well, so you don’t have to worry about puddles after a rainstorm. Plus, it’s one of the easiest DIY projects you can tackle—no mortar or special tools required.
Why This Combo Works
The gravel provides a loose, natural base that’s cheap and easy to spread. Pavers give you stable spots for furniture and foot traffic. Together, they create a floor that’s both functional and stylish, and you can adjust the layout anytime you want a change.
How To Lay It Out
Start by leveling the ground and laying down a weed barrier. Spread a layer of gravel about two inches thick, then place your pavers on top, leaving a few inches of gravel between them. Tamp everything down to keep it stable.
You can arrange the pavers in a grid, a random pattern, or even a winding path.
Choosing Your Materials
Go for pea gravel or crushed stone—both are affordable and come in various colors. For pavers, look for concrete squares or natural stone pieces at a home improvement store or salvage yard. Mixing sizes and shapes adds character and keeps the look from feeling too uniform.
Maintenance And Longevity
This floor is low-maintenance, but you’ll need to rake the gravel occasionally to keep it even. Over time, you might need to add a bit more gravel to top it up. The pavers can shift slightly, but that’s part of the charm—it’s a flexible, forgiving surface that’s easy to refresh.
5. Wooden Pallet Deck Tiles
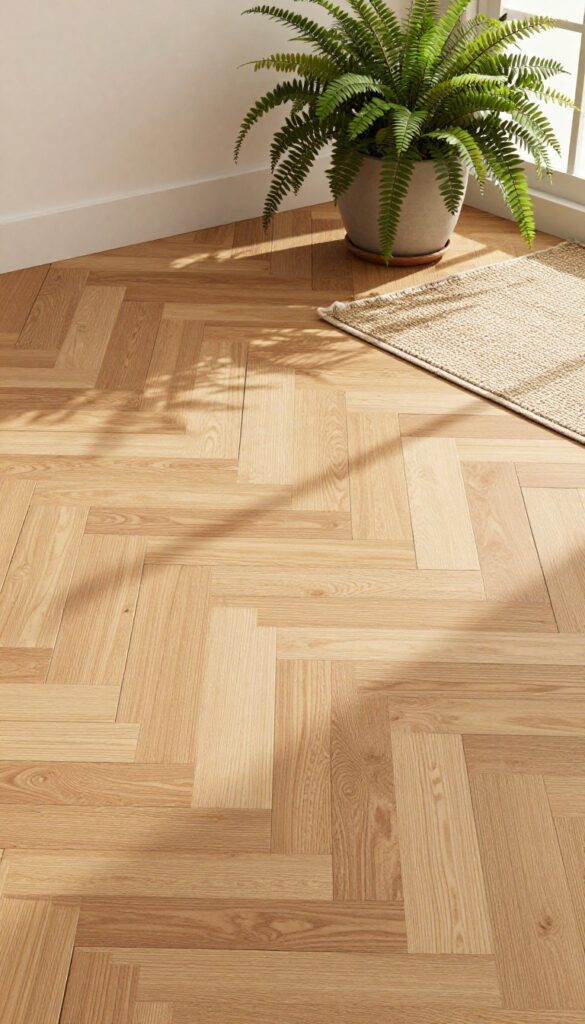
If you're after a warm, rustic look that doesn't cost a fortune, pallets are your best friend. They're often free or super cheap, and with a little elbow grease, you can turn them into sturdy deck tiles that look surprisingly high-end. This project is perfect for a weekend DIYer and adds instant charm to any patio.
Start by sourcing clean, heat-treated pallets (look for the HT stamp). Break them down carefully, remove any nails, and cut the boards into uniform squares or rectangles. Sand each piece thoroughly to avoid splinters, then apply a weatherproof sealant or outdoor paint to protect them from the elements.
For a polished finish, arrange the tiles in a herringbone or basketweave pattern on your patio. You can lay them directly on concrete or gravel, but adding a layer of landscape fabric underneath helps with drainage and weed control. If you want extra stability, consider attaching a plywood base to each tile.
The best part? If one tile gets damaged, you can simply replace it without redoing the whole floor.
How To Build Them
Measure your patio to determine how many tiles you'll need. Cut pallet boards to the same length and arrange them side by side, then attach two perpendicular support boards underneath using screws. For a herringbone pattern, cut boards at 45-degree angles and join them carefully.
Sand all edges and surfaces, then apply a wood primer and two coats of exterior paint or sealant. Let everything dry completely before placing them outdoors.
Styling Ideas
To make your pallet tiles feel custom, mix two wood tones—one natural and one stained darker—to create a checkerboard effect. Or paint the tiles in a bold color like navy or sage for a modern twist. Add an outdoor rug or a few potted plants to soften the look.
If you're feeling creative, use the tiles to create a defined dining area or a cozy reading nook.
Maintenance Tips
Sweep regularly to remove dirt and debris. Every few months, rinse with a hose and scrub with a mild soap solution. Reapply sealant once a year to keep the wood looking fresh and protected.
If you live in a rainy climate, consider storing the tiles indoors during the off-season or ensuring they have proper drainage underneath to prevent rot.
6. Outdoor Carpet Tiles
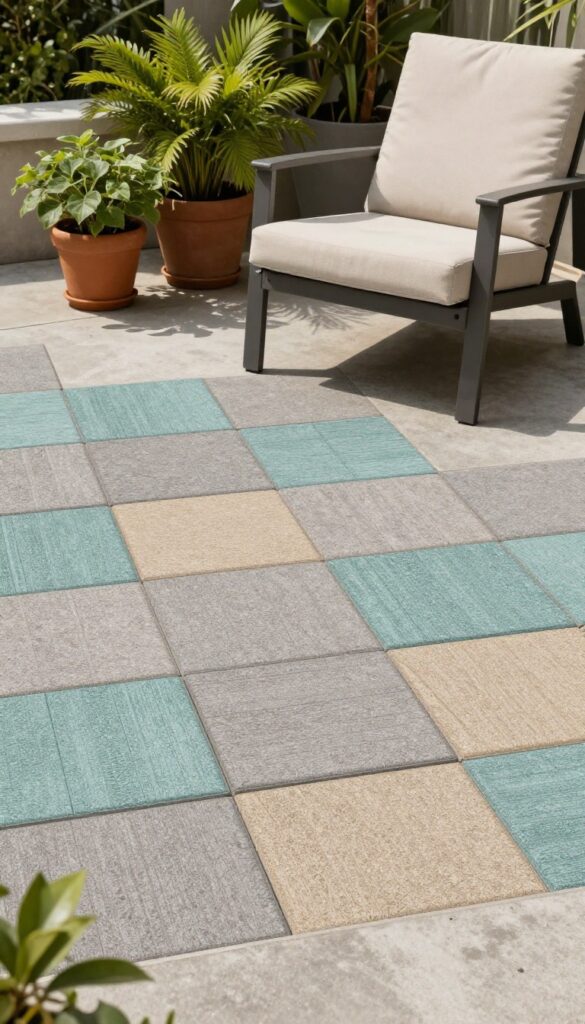
Outdoor carpet tiles bring the comfort of indoor flooring to your patio without the hassle of a full carpet installation. They’re soft underfoot, come in a rainbow of colors and patterns, and can be cut to fit any space. Best of all, if one tile gets stained or damaged, you can swap it out in minutes instead of replacing the whole floor.
Outdoor carpet tiles are a smart pick for renters or homeowners who want a quick change that doesn’t require permanent commitment. They’re lightweight, easy to handle, and you don’t need special tools—just a utility knife and a straight edge. You can lay them directly over concrete, wood, or even existing tiles, making them one of the most flexible budget options out there.
Why Carpet Tiles Work Outdoors
Unlike wall-to-wall carpet, tiles are designed to handle the elements. Many are made from UV-stabilized polypropylene that resists fading and mildew. They also drain well, so puddles dry quickly after a rain shower.
The soft surface feels great on bare feet, and the cushioning makes standing for long periods more comfortable than on hard stone or concrete.
How To Install Them Like A Pro
Start with a clean, dry surface. Sweep away debris and fill any large cracks. Lay the tiles in a brick pattern to avoid visible seams.
Use a utility knife to cut tiles along the edges, and if the area is exposed to wind, secure them with double-sided outdoor tape or a dab of outdoor adhesive. For a truly custom look, mix two or three complementary colors in a checkerboard or diagonal pattern.
Mixing Patterns And Colors
One of the biggest perks of carpet tiles is the design freedom. You can create a border in a contrasting shade, lay down a center medallion, or just go with a solid neutral that ties your patio furniture together. Because tiles are sold individually, you can experiment with small samples before committing—just order a few and lay them out to see what feels right.
Caring For Your Carpet Tiles
Maintenance is simple: a quick sweep or vacuum keeps dirt at bay, and for stains, a mild soap and water solution usually does the trick. If a tile gets really worn or damaged, pull it up and replace it with a fresh one. That’s a lot easier than ripping out a whole carpet or redoing a tile floor, and it keeps your patio looking sharp for years.
7. Brick Pavers on a Sand Base
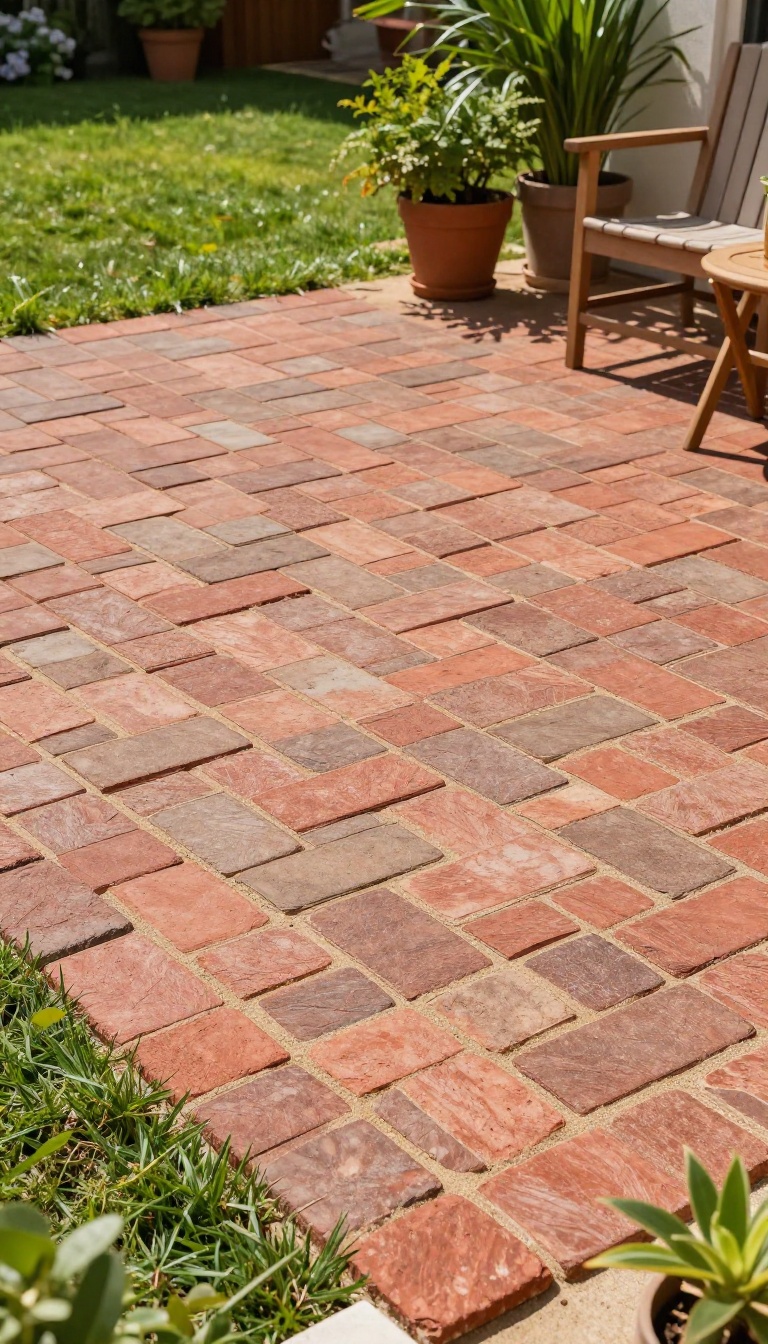
Brick pavers have that timeless, old-world charm that instantly makes a patio feel established. The best part? You don't need a mortar bed or professional skills to install them.
A simple sand base is all it takes to create a sturdy, level surface that looks like it was designed by a landscape architect.
This is a classic DIY project that's easier than you might think. You'll save a bundle by doing the labor yourself, and the materials are surprisingly affordable. Plus, if a paver ever cracks or stains, you can just lift it out and replace it without disturbing the rest of the patio.
Why Sand Beats Mortar For Diy
Mortar is permanent and unforgiving. Sand is flexible and forgiving. With a sand base, you don't need to mix anything or work fast before it sets.
You can adjust each paver as you go, and the sand naturally locks everything in place once it's compacted. This makes it a perfect weekend project for beginners.
Picking The Right Pavers
Look for concrete pavers that mimic brick—they're cheaper and lighter than real clay brick. You can find them in classic reds, earthy browns, or even gray tones. Choose a size that's easy to handle, like 4×8 inches, and buy a few extra to account for cuts and future repairs.
Laying The Base Step By Step
Start by excavating about 5-6 inches of soil, then add a layer of crushed stone and compact it. Top that with 1-2 inches of coarse sand, level it with a straight board, and lay your pavers in a running bond pattern. Use a rubber mallet to tap them down, then sweep more sand into the joints and mist with water to settle it.
Edging Keeps Everything In Place
Without edging, your pavers will slowly shift and spread. Install plastic or metal edging along the perimeter, secured with stakes. This keeps the sand and pavers locked together, so your patio stays neat for years.
It's a small cost that makes a big difference in durability.
8. Stamped Concrete Overlay
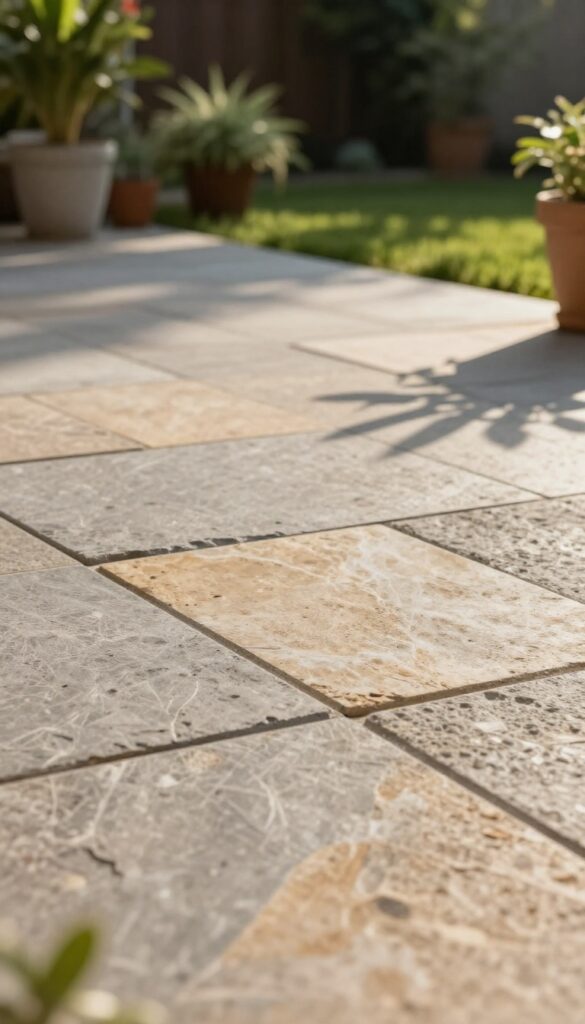
If your patio slab is structurally sound but visually tired, a stamped concrete overlay is a clever way to fake the look of natural stone without the cost of replacement. This technique involves applying a thin layer of concrete over the existing surface, then pressing rubber stamps into it to create realistic textures and patterns. The result is a durable, high-end floor that’s surprisingly budget-friendly, especially when you do it yourself.
A stamped concrete overlay is one of the most dramatic transformations you can make for your patio, and it’s far more affordable than tearing out and repouring concrete. The process starts with cleaning and repairing the existing slab, then applying a polymer-modified overlay mix that bonds to the old concrete. Once the overlay is troweled on, you press stamping mats into the surface to create the look of stone, brick, slate, or even wood planks.
After the concrete sets, you can add color hardener or acid stain to enhance the depth and realism of the pattern. With a little patience and the right tools, you can achieve a custom look that would cost thousands if professionally installed.
Why Overlay Instead Of Replace?
Replacing a concrete slab is expensive, messy, and time-consuming. An overlay, on the other hand, sits right on top of your existing patio, saving you the cost of demolition and disposal. It also adds a fresh layer of protection, extending the life of your old concrete.
Plus, overlays are thinner, so you won’t have to worry about height differences with adjacent surfaces.
Choosing The Right Pattern
The stamping mats come in a variety of patterns, from cobblestone to ashlar slate to running bond brick. Think about the style of your home and yard. For a rustic feel, go with a rough stone texture.
For a more modern look, a smooth slate or wood plank pattern works well. You can also mix patterns to create borders or focal points. If you’re unsure, order sample stamps first to see how they look on a small area.
Diy Vs. Hiring A Pro
This is one of those projects where the DIY route can save you a lot of money, but it’s not without its challenges. You’ll need to rent or buy stamping tools, and the timing is critical—you have to stamp the concrete while it’s still workable. If you’re comfortable with hands-on projects and have a weekend to spare, DIY is doable.
But if you’re short on time or want a flawless finish, hiring a professional might be worth the extra cost. Get quotes from a few contractors to compare.
Sealing And Maintenance
Once your stamped overlay is cured, you’ll want to apply a high-quality concrete sealer to protect it from moisture, stains, and UV rays. Sealing also brings out the colors and gives the surface a subtle sheen. Reapply the sealer every two to three years to keep the patio looking fresh.
Clean spills promptly and avoid using harsh chemicals that could dull the finish. With basic upkeep, your stamped overlay can last for decades.
9. Large Format Porcelain Tiles (on Sale)
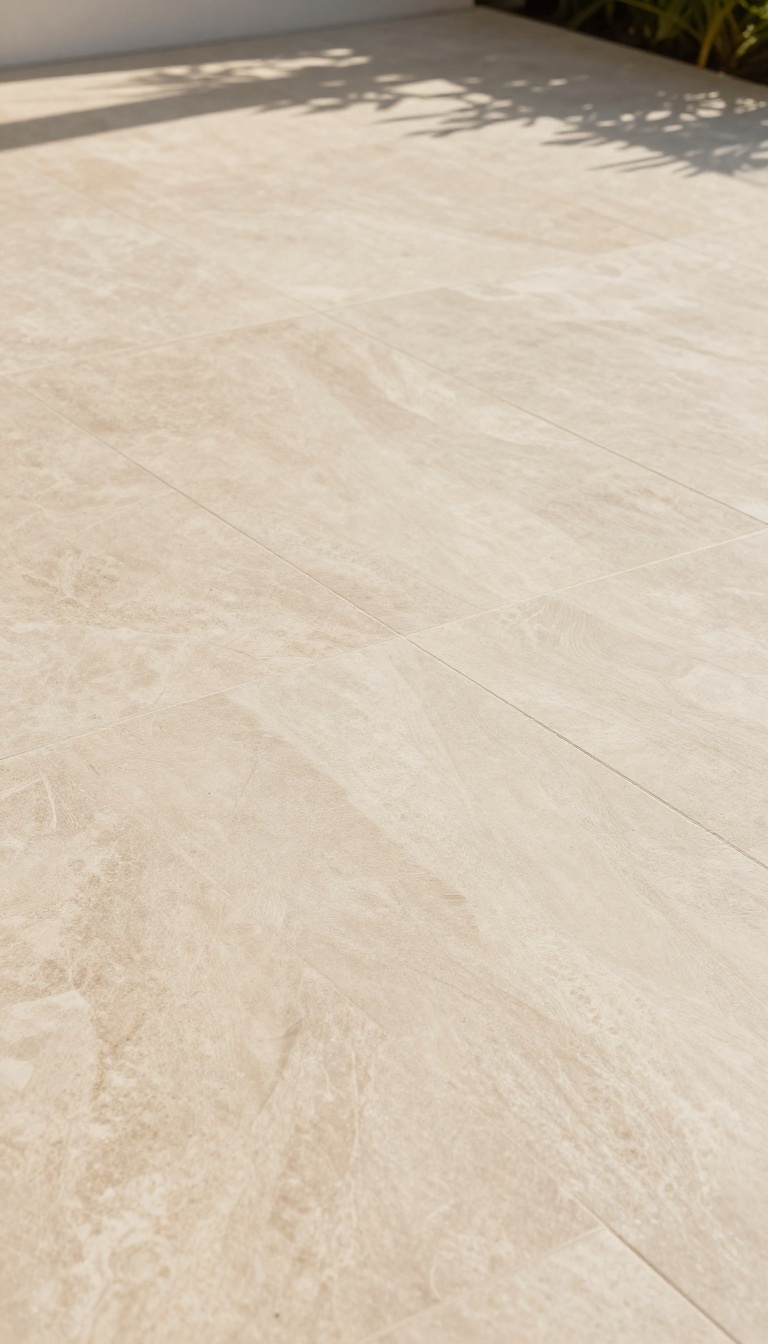
Large-format porcelain tiles are a designer favorite for their sleek, seamless look, but they often come with a hefty price tag. However, if you're willing to hunt for sales or clearance deals, you can snag these tiles for a fraction of the cost. They mimic natural stone convincingly and install quickly, making them a surprisingly budget-friendly option that feels custom-made.
When you score a deal on large-format porcelain tiles, you're not just getting a floor—you're getting a statement. The minimal grout lines create a smooth, continuous surface that instantly elevates any patio. Plus, porcelain is incredibly durable, weather-resistant, and easy to clean, making it perfect for outdoor use.
With a little patience and some savvy shopping, you can achieve a high-end look without the high-end price.
Why Large-format Tiles Feel Custom
The magic of large-format tiles lies in their size. Fewer grout lines mean a cleaner, more expansive look that tricks the eye into thinking your patio is bigger than it is. The subtle variations in color and texture, especially in stone-look tiles, add depth and realism.
This simplicity is what gives the floor that bespoke, designer feel.
Where To Find The Best Deals
Start by checking your local tile stores' clearance sections—they often discount overstocked or discontinued lines. Online marketplaces like eBay and Facebook Marketplace can also have great finds, but be sure to factor in shipping costs. Sign up for newsletters from big-box home improvement stores; they frequently run sales on tile.
And don't forget to ask about remnants or partial pallets, which can be heavily discounted.
Installation Tips For A Seamless Finish
Large-format tiles require a flat, level surface, so prep is key. Use a large-notch trowel and back-butter each tile to ensure full adhesion. For a truly seamless look, choose a grout color that closely matches the tile and use the smallest grout line possible.
If you're not confident in your DIY skills, hiring a pro for the installation might still save you money compared to natural stone.
10. Rubber Mulch or Playground Tiles
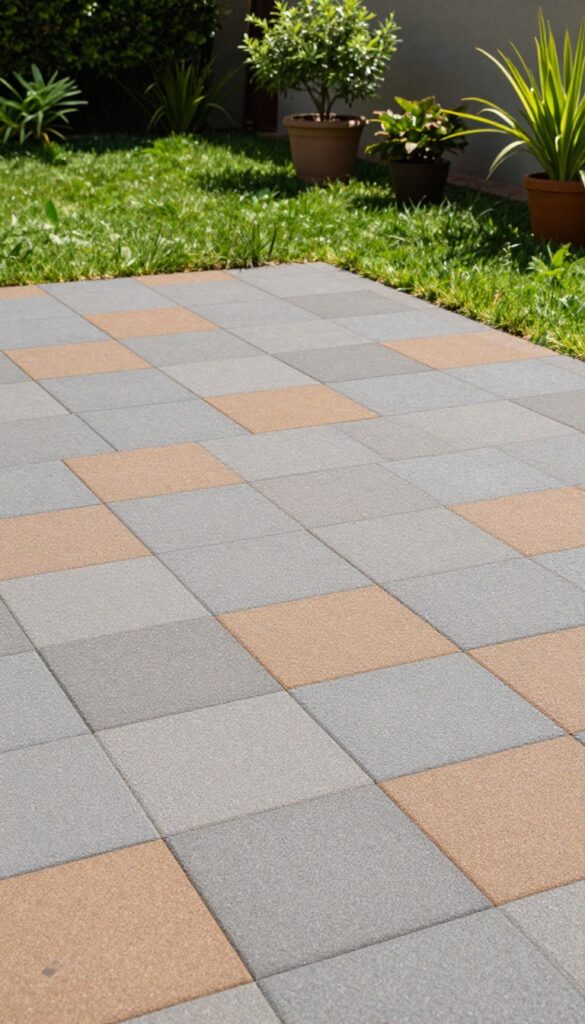
If you want a patio floor that’s soft underfoot, safe for kids, and surprisingly stylish, rubber mulch or interlocking playground tiles are a smart pick. These materials are often used in playgrounds, but they translate beautifully to residential patios, especially if you have little ones or just love a cushioned surface. Best of all, they come in a range of colors and are a breeze to install, so you can refresh your space in an afternoon.
Rubber mulch and playground tiles are two distinct options, each with its own perks. Rubber mulch is loose and poured like traditional mulch, while playground tiles are solid, interlocking squares. Both are made from recycled rubber, making them an eco-friendly choice that’s also gentle on knees and bare feet.
Why Rubber Wins For Comfort And Safety
The biggest draw is the cushioning. Rubber absorbs impact, so it’s perfect for areas where kids play or where you might stand for long stretches. It’s also slip-resistant, even when wet, and it drains well, so puddles aren’t a problem.
Plus, rubber doesn’t rot, splinter, or attract pests, making it a low-maintenance alternative to wood or grass.
Color And Style Options
Gone are the days of boring black rubber. You can find rubber mulch in earthy tones like brown, green, or red, and playground tiles in a rainbow of colors, from muted grays to vibrant blues. Mix and match tiles to create a checkerboard or geometric pattern, or stick with a single color for a clean, modern look.
The variety lets you tailor the patio to your home’s style.
Installation And Cost
Rubber mulch is the easiest—just spread it over a weed barrier and level it out. Playground tiles are a bit more involved but still DIY-friendly: they snap together like puzzle pieces over a flat surface. Both are budget-friendly, with rubber mulch costing around $10–$15 per square foot and tiles slightly more, but still far less than stone or pavers.
You can install them yourself in a day, saving on labor costs.
Maintenance And Longevity
Rubber is incredibly durable and can last for years without fading or breaking down. Rubber mulch may need occasional topping up, but it doesn’t decompose like wood. Tiles are easy to clean with a hose, and if one gets damaged, you can replace just that piece.
This makes them a practical, long-term investment that still fits a tight budget.
11. DIY Concrete Pavers with Molds
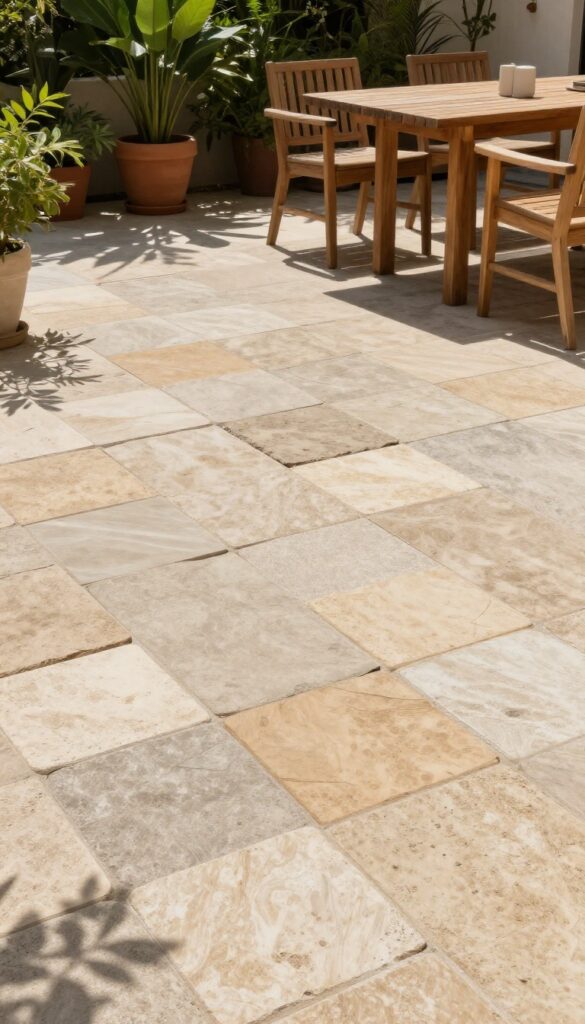
Making your own concrete pavers might sound like a weekend project for the overly ambitious, but with reusable molds, it’s surprisingly doable—and the payoff is huge. You get to pick the exact shape, color, and finish, so your patio floor looks like it was custom-made for your space. The best part?
You can create a high-end look for a fraction of what store-bought pavers would cost.
DIY concrete pavers give you total control over the final look. You can choose from molds that mimic natural stone, geometric shapes, or even large-format tiles. By mixing your own concrete, you can add pigments to match your home’s exterior or create a subtle mottled effect.
The process is straightforward: prepare the base, mix the concrete, pour into molds, and let them cure. Once they’re set, you lay them just like regular pavers. It’s a bit of work, but the result is a patio floor that looks like it cost three times as much.
Choosing The Right Mold
The mold you pick sets the tone for your entire patio. Square or rectangular molds give a clean, modern look, while interlocking shapes create a more traditional feel. You can find molds in various sizes, from small pavers to large slabs.
If you want a natural stone appearance, look for molds with irregular edges and texture. Consider the scale of your patio: bigger molds mean fewer pieces to make and install, which saves time.
Mixing And Coloring Concrete
The magic happens when you add color. You can buy liquid or powder pigments and mix them into the concrete before pouring. For a more organic look, try swirling two colors together or adding a surface hardener.
Don’t forget to use a release agent on the molds so the pavers pop out easily. A concrete mixer or a sturdy wheelbarrow and a hoe will do the job—just make sure the mix is consistent and not too wet.
Laying And Finishing Your Pavers
Once your pavers are cured (usually 24 to 48 hours), you can lay them on a bed of sand or gravel. Make sure the base is level and compacted. After placing the pavers, fill the joints with sand or polymeric sand to lock them in place.
You can also seal the pavers to protect them from stains and enhance the color. With a little patience, you’ll have a patio floor that looks professionally installed.
FAQ
What is the cheapest patio floor option?
The cheapest options are usually painted concrete, gravel, or peel-and-stick tiles. All three are low-cost and can be done as DIY projects, saving even more money.
Can I put peel-and-stick tiles directly on concrete?
Yes, as long as the concrete is clean, dry, and smooth. Make sure to fill any cracks and apply a primer if needed for better adhesion.
How long do painted concrete patios last?
With proper preparation and a high-quality exterior paint or stain, a painted concrete patio can last 2-5 years. Sealing it will extend the life.
Are rubber patio tiles durable?
Yes, rubber tiles are highly durable and weather-resistant. They can handle heavy foot traffic and are also slip-resistant, making them a safe choice.
Do I need to seal DIY concrete pavers?
Sealing is recommended to protect them from moisture and stains. A good sealer will also enhance the color and make them last longer.
Conclusion
Upgrading your patio floor doesn’t have to drain your savings. With a little effort and some smart material choices, you can achieve a custom look that feels high-end and personal. Start with one of these ideas, and you’ll be amazed at the transformation.
Remember, the best patio is the one you actually enjoy, so pick a style that fits your taste and budget. Now go make your outdoor space something special.