10 Peel & Stick Floor Tile Ideas for Quick Bathroom Fixes
Your bathroom floor is cracked, dated, or just plain boring, and you want it fixed before the weekend is over. Peel and stick tiles let you skip the contractor, the demolition, and the mess. You just clean the surface, peel the backing, and press each tile into place.
Most options cost a fraction of real tile, and many are waterproof enough for daily shower steam. Renters love them because they lift off without wrecking the original floor. Homeowners use them to refresh a powder room or guest bath in an afternoon.
The ten ideas below cover classic looks, bold patterns, and everything in between. Pick one that fits your space, or mix a few for something custom.
1. Classic Black and White Checkerboard
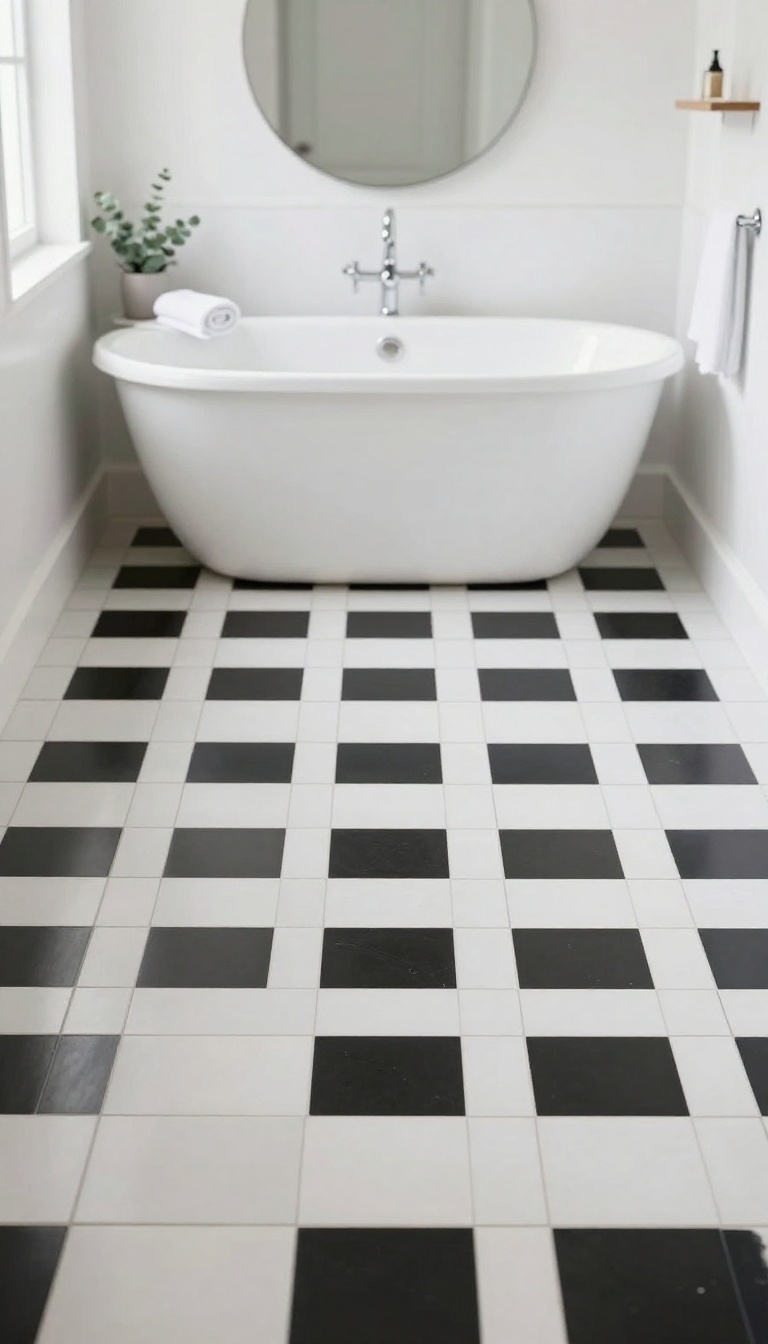
A black and white checkerboard floor never really goes out of style. It shows up in old diners, Parisian apartments, and brand-new bathrooms, and it looks just as good in peel and stick form as it does in real tile. The pattern is simple: alternate black and white squares in a grid.
That's it. But the result is bold enough to anchor a whole room without needing much else. It's also one of the most forgiving floors you can install.
Dark squares hide dust, light squares hide water spots, and the busy pattern masks crumbs and stray hairs between cleanings.
Checkerboard works because it plays with contrast and scale. Small squares feel busy and retro. Large squares feel cleaner and more modern.
You get to pick which version fits your bathroom. Peel and stick versions usually come in 12×12 inch squares, so a standard size gives you a classic look with minimal cutting. Some brands sell pre-arranged sheets that lock the pattern together, which takes the guesswork out of lining things up.
The trick is getting the grid straight. If your first row drifts, the whole floor drifts with it.
Getting The Grid Straight
Start from the center of the room, not the wall. Walls are rarely square, and if you build from one, the pattern will look crooked by the time you reach the other side. Snap a chalk line down the middle of the floor in both directions.
Lay your first tile where the lines cross, then work outward in quadrants. This keeps the pattern balanced and pushes any awkward cuts to the edges where they're less noticeable.
Choosing The Right Square Size
Small bathrooms look better with smaller squares, usually 6 to 8 inches. Big squares in a tiny powder room can feel overwhelming and make the space look smaller. Larger bathrooms can handle 12-inch squares or even bigger.
If you want a modern feel, go bigger. If you want vintage charm, go smaller and add a border.
Making It Last
Clean the floor thoroughly before you start. Peel and stick tiles need a smooth, dry, dust-free surface to grip properly. Any grit or moisture underneath will cause corners to lift later.
Press each tile down firmly, then roll over the whole floor with a rolling pin or a clean paint roller. This pushes out air bubbles and helps the adhesive bond. Avoid mopping for the first 24 hours so everything sets.
2. Faux Marble for a Luxe Look
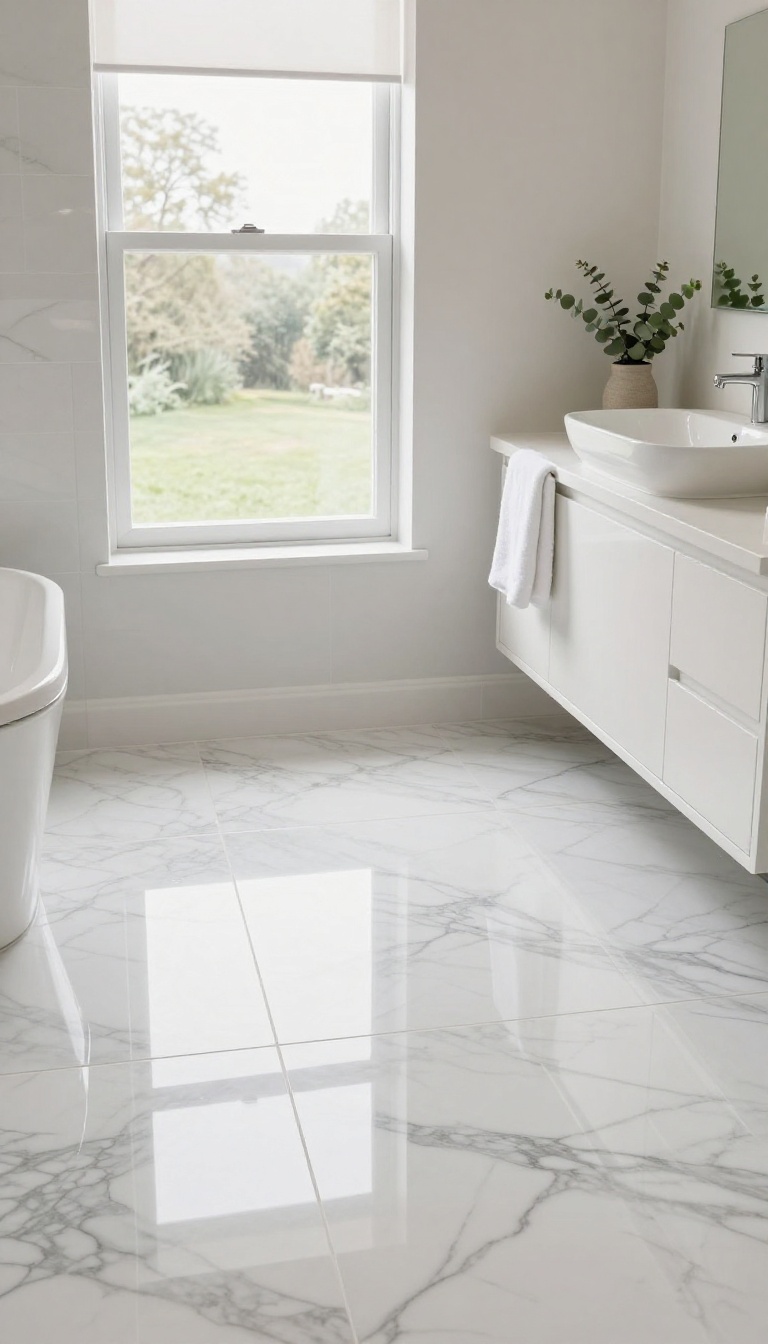
Marble has a way of making any bathroom feel like a fancy hotel suite. But real marble costs a fortune and needs constant sealing. Peel-and-stick faux marble gives you that same high-end vibe without the price tag or the upkeep.
These tiles come in glossy or matte finishes, with veining that looks surprisingly real. They bounce light around, so small bathrooms feel bigger and brighter. And because they're peel-and-stick, you can install them over your existing floor in a few hours.
If you want a quick upgrade that screams luxury, faux marble is a solid choice. Just pick a pattern that matches your style and stick with it.
Faux marble peel-and-stick tiles are a game-changer for renters and homeowners alike. They mimic the look of natural stone, but they're made from vinyl or laminate that's easy to cut and install. You don't need any special tools—just a utility knife, a ruler, and a little patience.
One of the biggest perks is how much light they reflect. In a small bathroom, that can make a huge difference. Dark floors can make a space feel cramped, but a light marble pattern opens things up.
It's like adding a window where there isn't one. Another bonus: they're water-resistant. Most peel-and-stick tiles are designed to handle bathroom humidity, so you don't have to worry about warping or peeling.
Just make sure you clean and dry the floor before you start. When shopping, look for tiles with a high-gloss finish if you want maximum shine. Matte options are better if you prefer a more subtle, natural look.
Either way, you'll get that marble elegance without the maintenance.
Choosing The Right Marble Pattern
Not all faux marble looks the same. Some have bold, dramatic veins, while others are subtle and soft. For a small bathroom, go with lighter colors and delicate veining—it keeps the space feeling airy.
If you have a larger bathroom, you can handle darker tones or more intense patterns. Also, consider the grout lines. Peel-and-stick tiles often have a grout line printed on them, so pick a pattern that matches your existing fixtures.
Installation Tips For A Seamless Look
Start with a clean, dry floor. Any dust or moisture will keep the tiles from sticking. Plan your layout before you peel anything—dry-fit a few tiles to see how they look.
Work from the center of the room outward to keep things symmetrical. Press each tile firmly, and roll over them with a rolling pin or a clean paint roller to ensure good adhesion. If you need to cut around toilets or sinks, use a sharp utility knife and take your time.
Making It Last
Peel-and-stick tiles are durable, but they're not indestructible. Avoid dragging heavy objects across them, and wipe up spills quickly. For cleaning, use a mild cleaner and a soft mop—harsh chemicals can dull the finish.
If a tile ever lifts, you can warm it with a hairdryer and press it back down. With a little care, your faux marble floor can look great for years.
3. Wood-Look Planks for Warmth
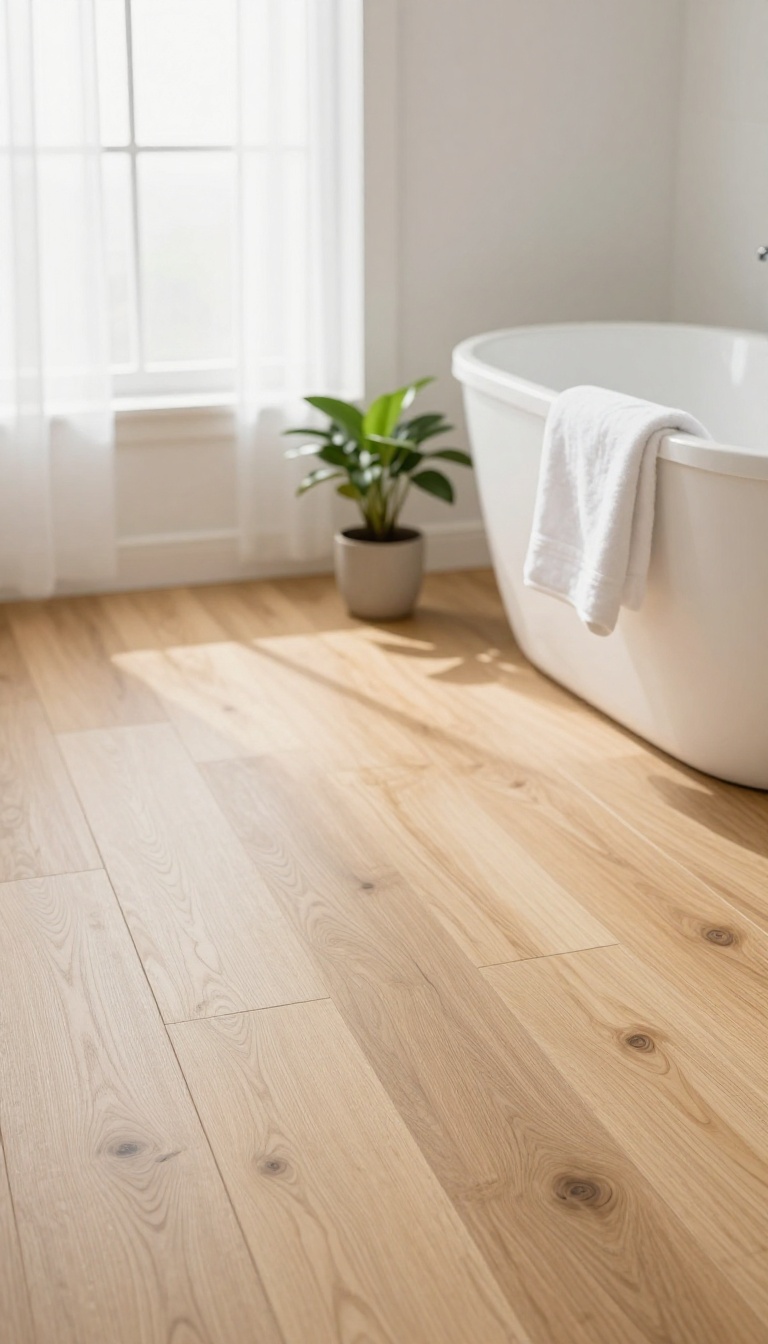
Tile floors have a way of making a bathroom feel cold underfoot, especially on winter mornings. Wood-look peel-and-stick planks solve that problem without the upkeep of real hardwood. They give you the grain, color, and coziness of wood while standing up to steam, splashes, and damp towels.
Most planks are made from vinyl or laminate with a waterproof backing, so moisture stays where it belongs. You get that warm, spa-like feel without worrying about warping or swelling. It is one of the easiest ways to soften a bathroom that feels more clinical than calm.
Wood-look planks come in long, narrow strips that mimic real hardwood boards. You lay them in a staggered pattern, just like traditional flooring, and the seams disappear into the grain. The result looks intentional and high-end, even though the install takes an afternoon.
Color choice matters more here than with tile. A light oak or ash keeps a small bathroom bright and airy. A walnut or espresso tone adds drama and makes a larger space feel grounded.
Either way, the wood grain brings a natural texture that flat tile simply cannot match.
Pick The Right Tone For Your Space
Light wood tones open up tight bathrooms and reflect whatever natural light you have. Medium browns work almost anywhere and hide dust better than pale planks. Dark woods look rich and moody, but they show water spots, so keep a towel handy for quick wipe-downs.
Lay Them Like Real Hardwood
Stagger the short ends so no two seams line up in a straight row. Leave a tiny gap at the walls and cover it with baseboard or trim later. Press each plank firmly, and roll over the whole floor with a hand roller to lock the adhesive.
Keep The Warmth Without The Worry
Vinyl wood-look planks handle humidity far better than real wood, but standing water is still the enemy. Dry up puddles near the tub and sink instead of letting them sit. A quick sweep or damp mop keeps the grain looking fresh for years.
4. Geometric Patterns for a Modern Twist
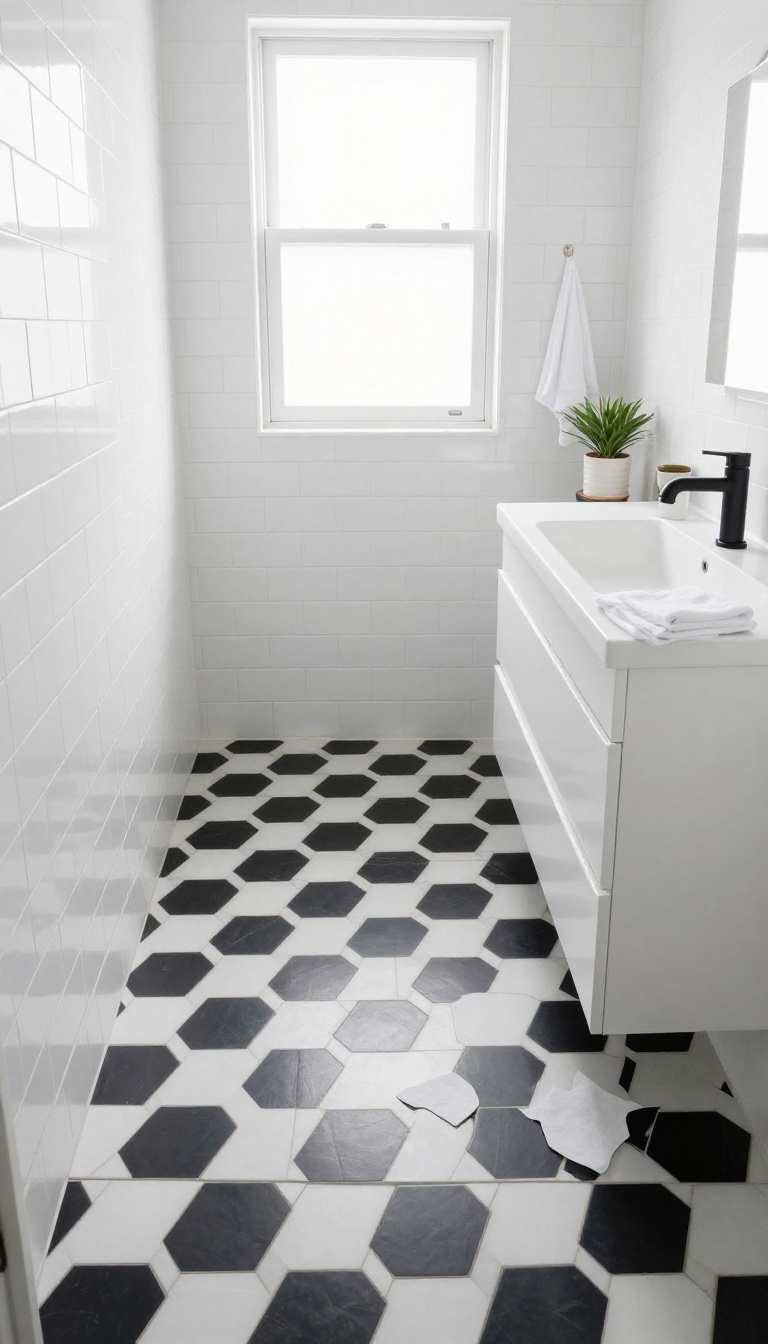
Geometric peel and stick tiles bring a designer edge to small bathrooms without a big commitment. Hexagons, triangles, and chevrons add movement and personality, making even a tiny powder room feel intentional. The key is to let the pattern take center stage while keeping everything else calm and simple.
Geometric patterns work because they create a focal point. In a small bathroom, that focal point can distract from awkward layouts or dated fixtures. You just need to choose a pattern that fits your style and install it correctly.
Start by picking a shape that complements your space. Hexagons feel modern and organic, while triangles and chevrons add sharp energy. Color matters too: bold black-and-white combos are classic, but soft pastels or metallic finishes can feel fresh.
Once you've chosen, keep the rest of the room neutral so the floor does the talking.
Choosing The Right Shape
Hexagons are a safe bet for beginners because they fit together easily and hide minor alignment mistakes. Triangles and chevrons make a bolder statement but require more precision during installation. If you're unsure, order a sample pack and lay a few tiles on the floor to see how they look in your lighting.
Color And Contrast
High-contrast patterns like black and white create a dramatic, graphic look. For a softer feel, try muted tones like gray, sage, or blush. Metallic finishes in gold or silver add a touch of glam without overwhelming the space.
Just remember: the busier the pattern, the simpler your walls and accessories should be.
Installation Tips For Patterns
Geometric tiles need careful planning to keep lines straight. Start from the center of the room and work outward so any cut tiles end up along the edges. Use a spacer or a laser level to maintain alignment.
Peel and stick tiles are forgiving, but you can't reposition them forever, so press firmly once you're happy with the placement.
5. Subway Tile for a Clean, Classic Vibe
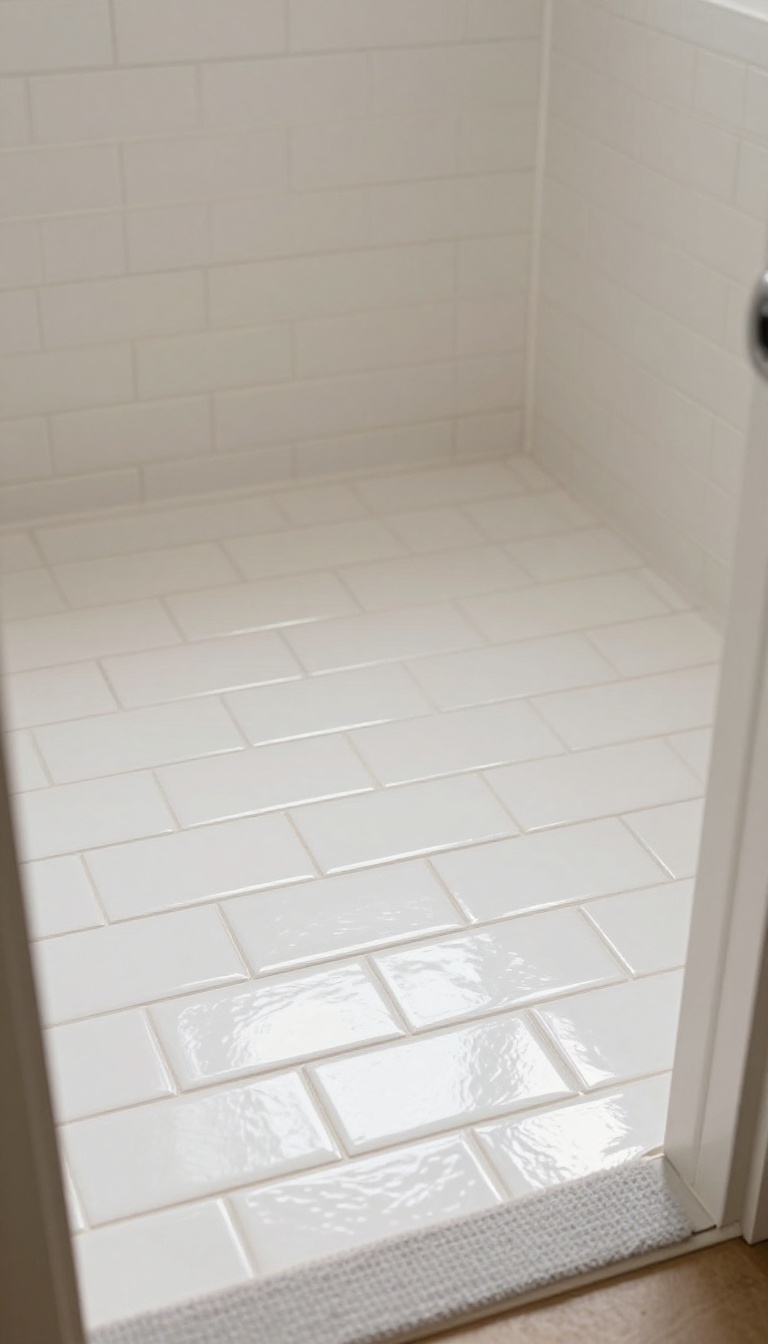
Subway tile earned its fame on kitchen backsplashes and bathroom walls, but it works just as well underfoot. In peel-and-stick form, those familiar rectangular tiles give you a floor that looks tidy, timeless, and surprisingly high-end. It's a safe pick that plays nice with almost any color scheme, from crisp white to warm gray to deep navy.
You get the classic look without the grout lines, the mortar, or the mess.
Subway tile is the little black dress of bathroom design. It never looks dated, it never clashes, and it makes everything around it look better. On the floor, that same 3-by-6-inch shape creates a subtle brick pattern that draws the eye without shouting for attention.
Peel-and-stick versions come in long strips or individual tiles, so you can choose how much control you want. Most have a glossy or matte finish that mimics ceramic, and some even have a slight bevel for depth. The result is a floor that feels polished but not precious.
One thing to keep in mind: subway tile floors show crumbs and hair more than you'd expect. A quick sweep or a damp mop keeps them looking sharp, which is a small trade-off for such a durable look.
Why It Works In Small Bathrooms
The rectangular shape tricks the eye into seeing more space. Run the tiles horizontally to widen a narrow room, or vertically to make a short room feel longer. Either way, the clean lines keep the floor from feeling busy.
Because subway tile is so neutral, you can go bold with wall color, a patterned shower curtain, or a bright vanity. The floor stays quiet and lets the rest of the room do the talking.
Layouts That Look Expensive
The classic running bond, where each row is offset by half a tile, is the most recognizable. But you can also try a stacked layout for a more modern, grid-like look. Herringbone is another option, though it takes more cutting and patience.
If you're using peel-and-stick strips, check the backing before you commit. Some brands let you reposition them during installation, which makes getting those straight lines a lot less stressful.
Pairing Subway Tile With Other Finishes
Subway tile floors love contrast. Pair white tiles with dark grout lines for a graphic punch, or go with a light gray tile and white grout for a softer, seamless feel. Black and white is always a winner, but so is warm beige with brass fixtures.
For a more custom look, mix in a border of larger tiles around the perimeter. It frames the room and adds a designer touch without much extra work.
6. Terracotta for a Warm, Earthy Feel
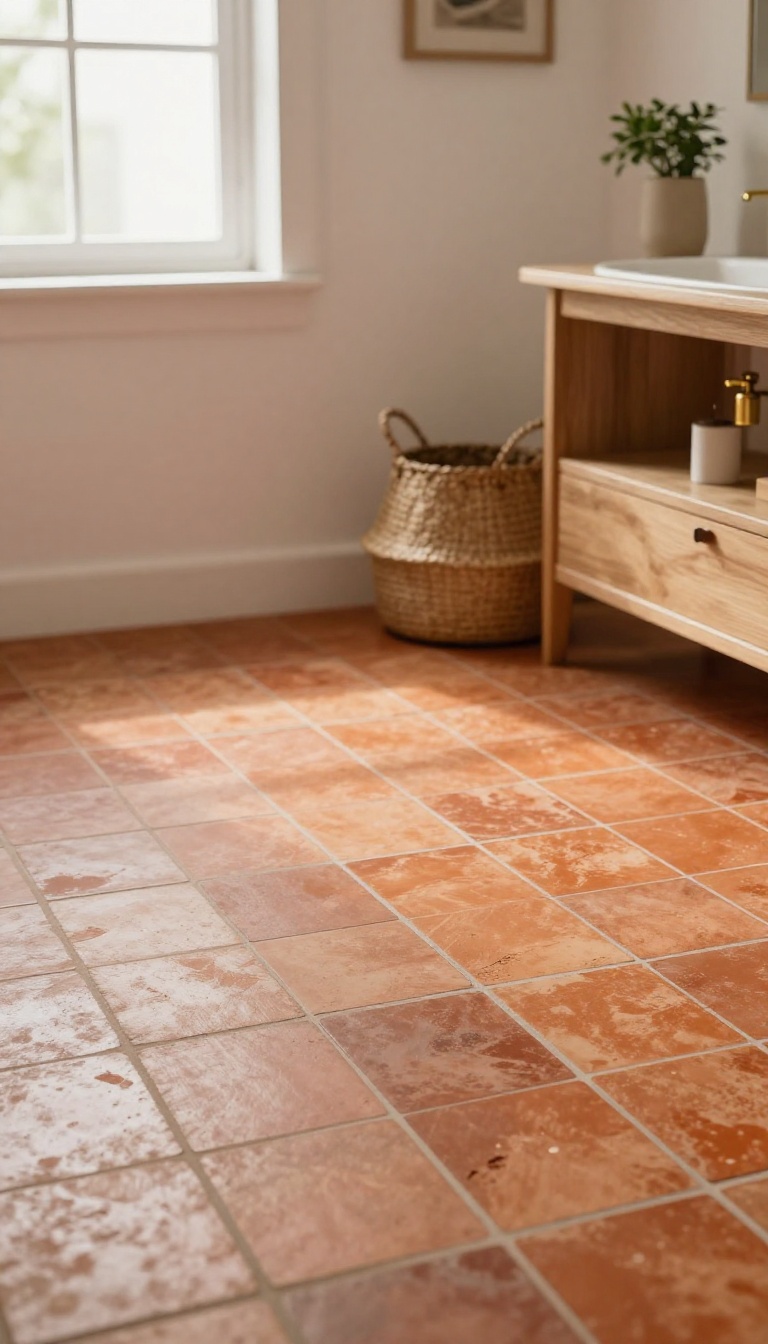
Terracotta has been a staple in Mediterranean and Southwestern homes for centuries, and for good reason. Its rich, earthy tones instantly warm up a space, making even a small bathroom feel cozy and inviting. But real terracotta tiles are heavy, require sealing, and can crack if you drop something on them.
Peel and stick terracotta tiles give you that same rustic charm without the hassle. They're lightweight, easy to install, and come in a range of finishes that mimic the real thing beautifully.
These tiles work best in bathrooms with natural light or warm-toned fixtures. They pair well with wood accents, woven baskets, and plants for a relaxed, organic vibe. If your bathroom feels sterile or cold, terracotta can soften the whole look.
Just avoid pairing them with cool grays or chrome if you want to keep the warmth. With peel and stick, you can even mix in a few patterned tiles for interest without committing to a full floor of them.
Choosing The Right Shade
Terracotta isn't just one color. You'll find everything from pale sandy tones to deep burnt orange. Lighter shades can make a small bathroom feel bigger, while darker, richer hues add drama.
Consider the lighting: in a dim room, go lighter to brighten things up. If you have plenty of natural light, you can handle deeper, more saturated colors. Order a sample or two before you buy a whole box.
Installation Tips For A Natural Look
Real terracotta tiles have slight variations in color and texture, so aim for a similar effect with your peel and stick tiles. Don't worry about making every tile perfectly aligned; a little imperfection adds character. Use a grout pen or tile grout in a matching earthy tone to fill the gaps between tiles.
This helps them look more like traditional terracotta. Also, make sure your floor is completely clean and dry before you start. Any dust or moisture can keep the adhesive from sticking properly.
Maintenance And Care
One of the best things about peel and stick terracotta is how easy it is to care for. Unlike real terracotta, you don't need to seal it regularly. Just sweep or vacuum to remove dust, then damp mop with a mild cleaner.
Avoid harsh chemicals or abrasive scrubbers, which can dull the finish. If a tile gets damaged, you can simply peel it up and replace it with a new one. That's a lot simpler than replacing a whole section of real tile.
7. Mosaic Sheets for Small Spaces
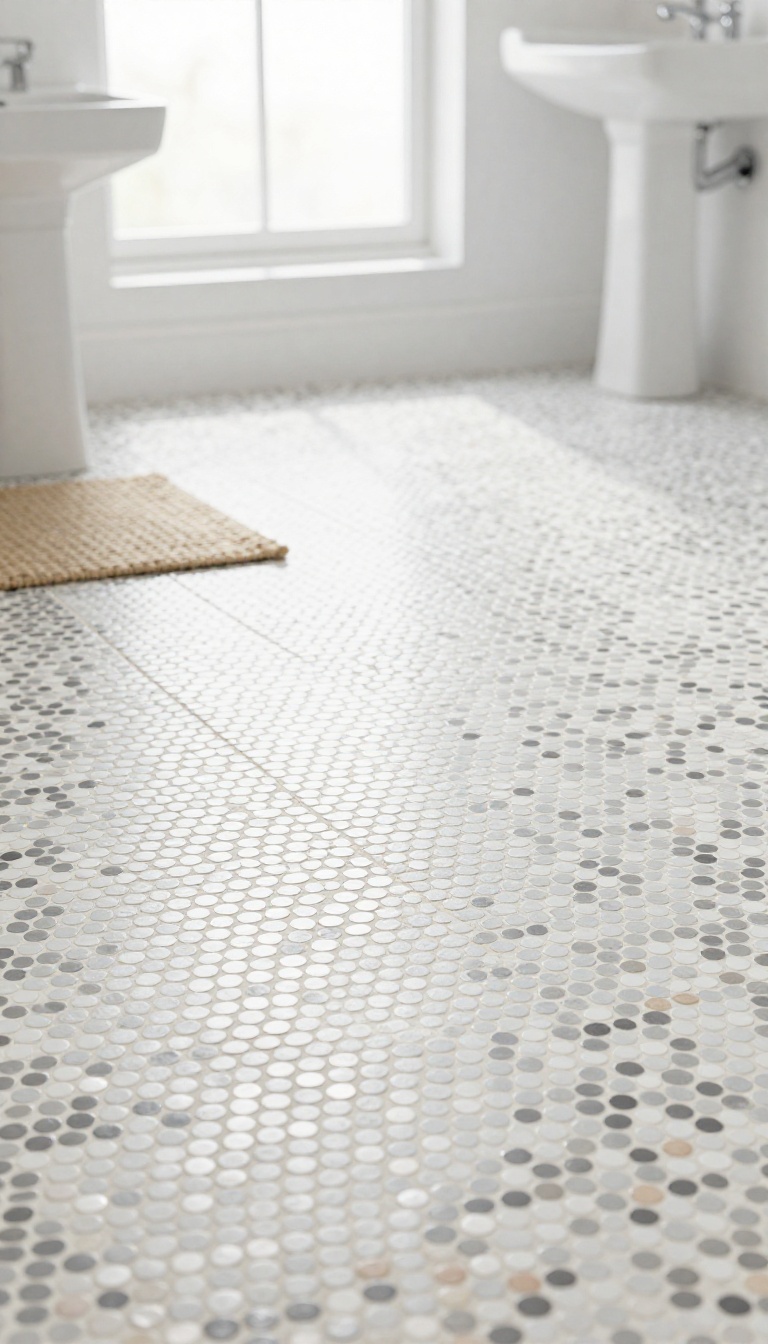
Mosaic sheets pack a ton of detail into a tiny footprint, which makes them a perfect match for powder rooms and half baths. Instead of laying individual tiles one by one, you get a whole grid of them attached to a mesh backing. You cut the sheet to size, peel, and press.
That's it.
The small tiles create a custom look that would cost a fortune in real stone or ceramic. Because the sheets are flexible, they hug slight dips and curves in the floor without cracking. And since most powder rooms are only 15 to 30 square feet, you can finish the whole job in under an hour.
Why Mosaic Works In Tight Spots
Small tiles mean more grout lines, and more grout lines mean better grip underfoot. That's a quiet win in a room where someone might step in with wet hands or bare feet. The busy pattern also hides dust, lint, and the occasional splash better than a solid color.
If your powder room has an awkward nook or a pedestal sink, mosaic sheets bend and trim around it without a fight.
Picking The Right Sheet Size
Most peel and stick mosaic sheets come in 12×12 or 10×10 squares. Measure your floor first, then buy 10 percent extra for cuts and mistakes. A 12×12 sheet covers one square foot, so a 5×6 powder room needs about 30 sheets.
If you choose a penny round or hexagon pattern, expect more waste because the edges don't line up as neatly.
Installation Tips For A Clean Finish
Start from the doorway and work inward so cut edges land against the walls. Use a utility knife and a straightedge to trim sheets, and change the blade often. Press each sheet down firmly with a grout float or a rolling pin to set the adhesive.
Wait 24 hours before mopping so everything cures. If you're renting, test a corner first to make sure the tile lifts cleanly later.
8. Bold Colors for a Fun Pop
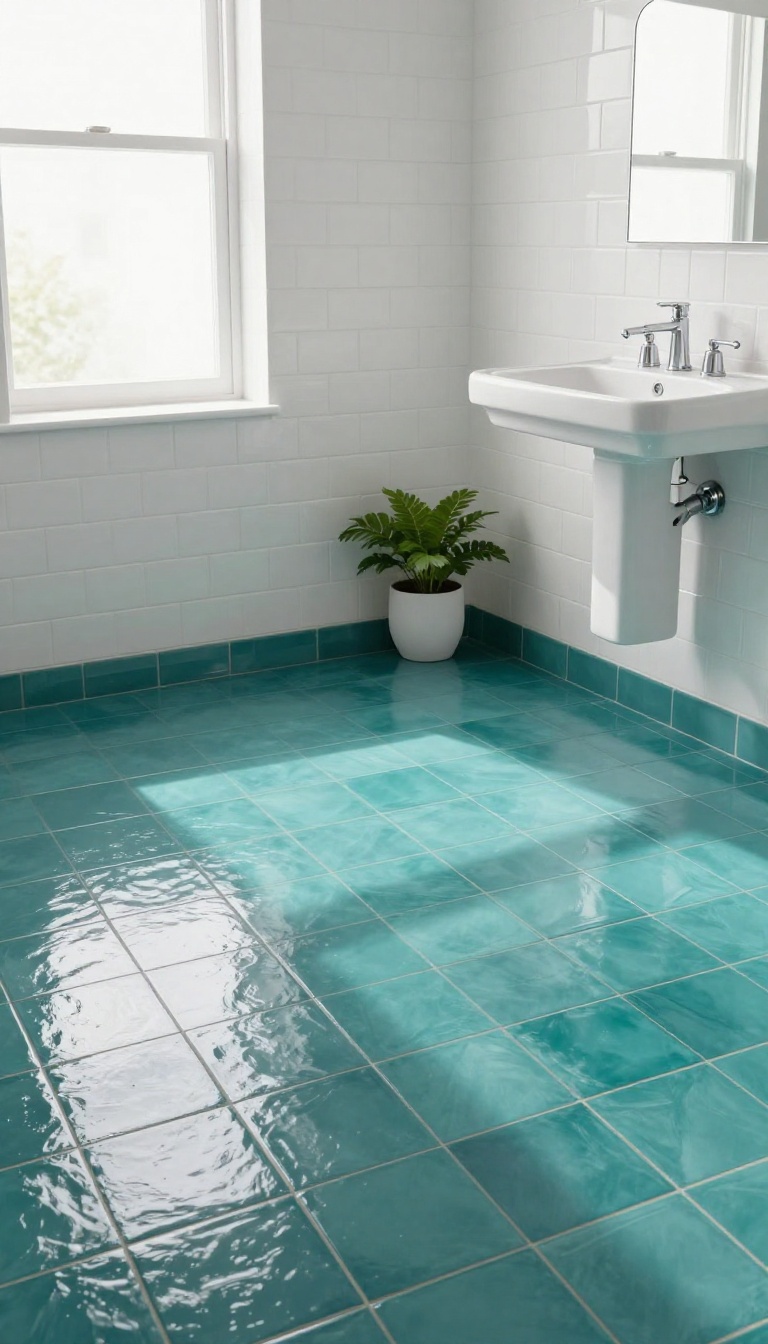
Neutral floors play it safe, but a splash of real color can wake up a bathroom that feels flat. Peel-and-stick tiles come in shades that go far beyond beige and gray, so you can pick something that actually makes you smile. Use one bright tone as an accent, or commit to a full-color floor for a look that feels custom.
Color changes the mood of a room fast. A sunny yellow or deep teal can make a small bathroom feel intentional instead of forgotten. The best part is that you can test a bold shade without the cost or permanence of real tile.
Bold color works best when you treat it like a design choice, not a random pick. Think about the light in your bathroom, the fixtures you already have, and how much color you can live with day after day. A little planning keeps the result fun instead of chaotic.
Start by deciding whether you want color as a supporting player or the main event. An accent strip or a border of bright tiles adds energy without overwhelming the space. A full floor in one strong hue makes a statement that carries the whole room.
Once you choose your direction, installation is the same as any peel-and-stick project. Clean the floor, plan your layout, and press each tile down firmly. The color does the heavy lifting from there.
Pick A Shade That Works With Your Fixtures
Look at your sink, tub, and cabinet colors before you buy. Warm whites and brass pair well with mustard, coral, or olive. Cool grays and chrome look sharp next to navy, emerald, or bright turquoise.
If your fixtures are basic white, almost any bold shade will work. That gives you room to choose based on the feeling you want, not just what matches.
Try An Accent Border First
Not ready for a full color floor? Run a border of bright tiles around the perimeter or create a simple stripe near the vanity. This adds a pop without turning the whole room into a color experiment.
An accent also helps define zones in a shared bathroom. It can separate the shower area from the main floor while keeping the overall look cohesive.
Go All-in With One Strong Hue
A single saturated color across the entire floor makes a small bathroom feel deliberate and stylish. Deep green, terracotta red, or cobalt blue all work well when the rest of the room stays simple. Keep walls and accessories calm so the floor can be the star.
A few white towels and a plain shower curtain are enough to balance the boldness.
Mix Two Colors For A Custom Look
Pairing two bold shades, like teal and coral or black and white with one bright accent, creates a checkerboard or striped pattern that feels personal. Just keep the rest of the room quiet so the floor doesn't compete. Stick to two colors plus a neutral to avoid visual clutter.
That combo gives you a designer look without hiring one.
9. Faux Stone for a Natural Look
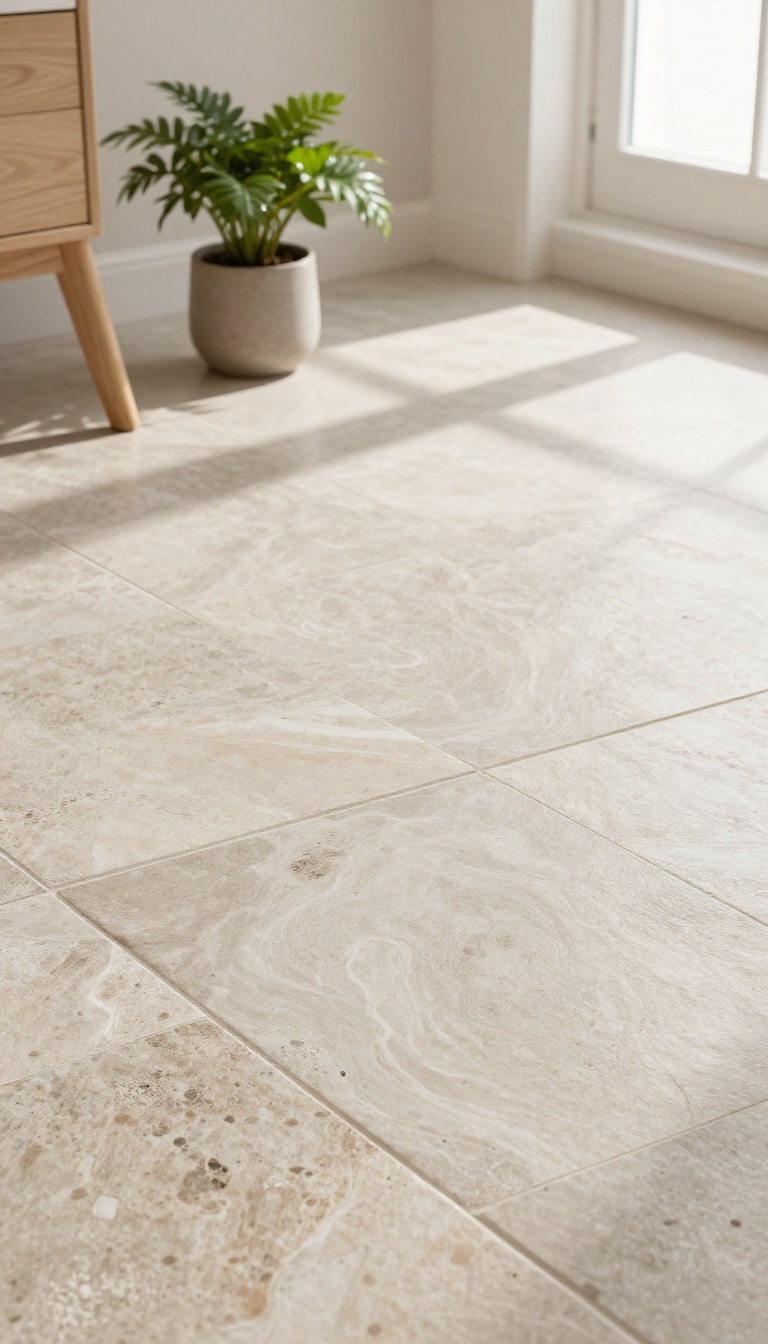
Real stone floors look incredible, but they come with a hefty price tag and a lot of weight. Faux stone peel and stick tiles give you that same earthy, textured vibe without the installation headaches. They're perfect for bathrooms with a rustic or organic theme, and they're a breeze to clean.
These tiles mimic the look of slate, travertine, or even river rock, adding depth and character to your floor. The peel-and-stick version is lightweight and easy to cut, so you can tackle odd corners and around the toilet without special tools. Plus, they're waterproof and resistant to mold, making them a smart choice for humid bathrooms.
Choosing The Right Stone Look
Faux stone comes in a range of styles, from smooth slate to rugged fieldstone. Pick a pattern that matches your bathroom's existing colors and textures. If you have a lot of wood or natural elements, a warm travertine or sandstone look can tie everything together.
For a cooler, more modern feel, go with slate or basalt.
Installation Tips For A Natural Finish
Start with a clean, dry floor. Lay out a few tiles without peeling the backing to find the best pattern. Faux stone often has variation between tiles, so mix them up for a more organic look.
Cut tiles to fit around edges and fixtures using a utility knife or scissors. Press firmly and roll a heavy object over them to ensure good adhesion.
Keeping It Clean And Fresh
One of the best things about faux stone is how easy it is to maintain. Sweep or vacuum regularly to remove grit, and damp mop with a mild cleaner. Avoid harsh chemicals that could dull the finish.
With minimal care, your faux stone floor will keep looking great for years.
10. Mix and Match Patterns for Custom Style
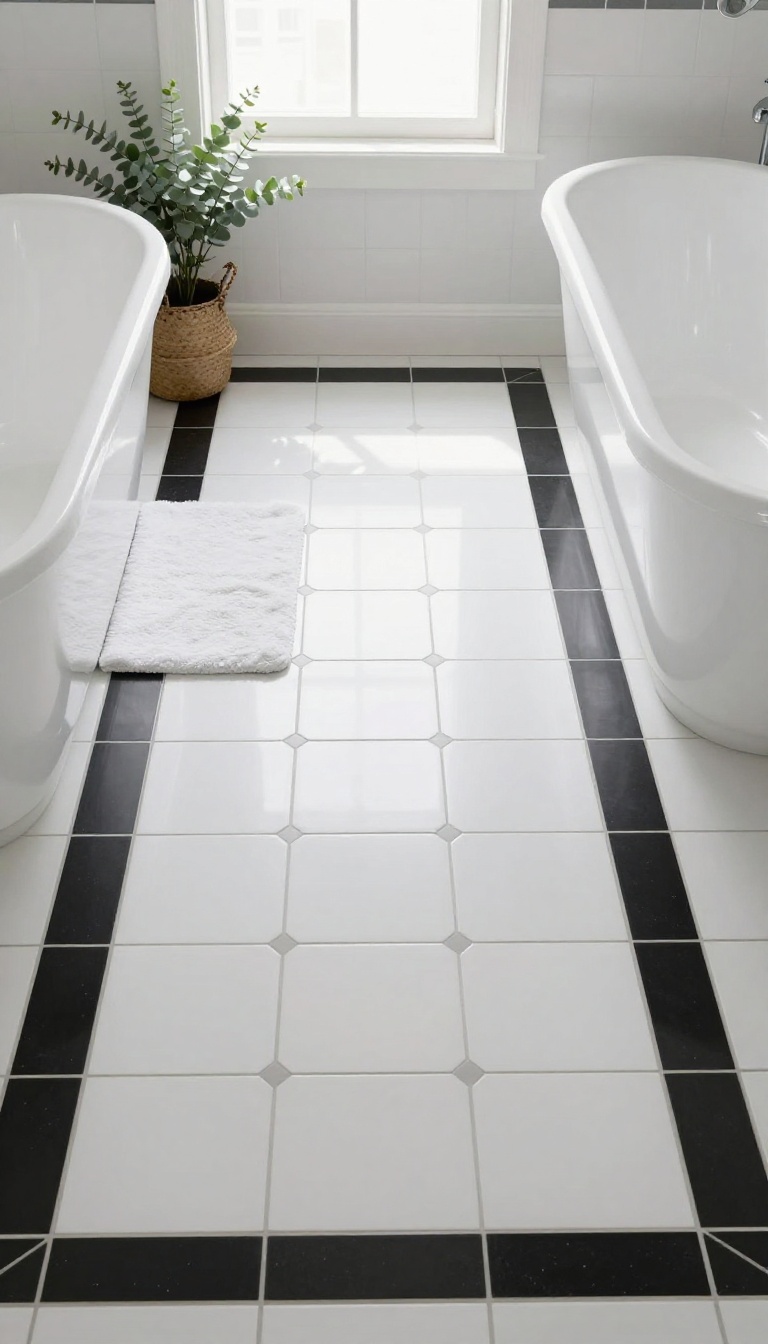
Why settle for one pattern when you can blend two or three? Mixing peel-and-stick tiles lets you create a floor that feels custom-made for your bathroom. You can combine colors, patterns, or even shapes to get a look that's all your own.
The best part? You don't need a designer's eye to pull it off. A few simple rules keep the result cohesive instead of chaotic.
And since these tiles are affordable, you can experiment without a big commitment.
Start by picking a focal pattern that you love. It could be bold geometrics, classic marble, or playful terrazzo. Then choose a solid or subtle tile to balance it out.
Use the solid tile for most of the floor and the pattern as an accent—like a border, a rug shape, or a stripe down the middle. If you want to mix two patterns, make sure they share a common color. For example, a black-and-white hexagon tile pairs well with a black-and-white striped tile.
The shared color ties them together, so the mix looks intentional. You can also play with scale. A large pattern next to a small one creates contrast without clashing.
Just keep the color palette tight—two or three colors max. That way, the floor feels curated, not busy. Don't forget about grout lines.
Peel-and-stick tiles often have a grout line printed on them. If you mix tiles with different grout colors, the seams might look off. Stick to the same grout color across all tiles for a seamless look.
When you're laying out your design, dry-fit the tiles before peeling the backing. This lets you adjust the arrangement until it feels right. Take a photo from a few angles to check the balance.
Once you're happy, peel and stick.
Pick A Base And An Accent
Choose one tile as the main floor and another as the accent. The main tile should be calm—like a solid or subtle pattern. The accent can be bold.
Use the accent sparingly: a border around the perimeter, a stripe down the center, or a square under the sink. This keeps the room from feeling overwhelmed.
Stick To A Tight Color Palette
Two or three colors max. Any more and the floor starts to look like a patchwork quilt. Pick one dominant color, one secondary, and maybe a small pop of a third.
If you're unsure, pull colors from your shower curtain, towels, or wall paint. That guarantees everything ties together.
Play With Scale And Shape
Mixing shapes—like hexagons and squares—adds visual interest. Just keep the scale in mind. A tiny hexagon next to a large square can look odd.
Instead, pair a small pattern with a medium or large one. Or use the same shape in two different patterns for a cohesive mix.
Test Your Layout Before You Peel
Lay out the tiles on the floor without removing the backing. Step back and look from the doorway. Adjust until the pattern feels balanced.
You can also use painter's tape to mark borders or stripes. Once you're satisfied, start peeling and pressing. This step saves you from wonky results.
FAQ
How long do peel-and-stick floor tiles last in a bathroom?
With proper installation and care, they can last several years. However, they may not be as durable as traditional tiles, especially in high-moisture areas. Regular cleaning and avoiding standing water will help extend their life.
Can I install peel-and-stick tiles over existing tile?
Yes, as long as the existing surface is clean, flat, and dry. You may need to fill in grout lines with a leveling compound first to ensure a smooth finish. Always check the manufacturer's instructions for specific requirements.
Are peel-and-stick tiles waterproof?
Most are water-resistant, but not fully waterproof. They can handle splashes and humidity, but standing water can cause peeling. It's best to dry up spills promptly and avoid using them in areas with constant moisture, like inside a shower.
How do I clean peel-and-stick floor tiles?
A damp mop with mild soap and water is usually sufficient. Avoid harsh chemicals or abrasive cleaners that can damage the adhesive or finish. Sweep regularly to prevent dirt buildup.
Can I remove peel-and-stick tiles without damaging the floor?
Yes, they are designed to be removable. However, the adhesive may leave residue, especially if left for a long time. You can use a heat gun or hairdryer to soften the adhesive for easier removal.
Conclusion
Peel and stick tiles will not fool anyone into thinking you hired a contractor, and that is fine. They are meant to buy you time, hide a floor you cannot stand, or test a look before you commit to the real thing. Pick one idea that matches your space and your patience level.
Lay a few tiles this weekend, live with them for a week, and see how the room feels. If it works, great. If not, you are only out a few dollars and an afternoon.