15 Simple Backyard Landscaping Ideas with Easy Appeal
Most backyards don't need a full redesign to look good. They need a few smart moves that tidy the edges, soften the hard spots, and make the space feel intentional instead of half-finished. That's exactly what this list is about.
Each of the 15 ideas below is simple enough to tackle over a weekend, often with basic tools and materials you can grab locally. Some add structure, like edged beds or a gravel path where your feet already wear a trail.
Others add comfort, like a small patio, a fire pit, or warm evening lighting. None require a contractor or a big budget.
1. Edge Your Garden Beds for an Instant Clean Line
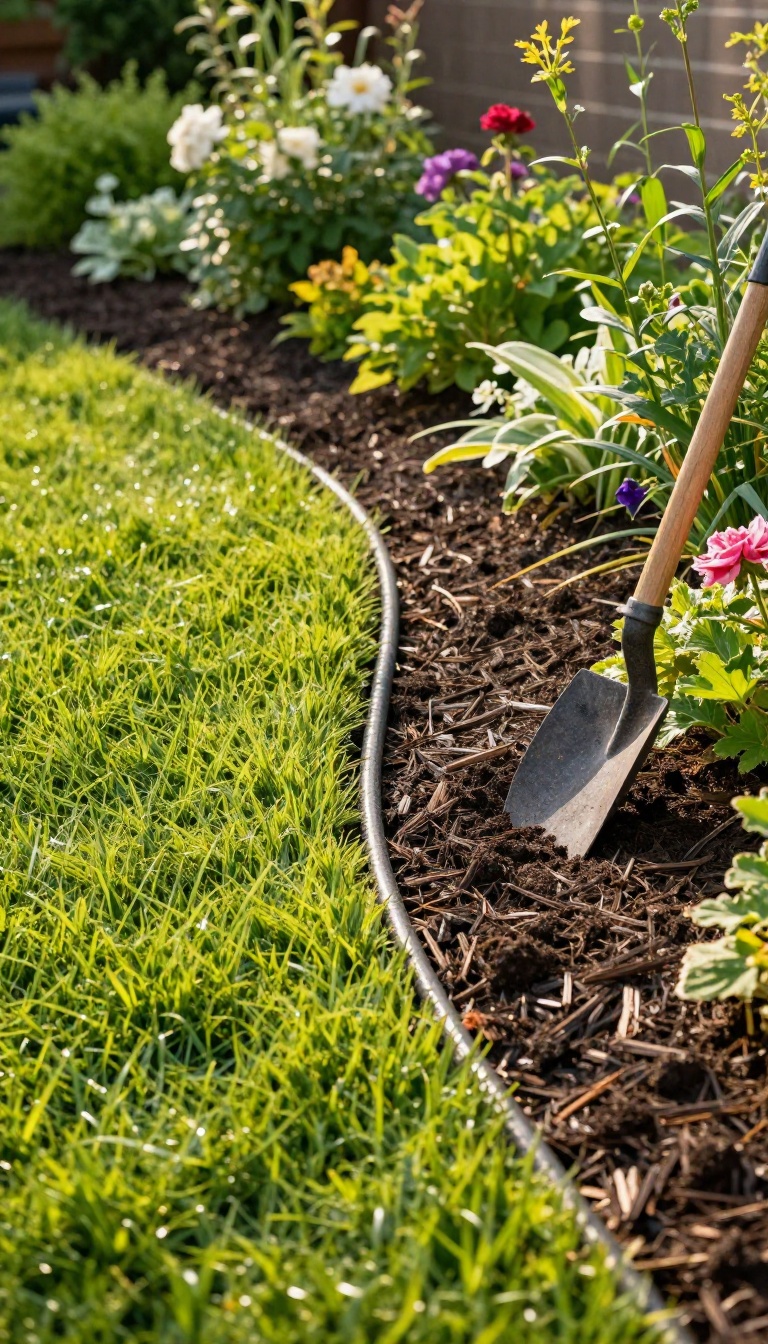
A sharp edge between your garden beds and lawn does more for curb appeal than almost any plant you can buy. It creates a crisp boundary that makes the whole yard look maintained, even if the weeds are winning elsewhere. Best of all, you can cut a fresh edge with a spade in about an hour, and it costs nothing but sweat.
The magic of a good edge is that it tells your eye where to stop. Without one, grass creeps into beds, mulch spills onto the lawn, and everything looks a little fuzzy. With one, the same plants suddenly look intentional, like they belong exactly where they are.
You have two main routes: a natural trench edge or a hard steel edge. Both are cheap, both are DIY-friendly, and both make mowing a breeze because you can run a wheel right along the line without scalping the turf. Start by defining the shape.
A gentle curve often looks more natural than a rigid straight line, especially in a casual backyard. Use a garden hose as a guide, moving it around until the curve feels right. Then grab a flat spade and get to work.
Cut A Trench Edge
Push the spade straight down along your hose line, about 4 to 6 inches deep. Then slice at a slight angle to lift out a wedge of soil, creating a small trench. Toss the soil into the bed or compost it.
Refresh the edge once or twice a year by re-slicing the same line. It's a 15-minute touch-up that keeps everything sharp.
Install Steel Edging
If you want a permanent, zero-maintenance line, go with steel. You can buy 4-foot sections at most home centers. Dig a shallow trench, set the edging so about an inch shows above the soil, and backfill.
It won't rust away, and it holds its shape for decades. It costs a bit more upfront, but you'll never cut that edge again.
Keep It Looking Sharp
Once your edge is in, maintenance is simple. Run a string trimmer along the line every few weeks to keep grass from creeping over. If you went with a trench edge, just re-cut it with a spade each spring.
A little attention goes a long way, and the payoff is a yard that looks professionally tended.
2. Lay a Gravel Path Where Feet Already Tread
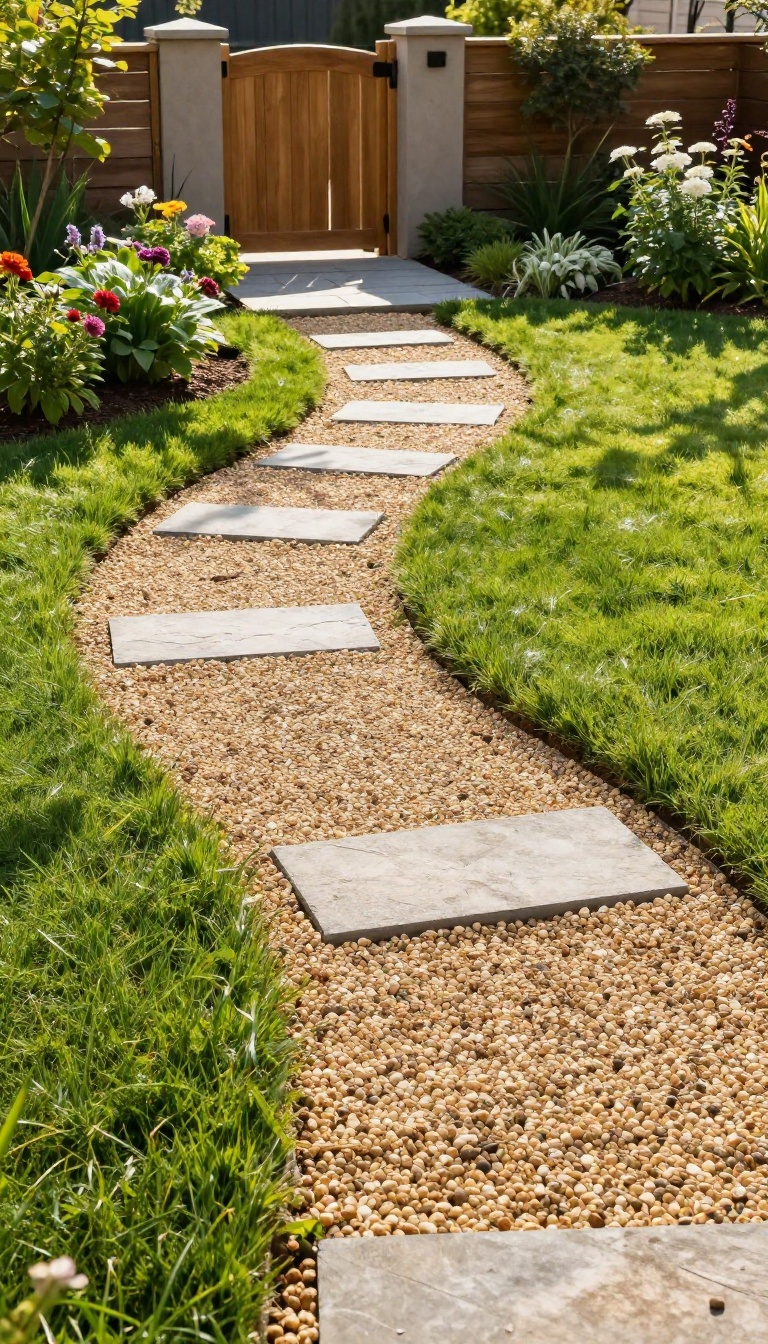
Look at your lawn after a few weeks of summer. You'll probably spot a faint trail—a line where the grass is thinner, worn down by repeated trips from the patio to the shed, the gate to the grill, or the back door to the garden. That worn route is telling you exactly where a path belongs.
Instead of fighting the traffic, lean into it. A simple gravel path or a line of stepping stones turns that muddy shortcut into a clean, defined walkway. It protects the grass, keeps feet out of flower beds, and adds a surprising amount of structure for very little money.
Best of all, you don't need to guess where to put it. Your own feet have already done the planning for you.
A gravel path is one of those projects that looks like you hired someone, but it's really just a weekend of digging, hauling, and smoothing. The key is to work with the route that already exists, not impose a new one. That way, the path feels natural and gets used immediately.
Before you buy a single bag of stone, walk your yard and pay attention. Where does the grass look trampled? Where do you instinctively cut across?
That's your path. Mark it with landscape paint or a garden hose, then step back and check the curve from a few angles. A gentle S-curve usually looks better than a straight line, but if your worn route is straight, keep it straight.
Function first. Once you've settled on the route, you'll need to decide between loose gravel and stepping stones. Both are easy, but they suit different yards and different budgets.
Gravel gives you a continuous surface that's great for wheelbarrows and bare feet. Stepping stones are more minimalist and blend into the lawn. You can even combine them—gravel with a few large stones spaced out for interest.
The actual installation is straightforward. You'll dig out the path about two to three inches deep, line it with landscape fabric to block weeds, and fill it with your chosen material. Tamp it down, wet it lightly, and you're done.
The whole thing can take an afternoon for a short path, or a full weekend if you're covering a long stretch. Don't skip the edging. A simple metal or plastic edge keeps the gravel from spilling into the lawn and makes the path look crisp.
It also makes mowing easier because you can run the mower right alongside without scattering stones. When you're finished, you'll wonder why you didn't do it sooner. The path instantly makes the yard feel more organized, and it saves your grass from turning into a mud pit.
Plus, it's a great excuse to finally deal with that worn spot you've been ignoring.
Find Your Natural Route
Watch how you and your family move through the yard for a few days. The grass will show you the way. Look for thin, compacted areas or bare dirt.
That's your path. Mark it with a hose or paint, then adjust the curve so it looks good from your main viewing spots—usually the back door, the patio, or a kitchen window. Don't overthink it; if it feels right underfoot, it'll look right.
Choose Your Material
Gravel is affordable, easy to spread, and comes in many colors. Pea gravel is smooth underfoot but can shift; crushed stone locks together better. Stepping stones are great for a more organic look and work well in small yards or where you want grass to grow between them.
For a low-maintenance option, consider decomposed granite—it compacts hard and looks neat. Pick based on how you'll use the path and how much upkeep you want.
Install It Right
Dig out the path to about two to three inches deep. Remove any grass and roots. Tamp the soil, then lay down landscape fabric to stop weeds.
Add a base layer of crushed stone if your soil is soft, then top with your chosen gravel or set your stepping stones in a bed of sand. Tamp everything down and wet it lightly to settle. Edge the path to keep materials in place and make mowing a breeze.
Keep It Looking Good
A gravel path needs a little love now and then. Rake it occasionally to smooth out footprints or pet scratches. Top it off with a fresh layer of gravel every year or two.
If weeds pop up, pull them while they're small. For stepping stones, just trim the grass around them with a string trimmer. A quick five-minute tidy keeps the path looking sharp and inviting.
3. Add a Small Patio Zone with Pavers
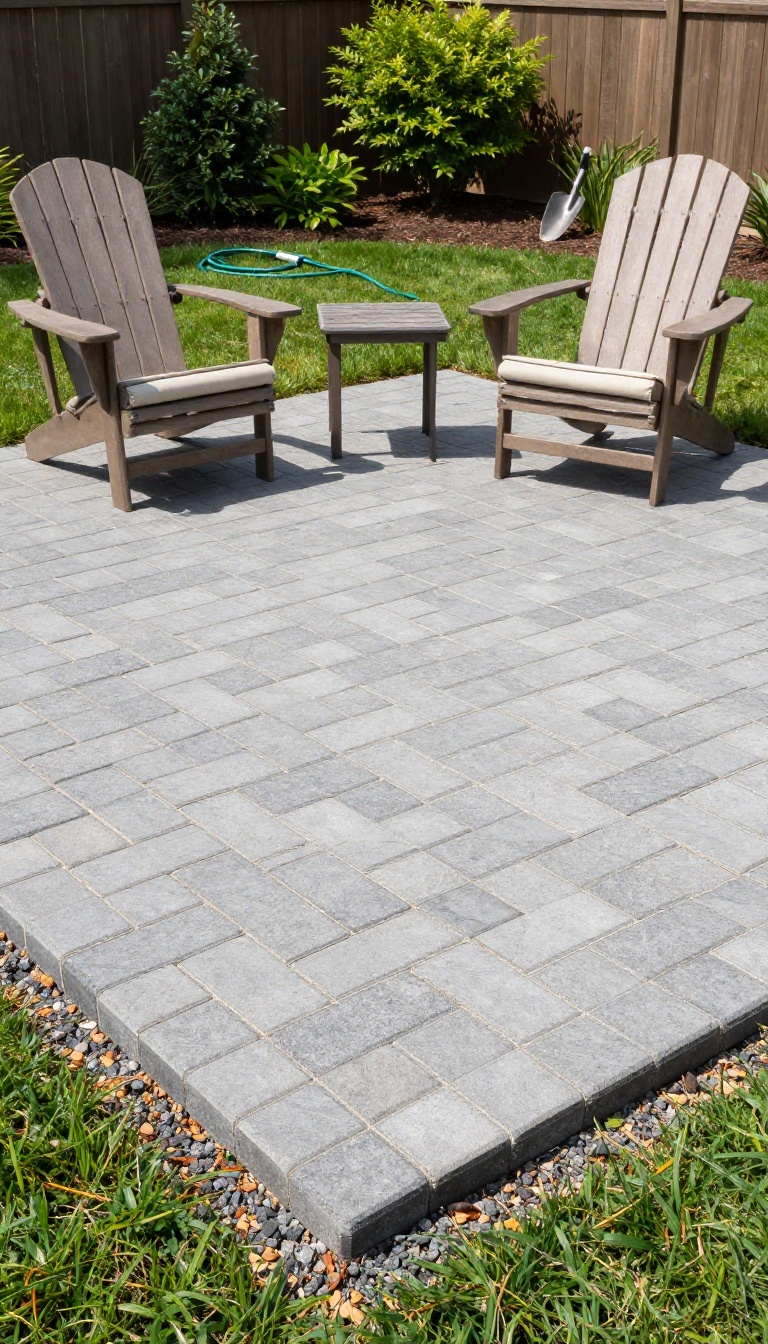
A patch of lawn that never gets used is just extra mowing. Turn a corner of it into a small paver pad and suddenly you have a real destination for morning coffee or evening drinks. It doesn't take a full hardscape crew—just a weekend, some base material, and a layout you can live with.
The goal here is simple: a flat, stable surface for two chairs and a side table. That's roughly 6 by 6 feet, or 8 by 8 if you want a little breathing room. You're not building an outdoor kitchen.
You're carving out a spot that feels intentional. Start by picking a location that already wants to be used. Maybe it's the shady side of the yard, or the spot where you always drag a chair.
Mark the shape with string or a garden hose, then cut the sod away with a flat shovel. A square or rectangle is easiest, but a soft curve works if you're patient with the edging. Dig down about 4 to 6 inches, then tamp the soil.
Add a layer of crushed gravel, wet it, and tamp again. This is the step most people skip, and it's the one that keeps pavers from sinking or shifting after a few rains. Next comes bedding sand.
Screed it flat with a board, then lay your pavers in a pattern you like. A simple running bond—like brickwork—looks clean and hides small mistakes. Leave a small gap between each paver for joint sand.
Once the pavers are down, sweep polymeric sand into the joints, mist it lightly, and let it set. That locks everything in place and keeps weeds from sprouting between the cracks. ### Pick a Size That Fits Two Chairs A 6-by-6 pad holds two Adirondack chairs and a small table without feeling cramped. If you want to stretch your legs, go 8-by-8.
Anything larger starts to feel like a patio project instead of a simple upgrade. ### Choose Pavers That Blend, Not Battle Concrete pavers in warm gray or sand tones disappear into most landscapes. Skip the glossy finishes and bright reds unless your house already leans that way. The point is a quiet base, not a statement floor. ### Keep the Edges Neat Plastic or metal edging holds the pavers tight and keeps the lawn from creeping in.
Install it before you sweep in the joint sand. It's a small detail that makes the whole pad look finished. ### Add a Little Softness Around It Tuck a few low-growing plants or a small potted grass at the corners. It breaks up the hard lines and helps the pad settle into the yard instead of sitting on top of it.
Pick A Size That Fits Two Chairs
A 6-by-6 pad holds two Adirondack chairs and a small table without feeling cramped. If you want to stretch your legs, go 8-by-8. Anything larger starts to feel like a patio project instead of a simple upgrade.
Choose Pavers That Blend, Not Battle
Concrete pavers in warm gray or sand tones disappear into most landscapes. Skip the glossy finishes and bright reds unless your house already leans that way. The point is a quiet base, not a statement floor.
Keep The Edges Neat
Plastic or metal edging holds the pavers tight and keeps the lawn from creeping in. Install it before you sweep in the joint sand. It's a small detail that makes the whole pad look finished.
Add A Little Softness Around It
Tuck a few low-growing plants or a small potted grass at the corners. It breaks up the hard lines and helps the pad settle into the yard instead of sitting on top of it.
4. Plant a Low-Maintenance Border Along the Fence
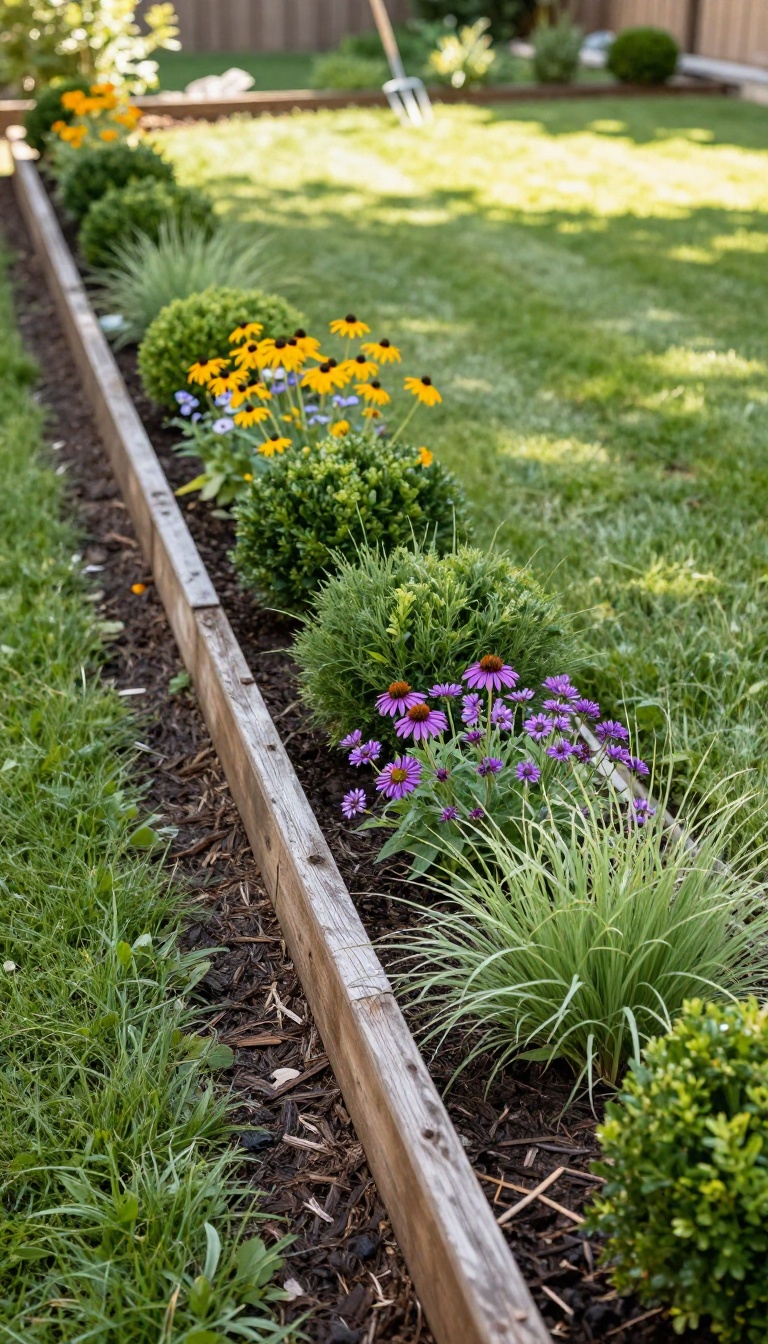
Fences do their job, but they rarely win beauty contests. A simple border of shrubs, grasses, and perennials along the base softens that hard line and hides whatever clutter tends to pile up back there. The best part?
Once these plants settle in, they ask for almost nothing—just a little water in the first year and maybe a quick trim now and then.
Start by clearing a strip about two to three feet wide along the fence. Remove grass and weeds, then loosen the soil with a garden fork. If your soil is poor, mix in a bag or two of compost.
This prep work takes an afternoon, but it saves you hours of weeding later. Next, lay out your plants before digging. Place taller shrubs toward the back, mid-size grasses in the middle, and low perennials up front.
Step back and adjust until the arrangement looks balanced. Then plant everything at the same depth it was growing in its pot, water well, and add a two-inch layer of mulch. That mulch is your best friend—it keeps moisture in and weeds out.
Pick Plants That Thrive On Neglect
Look for drought-tolerant workhorses like ornamental grasses, coneflowers, black-eyed Susans, and boxwood. These handle heat, poor soil, and irregular watering without fuss. Mix in a few evergreens for winter interest.
Avoid anything that needs constant deadheading or daily watering—that defeats the purpose.
Keep The Border Looking Tidy
Once established, your border needs little more than an annual haircut. Cut back perennials in late winter or early spring. Trim shrubs lightly after they flower if they get too big.
Refresh mulch once a year to keep it looking sharp. That's it—no weekly pruning, no fertilizer schedule.
Hide The Ugly Stuff
That border isn't just pretty—it's a screen. Use it to conceal trash cans, hose reels, or a compost bin. Plant taller grasses or shrubs in front of those eyesores.
The greenery draws the eye while the clutter fades into the background.
5. Use Containers to Fill Awkward Corners
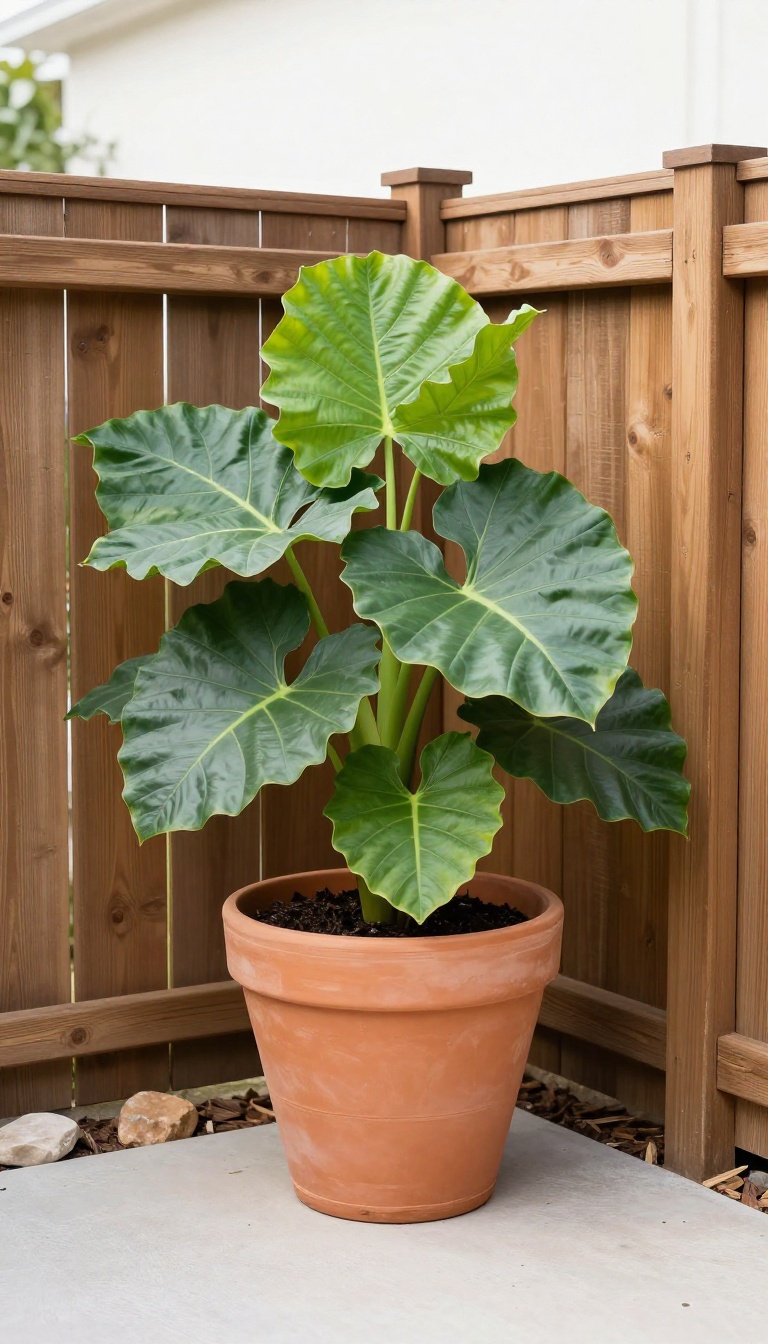
Every yard has that one spot that just doesn't work—too narrow for a bed, too shady for grass, or stuck behind the garage. Instead of ignoring it, drop a large container there and let a bold plant take over. It's a quick fix that looks intentional and takes minutes to set up.
Containers are the Swiss Army knife of landscaping. They fill gaps, add height where everything else is flat, and let you swap plants whenever you want a new look. No digging, no permanent commitment.
Just pick a pot, add soil, and you're done. The key is going big. Small pots get lost in the landscape.
A 20-inch-wide planter or larger holds its own and gives roots room to stretch. That means less watering and happier plants.
Pick The Right Spot
Look for corners where two fences meet, the strip between a downspout and a walkway, or the dead zone beside a steps. These spots collect leaves and look messy. A container turns them into a feature.
Make sure the spot gets the light your plant needs—most bold plants want at least a few hours of sun.
Choose Bold, Simple Plants
Skip the fussy annuals. Go for plants with big leaves or strong shapes: elephant ears, canna lilies, ornamental grasses, or dwarf evergreens. One type per pot looks cleaner than a mixed basket.
If you want color, add a trailing vine like sweet potato vine around the base.
Keep It Low-maintenance
Use a potting mix with slow-release fertilizer mixed in. Water when the top inch of soil feels dry—usually once or twice a week in summer. In colder zones, either empty the pot and store it, or plant something hardy that can stay out year-round.
Rotate plants seasonally for a fresh look without redoing the whole yard.
6. String Up Outdoor Lighting for Evening Atmosphere
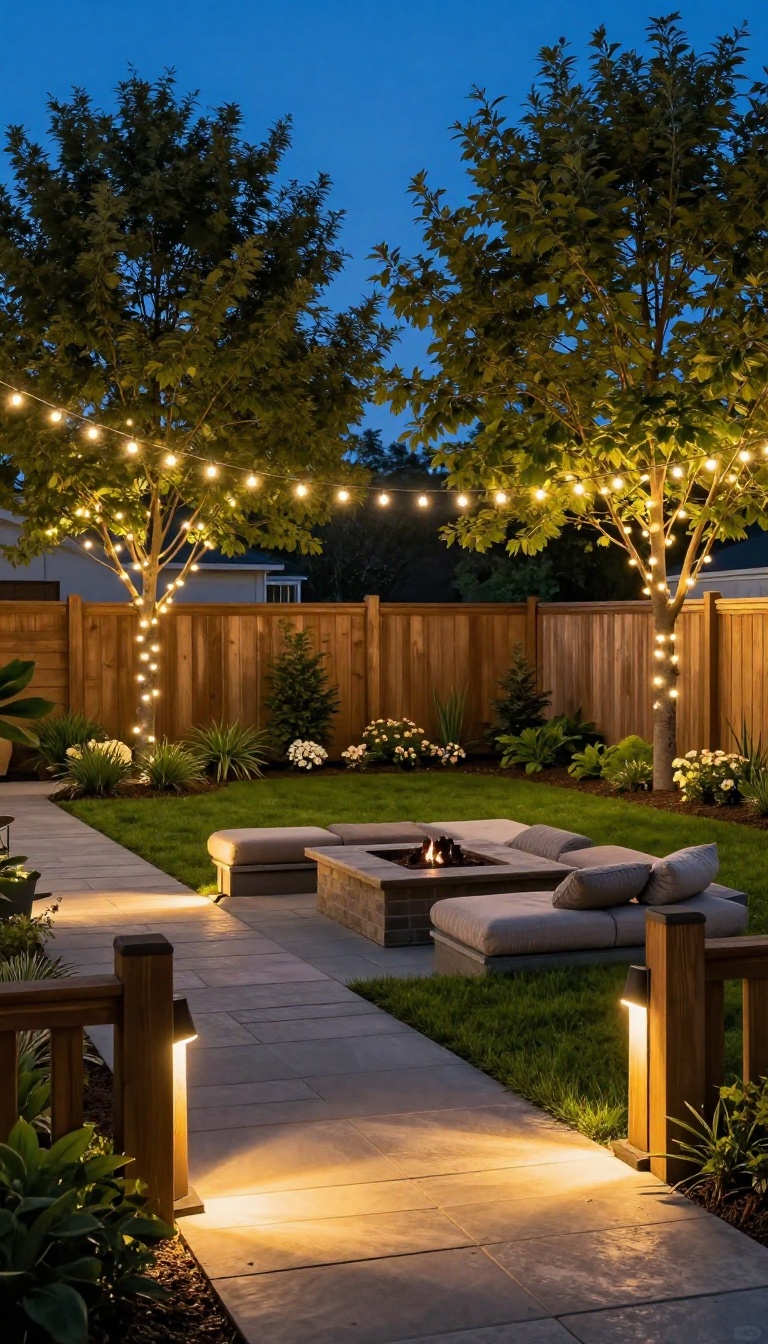
The sun drops, and suddenly your nice yard disappears into a black rectangle. A few strands of warm light fix that fast. You don't need an electrician or a fancy system—just a plan for where the glow should land.
String lights and path lights are the cheapest way to double the hours you actually use your backyard. They add depth, highlight the good stuff, and make even a plain lawn feel like a destination. The trick is keeping it warm and simple, not turning your yard into a runway.
Pick Your Glow Spots
Start where people sit. A patio, deck, or fire pit area should get the first strand. Then add a few small path lights along walkways or steps so nobody trips after dark.
If you have a tree you love, one uplight at its base makes it a feature instead of a shadow.
String Lights Without The Headache
Go with warm-white LED strands, not cool white—they look softer and use almost no power. Hang them zigzag style between two trees, a fence, and a house wall using screw-in hooks or zip ties. Keep the lowest point at least seven feet up so tall guests don't get a face full of bulbs.
Plug into an outdoor-rated timer so they turn on at dusk and off before bed.
Path Lights That Actually Help
Solar stake lights are fine if your path gets sun, but cheap ones fade fast. Better: low-voltage path lights on a single transformer. Space them six to eight feet apart along the edge of a walkway or bed.
Point them down, not out, so they light the ground without blinding you.
Keep It Cozy, Not Cluttered
More lights don't equal more atmosphere. Use one warm layer overhead and a few low points near the ground. Skip bright white floodlights unless you're grilling or doing security.
A dimmer switch or smart plug lets you dial the whole thing down to a soft glow when you're just hanging out.
7. Build a Simple Fire Pit Circle
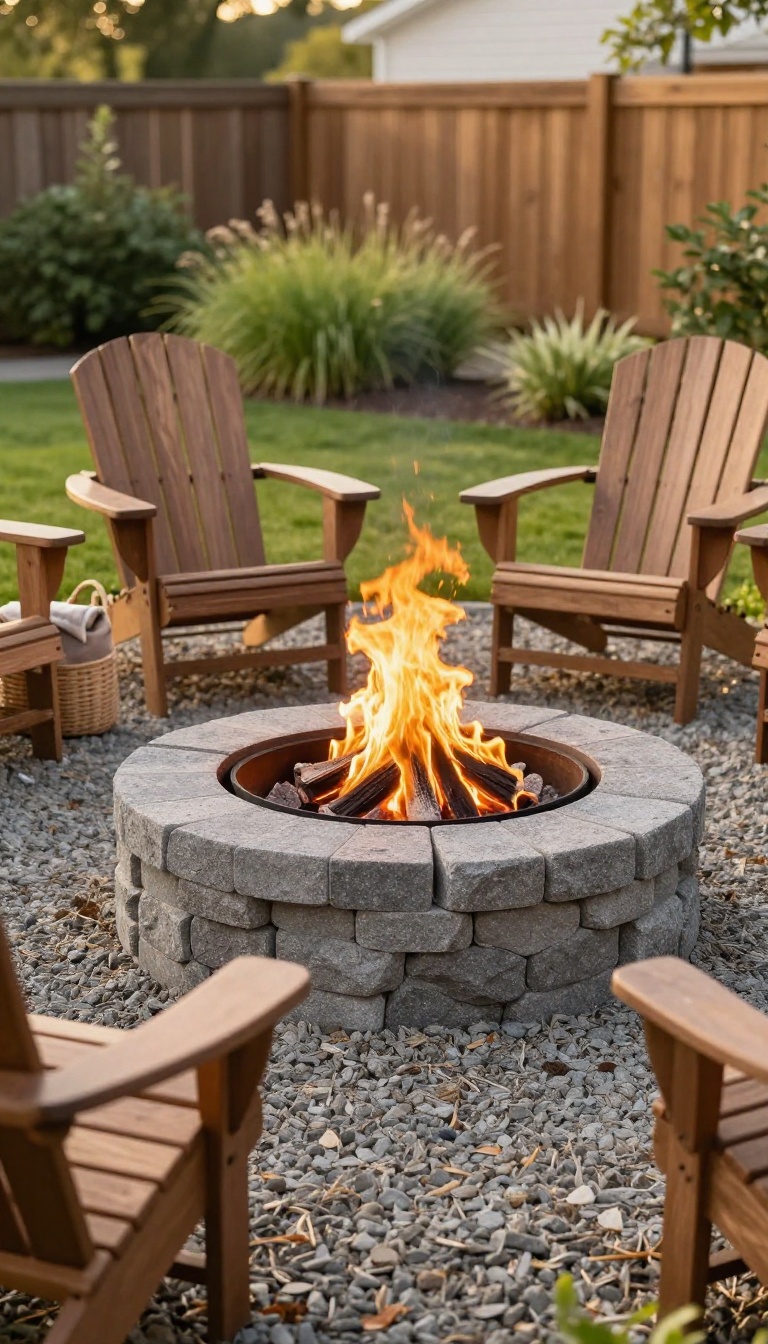
A fire pit gives your backyard a natural gathering spot that works day or night, spring through fall. It doesn't need to be fancy—a basic stone or block ring is enough to anchor the space. Once it's in, you'll wonder why you waited so long to add one.
The best part about a fire pit is how it changes the way people use your yard. Instead of scattering to different corners, everyone pulls up a chair and stays awhile. You can build a simple one in a weekend with materials from any home improvement store.
No mortar, no permits in most areas, and no special skills required.
Pick The Right Spot
Choose a flat, open area at least 10 feet from your house, fence, or low tree branches. You want enough clearance for safety and enough room for chairs around the circle. Check local rules first—some neighborhoods require a certain distance from structures or a specific pit depth.
Keep The Build Simple
A ring of landscape blocks or stacked stones works fine. Dig a shallow circle, add a layer of sand or gravel, then set your blocks in a circle. You can use a metal insert for the burning area if you want extra durability.
Skip the mortar unless you plan to move it later—dry stacking is easier and looks just as good.
Make It Comfortable
Add four to six sturdy chairs or a couple of benches around the pit. A small gravel or flagstone pad underneath keeps mud and grass out of the equation. Toss a few blankets in a nearby basket for cool evenings, and you're done.
8. Mulch Beds to Cut Weeds and Hold Moisture
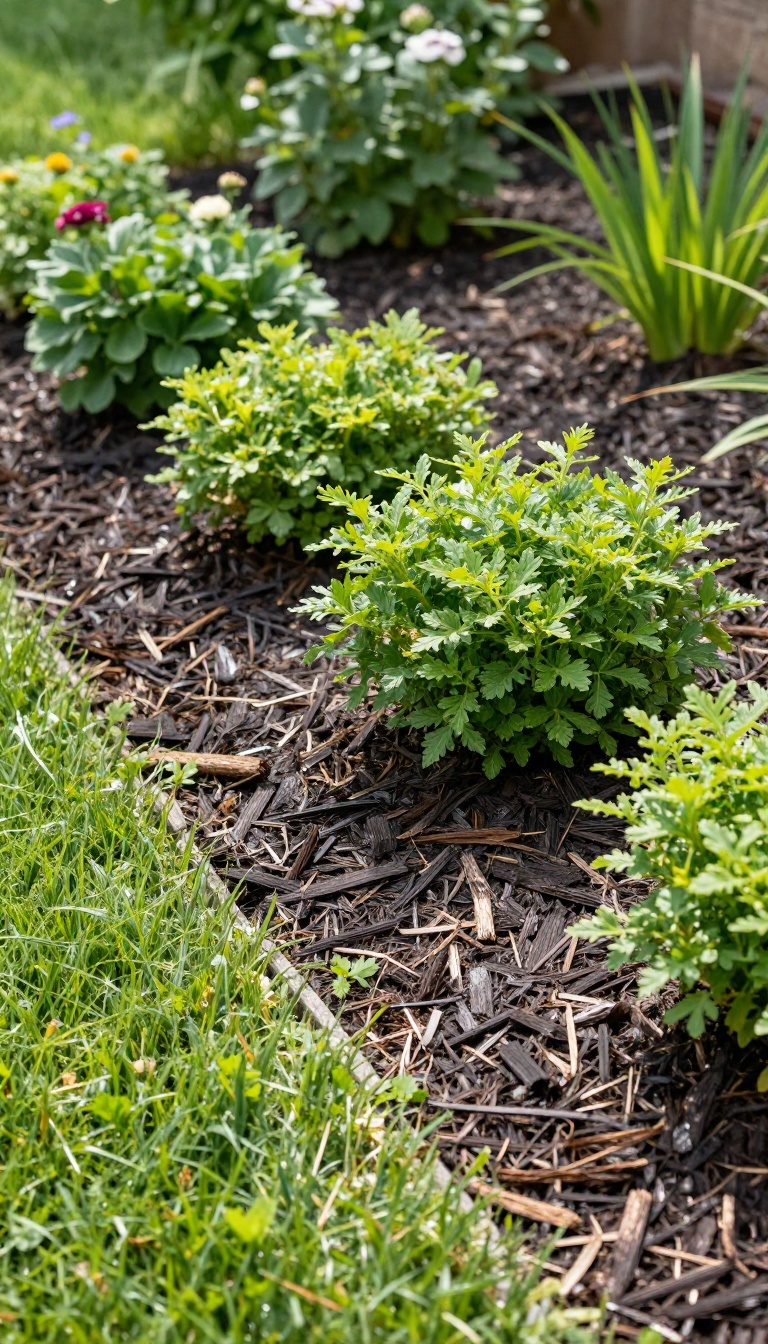
Mulch is one of those quiet upgrades that changes how a whole yard reads. A fresh layer darkens the soil, hides bare spots, and makes even simple plantings look deliberate. It also does real work: fewer weeds, less watering, and happier roots.
You can spread mulch in an afternoon and see the difference immediately. The bed edges look cleaner, the plants pop against the dark background, and you stop seeing dry, cracked soil every time you walk past. Best of all, mulch is forgiving.
You don't need perfect technique or expensive materials to get a good result. A few basic choices about type and depth will carry you most of the way.
Pick The Right Mulch
Shredded bark and wood chips are the workhorses for most beds. They knit together, stay put on slopes, and break down slowly. Straw works well around vegetables, while pine needles suit acid-loving plants like azaleas and blueberries.
Avoid dyed mulches if you can. Natural tones blend better with plants and won't look artificial as they age. If you're unsure, ask at a local nursery what works best for your soil and climate.
Spread It At The Right Depth
Two to three inches is the sweet spot. Less than that and weeds push through; more than that and you smother roots and waste money. Keep mulch a couple of inches away from trunks and stems so moisture doesn't sit against the plant.
Rake it smooth, then water lightly to settle everything in. That first watering helps the mulch lock together and keeps it from blowing around on a windy day.
Refresh Once A Year
Mulch breaks down over time, which is good for the soil but means you'll need to top it off. A light refresh each spring keeps the color rich and the weed barrier strong. You don't have to remove the old layer—just add enough to bring it back to that two-to-three-inch depth.
If weeds still sneak through, pull them while they're small. A quick pass every week or two beats a full weekend of catching up later.
9. Create a Privacy Screen with Tall Grasses or Bamboo
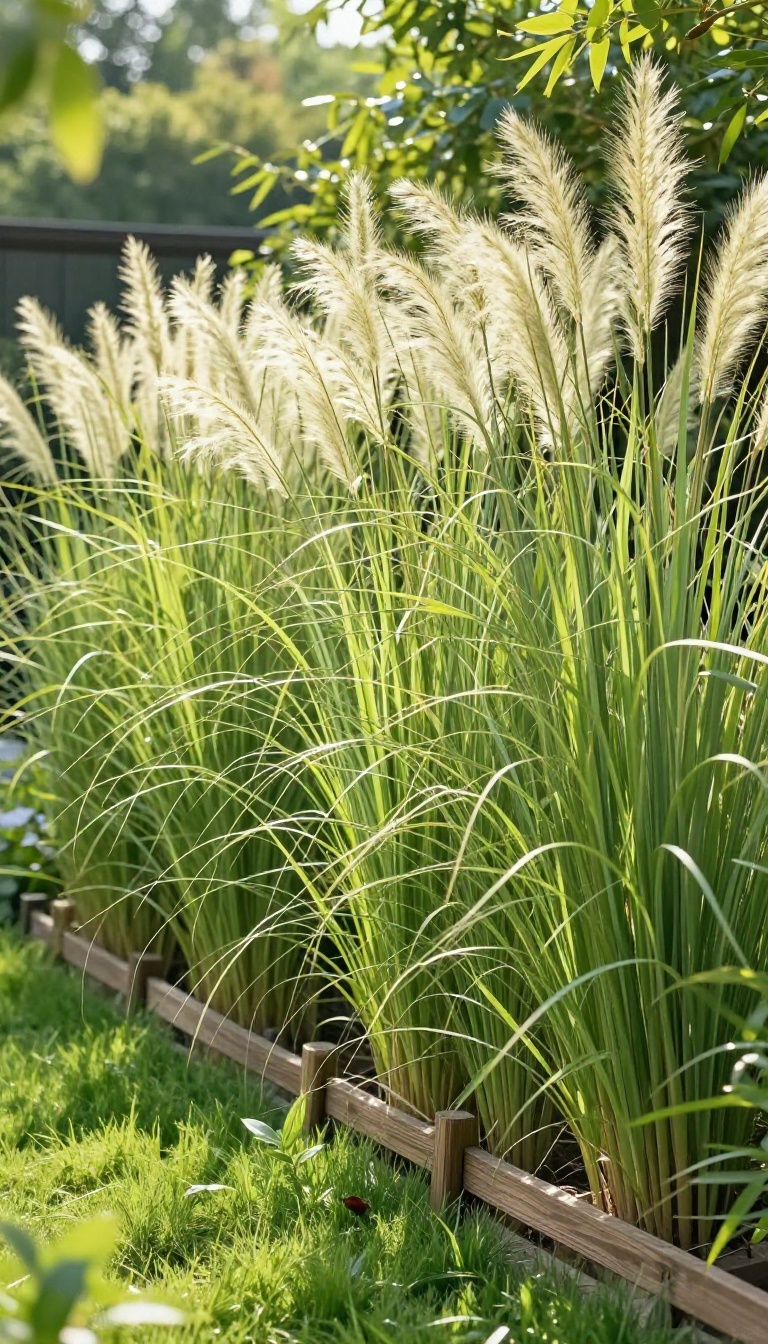
A living screen can give you the privacy of a fence without the fortress vibe. Tall grasses and bamboo grow quickly, block sightlines, and add movement and texture that a wooden panel never will. They also soften noise and wind, making your yard feel more secluded and calm.
Best of all, you can plant a screen in a weekend and see results within a season. Whether you need to hide a neighbor's window, a busy street, or an ugly utility box, these plants do the job with a softer, greener touch.
Tall grasses and bamboo are the go-to choices for fast privacy because they grow upright and dense. They work in narrow side yards, along property lines, and even in large containers on a patio. The key is picking the right type for your climate and giving them enough room to fill in without taking over.
You can plant a single row for a light screen or double up for a solid wall of green. Either way, you'll get a backdrop that changes with the seasons and feels more natural than a man-made barrier.
Choosing Between Grasses And Bamboo
Ornamental grasses like miscanthus, switchgrass, and feather reed grass are low-maintenance and die back in winter, so they're best for seasonal privacy. They handle wind, poor soil, and neglect like champs. Bamboo stays green year-round and grows faster, but you need to choose clumping types like Fargesia to avoid a runaway spread.
Running bamboo will take over your yard if you don't install a rhizome barrier—so stick with clumping unless you're ready for battle.
Planting For Quick Coverage
Space plants closer than you would for a typical garden bed—about 2 to 3 feet apart for grasses and 3 to 5 feet for clumping bamboo. Dig a hole twice as wide as the root ball and amend the soil with compost. Water deeply after planting and keep the soil consistently moist for the first growing season.
A layer of mulch will hold moisture and keep weeds down while the screen fills in.
Keeping It Tidy And Under Control
Cut back deciduous grasses in late winter or early spring before new growth starts. For bamboo, remove older canes every year to encourage fresh, upright shoots and keep the screen looking full. If you plant running bamboo, check your barrier annually for cracks or escapes.
A quick trim of wayward blades or canes keeps the screen sharp and prevents it from swallowing nearby beds.
10. Add a Raised Bed for Herbs or Veggies
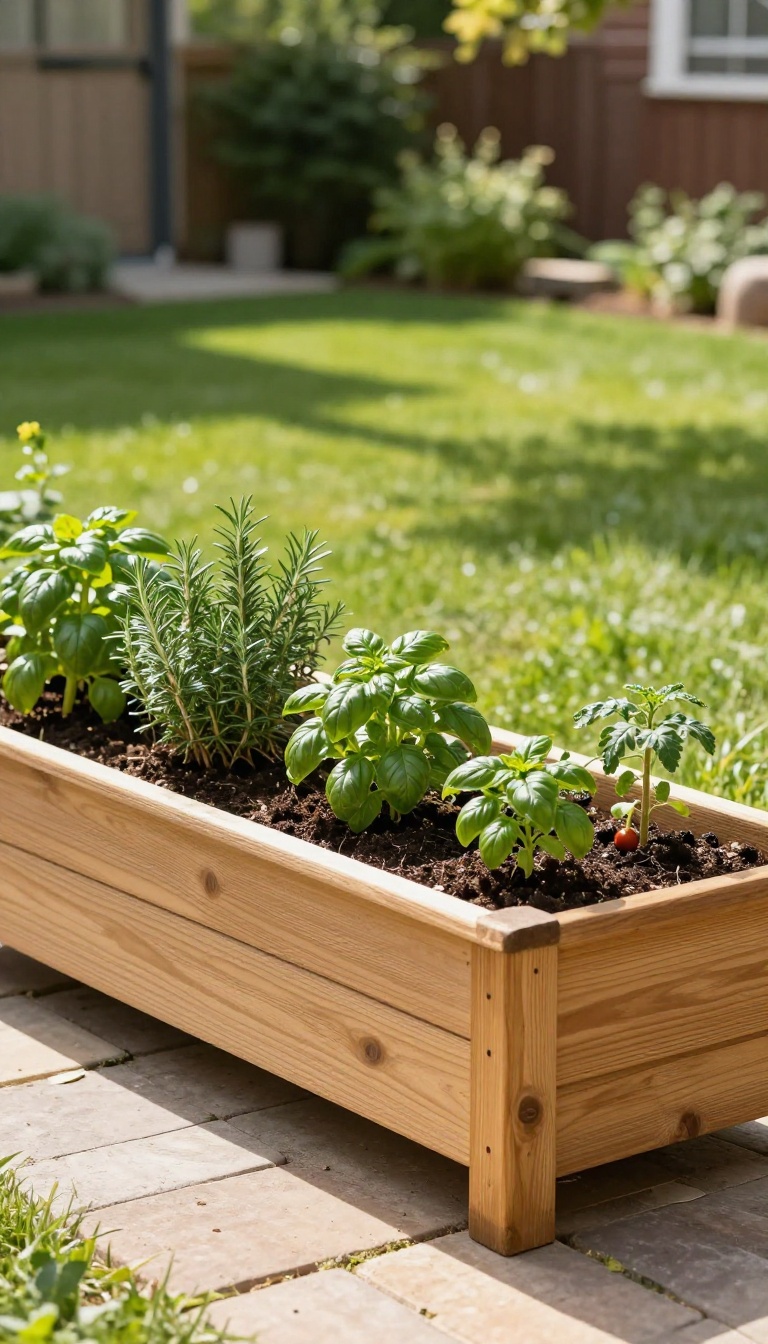
A raised bed near the kitchen door turns a forgotten corner into your most-used garden space. It gives you fresh herbs and a few vegetables without requiring a full garden plot. The structure also adds a clean, intentional look to an otherwise empty area.
Raised beds solve a lot of problems at once. They lift the soil to a comfortable height, so you're not bending as much or fighting poor ground. They also warm up faster in spring, which means you can plant earlier.
And because you control the soil mix, you're not stuck with whatever your yard happens to have. Place one within a few steps of your back door, and you'll actually use it. That short walk makes a bigger difference than you'd think.
Pick The Right Spot
Choose a level spot that gets at least six hours of sun. Herbs like basil, rosemary, and thyme need that light to thrive. If your only open corner is a bit shady, stick to lettuce, spinach, and mint.
Keep the bed close to a water source or your kitchen door so you don't ignore it.
Size And Materials
A bed that's 4 feet wide and 8 feet long works for most yards. You can reach the middle from either side without stepping in. Use rot-resistant wood like cedar or composite boards.
Avoid treated lumber if you're growing food, and skip anything that's been painted or stained recently.
Soil And Planting
Fill the bed with a mix of topsoil and compost. That gives roots room to spread and holds moisture without getting soggy. Plant a few herbs you actually cook with, plus one or two easy veggies like cherry tomatoes or peppers.
Don't overcrowd—give each plant space to breathe.
Keep It Low-maintenance
Add a layer of mulch to cut down on watering and weeds. A simple drip line on a timer makes summer care almost automatic. Check the bed once a week, pull anything that doesn't belong, and harvest often.
The more you pick, the more the plants produce.
11. Define a Seating Nook with a Bench or Swing
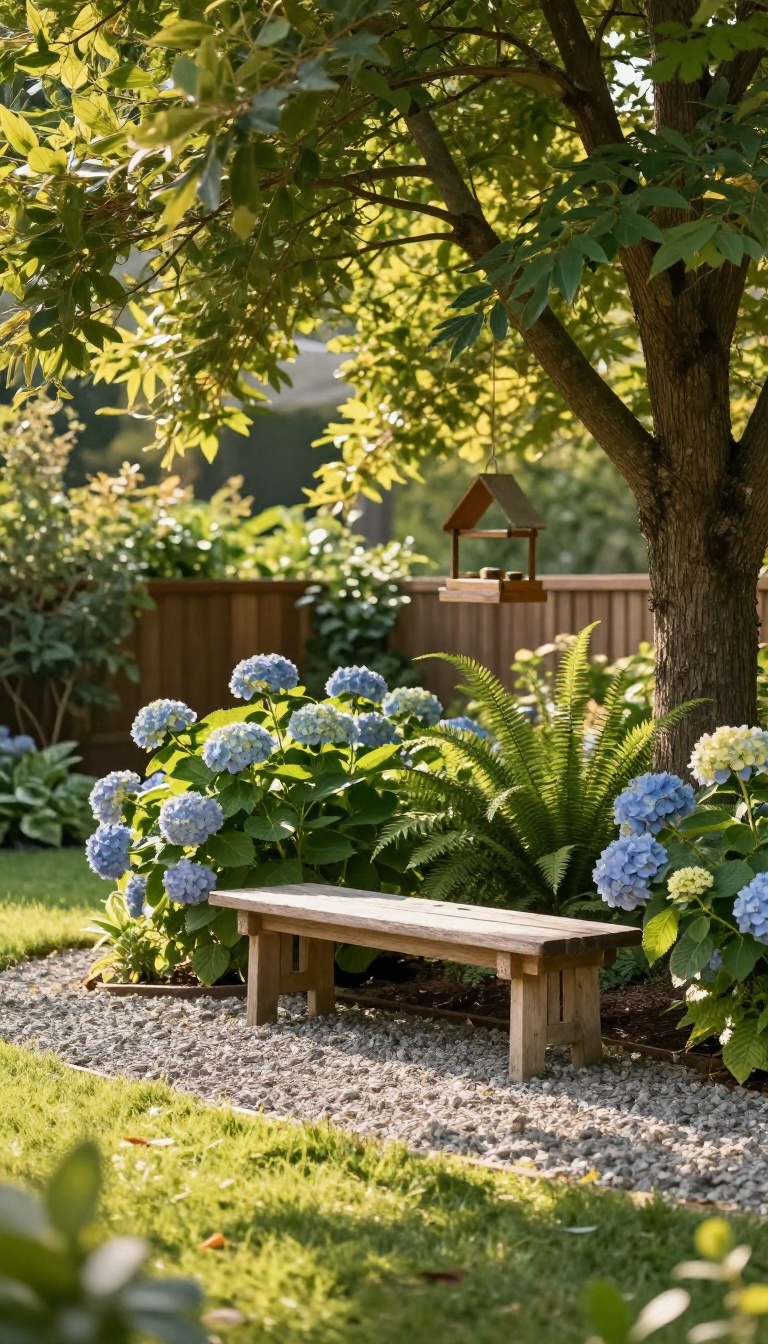
A bench under a shade tree or a swing hanging from a sturdy branch gives your backyard a destination. Instead of wandering outside and standing around, you have a spot that invites you to sit, sip something cold, and watch the light change. It's a small addition that makes the whole yard feel more lived-in.
The best part? You don't need a fancy setup. A simple wooden bench, a repurposed church pew, or a basic swing can do the trick.
The goal is to create a comfortable pause point that feels intentional, not accidental.
Think about where you naturally gravitate when you're outside. Maybe it's the cool spot under the maple, or the corner of the deck where the afternoon breeze hits. That's your nook.
By placing a bench or swing there, you turn a random patch of grass into a place you'll actually use. You also add a visual anchor. A bench gives the eye something to land on, making the yard feel designed rather than just a collection of plants.
And a swing? It adds a touch of nostalgia and motion that's hard to resist. ## Pick the Right Spot Shade is your friend. Look for a tree that casts dappled light or a spot where the house blocks the hottest sun.
You want a place that's comfortable even in July. Consider the view. Sit where you can see flowers, a bird feeder, or the kids playing.
A bench facing a blank fence won't get much use. Check the ground. You'll want a level surface.
If it's uneven, a few pavers or a gravel pad will keep the bench stable and your feet dry. ## Choose a Bench or Swing That Fits Benches come in all styles. A backless bench is easy to move and tuck away. A bench with a back is more comfortable for lingering.
Wood weathers nicely; metal can rust, so powder-coated is best. Swings need a strong support. A tree branch at least 8 inches in diameter works, but check for cracks.
Or build a simple A-frame stand. Hang the swing so the seat is about 17 inches off the ground. Don't forget cushions.
A couple of outdoor pillows make even a hard bench inviting. Store them in a deck box when not in use. ## Make It Cozy with Small Touches Add a side table or a stump for your drink. A small lantern or string lights overhead extend the time you can use it.
Plant something fragrant nearby. Lavender, mint, or jasmine will scent the air as you relax. A bench or swing doesn't need to be fancy.
It just needs to be there, ready when you are.
Pick The Right Spot
Shade is your friend. Look for a tree that casts dappled light or a spot where the house blocks the hottest sun. You want a place that's comfortable even in July.
Consider the view. Sit where you can see flowers, a bird feeder, or the kids playing. A bench facing a blank fence won't get much use.
Check the ground. You'll want a level surface. If it's uneven, a few pavers or a gravel pad will keep the bench stable and your feet dry.
Choose A Bench Or Swing That Fits
Benches come in all styles. A backless bench is easy to move and tuck away. A bench with a back is more comfortable for lingering.
Wood weathers nicely; metal can rust, so powder-coated is best. Swings need a strong support. A tree branch at least 8 inches in diameter works, but check for cracks.
Or build a simple A-frame stand. Hang the swing so the seat is about 17 inches off the ground. Don't forget cushions.
A couple of outdoor pillows make even a hard bench inviting. Store them in a deck box when not in use.
Make It Cozy With Small Touches
Add a side table or a stump for your drink. A small lantern or string lights overhead extend the time you can use it. Plant something fragrant nearby.
Lavender, mint, or jasmine will scent the air as you relax. A bench or swing doesn't need to be fancy. It just needs to be there, ready when you are.
12. Refresh the Lawn with Overseeding and Patch Repair
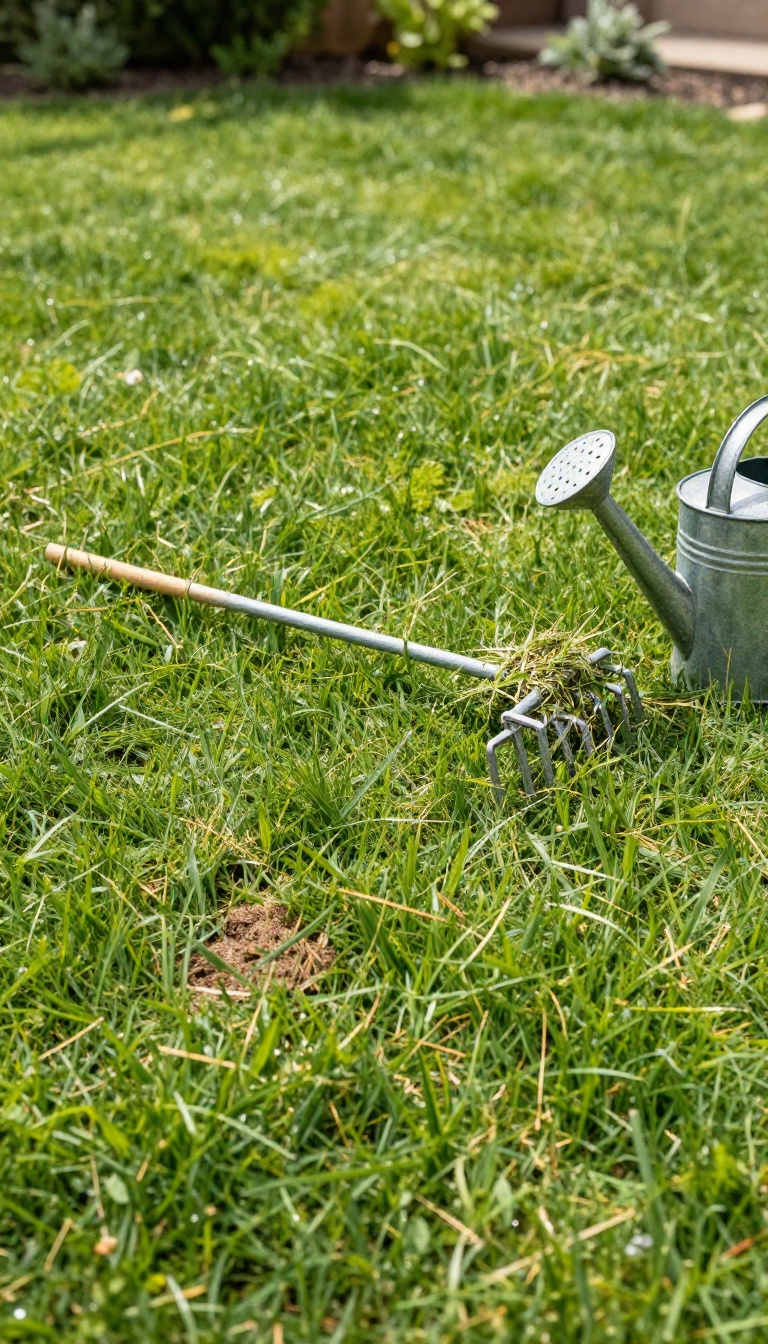
A lawn that's mostly green with a few rough patches doesn't need to be torn out and started over. Thickening what's already there is faster, cheaper, and a lot less work than laying new sod. Overseeding fills in the thin spots, and a little patch repair handles the bare ones.
Think of overseeding as giving your existing grass a boost rather than replacing it. You spread new seed over the lawn, and it settles into the gaps where turf has thinned out. Those bare or sparse areas fill in with fresh growth, so the whole yard reads as fuller and healthier.
Patch repair is the targeted version of the same idea, aimed at spots where grass has given up entirely.
Fix The Soil Before You Seed
Seed needs contact with soil to take, so rake away dead thatch and loosen the surface in bare spots. A little compost worked into the top inch gives new roots something to grab. If the ground is compacted, poke holes with a garden fork or a core aerator first.
Seed dropped onto hard, crusty ground mostly washes away or dries out.
Pick The Right Seed And Timing
Match the seed to your grass type and your climate, because a shade mix won't thrive in full sun. Cool-season grasses do best when you overseed in early fall, while warm-season types prefer late spring. Spread the seed evenly, then keep the top inch of soil consistently moist for the first couple of weeks.
Light, frequent watering beats one heavy soak during germination.
Protect The New Growth
Fresh seed and tiny seedlings are vulnerable, so keep foot traffic off those areas for a few weeks. A thin layer of straw or a light topdressing helps hold moisture and hides the seed from birds. Once the new grass reaches mowing height, start cutting it gently and avoid scalping.
A slow-release fertilizer after the first mow gives it steady support without pushing too much top growth.
13. Install a Small Water Feature for Sound
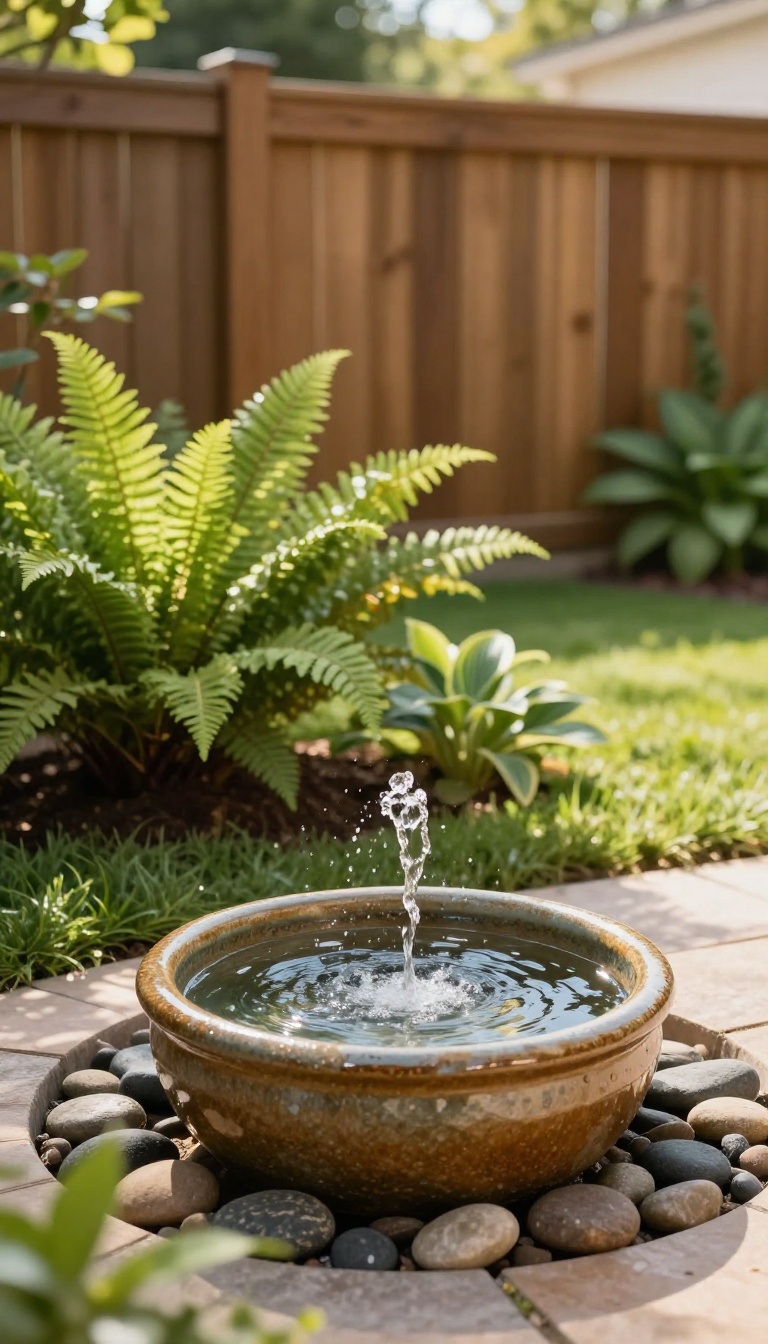
Water does something to a backyard that nothing else quite matches. It adds a gentle, consistent sound that covers traffic hum and neighborhood chatter without feeling like a machine. Even a tiny fountain or a bubbling pot can turn a plain corner into a spot where you actually want to sit.
The best part is that you don't need a pond, a pump house, or a permit. A compact, self-contained feature can sit on a patio, tuck into a flower bed, or anchor the end of a path. It gives the space a sensory focal point that you can hear before you see it.
A water feature works on two levels: it looks good, and it sounds good. That sound is the real magic. A soft trickle or a low burble creates a kind of white noise that makes the whole yard feel more private and more relaxing.
You also get a sensory anchor. Instead of a bunch of disconnected plants and furniture, the water gives your eye and ear a place to land. It makes the space feel designed, even if the rest is simple.
Start small. A tabletop fountain, a ceramic pot with a bubbler, or a wall-mounted spout are all easy wins. They plug in, hold a few gallons, and take about an hour to set up.
Pick The Right Spot First
Place your feature where you'll actually hear it. That usually means near a seating area, a bedroom window, or a patio edge. You want the sound to reach you, not get lost in the wind.
Avoid putting it right next to a loud air conditioner or a busy street corner where it has to fight noise. A spot with a wall or fence behind it helps bounce the sound back toward you. Also check for a nearby outlet or plan for a solar pump.
Choose A Style That Fits Your Yard
A bubbling pot blends into almost any landscape. It looks like a big planter with water welling up from the top, and it comes in glazed ceramic, stone, or resin. A small tiered fountain feels a bit more traditional.
A wall spout or a simple copper pipe gives you a modern, clean look. If you want zero fuss, go with a self-contained kit. Everything is inside one unit, so there's no digging or liner.
Just fill it, plug it in, and adjust the flow until the sound feels right.
Keep It Clean And Running Smoothly
Water features are low-maintenance, but they aren't no-maintenance. Top off the water every few days, especially in summer, because evaporation is real. A small pump can run dry and burn out if you forget.
Once a month, unplug the pump and rinse the intake screen. If algae shows up, a drop of fountain cleaner or a barley tablet keeps it clear. In winter, drain the feature and store the pump indoors if you live where it freezes.
Make It Feel Intentional
Surround the feature with a few stones, some low plants, or a small light. A solar spotlight aimed at the water after dark turns it into an evening focal point. Add a couple of floating flowers or a single lily for a little color.
You don't need to build a whole pond. A simple pot, a quiet pump, and a good spot are enough to change how the whole yard feels. The sound does the heavy lifting.
14. Zone the Yard with a Trellis or Arbor
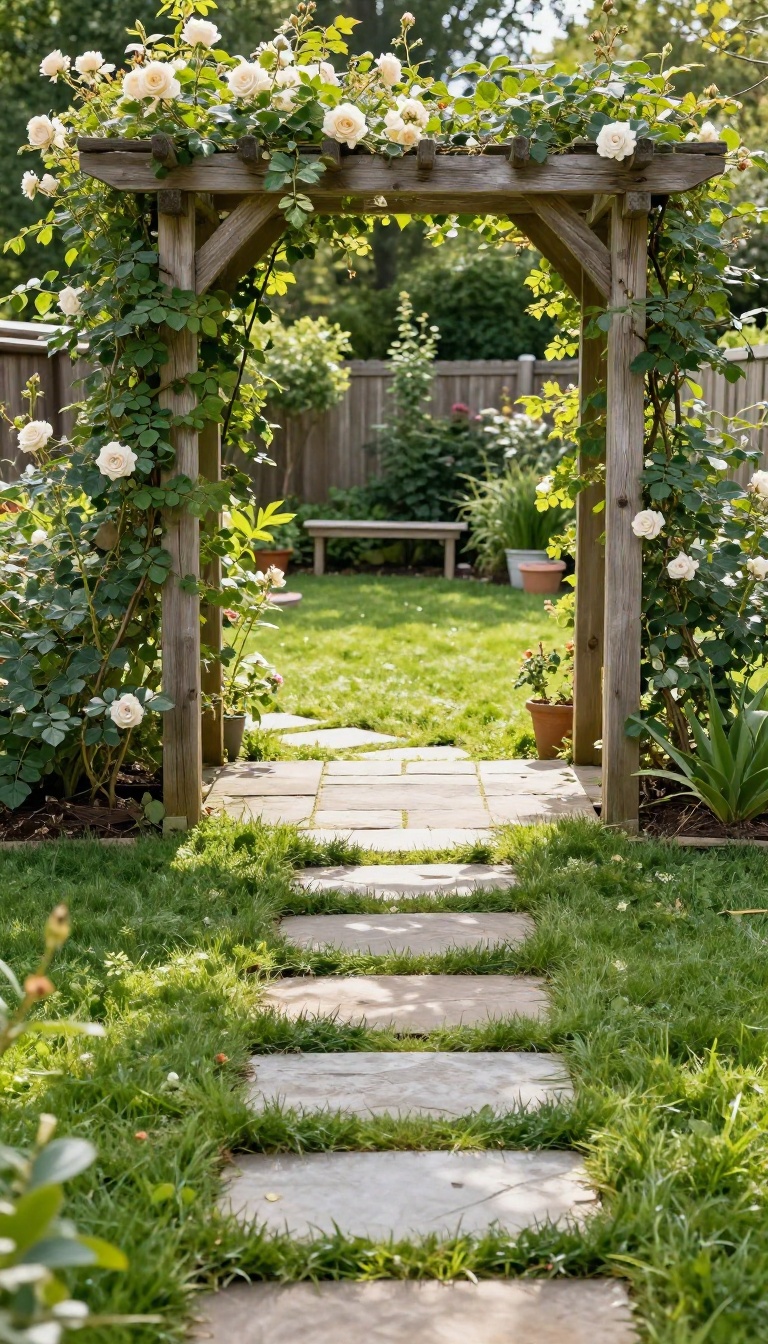
A trellis or arbor works like a doorway in an open yard. It marks a transition from one area to another, so your patio, garden, and lawn feel like separate rooms instead of one big, undefined space. The structure also adds height, which most flat backyards desperately need.
You don't need a massive archway to get the effect. A simple wooden trellis panel or a narrow arbor does the job. Over time, climbing plants turn it into a green threshold that softens the hard lines and makes the whole yard feel more layered.
Place it where you already walk. The best spot for a trellis or arbor is usually a natural crossing point—where the lawn meets the patio, or where a path leads into the vegetable beds. If you find yourself stepping over the same imaginary line every day, that's your spot.
A freestanding arbor over a walkway creates a clear entry. A trellis attached to a wall or fence adds vertical interest without eating up floor space. Either way, the goal is the same: give the eye a frame and give the yard a sense of structure. Pick a style that matches your home A white vinyl arbor looks crisp against a cottage-style house, while a rough cedar trellis suits a more rustic or naturalistic yard.
Metal options work well for modern or industrial spaces and tend to last longer with zero maintenance. Don't overthink the material. What matters is that the structure feels like it belongs.
If your house has dark trim, a dark-stained wood arbor will tie in nicely. If your fence is weathered gray, let the trellis weather too. Choose climbing plants that earn their keep Annual vines like morning glory or black-eyed Susan vine give you quick coverage in one season. Perennials like clematis, jasmine, or climbing hydrangea take longer to establish but come back year after year.
For edible yards, grow pole beans, cucumbers, or grapes up the trellis. You get the visual divider plus a harvest. Just match the plant to your sunlight—most climbing flowers and vegetables want at least six hours of direct sun. Install it so it stays put A trellis or arbor catches wind, so anchor it properly.
Set wooden posts in concrete if the structure is freestanding, or use metal ground spikes for lighter trellises. Attach wall-mounted trellises to studs or masonry anchors, not just siding. If you're placing an arbor over a path, leave at least three feet of clear width so people can walk through comfortably.
And keep it away from buried lines—call 811 before you dig. Let it age gracefully Wood will gray over time unless you seal it. That's fine if you like the look. If you want it to stay rich brown, plan on a fresh coat of stain every couple of years.
Metal might rust, which can be charming or annoying depending on your taste. The plants will do most of the work. Once a vine starts weaving through the slats, the structure stops looking like a purchase and starts looking like it's always been there.
Pick A Style That Matches Your Home
A white vinyl arbor looks crisp against a cottage-style house, while a rough cedar trellis suits a more rustic or naturalistic yard. Metal options work well for modern or industrial spaces and tend to last longer with zero maintenance. Don't overthink the material.
What matters is that the structure feels like it belongs. If your house has dark trim, a dark-stained wood arbor will tie in nicely. If your fence is weathered gray, let the trellis weather too.
Choose Climbing Plants That Earn Their Keep
Annual vines like morning glory or black-eyed Susan vine give you quick coverage in one season. Perennials like clematis, jasmine, or climbing hydrangea take longer to establish but come back year after year. For edible yards, grow pole beans, cucumbers, or grapes up the trellis.
You get the visual divider plus a harvest. Just match the plant to your sunlight—most climbing flowers and vegetables want at least six hours of direct sun.
Install It So It Stays Put
A trellis or arbor catches wind, so anchor it properly. Set wooden posts in concrete if the structure is freestanding, or use metal ground spikes for lighter trellises. Attach wall-mounted trellises to studs or masonry anchors, not just siding.
If you're placing an arbor over a path, leave at least three feet of clear width so people can walk through comfortably. And keep it away from buried lines—call 811 before you dig.
Let It Age Gracefully
Wood will gray over time unless you seal it. That's fine if you like the look. If you want it to stay rich brown, plan on a fresh coat of stain every couple of years.
Metal might rust, which can be charming or annoying depending on your taste. The plants will do most of the work. Once a vine starts weaving through the slats, the structure stops looking like a purchase and starts looking like it's always been there.
15. Tidy the Details with Storage and Screens
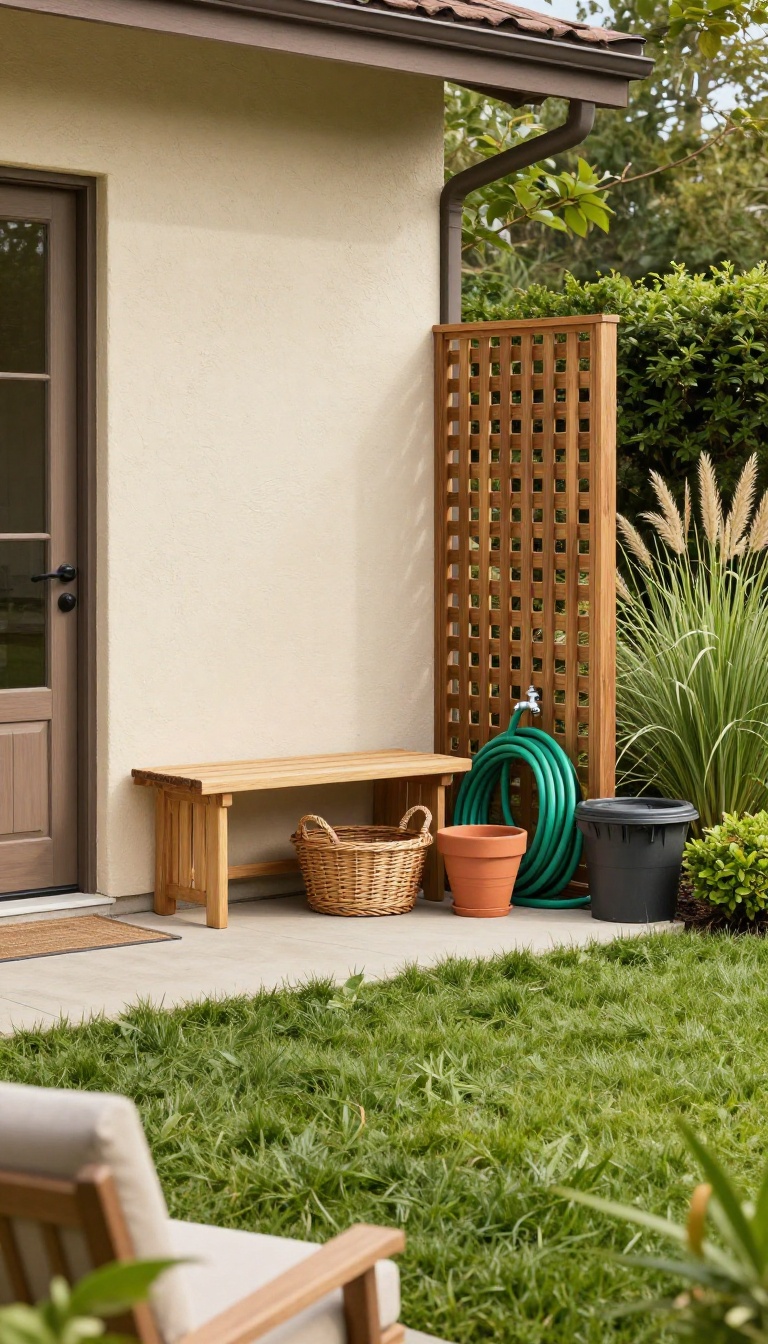
Hoses, garbage bins, and scattered tools can make even a well-kept yard feel messy. Screens and storage benches hide that clutter without much effort. The result is a calmer, more polished space that you actually want to spend time in.
Start by looking at what's visible from your main seating area. That pile of gardening tools, the coiled hose, the recycling bin—they all add visual noise. A simple screen or a storage bench can tuck them out of sight.
You don't need a fancy setup; just a bit of planning and a few basic materials.
Choose A Screen That Fits Your Space
A screen can be as simple as a lattice panel or a row of tall grasses. For a more solid look, use a wooden fence panel or a metal screen. Place it where it blocks the view of your bins or hose reel from the patio.
Make sure it's tall enough to hide what's behind it, but not so tall that it feels like a wall.
Use A Storage Bench For Double Duty
A weatherproof storage bench gives you a place to sit and a place to stash small tools, cushions, or kids' toys. Look for one with a hinged lid and a lock if you keep anything valuable inside. Place it near the back door or under a window where it's easy to reach.
It keeps the yard tidy and adds extra seating without taking up much room.
Keep Hoses And Cords Out Of Sight
A hose reel or a decorative hose pot keeps your garden hose from snaking across the lawn. Mount a reel on the side of the house or tuck a pot near a spigot. For extension cords, use a small outdoor storage box or a wall-mounted hook.
These small fixes make a big difference in how neat the yard looks.
FAQ
How much does simple backyard landscaping usually cost?
Most of these ideas land between $50 and $500 if you do the work yourself. Edging, mulch, and lighting are the cheapest wins, while pavers and fire pits cost more but still beat a full professional redesign.
Which project gives the biggest visual payoff for the least effort?
Edging beds and adding fresh mulch. Both take an afternoon, cost little, and instantly make the yard look maintained and intentional.
Do I need permission before adding a fire pit or patio?
Check local rules first. Many areas limit fire pit distance from structures or fences, and some HOAs require approval for hardscaping and tall plants.
What if my yard is mostly shade?
Lean on shade-tolerant plants like hostas, ferns, and certain grasses. Containers, lighting, and seating nooks also work well in shade and need no sun.
How do I keep these upgrades low-maintenance long term?
Choose drought-tolerant plants, mulch yearly, and pick materials like gravel and steel edging that age well. Fewer moving parts means less upkeep each season.
Conclusion
You don't need to redo the whole yard this season. Pick one idea from this list, try it this weekend, and see how it feels before adding more. A few pots by the steps or a simple path can change how you use the space.
Let it grow from there. Notice what still feels off, then layer in the next small fix. Good backyards come from steady tweaks, not a rushed overhaul.