11 Small Backyard Gardens That Make Every Inch Count
Most small backyards fail for one boring reason: wasted square footage. You have the space, but it is doing nothing useful, so the yard feels smaller than it actually is. Every inch can pull its weight when you plan around how you really live outside.
The eleven gardens below solve that problem in different ways. Some feed you weekly, some glow after dark, and some just keep the kids busy without turning the lawn into a toy dump.
None of them need a big budget or a crew. Pick the one that matches your light, your climate, and the way you actually use the yard.
1. The Vertical Salad Wall That Feeds You Weekly
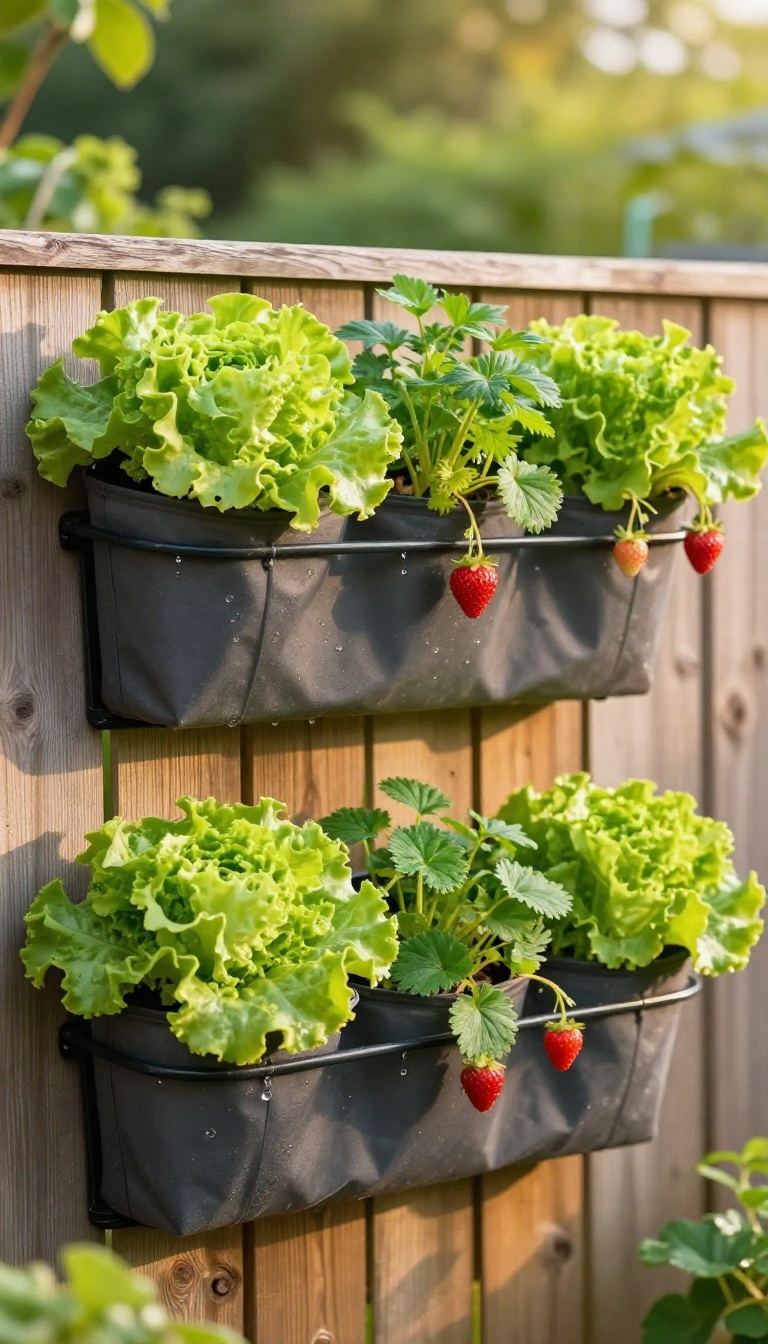
A south-facing fence or wall is prime real estate for growing food, and most people just stare at it. Turn that blank surface into a stacked salad factory using pocket planters and a simple drip line. You will harvest fresh lettuce, herbs, and strawberries every week without giving up an inch of ground space.
The vertical salad wall works because it uses the one dimension most small yards ignore: up. A standard 6-foot fence can hold three or four rows of pocket planters, which means dozens of plants in the footprint of a single tomato cage. South-facing is key because salad greens and strawberries need at least six hours of direct sun to stay productive.
If your wall faces east, you can still make it work with lettuce and herbs, but strawberries will sulk and produce tiny fruit. The whole setup costs less than a single trip to the nursery for starts, and you can build it in an afternoon with basic tools.
Pick The Right Wall And Plan Your Rows
Start by watching your wall for a day. South-facing gets the most sun and works for everything. East-facing is fine for lettuce and herbs but skip strawberries.
West-facing gets hot afternoon sun, which can bolt greens in summer, so choose heat-tolerant varieties like oakleaf lettuce. North-facing is a no-go for edibles unless you use grow lights. Once you know your light, measure the wall and plan rows about 18 inches apart vertically.
That gives each pocket planter enough room for roots and airflow. A 6-foot-tall wall can comfortably fit three rows, maybe four if you stagger them.
Set Up Pocket Planters And A Drip Line
Pocket planters come in fabric or plastic, and both work. Fabric dries out faster, so you will water more often unless you add a drip line. Plastic holds moisture longer but can get heavy when wet, so anchor them well.
Mount each planter with screws into studs or use heavy-duty hooks on masonry. For the drip line, run a half-inch main line across the top of the wall and add 1/4-inch spaghetti tubing down to each pocket. A simple battery timer at the spigot takes the guesswork out of watering.
Set it for five minutes every morning, and adjust based on how hot it gets.
Plant For Weekly Harvests, Not One Big Crop
The secret to a weekly salad is succession planting. Instead of filling every pocket at once, plant one row every two weeks. That way you always have new greens coming while the older ones finish.
Lettuce, arugula, and spinach are perfect for this. Tuck herbs like basil, parsley, and mint into the mix, but give mint its own pocket because it spreads. Strawberries go in the top row where they can cascade down and get plenty of sun.
Feed with a liquid organic fertilizer every other week, and you will be cutting leaves for dinner within a month.
2. A Pocket Patio Built From a Single Pallet
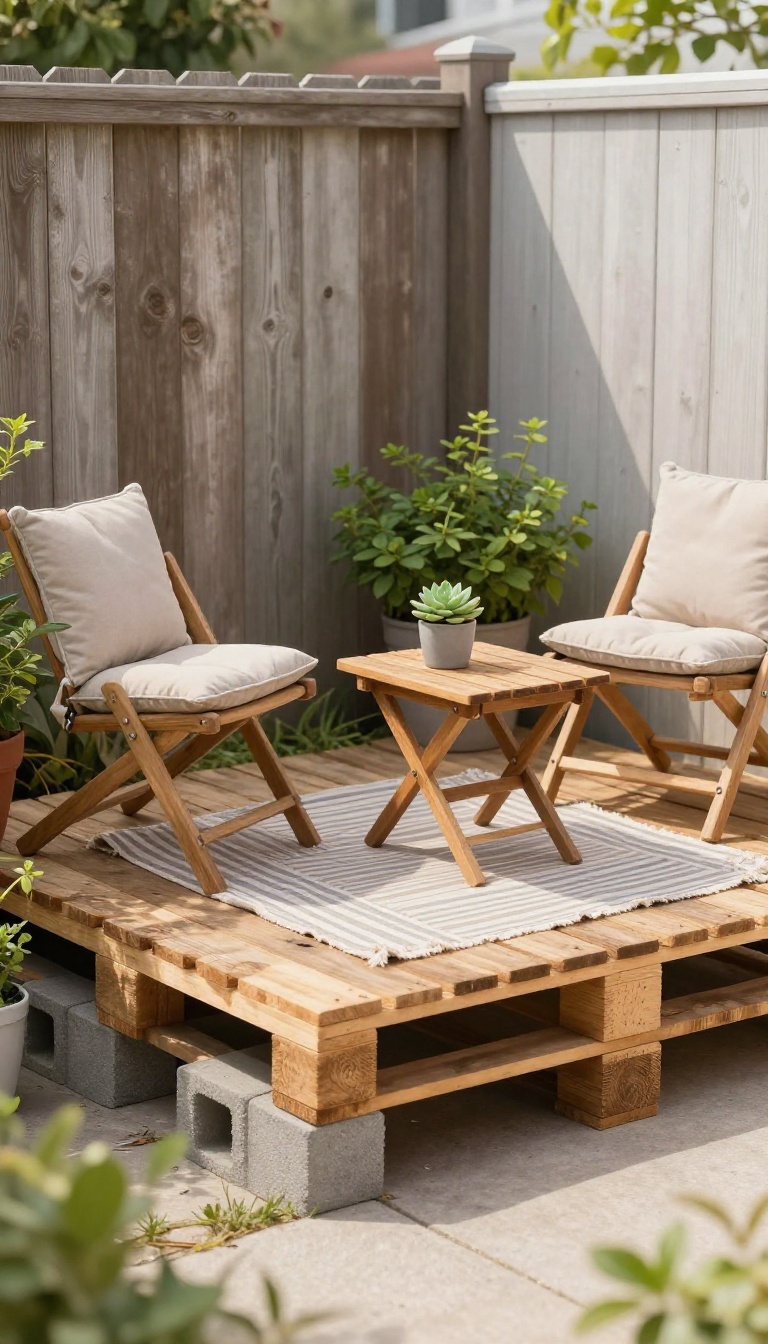
That bare dirt corner behind the garage doesn't need concrete or pavers. A single reclaimed pallet can become a sturdy little deck for two chairs and a side table. It's a weekend project that costs almost nothing and gives you a real spot to sit.
Start by finding a pallet that's heat-treated and stamped HT, not chemically treated. You want clean wood that hasn't been soaked in pesticides. Most warehouses and garden centers give them away if you ask.
Once you have it, you'll cut it down to a size that fits your corner. A standard pallet is 48 by 40 inches, which is perfect for two compact chairs. If your space is tighter, trim it to 36 by 36 with a circular saw.
Just make sure you reinforce the cut edge with a couple of 2×4 scraps screwed underneath. Set the pallet on four concrete blocks or pressure-treated feet so it doesn't sit directly on the dirt. That keeps the wood from rotting and levels it out.
Then add a thin outdoor rug or a coat of deck stain to make it feel intentional. Two folding chairs and a small plant stand complete the setup.
Pick The Right Pallet
Look for the HT stamp on the side. Avoid pallets with dark stains or a chemical smell. Oak and pine are both fine, but pine is lighter and easier to cut.
If you can only find one that's a little rough, a quick sanding with 80-grit paper smooths it out.
Cut And Reinforce
Measure your corner first. A 40-inch square fits two average chairs without feeling cramped. Use a circular saw to trim the pallet, then screw 2×4 braces along the cut side.
That keeps the slats from flexing when you sit down.
Set It And Style It
Raise the pallet on concrete blocks so air moves underneath. Add a small outdoor rug to hide the gaps between slats. Two bistro chairs and a tiny side table turn it into a real destination.
A potted herb or a solar lantern finishes the look.
3. The Raised Bed That Doubles as a Bench
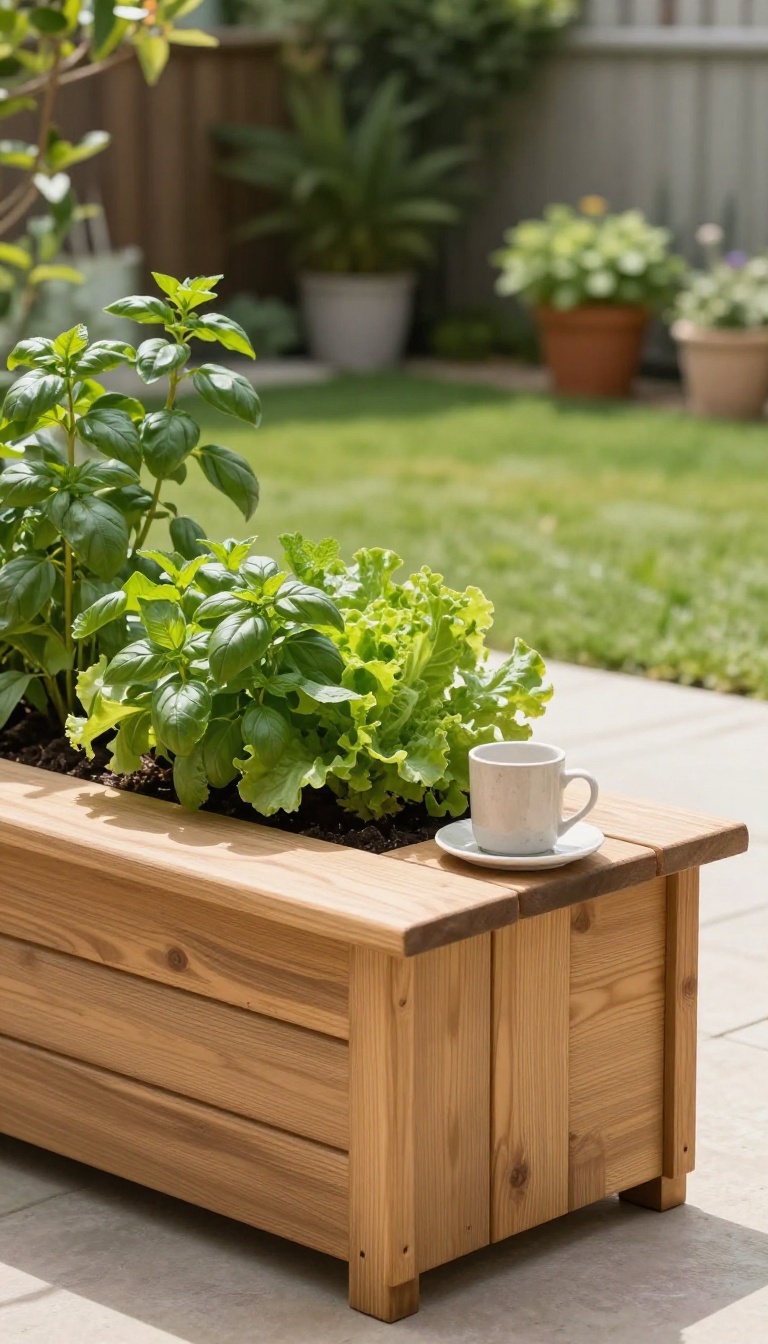
Kneeling in the dirt gets old fast, and so does standing around wondering where to put your coffee. A waist-high raised planter with a wide cedar cap fixes both problems in one move. You grow your herbs and greens at a comfortable height, then sit on the edge when you want to enjoy them.
The trick is treating the planter as furniture, not just a box for soil. Build it tall enough to rest your forearms on, then top the walls with a board wide enough to park a mug and a plate. Cedar works well because it shrugs off weather and feels smooth against bare legs.
The same structure that holds the soil becomes the seat, so you are not sacrificing any floor space to a separate bench.
Height And Depth That Actually Work
Aim for a finished height around 30 to 34 inches, which puts the soil surface near your waist. That range lets you plant, weed, and harvest without bending or kneeling. Keep the bed no wider than 3 feet so you can reach the middle from either side.
If you plan to sit on the cap, make it at least 8 inches deep and overhang it slightly for comfort.
Building The Bench Into The Bed
Frame the planter with 2×6 or 2×8 cedar boards, then run a wide cap board across the top edges. Screw the cap down from underneath so no hardware shows on the seat. Add a simple brace every few feet to keep the cap from bowing when someone sits down.
Line the inside with landscape fabric if you want to keep soil from washing out between boards.
What To Grow At Sitting Height
Fill the bed with things you will actually brush against while sitting: basil, mint, chives, and compact lettuce. Trailing herbs like thyme or oregano spill over the edge and soften the hard lines. Avoid tall plants that block your view or flop onto the seat.
A few marigolds at the corners add color and keep pests guessing.
4. A Shade Garden That Thrives Under a Tree
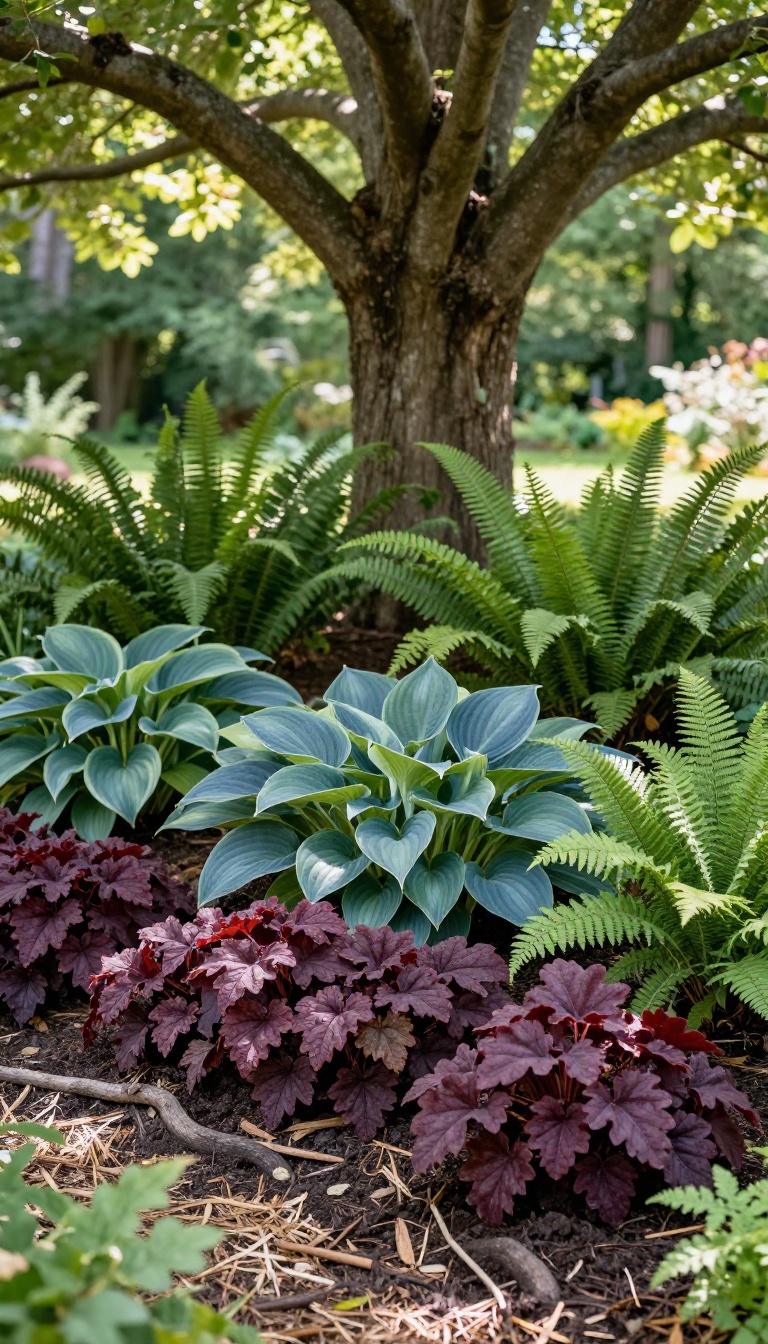
That dry, dark strip under a mature tree is not a problem to fix. It is a spot with its own rules, and once you stop fighting them, it becomes one of the easiest beds in the yard. The trick is picking plants that evolved on forest floors, where they get dappled light, root competition, and leaf litter.
Ferns, hostas, and heuchera handle all three without asking for much. This is a low-maintenance garden you plant once and mostly leave alone. No pruning schedule, no daily watering, no fuss.
The area under a tree stays dry because the tree's roots drink first. That means you are not building a flower bed so much as a woodland floor. Work with that, and the plants do the rest.
Start by clearing the space without digging deep. Tree roots sit close to the surface, so a shovel does more harm than good. Lay down a couple of inches of compost and let the worms work it in.
Then plant in small pockets, tucking each root ball between major roots. You are not amending the whole bed, just giving each plant a decent start.
Pick Plants That Like It Dark
Ferns give you height and soft texture without any flowers to deadhead. Hostas bring bold leaves in greens, blues, and golds, and they come back bigger every year. Heuchera adds color that lasts through winter in mild climates.
Mix them in drifts instead of rows. A group of three hostas next to a cluster of ferns looks intentional and fills in fast.
Water Smart, Not Often
New plants need regular water for the first season. After that, most shade perennials survive on rainfall alone, especially if you mulch. Use shredded leaves or fine bark, not heavy wood chips.
A two-inch layer keeps moisture in and stops weeds without smothering the tree.
Let It Look A Little Wild
This bed looks best when it feels natural, not manicured. Leave the fallen leaves in place over winter. They feed the soil and protect crowns from cold.
Cut back old foliage in early spring before new growth starts. That is the only real chore, and it takes about ten minutes.
5. The Container Trio That Anchors a Tiny Corner
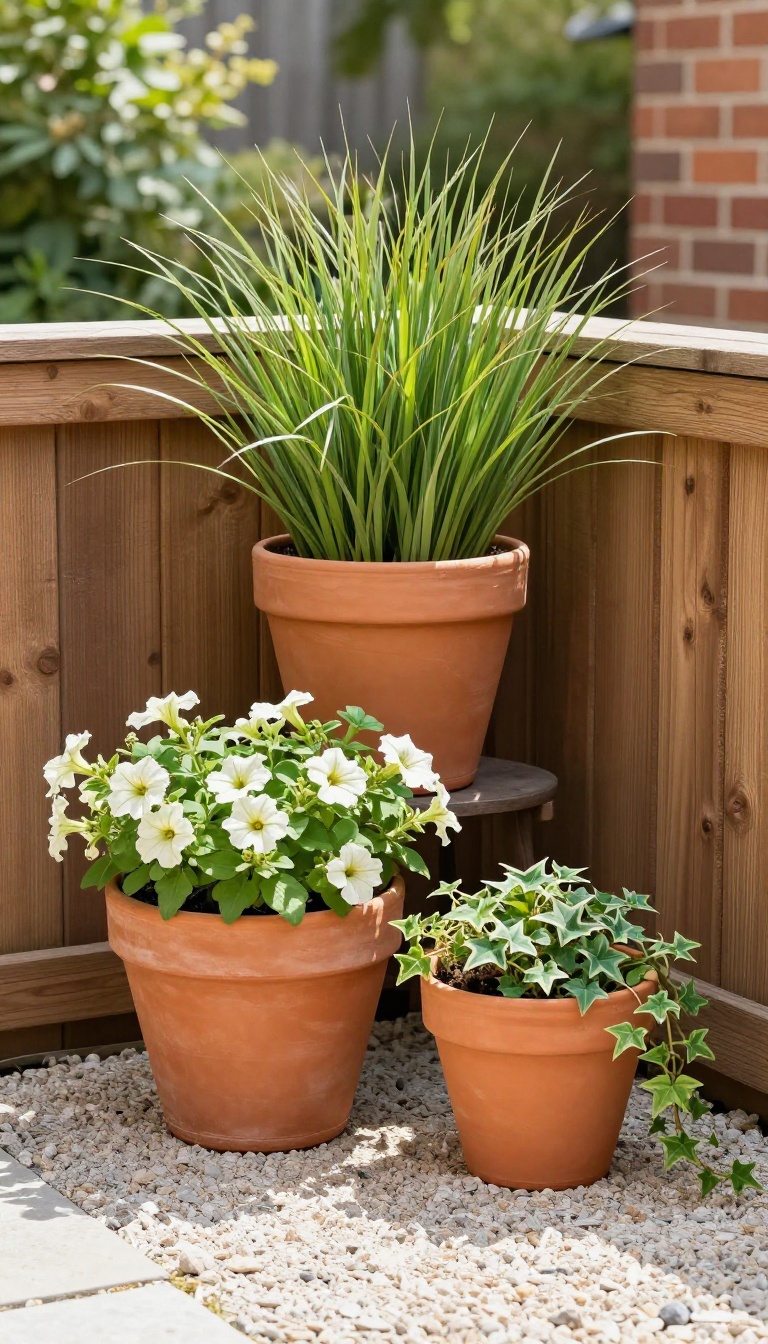
A corner that does nothing but collect leaves and a stray hose is a wasted opportunity. Three pots in graduated sizes can turn that dead spot into a polished focal point in one afternoon. The trick is picking plants that play three different roles: a thriller, a filler, and a spiller.
You do not need a landscaper or a truckload of soil. You need three containers that step up in height, a sunny or shady spot depending on your plant picks, and a simple planting formula that works almost anywhere. The thriller gives you vertical drama, the filler rounds out the middle, and the spiller cascades over the edge.
Together they cover the ground, soften the corner, and make the space feel intentional instead of forgotten.
Pick Pots That Step Up In Size
Start with the tallest pot and work down. A 14- to 16-inch pot for the thriller, a 10- to 12-inch pot for the filler, and an 8- to 10-inch pot for the spiller create a natural staircase effect. Stick to one material or color family so the trio reads as a set, not a yard sale.
Terracotta, matte black, or glazed ceramic all work. Just make sure every pot has a drainage hole, because soggy roots kill more container plants than neglect.
Choose Plants For Three Jobs
The thriller is your tall, attention-grabbing plant: ornamental grass, a small tropical, or a bold coleus. The filler is a mounding plant that fills the middle space, like petunias, begonias, or sweet potato vine in a bushy form. The spiller trails over the rim: trailing lobelia, ivy, or creeping jenny.
Match the plants to your light. Full sun means sun-loving varieties, while shade calls for impatiens, ferns, or heuchera. Keep colors to two or three so the corner looks cohesive.
Arrange, Plant, And Maintain
Place the tallest pot at the back of the corner, the medium pot slightly in front and to one side, and the smallest pot at the front edge. Angle the trio so it faces the main viewing area, usually your patio or kitchen window. Fill each pot with fresh potting mix and slow-release fertilizer.
Water when the top inch of soil feels dry, which may be daily in summer. Deadhead spent blooms and trim any leggy growth to keep the shapes tight. In cold climates, swap in frost-tolerant plants or move the pots indoors before the first freeze.
6. A Gravel Garden That Skips Watering Entirely
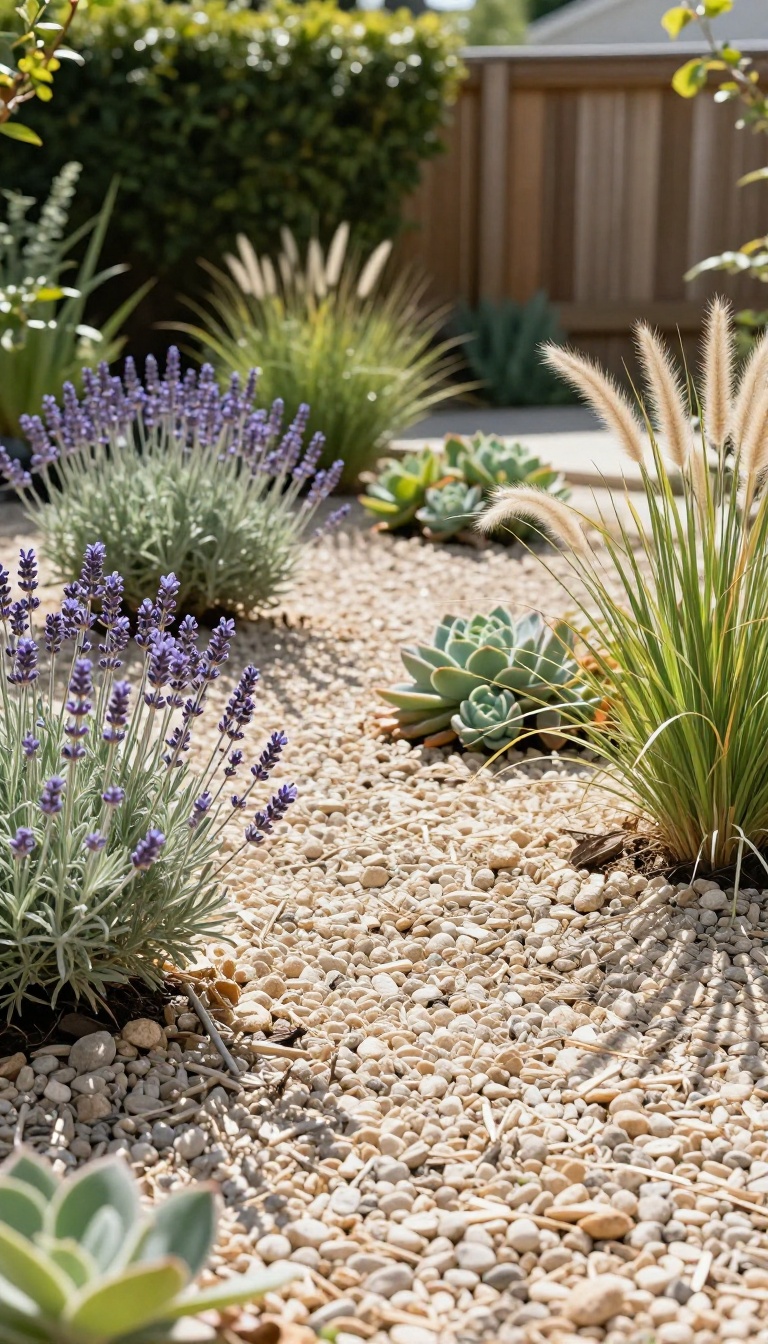
Gravel isn't just for driveways. When you plant the right things into it, a gravel bed becomes a self-sufficient garden that laughs at drought. It looks deliberate, not dusty, and you can ignore it for weeks without guilt.
The trick is choosing plants that evolved in rocky, dry places. Lavender, sedum, and ornamental grasses fit that bill perfectly. They actually prefer lean, gritty soil over rich, damp compost.
Start by clearing the area of weeds. You don't need to till or amend the soil much. If your ground is heavy clay, spread a 3-inch layer of coarse sand or fine gravel and mix it into the top few inches.
That improves drainage just enough. Plant your picks while they're small. Space them so they'll just touch when mature.
Then cover the entire bed with a 2-inch layer of gravel mulch. Pea gravel or crushed stone works well. This mulch does two jobs: it stops water from evaporating and keeps weed seeds from sprouting.
Why Gravel Beats Bark
Bark mulch holds moisture, which is great for thirsty plants but terrible for lavender and sedum. Gravel lets water drain fast and reflects heat back onto the leaves. That warmth helps these plants thrive and release their oils.
It also won't break down or need replacing every year.
The No-watering Rule
After the first month, you shouldn't need to water at all. Give new plants a deep soak once a week for the first few weeks to help roots establish. After that, rely on rain.
If you get a brutal heatwave, a quick drink once every two weeks is plenty. Overwatering kills these plants faster than drought.
Keeping It Tidy
In late winter or early spring, cut back the grasses and lavender to about 6 inches. Sedum can be left standing for winter interest, then trimmed. That's it.
No fertilizing, no spraying, no fuss. The gravel keeps weeds down, so you'll spend more time admiring it than maintaining it.
7. The Fence-Line Herb Strip Nobody Notices Until Dinner
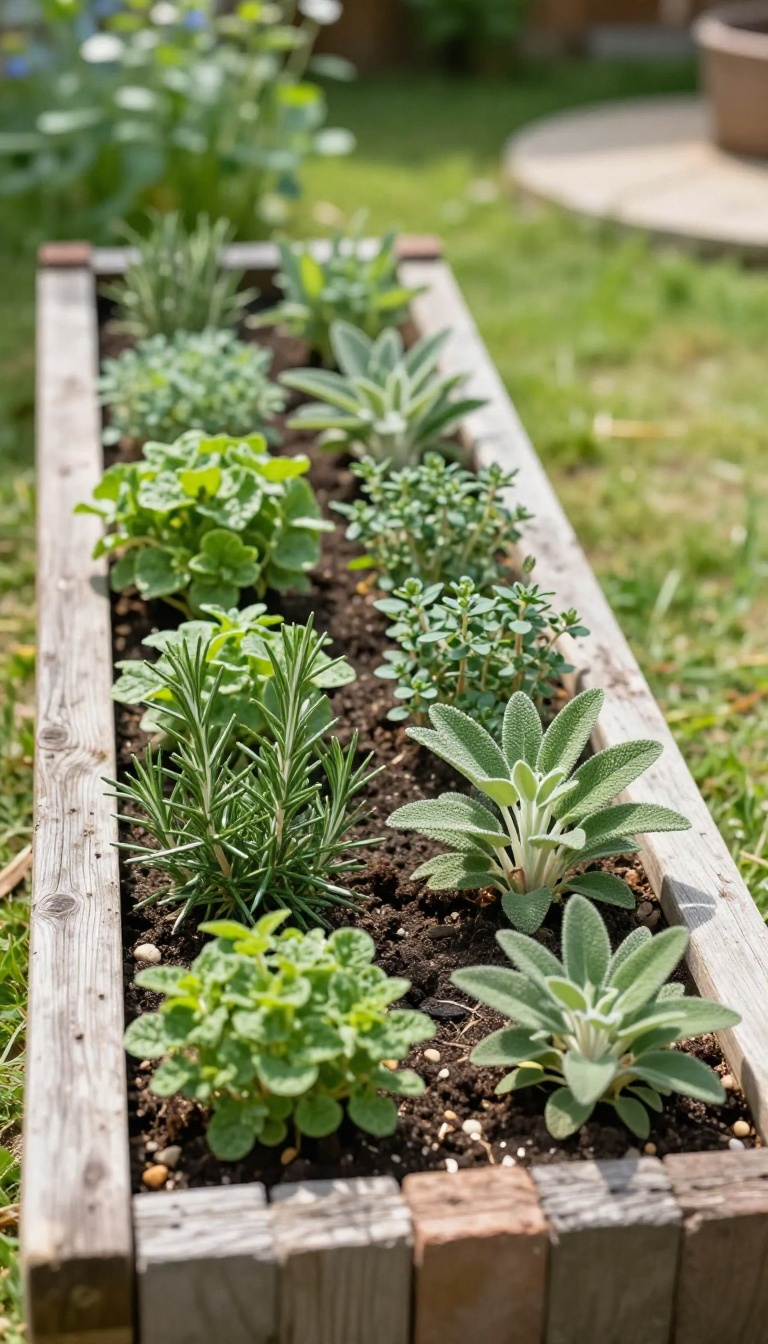
A 12-inch strip along your fence can become the hardest-working part of your yard. It stays out of the way, needs almost no maintenance, and puts fresh rosemary, thyme, sage, and chives within arm's reach of your kitchen door. You will not notice it much until you are cooking and suddenly need a handful of herbs.
This is not a full garden bed. It is a narrow border that hugs the fence line, so it does not steal space from the lawn or patio. The plants are perennials, which means you plant once and harvest for years.
The only real work is the first weekend of soil prep and a little water while they settle in.
The strip works because it uses a space you already ignore. That thin band of dirt or gravel along a fence is usually too narrow for furniture and too awkward for a lawn mower. Herbs do not mind tight quarters.
They actually prefer lean soil and good drainage, which is exactly what a fence line offers. You can build the whole thing in an afternoon. Start by clearing the strip of weeds and rocks, then loosen the top few inches of soil.
If your soil is heavy clay, mix in a bag of coarse sand or potting mix to help it drain. You do not need raised beds or expensive planters. A simple edge of bricks or stones keeps the strip looking tidy and stops grass from creeping in.
Plant your herbs in a row, spacing them according to their mature size. Rosemary and sage get bushy, so give them 18 to 24 inches. Thyme and chives stay smaller and can go closer together.
Water them deeply once a week for the first month, then mostly forget about them. These herbs are tough and drought-tolerant once established. Harvest often.
The more you snip, the fuller the plants grow. Use rosemary for roasted potatoes, thyme for chicken, sage for brown butter, and chives for eggs and salads. You will find yourself stepping outside mid-recipe, which is the whole point.
Picking The Right Spot
Most herbs want at least six hours of sun. A south- or west-facing fence usually gives you that. If your fence is shaded, stick to chives and mint, which tolerate less sun.
Avoid spots where water pools after rain. Herbs hate wet feet, and root rot will kill them faster than neglect.
Soil And Planting Basics
You do not need perfect soil. A mix of native dirt and coarse sand works fine. Add a handful of compost for nutrients, but do not overdo it.
Rich soil makes herbs grow fast and lose flavor. Plant in spring or early fall, and water gently after planting to settle the roots.
Keeping It Tidy
A fence-line strip can look messy if you let it. Trim your herbs back by a third a couple times a season. This keeps them bushy and prevents them from flopping over the fence.
Pull weeds while they are small. A layer of gravel or mulch between plants cuts down on weeds and makes the strip look intentional.
Harvesting Without Guilt
Snip from the top, never more than a third of the plant at once. Use sharp scissors or pruners. Morning is the best time, after the dew dries but before the sun gets hot.
Rinse herbs right before using them. If you have more than you can eat, dry the extras or freeze them in oil.
8. A Balcony Garden That Survives Wind and Heat
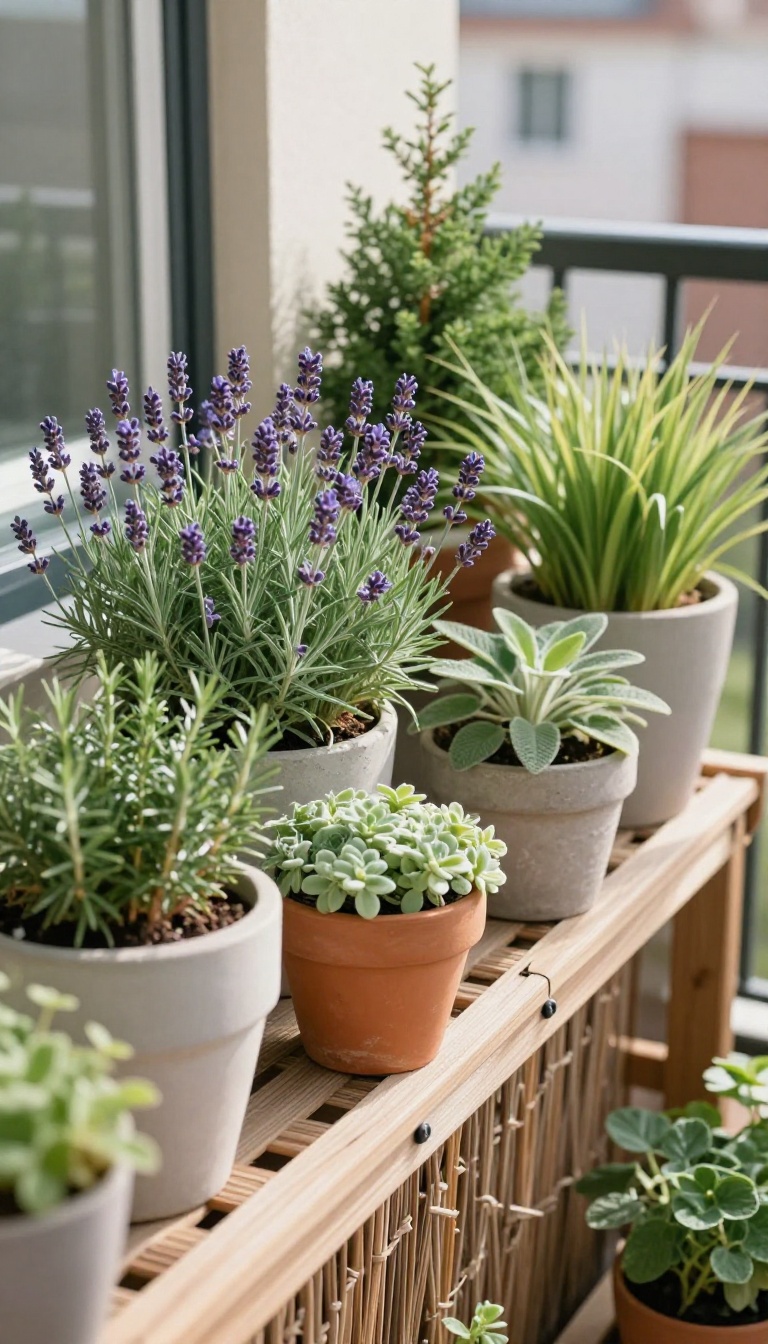
Balconies punish plants in ways ground gardens never do. Wind rips through gaps between buildings, sun bounces off concrete and glass, and every pot sits exposed on all sides. That combination kills most starter balcony gardens within a month.
The fix is not tougher plants alone. It is picking wind-tolerant species, weighing down your pots, and blocking the worst of the gusts before they hit your greenery. Get those three things right and a windy, sun-blasted balcony turns into a real garden.
Start by watching your balcony for a full day before you buy anything. Note where the wind hits hardest, which hours get direct sun, and where water pools after rain. That ten-minute observation saves you from fighting the space later.
Then build in layers: a windbreak first, anchored pots second, and plants last. This order matters because a beautiful plant in a tipping pot is still a dead plant.
Pick Plants That Shrug Off Wind
Skip delicate flowers with big petals and tall, top-heavy stems. They shred in a week. Go instead for tough, compact growers like lavender, rosemary, ornamental grasses, sedum, and dwarf conifers.
These handle constant airflow and bounce back from dry spells. Succulents and herbs like thyme and sage also earn their spot. They look good, need little water, and do not flop over when a gust rolls through.
Weight Your Pots And Anchor Them
Light plastic pots are the first thing to fly. Choose heavy ceramic, concrete, or resin containers, or line the bottom of lighter pots with bricks or stones. Group pots tightly so they support each other and block wind at soil level.
A cluster also shades the roots, which keeps moisture in during hot afternoons. If you rent and cannot drill into the wall, use weighted bases or a simple wooden frame that traps pots in place. Nothing should wobble when you nudge it.
Add A Simple Privacy And Wind Screen
A screen does double duty: it blocks nosy neighbors and cuts wind speed before it reaches your plants. Bamboo rolls, reed fencing, or outdoor fabric panels tied to a railing work well and cost little. Leave a small gap at the bottom so air still moves through instead of pushing the whole thing over.
Place the screen on the windward side, not all the way around. You want to slow the air, not seal the balcony into a hot box.
Water Smart In The Heat
Balcony soil dries fast, sometimes twice as fast as ground beds. Check pots daily in summer by pushing a finger into the top inch. Water deeply in the early morning so roots drink before the sun bakes the surface.
A layer of mulch or small pebbles on top slows evaporation and keeps the soil cooler. If you travel or forget often, a self-watering container or a simple drip line on a timer takes the guesswork out of it.
9. The Kids' Patch That Keeps Toys Off the Lawn
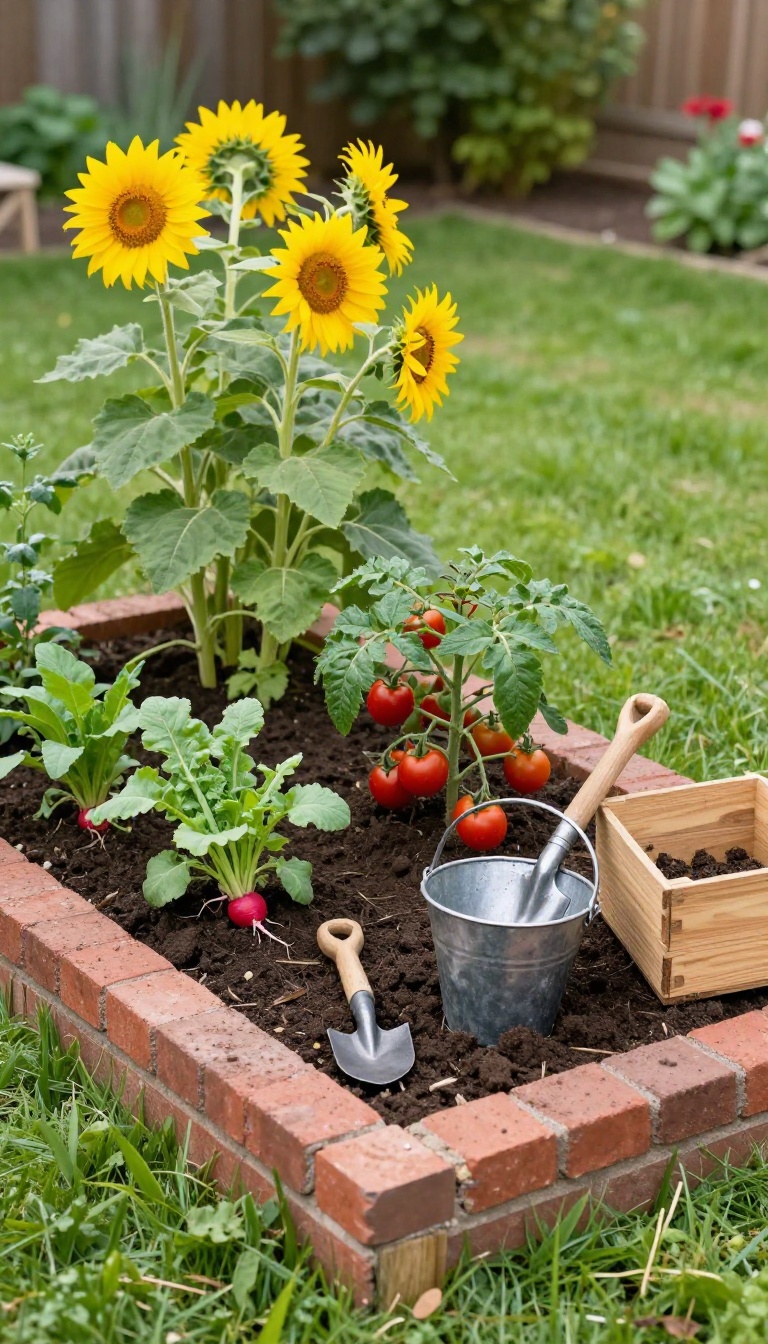
Give kids a patch of dirt to destroy and they'll leave the rest of the yard alone. That's the whole logic behind this idea: a dedicated digging bed where shovels, buckets, and muddy hands are welcome. Plant it with fast, tough, kid-friendly crops, and the lawn stops looking like a toy graveyard.
The patch doesn't need to be big. A four-by-four-foot bed is plenty for two kids to share. Pick a spot you can see from the kitchen window, because half the point is letting them play while you keep an eye on things.
Edge it with something low and soft, like bricks or a short timber border, so it reads as their zone and not a random hole in the yard. Fill it with loose, easy-to-dig soil, and the digging happens where you want it.
What To Plant
Sunflowers and cherry tomatoes are the workhorses here. Sunflowers sprout fast, get tall enough to feel like a jungle, and don't mind rough handling. Cherry tomatoes give kids something to pick and eat straight off the vine, which keeps them coming back.
Tuck in a few radishes or bush beans for quick wins. Skip anything delicate or slow, because impatient hands will trample it.
Keeping It Theirs
A small sign with their names, a couple of kid-sized tools on a hook, and a bucket for treasures goes a long way. Let them decide what goes in the patch, within reason. The more ownership they feel, the less they'll wander into the flower beds with a trowel.
Refresh the soil each spring and add a new packet of seeds to keep the interest alive.
Protecting The Rest
Even with a patch, toys will drift. A shallow tray or crate near the bed gives shovels and trucks a home, so they don't end up scattered across the grass. A quick five-minute tidy at the end of play becomes a habit fast.
And if a stray tomato gets squashed on the lawn, don't sweat it. That's what the patch is for.
10. A Night Garden That Glows After Sunset
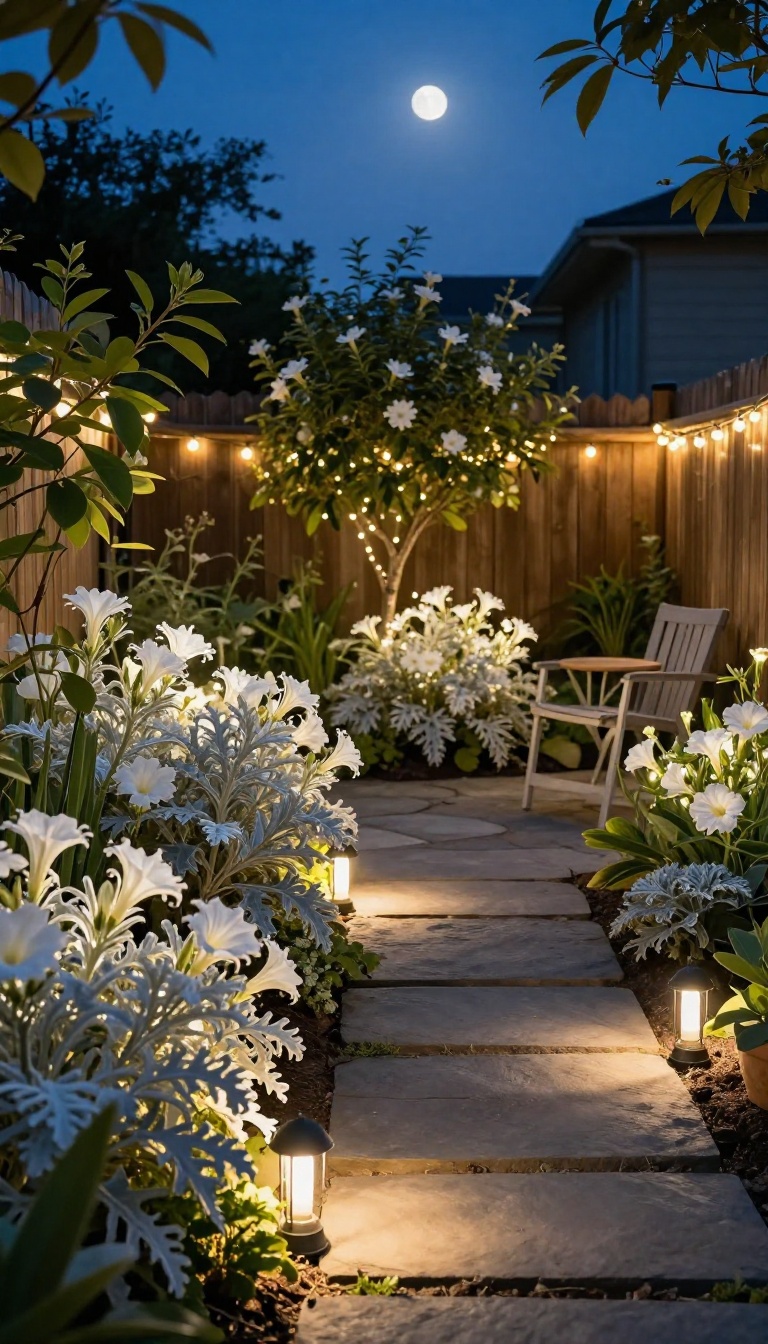
Your backyard might be at its best after the sun goes down. The heat fades, the neighborhood quiets, and a small space suddenly feels more intimate. A night garden leans into that shift instead of fighting it.
The trick is choosing plants that hold their own in low light. White flowers and silver leaves catch whatever glow is around, whether that's a moon, a porch light, or a cheap solar stake. Add a few soft lights and you have a reason to sit outside past nine.
Pick Plants That Shine At Night
White blooms are the backbone here. Think moonflower, nicotiana, white cosmos, or shasta daisies. They read as bright even when everything else turns to shadow.
Silver and gray foliage does the same job without flowers. Dusty miller, lamb's ear, artemisia, and Russian sage all reflect light instead of swallowing it. Plant them where you'll walk past them after dark.
Scent matters too. Night-blooming jasmine, gardenia, and stock release their fragrance in the evening. That combination of visible and fragrant keeps you outside longer.
Light It Without Wires Or An Electrician
Solar stake lights have gotten cheap and decent. Stick a few along a path or at the base of taller plants. They charge all day and come on at dusk without any wiring.
String lights are the other easy win. Drape them along a fence, over a pergola, or through a small tree. Warm white bulbs feel calmer than cool white, and they make a tiny yard feel like a room.
Skip floodlights. You want pools of soft light, not a stadium. A single uplight aimed at a white-flowering shrub can do more than six random stakes.
Keep The Seating Close And The Path Clear
A night garden only works if you actually sit in it. Put a chair or a small bench right in the middle of the glow, not off to the side. Two chairs facing each other beats one lonely seat.
Keep paths wide enough to walk without a flashlight. A 24-inch gravel or mulch strip lined with low lights does the job. You want to move through the space without thinking about it.
If mosquitoes are a problem, add a small fan or a citronella plant near the seating. Moving air does more than any candle.
Make It Work In A Tiny Footprint
You don't need a big bed. A 3-by-6-foot strip along a fence can hold three white-flowering perennials, a clump of silver foliage, and two solar stakes. That's a night garden.
Containers work too. A large pot of white petunias or bacopa on a patio gives you the same glow without digging anything up. Move it around until the light hits it right.
Layer heights so something is always at eye level. Tall white flowers in back, silver mounds in the middle, and low white groundcover in front. From a chair, it reads as a single soft wall of light.
11. The Four-Season Corner That Never Looks Empty
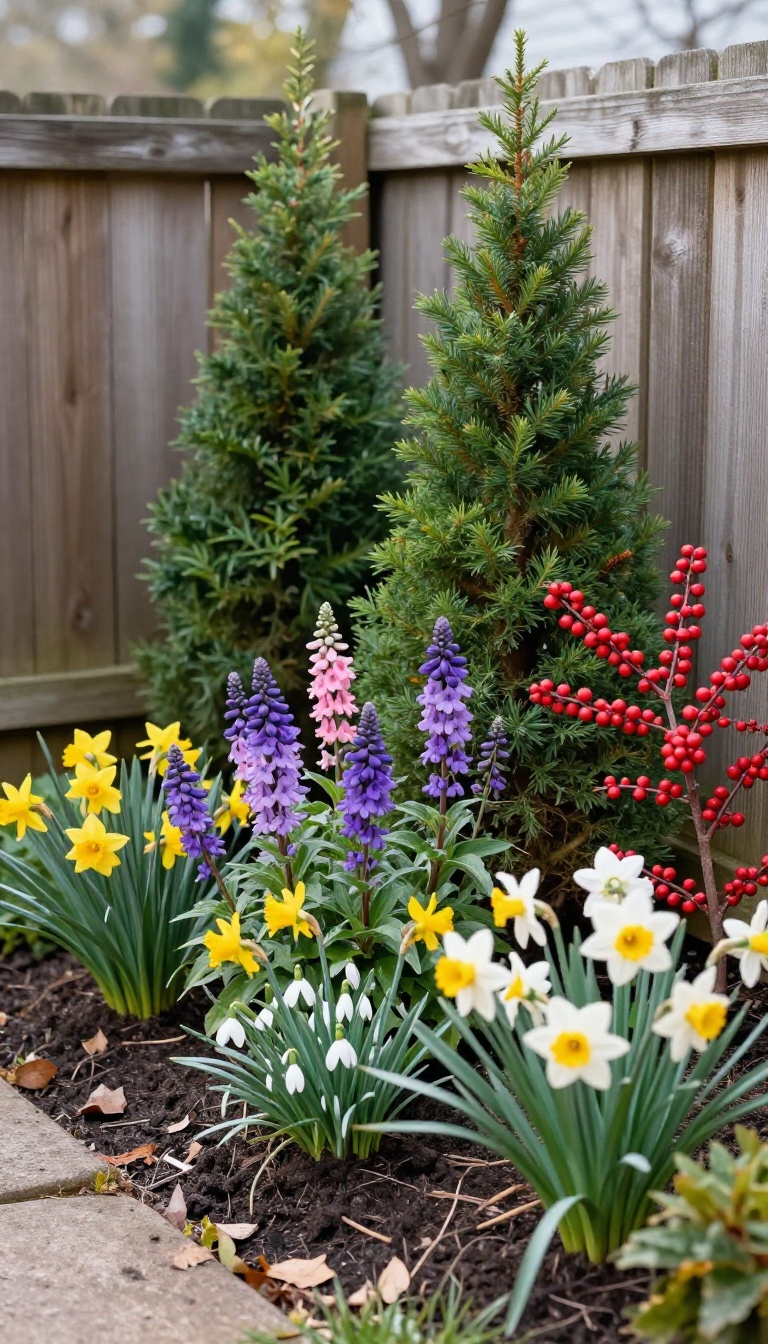
Most gardens have a season. This one has four. The trick is layering plants that take turns, so when one fades, another steps up.
You don't need a big bed for this. A corner that's six feet wide and four feet deep can hold enough variety to stay interesting all year. The goal is simple: something green, something blooming, or something bright in every month.
Here's how to build it.
Start with a backbone of evergreens. They hold the structure when everything else dies back. A small holly, a dwarf pine, or a boxwood works.
Plant one or two, not a hedge. Then add bulbs for early spring. Daffodils, crocus, and snowdrops push up before the trees leaf out.
They give you color when you need it most. Summer perennials take over next. Coneflower, salvia, and daylilies bloom for weeks.
They fill the gap between spring bulbs and fall berries. Finally, winter berries and bark. A winterberry shrub or red-twig dogwood brings color when the garden is bare.
The berries feed birds, too. Layer them by height. Tall evergreens in back, mid-size perennials in front, bulbs and groundcovers at the edges.
That way, each plant gets its moment without crowding the others.
Pick Plants That Peak At Different Times
Make a simple calendar of bloom times. You want at least one plant looking good in every month. Early spring: bulbs.
Late spring: columbine or bleeding heart. Summer: coneflower, black-eyed Susan. Fall: asters, sedum.
Winter: berries, evergreen foliage. Write it down so you don't end up with three plants that all bloom in June.
Keep The Soil Happy Year-round
A four-season bed works hard, so feed the soil. Mix in compost at planting time. Top-dress with more compost each fall.
Mulch with shredded leaves or bark to protect roots in winter and hold moisture in summer. Healthy soil means fewer pests and stronger plants.
Edit, Don't Overplant
It's tempting to cram everything in. Resist. Leave room for each plant to reach its natural size.
Cut back spent perennials in early spring, not fall, so birds can eat the seed heads. Remove anything that's struggling after a year. A simple, healthy bed beats a crowded, messy one.
FAQ
How do I choose the right garden idea for a really tiny yard?
Start with your light. Watch the space for a day and note where sun lands. Then pick the idea that matches that exposure, like the shade garden for dark corners or the gravel garden for full sun.
Space and budget come next.
Can I combine more than one of these ideas in the same yard?
Yes, and you probably should. A vertical wall, a raised bed bench, and a container trio can all fit in a 10-by-10 space if you plan the layout first. Sketch it on paper before you buy anything.
What is the cheapest way to start a small backyard garden?
The pallet patio and the fence-line herb strip cost the least. Both use reclaimed or inexpensive materials and need very few plants to look finished. Start there and add the raised bed later.
Do these small garden setups need a lot of maintenance?
Most need about 15 to 20 minutes a week once established. The gravel garden and four-season corner are the lowest effort. The salad wall and kids' patch need a bit more attention during peak season.
How do I keep a small garden from feeling cluttered?
Limit your plant palette to three or four main colors and repeat them. Use consistent pots and one type of mulch. Fewer, bigger groupings always look better than a dozen random ones.
Conclusion
Start with the idea that solves your most annoying problem, whether that's a dining table that never fits or a corner that collects dead leaves. Give it a weekend, then live with it for a week before adding anything else. Small yards reward patience, not a cart full of impulse buys.
Let each change settle, notice what still feels cramped, and build from there. Every inch starts working when you stop rushing the process.