15 Kitchen Christmas Decor Ideas for a Festive Makeover
You walk into the kitchen on a cold December morning, and it still looks like October. The coffee is brewing, but nothing else says Christmas. That gap between holiday cheer and everyday cooking space is exactly what this list fixes.
Kitchens get heavy traffic during the holidays, so the decor has to work around real life. Grease, steam, and busy counters rule out fussy setups. Every idea here keeps function first and adds festive charm second.
Some ideas take ten minutes and cost almost nothing. Others suit a full weekend makeover. Pick a few, mix them with what you already own, and the room will feel like the holidays without getting in your way.
1. Drape a Fresh Garland Across the Range Hood
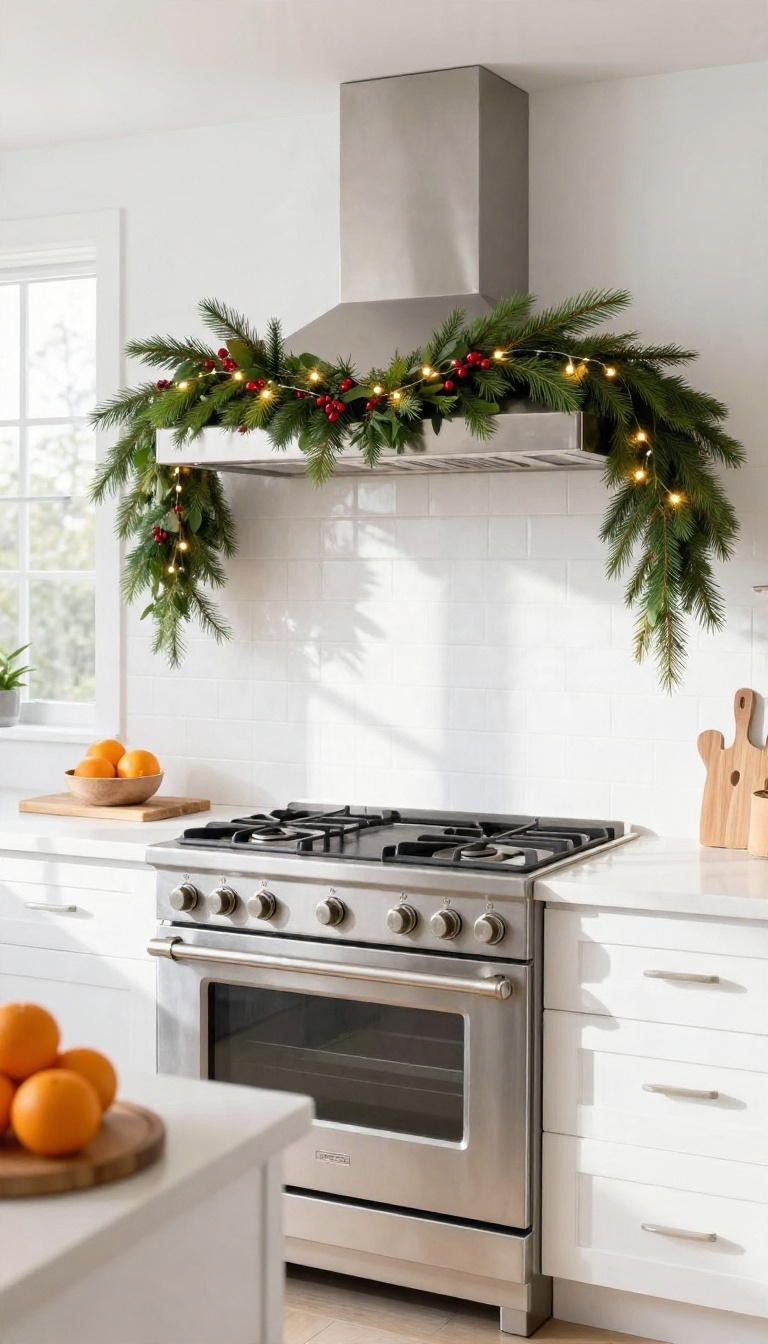
The range hood is the one spot in your kitchen that's already front and center, so it's a natural place to start decorating. A garland draped across the front turns that big metal box into something that looks intentional and festive. It takes maybe fifteen minutes, and you probably already have half of what you need.
Fresh greenery smells amazing, but faux holds up better near steam and grease. Either works, so pick based on how long you want it to last. The trick is getting it to stay put without wrecking the hood or blocking anything important.
Start by measuring the width of your hood and add a couple of feet so the garland can swoop down at the ends. A six-foot strand usually covers a standard hood with a little drape to spare. Fluff it out before you hang it so you can see how full it looks.
Once it's up, step back and check the proportions. A garland that's too thin gets lost against a big hood, and one that's too thick can look bulky. You can always tuck in extra sprigs to fill gaps.
Keep It Away From The Heat
Real greenery dries out fast near a hot hood, and dry branches near a flame are a bad combo. Keep the garland on the front face and sides, not directly over the vent or burners. If your hood runs hot, go faux or keep real greens well clear of the cooking zone.
Battery-powered lights are the safe choice here. Skip anything that needs an outlet near the stove, and check that cords aren't dangling where they could catch.
Secure It Without Nails
Command hooks are the easiest route and they peel off clean when the season ends. Stick them on the sides of the hood where they won't show, then loop the garland ends over them. For a metal hood, small magnetic hooks work great and leave zero residue.
If you want a fuller look, zip-tie a few branches to a tension rod and rest it across the top edge. Just make sure nothing hangs low enough to block your view of the burners.
Add Lights And A Little Sparkle
A strand of warm white battery lights woven through the garland makes the whole thing glow at night. Tuck the battery pack behind the garland so it stays hidden. Timer lights are worth the few extra dollars since you won't have to remember to switch them on.
A few small ornaments or pinecones tucked into the greenery add texture without going overboard. Keep it light so the garland still hangs naturally instead of sagging in the middle.
2. Hang a Mini Wreath on Every Cabinet Door

Cabinet doors are the biggest blank canvas in most kitchens, and they line up in perfect rows just waiting for something. Small wreaths turn that repetition into a design feature instead of a wall of wood. The trick is keeping them light, secure, and gentle on your finish.
You don't need fancy hardware or a big budget. Mini wreaths, ribbon loops, and removable hooks handle the whole job. Once you hang the first one, the rest go up fast and the symmetry does the heavy lifting.
The appeal here is rhythm. A row of matching wreaths reads as intentional, even when each one cost a couple of dollars. Space them evenly and the eye follows the line across the room.
Start with your upper cabinets, since they sit at eye level and carry the most visual weight. Lower cabinets can join in too, but keep the scale smaller so the room doesn't feel cluttered.
Pick The Right Size And Style
Mini wreaths usually run six to ten inches across, which sits nicely on a standard cabinet door. Go smaller on glass-front cabinets so you don't block what's inside. Greenery works for a classic look, but don't overlook felt, twine, or tiny dried citrus rings.
Mixing textures across the row adds interest without breaking the matching pattern. Stick to one style per row for a clean result.
Hooks That Protect Your Finish
Command-style removable hooks are the safest bet for painted and stained cabinets. Clean the surface first, press firmly, and let the adhesive set for an hour before hanging anything. Over-the-door hooks work on cabinet doors with a gap at the top, and they leave zero residue.
Avoid nails, screws, and anything that needs a drill. You want decor you can pull down in January without a touch-up pen.
Budget And Ribbon Options
Dollar-store wreaths look surprisingly good in a row, especially when you fluff the branches first. Thrift shops and after-Christmas sales are goldmines for small greenery. If wreaths aren't in the budget, ribbon loops cost almost nothing.
Cut wide ribbon into equal lengths, tie a simple loop, and hang one on each door. Red, plaid, or velvet ribbon gives you the same festive symmetry for pennies.
Keep The Arrangement Balanced
Measure from the top of each door to the hook so every wreath hangs at the same height. A cheap paper template makes this quick. Center each wreath horizontally, then step back and check the whole row from across the room.
Small adjustments matter more than you'd think. If one door feels bare, add a matching ribbon to tie it in.
3. Style a Countertop Christmas Tree

Not every kitchen has room for a full-size tree, and honestly, most don't need one. A small tabletop tree gives you the festive hit without eating up floor space or blocking a drawer. It works especially well on an island, a corner counter, or that awkward stretch of countertop near the fridge that collects junk mail.
The trick is treating it like a functional object, not just decoration. Pick the right size, get the base solid, and keep it clear of the stove. Do those three things and it earns its spot instead of becoming something you move every time you chop an onion.
A countertop tree should feel intentional, not like a mini version of your living room setup. Scale it to the space and keep the decorations simple so it reads as charming rather than cluttered.
Pick A Size That Fits The Counter
Measure the footprint before you buy anything. A tree that's 18 to 24 inches tall usually suits an island or a wide counter without hogging workspace. If your counter is narrow, go shorter and slimmer rather than wider.
Height matters as much as width. A tree taller than about two feet starts to feel like it's looming over the prep area, and it's easier to knock over. Keep the top below eye level when you're standing at the counter so it doesn't block your view or the light.
Make The Base Stay Put
Small trees tip easily, especially in a kitchen where people lean and reach. Skip the flimsy plastic stand that comes in the box and set the tree in something heavier. A weighted pot, a small bucket filled with stones, or a sturdy ceramic planter all work.
Line the bottom with a folded towel or felt pad so it doesn't scratch the counter. If your counter gets bumped a lot, a strip of removable mounting putty under the base adds grip without leaving marks. Test it with a gentle nudge before you decorate.
Keep It Clear Of The Cooking Zone
The stove, oven, and toaster are no-go zones. Grease and steam will coat the branches, and anything flammable near a heat source is a bad idea. Give the tree at least a few feet of clearance from anything that gets hot.
Corner counters and island ends are safer bets. Avoid placing it right next to the sink too, since splashes and dampness don't do decorations any favors. If your only open spot is close to the action, consider a spot on top of the fridge or a high shelf instead.
Decorate Light And Practical
Keep ornaments small, lightweight, and shatterproof. Glass baubles and a busy kitchen don't mix. Battery-operated fairy lights beat plug-in strands because there's no cord to trip over or unplug every time you wipe the counter.
Stick to a simple color scheme so a small tree doesn't look noisy. A few mini ornaments, a short garland, and a small topper are plenty. Skip tinsel and anything shedding glitter, because you'll be finding it in your food prep for weeks.
4. Swap Everyday Canisters for Festive Jars

Your countertop canisters already earn their keep holding flour, sugar, and oats. For December, give them a seasonal job instead. Swap in red, green, or clear glass jars filled with candy canes, cocoa, and peppermint bark, and the busiest corner of your kitchen turns festive without adding clutter.
The best part is how little effort it takes. You're not building anything or hanging anything. You're just trading one set of containers for another, and reversing it in January takes about five minutes.
Canisters sit right where everyone looks, so they do a lot of decorating work for zero extra square footage. A row of candy-filled jars reads as intentional holiday styling, even though it's really just storage doing double duty. Keep the swap simple and it stays useful all season.
Pick Jars That Earn Their Spot
Clear glass shows off the red-and-white stripes and cocoa layers, which is half the charm. Mason jars, latch-top jars, or plain glass canisters all work, and you probably own at least one already. If you want color, a red or forest green jar with a wooden lid adds a festive hit without shouting.
Match the size to what you're storing. Tall jars suit candy canes standing upright, while wide-mouth jars handle peppermint bark and wrapped chocolates. Line up three jars of similar height for a tidy row, or mix sizes for a looser, collected look.
Fill Them With Things People Actually Eat
Candy canes are the easy win, but don't stop there. Layer cocoa powder and mini marshmallows in a clear jar for a hot chocolate station that looks as good as it tastes. Peppermint bark, red-and-green wrapped chocolates, and even gingerbread cookies all fill the bill.
Keep one jar practical. A small jar of cinnamon sticks or whole nutmeg near the stove feels seasonal and gets used while you cook. That mix of pretty and practical is what keeps the setup from feeling like pure decoration.
Keep The Swap Easy To Undo
Store your flour and sugar in a cabinet or pantry bin for the month so nothing gets lost. Label the festive jars if guests will be dipping in, and keep a small scoop nearby for anyone who wants a candy cane with their coffee. Come January, empty the jars, run them through the dishwasher, and put the everyday staples back.
No packing boxes, no storage bins, no guilt about leftover decor. The whole thing resets in minutes.
5. Create a Hot Cocoa Station
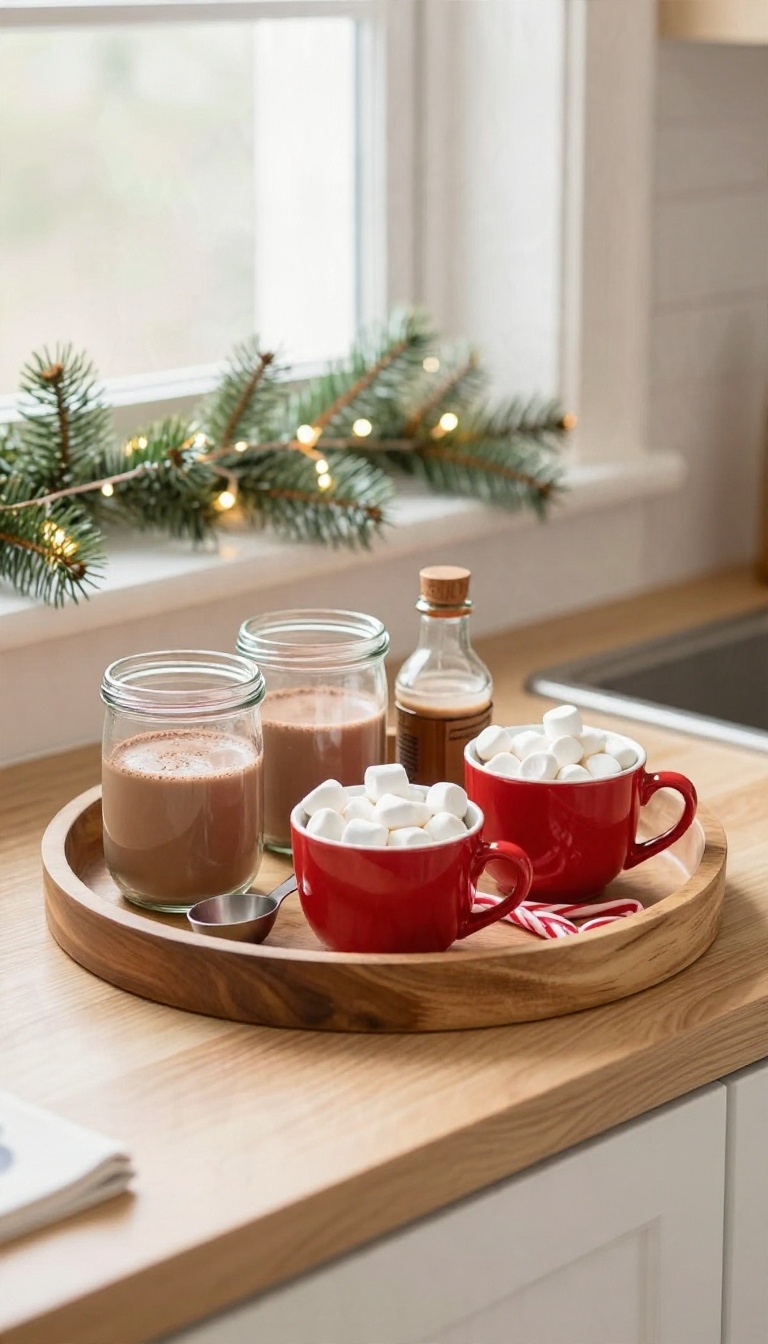
A hot cocoa station pulls double duty. It looks festive and it actually gets used every single day of the season, which is more than most decorations can claim. Guests gravitate to it, kids can serve themselves, and it gives you a reason to keep pretty mugs out instead of buried in a cabinet.
The setup itself is simple: a tray, a few jars, and something to hold spoons. You don't need special equipment or a dedicated corner. A stretch of counter near the kettle or coffee maker usually works fine, and it keeps everything within arm's reach when someone wants a warm drink.
Start with a sturdy tray so the whole station can move as one unit. That matters more than you'd think. When you need the counter back for cookie dough or a turkey, you lift the tray and set it aside instead of clearing ten separate items.
Wood, slate, or a rimmed metal tray all work. Pick something with a raised edge so mugs don't slide off when someone bumps the counter. Size it to your space before you fill it, because an overcrowded tray looks cluttered fast.
What To Put On The Tray
Keep it to the essentials and let the extras rotate. A jar of cocoa mix, a small bowl of marshmallows, and a stack of mugs cover the basics. Add a little dish for candy canes or chocolate stirrers if you have room.
Label the jars with simple tags or chalkboard stickers so guests know what they're scooping. A small scoop or spoon in each jar keeps things tidy and stops people from digging with their fingers. If you have a tiny creamer or a bottle of cinnamon, tuck it at the back so the front stays clean.
Fitting It On A Small Counter
Narrow counters don't have to sit this one out. Go vertical instead of wide. A two-tiered stand or a small shelf riser stacks mugs above the jars and frees up the surface below.
You can also use the wall. A floating shelf above the station holds mugs and keeps the counter clear for actual cooking. If neither works, scale down to a single mug, one jar, and a bowl of marshmallows on a small plate.
The idea still reads, just smaller.
Keeping It Festive And Clean
Cocoa stations get sticky, so make cleanup easy. Line the tray with a cloth or paper liner you can swap out, and keep a small damp cloth nearby during gatherings. Wipe the jars down every couple of days, especially if kids are serving themselves.
For the festive part, a string of battery lights around the tray or a sprig of greenery tucked behind the jars does plenty. Skip anything that touches the cocoa directly. You want charm that doesn't end up in someone's mug.
6. Layer a Holiday Runner Down the Island
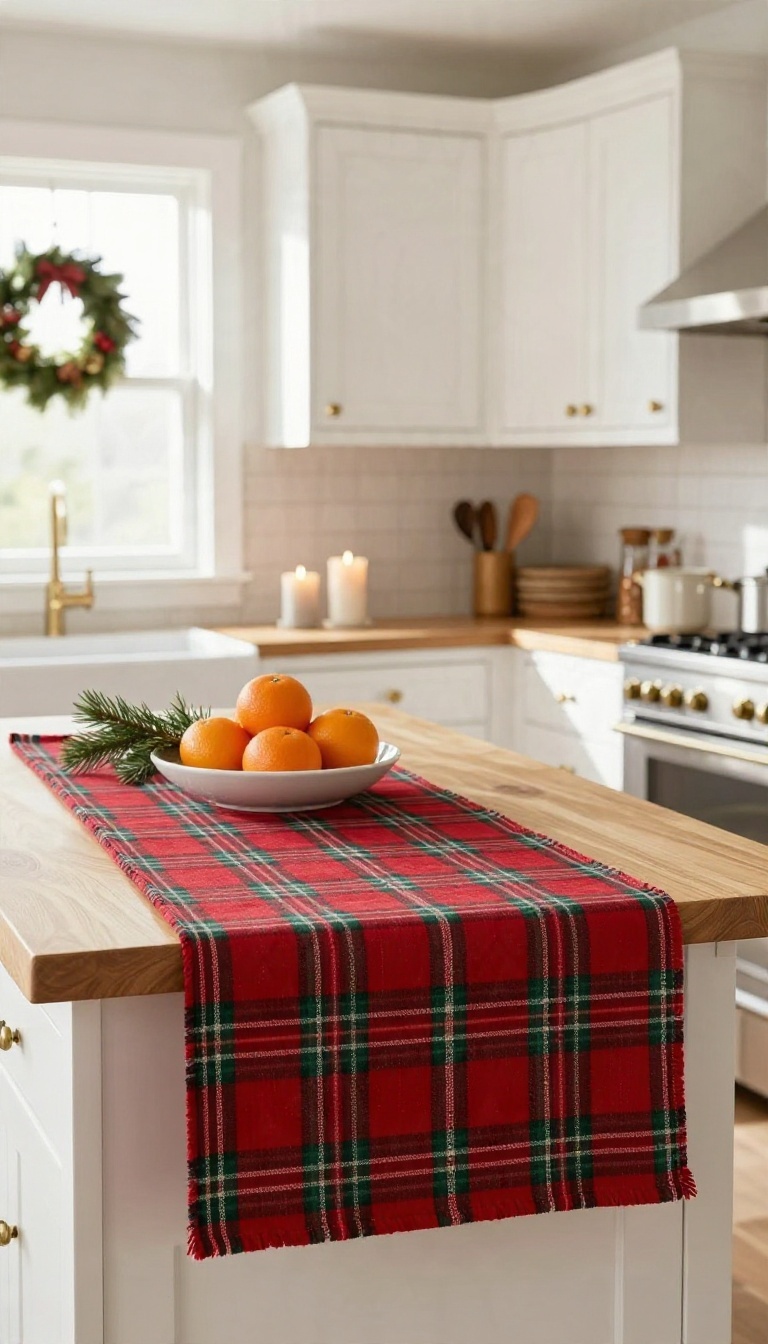
An island runner is the fastest way to make a kitchen feel dressed for the season. You fold it out, smooth it down, and the whole room shifts. No tools, no drilling, no ladder.
It also protects the surface where everyone leans, snacks, and sets down hot dishes. That practical side matters during party season. Pretty is nice; washable is better.
The trick is picking a fabric that suits your household and topping it with something simple. Get those two things right and the island does most of the decorating for you.
Start by measuring the island's length and adding about eight to twelve inches of overhang on each end. A runner that stops short looks accidental; one that drapes a little looks intentional. Standard runners often work on smaller islands, but long islands usually need a custom length or two runners butted together.
If your island is extra wide, don't force a skinny runner down the middle. A wider cloth reads better and won't slide around when someone bumps it.
Pick A Fabric That Survives Real Life
Cotton and linen blends win here. They drape well, wash easily, and don't melt if a warm pan gets close. Look for medium-weight fabrics with a tight weave, since loose weaves snag on rings and utensils.
Pattern matters too. A busy print hides crumbs and small spills far better than solid white, which is worth remembering if kids or grandkids use the island as a landing zone. Plaids, ticking stripes, and simple block prints all feel festive without screaming holiday.
Skip anything dry-clean only. A kitchen runner will need washing, probably more than once between Thanksgiving and New Year's.
Make Washability A Dealbreaker
Before you buy, check the care label and think about your actual week. If the runner can't go in the machine on cold and tumble low, it's probably not right for a working island. Pre-wash new fabric if you're sewing your own, so it doesn't shrink after the first spill.
For store-bought runners, a color catcher sheet in the first wash protects the reds and greens from bleeding. Keep a spare in the linen closet. Swapping a stained runner for a clean one takes thirty seconds and saves the whole setup on a busy night.
Top It With One Simple Centerpiece
The runner is the backdrop, so keep the centerpiece low and easy to move. A shallow bowl of ornaments, a cluster of candlesticks, or a small tray with greenery all work. Anything tall blocks conversation and gets shoved aside when the dough comes out.
Group items in odd numbers and leave breathing room at both ends of the runner. A single focal point looks calmer than a row of little things. If you need the counter space for cooking, choose a centerpiece you can lift off in one piece.
A tray or basket makes that easy, and the runner stays put underneath.
7. Add Battery-Operated Lights Under the Cabinets
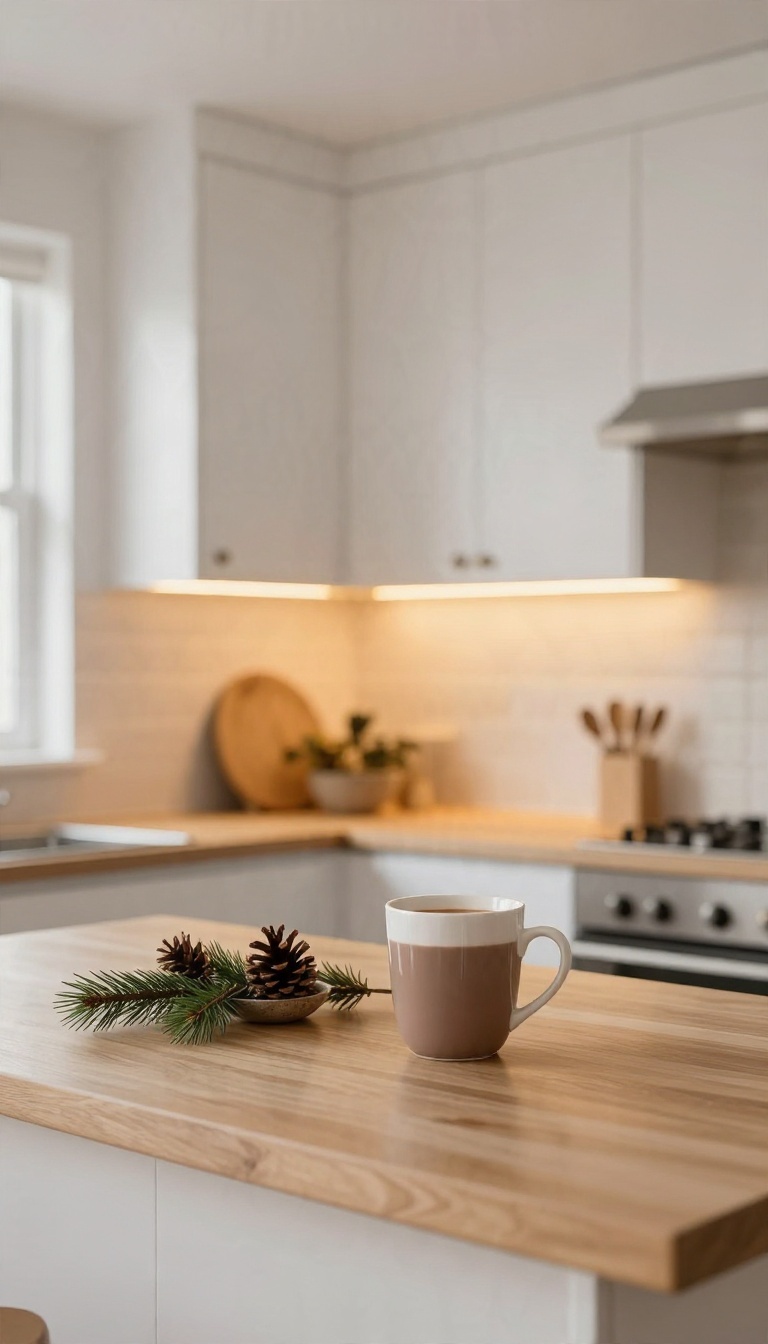
Under-cabinet lighting is one of those upgrades that feels fancy but costs very little. It turns your countertops into a warm, inviting stage after the sun goes down, and it makes evening baking sessions feel a lot more festive. The best part?
You don't need an electrician or a single new outlet.
Battery-operated LED strips are the secret weapon here. They stick right under your upper cabinets, run on AA batteries or a built-in rechargeable pack, and give off a soft glow that makes the whole kitchen look cozier. You can set them to a warm white or a gentle amber, which reads as holiday without screaming Christmas.
The trick is timing. Turn them on about an hour before guests arrive so the room feels warm when they walk in. During the day, keep them off to save battery life.
At night, they act like a nightlight for midnight water runs, and they highlight your countertop decor in a way overhead lights never do.
Peel-and-stick Picks
Look for strips that come with strong adhesive backing and a remote control. The remote lets you dim them or switch to a warmer tone without climbing on a chair. Some even have timers, so they turn on automatically at dusk.
Just make sure the strip is designed for under-cabinet use—those are usually narrower and easier to hide.
Hide The Cords
Cords are the enemy of a clean look. Run the wire along the back edge of the cabinet, where it meets the wall, and secure it with clear clips or cable ties. If you have a gap between cabinets, tuck the wire into it.
For the battery pack, mount it on the side of a cabinet or inside a nearby drawer if the wire reaches. A little planning keeps everything out of sight.
Timing And Battery Life
Rechargeable batteries are your friend. A set of good rechargeables will last a few weeks if you only use the lights in the evening. Set a reminder on your phone to recharge them at the start of December so they're ready for the whole season.
If you're using disposable batteries, stock up now—you don't want to be hunting for AAs on Christmas Eve.
8. Display a Vintage Christmas Plate Collection

Vintage Christmas plates carry a charm that new decor rarely matches. Those painted Santas, snowy cottages, and gold rims have a story behind them, and a kitchen wall is a perfect place to let that story show. The trick is arranging them so the display looks collected, not cluttered.
You do not need a matching set or a big budget. Thrift stores, estate sales, and even your grandmother's cabinet can supply the goods. A little planning on the wall keeps the whole thing looking intentional.
Start by deciding where the plates will live before you buy a single one. A blank wall beside the fridge, the space above a small breakfast nook, or a section of open shelving all work. Plate racks and plate hangers are cheap and keep everything secure, which matters in a room with steam and swinging cabinet doors.
Once you have a spot, gather more plates than you think you need. You can always rotate them or save extras for next year. The arranging part is where the display either sings or turns into visual noise.
Where To Find Vintage Plates
Thrift stores are the obvious stop, and they usually price holiday plates low because they sit on shelves all year. Dig through the back aisles in summer and you will often find Christmas designs marked down. Estate sales and church rummage sales are even better for older pieces with real character.
Check the back of each plate for cracks and chips before you buy. Small flaws on the rim are fine if the plate faces out, but a hairline crack can spread once it hangs on a wall. Mix brands freely.
A 1950s Santa next to a 1980s snow scene looks charming when the colors tie together.
Arranging Without The Clutter
Pick a color story and stick to it. Reds, greens, and creams keep a mixed collection cohesive, while a random rainbow of plates fights for attention. Group three to five plates in a loose cluster rather than spacing them evenly across the whole wall.
Vary the sizes so the eye has somewhere to travel. One large plate as the anchor, with smaller ones around it, reads better than a row of identical diameters. Leave breathing room between the cluster and nearby cabinets or shelves so the display does not feel crammed.
Hanging And Swapping Through The Season
Use proper plate hangers or a wall-mounted rack instead of tape or putty. Kitchens get warm and humid, and adhesive strips give out. Spring-loaded hangers grip the rim securely and let you pull a plate down for washing without fuss.
Treat the display as a rotating collection. Swap in a fresh plate or two after Christmas to keep the wall interesting through winter, or store the whole set in a padded box and bring it back next year. A small label on the back of each plate noting where you found it adds a fun detail for guests who ask.
9. Fill a Glass Bowl with Ornaments

A clear glass bowl full of shiny baubles might be the lowest-effort Christmas decor in existence. You grab a bowl you already own, dump in a handful of ornaments, and set it down. Done in under a minute, and it still looks intentional.
The glass does the heavy lifting here. It lets the colors show from every side and catches the kitchen light, so a plain bowl suddenly reads as a styled centerpiece. No glue, no tools, no trip to the craft store required.
This works on a kitchen table, an open shelf, or the corner of a counter that needs a little life. The bowl becomes a small burst of holiday color without taking up the space a full centerpiece would. You can swap the ornaments by mood or season, which makes it easy to refresh when the holidays roll around again.
It also gives stray baubles a home instead of leaving them loose in a storage bin.
Pick Colors That Play Well Together
Stick to two or three colors and let the glass bowl frame them. Red and gold feels classic, while silver and white reads calm and modern. If your kitchen already has a strong color, pull one shade from it so the bowl looks like it belongs.
Mixing finishes adds depth without extra effort. Try matte and shiny baubles side by side, or toss in one textured ornament for contrast. A single outlier color can be the detail that makes the whole bowl pop.
Keep It Away From Heat
Ornaments near a hot stove or open flame are a bad combo. Keep the bowl off the cooktop zone and away from anything that throws serious heat. A table, shelf, or far end of the counter keeps it safe and still visible.
Skip the spot right beside the kettle or toaster, too. Steam and splashes dull the finish over time. A dry, cool surface is all this setup needs to stay looking good through the season.
Make It Look Styled, Not Dumped
Fill the bowl most of the way but leave a little breathing room at the top. Overstuffing makes it look like storage, while a slight mound looks deliberate. Let a few baubles peek above the rim for a fuller shape.
For a little extra polish, tuck in a sprig of faux greenery or a ribbon loop. Keep it light so the ornaments stay the star. A small tray underneath can also anchor the bowl and catch any stray pieces.
10. Hang Stockings on a Kitchen Peg Rail

A peg rail on the kitchen wall solves a problem most holiday decor creates: it adds charm without eating up counter space. You get a spot for stockings, a place to hang dish towels, and a home for the utensils you reach for every day. It's the kind of setup that looks intentional but actually earns its keep.
The trick is treating it as a working rail, not a display shelf. Stockings go up, but they also need to stay clear of heat and splatter. Get the mounting and placement right, and this becomes one of the most practical festive touches in the room.
Peg rails come in wood, metal, and everything in between, and most are easy to install yourself. The main thing is anchoring them into studs or using proper wall anchors, since stockings and utensils add up in weight fast. Hang the rail at shoulder height so you can reach it without stretching, and keep it a safe distance from the stove.
Once it's up, you have a flexible spot that shifts with the season. In December it holds stockings and a few sprigs of greenery. In January it goes back to towels and tools without a single hole to patch.
Mounting It So It Stays Put
Find your studs before you drill. A rail loaded with stockings, a heavy towel, and a few utensils can pull loose from drywall alone, especially if someone tugs on it. Use a stud finder and drive screws into the framing wherever possible.
If the studs don't line up with where you want the rail, toggle bolts or heavy-duty anchors handle the load. Skip the tiny plastic plugs that come in the box. They're fine for a picture frame, not for something people grab.
Weight Limits And What To Hang
Empty stockings weigh almost nothing, but filled ones get heavy. Keep the rail for lightweight decor and everyday items, and let the big gifts go under the tree. A stocking stuffed with small treats is fine.
One loaded with a cast-iron pan is not. Mix in tea towels, measuring cups, or a small whisk to keep the rail looking useful rather than staged. The blend of holiday and everyday is what makes it feel natural.
Keeping Stockings Away From The Stove
Heat and open flame are the real risk here. Never hang stockings directly over or beside a cooktop, and keep them well clear of the oven door and any open burners. Fabric near a hot surface is a hazard, no matter how festive it looks.
Aim for a wall that's at least a few feet from the cooking zone, or use the rail on a free wall away from steam and grease. If your kitchen is tight, hang stockings on a rail near the doorway instead. They'll still be the first thing guests see.
11. Dress the Window with a Simple Swag
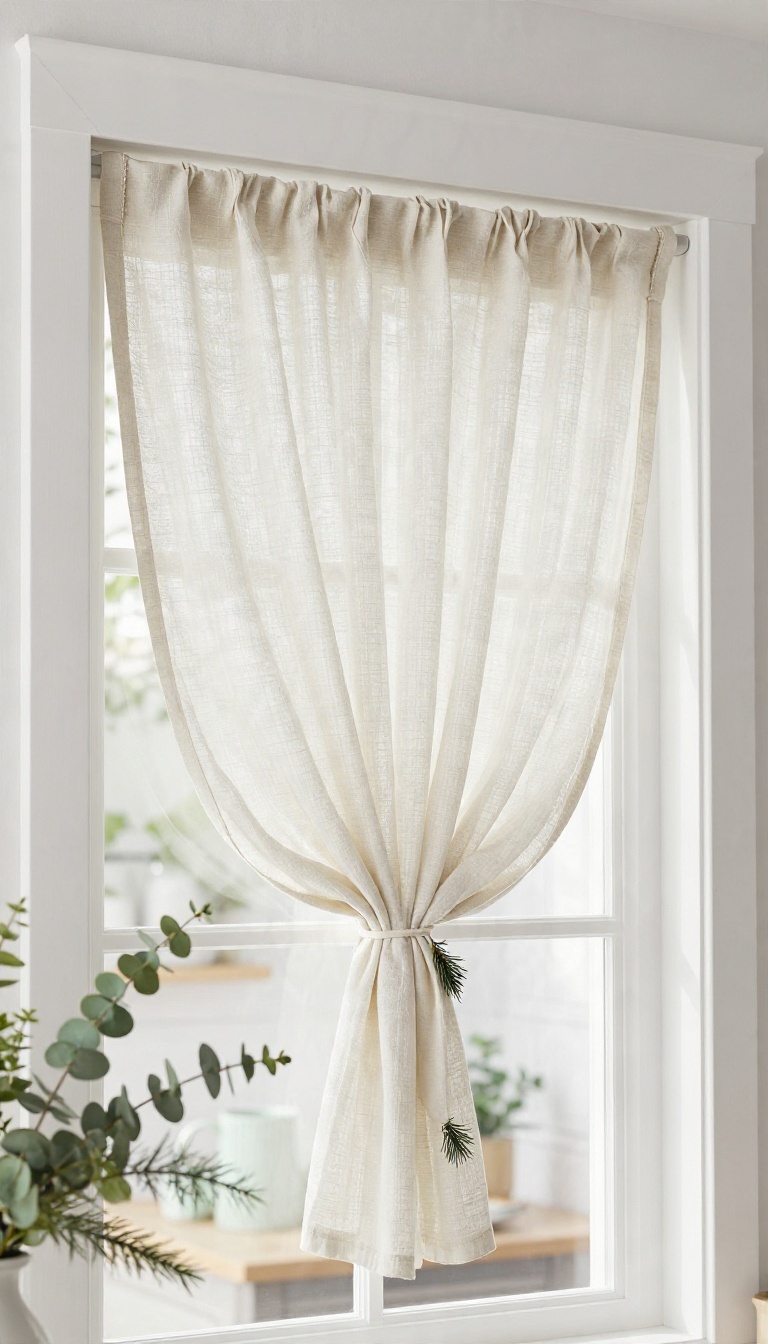
A swag across the top of your kitchen window adds holiday charm without sacrificing daylight. It's a low-commitment way to dress up the glass, and it works with almost any window style. Best of all, you can put one up in under an hour with minimal tools.
Swags are having a moment because they're unfussy and forgiving. They don't require drilling or curtain hardware, and they won't block your view. Whether you go fabric or greenery, a swag brings a soft, festive touch to the hardest-working room in the house.
Pick A Tension Rod That Fits
A tension rod is your best friend here—no screws, no holes, no regrets. Measure the inside of your window frame and choose a rod that extends at least an inch beyond each side for a secure grip. Look for a rod with rubber ends to prevent slipping and protect your trim.
If your window is extra wide, consider a center support bracket for added stability.
Choose A Light-filtering Fabric
You want fabric that lets daylight through while still feeling festive. Sheer fabrics like linen, voile, or lightweight cotton work well. Avoid heavy velvet or thick brocade—they'll make the window feel dark and heavy.
A patterned fabric in a holiday motif can be fun, but a solid color with a textured weave often looks more elegant and versatile.
Style It With Greenery Or Ribbon
Once the fabric is draped, tuck in a few sprigs of faux pine or eucalyptus for a natural touch. A simple ribbon tied at the center or on each side adds a pop of color without overwhelming the space. Keep it simple—the swag should enhance the window, not hide it.
12. Set Out Christmas-Themed Tea Towels
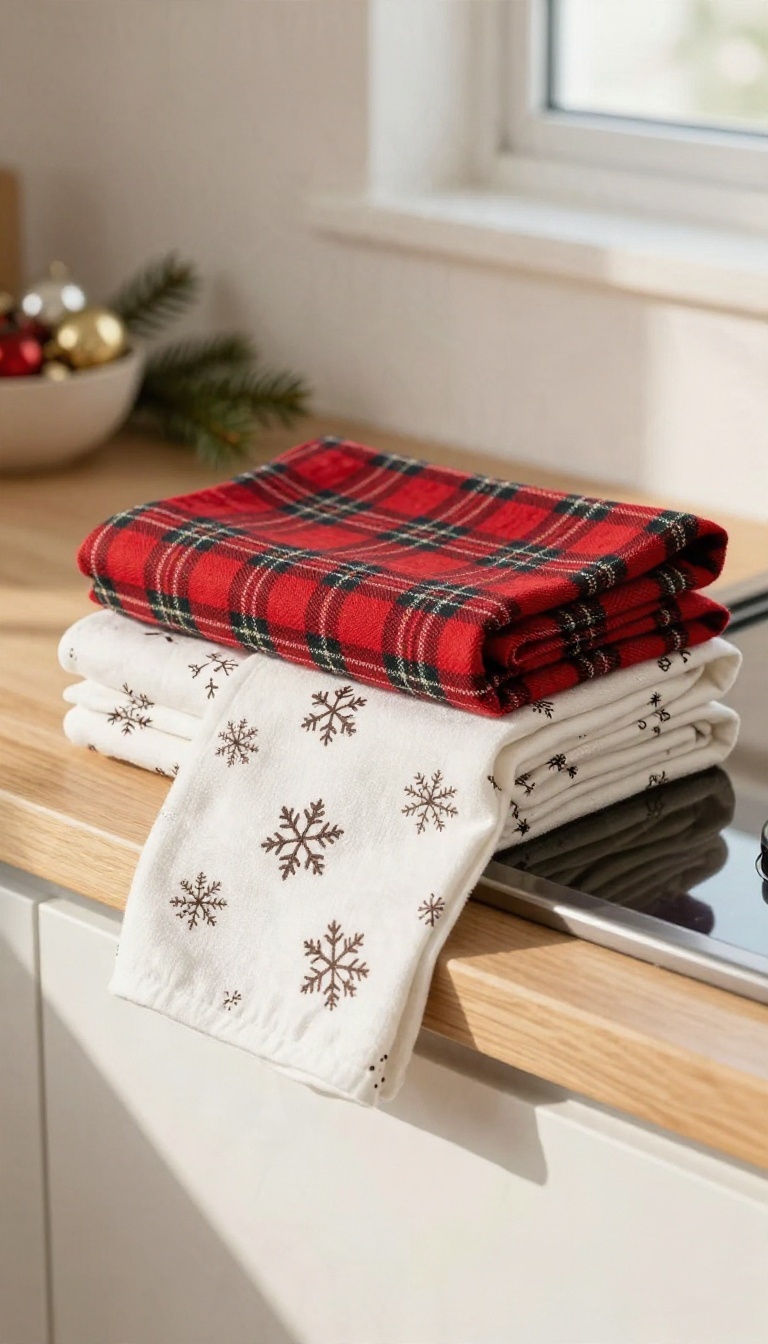
Tea towels hang in plain sight all day, which makes them one of the easiest spots to add holiday color. A stack of festive prints on the counter or a single towel draped over the oven handle changes the whole mood in seconds. It's also the cheapest makeover trick in the room, since a good set costs less than most ornaments.
The catch is picking towels that look seasonal without turning into a soggy mess the first time you dry a pot.
The real win here is that tea towels do double duty. They decorate the space and they actually get used, so you never feel like you're babying them. Treat them as working decor and they'll hold up through the busiest cooking weeks of the year.
Fold Them Like You Mean It
A neat fold does more for the look than the print itself. Lay a towel flat, fold it in thirds lengthwise, then drape it over the oven handle so the pattern faces out. A crisp stack on the counter works too, with the folded edges lined up and the prettiest print on top.
Skip the messy wad hanging off the dishwasher, since that just reads as laundry.
Rotate Your Prints
You don't need a dozen towels to keep things fresh. Keep three or four in rotation and swap them every few days, so the kitchen feels new without any real effort. Mix one bold pattern with two quieter ones, like a red plaid next to a simple snowflake print.
Store the off-duty ones folded in a drawer so they're ready to grab.
Pick Fabric That Actually Dries
Cotton and linen absorb well and hold up to repeated washing, which matters when you're wiping counters ten times a day. Pure linen dries fast and looks great, though it wrinkles, so embrace the texture. Skip anything with a plastic backing or heavy metallic print, since those smear water around instead of soaking it up.
Check the care label before you buy, because holiday towels that need dry cleaning won't survive December.
13. Build a Festive Fruit and Greenery Centerpiece

A bowl of fruit is already a kitchen staple, so turning one into holiday decor takes almost no extra effort. Pile oranges, cranberries, and a few evergreen sprigs into a bowl or tray, and you get a centerpiece that looks intentional but still feels edible and useful. The best part is that it works with the room instead of against it.
Citrus and berries bring color, greenery brings texture, and the whole thing sits low enough to see over while you cook. It also smells like the holidays without a single candle.
You do not need florist skills for this one. A wide, shallow bowl or a wooden tray gives you the most surface area, and a mix of sizes keeps it from looking flat. Start with the largest fruit on the bottom, then tuck smaller pieces into the gaps.
Greenery goes in last. Short sprigs of pine, cedar, or rosemary push into the spaces between fruit and hold everything in place. Keep the stems short so they do not poke out and look messy.
What To Use And Where To Find It
Oranges and clementines are the workhorses here because they hold up well and add bright color. Fresh cranberries fill gaps nicely and last for days without wilting. If you want a little shine, add a few whole nuts or a handful of cinnamon sticks.
Skip anything that bruises easily or needs refrigeration. The centerpiece sits at room temperature, so firm fruit is your friend. Grocery store produce works fine, and you can often grab a bag of cranberries for a couple of dollars.
Making It Last Through The Season
Fresh fruit will start to soften after about a week, especially near a warm stove. Swap out the softest pieces every few days and the display stays sharp. Cranberries hold up longer than most people expect, often a week or more.
Greenery is the first thing to dry out. Give the sprigs a fresh snip and re-tuck them, or replace them with new clippings from the yard. A light mist of water every couple of days helps them stay green a bit longer.
Refreshing It Without A Full Rebuild
You do not have to start over when the centerpiece starts looking tired. Pull out the sad pieces, add a few fresh oranges, and rearrange what is left. A handful of new cranberries on top hides a lot of wear.
If you want a quick change, swap the greenery for a different texture, like eucalyptus or bay leaves. The fruit stays, the look shifts, and you have a fresh centerpiece in under five minutes.
14. Line Open Shelves with Holiday Dishes

Open shelves in a kitchen are like a blank canvas—they show everything, so they might as well show something festive. Swapping your everyday plates and bowls for red and white holiday pieces instantly makes the space feel Christmasy without adding clutter. The trick is to keep it practical so you can still grab what you need while cooking.
You don't need special shelves for this; just use the ones you already have. The goal is to make the shelves look intentional and holiday-ready, not like a store display. A few key moves will get you there.
Group By Color And Shape
Pull out your red and white dishes—plates, bowls, mugs—and arrange them in small clusters. Stack plates in sets of three or four, and line up mugs in a row. Grouping similar items together creates a clean, organized look that's easy to maintain.
Leave Some Breathing Room
Negative space is your friend. Don't cram every inch of the shelf; leave gaps between groups so each piece stands out. This also makes it easier to grab what you need without knocking things over.
Keep It Functional
Remember these shelves are for everyday use, so don't make them too precious. Put the items you reach for most at eye level, and keep heavier pieces on lower shelves. That way, your holiday display doubles as a practical storage solution.
15. Add a Chalkboard or Letter Board Countdown

Kids ask how many days are left roughly forty times between Thanksgiving and Christmas. A small countdown board answers that question without you having to do the math out loud. It also gives the kitchen a spot of holiday personality that changes every single day, which keeps the room feeling alive instead of frozen in place.
The best part is how little it costs. A chalkboard, a letter board, or even a framed print you write on with a dry-erase marker all do the job. The trick is picking a spot where people actually look and setting up a system you'll keep up with on busy mornings.
A countdown only works if it's visible and easy to update. Otherwise it becomes another decoration you forget about by December 8th. Here's how to set one up that stays part of the routine.
Where To Put It
Hang it where the family already pauses: beside the coffee maker, next to the fridge, or on the wall by the doorway you use most. Eye level matters more than you'd think. A board above the counter gets read a hundred times a day; one tucked on a side wall gets ignored.
If your kitchen is short on wall space, lean a small board against the backsplash or prop it on a cookbook stand. It takes up almost no room and still catches the eye every time someone walks in.
Keep The Lettering Simple
You don't need perfect handwriting or a full set of fancy letters. Write the number big and clear, then add one small line underneath like "days till Christmas" or a short joke. Big number, small message.
That's the whole formula. For letter boards, pre-sort the numbers 1 through 25 into a tiny dish so swapping them takes seconds. For chalkboards, keep a chalk pen clipped to the frame.
Friction is what kills countdowns, so remove as much of it as you can.
Make The Daily Update Fun
Turn the swap into a small ritual. Let a different family member change the number each morning, or add a tiny doodle alongside it. A candy cane on the 10th, a snowflake on the 5th, a reindeer on Christmas Eve.
It gives everyone a reason to check the board. If you'll be out of town or know you'll forget, write out a few days in advance on a strip of paper and tape it nearby. Nobody's judging your system, and the board stays current either way.
FAQ
How do I decorate a kitchen for Christmas without cluttering the counters?
Go vertical. Use cabinet doors, walls, shelves, and windows for decor, and keep prep zones clear. A runner, a small tree, and one tray of festive items usually feel like enough.
Is it safe to hang garland near the stove?
Keep fabric and greenery well away from burners and hot surfaces. Faux garlands can melt, and real ones dry out fast. Stick to the hood's outer edge or skip that spot entirely.
What are the best budget Christmas decor ideas for a kitchen?
Tea towels, a bowl of ornaments, and a simple garland cost very little. Thrift stores often have holiday plates and jars that work well for a quick, cheap refresh.
How do I decorate a small kitchen for Christmas?
Pick two or three focal points, like a window swag and a countertop tree. Skip anything that blocks workspace, and favor slim pieces that sit against walls or hang overhead.
When should I put up kitchen Christmas decor?
Most people start right after Thanksgiving. If you use fresh greenery, wait a bit longer so it stays green through the holidays, and refresh it in mid-December.
Conclusion
A festive kitchen doesn't need a big budget or a free weekend. A garland, a few towels, and one glowing corner usually do more than a room full of stuff. Start with the ideas that fit your space and skip the rest.
Keep function first, and the room stays easy to cook in all season. When January comes, pack it away in one box and enjoy your normal kitchen again.