11 Homemade Christmas Card Ideas That Feel Extra Special
Store-bought cards all start to look the same after a while. You flip through a box, find something decent, sign your name, and hope it doesn't get lost in the holiday shuffle.
A homemade card fixes that problem in an afternoon. It doesn't need to be perfect or complicated—just a little thought and a few supplies you probably already have.
These eleven ideas range from five-minute projects to slightly more involved ones, so there's something here whether you're crafting with kids or making something quietly impressive for someone who deserves it.
1. Pressed Winter Botanicals on Kraft Paper
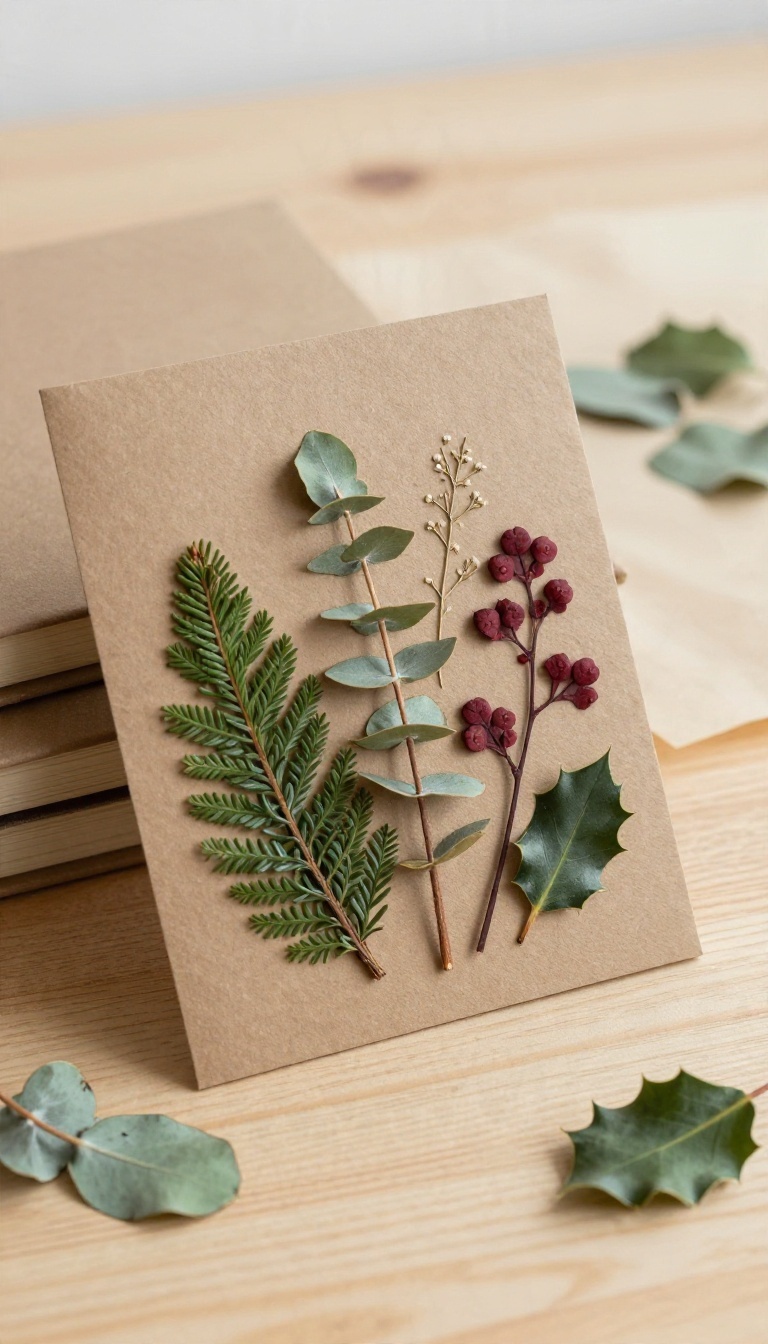
Nature does most of the design work here. A few dried sprigs pressed flat and glued to a plain kraft card look like something you'd find in a boutique stationery shop, but the whole thing costs pennies. It's the kind of project that rewards a little patience up front and then comes together fast once your botanicals are ready.
Start by gathering your greenery. Pine sprigs, eucalyptus, holly leaves, and even small fern fronds all press beautifully. Lay them flat between two sheets of parchment paper, slide them inside a heavy book, and stack a few more books on top.
Give them about a week to dry and flatten, and they'll hold their shape without turning brittle and crumbly. Once they're pressed, the assembly takes minutes. Fold a sheet of kraft cardstock in half, decide on your arrangement, and use a small dot of craft glue or a glue stick to tack each piece down.
Press gently and let it set. The natural brown of the kraft paper makes the muted greens and deep reds of the botanicals pop without any extra embellishment.
Pressing Tips That Actually Work
Thin, flat pieces press best. Skip anything thick or fleshy, like pine cones or chunky stems, because they won't flatten evenly and can leave moisture behind. If you're in a hurry, a dedicated flower press speeds things up, but a stack of heavy books does the job just fine.
Change the parchment after the first couple of days if the leaves feel damp.
Making The Arrangement Look Intentional
Less is usually more here. One or two sprigs placed off-center often look more polished than a busy cluster. Try a single eucalyptus stem curving up one side, or a small holly leaf trio in a corner.
Leave plenty of empty kraft space around the design so it can breathe.
Keeping It Intact In The Mail
Pressed botanicals are delicate, so a little protection goes a long way. Slip the card into a clear sleeve or a slightly larger envelope before mailing. If you're handing it over in person, no extra fuss is needed.
Either way, add your message on the inside before you glue anything down so you're not writing around fragile leaves.
2. Embossed Snowflake Cards with a Heat Tool
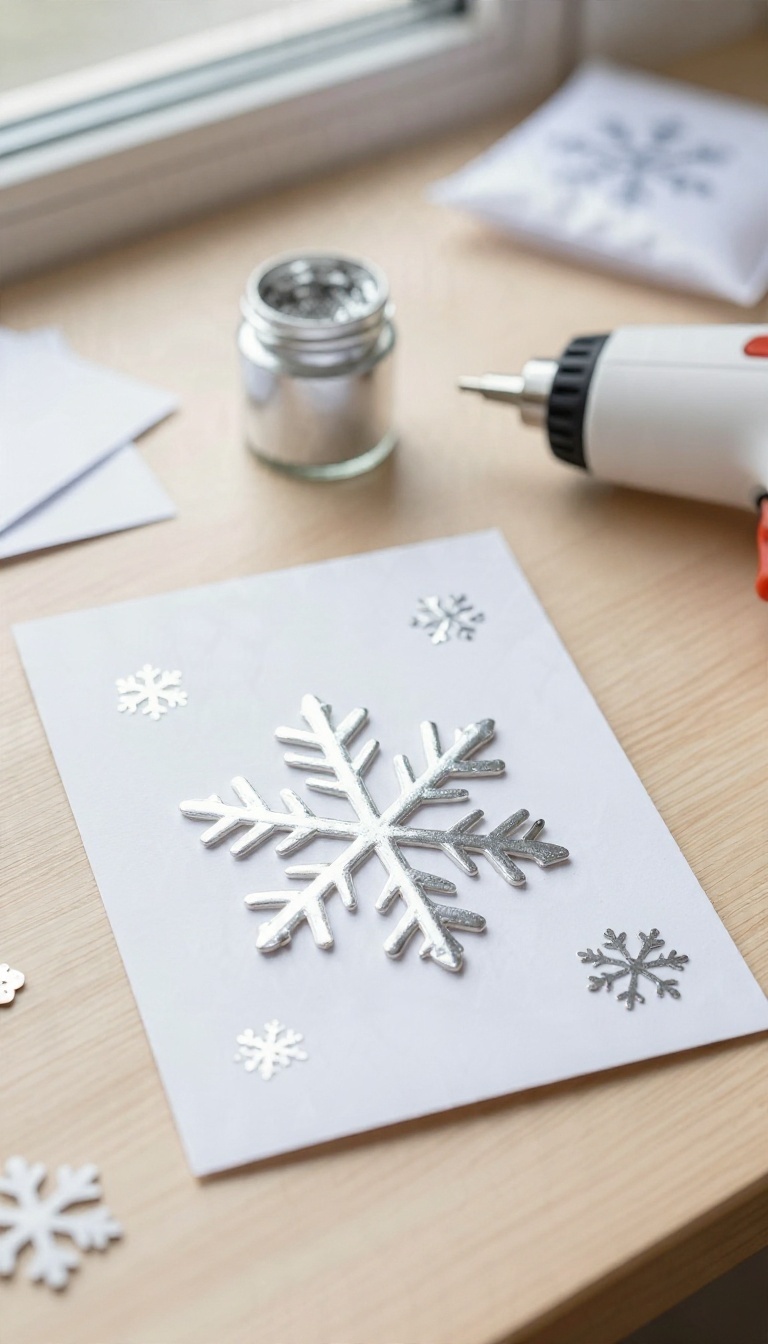
Embossing powder and a heat gun turn plain cardstock into raised, metallic snowflakes that look store-bought but feel handmade. The process is simple: stamp a design, sprinkle powder, and melt it with heat. The result is a glossy, dimensional finish that catches the light and adds a touch of winter magic to your Christmas cards.
Embossed snowflake cards are a great way to add a professional touch to your handmade cards. With just a few supplies and a little practice, you can create stunning raised designs that look intricate but are surprisingly easy to achieve.
What You'll Need
Gather these supplies: blank cardstock, snowflake stamps, embossing ink pad, embossing powder (silver, gold, or white), a heat gun, and an anti-static pouch (optional but helpful). A stamp positioning tool can also make alignment easier, especially for multiple cards.
Step-by-step Embossing
First, rub the anti-static pouch over the cardstock to prevent stray powder from sticking. Stamp your snowflake design using embossing ink, then generously sprinkle embossing powder over the stamped image. Tap off the excess powder back into the jar.
Next, hold the heat gun about two inches away and move it slowly over the powder until it melts and becomes raised and shiny. Let it cool completely before handling.
Design Variations
Experiment with different snowflake sizes and placements. Try embossing a border or a sentiment like 'Merry Christmas' for a cohesive look. You can also combine embossing with other techniques, like watercolor backgrounds or layered cardstock, to make each card unique.
For a more dimensional effect, emboss a snowflake on vellum and layer it over a colored background.
3. Photo Strip Cards with a Handwritten Note

Photos do the heavy lifting on this card, and the note does the rest. You pick three small pictures from the past year, run them down the front in a strip, and scribble a short memory underneath. It works because it's personal without being fussy.
The whole thing takes maybe fifteen minutes once you've chosen your photos, and most of that is scrolling through your camera roll. You don't need special tools. A printer, some tape, and a card blank will get you there.
Pick Three Photos That Tell A Story
Go for range instead of perfection. One funny shot, one candid, one sweet moment gives the strip a little arc, and it feels more like a mini year-in-review than a posed holiday portrait. Print them small—around two inches wide works well for a standard card.
If you don't have a printer at home, drugstore photo kiosks and online print services handle small sizes cheaply and quickly.
Build The Vertical Strip
Line the photos up down the center or slightly off to one side, leaving a thin, even gap between each one. A small ruler or a scrap of cardstock as a spacer keeps the spacing consistent without much effort. Double-sided tape gives the cleanest result, but washi tape or thin photo corners add a bit of charm.
Press each photo down firmly so the edges stay flat in the mail.
Write The Memory Underneath
Skip the generic greeting and write one specific thing instead. Something like "the day the sprinkler broke and you laughed for ten minutes" does more than "Merry Christmas" ever will. Keep it to a sentence or two in your own handwriting.
Messy is fine—it's the voice that matters, not the penmanship. If you're stuck, jot down the moment behind one of the photos and go from there.
A Few Finishing Touches
A date or a tiny caption next to each photo helps the recipient place the memory right away. You can also leave a small blank space at the bottom for a short signature. These cards mail well in a standard envelope, though a slightly padded one protects the photo edges.
If you're making a batch, print all the photos at once and assemble them assembly-line style.
4. Fingerprint Reindeer and Snowmen for Family Cards
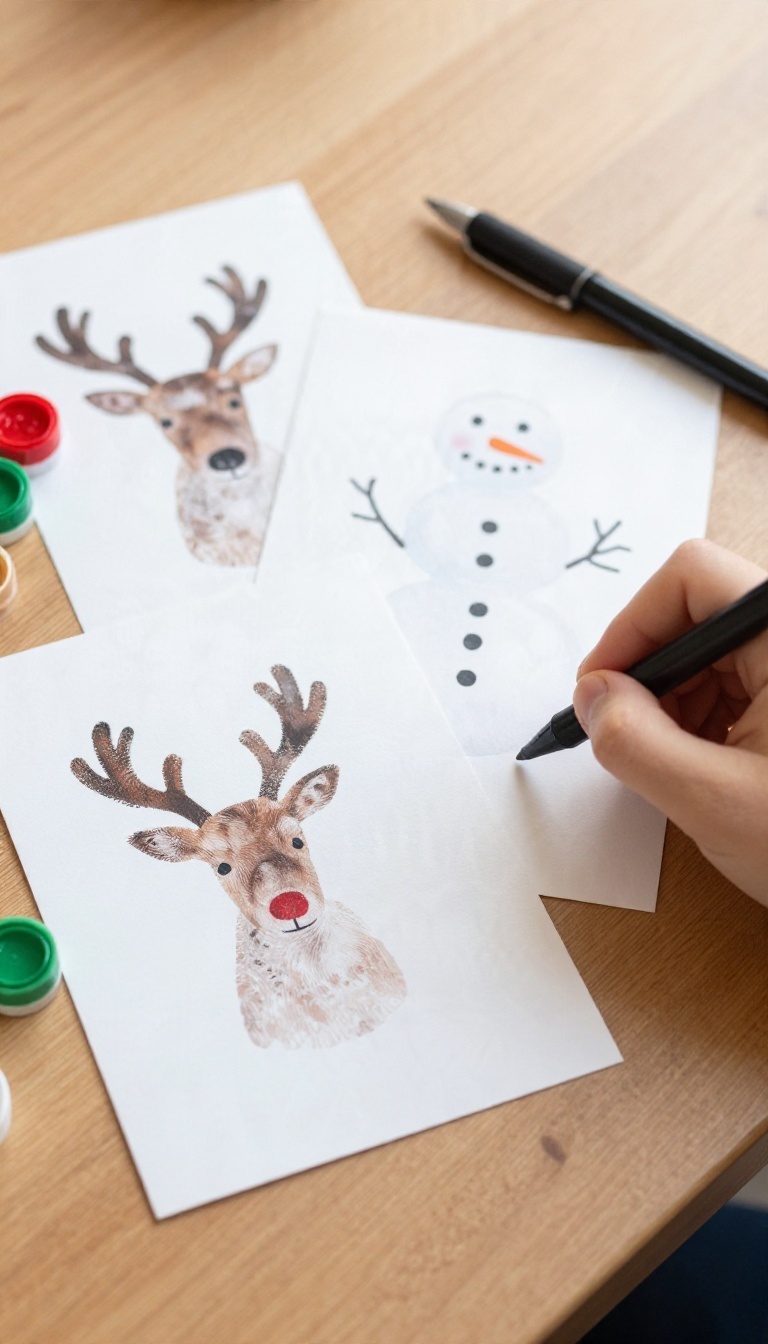
Ink pads and a fine-tip pen can turn a thumbprint into a reindeer and a pinky into a snowman. This is the kind of card that works best when small hands get involved, because every smudge and crooked antler becomes part of the charm. Grandparents and aunts tend to keep these long after the holiday decorations come down.
The process is simple enough that kids can lead it. You press a finger onto an ink pad, stamp it on cardstock, and wait a minute for it to dry before adding the details. A fine-tip black pen handles eyes, noses, antlers, and tiny scarves.
The whole card takes about ten minutes once you get going, and you can batch several at once. Use a washable ink pad so cleanup stays easy. Stamp on smooth cardstock rather than textured paper, since fingerprints blur on rough surfaces.
Leave a little space between prints so the pen details have room to breathe.
Stamp The Shapes First
Press a thumb flat and firm for the reindeer body, then stamp a smaller fingerprint above it for the head. For snowmen, stack two or three fingerprints in a tapering line. Rock the finger slightly as you lift to avoid a heavy edge.
Let the ink dry fully before you touch it with a pen, or the lines will bleed.
Add The Details With A Pen
Draw two thin antlers on the reindeer and a small red dot for the nose. Snowmen need a carrot nose, coal buttons, and a quick scarf line. Keep the strokes light and short.
If a print came out lopsided, work with it—a tilted head reads as personality, not a mistake.
Make It A Family Card
Have each person in the house stamp one fingerprint in a row, then label them with names or initials underneath. Kids love seeing their own print on the card, and the recipient gets a little lineup of the whole family. Add the year in the corner so it doubles as a keepsake.
5. Stitched Paper Cards with Simple Embroidery
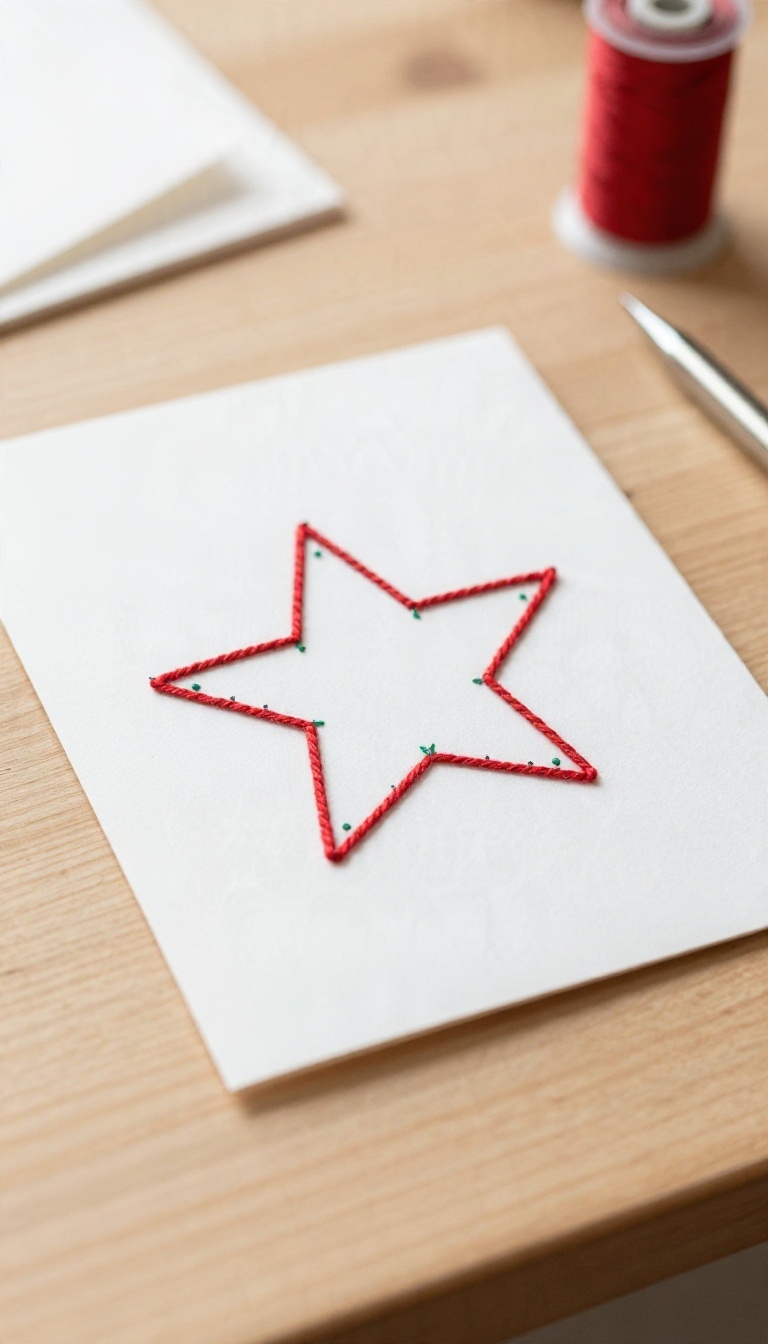
A needle and thread can turn a plain card into something people want to touch. You don't need embroidery skills—just a paper piercer, some floss, and a simple shape to follow. The result looks intricate, but the process is closer to connect-the-dots than actual stitching.
The trick is poking holes along a drawn outline, then stitching through them. It's forgiving, quick, and oddly relaxing. Plus, the raised texture gives the card a handmade feel that flat ink can't match.
Start with a blank card and a light pencil sketch of your design—a star, a tree, a snowflake, or even a simple border. Place the card on a foam mat or folded towel, then use a paper piercer or a thick needle to poke holes along the lines, spacing them about 1/8 to 1/4 inch apart. Erase the pencil marks once the holes are in place.
Thread a needle with embroidery floss (two or three strands work well) and stitch through the holes using basic stitches like running stitch or backstitch. Tie off the ends on the back with a small piece of tape or a dab of glue. That's it—you've got a textured, handmade card that looks like you spent hours on it.
Pick A Simple Shape
Beginners should stick to geometric shapes or simple outlines—a star, a heart, a Christmas tree, or a border. Avoid intricate details that require tight curves. A bold shape with clear lines will look clean and intentional, even if your stitches aren't perfect.
Choose The Right Thread
Embroidery floss gives you a nice range of colors and a soft sheen. Metallic thread adds sparkle but can be fiddly to work with. For a rustic look, try thin yarn or baker's twine.
Whatever you choose, keep the needle size matched to the hole size so the paper doesn't tear.
Keep The Back Neat
Since the inside of the card will be visible, secure your thread ends with tape or a small glue dot. Avoid long floats between stitches—they can snag. A clean back makes the card look professional and keeps the front from puckering.
6. Pop-Up Tree Cards That Fold Flat
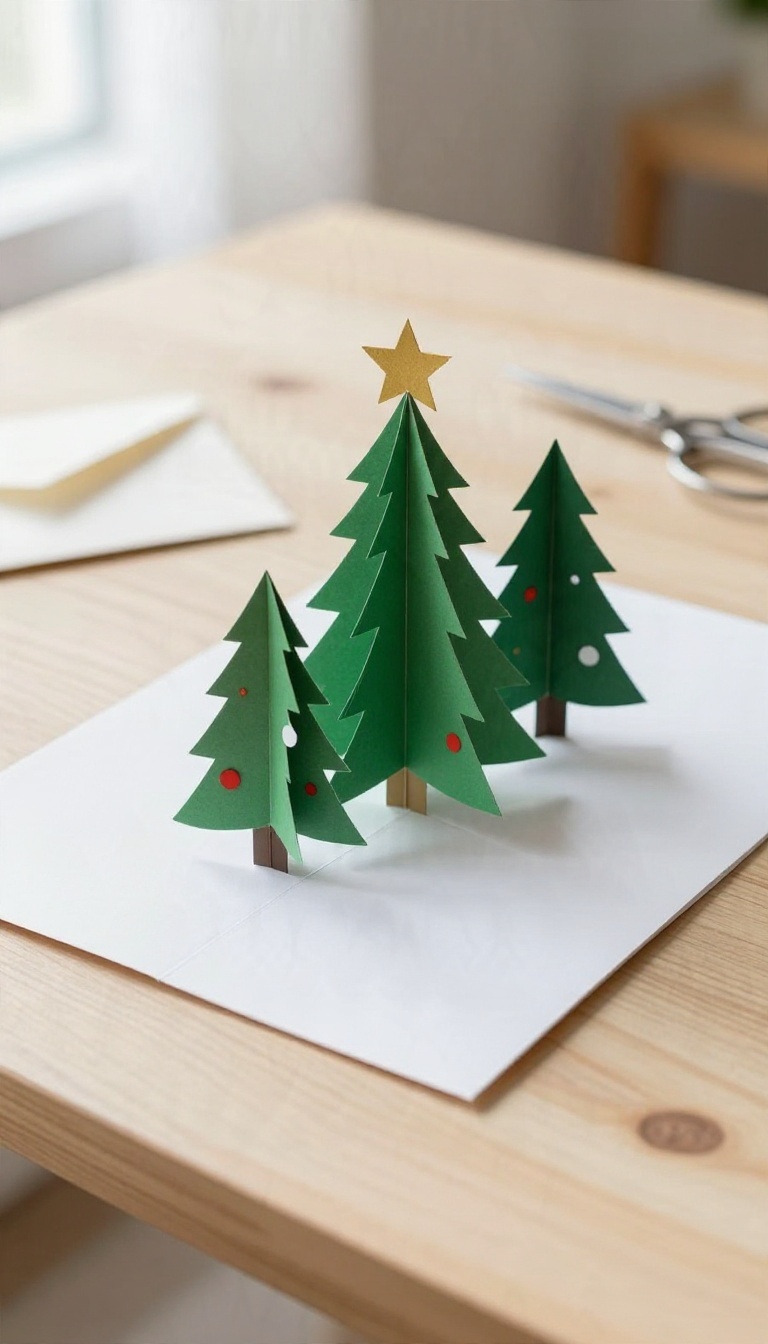
A pop-up card sounds like a big production, but the mechanics come down to a handful of straight cuts and one good fold. The tree stays flat while the card is closed, then rises into a little three-dimensional evergreen the moment someone opens it. No special tools, no extra bulk, and it still slips into a standard envelope.
The trick is a simple stepped fold. You cut a few nested tabs into the card's inner fold, then push them forward so each layer stands at a slightly different depth. The result reads as a full tree from the front and collapses cleanly when the card shuts.
Start with a piece of cardstock folded in half. Draw half a tree along the fold line, with the flat side of the trunk and branches sitting right on the crease. Cut along your pencil line through both layers, then unfold and refold so the tree pushes inward, toward the inside of the card.
That inward fold is what makes it pop. Once the basic shape works, the fun part is layering. A second, smaller tree glued to the front of the first adds depth, and a star on top finishes it off.
Keep the decorations flat so nothing catches when the card closes.
Getting The Cuts Right
Sharp scissors and a steady hand matter more than fancy tools here. Cut slowly along your drawn line, and keep the base of the tree attached to the fold so it has something to stand on. If you slip, a small snip usually hides itself once the card is folded.
Test the fold before you decorate. Open and close the card a few times to make sure the tree rises and flattens without tearing. A bone folder or the back of a spoon helps press the creases crisp.
Decorating Without The Bulk
Flat is the rule. Glue sticks, thin washi tape, and a marker for tiny ornaments all work because they add almost no thickness. Skip anything chunky like pom-poms or thick buttons, which will stop the card from closing flush.
A little glitter along the branches catches the light when the card opens. Just use a thin line of glue and tap off the excess so the tree still folds flat.
Making It Personal
Write your message on the flat panel below the tree so it stays readable when the card is open. A short note in the space beside the trunk works well too. For a family card, cut a row of smaller trees along the fold instead of one big one.
It turns into a little forest that pops up together, and kids love watching it unfold.
7. Watercolor Wash Cards with Gold Accents
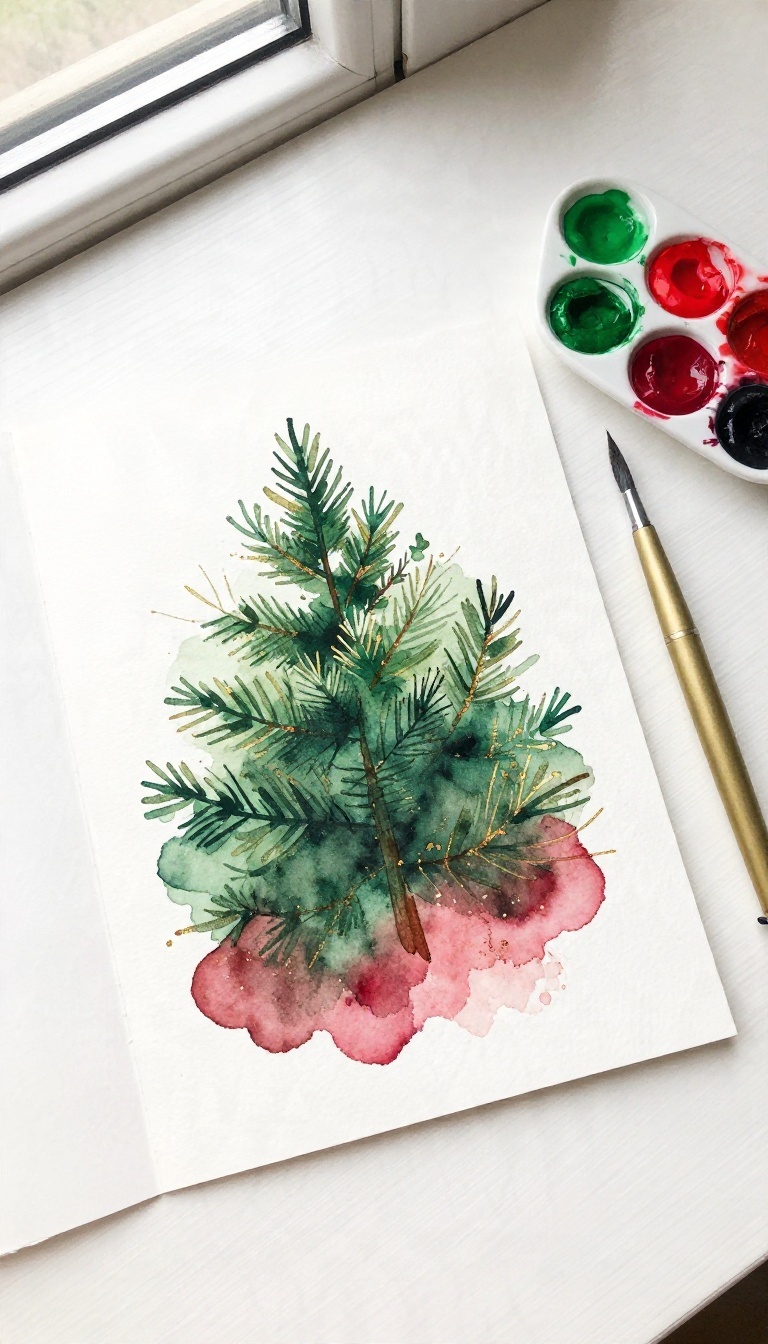
Watercolor has a reputation for being fussy, but a loose wash is about as forgiving as it gets. You wet the paper, drop in color, and let it do its own thing. Once it dries, a gold pen turns that soft blur into something that looks deliberate and a little bit fancy.
The whole card comes together in maybe fifteen minutes of actual work, plus drying time. No drawing skills required, no perfect brush control. Just color, water, and a steady hand for the finishing touches.
The trick is to stop trying to control the paint. Soft edges and uneven color are the point here, not a flaw to fix. Lean into the mess and the card ends up looking like a tiny piece of art instead of a craft project.
Use watercolor paper if you have it, since regular cardstock tends to buckle and pill when it gets wet. A pad of cold-press watercolor paper cut down to card size works well, and it holds up to a heavy wash without warping.
Pick Your Holiday Palette
Classic red and green can get muddy fast when they bleed together, so give them some space or let them meet only at the edges. Deep pine green with a touch of gold looks rich, and a wash of cranberry red fading into blush feels warm and festive. For something cooler, try indigo and silver-blue with a hint of teal.
Winter blues read as snowy and calm, and they pair beautifully with gold accents. Mix two or three colors max per card so the wash stays clean.
The Wash Itself
Tape your paper down to a flat surface so it dries flat. Wet the area with clean water first using a wide brush, then touch a loaded brush to the wet paper and watch the color spread on its own. Tilt the paper slightly to encourage blending, then leave it alone.
Resist the urge to keep poking at it, because that's what creates muddy patches. Let it dry completely, which takes about twenty to thirty minutes depending on how wet you got it.
Finishing With Gold
Once the paper is bone dry, a fine-tip gold pen does the rest. Scatter a few tiny stars across the wash, or draw a simple border just inside the card's edge. A single gold line along the bottom adds polish without much effort.
Keep the marks sparse. A handful of stars or one clean border looks intentional, while too many doodles start to feel cluttered. If you want a little extra shimmer, a gold gel pen over the wash catches the light nicely.
8. Vintage Book Page Cards with a Christmas Quote
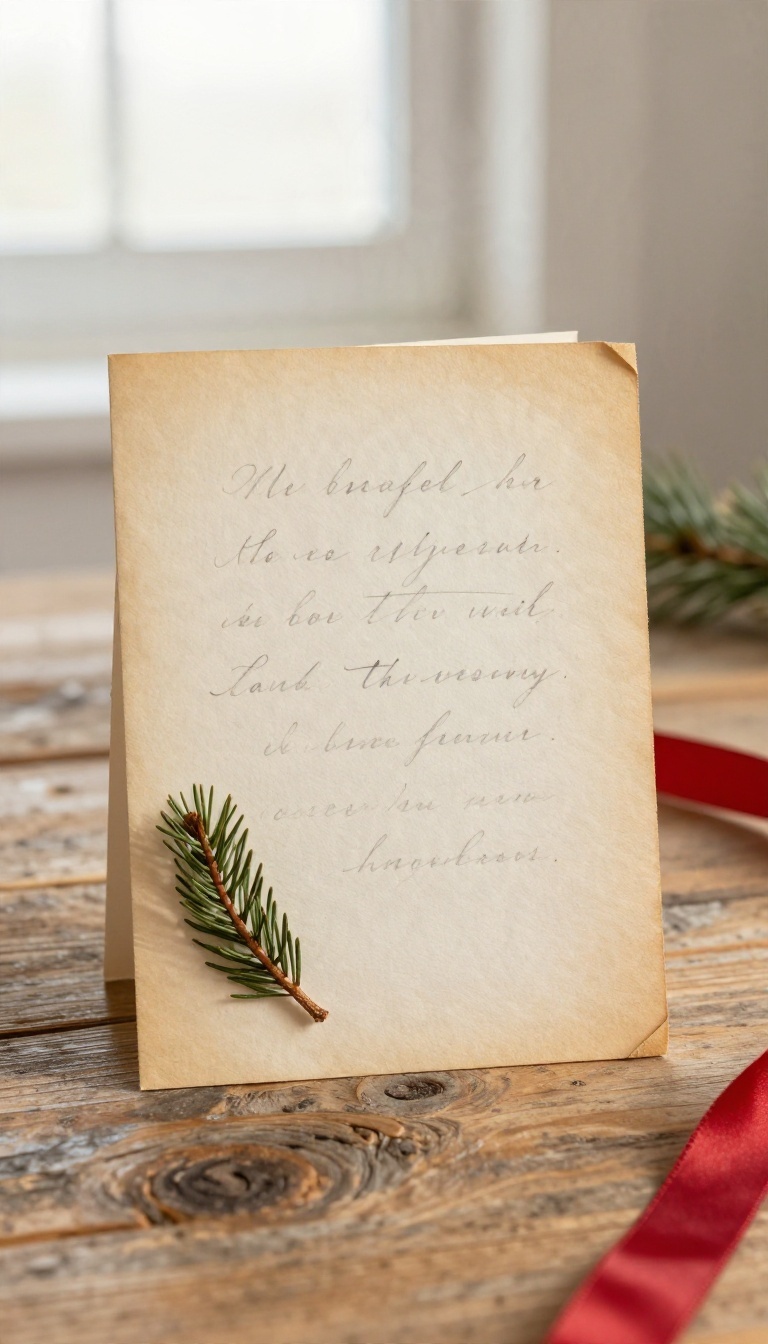
Old books carry a certain weight—not just physically, but in the stories they hold. Tearing out a page feels a little rebellious, but it gives that paper a second life on a Christmas card. Layer it behind a stamped or handwritten quote, and you've got a card that feels like a tiny piece of history.
It's cozy, literary, and surprisingly easy to put together.
The charm of this card comes from the texture and the words. You don't need a rare first edition—any old book with yellowed pages will do. Think garage sale novels, thrifted poetry collections, or even a damaged dictionary.
If you can't bring yourself to tear a book apart, print public-domain text from sites like Project Gutenberg onto cream-colored paper. Either way, the result is a card that feels personal and a little nostalgic.
Choosing And Prepping Your Pages
Pick pages that have a bit of character—maybe a chapter opening or a passage with an interesting font. Avoid pages with large illustrations unless you plan to feature them. Tear carefully along the spine or use a craft knife for a cleaner edge.
If the paper is brittle, lightly mist it with water and press it flat under a heavy book for an hour. For a more controlled look, cut the page to fit your card front, leaving a small border.
Picking A Quote That Fits
The quote can be classic or playful—whatever matches the recipient. A line from Dickens works for traditional folks, while a witty Mae West quip suits a friend with a sense of humor. You can stamp the quote using alphabet stamps, write it with a fine-tip pen, or print it on a label.
Keep it short so it doesn't overwhelm the page. If you're handwriting, practice on scrap paper first to get the spacing right.
Layering And Assembling The Card
Glue the book page to your card base using a glue stick or double-sided tape—avoid liquid glue, which can wrinkle the paper. Then add the quote on top, either directly on the page or on a smaller piece of cardstock for contrast. A torn edge on the quote piece adds to the vintage feel.
Finish with a simple embellishment like a piece of twine, a tiny star sticker, or a wax seal. Let everything dry flat before writing your message inside.
9. Washi Tape Tree Cards for Quick Batch Making
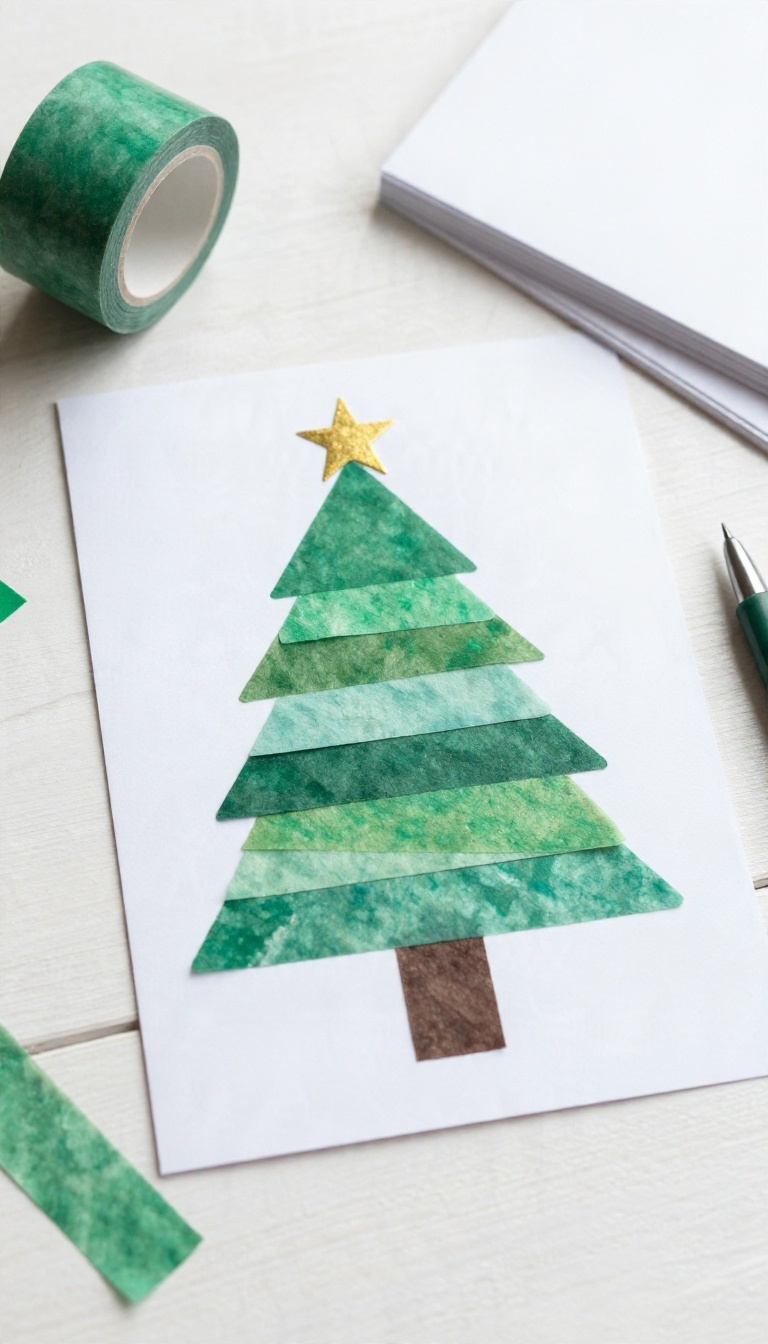
When your card list is longer than your free time, washi tape becomes your best friend. This method turns a few rolls of green tape into a stack of cards that look thoughtful but take about two minutes each. The secret is a simple triangle tree made from layered strips, topped with a star sticker.
Once you get the rhythm, you can crank out twenty in one sitting without losing your mind.
The beauty of washi tape is that it's forgiving. If a strip lands crooked, peel it up and try again—no smudges, no tears. That makes it perfect for batch making, where speed matters but you still want each card to feel special.
You don't need a ruler or a cutting mat, just a steady hand and a stack of blank cards.
What You'll Need
Gather a few rolls of green washi tape in different widths and shades—think forest green, mint, and maybe a metallic one for shine. You'll also want blank cardstock, a star sticker or two, and a fine-tip pen for a message. A small pair of scissors helps for trimming tape ends, but tearing by hand adds a nice rustic touch.
Building The Tree
Start with a short strip near the bottom center of the card—that's the trunk. Then layer slightly longer strips above it, each one a bit wider, until you've formed a triangle. Overlap the strips just a little so they stick together.
For a fuller look, use two shades of green and alternate them. Press down firmly, then add a star sticker at the top.
Batch-making Tips
Set up an assembly line: pre-cut tape strips to similar lengths, stack your cards, and keep stickers within reach. Work on one card at a time but repeat the same steps for each. If you're making twenty, do five at a time to avoid fatigue.
Let the cards dry flat for a few minutes before writing inside—washi tape can sometimes lift at the edges if you rush.
10. Shaker Cards with Confetti or Sequins
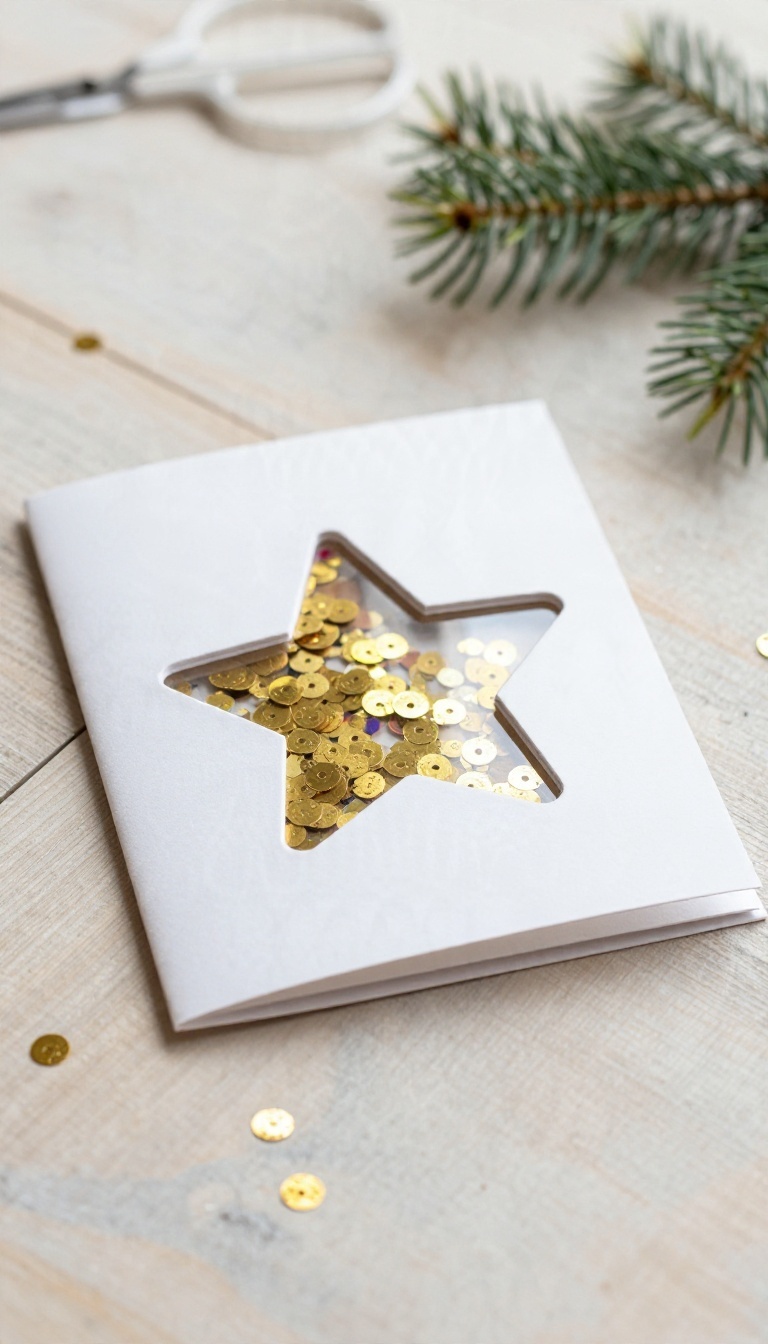
Shaker cards have a little secret tucked behind a window of clear acetate: loose sequins, confetti, or tiny paper shapes that slide around every time the card moves. They look impressive on a mantel, but the real magic happens when someone picks one up and gives it a shake. Kids treat them like toys, and adults can't help doing the same.
The good news is that the whole thing comes down to a simple layered sandwich, and you don't need special tools to build one.
The basic construction is three layers: a back panel with your greeting or design, a middle frame that creates a hollow channel, and a front panel with a window cut out and acetate glued behind it. You stack them so the shaker bits stay trapped in the middle but remain visible through the window. Once you've built one, the technique clicks, and you can start improvising shapes and sizes.
Start with cardstock that has a bit of weight to it—around 65 to 110 lb works well. Flimsy paper will buckle when you add the foam layer, and the window won't sit flat. If you're cutting a circle or star window, a craft knife and a steady hand get the job done, though a die-cut machine makes quick work of it if you have one.
Building The Acetate Window
Cut your window shape from the front panel, then cut a piece of acetate slightly larger than the opening. Glue it to the back of the front panel with a strong liquid adhesive or double-sided tape, pressing firmly around the entire edge. Any gap will let sequins escape, so run your finger along the border and patch thin spots before moving on.
Acetate sheets are cheap and easy to find at craft stores, but clear overhead projector film or even the plastic from a sturdy package works in a pinch. Just avoid anything with a cloudy finish—you want the shaker bits to read clearly through the window.
Creating The Shaker Channel
Foam tape is the workhorse here. Build a raised border around the window opening on the back of the front panel, using double layers if your shaker bits are chunky. The tape needs to form a continuous seal with no gaps at the corners, or your confetti will leak out the sides.
For a cleaner look, cut a frame from craft foam instead of using tape strips. It gives you more control over the shape and creates a more even depth. Either way, press the frame down firmly before adding your filler.
Choosing What Goes Inside
Sequins catch the light and make a satisfying sound, but they can be heavy and tend to clump in one corner. Paper confetti is lighter and floats around more, which feels livelier. A mix of both gives you movement and sparkle.
Punch tiny shapes from metallic or patterned paper for a custom touch, and keep the pieces small enough to slide freely. Fill the channel about a third of the way—too much and nothing moves, too little and it looks sparse. Seal the back panel on last, press all the edges, and give it a test shake before you write your message inside.
11. Hand-Lettered Cards with a Simple Brush Pen
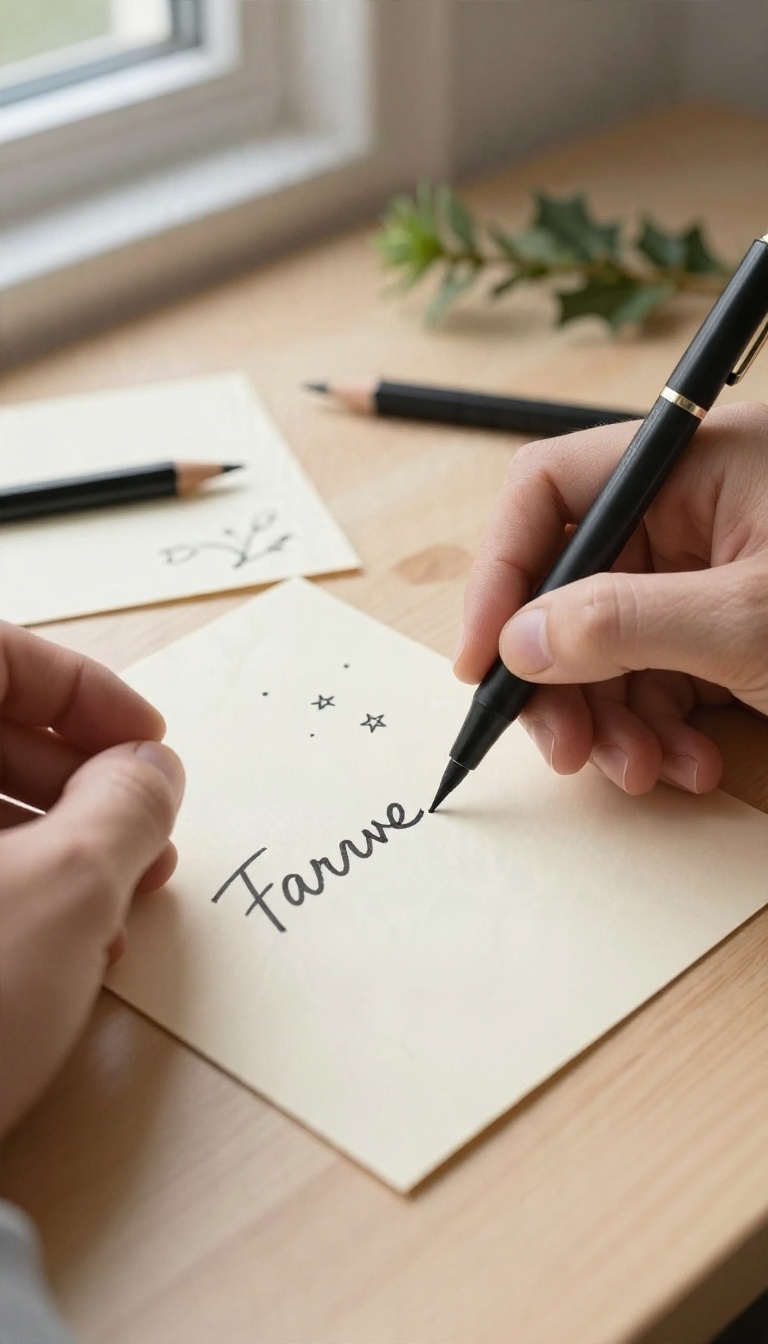
Hand lettering looks intimidating until you realize nobody's grading it. A brush pen, a blank card, and a short phrase are all you need. The wobbly lines and uneven pressure are the point—they're proof a person made it.
You don't need a calligraphy class or a set of fancy nibs. A basic brush pen from any craft store does the job, and the forgiving tip hides plenty of mistakes. Pick a short phrase, write it big, and let the imperfections stay.
Pick A Phrase That Fits
Long messages get cramped fast, so keep it to two or three words. "Merry & Bright, " "Joy to You, " or a name in big letters all work well. Sketch it lightly in pencil first if you're nervous, then go over it with the pen and erase once it's dry.
Get The Pressure Right
Brush pens respond to how hard you press. Push down on the downstrokes for thick lines, ease up on the upstrokes for thin ones. That contrast is what makes lettering look polished, and it comes with a few minutes of practice on scrap paper.
Add One Small Detail
A single flourish does a lot—a tiny star, a dotted underline, or a sprig of holly drawn in the corner. Keep it simple so the words stay the star. A colored card stock or a thin border in metallic pen finishes it off without extra effort.
FAQ
Do I need special crafting supplies to make these cards?
Most ideas use basic supplies like cardstock, scissors, glue, and pens. A few call for optional extras like embossing powder or washi tape, but you can skip or substitute those without ruining the card.
How long does each card take to make?
Simple cards like washi tape trees or fingerprint reindeer take about five to ten minutes. More detailed ones like shaker cards or stitched designs might take twenty to thirty minutes, especially the first time.
Can kids help with these Christmas card ideas?
Yes—fingerprint cards, washi tape trees, and simple pop-up cards are great for kids. Save the heat embossing and sharp cutting for adults or older teens.
What's the best paper for homemade Christmas cards?
Medium-weight cardstock (around 80–110 lb) folds cleanly and holds up to glue, watercolor, and stitching. For watercolor washes, use watercolor paper cut to size.
How do I mail homemade cards without them getting damaged?
Use a slightly padded envelope or add a piece of cardstock behind the card for stiffness. Avoid thick embellishments that might get caught in postal machines, or hand-deliver those cards instead.
Conclusion
Eleven ideas is more than enough to work with, so pick the one that fits your supplies, your skill level, and the person you're sending it to. A card that looks handmade but took twenty minutes still beats a store-bought one with a generic message inside. Start with one or two this week, and don't fuss over straight edges or perfect lettering.
The crooked glue line and the slightly smudged greeting are what make it feel like yours. Send it off, and let the mailbox do the rest.