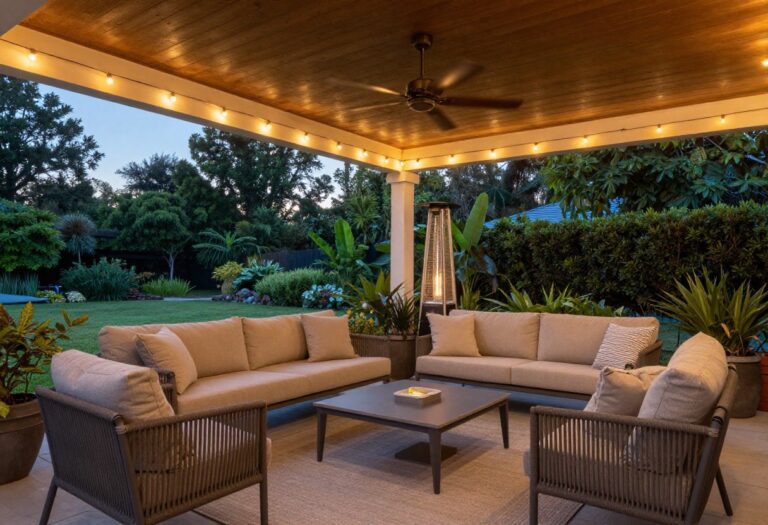
10 Small Rustic Bathroom Ideas with Tons of Personality
A small bathroom often feels like a compromise—cramped, generic, and forgettable. But rustic design turns those limitations into opportunities for warmth and character. You don't need square footage to make a big impression.
With the right mix of natural materials, vintage touches, and smart storage, even a tiny powder room can feel like a cozy cabin escape. These ten ideas focus on practical upgrades that maximize style without overwhelming the space.
Each one is easy to adapt, whether you rent or own, and many use affordable or reclaimed materials. Get ready to give your small bathroom the personality it deserves.
1. Reclaimed Wood Accent Wall
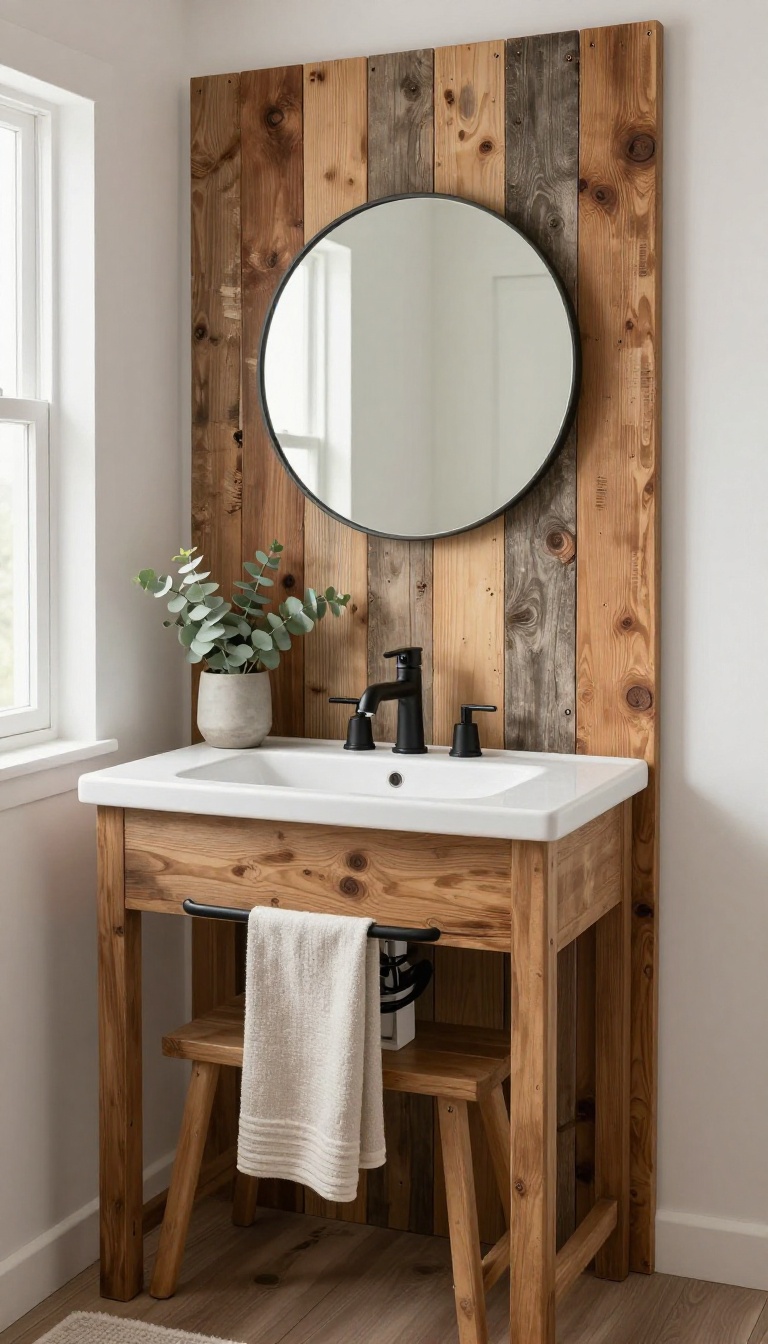
A reclaimed wood accent wall gives a small bathroom an instant dose of warmth and texture. It works especially well behind the sink or vanity, where your eye naturally lands. Because it lives on the wall, it adds personality without stealing an inch of floor space.
Reclaimed wood brings a story into the room. Every knot, nail hole, and weathered grain mark adds character you just can't fake with new lumber. In a small bathroom, that texture keeps the space from feeling flat or builder-grade.
It also pulls double duty. A wood plank wall hides uneven drywall, old tile, or patching you'd rather not look at. Instead of fixing imperfections, you cover them with something better.
Best of all, it turns a tight layout into a focal point. The eye goes to the wall, not the cramped corners.
Where It Works Best
The wall behind the sink or vanity is the sweet spot. You see it every time you walk in, and it frames the mirror without crowding the room. If your toilet sits on its own wall, that's another strong option.
Just avoid covering every wall—one accent surface keeps things from feeling like a sauna.
Choosing The Right Wood
Mix plank widths and tones for a collected, lived-in look. Narrow strips and wide boards together read as authentic rather than matchy. Look for wood that's already been dried and cleaned.
Old barn wood, fencing, and pallet boards all work if they're free of rot and pests. Seal it with a matte polyurethane or a natural oil. That protects the wood from bathroom humidity without giving it a plastic shine.
Installation Tips For Tight Spaces
Glue and nail the planks directly to the wall if you can. It keeps the profile thin, which matters when every inch counts. For renters, use removable adhesive strips rated for the wood's weight.
A lightweight panel system can come down clean when you move. Leave a small gap at the bottom and caulk it. That keeps splashes from wicking up into the wood over time.
Style Pairings That Click
Pair the wood with matte black fixtures for a crisp, modern-rustic contrast. Warm wood and dark metal always look intentional. Add a simple round mirror and a few woven or ceramic accents.
Keep the rest quiet so the wall stays the star.
2. Vintage Washstand Turned Vanity
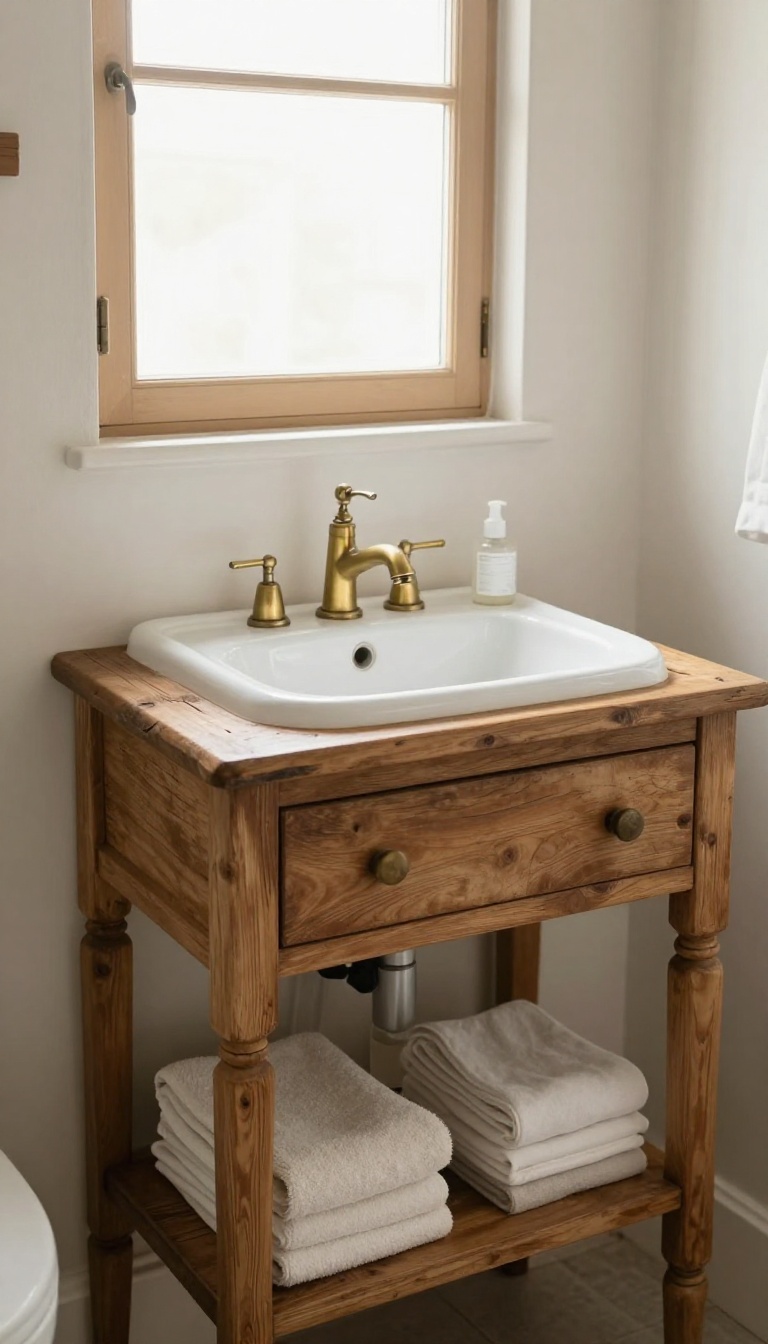
A vintage washstand or small dresser can replace a standard cabinet and bring instant character to a small bathroom. These pieces often have more storage than modern vanities, with drawers and shelves that hold towels, toiletries, and more. Pair one with a vessel sink to keep the look authentic and charming.
Antique washstands and dressers come in all shapes and sizes, so you can find one that fits your space perfectly. They add a sense of history and warmth that new cabinets just can't match. Plus, the extra storage is a game-changer in a small bathroom.
Finding The Right Piece
Look for a washstand or dresser that's solid wood and in good structural condition. Check thrift stores, flea markets, and online marketplaces for affordable options. Measure your space first to ensure a proper fit, and consider the height for comfortable sink use.
Adding A Vessel Sink
A vessel sink sits on top of the counter, so you'll need to cut a hole for the drain and install a faucet. Choose a sink that complements the style of your washstand—think ceramic, stone, or metal. This setup keeps the vintage feel while providing modern function.
Sealing And Protecting
Wood surfaces in a bathroom need protection from moisture. Apply a waterproof sealant to the top and any exposed wood. Use a tray or mat under toiletries to prevent water rings and stains.
With proper care, your vintage vanity will last for years.
3. Galvanized Metal Bucket Sink
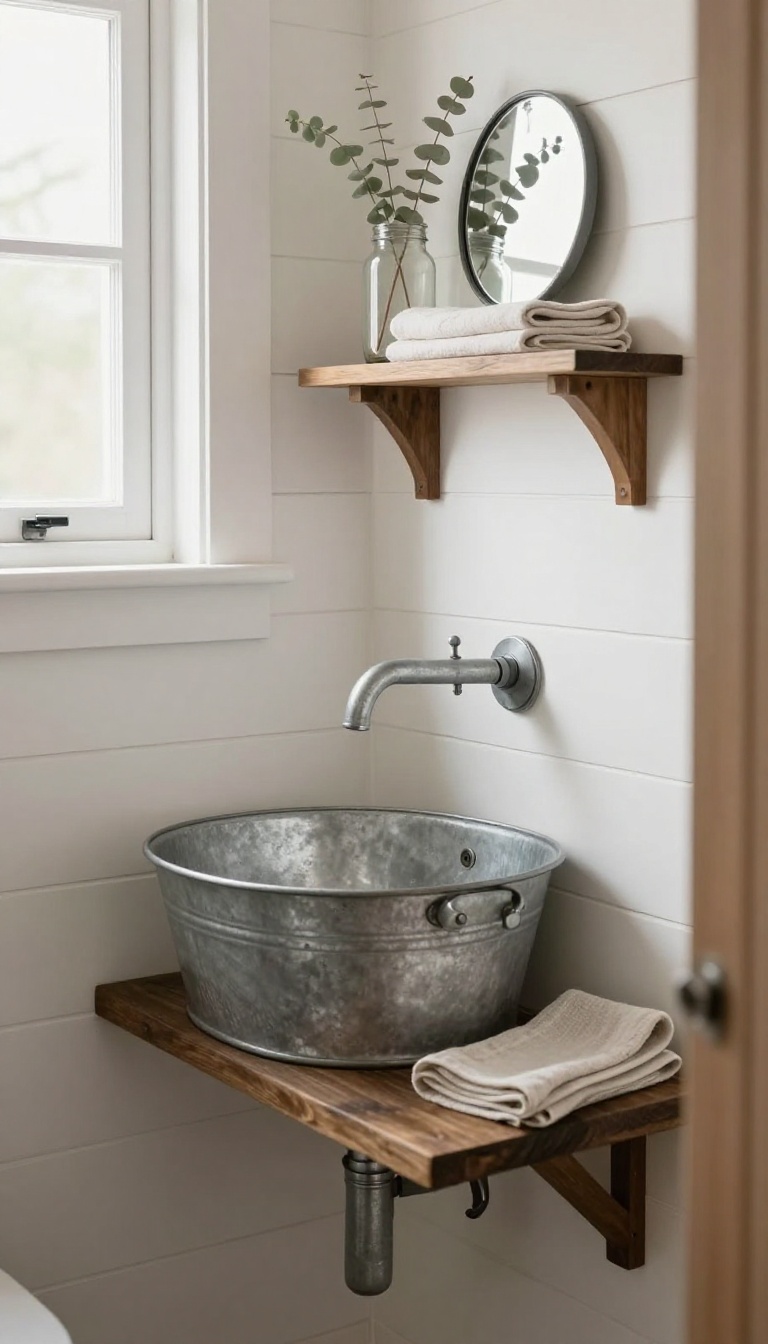
A galvanized bucket sink brings a dose of farmhouse grit to a small bathroom without eating up much space. It's a simple swap that instantly makes the room feel more collected and less cookie-cutter. Plus, the metal surface holds up to daily splashes and looks better as it ages.
You don't need a full renovation to pull this off. Many bucket sinks come as ready-to-hang kits or can be dropped into a small vanity top. The result is a compact, durable basin that adds a rugged industrial-rustic vibe.
It's a practical choice for tight quarters where every inch counts.
Why It Works In Tight Spaces
Galvanized buckets are naturally compact, often measuring 12 to 16 inches across. That means they fit where a standard sink won't, like a narrow alcove or a corner. The metal is also lightweight, so you can mount it on a wall or a simple wooden frame without heavy reinforcement.
Choosing The Right Bucket
Look for a bucket with a flat bottom and a rolled rim for a clean look. Vintage or reproduction farm buckets work well, but check for rust or holes before you commit. A new galvanized bucket is affordable and ready for a drain hole.
Just make sure the metal isn't too thin, or it may dent easily.
Installation Basics
You'll need a hole saw to cut a drain opening in the bottom of the bucket. A standard 1. 5-inch drain assembly fits most buckets, but measure first.
For a wall-mounted version, secure a sturdy bracket to studs, then hang the bucket and connect the plumbing. If you're not handy with pipes, a plumber can knock this out in an afternoon.
Styling And Maintenance
Pair the bucket with a simple gooseneck faucet and a chunky wooden counter for contrast. A small towel on a hook and a bar of homemade soap complete the look. To keep the metal looking good, wipe it dry after use and apply a thin coat of clear paste wax every few months.
That prevents water spots and keeps the rustic finish intact.
4. Open Shelving with Mason Jars
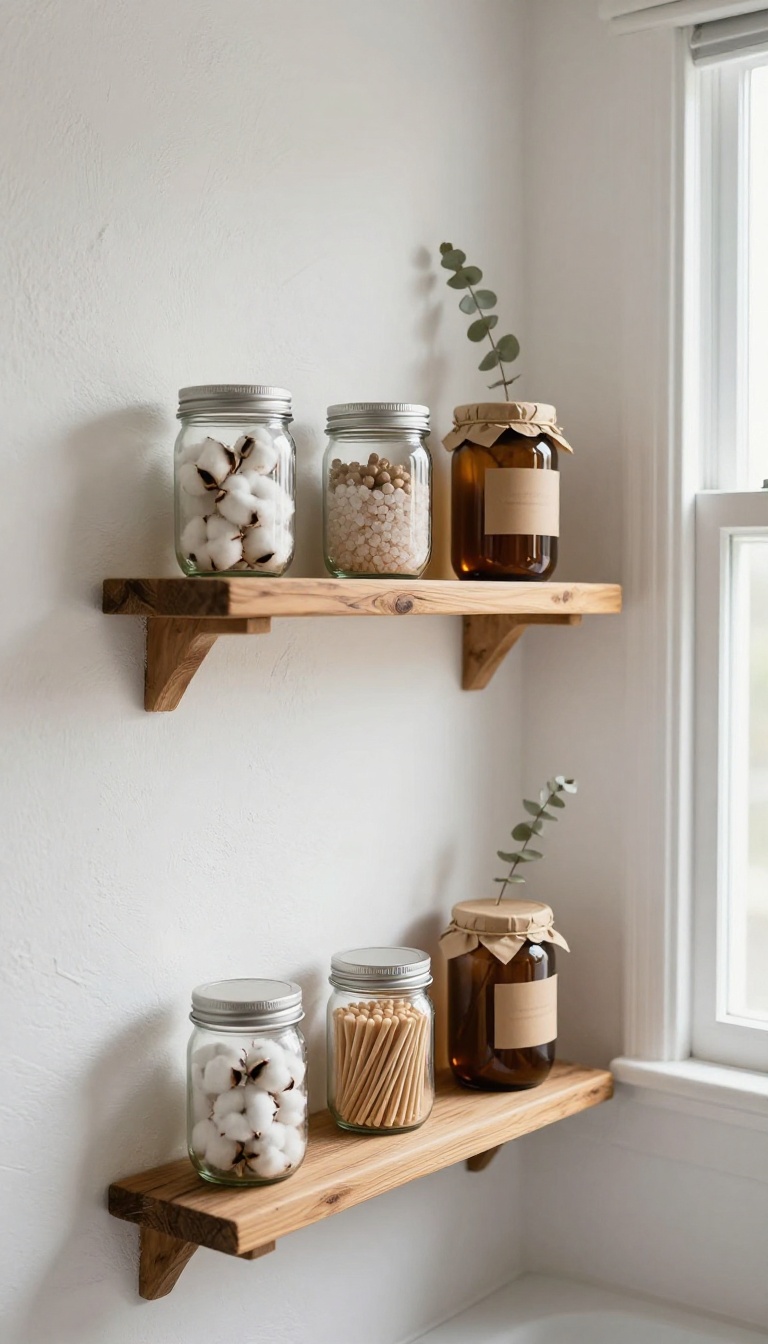
Open shelves do double duty in a small bathroom: they hold what you need and show off a little personality while they're at it. Swap the closed cabinet for a couple of rough-hewn wood planks, then line up mason jars to keep the small stuff corralled. Everything stays visible, reachable, and a whole lot more charming than a plastic bin stuffed under the sink.
The trick is treating the shelf like a display, not a dumping ground. A few well-chosen jars look intentional; a dozen half-empty ones look like clutter. Stick to three to five jars per shelf and give each one a clear job.
Rough, unfinished wood is the star here, so let it show. A live edge or a simple stained plank both work, and the contrast between warm timber and clear glass is what sells the rustic look.
Pick Jars That Earn Their Spot
Wide-mouth quart jars handle cotton balls, swabs, and bath salts without a fight. Pint jars are better for smaller items like hair ties, floss picks, or wrapped soaps. If you want the contents to stay hidden, go with amber or frosted glass instead of clear.
Label the lids with a chalk marker or a small kraft sticker so guests and family members know what's inside. It takes two minutes and keeps the shelf looking tidy.
Mount The Shelves Right
Bathrooms are humid, so anchor shelves into studs whenever you can. If studs aren't where you need them, use heavy-duty toggle bolts rated for the weight of full glass jars. Space shelves about ten to twelve inches apart so taller jars fit comfortably.
Seal the wood with a matte polyurethane or a food-safe oil to protect it from steam and splashes. A quick coat now saves you from warping and water rings later.
Style Without The Clutter
Leave a little breathing room between jars. Negative space keeps the shelf from feeling heavy in a tight room. Tuck a small trailing plant or a vintage shaving brush at one end for texture.
Rotate seasonal items—think eucalyptus in winter or a sprig of lavender in summer—so the shelf stays fresh without a full overhaul. Small changes, big payoff.
5. Pebble Tile Shower Floor
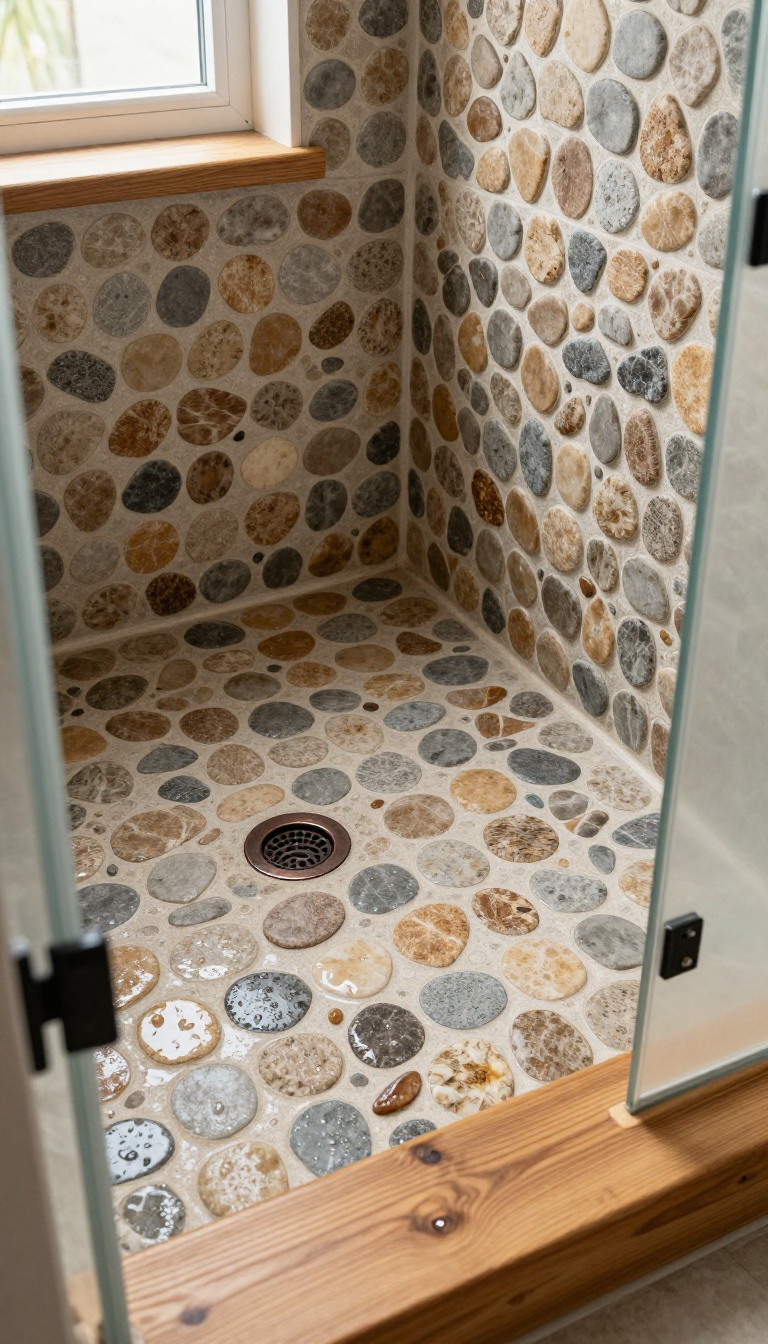
Pebble tile turns an ordinary shower floor into something that feels borrowed from a creek bed or a quiet spa. Instead of a flat, slick surface underfoot, you get rounded stones with soft variation in color and height. It's a small change with a big payoff in a compact bathroom.
The floor becomes a focal point without stealing space, and the organic texture plays nicely with wood, stone, and matte fixtures. Best of all, those pebbles aren't just pretty. They add grip, which matters in a small wet zone where every inch counts.
Why It Works In Tight Showers
Pebble mosaics come on mesh-backed sheets, so they bend and curve around small shower footprints with ease. That flexibility means fewer awkward cuts and a smoother look in a cramped stall. The stones also hide water spots and soap scum better than glossy ceramic.
In a tiny bathroom where you notice every detail, that forgiving surface keeps things looking clean with less fuss.
Grip And Drainage Basics
The uneven surface gives your feet something to hold onto, which is a real plus on a wet floor. Look for pebbles with a matte or slightly rough finish rather than polished ones that can feel slick. Drainage still matters.
Set the tiles on a slight slope toward the drain and seal the grout so water moves where it should. A good installer will keep the pitch subtle but effective.
Choosing The Right Pebbles
Natural stone pebbles bring earthy grays, tans, and browns that fit rustic rooms beautifully. If you want a cleaner look, tumbled marble or porcelain versions offer the same shape with more consistent color. Size plays a role too.
Smaller pebbles feel softer underfoot and conform to tight corners, while larger ones make a bolder statement. Either way, keep the palette muted so the texture does the talking.
Care And Longevity
Pebble floors need a little more attention than smooth tile because grout lines are deeper and wider. A soft brush and a mild cleaner once a week keeps them looking fresh. Re-seal stone pebbles every year or two to protect them from moisture and staining.
Do that, and the floor will hold up for years while keeping that just-gathered-from-the-river look.
6. Antique Mirror with Distressed Frame
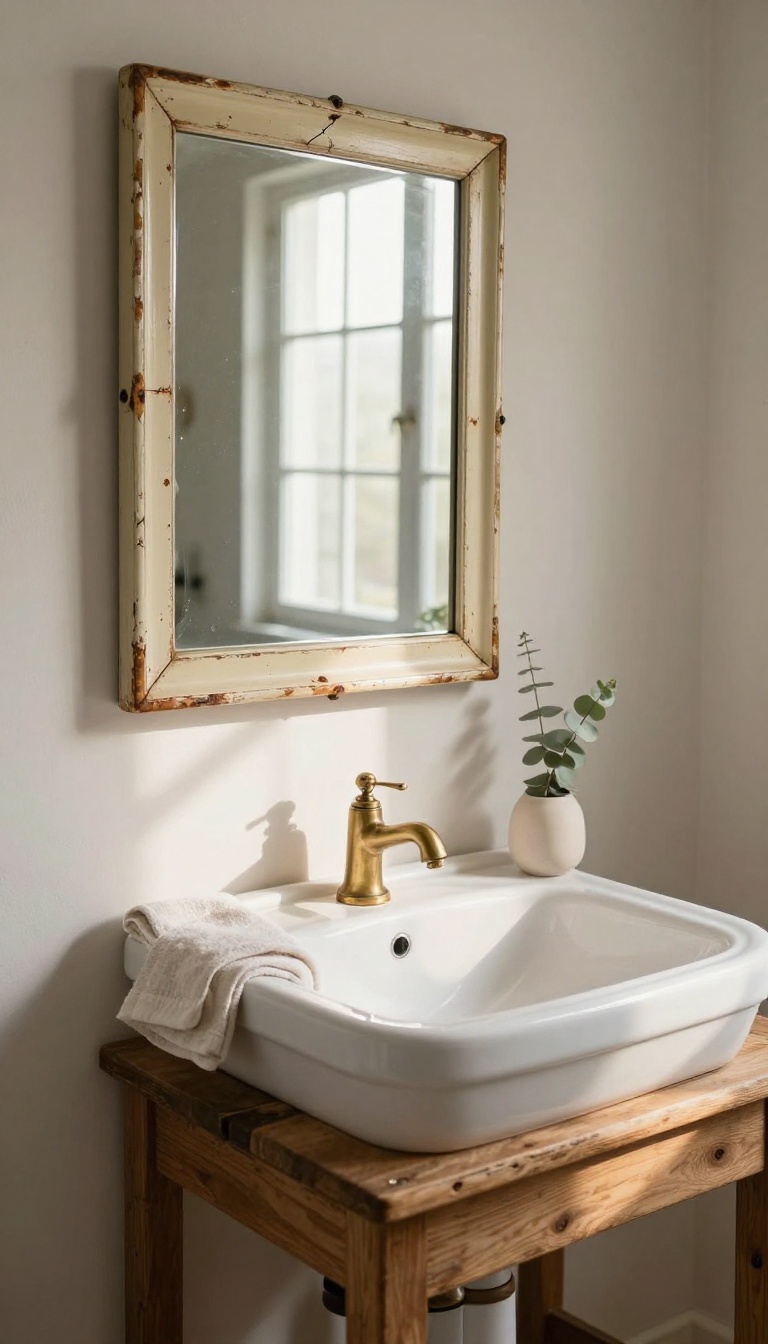
An antique mirror with a distressed frame brings instant old-soul charm to a small bathroom. The chipped paint and weathered wood tell a story, while the glass itself bounces light around and makes tight quarters feel airier. It’s a simple swap that adds patina and personality without a remodel.
You don’t need a perfect mirror to make a statement. In fact, the imperfections are the point. A frame with peeling paint, hairline cracks, or a bit of rust feels collected, not bought.
It softens the sterile look that builder-grade bathrooms often have. Hang it above the sink or on the wall opposite a window. The reflection doubles the natural light and visually pushes back the walls.
Even a small mirror can make a cramped corner feel less claustrophobic. Best of all, you can find these mirrors at flea markets, estate sales, or online for a fraction of the cost of new. A little cleaning and a secure hanging job are usually all it takes.
Where To Find One
Thrift stores, flea markets, and estate sales are goldmines for antique mirrors. Look for solid wood frames with original glass, even if it’s spotted. Online marketplaces and local antique shops also work.
Don’t overlook garage sales—sometimes the best pieces are hiding in plain sight.
How To Hang It Right
Antique mirrors can be heavy, so use a sturdy anchor or find a stud. If the frame is fragile, reinforce the back with a thin piece of plywood. Hang it at eye level, usually about 60 to 65 inches from the floor.
For a softer look, lean a large mirror against the wall and secure it with museum gel.
Styling Around The Patina
Let the mirror be the star. Keep nearby accessories simple—a small vase, a vintage soap dish, or a single candle. If the frame has a warm tone, pair it with brass or bronze fixtures.
For a cooler patina, mix in pewter or aged nickel. The goal is harmony, not competition.
7. Burlap or Linen Shower Curtain
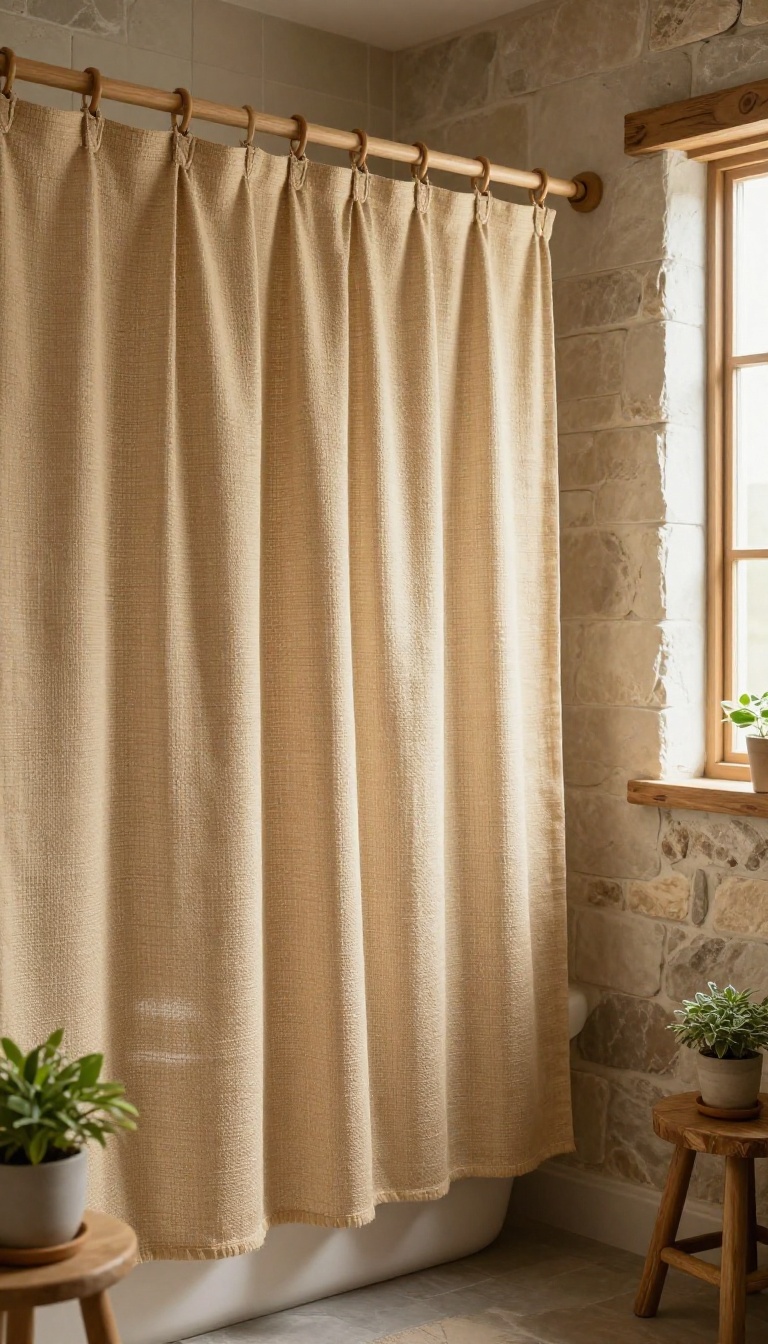
That standard plastic shower curtain might be practical, but it doesn't do your rustic bathroom any favors. Swap it for burlap or linen, and the whole space softens instantly. These natural fabrics bring texture and warmth that plastic simply can't match.
Best of all, you can change the look whenever you want without spending much. A new curtain is one of the easiest and most affordable updates you can make.
Burlap and linen shower curtains bring a relaxed, organic feel to a small bathroom. They're not just about looks—they also help absorb sound and add a layer of softness that makes the room feel cozier. Plus, they're a breeze to swap out when you want a fresh vibe.
Why Natural Fabrics Work
Burlap and linen have a raw, unpolished beauty that fits rustic style perfectly. They add subtle texture without overwhelming a small space. Unlike shiny plastic, these fabrics diffuse light and create a softer, more inviting atmosphere.
Choosing The Right Fabric
Linen is lighter and drapes beautifully, while burlap has a chunkier, more rustic weave. Both come in natural earth tones that blend with other rustic elements. Look for pre-shrunk options to avoid surprises after washing.
Practical Tips For Hanging
Use a liner behind your fabric curtain to protect it from water and mildew. Hang the curtain with wooden or metal rings that match your other hardware. To keep it fresh, shake it out regularly and wash it according to the care label.
8. Copper or Brass Fixtures
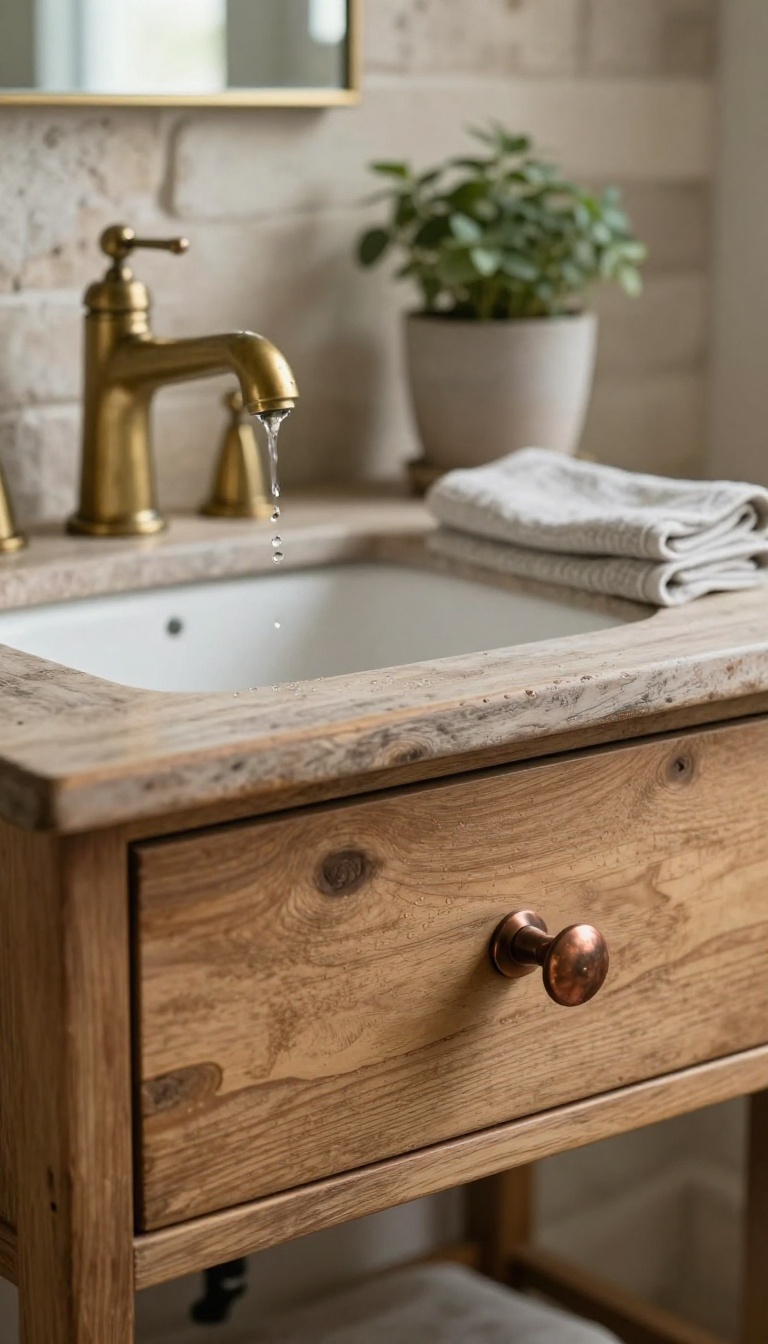
Swap out your faucet, showerhead, and cabinet pulls for copper or brass versions. These warm metals bring an instant vintage vibe and a hint of luxury to even the tiniest bathroom. They also age beautifully, developing a rich patina that adds character over time.
Copper and brass fixtures are like jewelry for your bathroom. They catch the light, warm up cool color palettes, and make builder-grade vanities look custom. In a small space, a little metallic shine goes a long way, so you don't need to replace everything—just the pieces you touch and see most.
Start with the faucet. A copper or brass faucet becomes the focal point of your sink area and sets the tone for the whole room. Then consider the showerhead.
A brass showerhead adds a spa-like feel and pairs perfectly with rustic materials like wood and stone. Finally, don't overlook cabinet pulls and knobs. They're small, affordable, and easy to swap, but they make a big impact.
The best part? These metals don't need to be perfect. In fact, a little wear and tear adds to their charm.
Look for unlacquered brass or raw copper if you want that living finish that changes over time. If you prefer a more polished look, choose lacquered versions that stay shiny.
Why These Metals Work
Copper and brass bring warmth to a small bathroom. They contrast nicely with cool tones like gray or white, and they add a touch of luxury without feeling stuffy. Plus, they're naturally antimicrobial, which is a nice bonus.
Where To Use Them
Focus on high-touch areas: faucets, showerheads, and cabinet hardware. You can also add a copper towel bar or a brass toilet paper holder for extra cohesion. Just keep the finishes consistent—mixing metals can work, but it's tricky in a small space.
Mixing And Matching
If you want to mix metals, stick to two types and repeat them. For example, pair brass fixtures with black accents for a modern rustic look. Or mix copper with oil-rubbed bronze for a more vintage feel.
Just make sure one metal dominates.
Care And Maintenance
Copper and brass are low-maintenance. A quick wipe with a soft cloth keeps them clean. If you want to slow down patina, use a metal polish.
If you love the aged look, just let them be—they'll develop a unique finish over time.
9. Wooden Crate Storage
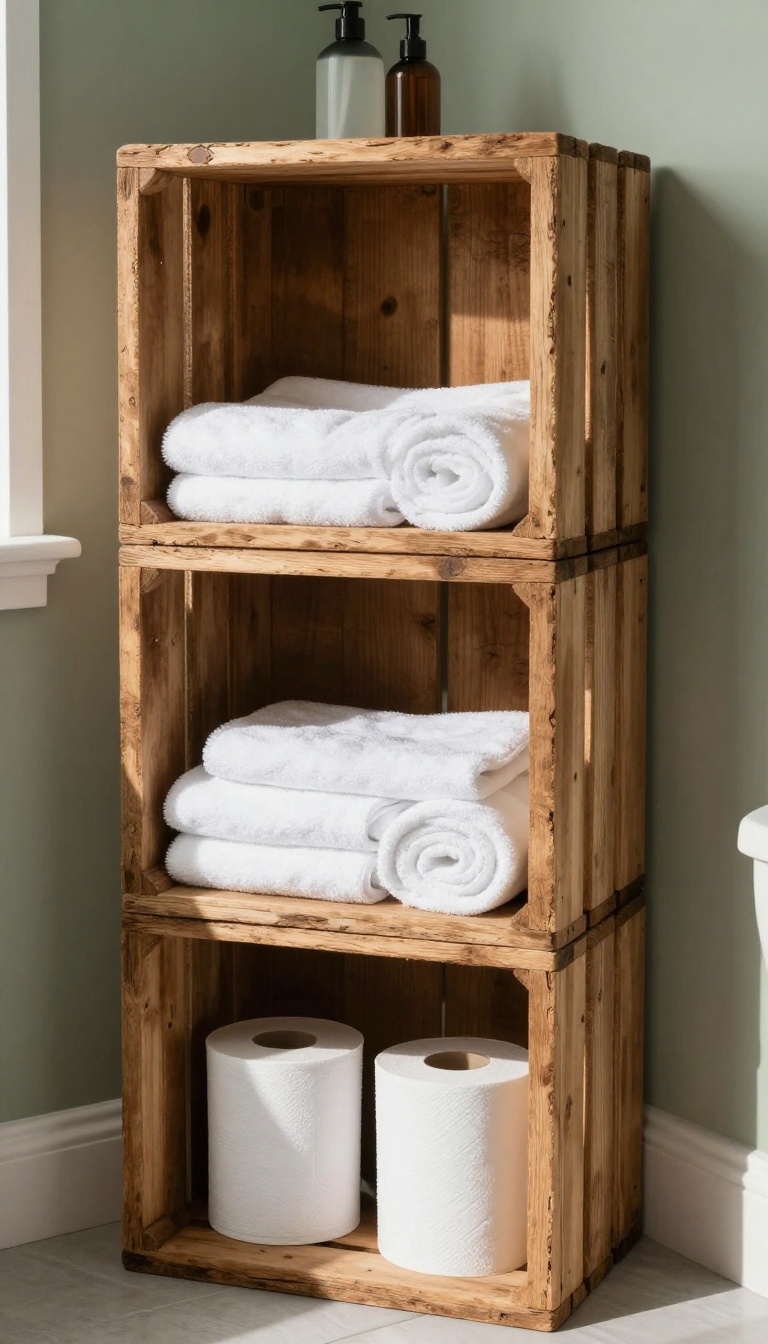
Wooden crates might be the most versatile rustic storage solution you can find. They're cheap, sturdy, and already have that weathered, farmhouse look that fits right into a rustic bathroom. Stack them vertically or mount them on the wall to corral towels, toilet paper, and toiletries without taking up precious floor space.
The best part? You can often snag crates for free from grocery stores, farmers markets, or online marketplaces. Even new ones are budget-friendly.
And because they're wood, they add warmth and texture that wire racks or plastic bins just can't match. Whether you need a simple floor stack or a custom wall shelf, crates adapt to your space and style. Here are a few ways to put them to work.
Stack Them High
Stack three or four crates vertically in a corner. Turn some sideways to create open cubbies. Use the bottom crate for bulky items like extra toilet paper, the middle for rolled towels, and the top for smaller toiletries.
Secure the stack to the wall with a bracket if you have kids or pets.
Mount Them On The Wall
Floating crate shelves add rustic charm and free up floor space. Mount two or three crates in a row or staggered pattern. Use heavy-duty anchors and screws to hold the weight.
Fill them with folded towels, mason jars of cotton balls, or small baskets of soap.
Add A Little Polish
Sand rough edges and seal the wood with a matte polyurethane to protect against moisture. For a softer look, paint the crates in a muted color like sage or cream, then distress the edges. Line the bottoms with shelf liner or burlap to keep small items from falling through.
10. Lantern-Style Lighting
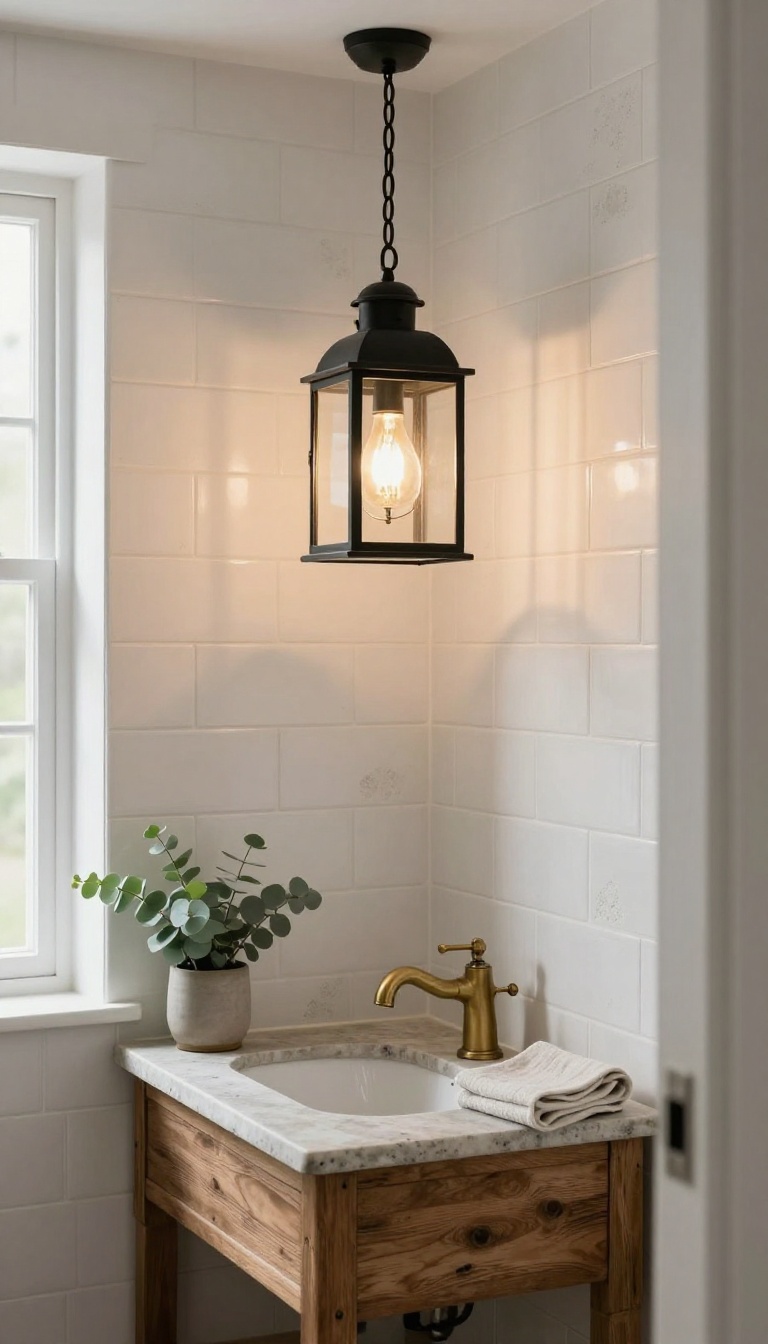
Builder-grade lights are the fast-food of bathroom fixtures: they get the job done, but they leave you feeling empty. Swapping that bland dome light for a lantern or cage-style fixture changes the entire mood of a small bathroom. It's a simple upgrade that adds warmth, character, and a touch of old-world charm without a major renovation.
Lantern-style lighting works because it feels intentional. Instead of a plain glass globe, you get a fixture with personality—metal cages, seeded glass, or a vintage-inspired silhouette. It instantly says 'rustic' without screaming for attention.
And because it's often the main light source in a small bathroom, it does double duty as both illumination and decor. You don't need to rewire your entire house to make this work. Most lantern fixtures install just like a standard light, so it's a beginner-friendly DIY if you're comfortable with basic electrical.
If not, an electrician can swap it out in under an hour. The payoff is a bathroom that feels curated rather than contractor-grade.
Why It Works In Small Spaces
In a tight bathroom, every visual element counts. A lantern fixture draws the eye upward, making the ceiling feel higher and the room less cramped. The open cage design also lets light bounce around more freely than a solid shade, so the space feels brighter.
Plus, the metal and glass materials tie into other rustic touches like wood, stone, or aged brass.
Choosing The Right Style
You'll find lantern lights in a range of rustic flavors. For a farmhouse look, go with a black metal cage and a clear bulb. For something softer, try a seeded glass shade with a bronze finish.
If your bathroom leans industrial, a raw steel or galvanized fixture fits right in. Just match the finish to your other hardware—faucet, cabinet pulls, towel bars—so the room feels cohesive.
Bulbs And Brightness
The bulb you choose matters as much as the fixture. Edison-style bulbs look great in cage lights, but they can be dim. For a small bathroom, aim for 60 to 75 watts equivalent, or use an LED that mimics warm incandescent light (around 2700K).
If you need more light for shaving or makeup, add a second fixture over the mirror or use a dimmer to adjust the mood.
Installation Tips
Before you buy, check the height of your ceiling and the size of your bathroom. A fixture that's too large will overwhelm a tiny space; too small and it'll look lost. Also, make sure the light is rated for damp locations—bathrooms get steamy.
If you're renting, look for plug-in or battery-operated lanterns that don't require wiring. They won't be as bright, but they still add that rustic glow.
FAQ
How can I make a small rustic bathroom look bigger?
Use light colors, large mirrors, and open shelving to create an illusion of space. Keep clutter minimal and choose multi-functional pieces like a vanity with storage.
What are the best materials for a rustic bathroom?
Reclaimed wood, natural stone, copper, brass, and galvanized metal are top choices. They add warmth and texture while standing up to moisture when sealed properly.
Can I achieve a rustic look on a budget?
Absolutely. Thrift stores, flea markets, and online marketplaces are great for finding vintage washstands, crates, and mirrors. DIY projects like pallet wood shelves also save money.
How do I prevent moisture damage with rustic materials?
Seal wood with a water-resistant finish, use exhaust fans, and wipe down surfaces regularly. Choose moisture-friendly materials like stone and metal for wet areas.
What lighting works best in a small rustic bathroom?
Warm, soft lighting from lantern-style fixtures or Edison bulbs works well. Add dimmers to control brightness and create a cozy atmosphere.
Conclusion
Rustic bathrooms work best when they feel a little imperfect. Pick one or two ideas that match your space and budget, then let the rest wait. A salvaged mirror or a chunky wood shelf can do more than a full remodel.
Start small and live with it for a week.
Notice how the light hits the wood, how the room feels in the morning. Add the next piece when it feels right. Personality builds slowly, and that is exactly what makes it yours.