13 Gazebo Ideas Backyard Outdoor Spaces Can Use for Shade
A good gazebo buys you something a patio umbrella can't: a real outdoor room that works from morning coffee to late dinners. It blocks the harshest sun, shrugs off light rain, and gives your yard a natural center point instead of a scattered collection of chairs.
The trick is matching the structure to your space, climate, and how you actually spend time outside. Some backyards call for a permanent wooden build with screens; others just need a pop-up canopy that disappears into the garage come October.
Budget matters, but so does maintenance, wind exposure, and whether you want a hot tub or a kids' craft table underneath.
1. Classic Wooden Gazebo with a Screened-In Bug Barrier
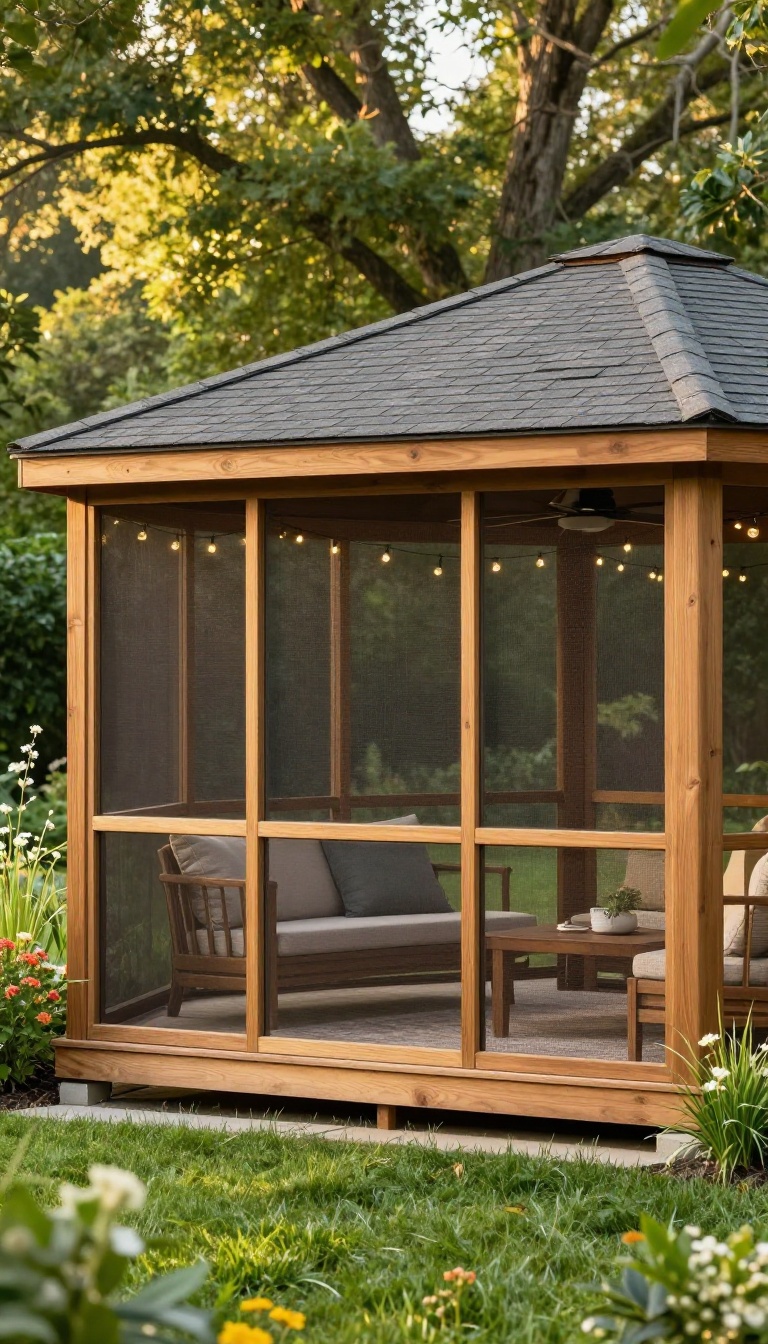
A wooden gazebo with screens solves the one problem that ruins summer evenings: bugs. You get the charm of real wood and the comfort of a bug-free zone. It's a classic for a reason.
You've probably swatted at mosquitoes while trying to enjoy a drink on the patio. A screened wooden gazebo ends that. It's an outdoor room that actually works when the sun goes down and the bugs come out.
The structure itself is simple: a wood frame, a solid roof, and screen panels on all sides. You can open or close it up depending on the weather. The screens let in every breeze but keep out the biters.
Why Wood And Screens Work Together
Wood gives you a sturdy frame that stands up to wind and rain. It also looks good with almost any home style, from farmhouse to modern. Screens add a layer of protection without blocking airflow.
Together, they create a space you can use from spring to fall, even in humid climates.
Choosing The Right Wood
Cedar and redwood resist rot and insects naturally, so they last longer with less fuss. Pressure-treated pine costs less but needs regular sealing. If you want a painted look, pine is fine.
For a natural finish that ages gracefully, go with cedar.
Screen Options And Maintenance
Standard fiberglass screens are affordable and easy to replace. Pet-resistant screens cost more but hold up to claws and kids. Clean them with a soft brush and mild soap once a year.
Check for tears before bug season starts.
Making It Comfortable
Add a ceiling fan to keep air moving on still days. String lights or a small chandelier make evenings feel cozy. A rug and cushioned chairs turn it into a real room.
Just avoid heavy furniture that blocks airflow.
2. Budget-Friendly Pop-Up Canopy for Renters
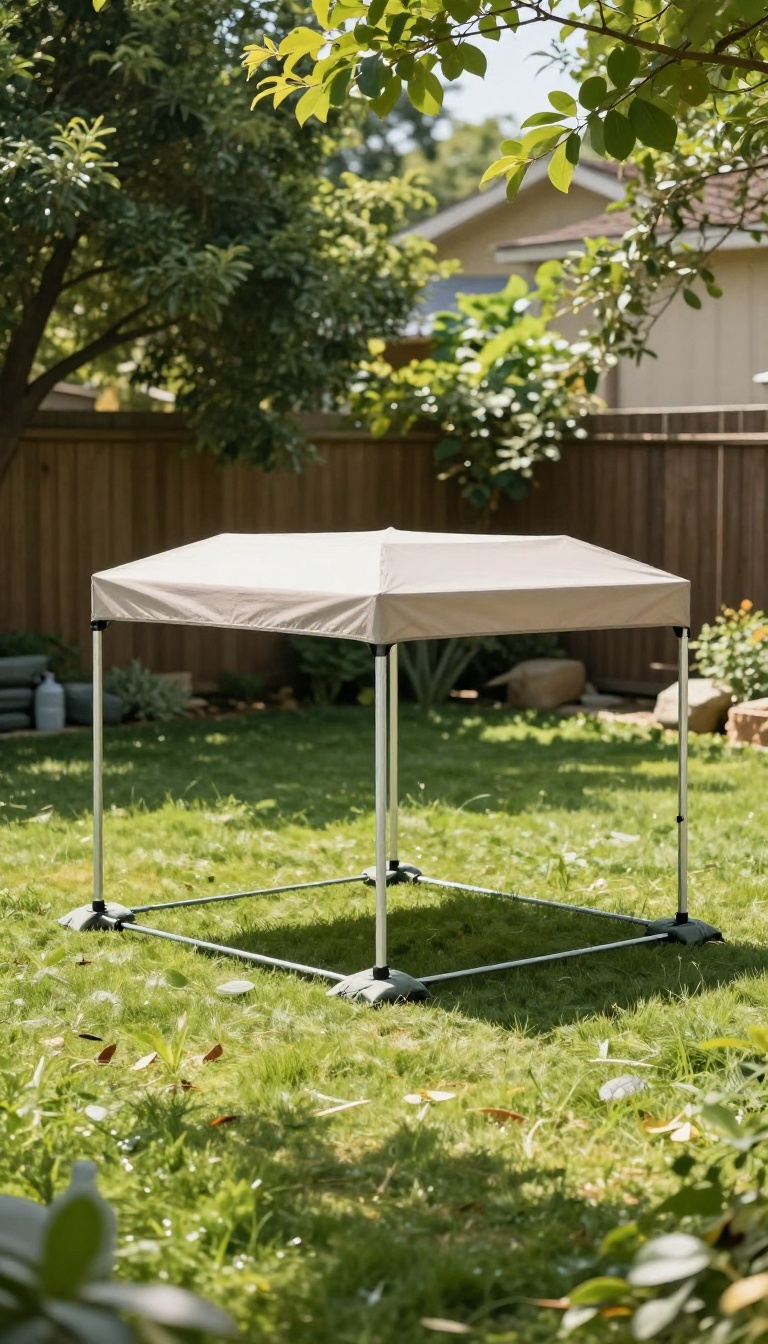
Renting a place with a great yard feels like a win until you realize you can't drill, dig, or build anything permanent. That's where a pop-up canopy earns its keep. It gives you shade and a defined outdoor space without touching the landlord's property, and it folds down flat when your lease ends.
These canopies cost a fraction of a permanent gazebo, and most set up in under ten minutes with two people. You get instant relief from the afternoon sun, a dry spot for a grill, or a shaded zone for kids without committing to concrete footings or a permit.
Pop-up canopies get dismissed as tailgate gear, but that undersells what they do in a backyard. A 10×10 straight-leg model covers a small patio table and four chairs with room to spare. A 12×12 gives you space for a lounge setup or a folding table buffet.
The frame is usually powder-coated steel or aluminum, and the canopy top is a coated polyester or oxford fabric. Look for a model with a vented top, sometimes called a wind vent or cathedral ceiling. That vent lets hot air escape instead of ballooning under the fabric, which keeps the canopy cooler and more stable when a breeze picks up.
You don't need the cheapest option on the shelf, but you also don't need a commercial-grade tent. A mid-range canopy from a brand that sells replacement tops will outlast a bargain bin special by several seasons.
Setting It Up Without Wrecking The Yard
Most pop-up canopies use weighted feet rather than stakes, which is perfect when you can't put holes in the ground. Fill the foot plates with sandbags, water jugs, or even paver stones you set on top. On grass, you can stake through the foot holes if the ground is soft, but weights alone usually hold fine on a patio.
Set it up with two people. One person pulls the frame open while the other guides the legs so they don't splay. Once the top is on, secure every Velcro strap and check that the legs are locked at the same height.
A wobbly canopy catches wind and turns into a kite. Take it down before storms. Pop-up canopies are not built for sustained wind, and a sudden gust can bend the frame or send the whole thing into a fence.
If you're leaving it up for the weekend, drop it a notch and add extra weight to the feet.
Making It Look Like A Room, Not A Tent
The frame is functional, but the styling is on you. Hang a string of outdoor lights along the inside edges using clips made for canopy frames, or wrap them around the legs. Battery-powered options mean no extension cord running across the lawn.
Add a rug underneath to define the space and keep your feet off hot pavers. An outdoor rug in a flat weave dries fast if it gets rained on. A small side table, a couple of planters at the corners, and a shade-friendly plant like a snake plant or a small palm can soften the edges.
If you want more privacy, clip lightweight curtains or sun shades to the frame with binder clips or curtain rings. Sheer outdoor curtains block the low evening sun and make the canopy feel intentional instead of temporary.
Storage And Packing When You Move
The best part of a pop-up canopy for renters is that it collapses into a wheeled bag roughly the size of a golf bag. That bag fits in a closet, a garage corner, or the trunk of a car. No disassembly tools, no leftover hardware, no awkward conversation with your landlord.
Before you store it, let the canopy top dry completely. Fold it loosely rather than cramming it into the bag, and keep the frame clean and dry to prevent rust. Store the whole thing somewhere off the floor if your garage gets damp.
When you move, the canopy moves with you. It works on a balcony, a rented patio, a community garden plot, or a tailgate. That portability is the whole point.
3. Hardtop Metal Gazebo for Low-Maintenance Shade
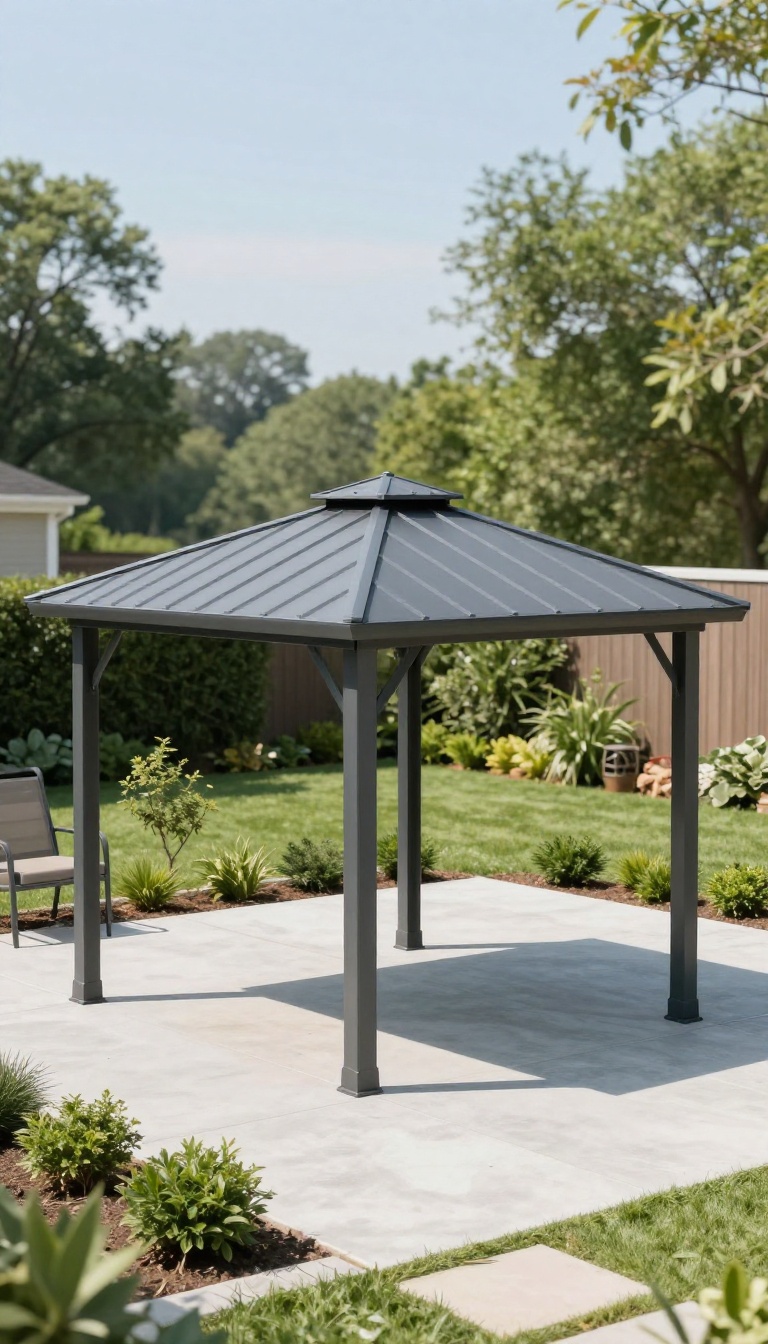
A hardtop metal gazebo swaps fabric for a solid roof, usually made of powder-coated steel or aluminum. That means no yearly cover replacement, no sagging canvas, and no scrambling to dry things out after a storm. If you live somewhere with real weather, this is the shade structure that quietly keeps working.
The frame and roof panels are the whole story here. Powder coating seals the metal against moisture, so rust stays away even through wet winters and humid summers. You get a permanent-looking structure without the upkeep of wood or the fragility of soft-top canopies.
Why The Coating Matters More Than The Metal
Powder coating is a dry finish baked onto the metal, and it holds up far better than paint. It resists chipping, fading, and the kind of bubbling you see on cheap steel furniture after one season. Both steel and aluminum work, but aluminum won't rust at all, which matters if you're near the coast.
Snow, Rain, And Wind Performance
A hardtop roof sheds rain instead of pooling it, and many models handle a few feet of snow if you clear it between storms. Wind is the bigger test, so anchor the feet into concrete or use weighted bases. Check the wind rating before you buy, especially in open yards.
What You Give Up And What You Gain
You lose the soft, airy look of fabric and the ability to collapse it for storage. In return, you get a space that's ready year-round with a quick wipe-down. Add mosquito netting or curtains if bugs and privacy are concerns, and you've got a nearly hands-off outdoor room.
4. Retractable Roof Gazebo for Adjustable Sun Control
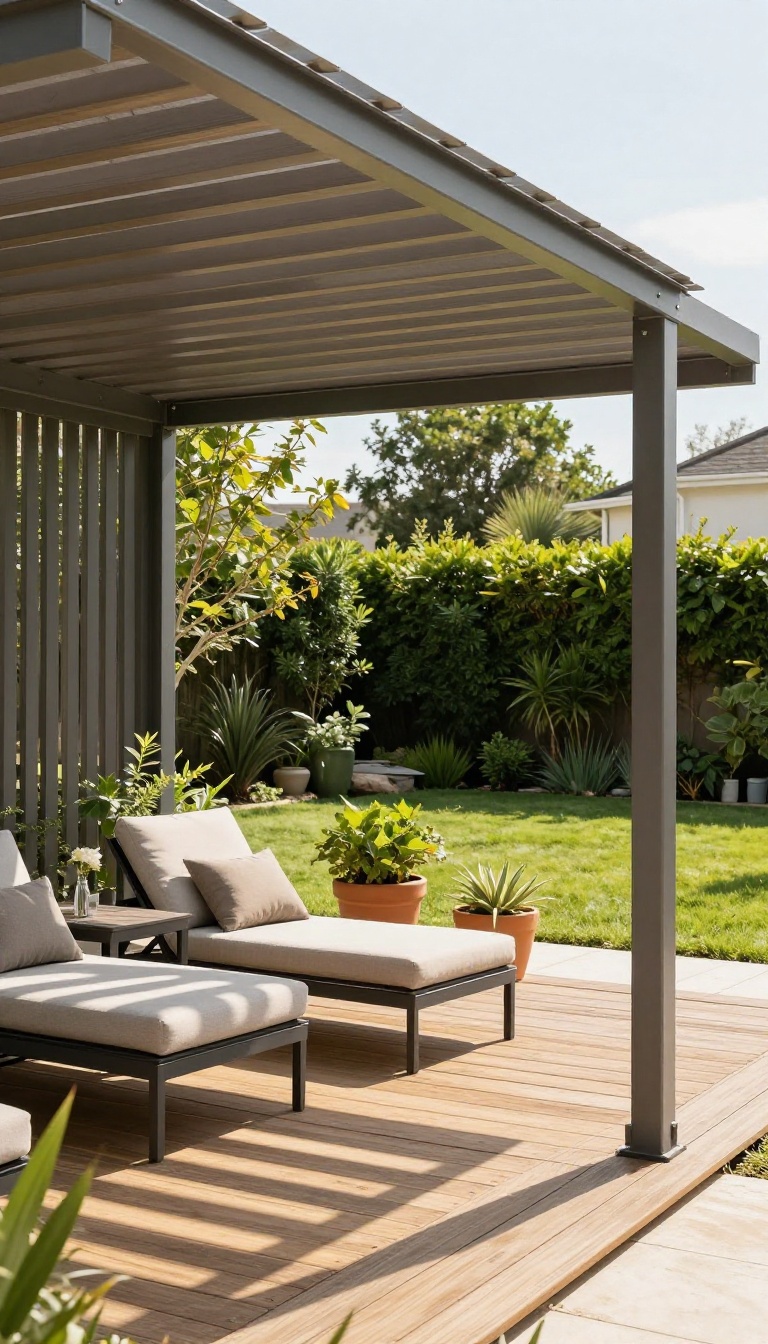
A louvered roof gazebo gives you a dial for the sun. Turn a crank or press a button, and the slats tilt from wide open to fully closed. You get full sun for morning coffee and full shade for a 2 p. m. lunch without moving an inch.
That kind of control changes how you use the space. No more chasing shade across the yard or dragging furniture under a tree. The gazebo stays put, and the roof does the work.
It also handles light rain. Close the louvers and the roof sheds water like a solid cover. Open them a crack and you get airflow without direct sun.
One structure, several moods.
Most homeowners don't realize how often they'd use a gazebo if the shade were adjustable. Fixed roofs are either on or off. A retractable louvered roof lets you fine-tune the light all day long.
The mechanism is simpler than it sounds. A series of horizontal aluminum slats spans the frame. A hand crank or a small motor tilts them in unison.
Some models integrate a rain sensor that closes the roof automatically when drops hit. You'll pay more than a fabric canopy, but less than a full custom build. Installation is usually a weekend project if you're handy, or a half-day job for a pro.
The payoff is a space that adapts to breakfast, lunch, and dinner without you lifting a finger.
How The Louvers Actually Work
Each slat pivots on a hidden axle inside the frame. A central gear mechanism links them so they move together. Turn the crank clockwise and the slats flatten into a solid roof.
Turn it back and they fan open like blinds. Motorized versions add a remote or a wall switch. Some pair with a phone app or smart home system.
The motor is quiet and runs on standard household current, though a few models offer solar options for off-grid setups. Maintenance is minimal. Rinse the slats a couple times a year and check the gears for debris.
Unlike fabric, aluminum won't fade or tear. It also won't sag after a heavy rain.
Where Adjustable Shade Pays Off
South-facing patios get brutal afternoon sun. A louvered roof lets you block the worst of it while keeping the morning light. West-facing decks benefit too, especially during summer evenings when the sun drops low and blinds everyone at the table.
If you live in a climate with frequent light showers, the close-and-go feature is a game changer. You don't have to run outside to drop a canopy or wipe down cushions. Just tilt the roof shut and wait it out.
Poolside setups love these roofs. You can open the slats for a breeze while keeping direct sun off the water, which slows evaporation and keeps the pool cooler. It's a small thing that adds up over a season.
Sizing, Wind, And Installation Notes
Louvered roofs come in standard sizes, usually 10×10, 10×12, and 12×12 feet. Larger spans may need extra posts or a reinforced frame. Check the wind rating before you buy.
Most quality models handle 60 to 75 mph gusts when closed, but open slats catch wind like a sail. Anchoring matters more than the roof itself. Concrete footings or heavy-duty ground stakes keep the frame steady.
If you're mounting on a deck, use blocking underneath to spread the load. Wiring for a motorized unit is the one step that trips up DIYers. Run conduit before you set the posts, or hire an electrician to tie into an outdoor outlet.
A licensed pro can also confirm local permit rules, which vary by county.
5. Gazebo with Built-In Bench Seating and Storage
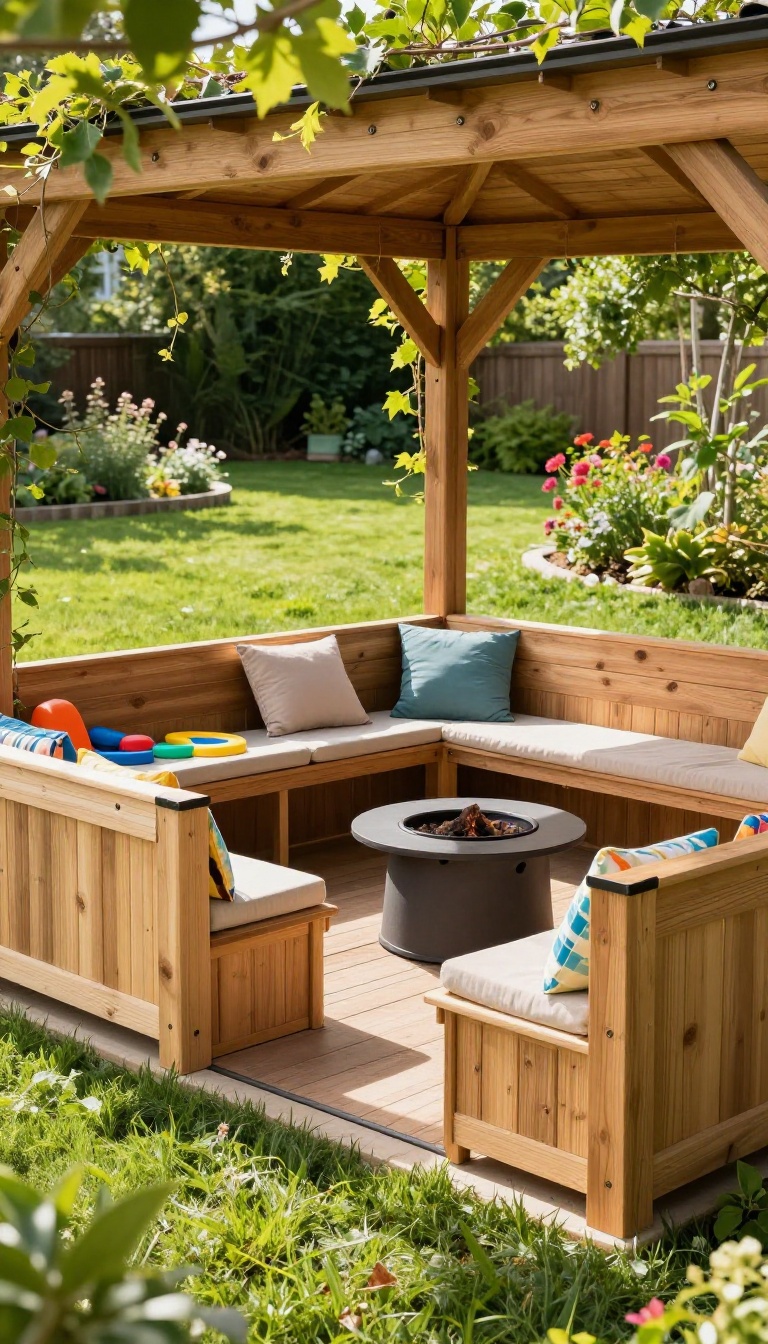
Built-in benches turn a gazebo into a tidy, functional hangout instead of a chair shuffle. You get seating that hugs the frame, so the middle stays open for a fire pit, a table, or kids playing. And the space under those benches?
It's prime real estate for cushions, tools, and pool toys.
Most gazebos waste their walls. You plop down a few plastic chairs, and suddenly the whole structure feels cramped. Built-in bench seating fixes that by using the perimeter for sitting and the space below for storage.
It's a simple upgrade that makes the gazebo feel custom without a custom price tag. The benches usually run along one, two, or three sides, leaving an open entry. You can build them as part of a wooden gazebo kit, add them to a metal frame with treated lumber, or hire a carpenter for a seamless look.
The storage part comes from hinged lids or slide-out drawers tucked under the seat. This setup works for almost any backyard because it's flexible. A small yard gets maximum seating with zero clutter.
A large yard gets a dedicated zone that doesn't need extra furniture. Either way, you spend less time hauling chairs and more time enjoying the shade.
Why Built-in Beats Freestanding Chairs
Freestanding chairs slide around, tip in the wind, and eat up floor space. Built-in benches stay put and create a clean, open center. You can still add a couple of movable chairs or poufs when guests come over, but day to day, the built-ins do the heavy lifting.
They also make the gazebo feel more like a room. The benches define the edges, so the space reads as intentional rather than a random collection of furniture. That matters if you use the gazebo for dinners, card games, or just reading on a Sunday.
Storage That Actually Works
Under-bench storage keeps clutter out of sight and off the floor. Hinged lids are the classic choice: lift the seat, grab a cushion, close it up. Slide-out drawers work better for heavier items like garden tools or grill accessories.
Line the compartments with plastic bins or weather-resistant totes to keep moisture and bugs out. If you live in a rainy climate, add a small gap or vent so air can move through. That prevents that musty smell from taking over your cushions.
Materials And Comfort Tips
Use rot-resistant wood like cedar or pressure-treated pine for the bench frame. For the seat itself, choose boards that won't splinter and can handle sun without fading. Composite decking is a low-maintenance option that holds up well.
Cushions make a huge difference. Go for quick-dry foam and outdoor fabric, then store them in the under-bench compartments when you're not using them. That keeps them dry and doubles the life of your seating.
A few throw pillows add color without much effort.
6. Corner Gazebo for Small Yards
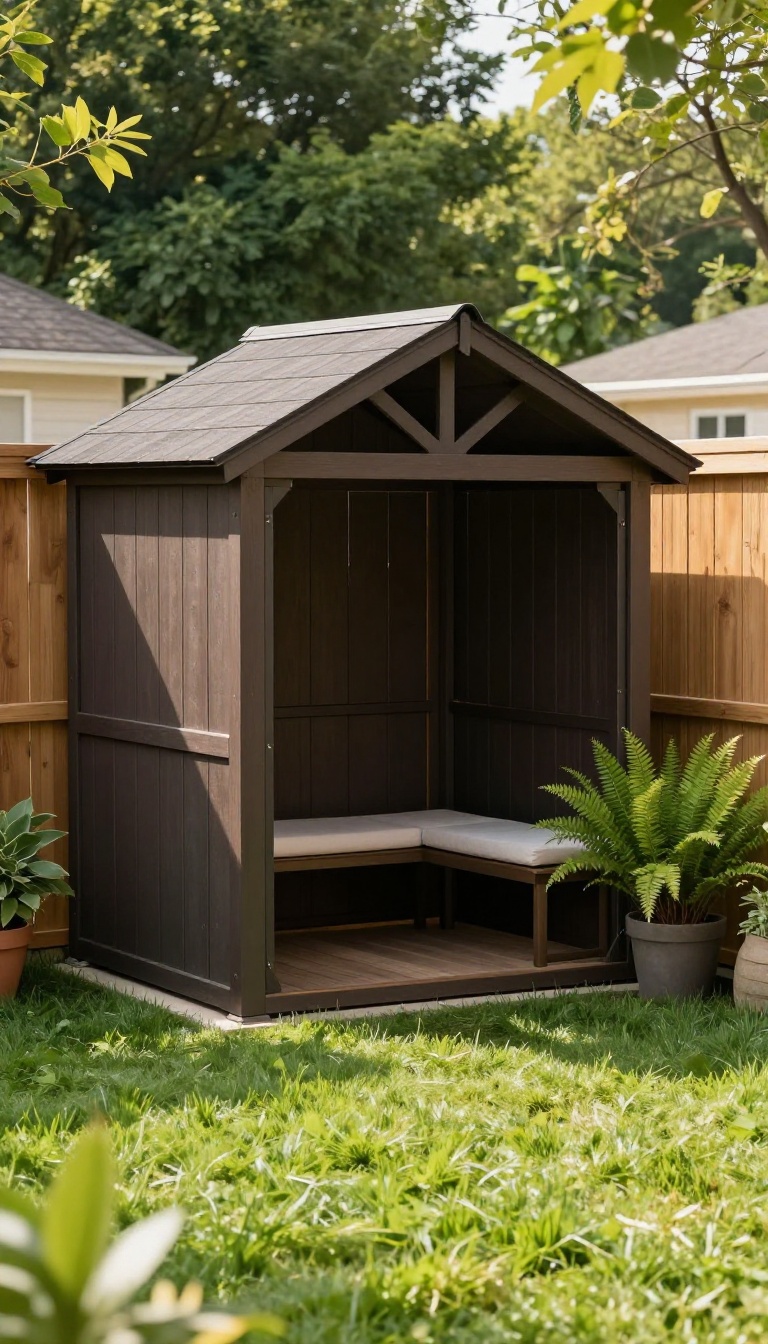
Small yards have a way of making every piece of furniture feel like a negotiation. A corner gazebo sidesteps that problem by claiming the one spot most people ignore. It tucks into the angle where two fences meet, leaving the middle of the lawn open for kids, dogs, or a clear path to the grill.
The corner itself does most of the work. Two sides of the structure sit close to the fence line, so you only need to anchor and finish the front. That means fewer posts blocking your view and less square footage swallowed by the footprint.
Most corner models come in square or hexagonal shapes, and the angled back wall naturally creates a cozy, enclosed feel. You get shade and privacy without building a full wall. A 7×7 or 8×8 footprint fits comfortably in yards that would choke on a 10×12.
Placement still matters. Leave at least a foot of breathing room between the gazebo and the fence for airflow and maintenance. If your corner gets full afternoon sun, a solid roof or adjustable louvers will outperform a fabric canopy that fades by August.
Why The Corner Works
Corners are dead space in most yards. You can't easily mow there, and a dining table looks awkward jammed into the angle. A gazebo turns that awkward pocket into a destination.
It also frames the yard, drawing the eye to a defined feature instead of a bare fence intersection. The result feels intentional rather than squeezed.
Sizing It Right
Measure the distance from the corner along both fences before you buy. A good rule is to leave 12 to 18 inches of clearance on each side. That gap keeps air moving, makes it easier to weed whack, and prevents moisture from trapping against the fence.
If your corner is tighter than 6 feet on either side, look for a 6×6 or a pop-up canopy instead.
Anchoring And Assembly
Corner gazebos catch wind differently because two sides are sheltered. That doesn't mean you can skip anchoring. Use ground stakes for soft turf or concrete anchors for pavers.
Many kits include corner brackets that let you bolt directly into fence posts, which saves floor space and adds stability. Two people can usually assemble a metal or pop-up model in an afternoon.
Furnishing The Nook
Once it's up, treat the corner like a tiny room. A round bistro table and two chairs fit better than a rectangular set. Add a small outdoor rug to define the floor, and hang a solar lantern from the center beam.
If you want a bench, run it along the back angle and keep the open sides clear for traffic.
7. Pergola-Style Gazebo with Climbing Vines
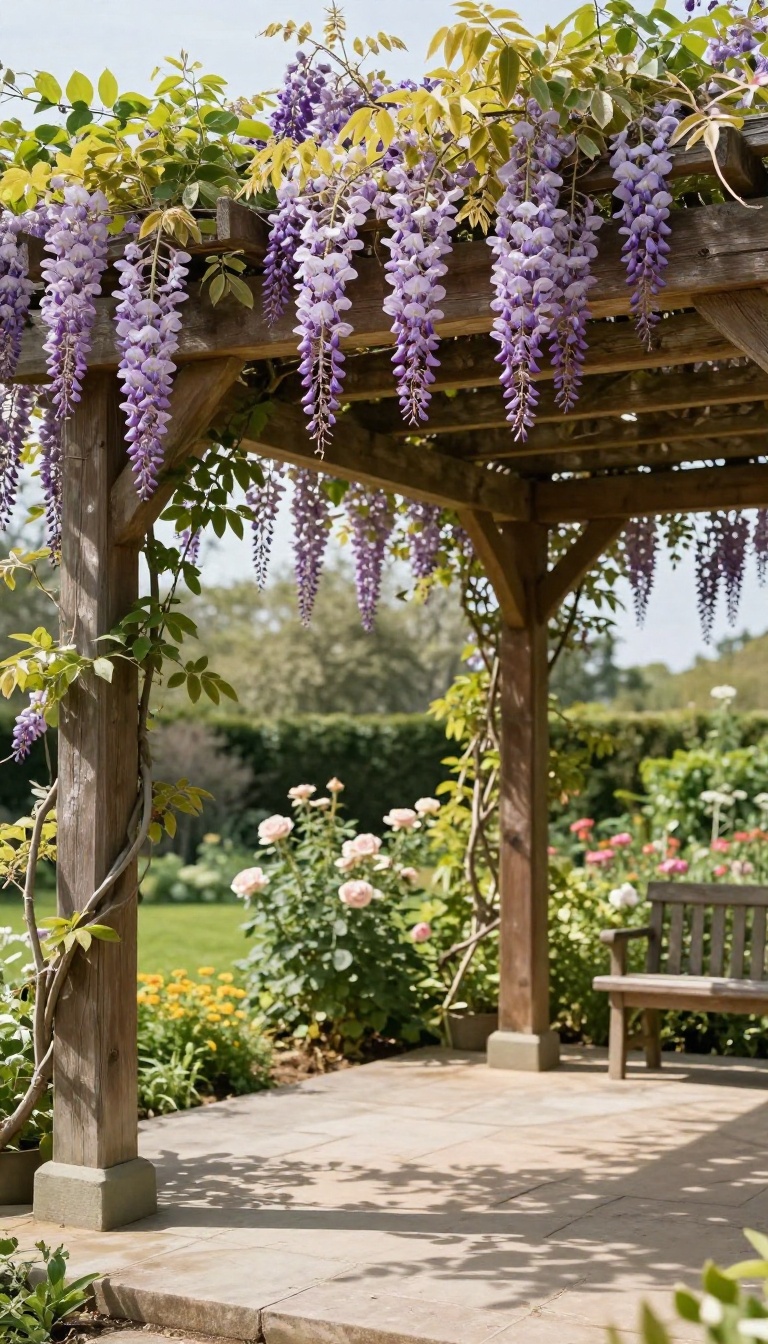
A pergola-style gazebo trades a solid roof for an open grid of beams, then lets plants do the covering. Wisteria, grapevines, or climbing roses weave through the top and create a canopy that shifts with the seasons. You get dappled shade instead of a dark box, and the whole thing looks like it grew there on purpose.
The structure itself is simple: four posts, a few crossbeams, and enough open space for vines to travel. Because air moves freely, these gazebos stay cooler than solid-roof versions on still summer days. The trade-off is less rain protection, so think of it as a shade-first feature rather than a storm shelter.
Picking The Right Vines
Wisteria grows fast and drops dramatic purple blooms, but it needs strong support and regular pruning. Grapevines give you fruit plus big leaves that block serious sun by midsummer. For something lower-maintenance, try climbing hydrangea or a vigorous clematis that comes back every year.
Building For Weight And Growth
Vines get heavy once they're established, especially after rain. Use thicker posts and beams than you would for a bare pergola, and anchor the base in concrete. Space the top slats close enough to give vines something to grab, but wide enough that light still filters through.
Training And Seasonal Care
Guide new shoots along the beams with soft ties during the first couple of years. After that, a hard prune in late winter keeps growth in check and encourages better blooms. Deciduous vines drop leaves in fall, which means more sun exactly when you want it.
8. Gazebo with a Fire Pit for Three-Season Use
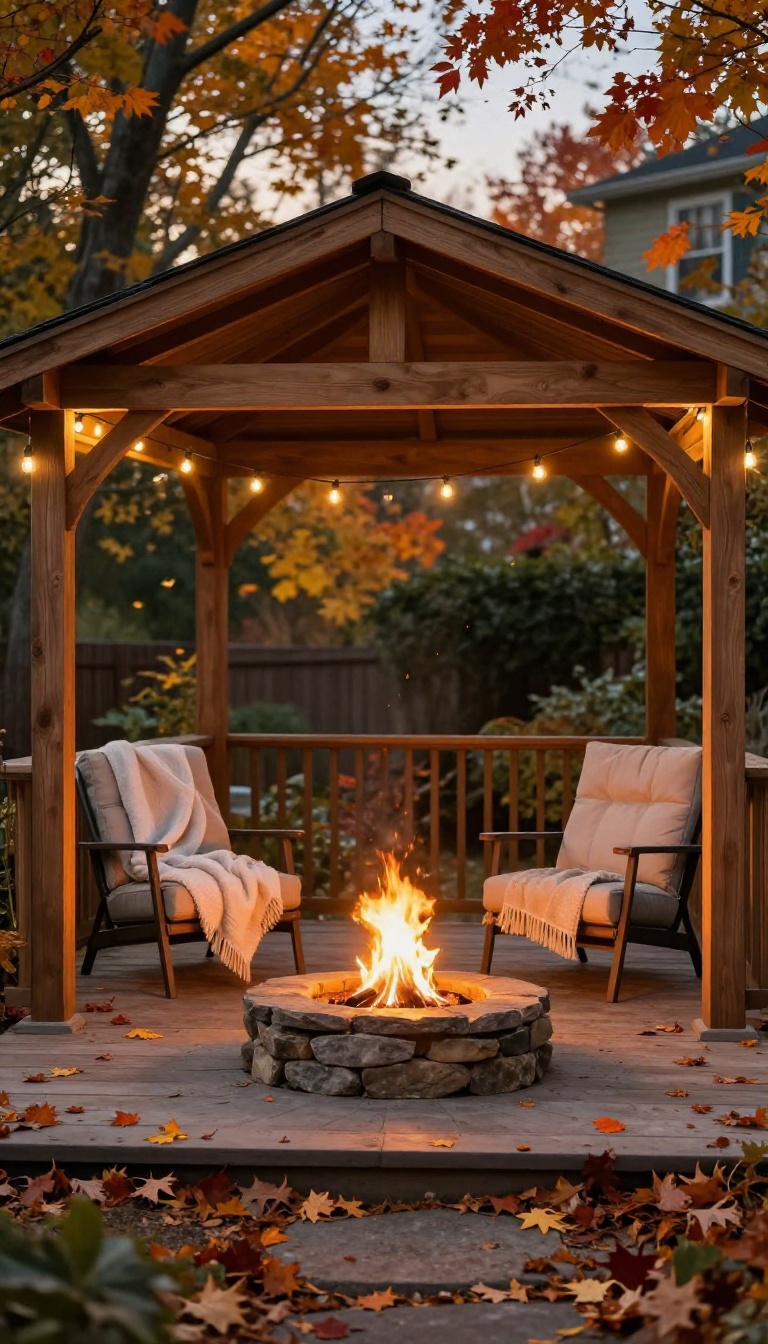
A fire pit turns a gazebo from a summer-only spot into a place you can enjoy well into fall and early spring. The heat radiates outward, taking the bite out of cool evenings so you can linger longer without bundling up like you're on a ski trip. It's one of the simplest upgrades that makes a big difference in how often you actually use the space.
You don't need a massive built-in setup to get the benefit. A portable fire pit or a small wood-burning bowl can work just fine under the right gazebo. The key is matching the fire feature to your structure and making sure you've thought through safety and ventilation before you light the first match.
Choosing The Right Fire Feature
Wood-burning pits give you that classic crackle and smoky smell, but they need more clearance and a spark screen. Propane or natural gas models light instantly, burn clean, and let you adjust the flame with a knob. If you want less fuss and no ash cleanup, gas is usually the way to go.
For a more permanent look, a small built-in stone or concrete pit can anchor the center of the gazebo and double as a table when it's not in use.
Safety And Clearance Basics
Never place a fire pit under a fabric canopy or a low roof without checking the manufacturer's guidelines. Most hardtop gazebos need at least 6 to 7 feet of clearance between the flame and the ceiling, and you'll want the structure to be open on at least two sides for airflow. Keep chairs at least 3 feet back from the pit, and always use a spark screen with wood fires.
A small ABC fire extinguisher within reach is cheap insurance.
Making The Space Comfortable
Once the fire is sorted, add a couple of deep chairs or a small loveseat angled toward the pit. A side table for drinks and a basket of blankets nearby encourages people to stay put. If your gazebo has screens, you can leave them up to block wind without losing the view.
String lights or a few lanterns on dimmers keep the mood going after the sun drops.
9. Poolside Gazebo with Privacy Curtains
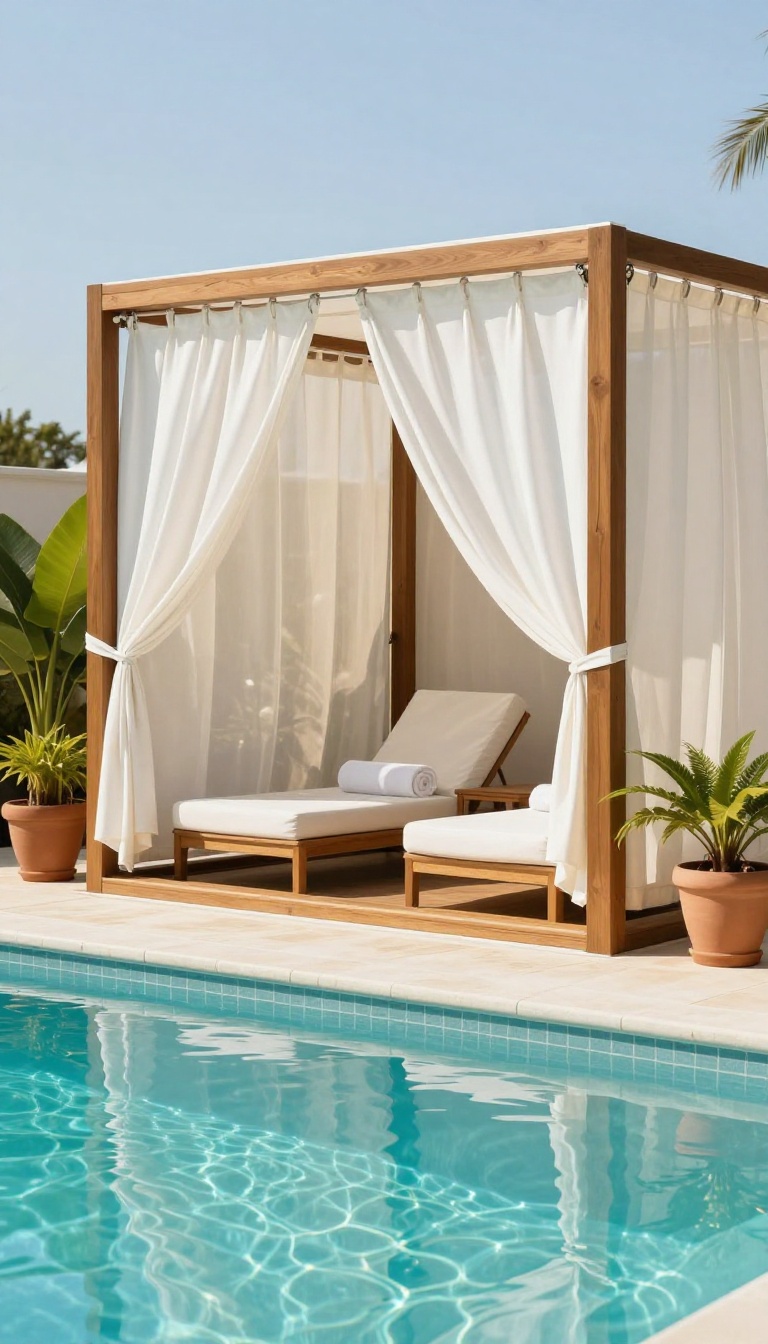
A gazebo by the pool already earns its keep as a shady retreat. Add curtains, and it becomes something more: a cabana with a built-in changing room and a sunblock that moves with the day. The fabric does double duty, blocking glare and giving you a private spot to dry off, swap suits, or escape the midday burn without walking inside.
Curtains turn an open frame into a flexible room. They slide shut when you want privacy or shade, then tie back when you want the breeze and a clear view of the water. That adaptability is what makes this setup feel less like a permanent structure and more like a poolside command center.
Choosing Curtains That Handle Pool Life
Pool areas are hard on fabric. Chlorine, salt, and constant sun will chew through cheap cotton in a single season. Look for solution-dyed acrylic or marine-grade outdoor curtains, which resist fading and mildew.
White and light sand stay cooler and hide water spots better than dark colors. If you want a resort look, go with a slightly heavier weave that drapes well but still dries fast.
Mounting And Track Options
You have two main choices: a ceiling track or a rod mounted just inside the frame. A track gives you a clean, hotel-style slide and keeps curtains from flapping in the wind. Rods are simpler and cheaper, but you will need tiebacks for breezy days.
Either way, leave a little slack at the bottom so curtains can move without snagging on furniture or wet feet.
Making The Changing Area Work
The real magic is the instant privacy. Hang a hook or two inside for towels and a dry bag, and add a small waterproof mat underfoot. A battery-powered puck light or a solar lantern keeps the space usable after sunset.
If you have the room, a narrow bench or a couple of folding stools make the changing area feel intentional instead of improvised.
Shade, Airflow, And Maintenance
Curtains cut glare and block low-angle sun that a roof alone misses. But you still want airflow, so keep at least one side open or use a two-panel setup you can part in the middle. Rinse curtains with a hose every few weeks and let them dry fully before closing them up.
That one habit keeps mildew away and stretches the fabric for years.
10. Gazebo with a Hot Tub for a Spa-Like Retreat
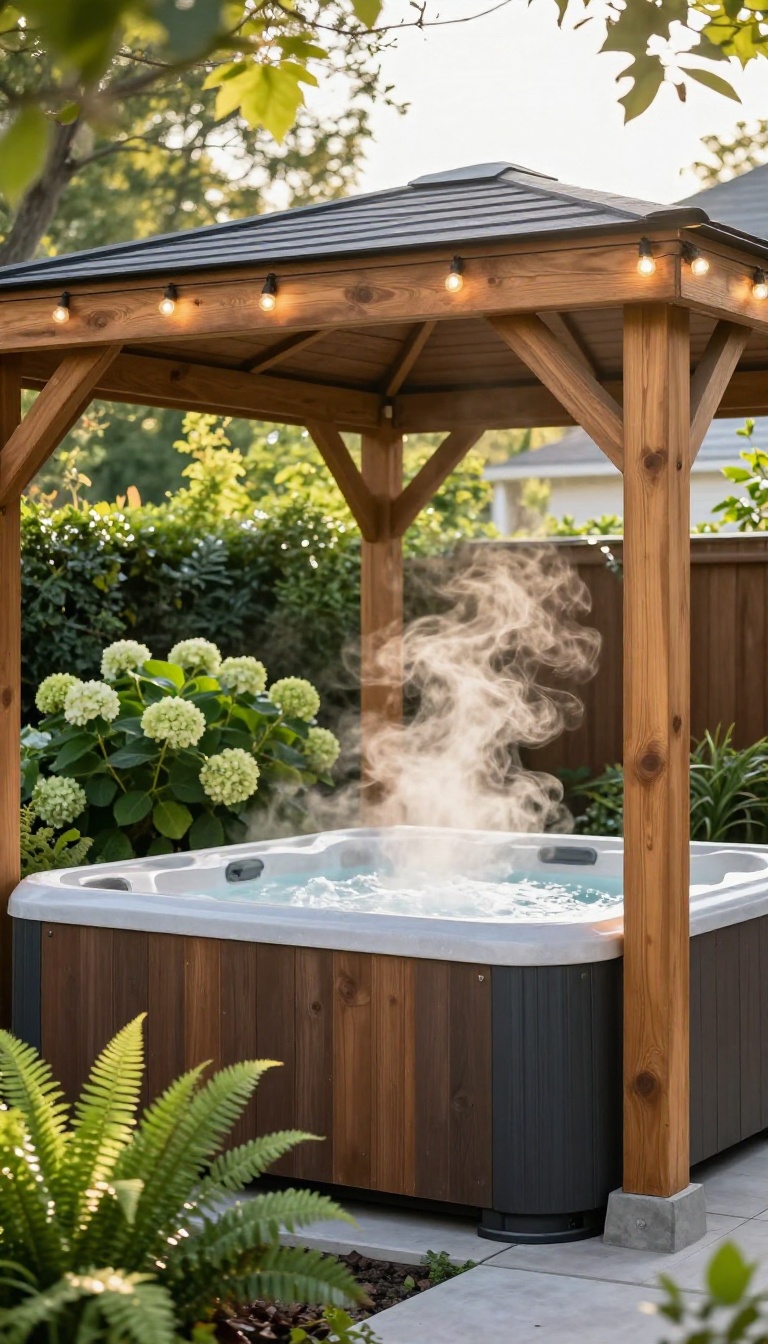
A hot tub under the open sky sounds great until you're skimming leaves every morning and dodging rain while your shoulders tense up. A gazebo changes that math. It gives the tub a roof, a little privacy, and a reason to use it year-round instead of just on perfect evenings.
The catch is that hot tubs are heavy, humid, and fussy about airflow. You can't just drop any gazebo over one and hope for the best. Get the structure and ventilation right, though, and your backyard starts feeling a lot like a resort you never have to drive to.
Pick A Structure That Can Handle The Weight
Water is heavy. A filled six-person hot tub can weigh 4, 000 to 6, 000 pounds, and that load doesn't disappear when the jets turn on. The gazebo needs a reinforced frame and footings that spread that weight across stable ground, not just four decorative posts sitting on pavers.
Wood and powder-coated steel both work, but check the manufacturer's load rating before you buy. If the gazebo wasn't designed for a tub, a contractor can often reinforce the base with concrete footings and cross-bracing. It's not glamorous, but it's the difference between a relaxing soak and a slow-motion collapse.
Ventilation And Moisture Control Matter More Than You Think
Hot water plus a roof equals steam, and steam has to go somewhere. A fully enclosed gazebo with no vents will turn into a sauna that peels paint and warps wood. Look for a design with open sides, a cupola, or ridge vents that let humid air escape.
If you want screens for bugs, choose mesh panels that still allow airflow. A ceiling fan mounted under the roof helps too, pushing steam out and keeping the space comfortable when you're not submerged. Skip the plastic sheeting unless you enjoy mold as a design feature.
Plan The Layout Before You Pour Anything
Leave at least two feet of walkable space on all sides of the tub for steps, towels, and not tripping. Think about where the cover goes when it's folded back, and whether you have a clear path from the house in winter. Electrical needs matter too.
Most hot tubs require a dedicated 240-volt line, and running that after the gazebo is up costs more. Decide on lighting, a small shelf for drinks, and maybe a hook for robes before the first post goes in. A little planning now saves a lot of extension cords later.
Make It Feel Like A Retreat, Not A Utility Shed
The difference between a hot tub with a roof and a spa-like escape comes down to the details. Warm, low-level lighting under the beams, a few weather-resistant plants at the corners, and a privacy screen on the neighbor-facing side go a long way. Add a small side table for a candle or a mug, and keep the color palette calm.
You don't need marble and orchids. You just need the space to feel intentional, so every soak feels like a small vacation instead of a chore with bubbles.
11. Dining Gazebo with a Chandelier and Table
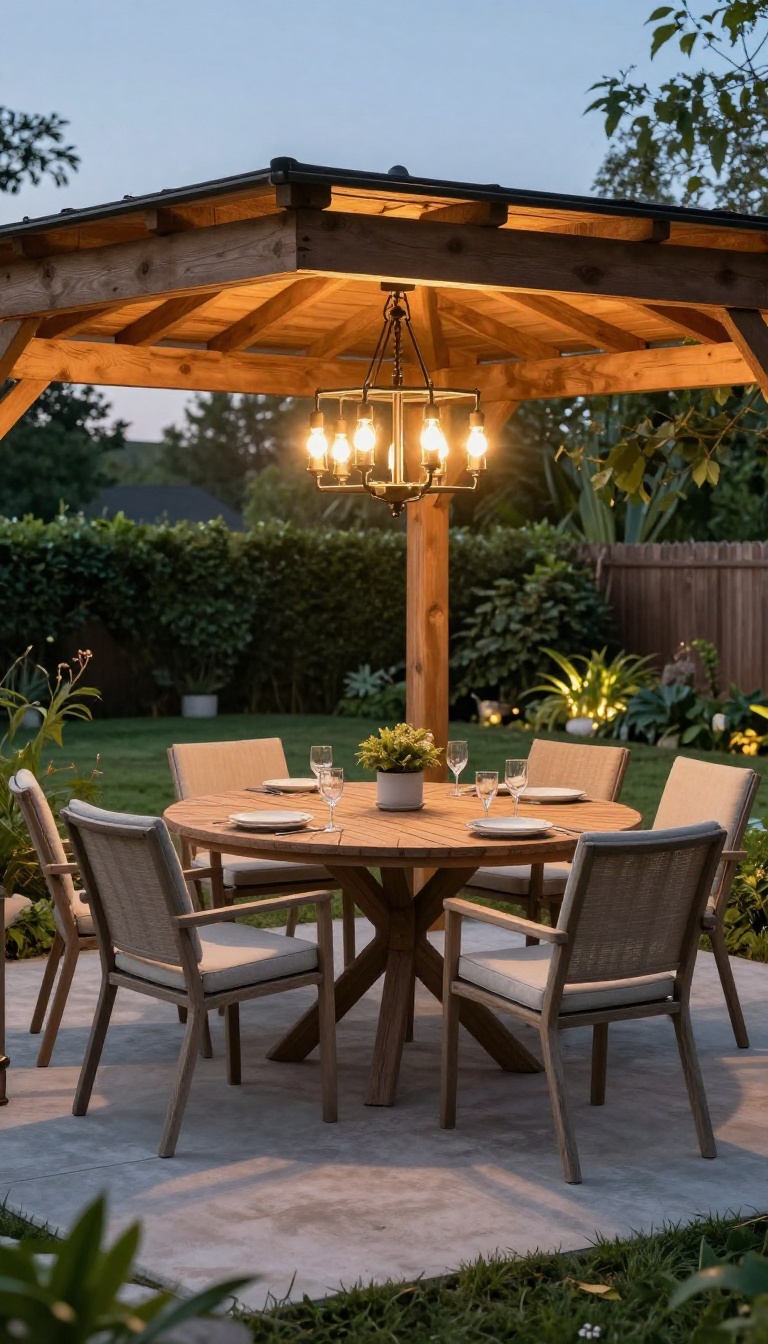
Dinner outside usually ends when the sun goes down, unless you give the space its own light source. A chandelier hanging from the gazebo ceiling changes that math. It turns a daytime shade structure into a proper dining room that works at 9 p. m. just as well as it does at noon.
The setup is simple: a table that fits the footprint, chairs that can handle weather, and a battery-powered chandelier mounted to the beams overhead. No wiring, no electrician, no extension cord snaking across the lawn. You get warm, even light right where people are eating, plus a focal point that makes the whole gazebo feel intentional instead of improvised.
Pick A Chandelier That Runs On Batteries
Look for a fixture with rechargeable LED bulbs and a remote, so you can dim it as the evening winds down. Most models run 20 to 40 hours per charge, which covers several dinners before you plug them in again. Hang it centered over the table at about 30 to 36 inches above the surface, high enough that nobody bonks their head when they stand up.
Choose A Table That Fits The Footprint
Measure the gazebo's usable interior before you shop. A round table usually works better than rectangular in a square or octagonal structure because it leaves walking room on all sides. If space is tight, a drop-leaf or folding table lets you seat six for a party and tuck it away the rest of the week.
Weatherproof The Details
Outdoor dining lives or dies on the small stuff. Choose chairs with quick-dry cushions or sling seats, and keep a covered bin nearby for napkins and candles. A washable rug under the table softens the floor and hides crumbs between cleanings.
If your gazebo is open on the sides, add roll-down shades or curtains to block wind and keep the chandelier from swinging too much.
12. Kids' Play Gazebo with Sandbox or Art Station
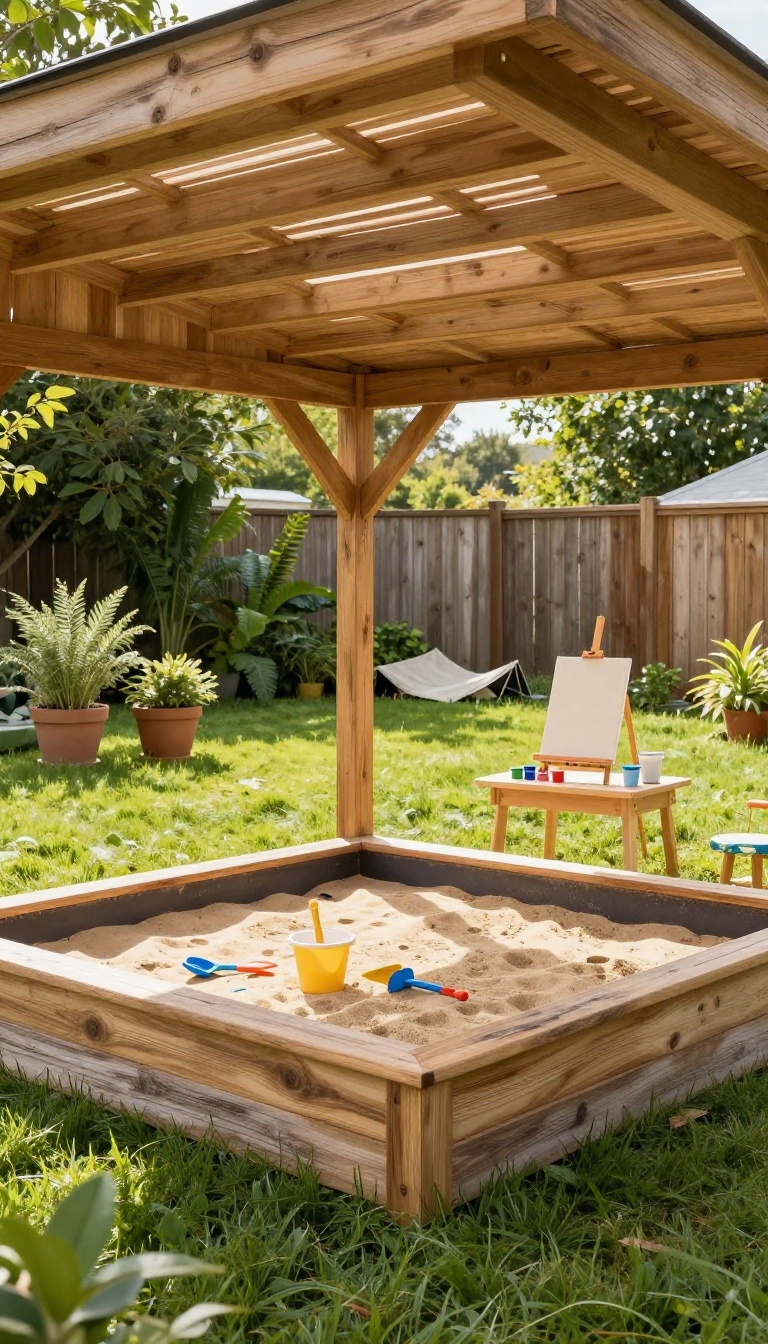
A gazebo can do more than shade a dining set. Turn one into a dedicated kids' zone, and suddenly the backyard becomes a place they actually want to be. You get shade, they get a space that's theirs, and the toys stop migrating into the kitchen.
The setup works because a gazebo creates a defined area. Kids understand boundaries, even loose ones. A roof overhead means less sunscreen wrestling and fewer squints.
Add a sandbox or an art station, and you've got a playroom that doesn't need walls. Pick a spot you can see from the house. That way you can keep an eye on things while you're cooking or working on the patio.
A little distance is fine, but not so far that you're constantly walking out to check. Corner placement often works well because it leaves the rest of the yard open for running and games. Size matters more than style here.
You need room for the activity plus a little buffer so kids aren't bumping elbows. A 10×10 is usually plenty for two or three kids. If you've got more, go bigger or plan for rotation.
The goal is a space that feels open, not cramped.
Sandbox Setup
A built-in sandbox keeps the sand contained and gives kids a clear place to dig. You can frame it with landscape timbers or use a plastic shell that drops into the space. Line the bottom with weed fabric to stop grass from poking through.
Cover it when it's not in use. A simple tarp and bungee cords keep cats out and rain from turning it into soup. A lid made from plywood works too, and it doubles as a bench.
Just make sure it's light enough for one person to move. Choose play sand, not construction sand. It's finer and less likely to scratch.
Rinse it before the first use to cut down on dust. A shallow depth of 4 to 6 inches is plenty for digging and building.
Art Station Basics
An art station needs a flat surface and easy cleanup. A small plastic table and chairs fit most gazebos. If you want something more permanent, build a low bench along one side.
Add a lip to keep crayons from rolling off. Store supplies in a plastic bin that slides under the table. Keep it simple: paper, washable markers, chalk, and a few coloring books.
Rotate the stash every couple of weeks so it stays interesting. A clip-on cup holder keeps water cups from tipping. Hang a small corkboard or a line with clothespins for drying art.
That way masterpieces don't end up on the ground. If you're worried about mess, put a washable rug underneath. It catches drips and shakes out easily.
Storage And Safety
Toys multiply. A storage bench or a couple of weatherproof bins keep the space tidy. Look for bins with lids that snap shut.
Clear ones let kids see what's inside without dumping everything out. Anchor the gazebo properly. Kids climb, and a lightweight canopy can tip in a gust.
Use ground stakes or weights on all four legs. If you have a permanent structure, check the hardware twice a year. Avoid sharp edges and pinch points.
Sand down rough wood and cover bolts with caps. Keep the area free of tripping hazards like stray toys or garden hoses. A small outdoor fan can help on still, hot days, but keep cords out of reach.
13. DIY Pallet or Recycled-Material Gazebo
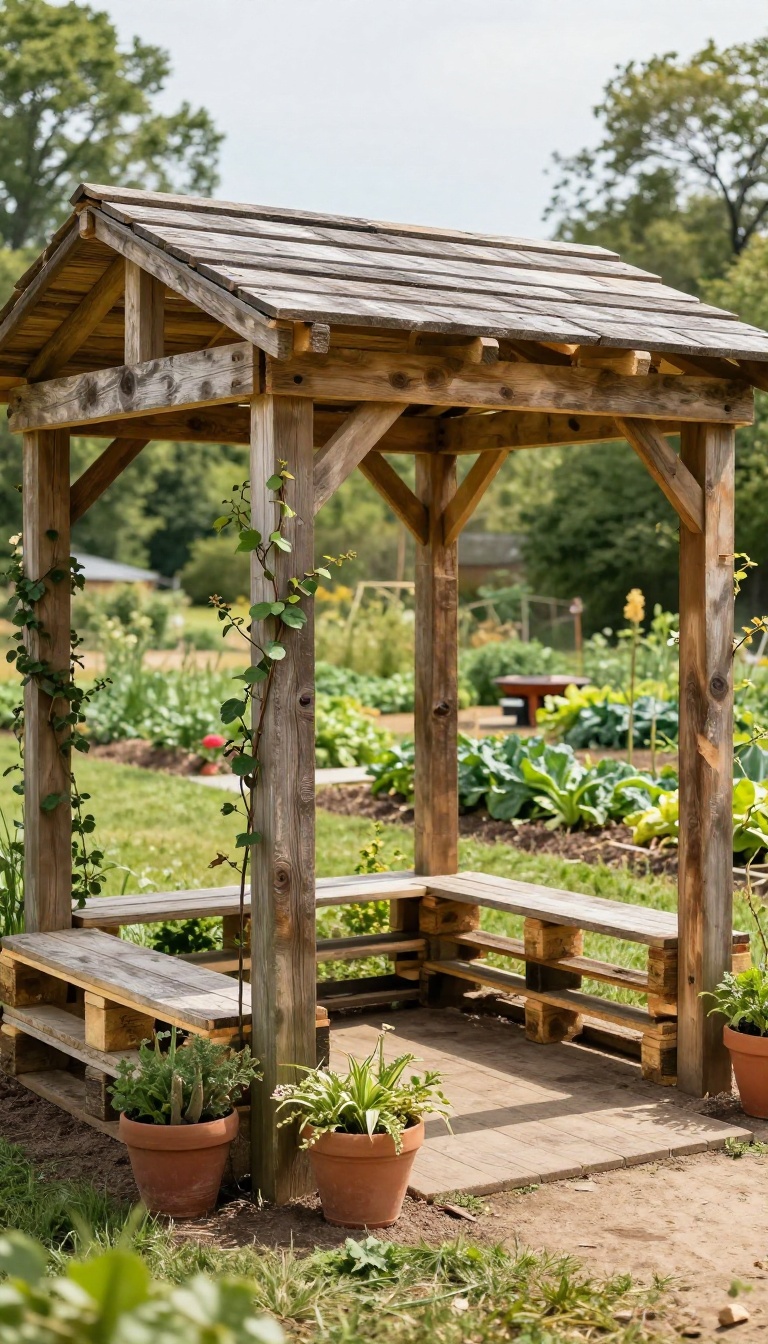
You don't need a contractor or a second mortgage to get a gazebo that looks like it belongs in a design magazine. Pallets and reclaimed wood are cheap, sturdy, and full of character that fresh lumber just can't match. This route rewards a little patience and some basic tools with a one-of-a-kind shade structure you built yourself.
The biggest draw here is cost. Pallets are often free if you ask around at garden centers, hardware stores, or warehouses, and reclaimed barn wood sells for a fraction of new cedar or pressure-treated pine. You also get a rustic, weathered look that fits naturally in a backyard garden, around a fire pit, or beside a vegetable patch.
The trade-off is time and elbow grease: you'll need to pull nails, sand rough edges, and treat the wood so it holds up to weather. But once it's standing, you have a gazebo nobody else on the block owns.
Sourcing Pallets And Reclaimed Wood
Not all pallets are safe to use. Look for the stamp 'HT' (heat treated) and avoid any marked 'MB' (methyl bromide), which is a chemical you don't want in your yard. Free pallets show up on marketplace listings, behind grocery stores, and at landscaping suppliers.
For reclaimed wood, check demolition yards, old barns, and local buy-nothing groups. Aim for a mix of thick 4x4s for posts and thinner planks for the roof slats or privacy panels.
Building A Safe, Sturdy Frame
A pallet gazebo still needs a solid skeleton. Set four pressure-treated 4×4 posts in concrete footings at least 18 inches deep, then build your roof frame from there. Pallets work great as wall panels, railings, or roof decking, but don't rely on them for structural support.
Use galvanized screws and metal brackets at every joint, and add diagonal bracing on at least two sides to handle wind. If you're not confident in your framing skills, keep the design simple: a flat or slightly pitched roof is easier to seal than a complex hip roof.
Finishing And Weatherproofing
Raw pallet wood will gray and rot fast if you skip the finish. Sand down splinters, then brush on a penetrating exterior stain or a clear deck sealer. For the roof, corrugated metal panels or polycarbonate sheets are cheap, light, and shed rain well.
Add a few coats of sealer every couple of years, and check for loose screws after big storms. A little upkeep keeps your recycled gazebo looking intentional instead of thrown together.
FAQ
Do I need a permit to build a gazebo in my backyard?
It depends on local rules. Many areas require a permit for permanent structures over a certain size or height. Check with your city or county before you build.
What's the best material for a gazebo in a rainy climate?
Metal or vinyl gazebos hold up best in wet conditions. Wood can work if you seal it regularly, but it needs more maintenance.
Can I put a gazebo on a concrete patio?
Yes, many gazebos come with anchors for concrete. Just make sure the base is level and use the right hardware for your surface.
How do I keep bugs out of my gazebo?
Add mesh screens or curtains. You can also use a fan to create airflow, which helps keep mosquitoes away.
How much does a basic gazebo cost?
Pop-up canopies start around $100. Wood or hardtop gazebos range from $500 to several thousand, depending on size and materials.
Conclusion
Shade is the difference between a yard you glance at and a yard you actually use. Pick one idea from this list that fits your space and budget, set it up, and see how it changes the way you spend your afternoons. You do not need all thirteen.
Start with the one that solves your biggest problem, whether that is harsh sun over the patio or a bare corner that needs purpose. Add more next season. The best gazebo setup is the one you will sit under tomorrow.