23 Shower Cleaning Hacks for Hard Water and Soap Scum
Hard water stains and soap scum can turn a sparkling shower into a frustrating eyesore. The minerals in hard water react with soap to create a stubborn film that regular cleaners often struggle to remove.
But you don't need harsh chemicals or expensive products to get your shower looking new again. These 23 hacks use everyday items like vinegar, baking soda, and even lemon to break down buildup and prevent future deposits.
Each tip targets a specific problem area, from glass doors to showerheads, so you can tackle the toughest spots with confidence. Whether you're dealing with cloudy glass, grimy grout, or a clogged showerhead, these practical solutions will save you time and elbow grease.
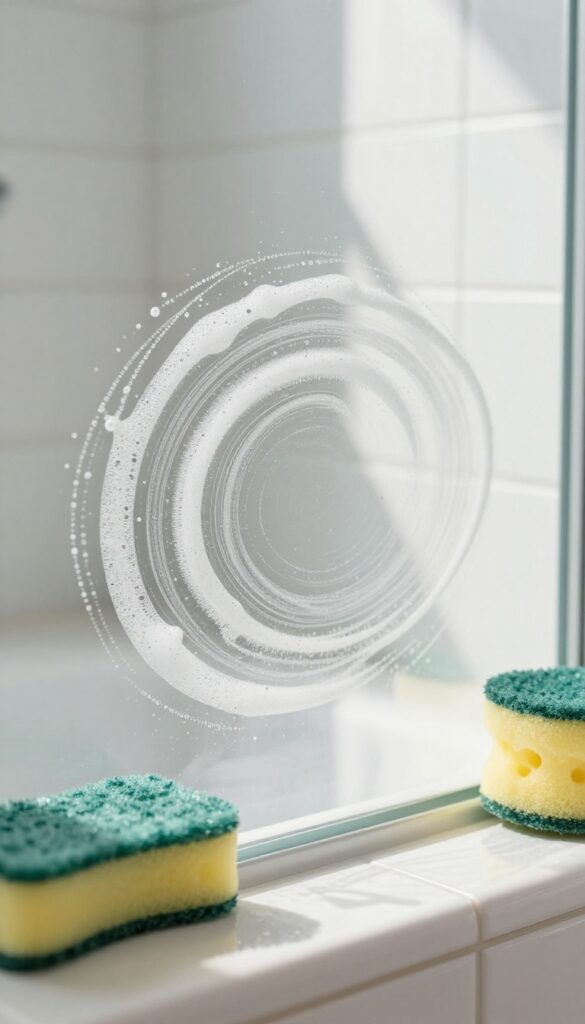
1. Vinegar and Dish Soap Spray for Glass Doors
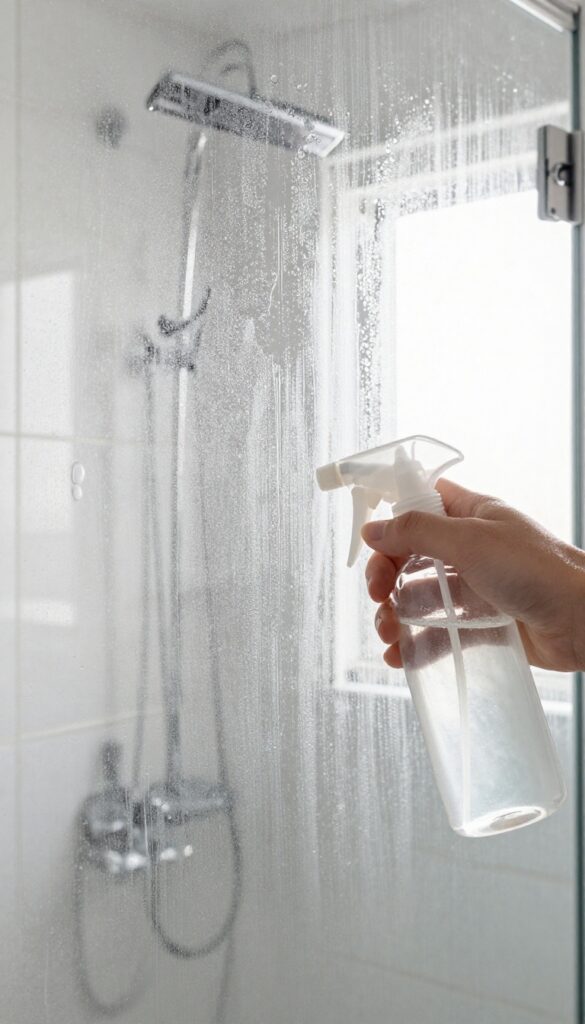
Glass shower doors are magnets for hard water spots and soap scum. The combination of minerals and soap residue creates a foggy film that regular cleaners often miss. A simple DIY spray cuts through both problems without harsh chemicals.
Mix equal parts white vinegar and dish soap in a spray bottle. Shake gently to combine. Spray the solution generously onto the glass, covering all foggy areas.
Let it sit for 10 minutes so the vinegar can dissolve mineral deposits and the soap can break down grease. Scrub with a non-abrasive pad or sponge, then rinse thoroughly with warm water. For best results, wipe the glass dry with a microfiber cloth to prevent new spots from forming.
Why This Combo Works
Vinegar is acidic, which dissolves the calcium and magnesium in hard water stains. Dish soap is a surfactant that lifts soap scum and oils. Together, they tackle both layers of buildup in one step.
Application Tips
Use a spray bottle with a fine mist to cover the glass evenly. For heavy buildup, let the solution sit for 15 minutes instead of 10. Avoid using abrasive scrubbers that can scratch the glass.
Prevention Routine
After each shower, use a squeegee to remove water from the glass. This simple habit cuts down on mineral deposits and keeps your doors clearer longer. Spray the vinegar solution once a week to maintain the shine.
2. Baking Soda Paste for Soap Scum on Tiles
Tiles take the brunt of soap scum buildup, especially in the lower corners where water lingers. A simple baking soda paste cuts through that grime without scratching the surface. It's cheap, non-toxic, and already in your pantry.
Mix three parts baking soda with one part water to form a thick paste. Spread it over the soap scum on your tiles, focusing on heavily coated areas. Let it sit for about 15 minutes so the baking soda can loosen the residue.
Then scrub gently with a damp sponge or soft brush. Rinse thoroughly with warm water. For tough spots, add a splash of white vinegar to the paste—it will fizz and boost cleaning power.
Why Baking Soda Works
Baking soda is mildly abrasive, so it physically lifts soap scum without scratching tile or grout. It's also alkaline, which helps break down fatty acids in soap residue. This combination makes it effective and safe for daily use.
Pro Tip For Stubborn Build-up
For thick, crusty soap scum, let the paste sit for 30 minutes instead of 15. You can also cover the paste with a damp cloth to keep it from drying out. After scrubbing, wipe with a microfiber cloth to prevent streaks.
When To Avoid This Hack
Don't use baking soda paste on natural stone tiles like marble or travertine—it can dull the finish. Stick to ceramic, porcelain, or glass tiles. Always test a small hidden area first if you're unsure.
3. Lemon Juice and Salt for Chrome Fixtures
Chrome fixtures like faucets and handles are prone to water spots and soap scum that dull their shine. Commercial chrome polishes can be pricey and full of chemicals, but a simple lemon and salt scrub works just as well. The natural acidity of lemon cuts through mineral deposits, while salt provides gentle abrasion without scratching.
This method is incredibly straightforward. Cut a lemon in half, dip the cut side into a small dish of salt, and rub it directly onto your chrome fixtures. Let it sit for a minute or two, then rinse thoroughly with water and buff dry with a soft cloth.
The result is gleaming, streak-free chrome that looks like new. For extra-stubborn spots, you can let the lemon juice sit for a few minutes before scrubbing. This hack is not only effective but also leaves a fresh citrus scent in your shower.
Why Lemon And Salt Work
Lemon juice contains citric acid, which breaks down hard water minerals and soap scum. Salt acts as a mild abrasive that helps lift the gunk without scratching chrome surfaces. Together, they create a powerful yet gentle cleaner that's safe for regular use.
How To Apply For Best Results
Start by wiping down the fixture to remove loose debris. Then, rub the salted lemon half over the entire surface, focusing on water spots. Let it sit for 1–2 minutes, then rinse with warm water.
Dry immediately with a microfiber cloth to prevent new spots from forming.
When To Avoid This Method
This hack is best for chrome fixtures. Avoid using it on brass, gold, or coated finishes, as the acid can damage the protective layer. Always test a small hidden area first if you're unsure about your fixture's finish.
4. Pumice Stone for Toilet Bowl Rings (if near shower)
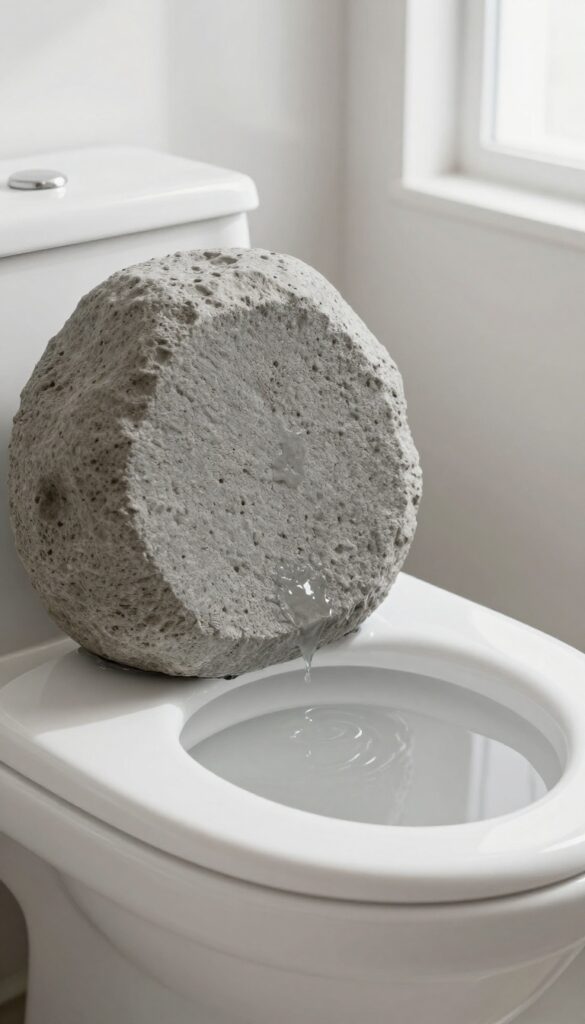
If your shower shares a bathroom with a toilet, you may notice hard water rings forming inside the bowl. These stubborn mineral deposits often appear at the waterline and around the rim, and regular scrubbing rarely touches them. A pumice stone offers a simple, chemical-free solution that works on tough calcium and lime buildup without damaging porcelain when used correctly.
A pumice stone is a natural volcanic rock that acts as a gentle abrasive. When wet, it can scrub away mineral rings without scratching the porcelain surface. This hack is especially useful for toilets located close to the shower, where hard water splashes and residue are common.
The key is to always wet both the stone and the porcelain before scrubbing, and to use light pressure. Never use a dry pumice stone, as it can cause scratches. For best results, work in small circular motions on the ring until it fades, then flush and rinse.
How To Use A Pumice Stone Safely
Start by soaking the pumice stone in water for a few minutes. Wet the toilet bowl surface as well. Gently rub the stone over the hard water ring using light pressure—let the stone do the work.
Rinse and check your progress frequently. Stop as soon as the ring is gone to avoid over-scrubbing. After use, rinse the stone and store it in a dry place.
Where Else To Use A Pumice Stone
Beyond toilet bowls, a pumice stone can remove hard water deposits from shower floors, porcelain sinks, and even ceramic tiles. It's also effective on rust stains and soap scum buildup on bathtub surfaces. Just remember to keep it wet and test on an inconspicuous area first.
Precautions To Avoid Damage
Never use a pumice stone on fiberglass, acrylic, or enameled surfaces—it will scratch them. Stick to unglazed porcelain or ceramic. If you're unsure about your toilet's finish, test on a small hidden spot.
Also, avoid using the stone on chrome or other metal fixtures.
5. Hydrogen Peroxide and Baking Soda for Grout
Grout lines are notorious for trapping moisture and soap residue, which leads to discoloration and mildew. A simple paste of hydrogen peroxide and baking soda can restore their brightness without harsh fumes. This combo lifts stains and kills mold spores naturally.
Mix hydrogen peroxide with baking soda to form a thick paste. Apply it to grout lines, let it sit for 10 minutes, then scrub with an old toothbrush. Rinse thoroughly with warm water.
For stubborn spots, repeat or let the paste sit longer.
Why This Works
Hydrogen peroxide is a natural bleach and disinfectant that breaks down organic stains and kills mildew. Baking soda adds gentle abrasion to scrub away grime without scratching tiles.
Application Tips
Use a small brush or toothbrush to work the paste into the grout. Avoid letting it dry completely, as that can make rinsing harder. For vertical grout, hold a paper towel against it to keep the paste in place.
Safety Precautions
Test on an inconspicuous area first, especially on colored grout, as hydrogen peroxide may lighten it. Wear gloves to protect your skin, and ensure the bathroom is well-ventilated.
6. CLR or Commercial Descaler for Heavy Buildup
Sometimes, natural cleaners just don't cut it. When you've got thick, crusty hard water deposits that laugh at vinegar and baking soda, it's time to bring in the big guns. Commercial descalers like CLR (Calcium, Lime, and Rust remover) are formulated to dissolve severe mineral buildup quickly and effectively.
For those stubborn rings around the drain or rock-hard deposits on glass, a commercial descaler can save you hours of scrubbing. Just be sure to follow the instructions carefully—these are strong chemicals. Wear gloves, open a window, and rinse thoroughly after use.
One treatment can make a dramatic difference.
When To Use A Commercial Descaler
Reserve these heavy-duty cleaners for areas where gentler methods have failed. Common trouble spots include the bottom of glass doors where water pools, showerheads with clogged nozzles, and around drains where mineral rings form. If you see thick, whitish crust that won't budge with a scrubbing sponge, a descaler is your next step.
How To Apply Clr Safely
Always test on a small, hidden area first. Spray or apply the product directly onto the buildup, let it sit for the recommended time (usually a few minutes), then scrub gently with a soft brush or sponge. Rinse with plenty of water.
Avoid letting it dry on surfaces, and never mix it with bleach or ammonia.
Preventing Damage To Surfaces
Commercial descalers are acidic and can etch certain materials. They're generally safe for glass, chrome, and ceramic tile, but avoid using them on natural stone like marble or granite. If you're unsure, check the product label.
After descaling, wipe the area with a damp cloth and dry it to prevent new deposits from forming.
7. Showerhead Soak in Vinegar
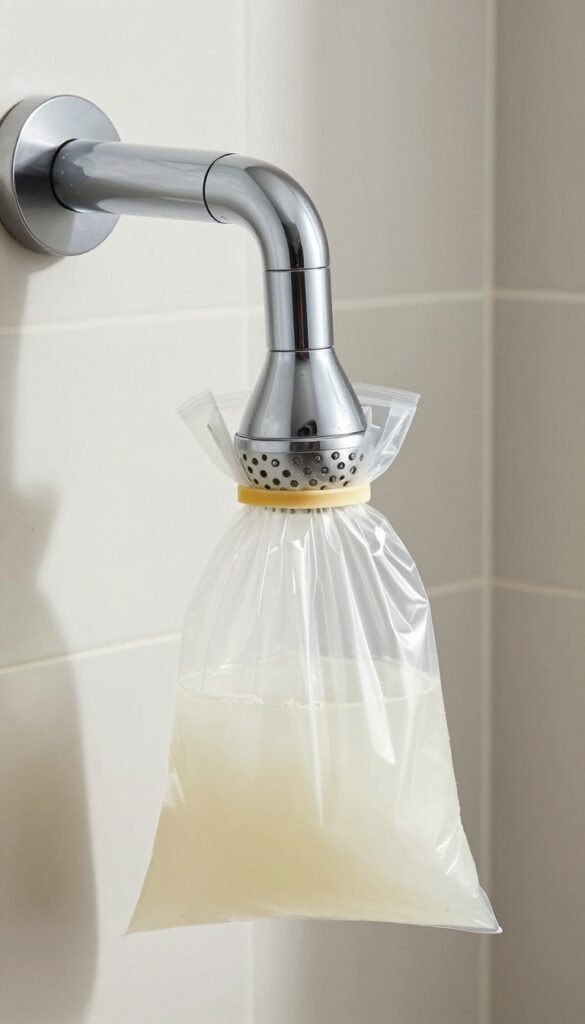
A clogged showerhead isn't just annoying—it can also reduce water pressure and spray unevenly. Hard water minerals build up inside the nozzles over time, but a simple vinegar soak can dissolve that crust without any scrubbing.
Fill a plastic bag with white vinegar, secure it over the showerhead with a rubber band, and let it soak overnight. Remove and run water for a few minutes to clear residue.
Why Vinegar Works
White vinegar is mildly acidic, which breaks down the calcium and lime deposits left by hard water. It's gentle enough for most metal and plastic showerheads but tough on mineral buildup.
Step-by-step Soak
Fill a sturdy plastic bag with enough white vinegar to fully submerge the showerhead. Secure the bag tightly around the neck of the showerhead using a rubber band or zip tie. Let it soak for at least 6 hours or overnight.
In the morning, remove the bag and turn on the water for a few minutes to flush out loosened debris.
Aftercare Tips
If some nozzles remain clogged, use a toothpick or small brush to gently dislodge remaining particles. For heavily scaled showerheads, you may need to repeat the soak. To prevent future buildup, wipe the showerhead dry after each use or install a water softener.
8. Dryer Sheets for Soap Scum on Glass
Who knew that laundry room staple could double as a glass cleaner? Used dryer sheets are surprisingly effective at cutting through soap scum on shower doors. The anti-static agents help loosen the grime while reducing static cling, which means less dust and future buildup.
It's a budget-friendly trick that leaves your glass streak-free and shiny.
How It Works
Dryer sheets contain mild abrasives and surfactants that break down soap scum without scratching glass. The anti-static properties also repel dust and lint, keeping doors cleaner longer. Simply wet a used sheet (or a new one if you're out of used) and scrub the glass in circular motions.
Best Practices
Rinse the glass thoroughly after scrubbing to remove any residue. Follow up with a squeegee or microfiber cloth for a perfect streak-free finish. For heavy buildup, let the wet dryer sheet sit on the scum for a few minutes before scrubbing.
What To Avoid
Don't use dryer sheets on acrylic or fiberglass shower enclosures—they can leave a waxy film that dulls the surface. Stick to glass doors only. Also, avoid using new dryer sheets with strong fragrances if you're sensitive to scents; used sheets are milder.
9. Magic Eraser for Stubborn Marks
Sometimes, gentle scrubbing just won't cut it. When hard water spots or soap scum have baked onto a surface, a melamine sponge—commonly known as a Magic Eraser—can be your secret weapon. The micro-abrasive foam lifts stubborn residue without the need for harsh chemicals, making it a quick fix for tough areas.
How To Use It Safely
Dampen the sponge with water and wring out excess. Gently rub the stained area in small circles. The sponge will start to break down as it works, so use light pressure.
Rinse the surface thoroughly with water afterward to remove any foam particles. Avoid using on glossy or delicate finishes like acrylic or fiberglass, as it can leave micro-scratches.
Best Surfaces For Magic Eraser
This hack works wonders on ceramic tile, porcelain, and glass shower doors. It's also great for removing hard water rings from stainless steel fixtures. Test on an inconspicuous spot first to ensure the finish isn't damaged.
For extra stubborn spots, dip the sponge in a little white vinegar before scrubbing.
Pro Tip: Extend The Life Of Your Sponge
Cut the sponge into smaller pieces before use. This way, you can use a fresh edge for each cleaning session. Once a piece gets dirty or starts crumbling, toss it.
Don't use Magic Eraser on the same surface you've just cleaned with bleach or other strong chemicals, as the reaction could release harmful fumes.
10. Rain-X for Glass Doors
If you've ever used Rain-X on your car windshield, you already know how well it repels water. The same principle works wonders on glass shower doors. A thin layer of this water repellent creates a hydrophobic surface that makes water bead up and slide off instantly.
That means fewer mineral deposits and less soap scum buildup between cleanings.
Applying Rain-X to your shower doors is a game-changer for anyone dealing with hard water stains. The hydrophobic coating prevents water from clinging to the glass, so minerals don't have a chance to dry and form stubborn spots. It also makes future cleaning much easier—just a quick wipe with a squeegee or microfiber cloth keeps the glass sparkling.
For best results, clean the glass thoroughly first, then apply Rain-X in a well-ventilated area. Reapply every few weeks or as needed.
How To Apply Rain-x To Glass Doors
Start by cleaning the glass with a vinegar solution or a dedicated glass cleaner to remove any existing buildup. Dry the surface completely. Apply a small amount of Rain-X to a clean, dry cloth and rub it onto the glass in a circular motion.
Let it haze over for a minute, then buff it off with a fresh cloth. Work in sections to avoid streaks.
Why It Works So Well
Rain-X contains silicone polymers that bond to the glass, creating a smooth, water-repellent layer. Water molecules can't spread out on this surface—they form tight beads that roll off under gravity. This reduces the contact time between water and glass, cutting down on mineral deposition significantly.
Maintenance Tips For Long-lasting Results
After each shower, use a squeegee to remove excess water from the doors. This extends the life of the Rain-X coating. Avoid using abrasive cleaners or scrub pads, as they can wear down the hydrophobic layer.
When you notice water starting to sheet instead of bead, it's time for a fresh application.
11. Squeegee After Every Shower
This might be the simplest hack on the list, but it's also one of the most effective. A quick pass with a squeegee after each shower removes the water that would otherwise dry into hard water spots and soap scum.
By taking just 30 seconds to squeegee, you're preventing mineral deposits from bonding to the surface. It's especially useful on glass doors, where spots are most visible. Make it a habit, and you'll notice a dramatic reduction in cleaning frequency.
Choose The Right Squeegee
Not all squeegees are created equal. Look for one with a rubber blade that's at least 6 inches wide—it covers more area in fewer strokes. A squeegee with a hook or suction cup makes storage easy, so it's always within reach.
Technique Matters
Start at the top corner and pull the squeegee across in a straight line, overlapping each stroke slightly. Wipe the blade dry with a microfiber cloth between passes to avoid streaks. Finish by wiping down the bottom edge and corners with a cloth.
Don't Forget The Tiles
While glass gets most of the attention, tiles and grout also benefit from a quick squeegee. Water runs off smooth tiles easily, reducing the moisture that leads to mold and mildew. A few extra seconds can save you hours of scrubbing later.
12. Baking Soda and Vinegar Foam for Drains
Shower drains take a beating from soap scum, hair, and hard water minerals. Over time, that gunk builds up inside the pipes and can cause slow drainage or funky smells. This fizzy duo works like a natural pipe cleaner without the harsh chemicals.
Pour 1/2 cup baking soda down the drain, followed by 1/2 cup vinegar. Cover for 15 minutes, then flush with hot water. This clears soap scum and hard water buildup in pipes.
Why It Works
Baking soda is a mild alkali that reacts with vinegar (an acid) to create carbon dioxide gas. That fizzing action physically loosens grime and mineral deposits clinging to pipe walls. The hot water rinse then flushes everything away.
When To Use This Hack
Use this method weekly as a preventive measure or whenever you notice slow draining. It's safe for PVC and metal pipes, but avoid if you've recently used a chemical drain cleaner—mixing can cause dangerous fumes.
Pro Tip For Stubborn Clogs
For extra tough blockages, add a cup of salt to the baking soda before pouring in the vinegar. The salt acts as an abrasive scrubber. Let it sit for 30 minutes, then flush with boiling water.
13. Toothbrush for Tight Spots
Even the best all-purpose scrubber can't reach every nook and cranny in your shower. Faucet bases, handle crevices, and grout lines are notorious for collecting hard water scale and soap scum that sponges just smear around. That's where an old toothbrush becomes your secret weapon.
The small, firm bristles of a toothbrush let you target buildup exactly where it hides. Dip it in white vinegar or a baking soda paste, then work it into those tight joints and corners. A few minutes of focused scrubbing will dislodge deposits that have been building up for months.
Why A Toothbrush Works Best
Standard scrub brushes are too bulky for tight spots. A toothbrush's narrow head and stiff bristles can fit into the gap behind a faucet handle or along the edge of a shower caddy. The vinegar or paste clings to the bristles, so the cleaning solution stays where you need it instead of dripping away.
How To Make A Baking Soda Paste
Mix three parts baking soda with one part water until it forms a thick, spreadable paste. Apply it to the toothbrush bristles and scrub the target area. Let the paste sit for five minutes before rinsing to give it time to break down the mineral deposits.
Target These Hotspots First
Focus on the base of the faucet where water pools, the underside of handles, and the grout lines along the shower floor. These areas tend to accumulate the most stubborn scum because they stay damp longer. A quick toothbrush scrub once a week will keep them looking fresh.
14. Dishwasher Rinse Aid for Glass
Dishwasher rinse aid isn't just for spot-free dishes. A quick wipe on your shower glass doors can work wonders against hard water spots and soap scum. The surfactants in rinse aid help water sheet off the glass instead of beading up and drying into mineral deposits.
This trick is almost too easy. Just apply a small amount of rinse aid to a soft microfiber cloth and buff it onto clean, dry glass doors. You don't need much—a little goes a long way.
The rinse aid leaves an invisible barrier that repels water, so droplets slide right off. That means fewer spots and less scrubbing between deep cleans.
How To Apply It Right
Start with a clean surface. If your glass already has buildup, clean it first with a vinegar solution or a dedicated glass cleaner. Once it's dry, put a dime-sized drop of rinse aid on a microfiber cloth.
Wipe it evenly across the entire glass surface, then use a dry part of the cloth to buff away any streaks. Let it cure for a few minutes before using the shower.
Why It Works So Well
Rinse aids contain wetting agents that reduce water's surface tension. Instead of forming droplets that dry into spots, water spreads into a thin film and runs off. This same principle keeps your dishwasher dishes spotless.
On shower glass, it means less mineral buildup and a clearer view for longer.
A Few Cautions
Avoid getting rinse aid on painted or metal surfaces—it can cause discoloration. Stick to glass and ceramic tiles. Also, don't overdo it.
Too much rinse aid can leave a sticky residue that actually attracts dirt. A light, even coat is all you need. Reapply every couple of weeks or whenever water starts beading again.
15. Cornstarch for Streak-Free Shine
Glass shower doors and chrome fixtures can look worse after cleaning if you're left with streaks and water spots. Cornstarch, a common kitchen staple, works as a gentle polish that absorbs oils and buffs surfaces to a brilliant shine without scratching. It's a simple, non-toxic alternative to commercial glass cleaners.
The Cornstarch Paste Method
Mix one tablespoon of cornstarch with enough water to form a smooth paste, about two to three tablespoons. Apply the paste to a clean, damp microfiber cloth or directly onto the glass or chrome surface. Spread it evenly, let it sit for a minute or two until it begins to dry, then buff vigorously with a dry, lint-free cloth.
The cornstarch absorbs residual moisture and leaves a polished, streak-free finish.
Why It Works On Hard Water Stains
Hard water stains are mostly calcium and magnesium deposits. Cornstarch is mildly abrasive, so it gently lifts those deposits without scratching. When buffed, it also fills microscopic scratches in glass, reducing the surface area where water can cling and new spots form.
This makes future cleaning easier and helps maintain clarity longer.
Best Surfaces And Safety Tips
Cornstarch is safe for glass, chrome, stainless steel, and acrylic shower doors. Avoid using it on porous stone like marble or granite, as the fine particles can leave a residue. For best results, use distilled water to mix the paste—tap water can reintroduce minerals.
Always test on a small hidden area first.
16. Essential Oils for Fresh Scent
Your shower might be clean, but does it smell like a spa? Standard vinegar sprays can leave a pungent odor that lingers. Essential oils are a natural way to add a pleasant fragrance while boosting the cleaning power of your homemade solutions.
Tea tree oil is a powerhouse in the cleaning world. Its antifungal and antibacterial properties help combat mold and mildew that thrive in damp showers. Lavender oil, on the other hand, offers a calming aroma and also has mild antiseptic qualities.
Both oils blend seamlessly with vinegar, masking its sharp smell while enhancing its ability to break down soap scum. Simply add 10–15 drops per cup of vinegar solution, shake well, and spray on surfaces. Let it sit for a few minutes before wiping.
The result is a fresh, clean scent without synthetic perfumes or harsh chemicals.
Choosing The Right Oil
Not all essential oils are created equal for cleaning. Tea tree and lavender are top choices due to their antimicrobial properties. Avoid oils like citrus or peppermint if you have sensitive skin, as they can be irritating.
Always do a patch test on a small area first. For a customized scent, blend a few drops of each—lavender and tea tree pair beautifully, or add a drop of eucalyptus for an invigorating twist.
Application Tips
For best results, use a dark glass spray bottle to protect the oils from light degradation. Shake the bottle before each use to re-emulsify the oils. Focus on grout lines, corners, and shower curtains where mold likes to hide.
After spraying, let the solution sit for 5–10 minutes, then scrub with a soft brush and rinse. The essential oils will leave a lingering fresh scent that lasts.
17. Steam Cleaner for Deep Grime
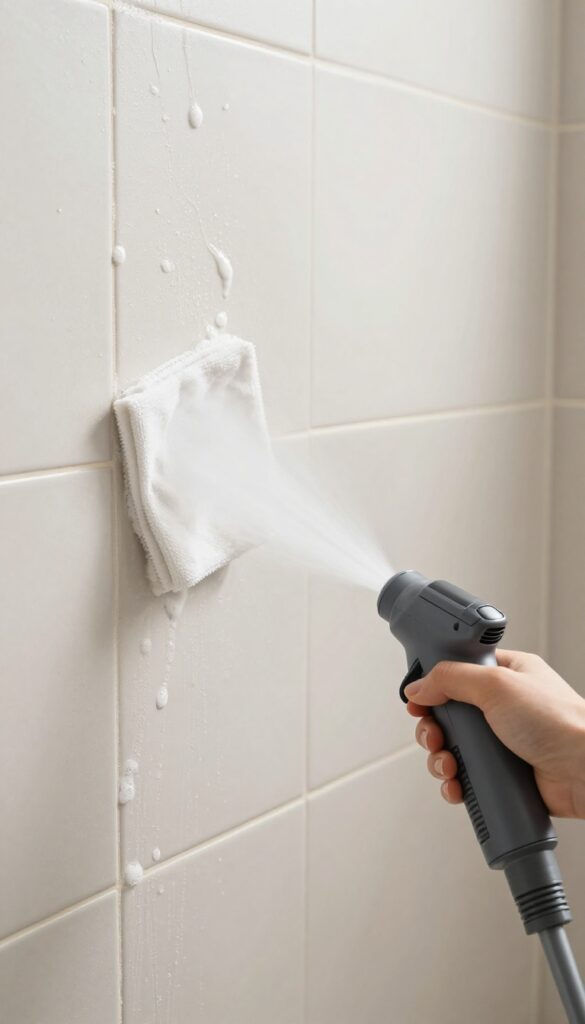
When scrubbing by hand isn't cutting it, a handheld steam cleaner can be a game-changer. The high heat penetrates porous surfaces like grout and textured tile, loosening years of soap scum and mineral deposits. It also kills bacteria and mold spores without a single chemical, making it a safe choice for bathrooms used by kids or pets.
Steam cleaning works best on surfaces that can handle heat and moisture, like ceramic tile, glass, and sealed stone. The steam softens the grime so you can simply wipe it away with a microfiber cloth. For extra stubborn spots, let the steam sit for a few seconds before wiping.
Best Surfaces For Steam
Stick to non-porous or well-sealed surfaces. Glazed ceramic tile, glass shower doors, and chrome fixtures respond beautifully. Avoid unsealed natural stone or laminate, as moisture can damage them.
How To Use A Steam Cleaner
Fill the reservoir with distilled water to prevent mineral buildup. Let the steam heat up for a minute, then direct the nozzle at the grout lines or glass. Move slowly and wipe the loosened residue with a dry cloth.
For grout, use a brush attachment to agitate the dirt.
Safety Tips
Always test on an inconspicuous spot first. The steam is hot, so wear gloves and avoid direct contact with skin. Keep the nozzle moving to prevent heat damage to seals or caulk.
18. Wax or Car Wax for Glass Protection
Car wax isn't just for your vehicle's paint job. A thin layer applied to clean glass shower doors creates a slick, hydrophobic surface that water beads up on and rolls off, taking soap scum with it. This simple trick can keep your doors looking spotless for weeks with minimal effort.
Start by thoroughly cleaning your glass doors with a vinegar solution or a dedicated glass cleaner to remove all existing buildup. Dry them completely with a microfiber cloth. Then, apply a small amount of car wax (paste or spray) to a soft cloth and rub it onto the glass in a circular motion.
Let it haze for a minute, then buff it off with a clean, dry cloth until the glass is clear and shiny. The wax fills microscopic pores in the glass, creating a barrier that repels water and prevents minerals from bonding. Reapply every few months or when you notice water no longer beads up.
Why Car Wax Works
Car wax contains polymers and natural waxes that create a hydrophobic layer. On glass, this layer reduces surface tension, causing water to form beads that slide off easily. Soap scum and hard water minerals have a harder time sticking, so your doors stay cleaner longer.
It's the same principle as using a rain repellent on car windshields.
Best Wax To Use
Any quality car wax will work, but paste waxes tend to last longer than sprays. Look for a wax labeled as 'clear coat safe' or 'all-in-one'—these are gentle on glass and won't leave residue. Avoid waxes with abrasives or colorants.
Spray waxes are easier to apply but may need more frequent reapplication.
Application Tips
Work in a small section at a time to avoid the wax drying too quickly. Use a foam applicator pad or a microfiber cloth. Buff with a clean, dry microfiber cloth until no smears remain.
For best results, apply wax after every deep clean. If you notice streaking, you may have used too much wax—buff again with a fresh cloth.
19. White Vinegar and Water Daily Mist
A daily mist of diluted vinegar is one of the simplest ways to keep hard water stains and soap scum at bay. This preventive step takes just seconds after each shower and can dramatically reduce how often you need to deep-clean.
The acidity in white vinegar helps dissolve mineral deposits and soap residue before they have a chance to harden. By misting surfaces daily, you're essentially stopping buildup in its tracks. Plus, this method is completely chemical-free and costs pennies per use.
Why It Works
Hard water contains calcium and magnesium ions that react with soap to form a sticky film. Vinegar's mild acetic acid breaks down these bonds, making it easy for water to rinse away the residue. A daily mist keeps the pH on your shower surfaces slightly acidic, which discourages new deposits from forming.
How To Make And Use The Mist
Mix equal parts white vinegar and water in a clean spray bottle. After your shower, give the walls, door, and fixtures a light spritz. No need to rinse or wipe — just let it air dry.
For best results, use distilled water to avoid introducing new minerals. If the vinegar smell bothers you, add a few drops of essential oil like lemon or tea tree.
Tips For Best Results
Use a spray bottle with a fine mist setting to cover surfaces evenly without soaking them. Focus on areas where water pools, like corners and tracks. If you have natural stone tiles, test the mist on an inconspicuous spot first, as vinegar can etch some stones.
For glass doors, follow up with a squeegee once a week for streak-free clarity.
20. Borax for Tough Soap Scum
When soap scum has built up into a thick, stubborn layer, it's time to bring out the big guns. Borax is a natural mineral that works wonders on hard water deposits without the harsh fumes of commercial cleaners. It's cheap, easy to find, and surprisingly effective.
Mix borax with just enough water to form a thick paste—think toothpaste consistency. Apply it generously to the soap scum, especially on shower walls and glass doors. Let it sit for about 20 minutes so the borax can break down the mineral bonds.
Then scrub with a non-abrasive sponge or brush, and rinse thoroughly. You'll notice the scum lifts away much easier than with regular cleaners. Borax is also great for preventing future buildup if you use it weekly.
Why Borax Works
Borax has a high pH and acts as a mild abrasive, which helps dissolve soap scum and mineral deposits. It's also a natural deodorizer, so it leaves your shower smelling fresh. Unlike bleach, it won't damage grout or discolor surfaces when used correctly.
Where To Apply It
This paste is perfect for glass shower doors, tile walls, and even shower caddies. Avoid using it on natural stone like marble or granite, as the abrasiveness can etch the surface. Stick to ceramic, porcelain, or fiberglass.
Pro Tips For Best Results
For extra tough spots, let the paste sit for 30 minutes instead of 20. If the paste dries out, spritz a little water on it to reactivate. Always wear gloves to protect your hands, and make sure the area is well-ventilated.
Rinse with warm water and wipe dry with a microfiber cloth to prevent new water spots.
21. Shower Filter to Reduce Hard Water
A showerhead filter is one of the easiest ways to fight hard water at its source. These filters attach between your pipe and showerhead, removing chlorine, heavy metals, and minerals before they hit your tiles and fixtures. You'll notice less buildup on glass doors and walls, plus your skin and hair might feel softer too.
Installing a shower filter is a straightforward DIY project that takes just a few minutes. Most models screw right onto your existing shower arm, and you don't need any special tools. Once it's in place, the filter works every time you shower, reducing the mineral content that causes those stubborn white deposits.
You'll still need to clean occasionally, but the frequency drops significantly. Just remember to replace the filter cartridge every 6 to 12 months, depending on your water hardness and usage. Some filters have a built-in indicator, but if not, mark your calendar so you don't forget.
What To Look For
Not all shower filters are created equal. Look for one that specifically mentions reducing calcium and magnesium, the main culprits in hard water stains. A multi-stage filter with KDF-55 or activated carbon will also remove chlorine and improve water quality.
Check the flow rate too—some filters can reduce water pressure, so choose one with a high GPM (gallons per minute) rating if you have low pressure already.
Installation Tips
Before installing, wrap the pipe threads with Teflon tape to prevent leaks. Hand-tighten the filter first, then give it a quarter turn with pliers—but don't overtighten. If your shower arm is short or angled, you might need an extender arm to fit the filter properly.
Test for leaks by running water for a minute before using the shower.
Maintenance Matters
Set a reminder to change the filter every 6 months or as recommended by the manufacturer. A clogged filter not only stops working but can also reduce water pressure and even harbor bacteria. Some filters are reusable and just need rinsing, but most require a replacement cartridge.
Keep a spare on hand so you're not tempted to put it off.
22. Microfiber Cloths for Lint-Free Drying
Drying your shower surfaces after cleaning might seem like an extra step, but it's the secret to a spotless finish. Hard water spots and soap scum love to reform on wet surfaces, so removing moisture quickly prevents new deposits from forming. Microfiber cloths are perfect for this job because they trap dust and residue without scratching or leaving lint behind.
Grab a clean, dry microfiber cloth after you've cleaned your shower. Wipe down glass doors, chrome fixtures, and tile from top to bottom. The cloth's fine fibers grab onto leftover moisture and any trace of cleaner, leaving surfaces streak-free and shiny.
For best results, use a fresh cloth each time and wash them separately to avoid transferring oils or dirt.
Why Microfiber Works Best
Microfiber is made of split polyester and polyamide fibers that create a static charge, attracting dust and grime like a magnet. Unlike cotton towels, it doesn't shed lint or leave streaks. It also absorbs several times its weight in water, making drying quick and efficient.
How To Use For Hard Water Spots
After cleaning, give glass doors a final wipe with a dry microfiber cloth. For stubborn water spots, lightly dampen the cloth with distilled water or a 50/50 vinegar solution, then buff dry. This removes mineral residue without adding new chemicals.
Care Tips For Longevity
Wash microfiber cloths in warm water with mild detergent—no fabric softener, bleach, or dryer sheets, as they clog the fibers. Air dry or tumble on low heat. Proper care keeps them effective for dozens of uses.
23. Regular Weekly Maintenance Routine
Consistency is the real secret to a shower that always looks clean. A quick weekly routine stops hard water and soap scum from ever getting a foothold. It takes just ten minutes and saves you from deep scrubbing later.
Set aside ten minutes each week for a simple maintenance routine. Spray all shower surfaces with a 50/50 vinegar and water solution. Let it sit for a few minutes, then scrub with a soft brush or sponge.
Rinse thoroughly and finish by squeegeeing the walls and door. This prevents mineral deposits and soap residue from building up into stubborn stains.
Why It Works
Hard water stains form when water evaporates and leaves minerals behind. Soap scum is created when soap reacts with those minerals. A weekly cleaning removes both before they have time to bond tightly to surfaces.
The vinegar dissolves the minerals, and the scrubbing lifts the soap film.
Tips For Success
Keep your cleaning supplies in a caddy near the shower so you can grab them quickly. Use a soft brush to avoid scratching glass or acrylic. Always rinse well to remove any vinegar smell.
A squeegee after rinsing cuts drying time and reduces water spots.
Customize Your Routine
If you have very hard water, you might need to increase the vinegar concentration or use a commercial hard water cleaner once a month. For glass doors, a daily quick squeegee can extend the time between weekly cleanings. Adjust the routine to fit your shower's needs.
FAQ
What is the best homemade cleaner for hard water stains?
A mixture of equal parts white vinegar and dish soap is highly effective. Spray it on, let it sit for 10-15 minutes, then scrub and rinse.
How do I prevent soap scum from building up?
Use a squeegee on glass and tiles after every shower, and apply a water repellent like Rain-X to glass doors. Also, consider a shower filter to reduce minerals.
Can I use vinegar on natural stone tiles?
No, vinegar is acidic and can etch natural stone like marble or granite. Use a pH-neutral stone cleaner instead.
How often should I clean my showerhead?
Every 1-3 months, or when you notice reduced water flow. Soaking it in vinegar overnight is an easy way to remove mineral deposits.
What is the safest way to clean grout?
Use a paste of baking soda and hydrogen peroxide. Apply, let sit for 10 minutes, scrub gently with a toothbrush, and rinse. Avoid bleach if you have colored grout.
Conclusion
Hard water and soap scum don't have to be a constant battle. With these 23 hacks, you can choose the methods that fit your shower's specific needs and your cleaning style. From daily squeegee habits to weekly vinegar sprays, small consistent efforts make the biggest difference.
Remember, the key is to prevent buildup before it becomes stubborn. Pick a few hacks that work for you and stick with them. Your shower will thank you with a lasting sparkle that makes your bathroom feel fresh and inviting every day.