25 Bathroom Cleaning Tips for a Fresh, Tidy Home Reset
A clean bathroom can change how you feel about your entire home. It’s the first room you see in the morning and the last at night, so keeping it fresh matters more than you think. But scrubbing every surface doesn’t have to be a weekend-long chore.
With the right approach, you can keep your bathroom looking and smelling great with minimal effort. These 25 tips are designed to tackle common trouble spots and build simple habits that stick.
Whether you’re dealing with hard water stains, mildew, or just daily clutter, there’s a tip here to make your routine easier. Let’s turn your bathroom into a space you actually enjoy stepping into.
1. Start with a Clear Counter
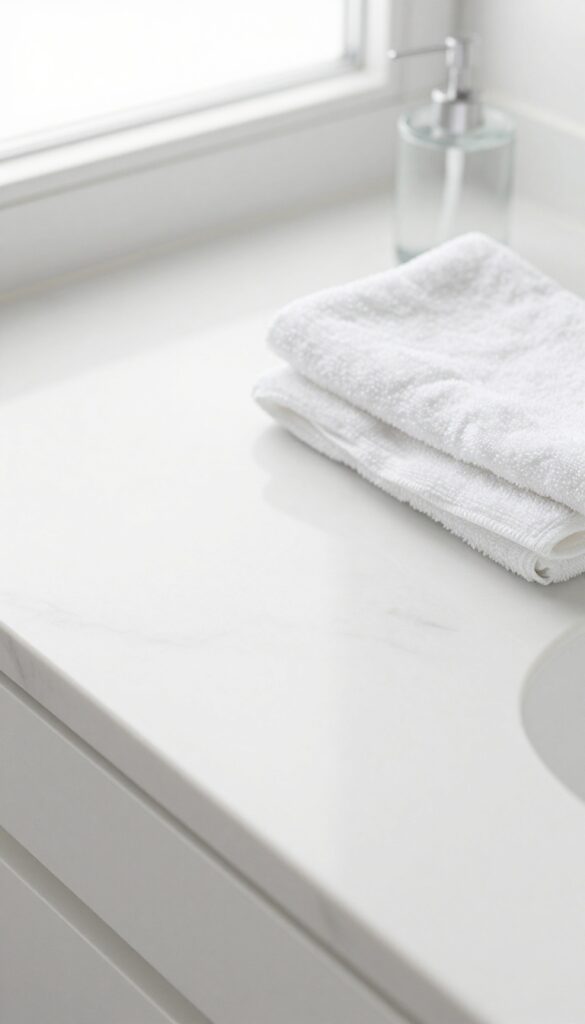
Before you spray or scrub anything, take a moment to clear the clutter. Countertops collect everything from toothbrush holders to random bottles, and trying to clean around them just pushes grime into corners. A bare surface lets you work fast and actually see what you're doing.
Why Clearing First Saves Time
When you clean around objects, you end up moving them multiple times and missing spots underneath. By removing everything upfront, you can wipe the entire counter in one smooth pass. It also forces you to declutter—if you haven't used that lotion in months, toss it.
How To Organize What You Remove
Group items by category: daily essentials (toothbrush, soap), occasional use (hair tools), and rarely used (old cosmetics). Put the daily stuff back in a tidy tray or caddy. For the rest, find a drawer or cabinet home.
This keeps your counter clear longer.
The Right Way To Wipe Down
Use a microfiber cloth and an all-purpose cleaner or a vinegar-water mix. Spray the surface, let it sit for 30 seconds, then wipe in overlapping strokes. Don't forget the edges and backsplash.
For stubborn spots, a little baking soda paste works wonders.
2. Use a Squeegee After Every Shower
A squeegee might seem like a small tool, but it makes a huge difference in how often you need to deep-clean your shower. Running it over glass doors and tiles after every shower takes just 30 seconds and prevents water spots and soap scum from setting in. Once you make it a habit, you'll wonder how you ever went without it.
The secret to a low-maintenance shower is stopping buildup before it starts. Hard water spots and soap scum are much harder to remove once they've dried and bonded to the surface. A quick squeegee swipe after each shower keeps your glass and tile looking clear and clean with almost zero effort.
Choose The Right Squeegee
Not all squeegees are created equal. Look for one with a rubber blade that's at least 10 inches wide for maximum coverage. A stainless steel handle resists rust, and a hook or suction cup makes it easy to store inside the shower.
Replace the blade every few months if it starts to leave streaks.
Make It A Family Habit
Get everyone in the household on board by keeping the squeegee visible and within arm's reach. A quick demonstration shows how easy it is: start at the top and pull down in overlapping strokes. After a week, it becomes second nature.
Pair With A Daily Spray Cleaner
For even better results, follow the squeegee with a daily shower spray. A simple mix of water and distilled white vinegar in a spray bottle works wonders. Spritz the walls and glass after squeegeeing to dissolve any remaining residue.
This combo keeps your shower fresh without harsh scrubbing.
3. Vinegar and Baking Soda for Grout
Grout lines are notorious for trapping dirt and mildew, making them look darker and dingier over time. But you don't need harsh chemicals to bring them back to life. A simple paste made from baking soda and vinegar works wonders, and you probably already have both in your kitchen.
The combination of baking soda and vinegar creates a gentle abrasive that scrubs away grime without damaging the grout. The fizzing action helps loosen embedded dirt, making it easier to rinse away. This method is safe for most tile surfaces and is a budget-friendly alternative to commercial grout cleaners.
How To Make The Paste
Mix three parts baking soda with one part white vinegar in a small bowl. Stir until it forms a thick, spreadable paste. If it's too runny, add more baking soda.
If it's too dry, add a splash of vinegar. The consistency should be similar to toothpaste.
Application And Scrubbing
Use a small spatula or an old toothbrush to apply the paste directly onto the grout lines. Press it into the grooves so it makes good contact. Let it sit for 10 minutes to break down the grime.
Then, scrub vigorously with the toothbrush, focusing on the darkest areas. Rinse with warm water and wipe away any residue with a damp cloth.
When To Use This Method
This technique works best for light to moderate grout stains. For deeply embedded mold or mildew, you might need a stronger cleaner or a commercial grout pen. But for regular maintenance, a monthly treatment with this paste will keep your grout looking fresh and bright.
4. Disinfect Light Switches and Handles
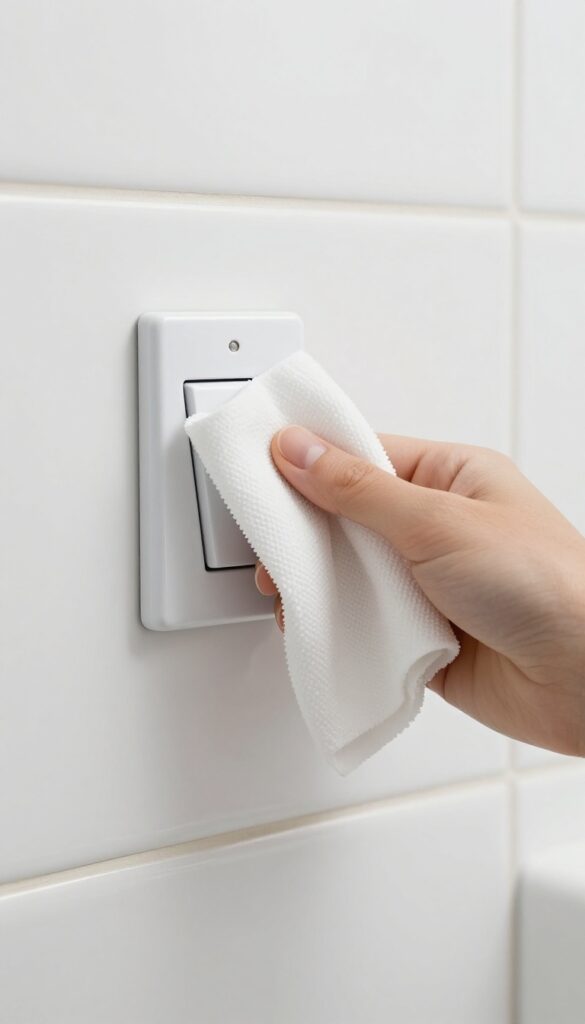
Light switches and cabinet handles are some of the most touched surfaces in your bathroom, yet they often get overlooked during cleaning. Every time you flush the toilet or touch a dirty counter, you transfer germs right back to these spots. A quick weekly wipe-down keeps them from becoming germ highways.
Why These Spots Matter
Think about how many times you flip a light switch or open a cabinet door after using the toilet or touching a damp towel. Bacteria and viruses can survive on hard surfaces for hours or even days. Regularly disinfecting these high-touch areas reduces the risk of spreading illness and keeps your bathroom truly clean.
Best Products To Use
Disinfectant wipes are the easiest option—just pull one out and wipe. If you prefer a spray, use an EPA-approved disinfectant and let it sit for the recommended contact time (usually a few minutes) before wiping dry. Avoid using bleach on metal fixtures as it can cause tarnishing.
How To Make It A Habit
Tie this task to something you already do regularly, like your weekly mirror cleaning or toilet scrubbing. Keep a container of wipes under the sink so they’re easy to grab. A quick once-over on all switches, handles, and knobs takes less than a minute and makes a big difference.
5. Clean the Toilet from the Inside Out
The toilet is one of the hardest-working fixtures in your bathroom, but cleaning it doesn't have to be a dreaded task. A simple two-ingredient method can lift stains and deodorize without harsh chemicals. Here's how to get it sparkling from the inside out.
Start by flushing the toilet to wet the bowl and lower the water level. Then pour one cup of baking soda directly into the bowl, followed by one cup of white vinegar. The mixture will fizz and bubble, working to loosen grime and mineral deposits.
Let it sit for 10 minutes, then scrub thoroughly with a toilet brush, paying extra attention under the rim and around the drain. Flush again, and you're done. This method is safe for septic systems and leaves the bowl fresh without a chemical smell.
Why Baking Soda And Vinegar Work
Baking soda is a mild abrasive that gently scrubs away stains, while vinegar's acidity dissolves mineral deposits and hard water rings. Together, they create a fizzy reaction that helps lift debris from hard-to-reach areas. This combination is effective, inexpensive, and eco-friendly.
Pro Tips For A Deeper Clean
For stubborn rings, let the mixture sit for 20 minutes instead of 10. You can also add a few drops of tea tree oil for extra antibacterial power. To clean under the rim, use a small brush or an old toothbrush to reach those hidden spots.
And don't forget the exterior—wipe down the lid, seat, and base with a disinfectant spray.
How Often To Do This
For a consistently fresh toilet, use this method once a week. If you have hard water, you might need to do it every few days. Regular maintenance prevents buildup and makes each cleaning quicker and easier.
6. Don’t Forget the Exhaust Fan
Your bathroom exhaust fan works hard every day pulling out steam and odors, but it rarely gets any thanks. Over time, dust and grime build up on the cover and inside the unit, making it less effective and noisier. A quick clean every few months keeps it running smoothly and helps prevent mold growth.
Cleaning the exhaust fan is one of those tasks that’s easy to ignore, but it makes a real difference in air quality and fan longevity. Here’s how to do it right.
Remove And Wash The Cover
Most fan covers simply unclip or have a couple of screws. Pop it off and soak it in warm, soapy water for a few minutes. Use a soft brush to scrub away any stubborn dust or grime, then rinse and let it dry completely before reinstalling.
Vacuum The Interior
With the cover off, use a vacuum with a brush attachment to gently remove dust from the fan blades and motor housing. Be careful not to touch the electrical components. This step alone can restore airflow and reduce noise.
Wipe Down The Blades
If vacuuming doesn’t get all the dust, lightly dampen a microfiber cloth with water or a mild cleaner and wipe the blades one by one. Avoid getting moisture on the motor. Let everything air dry before turning the fan back on.
7. Use a Microfiber Cloth for Mirrors
Mirrors are one of the first things you notice in a bathroom, and streaks or smudges can make the whole space feel less clean. A microfiber cloth is the simplest upgrade you can make for a flawless shine. Unlike paper towels or rags, microfiber traps dust and absorbs moisture without leaving lint behind.
Dampen your microfiber cloth slightly with water or a 50/50 vinegar and water solution. Wipe the mirror in an S-pattern from top to bottom to avoid streaks. For stubborn spots, a drop of dish soap in the water works wonders.
Keep a dedicated microfiber cloth in the bathroom for quick touch-ups between deep cleans.
Why Microfiber Works Best
Microfiber has split fibers that create a static charge, attracting dust and dirt like a magnet. It also absorbs several times its weight in liquid, so you need less product. Unlike cotton, it won't shed fibers or leave streaks when used damp.
The Right Way To Wipe
Start at the top corner and work your way down in a zigzag or S-pattern. This prevents drips from running onto already-cleaned areas. Use a separate dry microfiber cloth to buff away any remaining moisture for a crystal-clear finish.
Caring For Your Microfiber Cloths
Wash microfiber cloths separately from cotton towels to avoid lint transfer. Use mild detergent and skip fabric softener, which clogs the fibers. Air dry or tumble dry on low heat to keep them effective for months.
8. Tackle Mold with Hydrogen Peroxide
Mold loves the damp corners of your bathroom, especially around the tub, shower, and window sills. Instead of reaching for harsh bleach, try hydrogen peroxide. It kills mold effectively without the strong fumes or risk of damaging surfaces.
Plus, it’s something you probably already have in your medicine cabinet.
Hydrogen peroxide is a gentle but powerful mold fighter. It works by releasing oxygen bubbles that break down mold and mildew at the root. Unlike bleach, it doesn’t produce toxic fumes, making it safer for you and your family.
It’s also color-safe on most surfaces, so you won’t have to worry about bleaching your grout or tiles.
How To Apply It
Pour 3% hydrogen peroxide into a spray bottle. Spray it directly onto the moldy areas until they’re thoroughly wet. Let it sit for 10 minutes to give it time to work.
After that, scrub the area with a brush or sponge. Rinse with water and wipe dry. For stubborn spots, you can repeat the process or let it sit longer.
Where to Use It
Hydrogen peroxide works great on grout, caulk, shower curtains, and tile surfaces. It’s also safe for use on plastic and fiberglass. Avoid using it on natural stone like marble or granite, as it can cause etching.
Stick to ceramic, porcelain, and sealed surfaces for best results.
Why It’s Better Than Bleach
Bleach is harsh and can irritate your skin, eyes, and lungs. It also produces harmful fumes when mixed with other cleaners. Hydrogen peroxide breaks down into water and oxygen, leaving no toxic residue.
It’s biodegradable and safer for the environment. Plus, it’s just as effective at killing mold spores when used correctly.
9. Organize Under the Sink
The area under your bathroom sink can quickly become a black hole of half-empty bottles and tangled cleaning supplies. When you have to dig through clutter just to find a sponge, you're less likely to keep up with daily wiping and spraying. A simple organization system turns that dark cabinet into a functional storage zone that actually helps you clean faster.
Group like items together in clear bins or small baskets. Keep all your cleaning sprays, scrub brushes, and microfiber cloths in one bin, extra toilet paper and tissues in another, and personal toiletries like backup shampoo or lotion in a third. This way you can grab the cleaning bin, do your work, and put it back without making a mess.
Label each bin if you share the bathroom with family or roommates.
Use Clear Bins For Visibility
Clear plastic bins let you see what's inside without pulling everything out. Choose bins with handles for easy access, and measure your cabinet depth first so they fit without blocking the plumbing. Stackable bins work well if you have vertical space, but avoid stacking too high or you'll lose the convenience.
Add A Tension Rod For Spray Bottles
Install a small tension rod under the sink and hang spray bottles upside down by their triggers. This keeps them off the cabinet floor and makes it easy to grab any cleaner you need. It also prevents bottles from leaking onto your bins and keeps the area looking neat.
Keep A Small Trash Bin Handy
Tuck a slim, lidded trash bin under the sink for quick disposal of used cotton rounds, empty bottles, or packaging. Empty it weekly during your cleaning routine so it doesn't overflow. This small addition makes it easier to toss things immediately instead of letting clutter pile up.
10. Wash Shower Curtains and Liners
Shower curtains and liners take a beating from soap scum, mildew, and hard water stains. They’re often overlooked until they start looking grimy, but a quick clean can make your whole bathroom feel fresher. The good news is that cleaning them is simple, and you probably already have the supplies.
Fabric curtains can go right in the washing machine with your regular laundry detergent. Add a half-cup of baking soda to the wash cycle to help remove odors, and toss in a couple of towels to scrub the curtain clean. For extra whitening, use a quarter-cup of bleach or white vinegar instead of fabric softener.
Hang the curtain back up immediately to air dry—this prevents wrinkles and mildew. Plastic liners are trickier. You can wipe them down with a sponge and a vinegar-water solution, but if they’re heavily stained or have mold spots, it’s easier to just replace them.
A new liner costs a few dollars and takes seconds to swap out. Aim to replace plastic liners every three to six months, or as soon as you notice discoloration or a musty smell.
Machine-wash Fabric Curtains
Remove the curtain and any hooks or rings. Wash on a gentle cycle with warm water, adding a cup of white vinegar or bleach to the rinse cycle. Never use fabric softener—it leaves a residue that attracts soap scum.
Tumble dry on low or hang to dry completely before rehanging.
Wipe Down Plastic Liners
For plastic liners, a quick scrub with a soft brush and a solution of equal parts water and white vinegar works well. Rinse thoroughly with warm water. If you see mold or stubborn stains, it’s time to toss it.
Keep a spare liner on hand so you can swap it out instantly.
When To Replace Instead Of Clean
Plastic liners are cheap and easy to replace. If yours has visible mold, tears, or a lingering odor after cleaning, don’t waste time—buy a new one. Fabric curtains can last much longer, but wash them monthly to prevent buildup and extend their life.
11. Descale the Showerhead
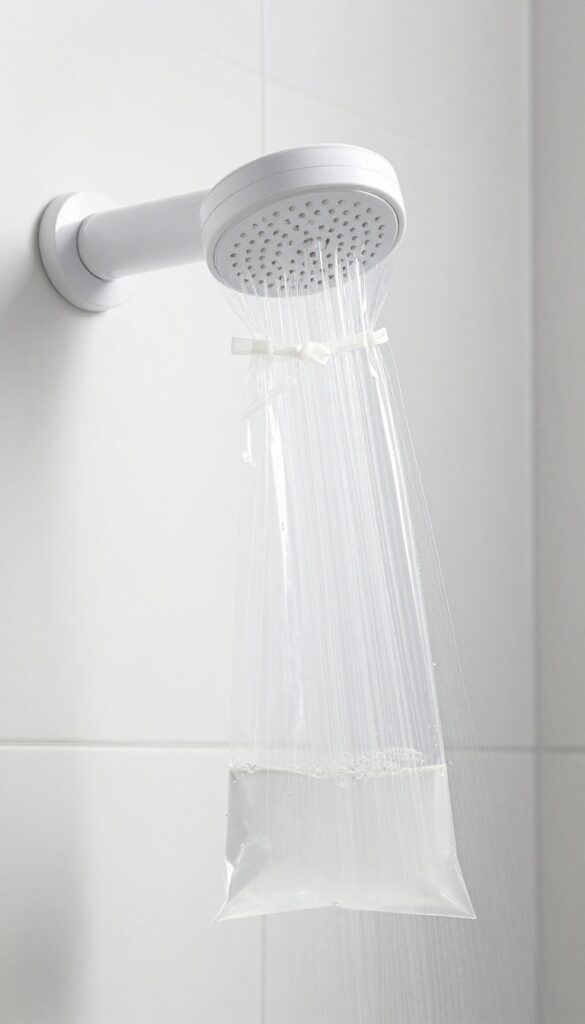
Hard water can clog showerhead nozzles with mineral deposits, reducing water pressure and leaving you with a weak spray. A simple vinegar soak dissolves that buildup without harsh scrubbing. This trick works for both fixed and handheld showerheads.
To descale your showerhead, fill a plastic bag with white vinegar and secure it around the showerhead with a rubber band or twist tie. Make sure the nozzles are fully submerged. Let it soak overnight—the acetic acid breaks down calcium and lime deposits.
In the morning, remove the bag and run the water for a few minutes to flush out loosened residue. For stubborn buildup, gently scrub the nozzles with an old toothbrush before rinsing. This method is safe for most metal and plastic showerheads, but avoid using vinegar on brass or gold finishes without checking manufacturer guidelines first.
Why Vinegar Works Best
White vinegar is mildly acidic, which makes it effective at dissolving mineral deposits without damaging the showerhead's finish. It’s also cheap, non-toxic, and readily available. Avoid harsh chemical descalers that can corrode metal parts or harm your skin and lungs.
How Often To Descale
If you have hard water, plan to descale your showerhead every one to three months. Signs it’s time include reduced water flow, uneven spray patterns, or visible white crust around the nozzles. Regular descaling extends the life of your showerhead and keeps water pressure strong.
Alternative Methods For Stubborn Deposits
If vinegar alone doesn’t cut it, try soaking in a 50/50 mix of vinegar and warm water for a few extra hours. For severely clogged nozzles, remove the showerhead and soak it in a bowl of undiluted vinegar. You can also use a pin or toothpick to poke out individual holes after soaking.
12. Use a Toilet Brush with a Holder
A toilet brush is one of those tools you hope you never have to think about, but using one correctly makes a huge difference in bathroom hygiene. The key is having a dedicated brush stored in a covered holder right next to the toilet, so it's always ready when you need it. That way, you can give the bowl a quick scrub after each use without hunting for supplies.
Most people store their toilet brush in a corner or under the sink, but that adds extra steps to an already unappealing task. Keeping it in a covered holder next to the toilet means you can reach it immediately. The cover also hides the brush from sight and contains any lingering odors.
Plus, it protects the brush from dust and bathroom moisture, which can cause mildew.
Choose The Right Holder
Look for a holder that has drainage holes or a removable drip tray so water doesn't pool at the bottom. Some holders are designed with ventilation slots to help the brush dry faster. A weighted base is also a plus to prevent tipping.
Avoid holders that are completely sealed, as they trap moisture and encourage bacterial growth.
Clean The Brush Regularly
Even though the brush is used for cleaning, it needs cleaning itself. Every few weeks, fill the holder with a mixture of bleach and water (about 1 part bleach to 10 parts water) and let the brush soak for 15–20 minutes. Then rinse thoroughly with clean water and let it air dry.
This kills germs and prevents the brush from developing a musty smell.
Replace Worn Brushes
Toilet brushes don't last forever. When the bristles start to bend, fray, or lose their shape, it's time for a new one. A worn brush won't clean effectively and can scratch the porcelain.
Aim to replace it every six months, or sooner if you notice it looking tired.
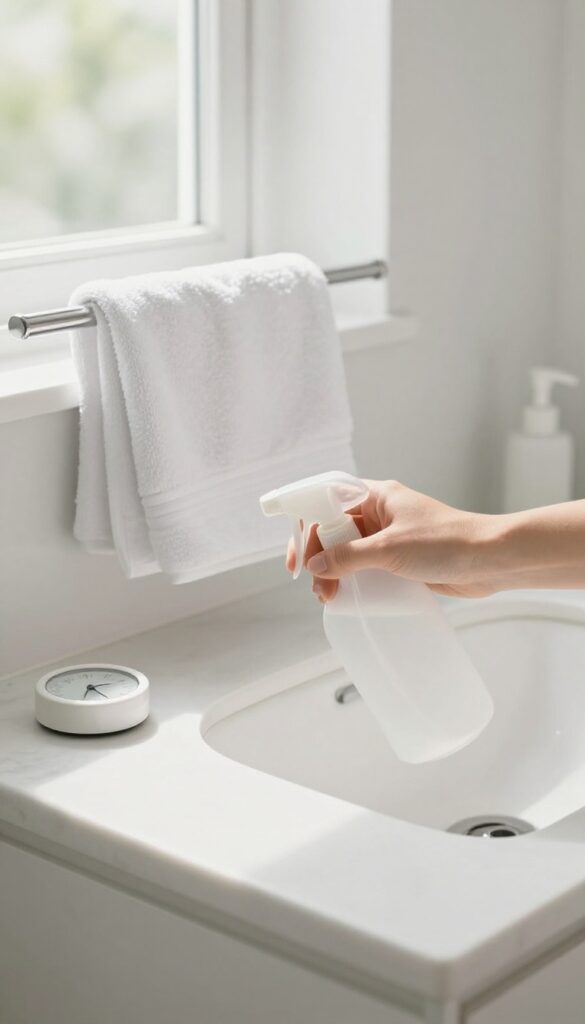
13. Wipe Down the Sink After Each Use
Toothpaste splatters and soap scum have a way of hardening into stubborn stains if you leave them be. A quick wipe after each use keeps your sink looking fresh and cuts down on deep cleaning later. It’s a tiny habit that pays off big time.
Grab a dedicated cloth or sponge and keep it within arm’s reach. After brushing your teeth or washing your hands, give the basin, faucet, and handles a quick swipe. This prevents buildup and keeps water spots at bay.
For an extra boost, use a daily shower spray or a diluted vinegar solution on the cloth.
What You’ll Need
A small microfiber cloth or a soft sponge works best. Store it in a caddy or hang it on a hook near the sink so it’s always handy. Avoid using the same cloth for the toilet to prevent cross-contamination.
How To Make It A Habit
Pair the wipe-down with an existing routine, like after you rinse your toothbrush. It takes only 10 seconds. If you forget, set a sticky note on the mirror as a reminder for the first week.
Bonus: Tackle The Faucet
Don’t ignore the faucet base and handles—they collect grime too. A quick wipe prevents that sticky film and keeps chrome or brushed nickel finishes shiny.
14. Deep Clean the Trash Can
The bathroom trash can is easy to overlook, but it collects dust, grime, and odors over time. A quick wipe-down isn't enough to keep it fresh. Giving it a proper deep clean every few weeks makes a big difference in how the whole room smells.
Empty And Rinse
Start by taking out the liner and tossing any leftover debris. Give the can a quick rinse with warm water to loosen stuck-on gunk. If there are any sticky spots, use a scrub brush or sponge to gently remove them before moving on to the wash step.
Wash With Soap And Water
Fill your sink or a bucket with warm water and a squirt of dish soap. Submerge the can and scrub the inside and outside with a sponge or cloth. Pay extra attention to the rim and bottom where grime tends to hide.
Rinse thoroughly to remove all soap residue.
Dry Completely
After rinsing, shake off excess water and let the can air dry upside down. Make sure it's completely dry before putting in a new liner. Any moisture left behind can encourage mold or mildew growth.
Add Baking Soda For Odor Control
Once the can is dry, sprinkle a thin layer of baking soda across the bottom. This natural deodorizer absorbs smells between liner changes. Replace the baking soda each time you deep clean the can for best results.
15. Use a Magic Eraser on Scuffs
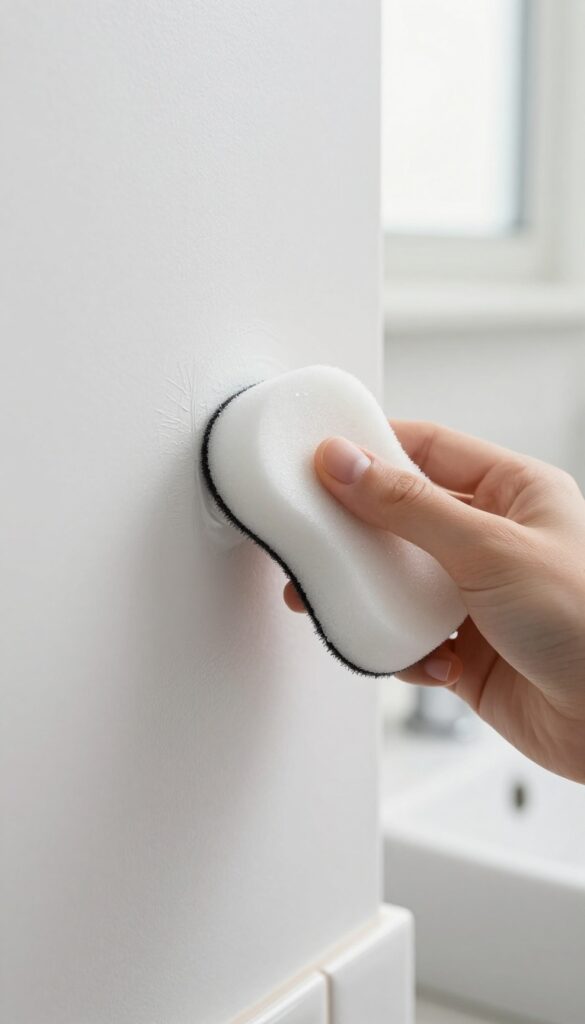
Scuff marks on walls, baseboards, and tile can make even a clean bathroom look dingy. They're usually caused by shoes, cleaning tools, or everyday bumping. A magic eraser is a quick, mess-free fix that works better than most sprays or scrubs.
How It Works
Magic erasers are made of melamine foam, which acts like fine sandpaper when dampened. It lifts scuff marks without harsh chemicals. Just wet the eraser, squeeze out excess water, and gently rub the mark in a circular motion.
Where to Use It
These erasers are safe on most painted walls, vinyl baseboards, ceramic tile, and even some countertops. Avoid using them on glossy or delicate surfaces like polished marble, stainless steel, or high-gloss paint, as they can dull the finish.
Tips For Best Results
Test in an inconspicuous spot first. Use light pressure—scrubbing too hard can remove paint. For stubborn marks, dampen the eraser a bit more.
Keep one in your bathroom caddy for quick touch-ups after cleaning.
16. Freshen the Air Naturally
Chemical air fresheners often mask odors with synthetic scents that can irritate sensitive noses. Natural alternatives are just as effective and much gentler on your home environment. A few simple ingredients can keep your bathroom smelling clean without the artificial overload.
Skip the aerosol sprays and plug-in diffusers. Instead, place a small bowl of baking soda on a shelf or under the sink. It absorbs moisture and neutralizes odors silently.
For a light fragrance, add a few drops of your favorite essential oil—lavender, lemon, or eucalyptus—onto a cotton ball and tuck it into a discreet corner. Replace the cotton ball every week or when the scent fades. You can also simmer a pot of water with citrus peels and cinnamon sticks on the stove for a whole-house aroma that lingers.
Baking Soda: The Odor Absorber
Baking soda is a powerhouse for neutralizing smells without adding any scent. Place an open container in a cabinet or on a high shelf. Stir it once a week to refresh its absorbing power, and replace it monthly.
It’s also safe around kids and pets.
Essential Oils: Custom Scents
A few drops of essential oil on a cotton ball or a wooden diffuser stick can create a subtle, pleasant aroma. Choose oils known for their fresh, clean notes—like peppermint, tea tree, or orange. Rotate scents to keep things interesting.
Diy Simmer Pots
For a deeper clean smell, simmer water with slices of lemon, orange, and a few sprigs of rosemary or mint. The steam carries the fragrance through the bathroom and beyond. Just keep an eye on the water level so the pot doesn’t dry out.
17. Clean the Toothbrush Holder
Your toothbrush holder is a magnet for toothpaste drool, dust, and bacteria. Since it sits right next to your sink, it gets splashed with dirty water and never really dries out. That damp, dark interior is a perfect breeding ground for mold and germs.
Dishwasher Method
If your holder is dishwasher-safe (check the bottom for a symbol), toss it on the top rack. Run a hot cycle with a sanitizing rinse. The high heat kills bacteria and loosens any grime.
Let it dry completely before putting toothbrushes back.
Hand Wash Soak
For holders that can't go in the dishwasher, fill your sink with hot water and a squirt of dish soap. Add a splash of white vinegar for extra disinfecting power. Let the holder soak for at least 15 minutes, then scrub with a bottle brush or old toothbrush.
Rinse well and dry upside down on a towel.
Weekly Maintenance
Make this a weekly habit. While you're at it, wipe down the counter around the holder. If you notice black spots inside the holder, it's time to replace it.
Also, consider switching to a holder with a vented design that allows air to circulate and prevent moisture buildup.
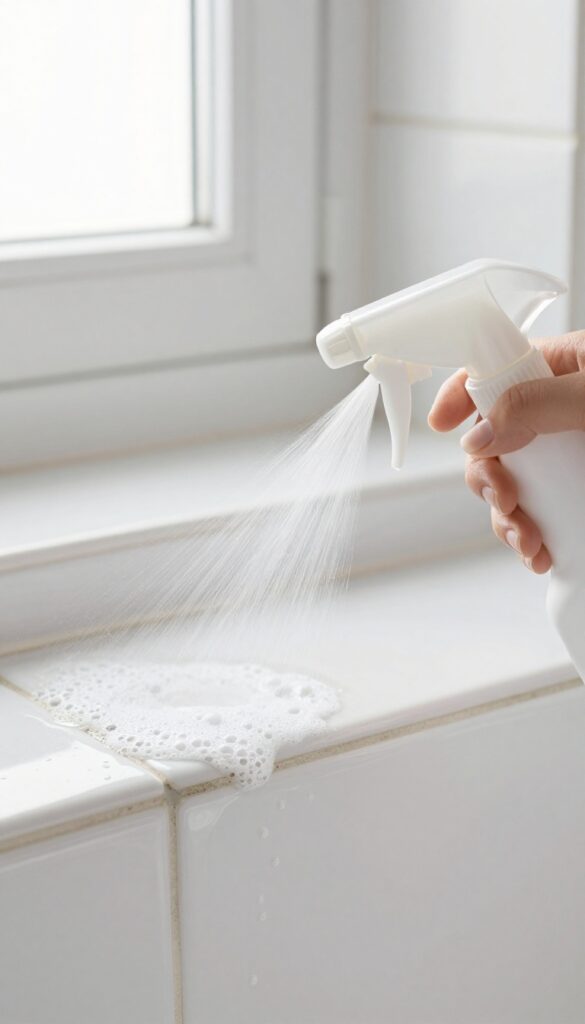
18. Prevent Hard Water Stains with a Spray
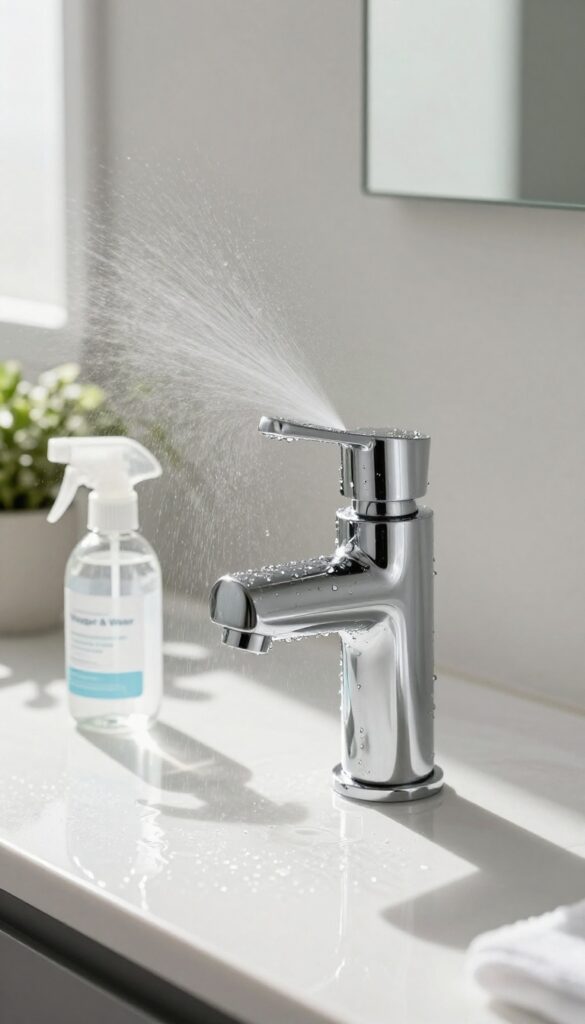
Hard water stains can make even the cleanest bathroom look dull and neglected. Those white, crusty deposits on faucets and showerheads build up fast, but you can stop them before they start. A simple DIY spray turns prevention into a quick, daily habit.
Mix equal parts white vinegar and water in a spray bottle. After each use, give your faucets, showerhead, and any chrome fixtures a light mist. Let it sit for a minute, then wipe dry with a microfiber cloth.
The vinegar’s acidity dissolves minerals on contact, preventing buildup before it hardens. For best results, do this daily—it takes less than 30 seconds and keeps fixtures sparkling without harsh scrubbing.
Why Vinegar Works
White vinegar is a mild acid that breaks down calcium and lime deposits naturally. Unlike commercial sprays, it’s non-toxic and safe for most surfaces. Just avoid using it on unsealed natural stone or brass, as it can etch those materials.
Make It A Routine
Keep the spray bottle next to your sink or in the shower. Pair the misting step with another habit, like drying off after a shower or brushing your teeth. The more consistent you are, the less scrubbing you’ll need later.
Extra Tips For Stubborn Spots
For already-stained fixtures, spray generously and let the vinegar sit for 10–15 minutes before wiping. A soft toothbrush can help dislodge deposits in crevices. Rinse thoroughly with water afterward to prevent any lingering smell.
19. Vacuum Before Mopping
Mopping a dirty floor just pushes debris around, leaving you with a gritty film instead of a clean surface. Bathroom floors collect hair, dust, and lint that a mop alone can't pick up. Taking two extra minutes to vacuum or sweep first makes a huge difference.
Vacuuming removes loose particles that would otherwise turn into muddy streaks when wet. It also prevents hair from clogging your mop head or leaving behind unappealing clumps. A quick pass with a handheld vacuum or a dry dust mop is all you need before bringing out the wet tools.
Why It Works Better
When you mop over loose hair and dust, you're essentially spreading a thin layer of grime across the entire floor. The debris gets trapped under the mop and can scratch tile or dull the finish over time. Vacuuming first lifts all that dry mess so the mop can focus on dissolving sticky spots and sanitizing.
Best Tools For The Job
A cordless stick vacuum with a floor head works great for quick pickups. If you prefer sweeping, use a microfiber dust mop that traps particles instead of flicking them around. For tight corners and under the vanity, a crevice tool attachment helps reach hidden dirt.
20. Use a Steam Cleaner for Tough Jobs
Sometimes scrubbing just doesn't cut it, especially when you're dealing with baked-on grime or stubborn mold. That's where a handheld steam cleaner comes in. It uses high-temperature steam to loosen dirt and kill bacteria without any harsh chemicals.
It's a game-changer for deep cleaning tasks that usually require elbow grease and toxic sprays.
A steam cleaner is one of those tools you don't realize you need until you try it. It blasts away soap scum, sanitizes surfaces, and reaches into tiny crevices that a sponge can't. Best of all, it's chemical-free, so it's safe for kids and pets.
Here's how to use it for three of the toughest bathroom jobs.
Tiles And Grout
Grout lines are notorious for trapping dirt and mildew. A steam cleaner's concentrated nozzle directs steam right into the grout, loosening grime so you can wipe it away with a cloth. For really stubborn stains, follow up with a stiff brush while the grout is still hot.
Your tiles will look like new without any bleach or scrubbing paste.
Toilet Bowls
Yes, you can steam your toilet bowl. The high heat kills germs and loosens mineral deposits around the rim and under the waterline. Use the angled nozzle to target hard-to-reach areas.
Just make sure to let the bowl cool before flushing, and never steam the wax ring or internal components. This method is especially effective for removing rust rings.
Shower Doors And Fixtures
Glass shower doors and metal fixtures collect hard water spots and soap scum. A steam cleaner's wide attachment covers large surfaces quickly. The steam dissolves the buildup, and a microfiber cloth wipes it away streak-free.
For faucets and handles, use the small brush attachment to get around the base and crevices.
21. Keep a Small Trash Can with a Lid
A tiny trash can might not seem like a big deal, but it makes a real difference in how clean your bathroom feels. Without a lid, used cotton balls, floss, and other waste sit out in the open, letting odors escape and making the space look messier than it is. A lidded bin keeps those smells contained and gives the room a tidier appearance.
Choose a small can that fits neatly beside the toilet or under the sink. Look for one with a step pedal or a swing lid so you don't have to touch it with dirty hands. Empty it at least once a week, or more often if you use it for disposable products like diapers or sanitary items.
A quick wipe-down with a disinfectant wipe every time you change the bag will keep it from getting grimy.
Why A Lid Matters
An open trash can lets odors drift into the room, especially if you toss damp items like used tissues or cotton pads. A lid traps those smells inside until you take out the trash. It also hides the contents from view, so the bathroom looks cleaner even between cleanings.
Choosing The Right Size And Style
You don't need a big bin—a 2- to 4-gallon can is plenty for a bathroom. Look for one with a lid that opens easily, like a step pedal or a motion sensor. Stainless steel resists rust and wipes clean easily, while plastic is lightweight and affordable.
Avoid anything too tall that might tip over.
Maintenance Tips
Line the can with a small trash bag or use a scented bag to help control odors. Empty it before it gets full—overstuffed bins are harder to close and more likely to leak. Once a month, wash the can with soap and water or a disinfectant spray to prevent buildup.
22. Wash Bath Mats Weekly
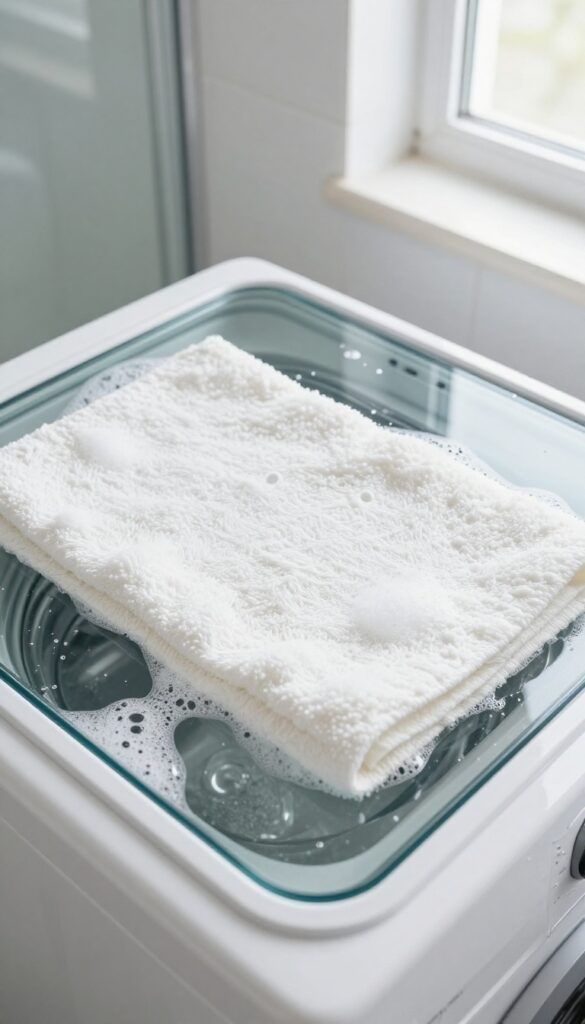
Bath mats are the unsung heroes of your bathroom, but they also trap moisture, soap scum, and bacteria. If you let them go too long, they start to smell musty and can even grow mildew. The fix is simple: wash them weekly to keep them fresh and functional.
Why Weekly Washing Matters
Bath mats sit in a damp environment, making them a breeding ground for bacteria and mold. Washing them weekly removes dirt, soap residue, and microbes before they have a chance to multiply. It also prevents that sour smell that can linger even after the mat dries.
How To Wash Bath Mats Properly
Check the care label first—most cotton or microfiber mats can go in the washing machine. Use hot water and a regular detergent, and add a half cup of white vinegar to the rinse cycle to kill odors and soften fibers. Avoid fabric softener, which can reduce absorbency.
Drying Tips For Best Results
Always dry bath mats thoroughly to prevent mildew. Tumble dry on low heat or hang them in direct sunlight. If the mat has a rubber backing, air-dry it instead of using high heat, which can cause the rubber to crack or peel.
23. Use a Lint Roller for Dust Bunnies
Dust bunnies love hiding in bathroom corners, under the vanity, and along baseboards. But you don’t always need a vacuum or a dust cloth to catch them. A simple lint roller—the kind you use for clothes—can be a surprisingly effective tool for quick touch-ups.
Keep a lint roller in the bathroom cabinet or under the sink. When you spot dust or hair on baseboards, vents, or even fabric shower curtains, just roll it over the area. The sticky sheets grab everything in one pass, no bending or awkward reaching required.
It’s especially handy for those hard-to-reach spots where dust tends to settle.
Baseboards And Vents
Run the lint roller along baseboards and over air vents to pick up dust and pet hair. It’s faster than wiping with a damp cloth and won’t spread dust around. Plus, you can toss the dirty sheet and move on.
Fabric Shower Curtains
Fabric shower curtains attract lint and hair over time. Instead of tossing them in the wash every week, give them a quick roll with a lint roller. It removes surface debris and keeps them looking fresh between washes.
Light Fixtures And Shelves
Dust collects on light fixtures, shelves, and even towel racks. A lint roller can reach these spots easily. Just press and roll—no need for a step stool or extra cleaning products.
24. Seal Grout After Cleaning
You’ve scrubbed the grout lines until they’re bright and clean, but that pristine look won’t last long without protection. Grout is porous, which means it soaks up moisture, soap scum, and dirt easily. Sealing it after a deep clean creates a barrier that keeps grout looking fresh and makes future cleaning much easier.
Once your grout is completely clean and dry, apply a high-quality grout sealer using a small brush or applicator bottle. Work it into the lines carefully, wiping away any excess from the tile surface. Let it cure according to the manufacturer’s instructions—usually 24 to 48 hours.
Reapply the sealer every year, or more often in high-moisture areas like showers. This simple step prevents stains, reduces mold growth, and keeps your bathroom looking newer for longer.
Why Sealing Matters
Unsealed grout acts like a sponge. Every splash of shampoo or drop of hard water gets absorbed, leading to discoloration and mildew. A good sealer fills the pores so liquids bead up and wipe away instead of soaking in.
It also makes routine cleaning faster—you won’t need to scrub as hard or as often.
How To Choose The Right Sealer
Look for a penetrating sealer designed for your type of grout—sanded or unsanded. Penetrating sealers go into the grout rather than sitting on top, so they don’t change the look or texture. Avoid film-forming sealers that can peel or yellow over time.
For showers, choose a sealer with mold and mildew resistance.
Application Tips For Best Results
Make sure the grout is bone-dry before you start. Use a small foam brush or a squeeze‑bottle applicator to control the flow. Work in small sections, applying sealer generously and letting it sit for a few minutes.
Then buff off any excess with a clean, dry cloth before it dries on the tile. Test a hidden spot first to confirm the sealer doesn’t alter the color.
25. Set a 10-Minute Daily Tidy
A little consistency goes a long way. Instead of letting mess pile up all week, spend just 10 minutes each day doing a quick reset. It’s amazing how much you can accomplish when you make it a non-negotiable part of your routine.
Think of it as a mini refresh. Wipe down the counter, put stray items back in their place, and give the floor a quick sweep. That’s usually enough to keep things looking tidy without any heavy lifting.
The key is to do it every day, so grime and clutter never get a chance to settle.
What To Focus On
Start with the surfaces you touch most: the sink, counter, and toilet handle. A quick spray and wipe takes less than two minutes. Then move on to putting away toiletries, folding towels, and tossing any trash.
End with a fast sweep or vacuum of the floor.
Make It A Habit
Pair your tidy time with something you already do, like brushing your teeth or waiting for your coffee to brew. Set a timer if you need to. After a week, it’ll feel automatic.
You’ll walk into a fresh bathroom every morning without even thinking about it.
FAQ
How often should I deep clean my bathroom?
Aim for a deep clean every one to two weeks, depending on usage. High-traffic bathrooms may need weekly attention, while guest bathrooms can go longer.
What’s the best way to remove hard water stains?
White vinegar is very effective. Soak a cloth in vinegar and lay it on the stain for an hour, then scrub. For stubborn spots, use a pumice stone gently.
Can I use bleach on colored grout?
Bleach can discolor colored grout. Instead, use a mixture of baking soda and hydrogen peroxide or a dedicated grout cleaner.
How do I keep my bathroom smelling fresh without chemicals?
Place a bowl of baking soda or activated charcoal in a corner. You can also use a few drops of essential oil on a cotton ball or a reed diffuser.
What’s the best way to clean a glass shower door?
Use a squeegee after each shower to prevent buildup. For existing spots, spray with a vinegar-water solution and wipe with a microfiber cloth.
Conclusion
A fresh, tidy bathroom doesn’t require hours of scrubbing every week. By incorporating these 25 tips into your routine, you can maintain a clean space with less effort and more consistency.
Start with a few changes that feel manageable, like using a squeegee or wiping the sink after use. Over time, these small habits add up to a bathroom that feels like a personal retreat rather than a chore zone.