25 Bathroom Cleaning Checklist Ideas for Busy Homes
Bathrooms get dirty fast. Between morning rushes, evening showers, and kids splashing everywhere, grime builds up quicker than you can say "scrub. " A solid checklist keeps you on track without overwhelming your schedule.
Most cleaning routines fail because they try to do too much at once. Instead of a marathon cleaning session, break tasks into bite-sized chunks. That way, you can tackle one or two items each day and still have a sparkling bathroom by the weekend.
These 25 checklist ideas cover everything from daily wipe-downs to monthly deep cleans. Pick the ones that fit your home best, mix and match, and watch your bathroom stay fresh with minimal effort.
1. Daily Sink Wipe-Down
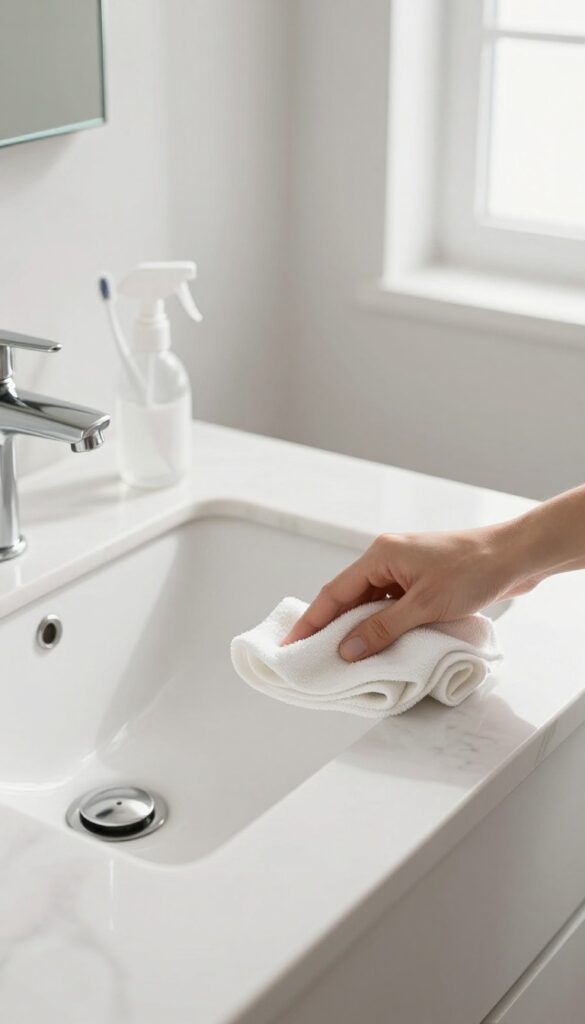
After brushing your teeth, take 30 seconds to wipe the sink and counter with a microfiber cloth. This prevents toothpaste splatters and soap scum from hardening. It’s the easiest habit to build and keeps your bathroom looking fresh every morning.
A quick daily wipe-down stops grime from building up. You don’t need harsh chemicals—just a damp microfiber cloth does the trick. Keep a dedicated cloth under the sink so you can grab it without thinking.
Why It Works
Toothpaste and soap residue dry into stubborn stains. Wiping them while they’re still wet takes seconds instead of scrubbing later. This one habit cuts your weekly cleaning time in half.
What You Need
A microfiber cloth and a small spray bottle with water or a mild cleaner. Store them within arm’s reach of the sink. No fancy tools required.
Make It Stick
Pair the wipe-down with an existing habit, like after brushing your teeth. Set a visual reminder—like leaving the cloth on the counter—until it becomes automatic.
2. Quick Mirror Mist and Wipe
Foggy mirrors and water spots are a daily nuisance. Instead of scrubbing dried-on streaks, tackle the mirror right after a hot shower when the steam has already loosened grime. A simple spray-and-wipe routine takes less than a minute and keeps your mirror sparkling.
Keep a small spray bottle filled with a 50/50 mix of white vinegar and water near the mirror. After everyone is done showering, give the mirror a quick mist and wipe with a microfiber cloth or a squeegee. This prevents hard water spots and soap residue from building up.
Do this daily, and you'll never need a heavy-duty mirror cleaner again.
Why It Works
Vinegar cuts through soap scum and mineral deposits without harsh chemicals. The steam from the shower softens any residue, so a light wipe is all it takes. Doing it right after showers means less elbow grease later.
What You'll Need
A spray bottle, white vinegar, water, and a lint-free microfiber cloth or squeegee. Keep them in a caddy or basket under the sink so they're always handy.
Pro Tip For Streak-free Results
Use a microfiber cloth that's been washed without fabric softener. Fabric softener leaves a residue that causes streaking. For extra shine, buff the mirror with a dry cloth after wiping.
3. Toilet Bowl Daily Swish
The toilet bowl is one of those spots that can get nasty fast, but keeping it fresh doesn't require a deep scrub every day. A quick daily swish with the toilet brush does wonders. It stops stains from setting and keeps odors under control, so you never walk into a bathroom that smells less than fresh.
Grab your toilet brush first thing in the morning, give the bowl a few swirls under the rim and around the sides, then flush. That's it. The whole thing takes maybe 30 seconds.
Doing this daily means you rarely need to break out the heavy cleaners or scrub for minutes on end. It's a small habit that pays off big in cleanliness and peace of mind.
Why Morning Works Best
Mornings are ideal because the bowl hasn't been used much overnight, so any residue is still loose. A quick swish before the day's traffic starts keeps things fresh and prevents buildup. Plus, it's easy to remember as part of your morning routine—right after you brush your teeth.
Brush Care Matters
Your toilet brush needs love too. After each swish, let it drip into the holder, and once a week, rinse it with a little bleach or sanitizing spray. Replace the brush every few months or when bristles start looking worn.
A clean brush means a cleaner bowl.
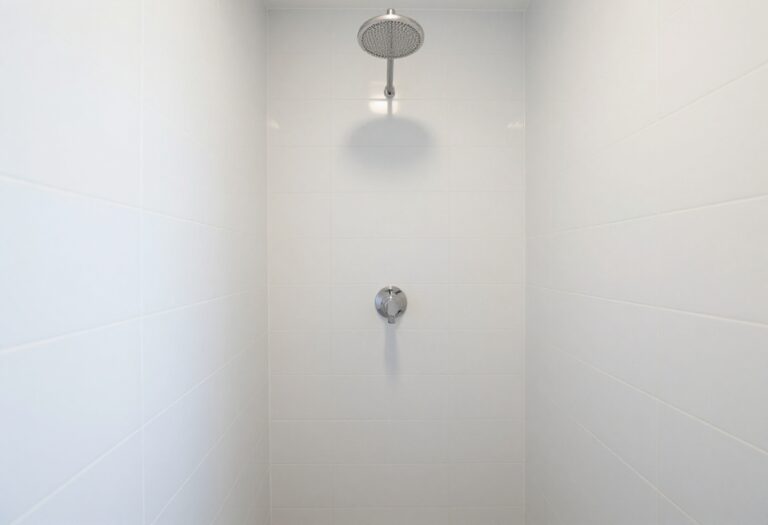
4. Shower Floor Squeegee After Each Use
Soap scum and mildew love a wet shower floor. The longer water sits, the more those grimy deposits settle in. A squeegee changes the game completely.
Hang one inside the shower where it's easy to grab. After you turn off the water, give the floor a quick once-over. It takes about ten seconds but saves you from scrubbing later.
This simple habit keeps your shower looking cleaner between deep cleans. Plus, it cuts down on the slippery film that builds up over time.
A squeegee is a small tool with big results. It removes standing water that would otherwise evaporate and leave behind mineral deposits and soap residue. Over a week, that adds up to noticeably less grime.
Make it part of your post-shower routine. Keep the squeegee within arm's reach so you don't have to stretch or step out wet. A quick swipe across the floor tiles and you're done.
If you have glass shower doors, run the squeegee over those too. Water spots disappear, and you won't need harsh cleaners as often. It's a win-win for busy homes.
Why It Works So Well
Soap scum forms when the fats in soap mix with minerals in hard water. Standing water gives that mixture time to bond with tile and grout. By removing the water immediately, you stop the reaction before it starts.
Mildew also needs moisture to thrive. A dry shower floor is a hostile environment for mold spores. The squeegee keeps the surface dry enough that mildew struggles to take hold.
Best Squeegee For The Job
Look for a squeegee with a rubber blade and a sturdy handle. A wall-mounted hook or suction cup holder keeps it handy. Avoid cheap plastic models that warp or leave streaks.
For shower floors, a wider blade (12 inches or more) covers more area quickly. If you have textured tiles, a squeegee with a flexible blade works better than a rigid one.
How To Build The Habit
Start by placing the squeegee in a visible spot. Remind yourself for the first few days. After a week, it becomes automatic.
Pair it with another habit, like turning off the water or stepping out of the shower. That mental link makes it easier to remember. Soon you won't even think about it.
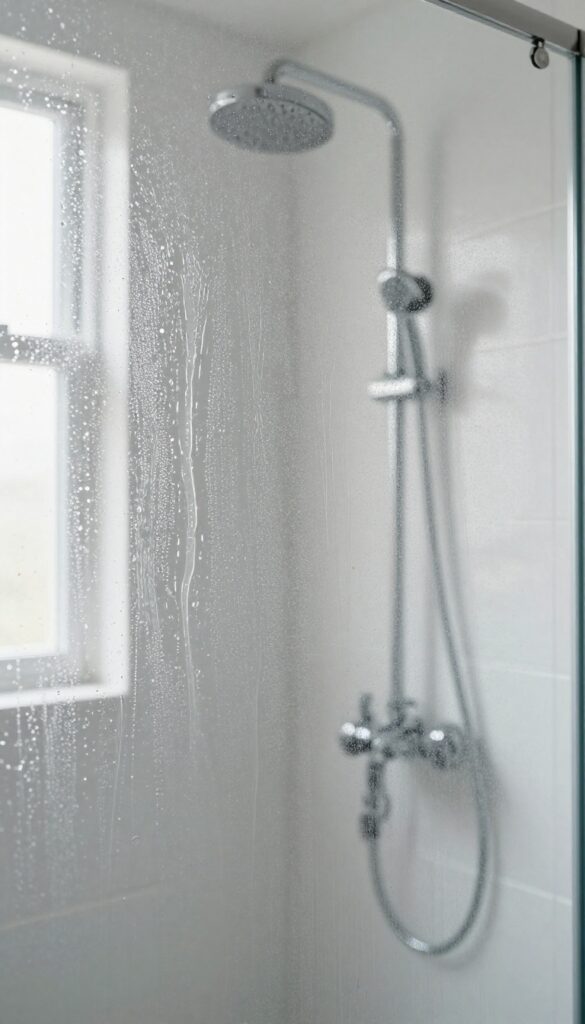
5. Weekly Shower Tile Spray
Shower tiles take a beating from soap scum, hard water, and daily moisture. A quick weekly spray keeps them looking fresh and cuts down on scrubbing time. This simple habit prevents stubborn buildup that turns into a weekend project.
Once a week, spray your shower tiles with a daily shower cleaner or a simple vinegar solution (equal parts white vinegar and water). Let it sit for 3–5 minutes to break down soap residue and minerals. Then rinse thoroughly with warm water.
No scrubbing needed.
Why It Works
Soap scum and hard water deposits start forming within days. A weekly spray disrupts that process before the gunk hardens. The acidity in vinegar dissolves minerals, while commercial sprays often contain surfactants that lift grime.
Either way, you're stopping buildup in its tracks.
Best Products To Use
For convenience, grab a daily shower spray from the store—look for ones labeled "no scrub" or "daily use. " If you prefer DIY, mix vinegar and water in a spray bottle. Add a few drops of tea tree oil for extra mildew-fighting power.
Avoid bleach-based cleaners on natural stone tiles.
Pro Tips For Best Results
Spray right after your last shower of the day while the tiles are still warm—the heat helps the solution work faster. Keep the spray bottle in the shower caddy so you don't forget. If you have glass doors, spray them too, then squeegee for a streak-free finish.
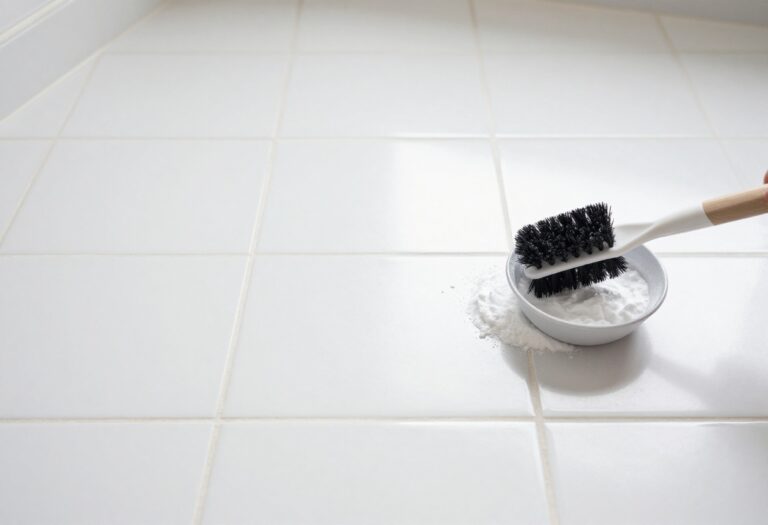
6. Grout Spot Cleaning with Baking Soda Paste
Grout lines are magnets for dirt and mildew, turning from bright white to dingy gray faster than you'd expect. A full deep scrub every week is overkill, but a quick spot treatment every two weeks keeps things looking fresh without much effort. Baking soda paste is your secret weapon—it's gentle, cheap, and already in your pantry.
Mix a few tablespoons of baking soda with just enough water to form a thick paste—think toothpaste consistency. Dab it onto the grout lines with your finger or a small spatula, let it sit for five minutes, then scrub with an old toothbrush. Rinse with water and wipe dry.
This two-minute task per section keeps grout from becoming a weekend project.
Why Every Two Weeks?
Grime builds up gradually, so a biweekly schedule catches it before it sets. If you wait a month, you'll need more elbow grease. Two weeks is the sweet spot for busy homes—short enough to prevent staining, long enough to not feel like a chore.
Tools That Make It Easier
A grout brush with a angled handle saves your wrist, but an old toothbrush works fine. Keep a dedicated one in a ziplock bag under the sink. For tight corners, a small stiff-bristled detail brush from a hardware store is a game changer.
When To Upgrade To Hydrogen Peroxide
If your grout has stubborn dark spots or mildew, swap water for hydrogen peroxide in the paste. It's a mild bleach alternative that won't damage tile. Test on a hidden area first, then apply the same way.
Let it fizz for 10 minutes before scrubbing.
7. Glass Shower Door Vinegar Soak
Hard water stains on glass shower doors can make your bathroom look dingy no matter how clean everything else is. Vinegar is a natural acid that dissolves mineral deposits without the harsh fumes of commercial cleaners. This soak method lets the vinegar do the heavy lifting so you barely have to scrub.
Spray the glass doors generously with undiluted white vinegar, making sure every spot is covered. Let it sit for 10 minutes—longer if you have stubborn buildup. Then scrub with a non-abrasive pad or sponge, working in circular motions.
Rinse thoroughly with warm water and squeegee dry to prevent new spots. For extra shine, follow with a microfiber cloth.
Why Vinegar Works Best
White vinegar has a pH of about 2. 5, which is acidic enough to break down calcium and lime deposits found in hard water. Unlike bleach or ammonia-based sprays, vinegar is non-toxic and safe for most glass surfaces.
It also cuts through soap scum without leaving a sticky residue.
Pro Tips For Stubborn Stains
If your doors have years of buildup, wrap the glass with plastic wrap after spraying to keep the vinegar from evaporating. Let it sit for 30 minutes instead of 10. For extra tough spots, make a paste of baking soda and vinegar, apply it to the stains, and let it foam before scrubbing.
Aftercare To Keep Doors Spotless
Once your doors are clean, get into the habit of squeegeeing after every shower. This simple step prevents water from drying and leaving new deposits. You can also apply a thin layer of car wax or a commercial glass protectant to repel water and stains.
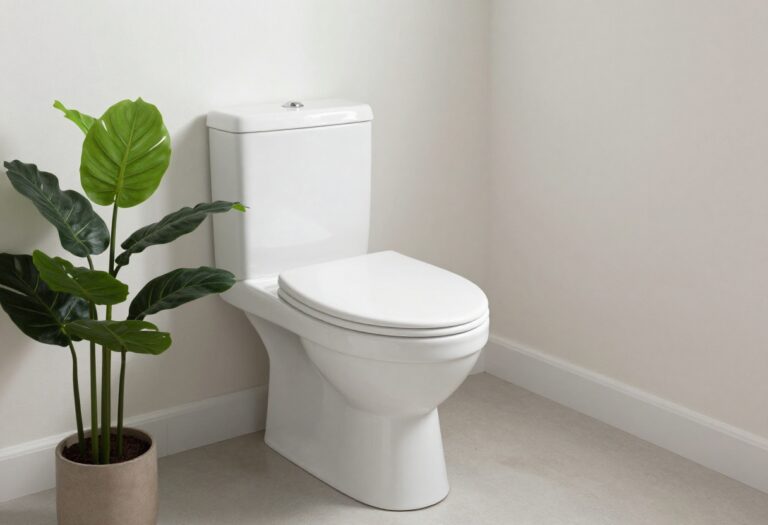
8. Toilet Exterior Wipe-Down
The toilet exterior gets touched multiple times a day, but it's often overlooked during quick cleans. A simple wipe-down of the lid, seat, and base can make a huge difference in how clean your bathroom feels. Doing this twice a week prevents buildup and keeps germs at bay without much effort.
Focus on the high-touch areas: the lid, seat, and base. Use a disinfecting wipe or a cloth with an all-purpose cleaner. Start from the top and work your way down to avoid dripping onto already cleaned surfaces.
Pay special attention to the hinges and the area where the seat meets the bowl.
Why Twice A Week Works
Daily use means daily germs. Twice a week is enough to stay ahead of grime without overdoing it. If you have kids or a shared bathroom, you might want to bump it up to three times.
But for most homes, two wipe-downs keep things fresh and sanitary.
Best Tools For The Job
Disinfecting wipes are convenient and disposable, so you don't spread germs. If you prefer reusable options, microfiber cloths with a spray cleaner work just as well. Just make sure to wash the cloths after each use to avoid cross-contamination.
Don't Forget The Base
The base of the toilet collects dust, hair, and splashes. Give it a quick wipe when you do the lid and seat. A small brush or an old toothbrush can help get into crevices around the bolts and floor.
It takes an extra 30 seconds but makes a big visual difference.
9. Faucet and Handle Polish
Faucets and handles get touched constantly, yet they're often the last thing we think about during a quick clean. Water spots, fingerprints, and toothpaste splatters make them look dull fast. A simple daily habit keeps them gleaming without extra effort.
Daily Wipe-down
Keep a dry microfiber cloth near the sink. After washing hands or brushing teeth, give the faucet and handles a quick wipe. This prevents water spots and mineral buildup.
It takes five seconds and makes a huge difference.
Weekly Deep Clean
Once a week, mix a few drops of mild dish soap with warm water. Dip a soft cloth, wring it out, and wipe down all metal surfaces. Rinse with a damp cloth and dry immediately with a fresh microfiber towel.
Avoid abrasive cleaners that can scratch the finish.
Tackle Hard Water Stains
If you see white chalky spots, use a 50/50 vinegar and water solution. Spray on, let sit for a minute, then wipe and dry. For stubborn buildup, a soft toothbrush can gently scrub crevices.
Rinse thoroughly to prevent vinegar residue.
10. Vanity Drawer Organizer Sweep
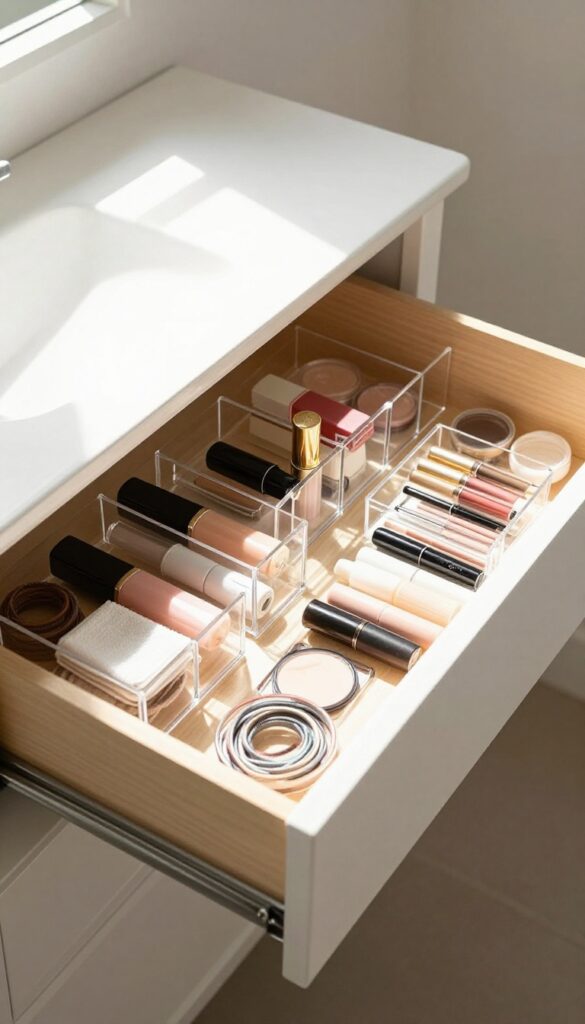
Vanity drawers are a black hole for old lipsticks, dried-out mascaras, and random bobby pins. A monthly sweep keeps them tidy and makes your morning routine smoother. This isn't about deep organizing—just a quick purge and wipe-down.
Set a recurring reminder on your phone for the first weekend of each month. Pull everything out, toss anything expired or unused, and give the drawer a quick wipe with a disinfectant wipe. Then return only what you actually use.
What To Toss
Check expiration dates on makeup and skincare. Lip products, mascara, and liquid eyeliners go bad fast. Also toss old razors, empty bottles, and any product that's changed color or smell.
Wipe And Refresh
Use a multipurpose cleaner or a disinfectant wipe to clean the drawer interior. Let it dry completely before putting items back. This prevents product residue from building up and keeps the drawer fresh.
Restock Smartly
As you return items, group them by category—hair ties in one corner, daily makeup in another. Use small organizers or even empty mint tins to keep things from sliding around. This saves time when you're rushing in the morning.
11. Medicine Cabinet Declutter
Medicine cabinets are easy to ignore until they won't close anymore. A quarterly clean-out keeps them organized and prevents expired products from piling up. It also frees up space for the things you actually use.
Check Expiration Dates
Pull everything out and check dates on medications, skincare, and makeup. Toss anything past its prime. Old prescriptions should be disposed of properly—many pharmacies have take-back programs.
Wipe Down Shelves
With the cabinet empty, give the shelves a quick wipe with a damp cloth. Use a mild cleaner if there are spills or sticky spots. Let them dry completely before restocking.
Group Like Items Together
Keep first-aid supplies in one spot, daily toiletries in another, and backup products in the back. Use small bins or trays to prevent items from sliding around. This makes it easier to find what you need.
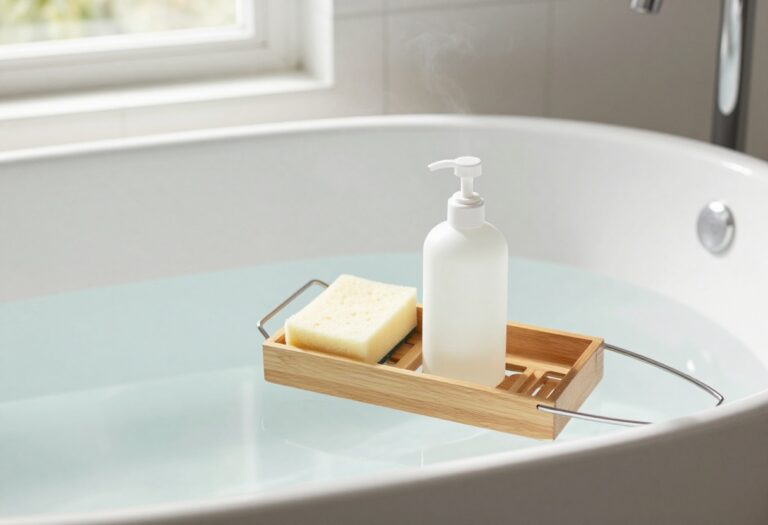
12. Shower Caddy Deep Clean
Shower caddies hold all your bottles and loofahs, but they also trap soap scum, hard water deposits, and even mold. Over time, that buildup can transfer back onto your skin or make your products look grimy. A monthly deep clean keeps the caddy fresh and your shower routine more hygienic.
Start by removing everything from the caddy—shampoos, conditioners, body washes, razors, and anything else. Give each bottle a quick wipe with a damp cloth to remove any residue. Then, fill a sink or bucket with hot water and a few squirts of dish soap.
Submerge the caddy completely and let it soak for at least 15 minutes. This loosens stubborn soap scum and mineral deposits. After soaking, scrub the caddy with an old toothbrush or a soft sponge, paying extra attention to corners and crevices.
Rinse thoroughly with clean water and dry with a towel. Let it air out completely before putting your products back. Do this once a month to prevent rust and keep your caddy looking like new.
Why Monthly Matters
Soap scum and hard water minerals build up fast in a humid shower. If you skip deep cleaning, the caddy can develop a slimy film or even rust spots, especially if it's made of metal. Monthly maintenance prevents that grime from becoming stubborn stains that require heavy scrubbing or replacement.
What About Plastic Caddies?
Plastic caddies are lighter and won't rust, but they can still get cloudy from mineral deposits. Soaking them in a mixture of hot water and white vinegar works wonders. Use a 1: 1 ratio and let it sit for 10 minutes before scrubbing.
Rinse well—vinegar smell fades quickly.
Quick Weekly Touch-up
Between deep cleans, give your caddy a quick rinse after each shower. Just spray it with hot water from the showerhead to wash away loose soap residue. This simple habit reduces buildup and makes your monthly deep clean much easier.
13. Bath Mat Machine Wash
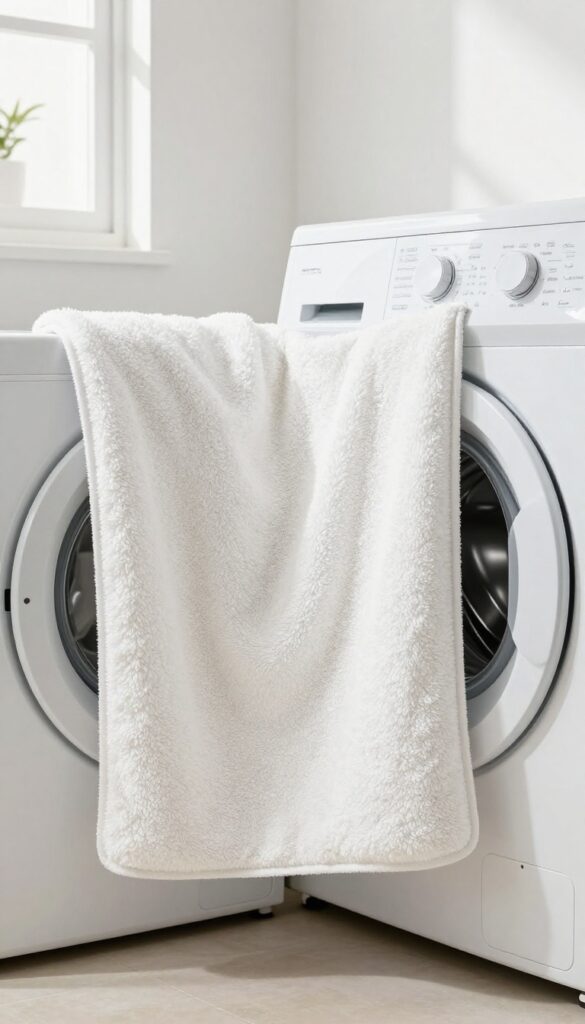
Bath mats sit in a damp environment all day, making them a perfect breeding ground for mildew and bacteria. A quick machine wash once a week keeps them fresh and extends their life. It's one of the easiest tasks on your checklist because the washing machine does all the work.
Toss bath mats in the washing machine on a hot cycle with detergent and a little bleach or vinegar. Wash weekly to prevent mildew and odors. This simple habit keeps your bathroom smelling clean without extra scrubbing.
Why Weekly Washing Matters
Bath mats trap moisture, soap residue, and dead skin cells. If left unwashed, they develop a musty smell and can even grow mold. A weekly hot wash kills bacteria and removes buildup, keeping your mat fluffy and fresh.
Choosing The Right Cycle And Detergent
Use a heavy-duty or sanitize cycle with hot water. Add your regular detergent plus a half cup of white vinegar or a splash of bleach (check the care label first). This combination cuts through grime and disinfects without damaging the fibers.
Drying Tips For Best Results
Air drying is gentle, but a low-heat tumble dry works well for most mats. Shake out the mat before drying to restore its loft. Avoid high heat, which can melt rubber backing.
If the mat has a non-slip backing, skip the dryer and hang it to prevent peeling.
14. Towel Refresh and Rotation
Towels take a beating in busy bathrooms. They get damp, smell funky, and lose their fluff if you don't stay on top of them. A simple rotation system keeps them fresh and extends their life.
Swap out bath towels every three days. Hand towels and washcloths should be changed daily or every other day. Wash towels in hot water with a half cup of white vinegar added to the rinse cycle—this removes residue and odors without harsh chemicals.
Dry them on high heat or line dry for extra fluffiness. Fold and store neatly so everyone can grab a clean one easily.
Why Every Three Days?
Towels stay damp long after you use them, which invites bacteria and mildew. Three days is the sweet spot—long enough to get good use, short enough to prevent musty smells. If your bathroom is humid, switch to every two days.
Washing With Vinegar
Skip the fabric softener—it coats fibers and reduces absorbency. Instead, add vinegar to the rinse cycle. It neutralizes odors, brightens colors, and softens towels naturally.
For extra freshness, wash with baking soda once a month.
Storage That Works
Store towels in a dry, open area—not a closed cabinet that traps moisture. Roll them instead of folding to save space and let air circulate. Keep a separate stack for each family member to avoid mix-ups.
15. Shower Curtain and Liner Care
Shower curtains and liners take a beating. Between constant moisture, soap scum, and mildew, they can look grimy fast. But you don't need to replace them every month.
A simple washing routine keeps them fresh and extends their life.
Machine wash fabric shower curtains and liners monthly. Add a towel to the load to scrub them clean. Rehang immediately to prevent wrinkles.
Wash Cycle Tips
Use warm water and a mild detergent. Add a cup of white vinegar to the rinse cycle to kill mildew and remove soap residue. Skip the fabric softener—it can leave a film that attracts grime.
Drying Done Right
Shake out the curtain and liner before hanging. Smooth out wrinkles by hand. Let them air dry fully on the rod.
If you use a dryer, use low heat and remove promptly to avoid creases.
When To Replace
Even with regular washing, liners wear out. Replace them every six months or sooner if you see persistent mildew stains or tears. Fabric curtains can last a year or more with proper care.
16. Exhaust Fan Dusting
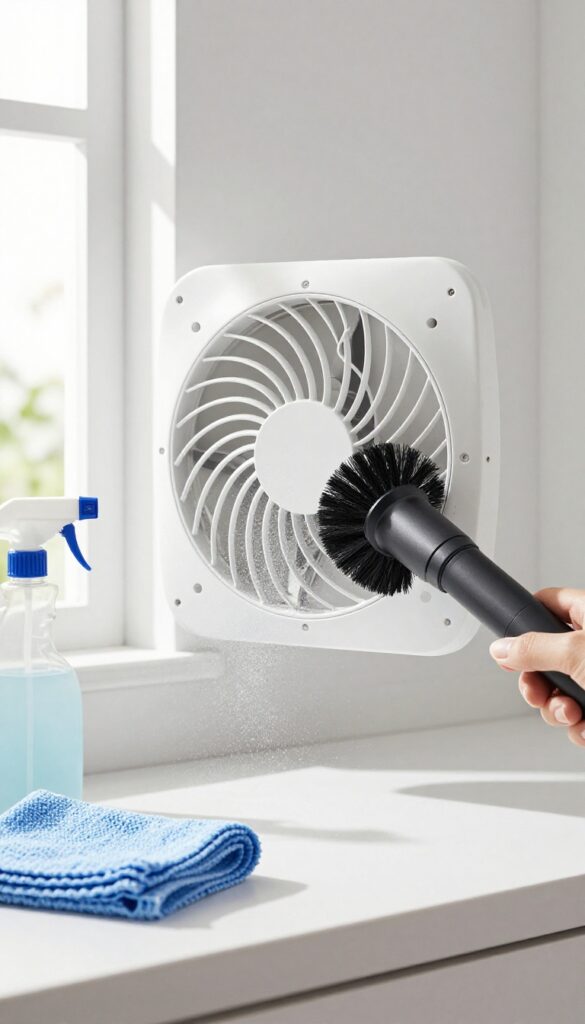
Your bathroom exhaust fan works hard to remove moisture and odors, but it also collects dust like crazy. When the fan grille gets clogged, it struggles to pull air, leading to more humidity and potential mold issues. A quick monthly dusting keeps it running efficiently and quietly.
Why It Matters
A dirty fan can't do its job. Dust buildup reduces airflow, makes the motor work harder, and can even cause it to fail early. Plus, all that circulating dust ends up on your mirror, counter, and toothbrush holder.
How To Do It
Start by turning off the fan and removing the cover—most just pop off or have a couple of screws. Vacuum the cover and the inside opening with a brush attachment. Then wipe the cover with a damp cloth and mild cleaner.
Let it dry completely before snapping it back on.
When To Go Deeper
If you notice the fan is still noisy or weak after cleaning, it might need a deeper clean inside. Use a can of compressed air to blow dust off the motor blades, or call a professional if you're not comfortable disassembling it.
17. Light Fixture and Vent Cleaning
Light fixtures and vents often get overlooked during routine bathroom cleaning, but they collect dust and grime that can dull the room's brightness and affect air quality. A quick dusting every two weeks keeps them functioning well and looking clean. This simple habit takes just a few minutes and makes a noticeable difference in how fresh the bathroom feels.
Dust buildup on light fixtures reduces illumination and can make the bathroom feel dimmer than it is. Vents, especially exhaust fans, accumulate dust that hinders airflow and can even become a fire hazard. Regular cleaning prevents these issues and keeps the air moving properly.
Tools Of The Trade
Grab a microfiber duster or a vacuum with a brush attachment. Microfiber traps dust without scattering it, while a vacuum gently removes debris from vents. For stubborn grime on fixtures, a damp cloth with mild soap works well—just make sure everything is dry before turning lights back on.
How To Clean Light Fixtures
Turn off the lights and let bulbs cool completely. Use a dry microfiber duster to wipe down the fixture's surface and bulbs. For glass shades, remove them if possible and wash with warm soapy water, then dry thoroughly before reattaching.
Avoid spraying cleaner directly onto fixtures to prevent moisture damage.
Vent Cleaning Made Simple
Remove the vent cover if it snaps off easily. Vacuum the cover and the opening behind it to remove dust and lint. For exhaust fans, use a soft brush attachment to clean the fan blades gently.
Reattach the cover and run the fan for a few minutes to clear any remaining dust.
18. Baseboard and Trim Wipe
Baseboards and door trim are the unsung heroes of a clean bathroom. They frame the space, but they also catch every splash, dust bunny, and stray hair. A monthly wipe-down keeps them looking fresh and prevents grime from building up into a scrubbing nightmare.
Grab a damp microfiber cloth and run it along the top edge of the baseboards, then down the face. For door trim, focus on the top and the areas around the handle where hands leave marks. A little dish soap in the water helps cut through grease.
You can also use a disposable dusting wand for a quick once-over between deep cleans.
Why Baseboards Matter
Baseboards in bathrooms take a beating from moisture, toothpaste splatters, and foot traffic. Over time, that layer of grime can make the whole room feel dingy. A monthly wipe prevents buildup and keeps your bathroom looking well-maintained.
The Quickest Way To Wipe
Use a long-handled duster or a microfiber cloth attached to a broom handle to reach the top of baseboards without bending. For stubborn spots, a Magic Eraser works wonders. Just be gentle on painted surfaces to avoid removing the finish.
Don't Forget The Door Trim
Door trim collects hand oils, dust, and even toothpaste splatter. Wipe it down with the same damp cloth you use for baseboards. Pay extra attention to the area around the doorknob and the top edge where dust settles.
19. Floor Spot Cleaning Between Mopping
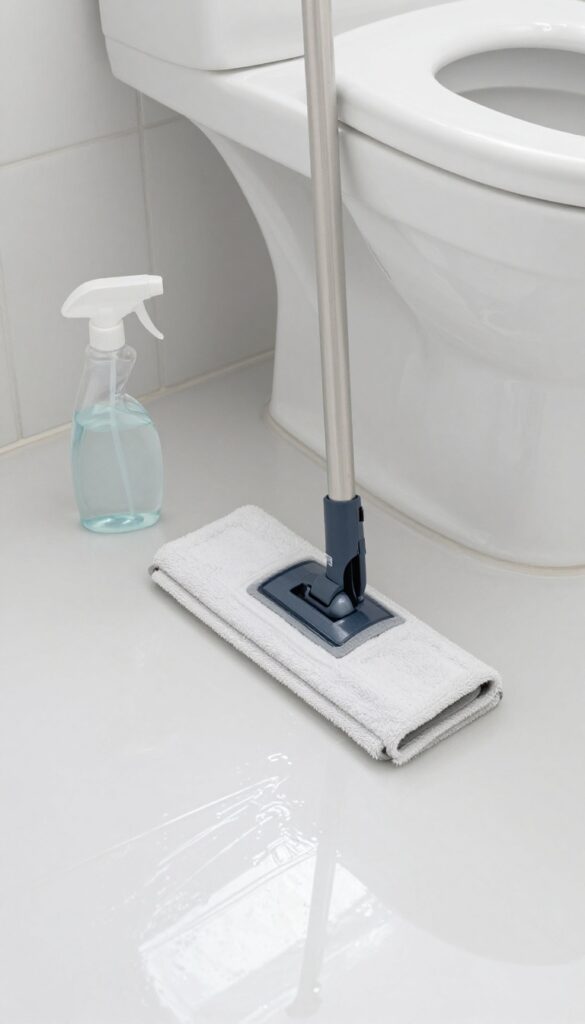
Mopping the whole bathroom floor can feel like a big production, especially when you're short on time. But you don't need to wait for a full mop session to keep things looking clean. A quick spot clean around the toilet and sink a couple times a week catches drips, splashes, and spills before they dry into stains.
Grab a Swiffer, a damp microfiber mop, or even a rag on a stick and focus on the high-traffic zones. The area right in front of the toilet and under the sink tend to collect the most mess. A 30-second pass twice a week makes a big difference and keeps your floors fresh between deep cleans.
What You Need
Keep a Swiffer or a spray mop handy in a nearby closet. You can also use a microfiber cloth attached to a flat mop head. A small spray bottle with water and a drop of dish soap works perfectly for quick touch-ups.
Where To Focus
Target the floor around the toilet base, the area in front of the sink, and any spots where kids or pets tend to drip. These spots get the most moisture and are prone to soap scum or toothpaste residue.
How Often To Spot Clean
Twice a week is plenty for most busy homes. If you have toddlers or multiple people sharing one bathroom, you might bump it up to three times. It takes less than a minute and saves you from scrubbing stubborn stains later.
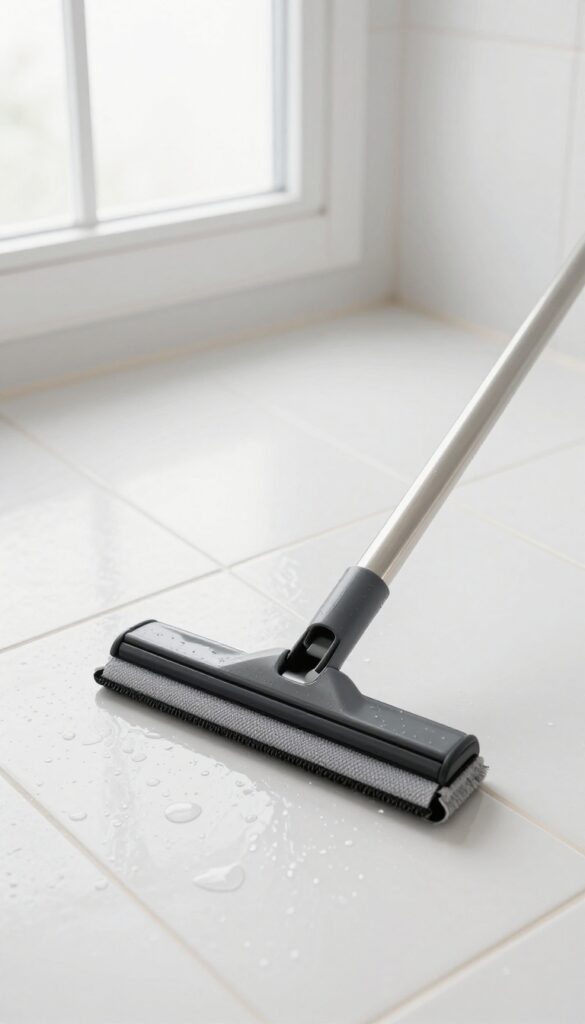
20. Weekly Full Floor Mop
A quick daily sweep is great, but nothing beats a proper weekly mop for the whole bathroom floor. Water, soap scum, and dust settle into corners and under the toilet where a broom can't reach. A weekly mop with a pH-neutral cleaner lifts that hidden grime without damaging tile or grout.
Mop the entire bathroom floor weekly with a pH-neutral cleaner. Pay extra attention to corners and under the toilet where dirt hides.
Choose The Right Cleaner
Stick with a pH-neutral floor cleaner—it's gentle on tile, grout, and any sealants. Avoid bleach or ammonia-based products that can dull finishes or damage grout over time. A few capfuls in warm water is all you need.
Don't Skip The Corners
Corners and edges collect dust bunnies and hair. Use the mop head to swipe into each corner, or keep a microfiber cloth handy for tight spots. Under the toilet is another hotspot—slide the mop head around the base to catch hidden dirt.
Let It Air Dry
After mopping, open the bathroom door or turn on the fan to speed up drying. Standing water can lead to mildew, so a quick dry keeps your floor fresh longer. If you have a squeegee, use it on tile floors to remove excess water.
21. Toilet Tank Interior Cleaning
The toilet tank is one of those spots that rarely gets attention, but it can harbor mineral deposits and bacteria that affect both performance and cleanliness. A simple monthly vinegar flush keeps the tank fresh and reduces the need for harsh chemical cleaners. This quick maintenance trick also helps prevent stains in the bowl, so you spend less time scrubbing.
To clean the tank, start by pouring one cup of white vinegar directly into the overflow tube—the open pipe in the center of the tank. Let it sit for an hour so the vinegar can break down calcium and lime buildup. After the hour, flush the toilet to rinse everything through.
For extra freshness, add a few drops of essential oil to the vinegar before pouring. This method is safe for all toilet types and won't damage rubber seals or gaskets.
Why The Tank Matters
Mineral deposits from hard water can clog the tiny holes under the toilet rim, causing weak flushes and uneven cleaning. A clean tank means better water flow and a bowl that stays cleaner longer. Plus, it reduces odors and keeps the toilet looking newer.
Step-by-step Quick Clean
- Remove the tank lid and set it aside carefully. 2.
Pour one cup of white vinegar into the overflow tube. 3. Wait one hour—no need to scrub.
- Flush the toilet to clear the vinegar. 5.
Wipe down the tank lid and exterior with a damp cloth. That's it.
When To Skip This Method
If you have a newer toilet with electronic components or a dual-flush system, check the manual first. Some manufacturers advise against vinegar because it can damage certain seals. In that case, use a toilet tank tablet specifically designed for your model.
22. Drain Deodorizing with Baking Soda and Vinegar
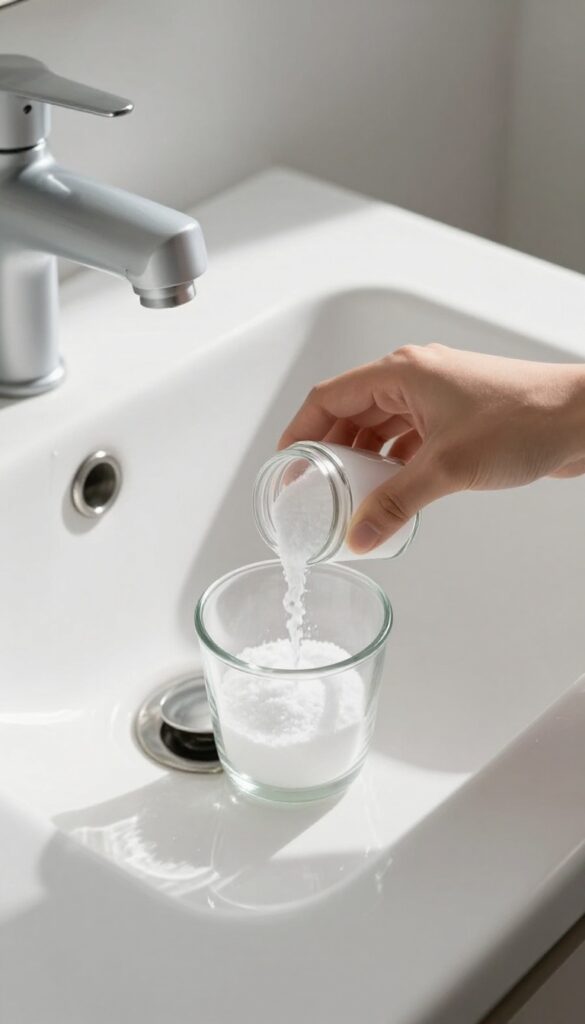
Drains can get funky fast, especially in a busy bathroom where hair, soap scum, and toothpaste build up. That lingering smell isn't just unpleasant—it's a sign of gunk lurking below. Luckily, you don't need harsh chemicals to freshen things up.
A simple baking soda and vinegar treatment works wonders and costs pennies.
Pour 1/2 cup baking soda down the drain, followed by 1/2 cup vinegar. Let fizz for 15 minutes, then flush with hot water. Do this monthly to prevent odors and slow drains.
Why This Combo Works
Baking soda is a mild abrasive that scrubs away residue, while vinegar's acidity breaks down grease and mineral deposits. The fizzing action physically dislodges debris stuck to pipe walls. Together, they neutralize odors without toxic fumes.
Monthly Maintenance Schedule
Make drain deodorizing part of your monthly bathroom routine. Pick a day, like the first Sunday, and do all drains at once. Consistency prevents buildup, so you'll rarely deal with slow drains or bad smells.
Extra Tips For Stubborn Drains
If your drain is really slow, start by removing visible hair with a zip tool or wire hanger. Then do the baking soda and vinegar treatment. For extra freshness, follow up with a few drops of lemon essential oil on a cotton ball tossed down the drain.
23. Caulk Inspection and Touch-Up
Caulk might not be the first thing you think about when cleaning, but it plays a huge role in keeping your bathroom dry and mold-free. Over time, it can crack, shrink, or develop mildew, especially in high-moisture areas like around the tub and sink. A quick quarterly check can save you from costly water damage down the road.
You don't have to be a DIY expert to handle small caulk repairs. With a few basic tools and a little patience, you can remove old, grimy caulk and apply a fresh bead that looks professional. It's one of those tasks that takes less than an hour but makes the whole bathroom feel cleaner and more polished.
Make it part of your seasonal cleaning rotation. Set a reminder on your phone for every three months, and you'll never let caulk issues slide. Your bathroom—and your wallet—will thank you.
Caulk inspection is simple: run your finger along seams and look for dark spots, gaps, or peeling. If you see any, it's time to act. Left unchecked, moisture seeps behind tiles and fixtures, leading to mold, rot, and expensive repairs.
A proactive approach keeps your bathroom looking fresh and structurally sound. When you find problem areas, don't just patch over them. Remove the old caulk completely with a caulk remover tool or a utility knife, clean the surface with rubbing alcohol, let it dry, then apply new 100% silicone caulk.
Smooth it with a wet finger or a caulk finishing tool for a neat finish. Let it cure for 24 hours before exposing it to water. For busy homes, this task is best scheduled on a weekend when the bathroom won't be used much.
Once you get the hang of it, each touch-up takes only 15–20 minutes. Keep a tube of caulk and a caulk gun in your cleaning caddy so you're always ready.
What To Look For
Inspect all caulked joints: where the tub meets the tile, around the shower base, along the sink backsplash, and around the toilet base. Look for discoloration (black, green, or yellow spots), cracks, peeling edges, or areas where the caulk has pulled away from the surface. If you can slide a fingernail under the edge, it's compromised.
How To Fix It Right
Remove old caulk completely using a caulk removal tool or a flathead screwdriver. Scrape away residue, then clean the area with rubbing alcohol or a 50/50 vinegar-water solution. Let it dry thoroughly.
Apply a thin, even bead of 100% silicone caulk, then smooth it with a wet finger or a caulk finishing tool. Wipe away excess with a damp cloth. Allow 24 hours to cure before using the shower or sink.
When To Call A Pro
If you notice widespread mold behind the caulk or if the tiles themselves feel loose, you may have a bigger moisture problem. In that case, it's wise to call a contractor to check for water damage behind the walls. Also, if the caulk around the toilet base is repeatedly failing, the toilet wax ring might be leaking—another job best left to a plumber.
24. Trash Can and Diaper Pail Wipe
Trash cans and diaper pails are magnets for bacteria and odors. A quick weekly wipe-down keeps them from becoming a source of bathroom smells.
Weekly Wipe-down
Empty the trash can every week, then spray the inside and outside with a disinfecting cleaner. Wipe with a cloth or paper towel, and let it air dry before relining. This prevents buildup of grime and keeps the area fresh.
Diaper Pail Odor Control
For diaper pails, odors can linger even after emptying. Sprinkle baking soda inside, scrub with a damp sponge, and rinse thoroughly. The baking soda neutralizes smells without harsh chemicals.
Do this monthly or whenever odors return.
Pro Tip: Liners Matter
Use heavy-duty trash bags or pail liners to prevent leaks. Double-bagging for diaper pails adds extra protection. Replace liners immediately after emptying to avoid residual smells.
25. Seasonal Deep Clean Rotation
Every three months, your bathroom deserves a reset. A seasonal deep clean targets the buildup that daily and weekly tasks miss, from mineral deposits on fixtures to grime in hard-to-reach corners. This isn't about scrubbing everything—it's about refreshing the space so your regular routine stays effective.
A seasonal deep clean rotation keeps your bathroom from ever reaching a state of neglect. By dedicating a few hours each quarter to tasks like washing windows, scrubbing grout, descaling showerheads, and organizing cabinets, you prevent grime from becoming stubborn. This reset makes daily maintenance easier and extends the life of your fixtures.
Plus, it’s a great opportunity to declutter expired products and restock essentials.
What To Tackle Each Season
Start with windows and mirrors—wash them inside and out for streak-free shine. Move to grout lines: scrub with a stiff brush and a baking soda paste, then rinse thoroughly. Descaling showerheads is simple: soak them in vinegar overnight.
Finally, empty and wipe down cabinets, tossing anything expired and reorganizing what’s left.
Making It A Habit
Set a recurring reminder on your phone for the first weekend of each season. Break the tasks into two sessions if needed: one for cleaning and one for organizing. Involve family members by assigning simple jobs like wiping shelves or sorting products.
The key is consistency—once you establish the rhythm, it becomes a natural part of your home care.
FAQ
How often should I clean my bathroom if I'm busy?
Aim for a quick daily wipe (sink, mirror, toilet swish) and a weekly deeper clean. Use the checklist to spread tasks across the week so you never spend more than 10 minutes per day.
What's the best all-purpose cleaner for bathrooms?
A mix of equal parts white vinegar and water works for most surfaces. For tough soap scum, use a baking soda paste. Avoid vinegar on natural stone like marble.
How do I prevent mold in the shower?
Squeegee the walls and floor after each use, keep the bathroom ventilated, and wash the shower curtain monthly. Use a mold-killing spray weekly on grout.
Can I use bleach on colored grout?
Bleach can discolor colored grout. Instead, use a baking soda and hydrogen peroxide paste. Test in an inconspicuous area first.
How do I clean a toilet tank without damaging it?
Pour white vinegar into the overflow tube (not the tank directly) and let it sit. Avoid harsh chemical tablets that can corrode internal parts. Flush after an hour.
Conclusion
A clean bathroom doesn't have to eat up your whole weekend. Pick two or three checklist items that target your biggest pain points—like the toilet bowl or shower glass—and make them a weekly habit. Small, consistent efforts beat a monthly marathon every time.
The key is finding a rhythm that fits your schedule.
Maybe you tackle the sink and mirror on Tuesday, then hit the floor and toilet on Saturday. Over time, these micro-routines keep your bathroom fresh without the overwhelm. Your home will feel cleaner, and you'll reclaim those lost hours.