13 Small Bathroom Walk In Shower Ideas That Save Space
A tiny bathroom doesn't mean you have to settle for a cramped shower. Walk-in showers can actually save space by eliminating bulky enclosures and making clever use of corners. The key is choosing the right layout and fixtures to maximize every inch.
Curbless designs and sliding doors remove the need for swing clearance, while pocket doors and wet rooms take it a step further. Even narrow spaces can fit a shower tray that tucks neatly against a wall. These solutions turn tight spots into functional, open-feeling showers.
From glass block walls to ceiling-mounted showerheads, each idea targets a specific space-saving challenge. You don't need a huge renovation—just smart choices that make your small bathroom work harder.
1. Corner Walk-In Shower: Use Dead Space
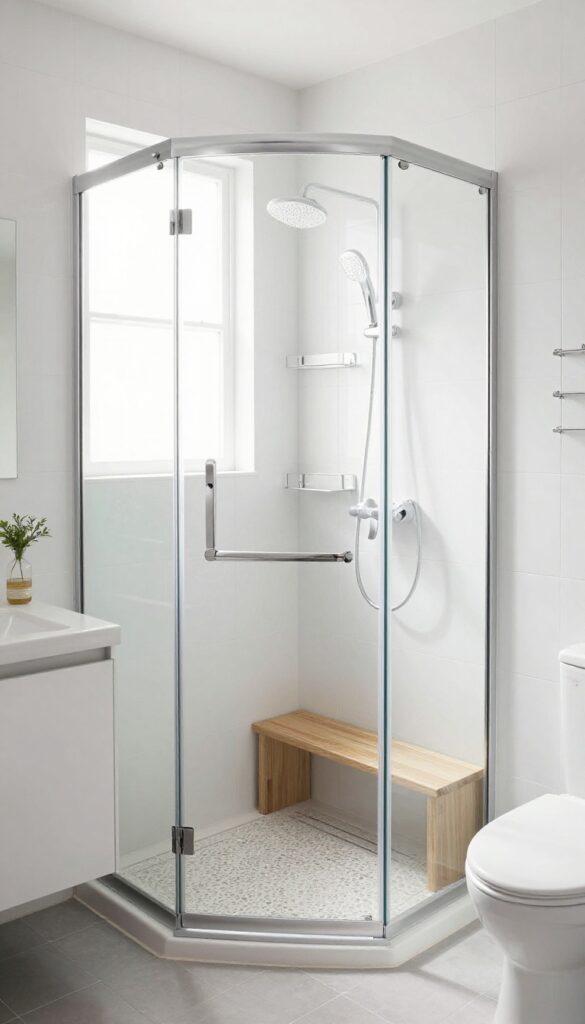
That awkward corner where two walls meet? It's prime real estate for a walk-in shower. A corner shower tucks neatly into an unused nook, freeing up the rest of the bathroom for other fixtures.
It's a classic space-saver that works in almost any layout, especially when you choose a curved or neo-angle enclosure that doesn't jut out.
A corner shower makes use of space that often goes wasted. By placing the shower in a corner, you open up the rest of the bathroom for a vanity, toilet, or storage. This layout is especially effective in square or nearly square bathrooms where a linear shower would eat up too much wall space.
Neo-angle Vs. Curved Enclosures
Neo-angle doors have three panels that create a compact footprint, while curved doors offer a softer look and a bit more elbow room inside. Both save space compared to a standard rectangular shower. Choose neo-angle for a modern, angular feel and curved for a more traditional or spa-like vibe.
Sliding Or Bi-fold Doors
In a small bathroom, every inch counts. Sliding or bi-fold doors eliminate the swing radius needed for hinged doors. They glide along tracks, so you can place the shower close to a toilet or vanity without worrying about clearance.
Look for frameless glass to keep the space feeling open.
Maximizing Interior Space
Even a corner shower can feel cramped if you don't plan the interior. Use a corner caddy or built-in niche for toiletries instead of a bulky rack. A handheld showerhead with a slide bar adds flexibility.
Consider a corner bench or a foldable seat if you want seating without sacrificing floor space.
2. Wet Room Concept: No Enclosure Needed
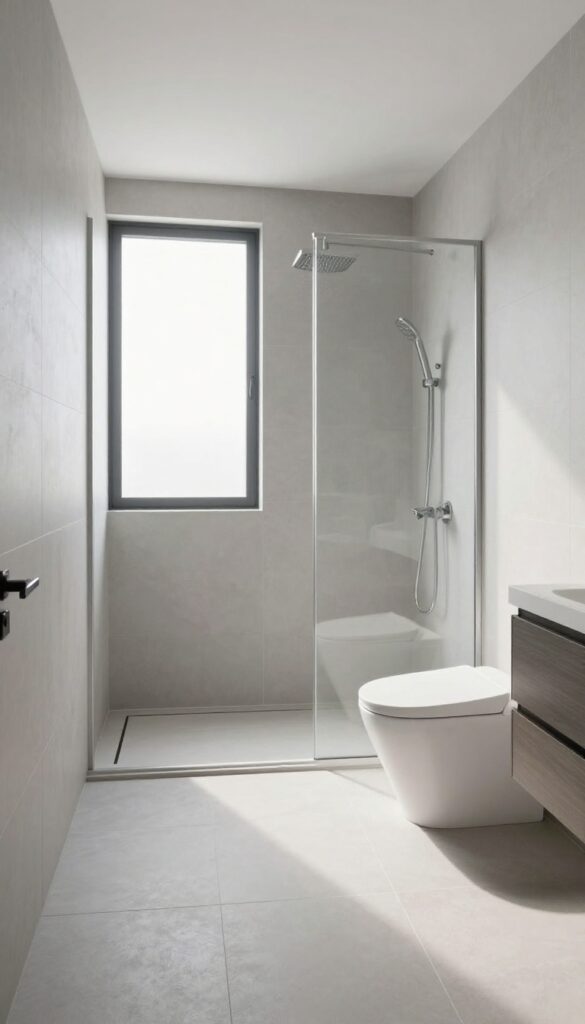
A wet room turns your entire bathroom into a waterproof zone, so you can ditch the shower door or curtain entirely. This open design makes a small space feel much larger and is incredibly easy to clean. No more scrubbing tracks or wiping down glass.
By sloping the floor toward a central drain, water flows away naturally without any barriers. This seamless look also eliminates visual clutter, making the bathroom appear more spacious. Plus, you can walk right in without stepping over a threshold—great for accessibility.
Waterproofing Essentials
Proper waterproofing is critical for a wet room. Use a tanking membrane on walls and floors, and install a linear drain for efficient water flow. Tiles with low water absorption, like porcelain, work best.
Layout Considerations
Keep the shower area away from the door to prevent splashes. A slight slope (1-2%) toward the drain is enough. Consider a ceiling-mounted showerhead to minimize wall spray.
Furniture And Fixtures
Use wall-mounted toilets and vanities to avoid water damage. Open shelving with waterproof materials keeps essentials handy. Heated floors add comfort and help dry the floor quickly.
3. Sliding Glass Doors: Zero Swing Clearance
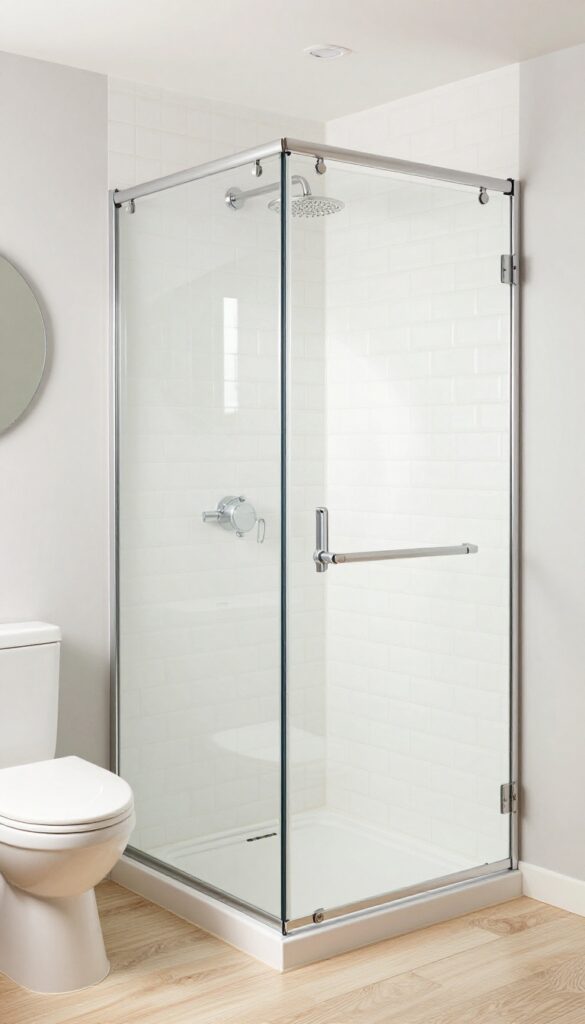
Standard hinged doors need a clearance zone to swing open, which can eat up valuable floor space in a small bathroom. Sliding glass doors glide along a track, requiring no swing area at all. They keep the shower accessible while letting natural light pass through, making the whole room feel larger and brighter.
Sliding doors are a practical upgrade for tight bathrooms because they eliminate the safety hazard of a door swinging into a toilet or vanity. They also simplify cleaning since there are fewer nooks for grime. Choose a frameless design for a sleek, modern look that visually opens up the space.
Track Options: Top-mount Vs. Bottom-mount
Top-mounted tracks keep the floor clear and are easier to clean, but they require a sturdy header for support. Bottom-mounted tracks are simpler to install but can collect soap scum and debris. For a small bathroom, a top-mounted track is usually the better choice to maintain a clean, open floor.
Glass Choices: Clear, Frosted, Or Textured
Clear glass maximizes light flow and makes the shower area feel larger, but it shows water spots easily. Frosted or textured glass offers privacy without blocking light, ideal if the shower is near the entrance. Consider a low-iron glass for a truer, less green tint that enhances the airy feel.
Installation Tips For Tight Spaces
Measure the opening carefully to ensure the door panels overlap properly and seal against water leaks. Use a continuous bottom guide to prevent the door from rattling. If the shower is extra narrow, opt for a single sliding panel instead of two to maximize the entry width.
4. Curbless Shower: Seamless Floor Transition
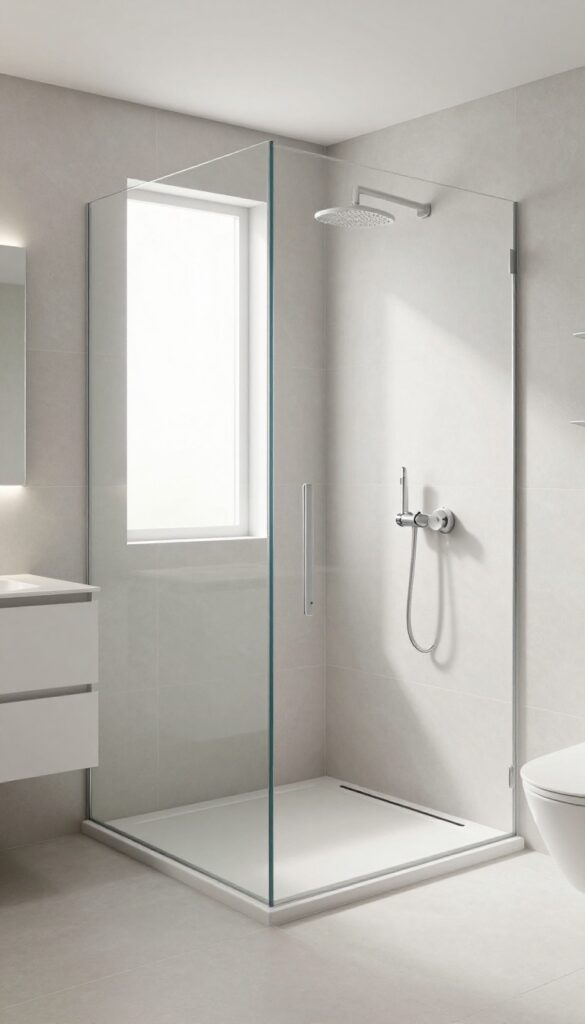
A curbless shower is one of the smartest space-saving moves you can make in a small bathroom. By removing the traditional step-up, the shower floor becomes flush with the rest of the room, creating a seamless transition that visually expands the space. This design also eliminates the need for a bulky shower pan or threshold, freeing up precious square footage.
The beauty of a curbless shower lies in its simplicity. Without a curb, the shower feels like a natural extension of the bathroom, making the entire room appear larger. It's a minimalist approach that works especially well in tight spaces where every inch counts.
Plus, it's a game-changer for accessibility—no tripping hazards or barriers to navigate.
Linear Drain Placement
A linear drain is key to making a curbless shower functional. Placed along the wall or at the shower entrance, it allows the floor to slope gently without needing a raised curb. This keeps the transition smooth and the water flowing away efficiently.
Choose a long, slim drain that blends with the tile for a clean look.
Waterproofing The Whole Floor
Since there's no curb to contain water, the entire bathroom floor needs proper waterproofing. A liquid or sheet membrane under the tile ensures no moisture seeps through. This might sound like extra work, but it's essential for a curbless design to prevent leaks and damage.
The result is a worry-free, open shower space.
Tile Continuity For Visual Flow
Using the same tile on the shower floor and the rest of the bathroom enhances the seamless effect. Large-format tiles with minimal grout lines make the transition even smoother. This trick tricks the eye into seeing one continuous surface, making the small bathroom feel more spacious and cohesive.
5. Narrow Shower Tray: Fit a Slim Space
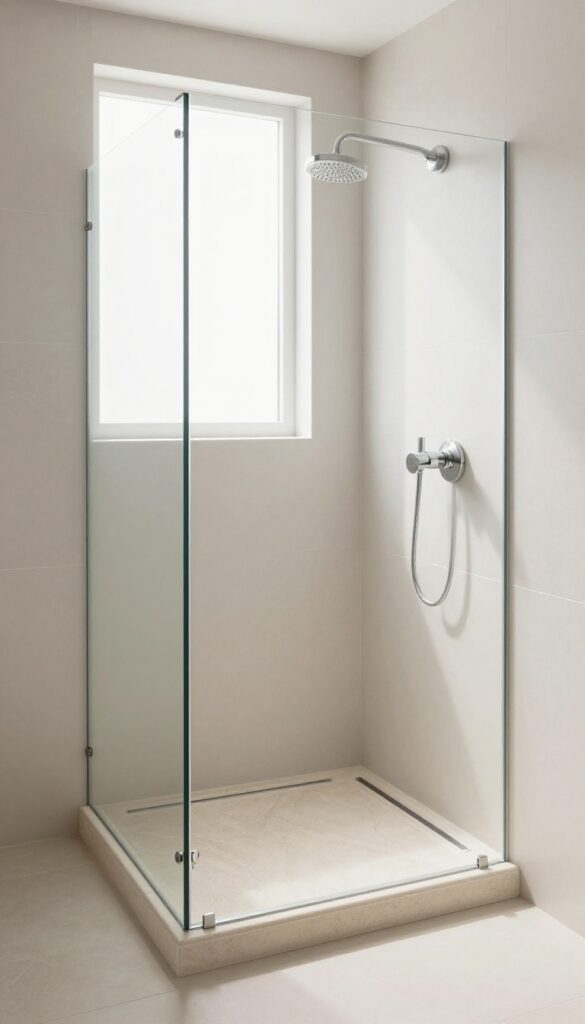
Not every bathroom has room for a standard 36-inch shower pan. A custom narrow shower tray can slide into a slim alcove or run along a wall, turning what feels like wasted space into a functional shower. These trays are typically 24 to 30 inches wide, just enough to shower comfortably without hogging floor area.
Paired with a linear drain, the look stays clean and modern.
A narrow shower tray is a simple way to carve out a shower in a tight spot. You can have one made to fit almost any width, so even a 22-inch gap becomes usable. The key is choosing a low-profile tray that sits flush or nearly flush with the floor, avoiding a tripping hazard and making the space feel larger.
Linear drains run along one edge, which lets you tile right up to the tray for a seamless finish.
Measure First
Before ordering, measure the exact space you have. Standard narrow trays start around 24 inches wide, but custom options can go narrower. Account for wall thickness and any plumbing pipes that might protrude.
A template from the manufacturer helps avoid costly mistakes.
Choose The Right Material
Acrylic and fiberglass trays are lightweight and budget-friendly, while stone resin or solid surface options feel more premium and durable. For a small bathroom, a lighter color can make the tray blend in and keep the room feeling open. Make sure the material has a non-slip surface for safety.
Pair With A Linear Drain
Linear drains are a natural match for narrow trays. They sit along the long edge, so water flows straight into the drain without needing a sloped floor in multiple directions. This also means you can use larger tiles on the shower floor, which reduces grout lines and looks cleaner.
6. Pocket Door Shower: Hide the Entry
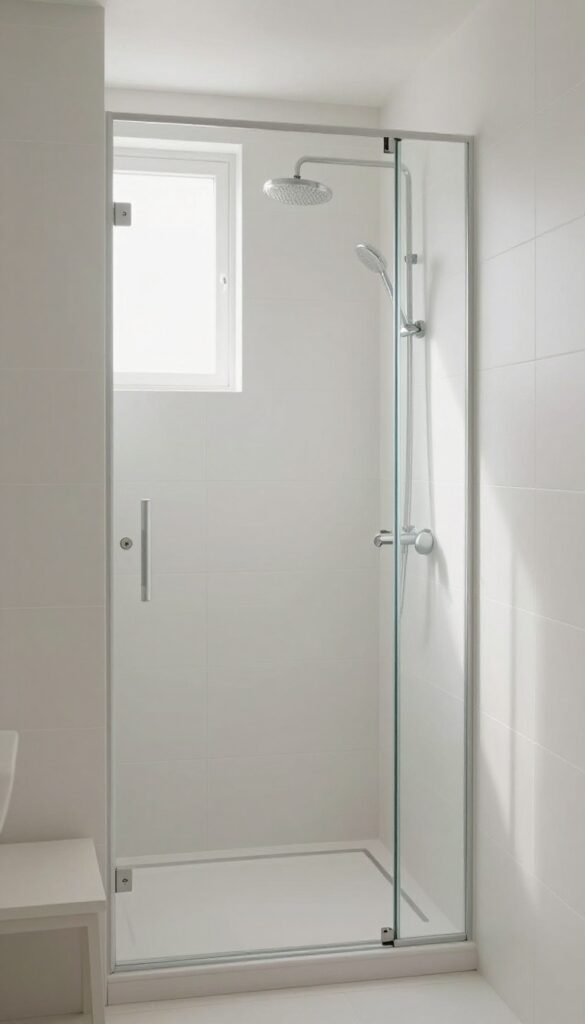
A pocket door slides into the wall, so it doesn't take up any floor space. This is ideal for ultra-compact bathrooms where every square inch counts. Instead of a swinging door that needs clearance, the entry simply disappears when not in use.
Pocket doors are a brilliant solution for tiny bathrooms. They glide into a cavity within the wall, leaving the entire floor area open. This allows you to place the shower right against a wall or in a tight corner without worrying about door swing.
The mechanism is smooth and space-efficient, making the bathroom feel larger and more streamlined.
Installation Considerations
Installing a pocket door requires some wall modification. You'll need a hollow wall cavity, which often means building a new stud wall or using a pocket door kit. It's best to plan this during a renovation, as retrofitting can be more complex.
Professional installation ensures the track is level and the door slides smoothly.
Glass Vs. Solid Doors
For a shower, a glass pocket door maintains an open feel and lets light pass through. Frosted or textured glass adds privacy while still feeling airy. Solid doors offer more privacy but can make the space feel closed off.
Choose based on your bathroom's natural light and your preference for openness.
Maintenance Tips
Keep the track clean to prevent debris from jamming the door. Use a soft brush or vacuum attachment regularly. Lubricate the rollers occasionally with silicone spray.
Also, ensure the door is properly aligned to avoid scraping the frame. With minimal care, a pocket door can last for years.
7. Shower Niche Storage: No Caddy Needed
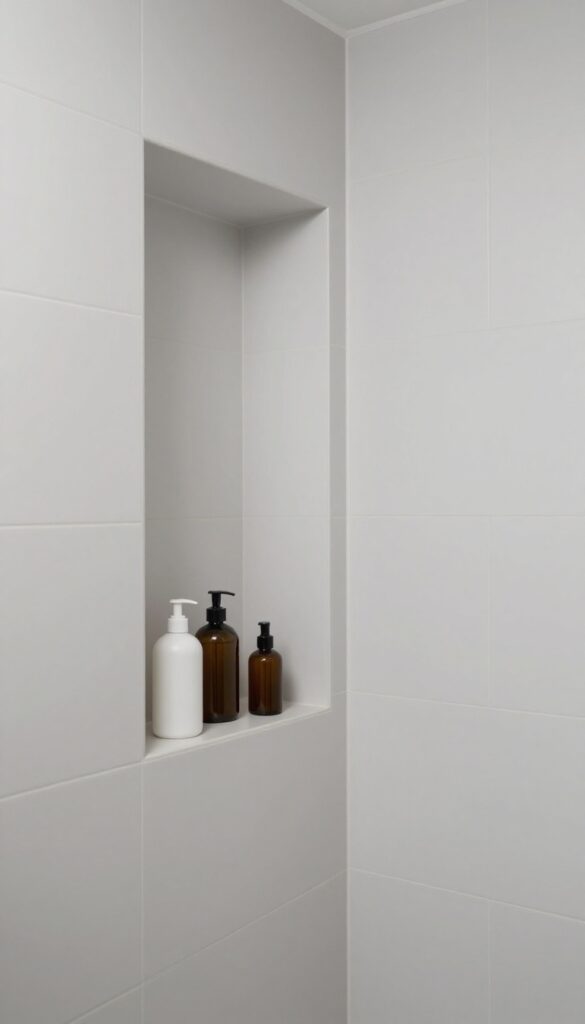
Built-in niches are a game-changer for small walk-in showers. Instead of hanging a bulky caddy that sticks out and collects grime, you get storage that sits flush with the wall. This keeps your shower clutter-free and your toiletries within easy reach.
A niche is essentially a recessed shelf built into the shower wall. It can hold shampoo, conditioner, soap, and razors without any protrusions. This is especially valuable in a tight space where every inch of clearance matters.
Plus, it looks clean and custom.
Where To Place Them
The best spot is on a wall that won't get direct spray from the showerhead. Usually, that's the side wall or the back wall opposite the entrance. Place it at a height that's comfortable for reaching—typically between 36 and 48 inches from the floor.
If you have multiple users, consider two niches at different heights.
Sizing And Depth
A standard niche is about 12 to 14 inches wide and 6 to 8 inches tall. Depth should match the wall cavity—usually 3. 5 inches for a standard 2×4 wall.
That's enough for most bottles. For larger items, you can go wider or taller, but keep it proportional to the shower size.
Tiling And Waterproofing
Niches need proper waterproofing to prevent moisture from seeping into the wall. Use a waterproof membrane behind the tile and slope the bottom slightly so water drains out. Choose tiles that are easy to clean and match your shower wall.
Accent tiles or a contrasting color can make the niche a design feature.
8. Glass Block Wall: Privacy Without Bulk
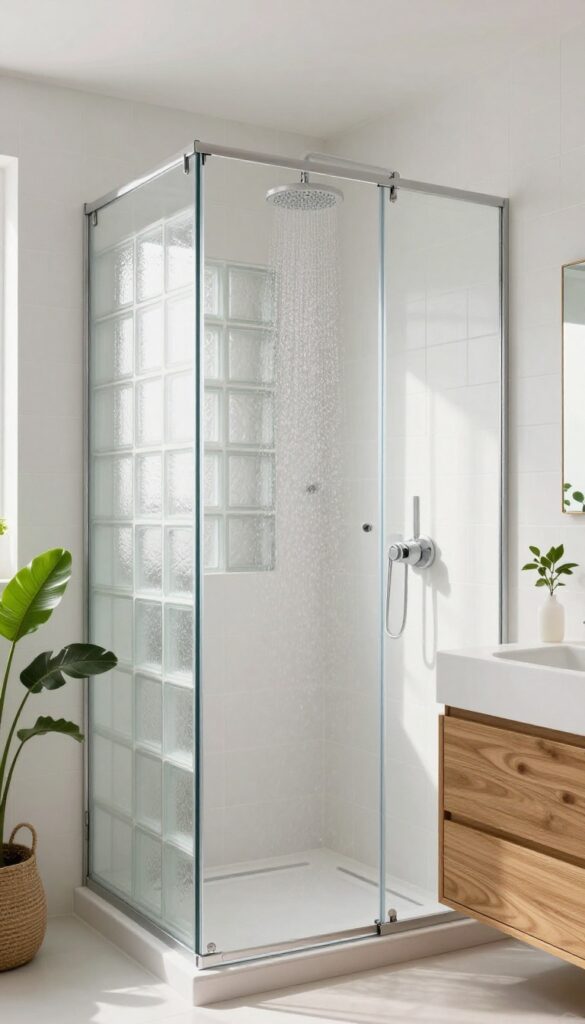
Glass block walls are making a serious comeback, and for good reason. They let natural light flow through while keeping your shower completely private. Unlike a standard wall, they don't add visual weight or take up extra floor space.
That makes them perfect for small bathrooms where every inch counts.
A glass block wall can replace a traditional partition or even an exterior wall in a shower. The blocks are thick enough to provide privacy, but they still allow light to pass through. This means you can have a bright, open-feeling shower without needing a window or a full glass enclosure.
Plus, the blocks come in different patterns and finishes, so you can customize the look. Installing a glass block wall is more involved than putting up a shower curtain, but it's a long-term solution that adds value. You'll need a professional for the mortar work, but the result is a sturdy, low-maintenance wall that never needs replacing.
It's also easier to clean than glass panels because the blocks have a textured surface that hides water spots.
Light Without Exposure
The biggest advantage of glass block is the way it handles light. In a small bathroom, you often have to choose between privacy and brightness. Glass block gives you both.
You can install it on an exterior wall to let in daylight, or use it to borrow light from an adjacent room. Either way, your shower feels larger and more inviting.
Space-saving Design
A glass block wall is only about 3 to 4 inches thick, much thinner than a typical stud wall. That saved width can make a real difference in a tight bathroom. And because the wall is self-supporting, you don't need extra framing or a bulky shower enclosure.
It's a sleek, minimalist solution that maximizes usable space.
Easy Maintenance
Unlike clear glass that shows every water spot and fingerprint, glass block has a subtle texture that hides smudges. A quick wipe with a squeegee or a mild cleaner keeps it looking good. The mortar joints are sealed, so you don't have to worry about mold or mildew buildup.
It's a low-fuss option that stays clean with minimal effort.
9. Foldable Shower Seat: Comfort When Needed
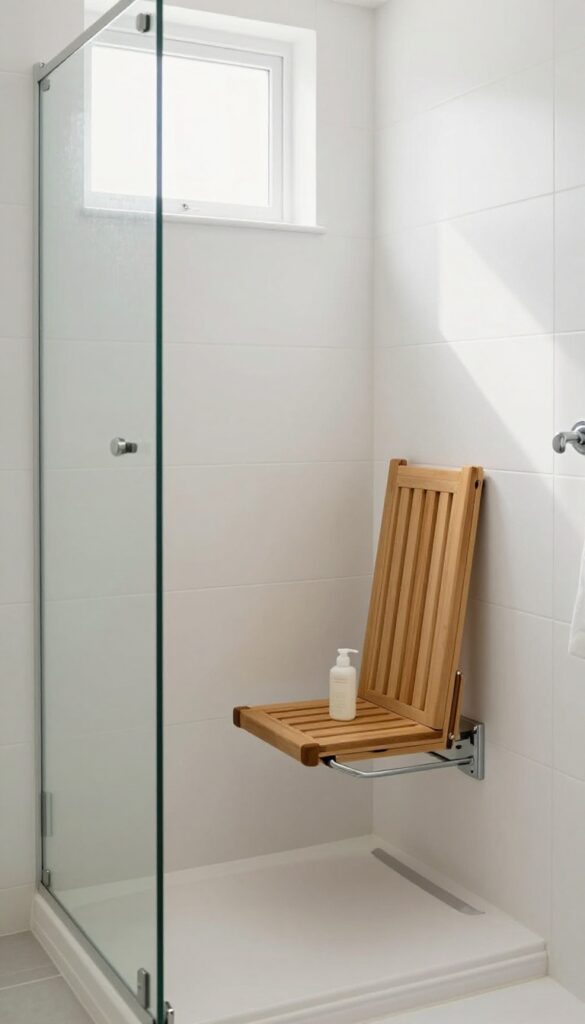
A foldable shower seat is a smart addition to a small walk-in shower. It mounts to the wall and folds flat when not in use, so it never gets in the way. This gives you a comfortable place to sit while shaving, washing, or just relaxing, without sacrificing precious floor space.
Foldable seats come in various materials like teak, plastic, or aluminum, and they're easy to install on any solid wall. They're especially useful for elderly individuals or anyone with mobility issues, but even able-bodied people appreciate having a perch. The key is to choose a seat that matches your shower's style and can support your weight.
Space-saving Design
Unlike fixed benches, foldable seats take up zero floor space when not in use. They hinge up against the wall, leaving the shower area open and easy to clean. This makes them ideal for tiny bathrooms where every inch counts.
Installation Tips
Mount the seat on a stud or use heavy-duty toggle bolts for solid attachment. Place it at a comfortable height—typically 17 to 19 inches from the floor. Make sure it's installed away from the showerhead to keep it dry when folded.
Material Choices
Teak is naturally water-resistant and looks warm and organic. Plastic or resin seats are lightweight and easy to clean. Aluminum or stainless steel frames are durable and rust-proof.
Choose a material that complements your bathroom's finish.
Safety Considerations
Look for seats with a textured surface or non-slip strips to prevent slipping. Ensure the seat locks securely in the down position. Always check the weight capacity and install it according to the manufacturer's instructions.
10. Linear Drain: Simplify Floor Slope
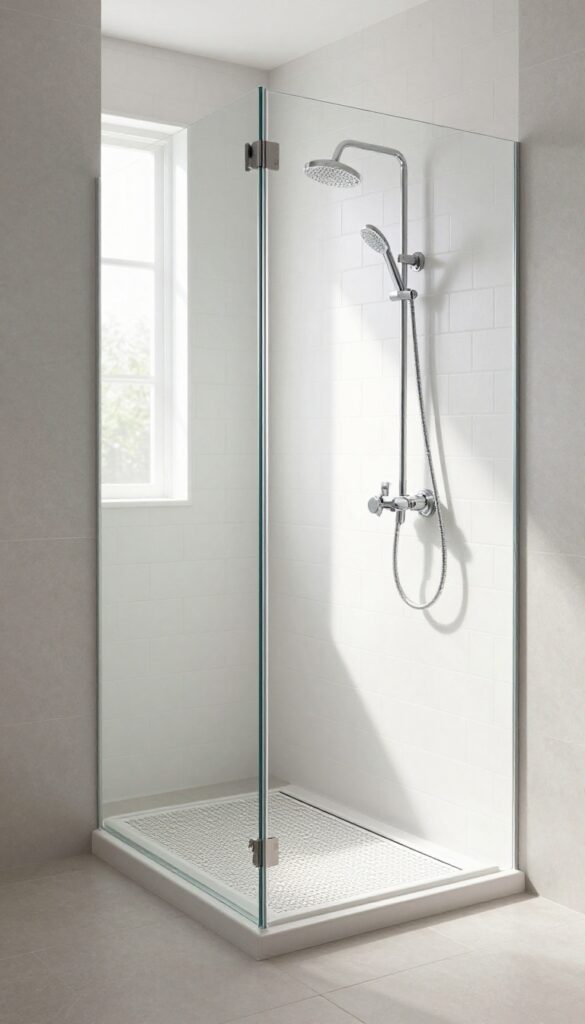
A linear drain changes the game for small shower floors. Instead of a traditional center drain that requires slopes in multiple directions, a linear drain sits along one edge, allowing the floor to slope in a single plane. This simpler geometry makes installation easier and opens up more tile possibilities, especially with large-format tiles that can look awkward with complex slopes.
Linear drains are a smart choice for small walk-in showers because they reduce the visual clutter of a center drain and make the floor feel more spacious. The single-slope design also means less cutting and fitting of tiles, which can save on installation costs. Plus, the long, narrow drain cover can be a subtle design element that blends into the floor or stands out as a sleek accent.
Why Single Slope Works In Small Spaces
In a compact shower, every inch counts. A traditional center drain requires the floor to slope from all four corners, which can create a noticeable hump or require smaller tiles to manage the compound angles. A linear drain lets you slope the floor in just one direction, so the surface stays flatter and more uniform.
This is especially beneficial if you're using large tiles like 12×24 or 24×48, which can look seamless with a single slope.
Placement Options For Maximum Effect
You can install a linear drain at the entrance of the shower, along the back wall, or even in the middle. Placing it at the entrance creates a gentle slope away from the rest of the bathroom, keeping water contained. Putting it against a wall allows for a subtle pitch toward the back, which can be less noticeable.
For a wet-room style, a linear drain at the far end of the space can handle water from both the shower and the surrounding area.
Tile And Design Considerations
Large-format tiles are a natural match for linear drains because the single slope minimizes lippage and uneven grout lines. You can run the same tile from the shower floor out into the bathroom for a continuous look. Choose a drain cover that complements your tile—stainless steel for a modern vibe, or a tile-insert cover that lets the floor pattern flow uninterrupted.
Just make sure the drain is properly sloped (typically 1/4 inch per foot) for efficient water flow.
11. Ceiling-Mounted Showerhead: Free Up Walls
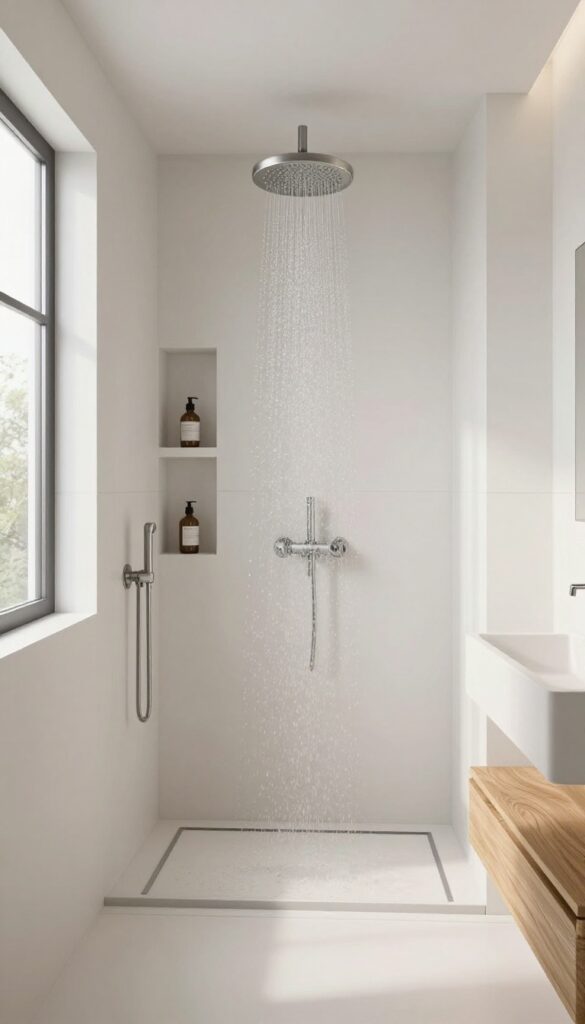
Wall space is precious in a small shower. Every inch counts for storage, seating, or grab bars. A ceiling-mounted showerhead pulls the fixture out of the wall zone entirely, giving you back that real estate for things that matter more.
A rain showerhead suspended from the ceiling creates a luxurious, spa-like feel without eating into wall space. Since there's no arm or bracket protruding from the wall, you can install a full-length niche for toiletries or add a grab bar exactly where you need it. The showerhead itself becomes a focal point overhead, drawing the eye up and making the room feel taller.
Pair it with a linear drain and a curbless entry for a seamless, open look that maximizes every square inch.
Installation Considerations
Ceiling-mounted showerheads require access above the ceiling for plumbing. If you have an attic or drop ceiling, installation is straightforward. For solid ceilings, you may need to cut and patch drywall.
Hire a licensed plumber to ensure proper support and waterproofing. The showerhead should be centered over the drain for optimal coverage.
Choosing The Right Showerhead
Look for a rain showerhead with a diameter of 8 to 12 inches for even water distribution. Adjustable flow settings can help conserve water. Brushed nickel or matte black finishes resist water spots and match modern fixtures.
Consider a model with a swivel joint if you want to direct the spray slightly.
Combining With Other Space-savers
Since the walls are free, use them for a recessed shelf or a foldable teak bench. A handheld showerhead on a slide bar can be mounted on the opposite wall for flexibility. The ceiling-mounted head handles everyday rinsing, while the handheld is perfect for cleaning or washing pets.
12. Minimalist Framed Glass: Light and Open
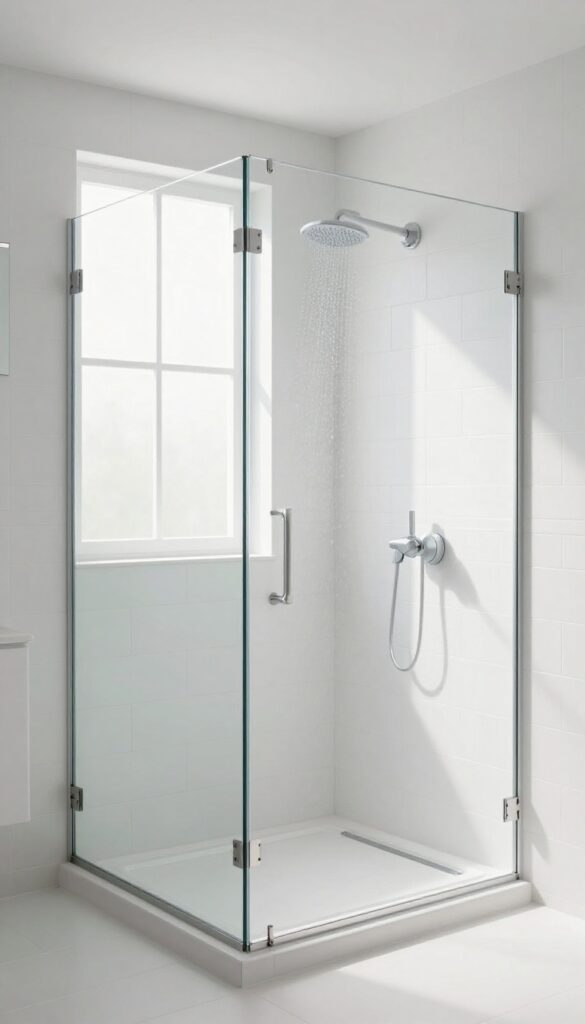
Thin-framed or frameless glass enclosures create an open feel without the visual weight of bulky frames. They make the shower area feel larger by letting light flow through and eliminating visual barriers. This approach works especially well in small bathrooms where every inch counts.
When space is tight, the last thing you want is a heavy shower enclosure that chops up the room. Minimalist glass—whether frameless or with ultra-thin frames—keeps the sightline clear and the bathroom feeling airy. The transparency tricks the eye into seeing more space than there actually is.
Plus, less metal means less to clean and fewer places for soap scum to hide.
Frameless Vs. Thin-frame: What’s The Difference?
Frameless glass uses thick tempered panels held together with minimal hardware like hinges and clips. It’s the purest look but requires precise installation and often costs more. Thin-frame options use slim aluminum or stainless steel profiles that are barely noticeable.
They’re more budget-friendly and still provide that open, airy vibe without the full frameless price tag.
Hardware Choices That Disappear
Choose hinges and handles in finishes that blend with the glass or the bathroom fixtures. Clear or satin nickel hinges are popular because they don’t draw attention. For a near-invisible look, opt for glass-to-glass hinges that mount directly onto the panels.
Even the door handle can be a simple, sleek bar that doesn’t interrupt the clean lines.
Keeping It Clean And Streak-free
Glass enclosures show water spots and soap residue easily, so maintenance matters. A daily squeegee keeps streaks at bay, and a weekly spray with a vinegar-water solution prevents buildup. Consider applying a protective coating to the glass to repel water and make cleaning easier.
With minimal frames, there are fewer crevices for grime to collect, so upkeep is simpler than you might think.
13. Multi-Function Shower Panel: All-in-One
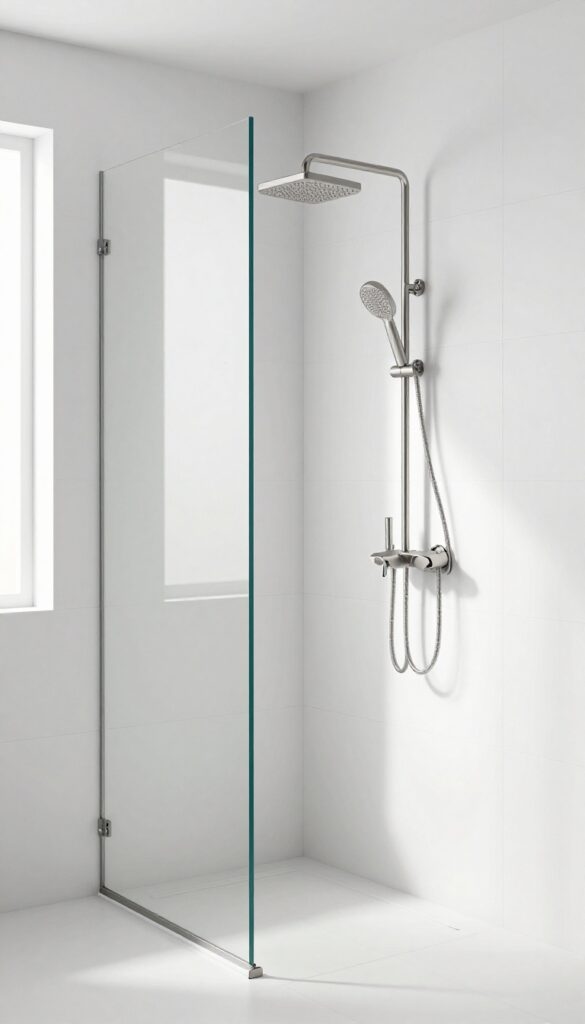
A shower panel brings together a rainfall showerhead, body jets, and a handheld spray in one sleek unit. It mounts directly on the wall, so you don't need separate fixtures or extra plumbing. This all-in-one design frees up wall space and gives your small shower a clean, modern look.
Multi-function shower panels are perfect for small bathrooms because they consolidate multiple fixtures into a single, compact unit. Instead of installing a separate showerhead, handheld spray, and body jets, you get everything in one panel. This not only saves space but also simplifies installation and reduces clutter on your shower walls.
Many panels come with thermostatic controls, so you can set your ideal water temperature and pressure without fiddling with separate knobs. Some models even include a digital display or LED lighting for a spa-like experience. The panel itself is typically slim and takes up minimal wall space, leaving more room for storage or movement.
Installation is straightforward—most panels connect to a single water supply and require only one hole in the wall. This makes them a great DIY-friendly option for a quick bathroom refresh. Plus, the sleek design adds a touch of luxury without overwhelming a small space.
Space-saving Design
A shower panel mounts flush against the wall, so there are no protruding arms or bulky fixtures. This leaves more open space in the shower, making it feel larger. The panel itself is usually less than 6 inches deep, so it won't eat into your shower's footprint.
Easy Installation
Most panels connect to a single water inlet and outlet, which simplifies plumbing. You don't need to run separate pipes for each function. Many models are designed for retrofit, so you can replace an existing showerhead without major construction.
Customizable Shower Experience
With multiple spray options, you can switch between a gentle rainfall, invigorating body jets, or a targeted handheld spray. Some panels have adjustable jet positions and flow rates, letting you tailor the experience to your mood. This versatility is a big plus in a small shower where you might not have room for separate fixtures.
FAQ
What is the smallest size for a walk-in shower?
A walk-in shower can be as small as 30 x 30 inches, but 36 x 36 inches is more comfortable. For a wheelchair-accessible shower, aim for at least 60 x 30 inches.
Do walk-in showers save space in a small bathroom?
Yes, walk-in showers can save space by eliminating the need for a bathtub or a bulky shower enclosure. Designs like corner showers or wet rooms maximize floor area.
How do I prevent water from splashing out of a walk-in shower?
Use a slight slope toward the drain, install a shower curtain or glass panel, and consider a linear drain. A wet room design with a floor drain also helps.
Can I install a walk-in shower in a small bathroom without a major renovation?
Yes, some options like a shower panel or a prefabricated shower tray can be installed with minimal demolition. However, a curbless shower or wet room may require more work.
What type of door is best for a small walk-in shower?
Sliding or pocket doors are best because they don't require swing clearance. Frameless glass doors also help maintain an open feel.
Conclusion
A small bathroom doesn't have to mean a cramped shower. With these 13 ideas, you can create a walk-in shower that feels spacious and works with your layout. Whether you choose a corner unit, a wet room, or a simple glass enclosure, the key is to prioritize function and flow.
Start with one idea that solves your biggest pain point, and build from there. Your tiny bathroom can become a daily retreat.