13 River Rock Shower Ideas for a Natural Textured Finish
River rock showers are having a moment, and for good reason. Those smooth, rounded stones instantly turn a plain shower into something that feels grounded and organic. But beyond the looks, river rock solves a few practical problems you might not have thought about.
Slippery shower floors are a genuine safety concern, especially with kids or older adults. River rock's uneven surface gives you natural traction without needing sticky mats. Plus, the stones help water drain faster because they create tiny channels between them.
Whether you're planning a full renovation or just want to refresh one wall, these 13 ideas will help you use river rock in ways that feel intentional, not random. Let's walk through them.
1. Full River Rock Shower Floor for Slip Resistance
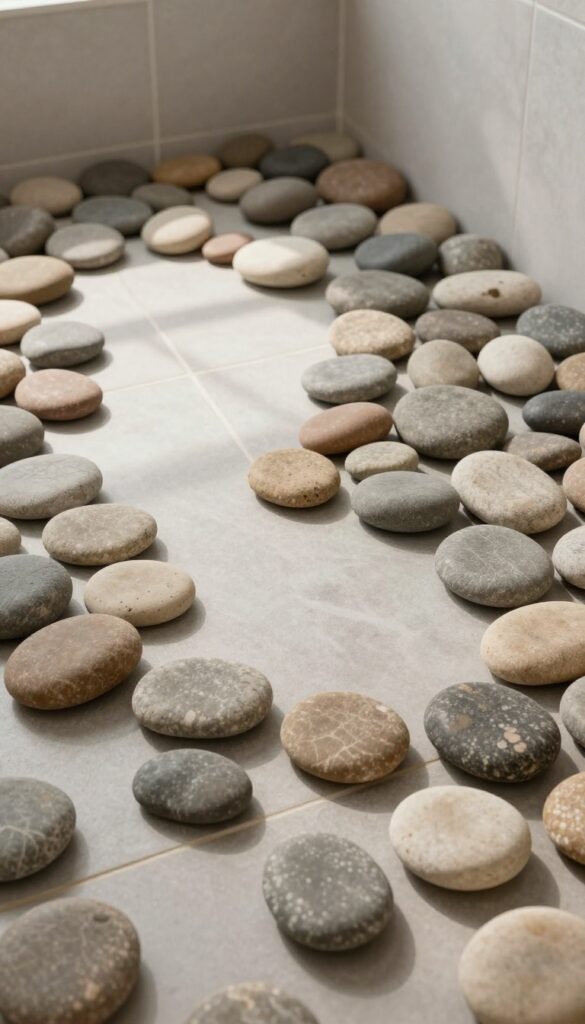
Starting from the ground up makes sense when you want both safety and style. A full river rock floor transforms your shower into a natural oasis while giving you serious traction. The pebbles create a textured surface that grips your feet, even when soapy water is running.
Covering the entire floor with river rock pebbles creates a non-slip surface that feels like a natural stream bed underfoot. The stones are set in grout or resin, leaving small gaps for water to drain quickly. This design is especially popular in master bathrooms and spa-like retreats where barefoot comfort matters.
Why It Works So Well
River rock's uneven surface provides natural friction, reducing slip risks without harsh textures. The rounded stones are gentle on bare feet, making morning showers feel like a walk on the beach. Plus, the gaps between pebbles allow water to flow through faster than standard tile, cutting down on standing water.
Installation Tips
Use a flexible thinset mortar to set the pebbles, and seal the grout to prevent mold. Choose pebbles that are relatively flat on top for a more comfortable walking surface. A consistent size (around 1-2 inches) gives the floor a uniform look and avoids awkward gaps.
Maintenance Made Simple
Sweep or vacuum the floor regularly to keep debris out of the crevices. A mild pH-neutral cleaner works best to avoid damaging the sealer. Re-seal every year or two to keep the stones looking fresh and water-resistant.
2. River Rock Accent Wall Behind the Shower Bench
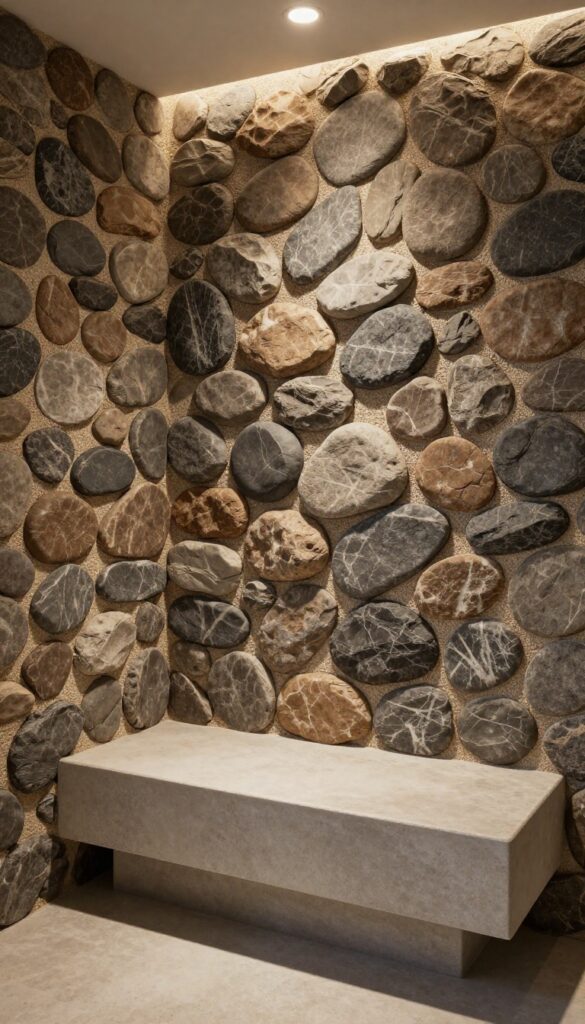
A built-in bench in the shower is a luxury, but the wall behind it often gets overlooked. Adding a river rock accent wall there changes the whole feel of the space. It gives you a textured focal point that defines the seating area and gives bathers something pleasant to look at while they sit.
The contrast between smooth stone and the bench's surface creates visual depth. River rock also helps protect the wall from water splashes, since the stones and grout are more durable than standard tile in wet areas. Plus, the natural texture feels amazing against your back when you lean into it.
Choosing The Right Stones
Go with flat or low-profile river rocks for a bench backdrop. Thick, rounded stones can stick out too far and make the wall feel bumpy. Look for stones in earthy tones like slate, brown, or gray to keep the look cohesive.
Mixing sizes adds interest without looking chaotic.
Installation Tips
Install the river rock on a cement backer board with thin-set mortar. Make sure the stones are tightly packed but leave even gaps for grout. Use a sanded grout that matches the stones to keep the focus on the texture.
Seal everything with a penetrating sealer to prevent mold and stains.
Lighting It Right
A small recessed light or a waterproof LED strip above the accent wall makes the river rock glow. The light catches the natural curves and shadows, turning the wall into a living piece of art. Avoid harsh overhead lights that wash out the texture.
3. River Rock Shower Curb for a Seamless Transition
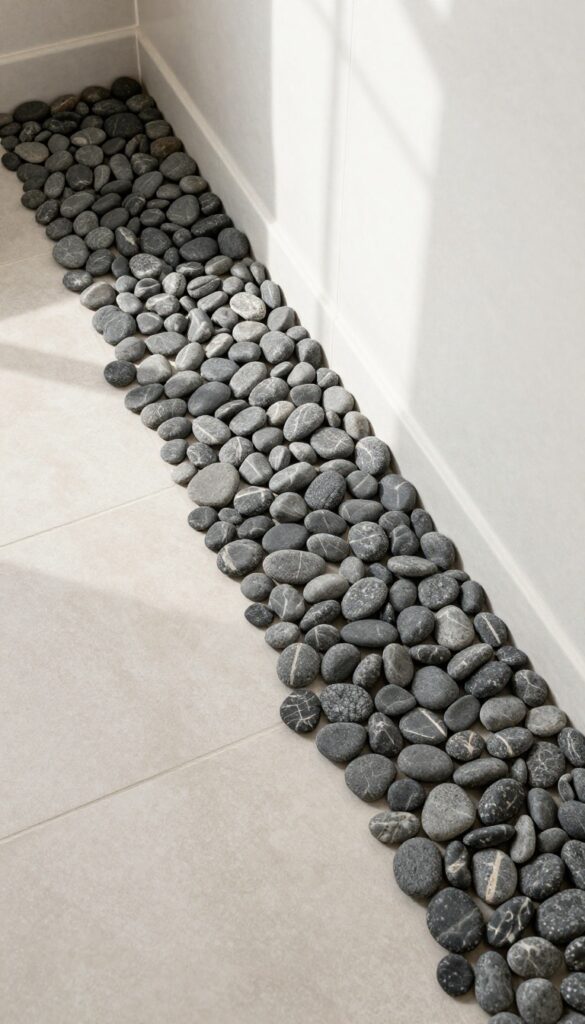
The curb is often an afterthought, but it's one of the first things you step over every day. Covering it with river rock ties the shower to the rest of the bathroom in a way that feels intentional. Plus, those stones add extra grip exactly where you need it most.
A river rock curb works especially well in bathrooms where the floor tile continues right up to the shower. Instead of a stark metal or stone threshold, the pebbles create a gradual visual shift. The texture also helps prevent slips when stepping out onto potentially wet bathroom floors.
Matching The Curb To The Floor
For the most seamless look, use the same river rock on the curb as you have on the shower floor. If your bathroom floor is a different material, choose river rock in a complementary color or tone. A dark pebble curb against light floor tiles creates a subtle border without a hard break.
Grip Where You Need It
The top of the curb takes the most wear and moisture. River rock's uneven surface gives your foot something to grab, even when wet. This is especially helpful if you have a walk-in shower with a low curb that you step over frequently.
Durability And Maintenance
River rock is naturally tough and stands up to daily foot traffic. Sealing the stones and grout every year or two keeps them looking fresh and prevents moisture from seeping in. A sealed river rock curb is easy to wipe down and resists soap scum buildup.
4. River Rock Niche Shelves with Pebble Backing
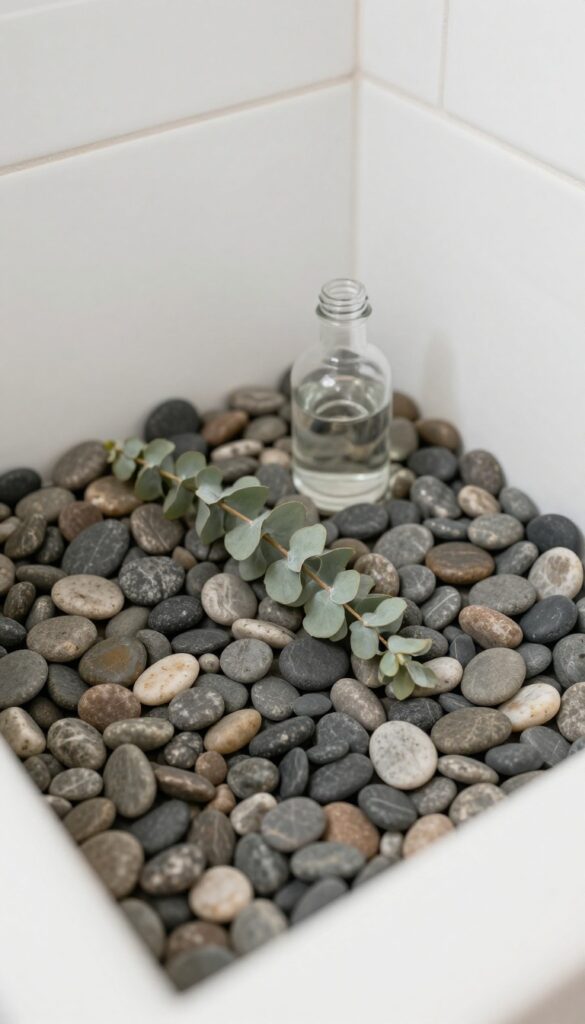
Shower niches are super handy for keeping bottles organized, but they often end up looking like a boring hole in the wall. Lining the back with river rock changes that completely. The pebbles add texture and depth, turning a functional shelf into a focal point that feels like a natural grotto.
This idea works for both recessed and surface-mounted niches. The key is using smaller, flatter pebbles so your bottles sit steady. You can match the rock to your shower floor or go with a contrasting tone for extra pop.
The grout lines should be tight to minimize cleaning hassle.
Choosing The Right Pebbles
Opt for tumbled river stones that are smooth and uniform in thickness. Stay away from jagged or overly large rocks—they'll make bottles wobble. A mix of grays, browns, and blacks creates a natural look, while all-white pebbles give a clean, spa-like vibe.
Installation Tips For A Clean Finish
Use a waterproof membrane behind the pebbles and apply thin-set mortar evenly. Press each stone in firmly, leaving small gaps for grout. After the mortar sets, seal the grout and stones to protect against moisture and soap scum.
A matte sealer keeps the rocks looking natural.
Styling Your Pebble Niche
Keep the shelves uncluttered to let the texture shine. Use matching glass bottles or neutral-colored containers. Add a small eucalyptus bundle or a single candle for a spa touch.
Avoid dark bottles that hide the pebble backdrop.
5. River Rock Border Around a Larger Tile Pattern
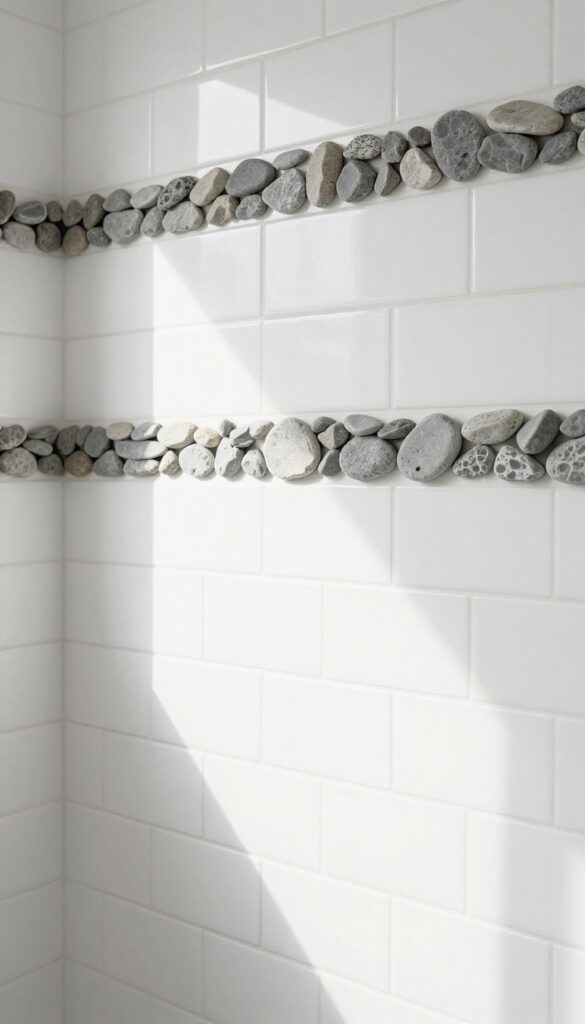
If you love the look of large-format tiles but don't want to lose that natural texture, a river rock border is the perfect compromise. It frames the main tile field with a strip of organic stone, adding visual interest without making the whole shower feel busy. This approach works especially well in modern bathrooms where you want a touch of nature without going full rustic.
Where To Place The Border
The most common spot is at eye level, running horizontally across the shower wall. This creates a clear visual break and draws the eye naturally. You can also do a vertical border on one side or frame the entire shower area like a picture frame.
For a subtle touch, try a border at the top of the tile wainscot or just below the ceiling.
Choosing The Right River Rock
Stick with smaller, flat stones for the border so they don't protrude too much. Pebbles around 1 to 2 inches work well. Match the color to the main tile—gray river rock with white subway tile is a classic combo, while warm earth tones complement beige or travertine.
Make sure the stones are tumbled and smooth for a consistent look.
Installation Tips For A Clean Finish
Plan the border width carefully—usually 4 to 6 inches is enough to stand out without dominating. Use a mesh-backed river rock sheet to keep spacing even and speed up installation. Grout lines should match the stone color to keep the border cohesive.
Seal the river rock after grouting to prevent stains and make cleaning easier.
6. River Rock Shower Floor with a Center Drain Design
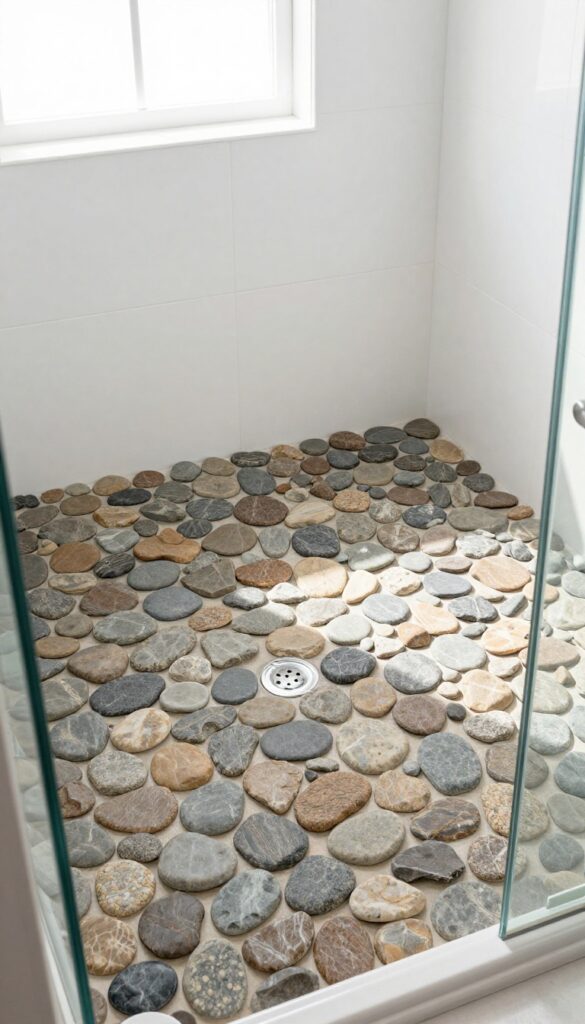
A center drain is often seen as a limitation, but with river rock it becomes a design opportunity. By arranging the stones in a circular pattern around the drain, you get a custom look that feels intentional and artistic. The slope toward the center also improves water drainage, so puddles are less likely to form.
This approach works especially well in showers with a single central drain. The circular layout naturally guides water to the drain while creating a focal point. You can use uniform stones for a clean look or mix sizes for more texture.
The key is to start from the drain and work outward, keeping the pattern tight and consistent.
Why A Circular Pattern Works
A circular arrangement around the drain isn't just for looks—it helps water flow more efficiently. The stones are angled slightly toward the center, so water follows the path of least resistance. This reduces standing water and makes cleaning easier.
Plus, the pattern draws the eye downward, making the shower feel larger.
Choosing The Right Stones
Pick river rocks that are flat on top and relatively uniform in thickness. This makes for a more comfortable standing surface and a tighter fit. Avoid stones that are too round or uneven, as they can wobble or create tripping hazards.
A mix of earthy tones like gray, brown, and tan gives a natural look.
Installation Tips For A Smooth Finish
Start by dry-laying the stones around the drain to plan the pattern. Use a thin-set mortar that's suitable for wet areas, and press each stone firmly into place. Leave small gaps between stones for grout, which should be sanded and epoxy-based for durability.
After grouting, seal the entire floor to protect against stains and moisture.
7. River Rock and Glass Mosaic Combo
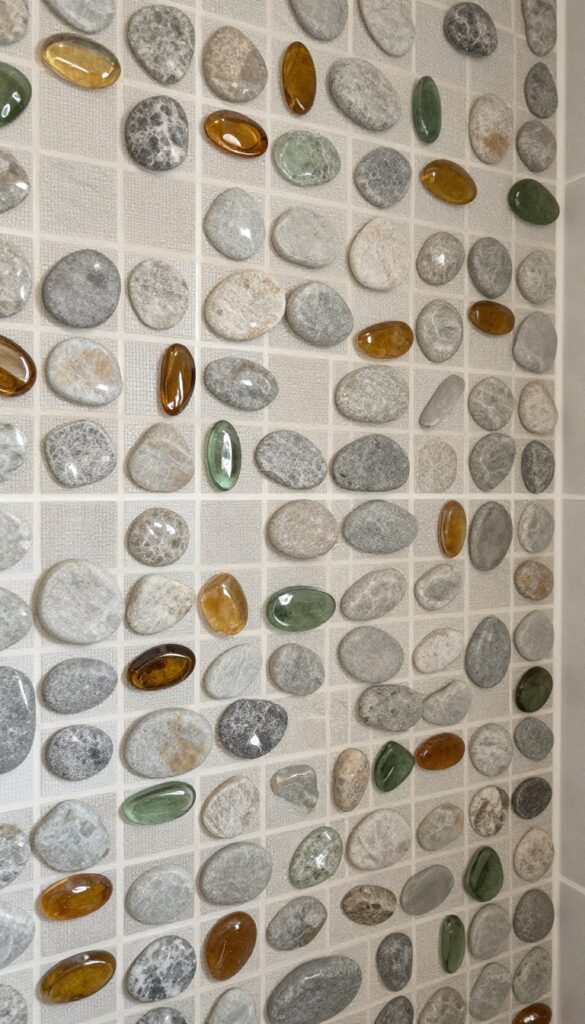
Mixing river rock with glass mosaic tiles gives you the best of both worlds: natural texture from the stones and glossy, light-catching color from the glass. This combination works especially well in showers where you want a spa-like feel but with a modern edge. The glass tiles can be used as an accent strip or woven throughout the rock for a more integrated look.
The key to pulling off this combo is choosing glass tiles in colors that complement the river rock. Earthy tones like moss green, warm amber, or deep blue pair beautifully with gray or brown pebbles. You can buy pre-made mosaic sheets that already combine the two materials, making installation straightforward.
Or you can create your own pattern by placing individual glass tiles among the pebbles on a mesh backing. The result is a shower surface that feels organic yet intentionally designed.
Color Pairing Tips
Stick with a limited palette to keep the look cohesive. For gray river rock, try glass tiles in soft blues or greens. For warmer-toned rocks, amber or copper glass adds richness.
Avoid mixing too many colors, as it can look chaotic.
Placement Ideas
Use the glass mosaic as a horizontal band at eye level to draw attention. Or create a vertical stripe behind the shower fixtures for a focal point. For a more subtle effect, scatter glass tiles randomly among the river rock on the entire wall.
Maintenance Considerations
Glass tiles are non-porous and easy to clean, but the grout lines between them and the river rock need regular sealing. Use a high-quality sealer to prevent staining and mold. Wipe down the surface after each use to keep it looking fresh.
8. River Rock Shower Wall from Floor to Ceiling
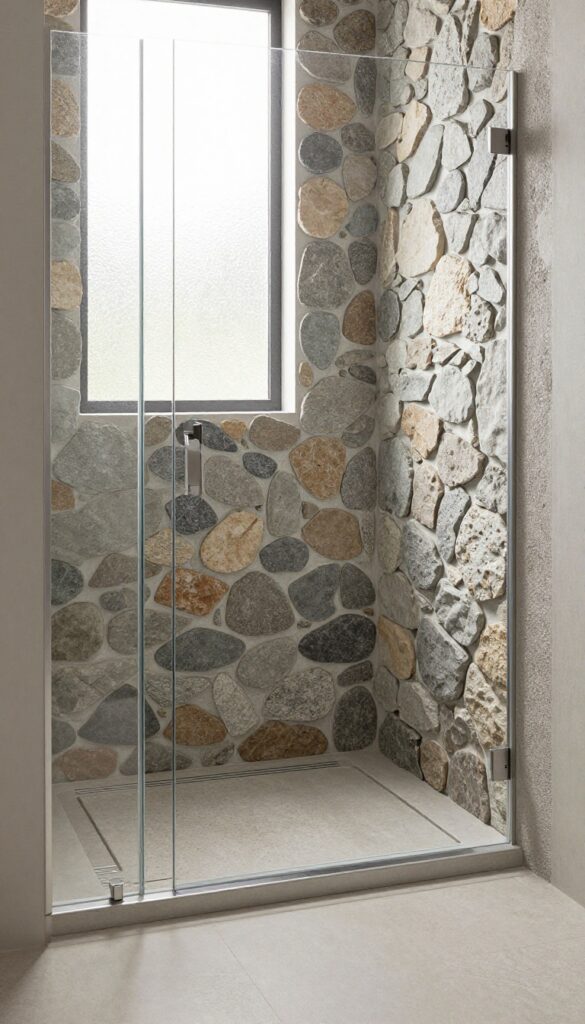
Going all in on one full wall of river rock creates a bold, spa-like statement that instantly transforms your shower into a natural retreat. The texture draws the eye upward, making the space feel taller and more grounded at the same time. It's a dramatic move, but one that pays off with every shower.
A floor-to-ceiling river rock wall is the ultimate way to bring the outdoors in. The continuous surface mimics a natural stream bed, creating a calming, immersive experience. The key is to choose stones with varied sizes and colors—grays, tans, and charcoal—to keep the wall from looking flat.
A professional installer is recommended because the stones need to be set closely and grouted carefully to avoid uneven gaps. The result is a feature wall that doubles as a conversation piece and a daily dose of nature.
Choosing The Right Stones
Not all river rock is created equal. Look for flat, smooth stones that are about 2 to 4 inches across. Flatter stones sit better on the wall and create a more uniform surface.
Mixing in a few larger accent stones adds visual interest without overwhelming the pattern.
Grout Color Matters
The grout color can make or break the look. A light gray or beige grout blends in and lets the stones pop, while a darker charcoal grout creates a more dramatic, modern feel. Avoid white grout—it tends to look dirty quickly and can clash with the natural tones.
Lighting And Finishing Touches
A floor-to-ceiling river rock wall loves natural light, but if your shower is windowless, add a recessed light or a waterproof sconce to highlight the texture. A linear drain at the base keeps the wall clean and prevents water pooling. Seal the stones and grout with a penetrating sealer to protect against moisture and soap scum.
9. River Rock Shower Mat Insert (DIY-Friendly)
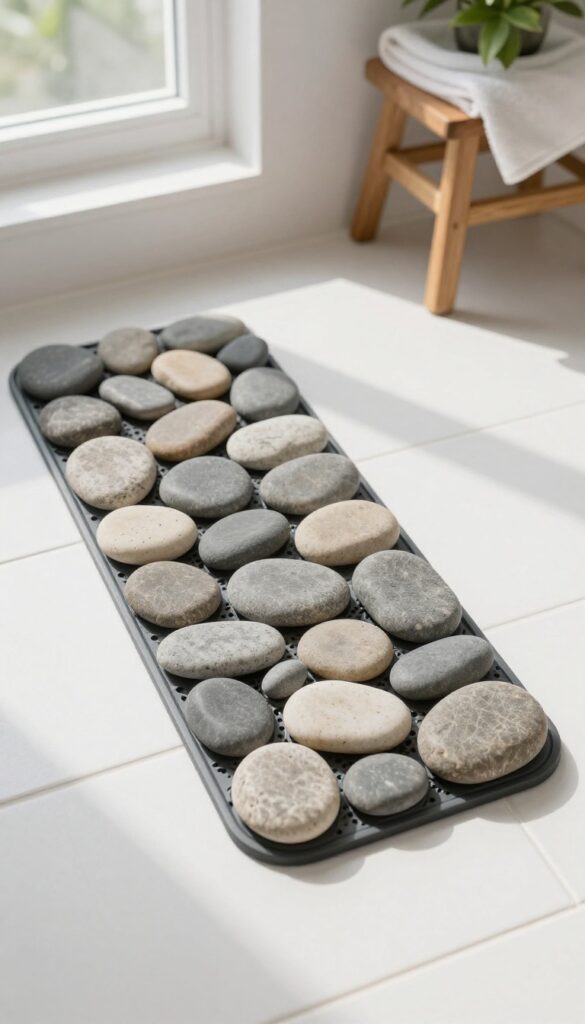
A removable river rock mat gives you all the texture and slip resistance without the permanence. It sits on top of your existing tile floor, so you can take it out for cleaning or swap it when you want a change. This is a great weekend project that costs a fraction of a full river rock floor.
You can build this mat using a flexible backing like rubber or silicone mesh, then attach smooth river stones with strong waterproof adhesive. The key is to leave small gaps between stones for drainage. Once cured, the mat stays put during use but lifts out easily for cleaning.
It's ideal for rentals or anyone who wants to test the river rock look before committing to a permanent install.
Materials & Prep
You'll need a sheet of rubber or silicone matting (cut to your shower floor size), smooth river stones (washed and dried), and a marine-grade or construction adhesive. Lay out the stones on the mat to plan the pattern before gluing. Keep stones relatively flat on top for comfort underfoot.
Assembly Tips
Apply adhesive to each stone and press firmly onto the mat. Leave a 1/8 to 1/4 inch gap between stones for water flow. Let the mat cure for 24 hours before use.
For extra grip, you can add a thin layer of clear silicone over the back of the mat to prevent sliding on tile.
Maintenance & Cleaning
Once a week, lift the mat and rinse it with a hose or in the shower. Use a stiff brush to remove any soap scum from between stones. If you notice mildew, soak the mat in a diluted bleach solution for 15 minutes, then rinse thoroughly.
Let it dry completely before putting it back.
10. River Rock Shower Foot Rest or Ledger
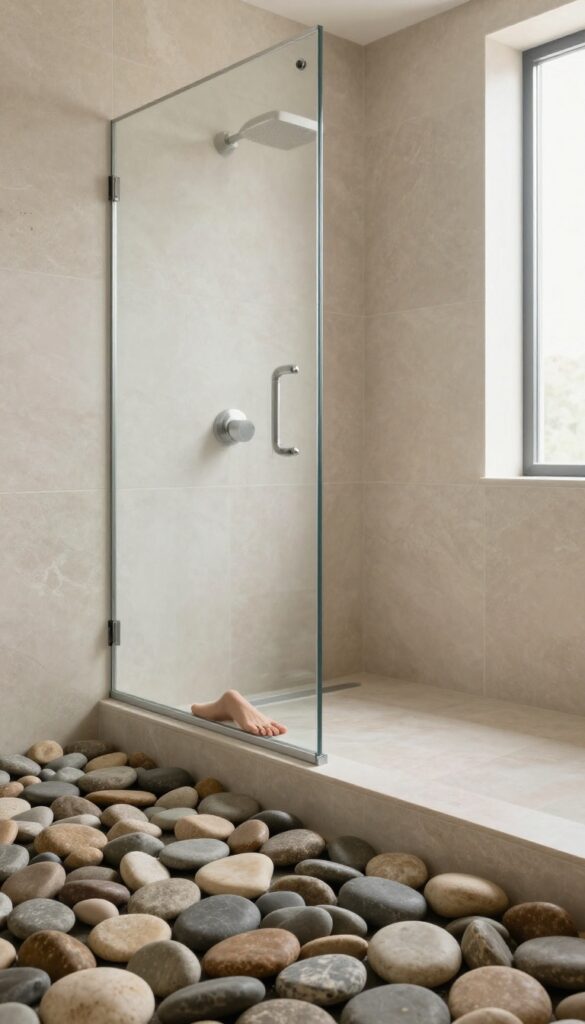
Shaving your legs or scrubbing your feet in the shower often means balancing on one leg like a flamingo. That's not exactly safe on wet tile. A small river rock ledge at ankle height gives you a sturdy, textured spot to prop your foot while you take care of business.
This idea works especially well in a curbless or walk-in shower where there's no built-in bench. The ledge can be as simple as a narrow shelf built into the wall or a small corner seat covered in river rock. Either way, it adds function without eating up floor space.
The key is getting the height right. Aim for about 8 to 12 inches off the floor, which is comfortable for most people to rest a foot without bending too far. The ledge should be at least 6 inches deep so your foot sits securely.
Cover the top and front face with river rock for a cohesive look that blends with the rest of your shower. If you're worried about water pooling, slope the top slightly toward the drain.
Built-in Vs. Add-on
A built-in ledge is part of the shower construction, framed with waterproofing and tile backer before the river rock is applied. It's the most durable option but requires planning during a renovation. An add-on, like a small stone stool or a prefab corner shelf covered in river rock, can be installed later.
Just make sure it's secured to the wall or floor so it doesn't shift.
Matching The Rock To Your Shower
Use the same river rock you have on the floor or walls for a seamless look. If your shower uses a mix of stones, choose a few larger flat pebbles for the top of the ledge so the surface feels smooth underfoot. Avoid sharp or uneven stones that could be uncomfortable when you press your foot down.
Drainage And Cleaning
A ledge can trap water if it's not sloped. Make sure the top has a slight pitch toward the shower floor. Also, leave small gaps between the stones on the top surface so water can drain through.
Clean the ledge regularly with a soft brush to prevent soap scum from building up in the crevices.
11. River Rock Shower Ceiling Accent
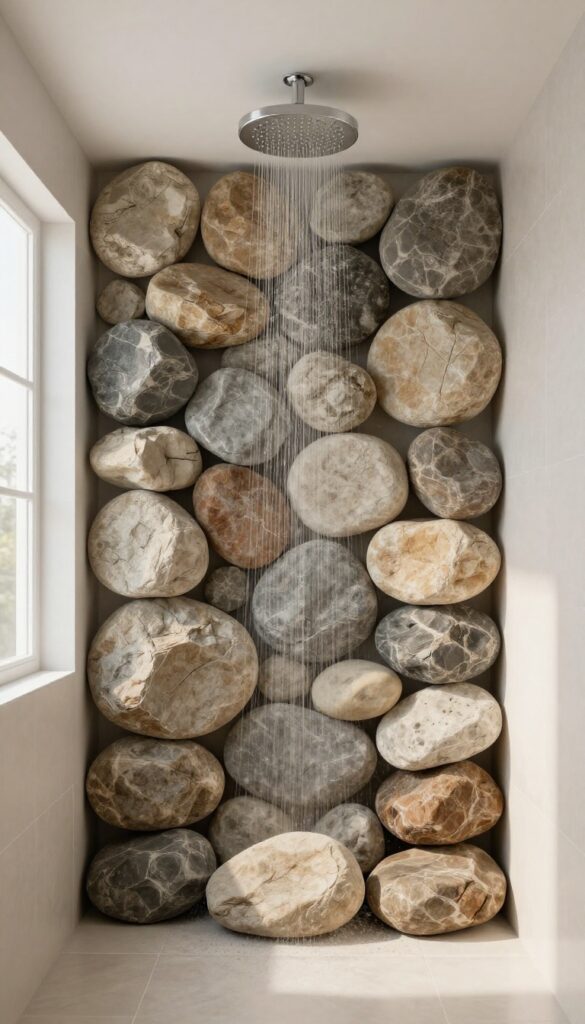
Most people stop at the walls and floor when adding river rock to a shower, but the ceiling is a missed opportunity. Applying river rock above the rainfall showerhead creates a surprising focal point that draws the eye upward and makes the shower feel more immersive. It's an unexpected twist that adds depth without overwhelming the space.
A river rock ceiling accent works best when kept to a defined section rather than covering the entire ceiling. Think of it as a natural canopy directly above the showerhead, roughly three to four feet square. The contrast between the smooth stones and a painted or tiled ceiling makes the texture pop.
Plus, the steam from hot showers keeps the stones looking rich and vibrant, almost like they're glowing.
Installation Tips For Ceiling River Rock
Weight is a real concern here. Use lightweight river rock veneer or thin-cut stones to avoid putting too much stress on the ceiling. A good construction adhesive and proper backing are essential.
Make sure the area is well-ventilated during installation to help the adhesive cure correctly. Also, seal the stones with a matte stone sealer to protect against moisture and mineral buildup.
Lighting Considerations
Recessed lighting or a small dimmable LED spot aimed at the river rock ceiling accent can create a stunning effect. The light catches the natural variations in the stones, casting soft shadows that add drama. Avoid placing lights too close to the water stream; instead, position them to graze the stones from an angle.
This technique highlights the texture without glare.
Maintenance And Cleaning
Ceiling river rock doesn't get as much soap scum as walls or floors, but it still needs occasional care. A squeegee after each shower helps prevent water spots. Once a month, wipe the stones with a mild stone cleaner and a soft cloth.
Avoid acidic cleaners—they can etch the stone. Sealing every year or two keeps the stones looking fresh and prevents mold in the grout lines.
12. River Rock Shower Partition Wall
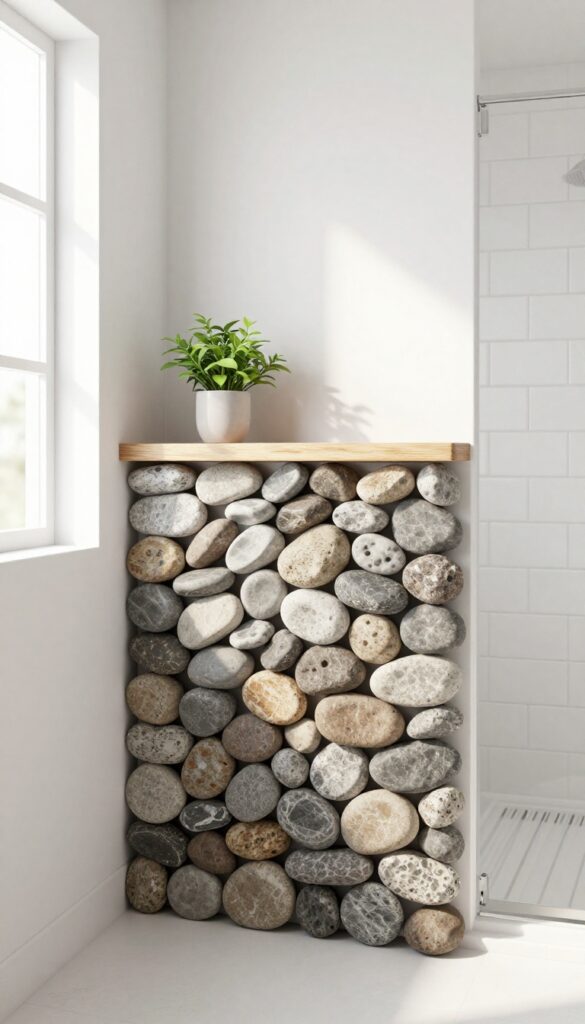
A half-wall clad in river rock can define your shower zone without closing it off completely. It adds privacy, blocks splashes, and becomes a natural focal point that ties the whole bathroom together. The rough texture contrasts beautifully with smooth tiles or painted walls, making the space feel layered and intentional.
This partition doesn't need to be massive—a waist-high wall is enough to separate the shower while keeping the room airy. The river rock cladding gives it a sculptural, almost furniture-like quality. You can cap it with a wooden or stone shelf for extra storage, or keep it simple and let the stones speak for themselves.
Why A Half-wall Works
A full glass enclosure can feel cold and clinical. A river rock half-wall feels warmer and more organic. It also cuts down on cleaning since there's less glass to wipe.
The wall doubles as a visual anchor, drawing the eye and giving the bathroom a clear layout without needing a door.
Installation Tips
Use a waterproof backer board as the base, then apply thinset and press the river rocks in place. Grout with a sanded grout that matches the stone tones for a seamless look. Seal the rocks and grout after installation to prevent moisture damage and make cleaning easier.
Design Variations
You can build the wall floor-to-ceiling for a more dramatic separation, or keep it low for a bench-like effect. Pair it with a floating wooden top for a spa vibe, or add a small niche for shampoo bottles. The river rock can cover one side only, leaving the other side smooth for a mixed texture look.
13. River Rock Shower Floor with Linear Drain
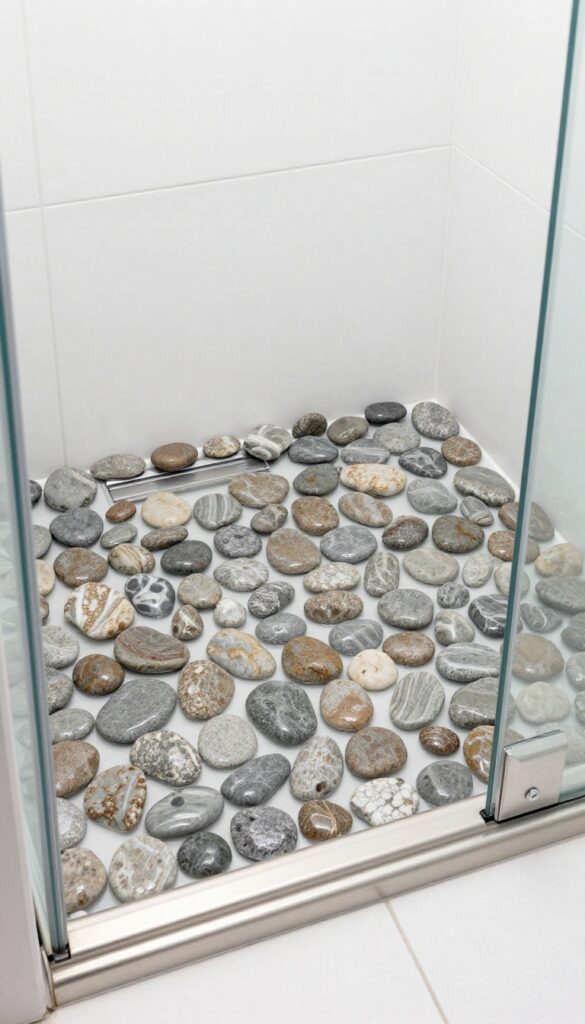
Pairing river rock with a linear drain creates a clean, modern look that still delivers the natural texture you want. Instead of a traditional square drain in the center, a linear drain runs along one edge, letting the river rock flow uninterrupted across the floor. It's a smart way to keep the organic feel while making drainage more efficient.
The combination solves two common issues: water pooling and visual clutter. The linear drain sits flush against one wall, so water naturally flows in one direction. This means you can install the river rock in a single continuous sheet without cutting stones around a drain.
The result is a minimalist floor that feels both spa-like and practical. Installation does require some planning. The shower floor needs a slight slope toward the drain, which your contractor can adjust during the pre-slope.
Choose river rock that's been tumbled smooth and mounted on mesh sheets for easier installation. The stones should be small enough—around 1 to 2 inches—to sit flat against the drain channel.
Why It Works So Well
The linear drain acts like a long gutter, catching water across the entire width of the shower. With river rock, water slips between the stones and into the drain quickly, reducing standing water. The even surface also makes cleaning easier since there's no central grate to scrub around.
Plus, the straight line of the drain adds a geometric contrast to the organic stones.
Design Tips For A Seamless Look
Match the drain cover material to your fixtures—brushed nickel or matte black are popular choices. For a truly seamless look, some homeowners opt for a tile-insert drain cover that lets river rock continue right over the drain. If you go that route, make sure the stones are small enough to fit the insert.
Keep grout lines tight and use a dark grout to hide dirt and blend with the stones.
Maintenance And Long-term Care
Seal the river rock every year to prevent staining and mold. The linear drain itself needs occasional cleaning—pop off the cover and rinse out any hair or debris. Because the floor is sloped, water rarely sits on the stones, which helps them stay cleaner longer.
A squeegee after each shower keeps the floor looking fresh.
FAQ
Is river rock slippery when wet?
No, river rock is naturally slip-resistant because of its uneven surface. The gaps between stones also help water drain quickly, reducing standing water.
How do you clean a river rock shower floor?
Use a mild pH-neutral cleaner and a soft brush to scrub between the stones. Rinse thoroughly. Avoid harsh chemicals that can damage the grout or sealer.
Do river rock showers need special grout?
Yes, use a sanded grout that matches the stone color. Epoxy grout is also a good choice because it resists stains and moisture better than cement-based grout.
Can you install river rock over existing tile?
It's possible if the existing tile is in good condition and properly prepared. You'll need to rough up the surface and use a strong thin-set mortar for adhesion.
How much does a river rock shower cost compared to tile?
River rock can be slightly more expensive than basic ceramic tile but comparable to natural stone tile. Expect to pay $8–$15 per square foot for materials, plus installation.
Conclusion
River rock showers bring nature's texture right into your daily routine, turning a simple rinse into a grounding experience. The uneven stones underfoot and the organic color palette create a spa-like atmosphere that never feels sterile.
Start with one accent wall or go all in with a full floor—either way, the natural variation in each stone ensures your shower stays unique. Pick the idea that fits your space best, and enjoy a bathroom that feels both rugged and refined.