13 Charming Kitchen Breakfast Bar Ideas That Feel Practical and Pretty
Mornings are better when there's a cozy spot to sip coffee and enjoy a quick bite. A kitchen breakfast bar can be that perfect perch, but it needs to work as hard as it looks. You want something that invites you to sit down, yet still keeps your kitchen feeling open and organized.
Whether you're working with a tiny corner or a sprawling island, the right breakfast bar can change how you use your kitchen. It's not just about adding seating—it's about creating a daily ritual that feels effortless.
The best designs balance comfort, style, and storage without making the space feel cramped. From clever fold-down options to built-in banquettes, these ideas cover a range of styles and budgets.
1. Fold-Down Breakfast Bar for Tiny Kitchens
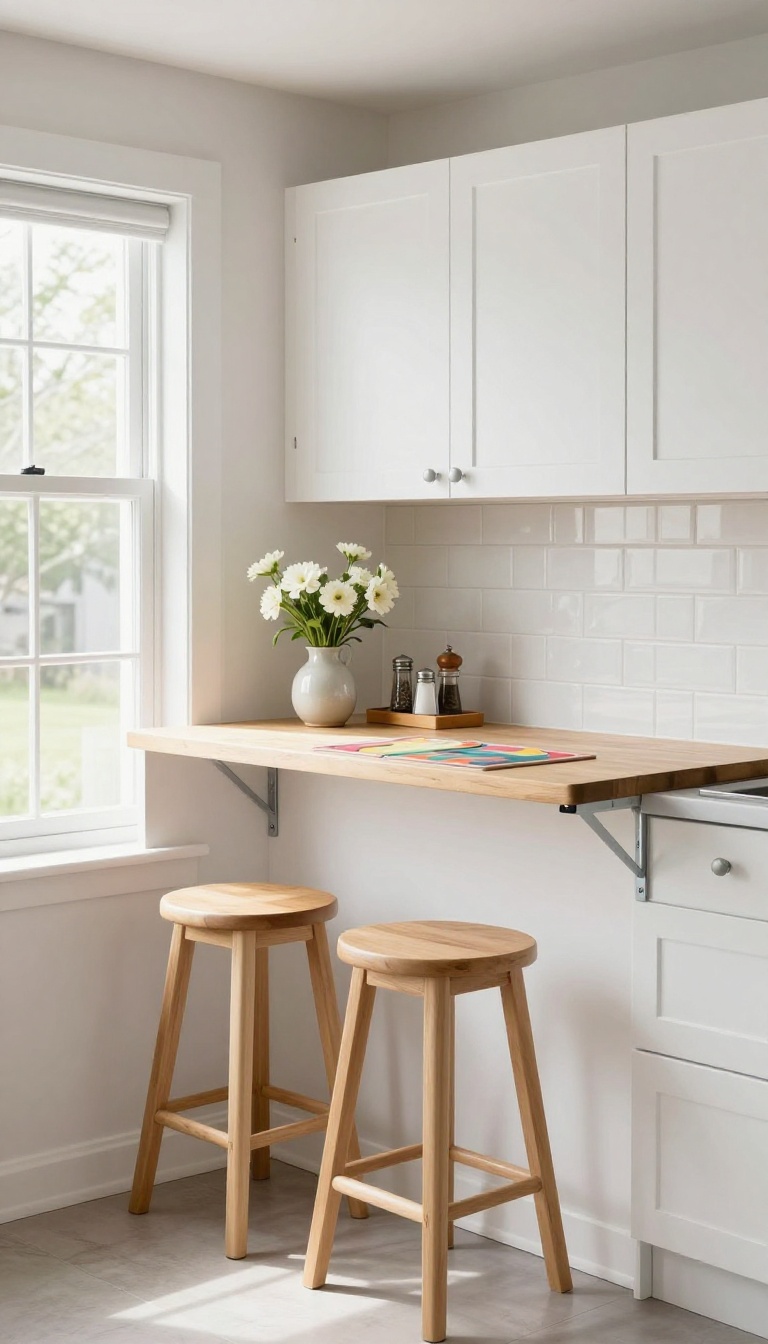
When square footage is tight, a permanent breakfast bar can eat up valuable floor space. A fold-down option flips up only when you need it, giving you a sturdy spot for meals without the bulk. It's a smart, space-saving solution that keeps your kitchen feeling open and airy.
A wall-mounted fold-down table is a game-changer for small kitchens. It attaches to a wall or cabinet, folds flat when not in use, and provides a solid surface for quick breakfasts or coffee breaks. Pair it with slim stools that tuck neatly underneath to keep the area clear and unobstructed.
Choosing The Right Hinges And Support
The key to a reliable fold-down bar is sturdy hardware. Look for heavy-duty folding brackets that can support the weight of plates, mugs, and leaning elbows. Consider a drop-leaf design with a locking mechanism for extra stability.
Test the hinge action before committing to ensure smooth folding and unfolding.
Space-saving Stool Options
To maximize the space-saving benefit, choose stools that can be stored away when the bar is folded. Look for stackable stools, nesting stools, or stools that can hang on a wall hook. A slim profile with a low back or no back makes them easy to tuck under the bar or into a nearby corner.
Styling A Fold-down Bar
Even a compact fold-down bar can have personality. Add a small vase with fresh flowers, a stylish tray for salt and pepper, or a couple of colorful placemats. When the bar is folded up, the wall space can be used for art or a chalkboard menu.
Keep the area around it clutter-free to maintain that open feel.
2. Window-Facing Breakfast Nook with Built-In Seating
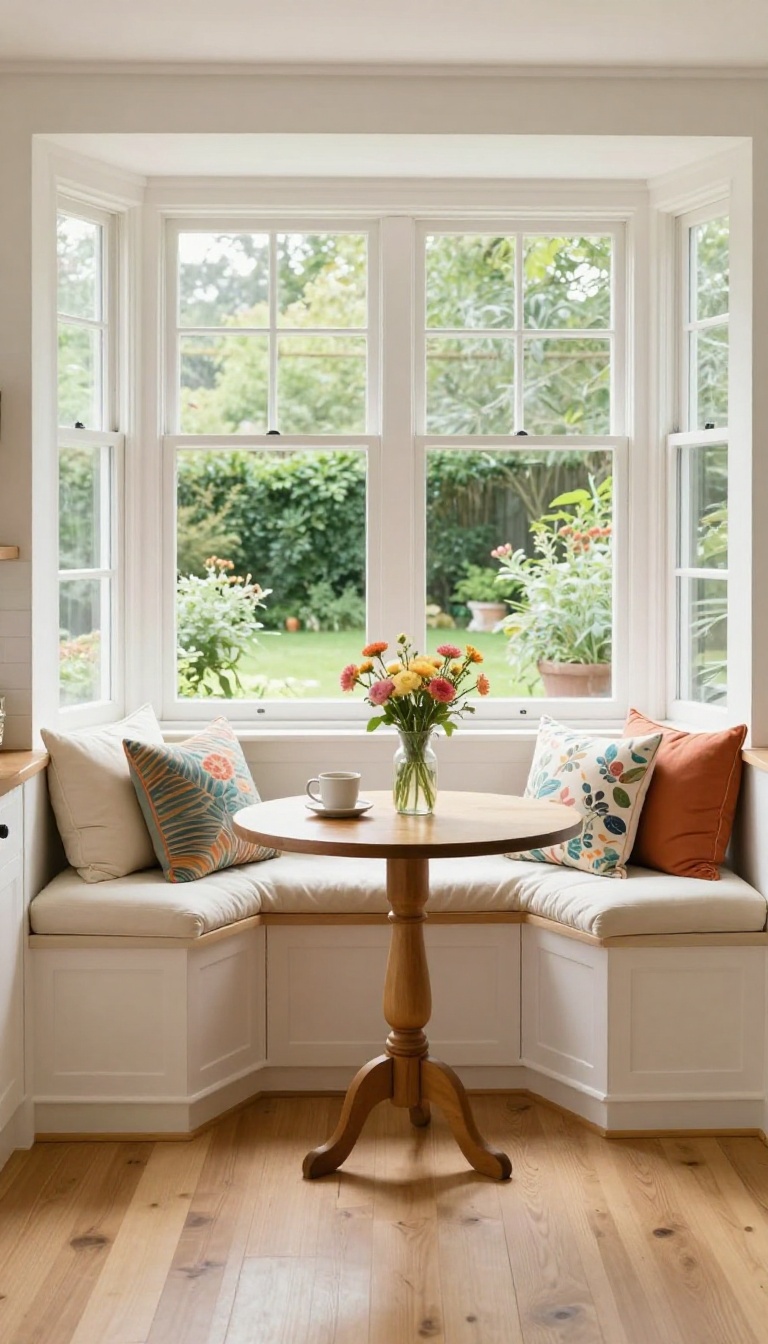
If you have a bay window or a bump-out that's just collecting dust, this idea turns it into the most requested seat in the house. Built-in benches and a small table create a cozy nook that feels like a mini escape—without giving up any floor space. Add cushions and throw pillows, and you've got a breakfast spot that's both practical and pretty.
A window-facing breakfast nook is all about making the most of natural light and awkward corners. The built-in seating hugs the wall, so you don't need extra chairs that get in the way. Plus, the table can be sized to fit your space—round for tight corners, rectangular for longer walls.
This setup works especially well in kitchens that lack a dedicated dining area, giving you a spot for quick meals or lazy weekend coffee.
Maximize The View And Light
Position the table and benches so you're looking outward, not at a wall. If your window faces a garden, street, or just a nice tree, that becomes your backdrop. Keep the windowsill clear or add a few small plants to bring the outside in.
Sheer curtains let in soft morning light while still offering privacy when you need it.
Built-in Bench Comfort
Cushions are non-negotiable for a built-in bench. Choose foam that's at least 2 inches thick and covered in a durable, stain-resistant fabric. Add a mix of throw pillows for back support and a pop of color.
If you're worried about storage, hinged bench seats can lift up to reveal hidden cubbies for table linens, small appliances, or kids' toys.
Choosing The Right Table Shape
A round table feels more intimate and works well in tight spaces, while a rectangular table offers more surface area for spreading out. Consider a drop-leaf table if you need flexibility—it can fold down when you're not using it. Pair the table with a bench on one side and a couple of chairs on the other for a more casual, mixed look.
Styling Ideas For A Cozy Look
Layer textures to make the nook inviting: a chunky knit throw, linen cushions, and a woven rug underneath. Add a small pendant light or wall sconce for evening ambiance. Keep the color palette soft and neutral, then bring in warmth with wood tones and greenery.
A small vase of fresh flowers on the table is the finishing touch.
3. Kitchen Island Overhang with Comfortable Stools
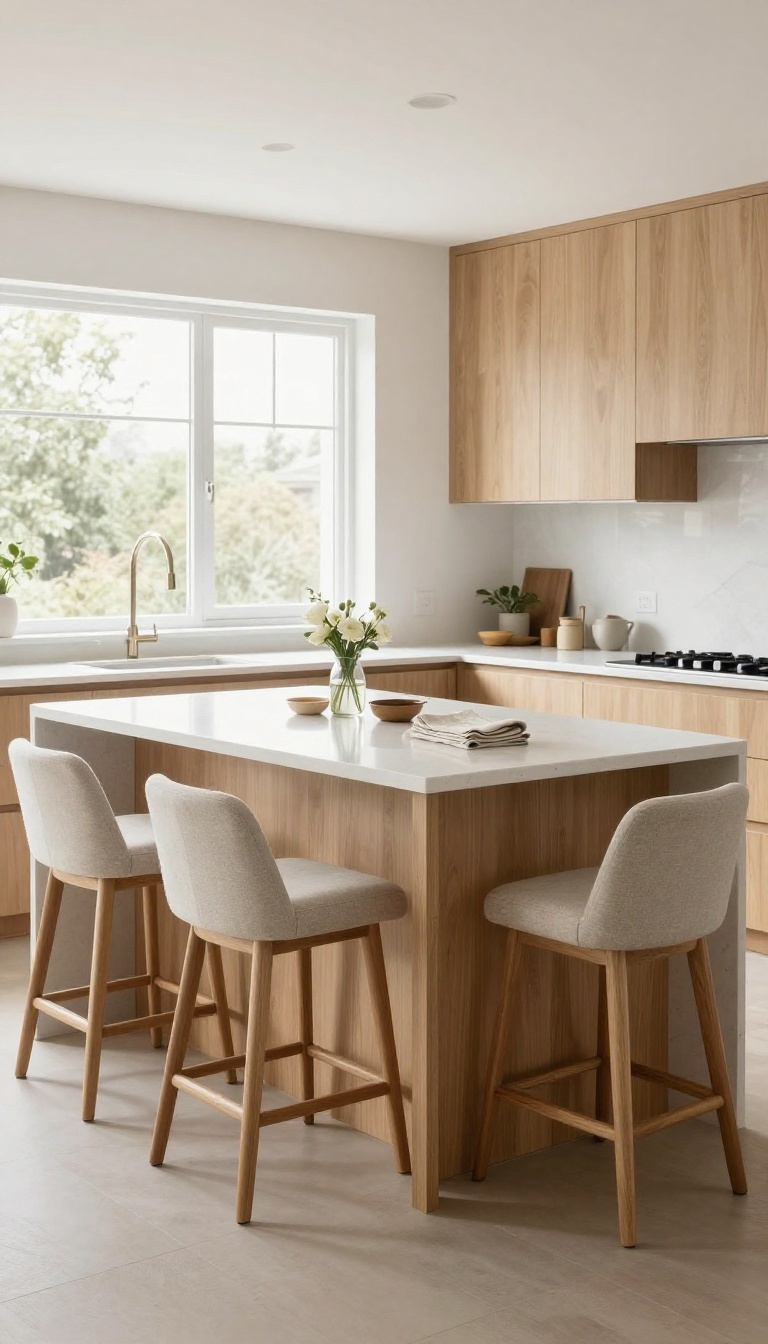
An island overhang is one of the most popular ways to add casual seating without taking up extra floor space. By simply extending your countertop, you create a natural spot for meals, homework, or morning coffee. The trick is making it comfortable enough that people actually want to linger.
Start by planning the overhang depth—typically 12 to 15 inches is enough for a comfortable knee space, but if you want more legroom, go for 15 to 18 inches. Pair that with stools that have back support and a footrest, because perching on a backless stool gets old fast. Leave at least 18 inches between the counter edge and the back of the stool when it's pushed in, so people can slide in and out easily.
Getting The Overhang Depth Right
Measure your island's countertop overhang before buying stools. A 12-inch overhang works for tight spaces, but 15 inches feels more relaxed. If you plan to use the bar for meals, aim for 15 to 18 inches to give diners enough room to sit comfortably without bumping their knees.
Choosing Stools That Support Long Sittings
Look for stools with a supportive backrest and a footrest that's positioned so your feet can rest naturally. Swivel stools can add convenience, but make sure they don't take up too much visual space. Upholstered seats add comfort, but consider wipeable materials for easy cleanup.
Clearance And Flow Around The Island
Leave at least 36 inches of clearance behind the stools so people can walk by while others are seated. If your island is near a wall or appliance, measure the total space to avoid a cramped feel. Test the stool height—your counter should be about 10 to 12 inches higher than the seat.
4. Rustic Farmhouse Bar with Open Shelving
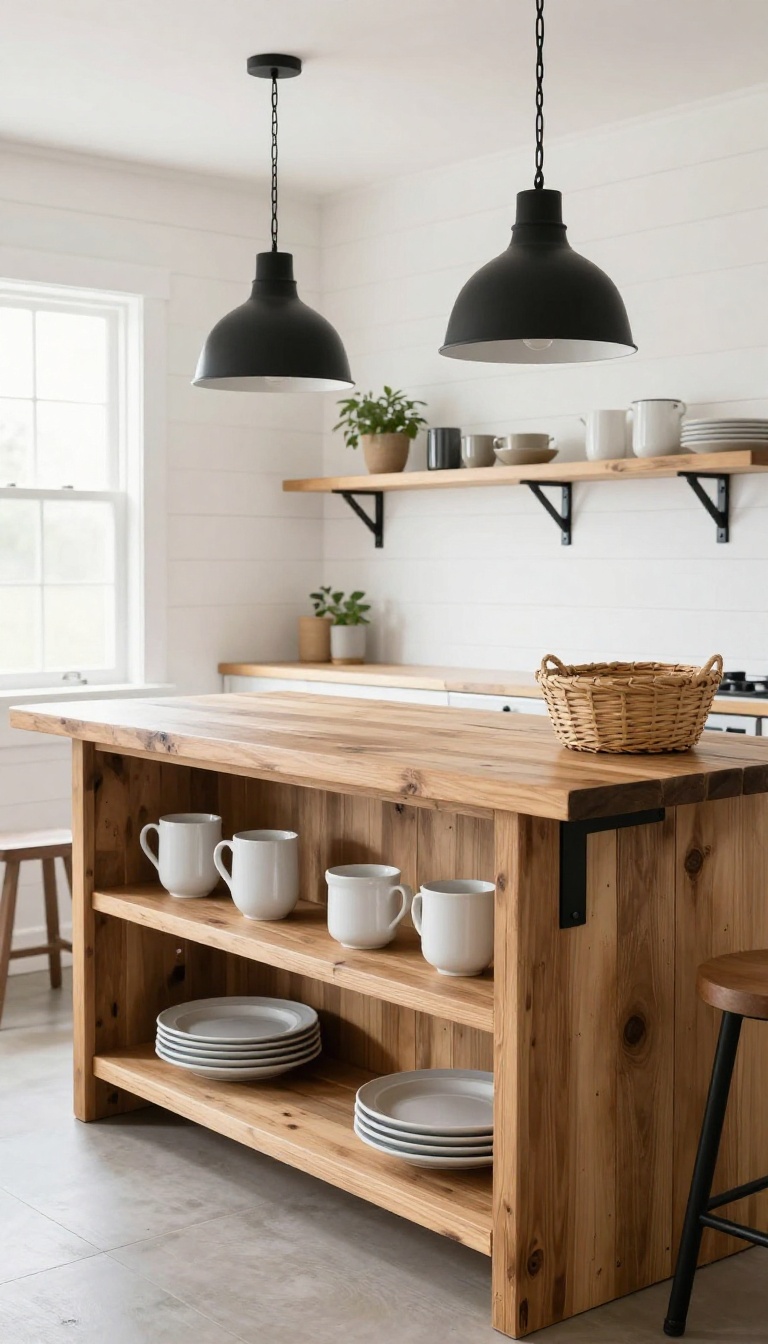
Reclaimed wood instantly warms up a kitchen, and when it forms a breakfast bar, it becomes the heart of the room. Pair that with open shelving below, and you've got a setup that's as practical as it is pretty. The natural grain and weathered texture add character, while the shelves keep everyday items within easy reach.
This design leans into the farmhouse aesthetic without feeling too themed. The key is mixing materials and keeping the look relaxed. You can use a thick slab of reclaimed wood for the counter, then let simple brackets or a sturdy frame support it.
Below, open shelves made from the same wood or a complementary tone hold baskets, mugs, and cookbooks, turning storage into part of the decor.
Choosing The Right Wood
Reclaimed wood comes in all shades and textures. For a true farmhouse feel, look for boards with visible grain, knots, and maybe a few nail holes. Pine and oak are popular choices, but you can also use barn wood for extra character.
If you're worried about maintenance, seal the surface with a food-safe finish so it's easy to wipe down after meals.
Styling The Open Shelves
Open shelves are all about balance. Mix functional items like stacked plates and coffee mugs with decorative touches like a small plant or a stack of cookbooks. Use baskets to hide clutter and keep the look tidy.
Try grouping items in odd numbers and varying heights for a natural, curated feel. Remember to leave some breathing room so it doesn't look overcrowded.
Lighting And Seating
Lighting can make or break the rustic vibe. Pendant lights with a matte black or bronze finish hang nicely above the bar and cast a warm glow. For seating, wooden stools with a natural finish or even a cushioned bench can work.
If you're short on space, consider backless stools that tuck neatly under the bar when not in use.
5. Minimalist Waterfall Edge Breakfast Bar
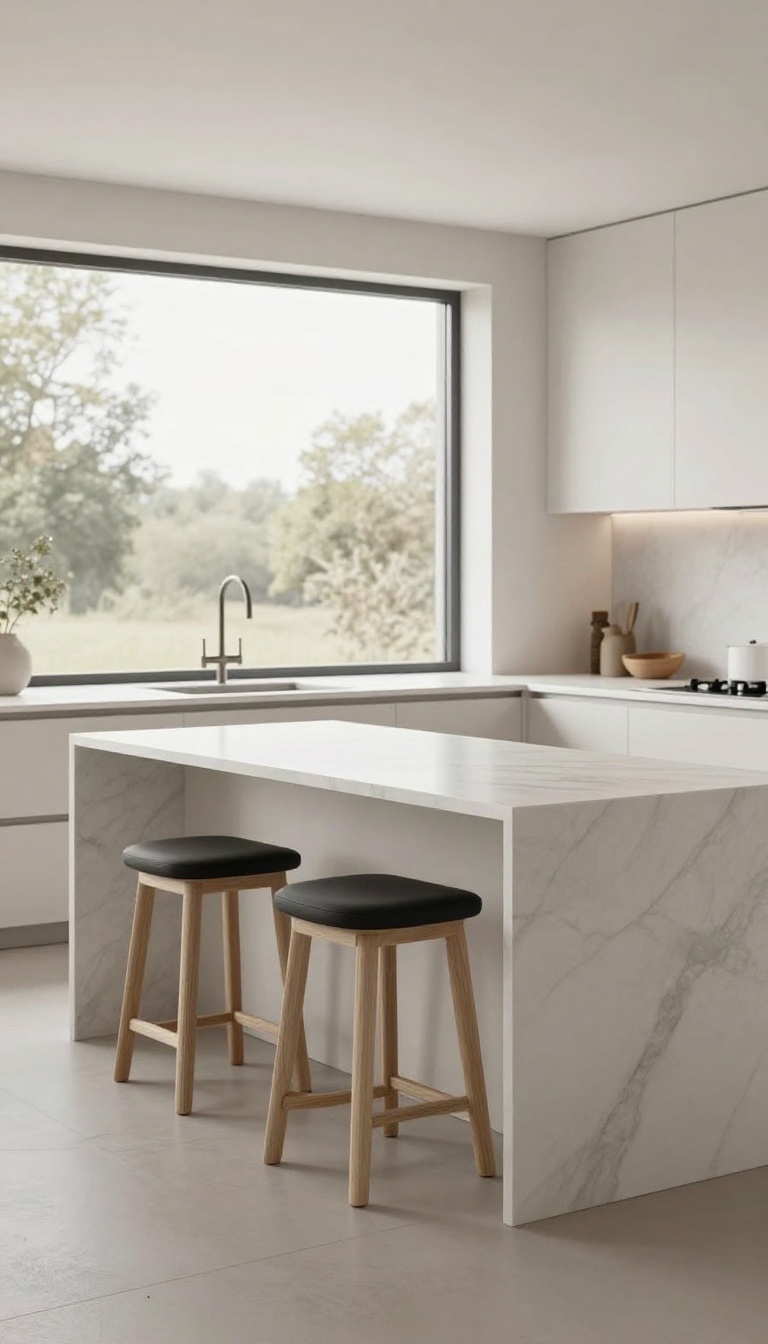
Clean lines and a seamless flow define the minimalist waterfall edge breakfast bar. Instead of a traditional countertop that stops abruptly, the surface material cascades down the sides, creating a sleek, monolithic look. This design is perfect for modern kitchens where simplicity and elegance take center stage.
The waterfall edge is more than just a visual trick—it's a design statement. By extending the countertop material down to the floor, it eliminates visual clutter and makes the bar feel like a sculptural piece. Pair it with simple, sculptural stools and keep the surface clutter-free to let the clean lines shine.
This approach works especially well in open-plan spaces where the bar becomes a subtle divider without feeling heavy.
Why Choose A Waterfall Edge?
A waterfall edge adds a touch of luxury and sophistication to any kitchen. It creates a continuous line that draws the eye, making the space feel more cohesive and polished. Plus, it's surprisingly practical—no awkward corners to bump into, and the seamless surface is easy to wipe clean.
Styling Your Minimalist Bar
Keep the focus on the architecture. Choose stools with clean, geometric shapes—think molded plastic, light wood, or metal with a matte finish. Avoid ornate details or busy patterns.
On the countertop, a simple ceramic mug or a small plant is all you need. The goal is to let the waterfall edge be the hero.
Material Ideas For A Seamless Look
Quartz and marble are classic choices for a waterfall edge because they come in large slabs that can be cut to flow seamlessly. For a warmer feel, consider a light oak or walnut veneer. If you're on a budget, laminate can mimic the look at a fraction of the cost.
Just make sure the material is durable enough for daily use.
6. Two-Tiered Bar for Multi-Function Use
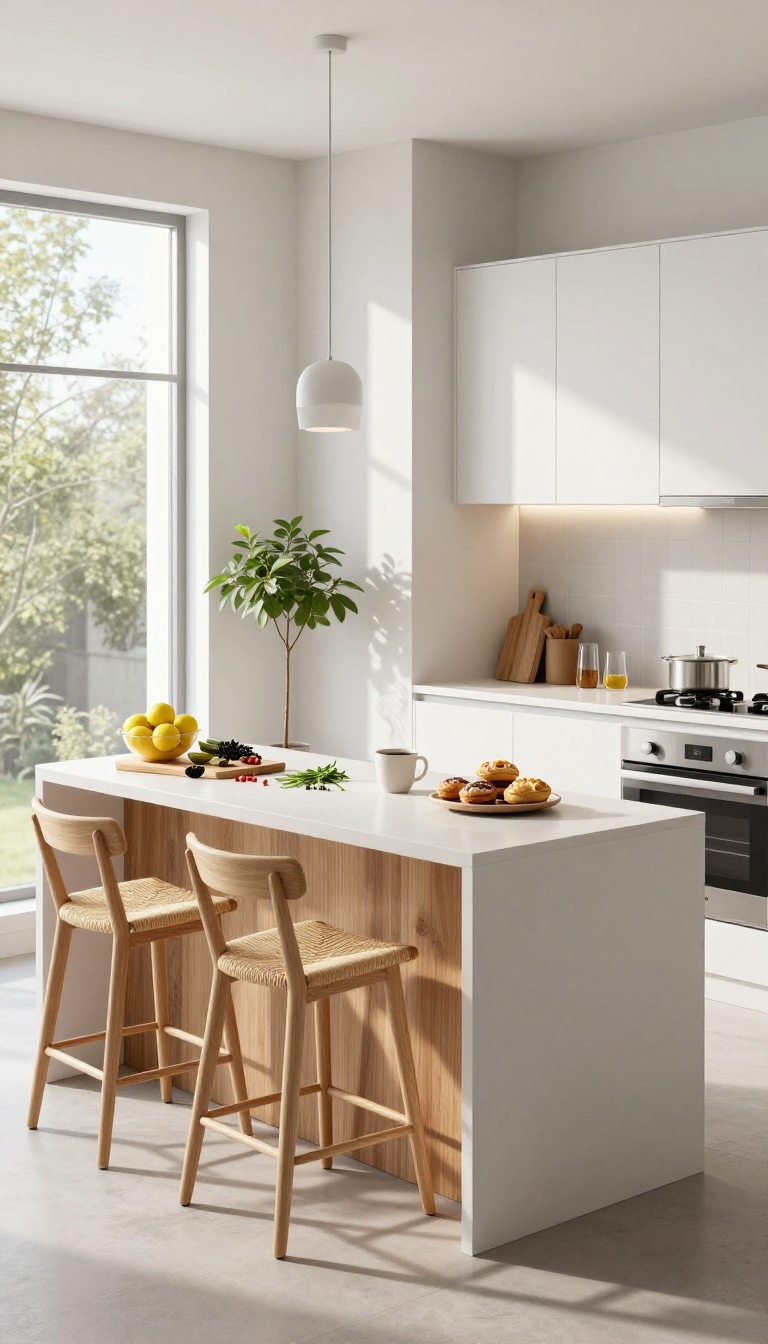
A two-tiered breakfast bar is a clever way to separate the cooking zone from the dining zone without losing that open, connected feel. The raised counter acts as a visual and functional barrier, hiding the inevitable mess of meal prep while you entertain or keep an eye on the kids. This design is especially handy in open-plan kitchens where you want to keep the living area looking tidy.
The key to a successful two-tiered bar is the height difference. The lower tier, typically at standard counter height, is your workspace for chopping, mixing, or setting out dishes. The upper tier, raised about 6 to 12 inches higher, becomes the eating surface.
This separation means guests can sit at the bar without being in the way of your cooking, and you can still chat with them without worrying about flour clouds or onion tears.
How To Plan The Heights
Standard counter height is around 36 inches, while bar height is usually 42 inches. For a two-tiered bar, the lower prep area should stay at 36 inches, and the upper dining surface should be between 40 and 42 inches. This gives enough clearance for a comfortable seating position and keeps the sightline open.
If you're working with a custom build, make sure to account for the thickness of the countertop material so the final heights fall within the recommended range.
Materials That Work Well
Mixing materials can make the two-tiered design look intentional. For example, a butcher block lower tier for prep and a quartz or granite upper tier for dining adds texture and durability. If you prefer a seamless look, use the same material for both, but consider a contrasting edge or color to define the two levels.
Keep in mind that the upper tier will get more wear from dishes and glasses, so choose a scratch-resistant surface.
Styling And Lighting Tips
Hang pendant lights above the upper tier to define the dining area and add warmth. For the lower tier, under-counter lighting can brighten your workspace without creating glare. To make the bar feel inviting, add a few bar stools with footrests that tuck neatly under the overhang.
A small vase of flowers or a fruit bowl on the upper tier adds a pop of color, but keep it minimal so there's room to eat.
7. Breakfast Bar with Wine Storage Below
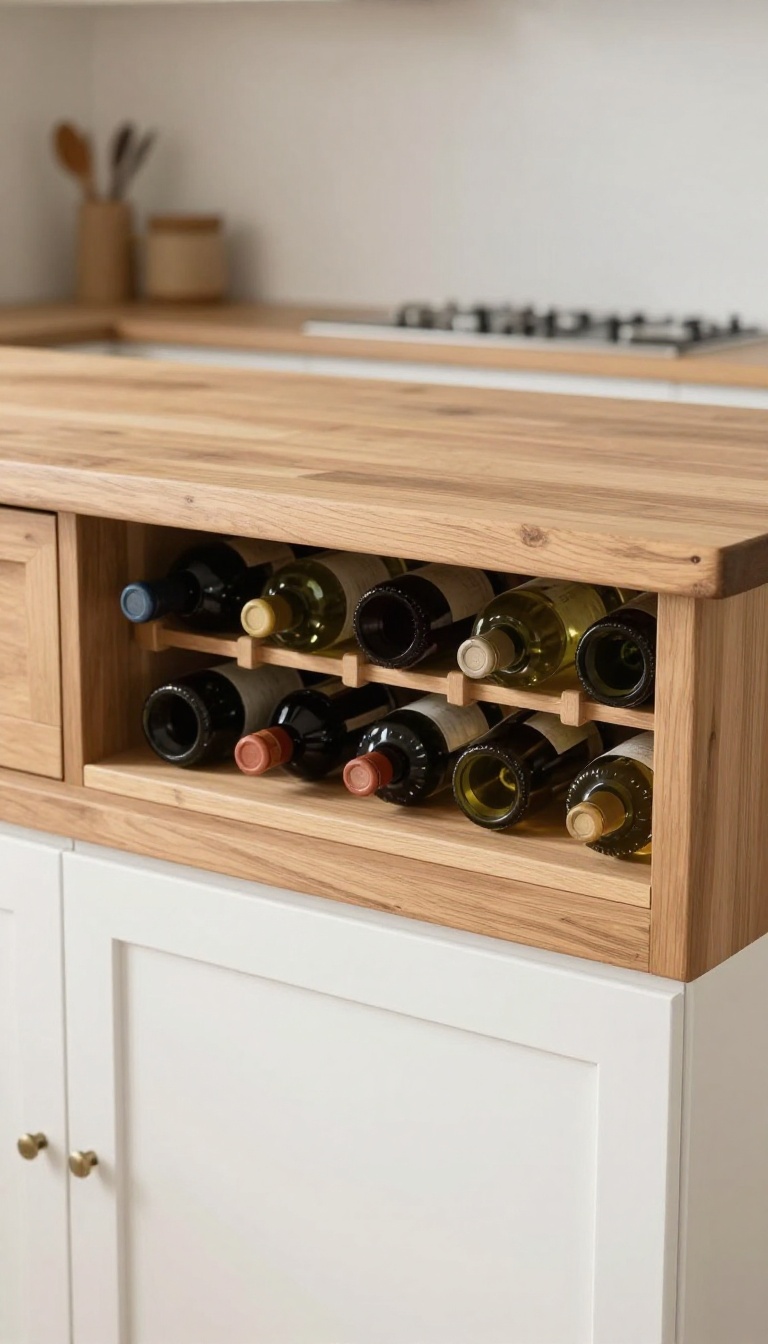
A breakfast bar that doubles as a wine station? That's a win-win. By tucking a wine rack or a mini-fridge underneath, you keep the countertop clear for your morning toast while making it effortless to pour a glass when the evening rolls around.
It's a practical twist that adds a touch of fun without sacrificing function.
Pick Your Storage Style
You've got options when it comes to stashing bottles below. A classic wooden wine rack adds warmth and a rustic feel, while a sleek metal rack brings a modern edge. If you want to keep things cold, a small under-counter beverage fridge is a game-changer—it holds wine, craft sodas, or sparkling water, all within arm's reach.
Design Ideas For A Seamless Look
To keep the bar looking intentional, match the wine storage to your kitchen's vibe. For a farmhouse feel, use open shelving with a few bottles and glasses on display. In a contemporary space, go for a built-in fridge with a panel front that blends right in.
You can also add a couple of wine glass holders underneath the counter to free up cabinet space.
Make It Work For Everyday Use
This idea isn't just for entertaining. Use the lower shelf for a basket of coffee pods or a small pitcher for daily drinks. If you're tight on space, a compact wine rack that fits in a corner still gives you that convenience without taking over.
Just make sure the area stays tidy so it doesn't become a catch-all.
8. Corner Breakfast Bar with L-Shaped Seating
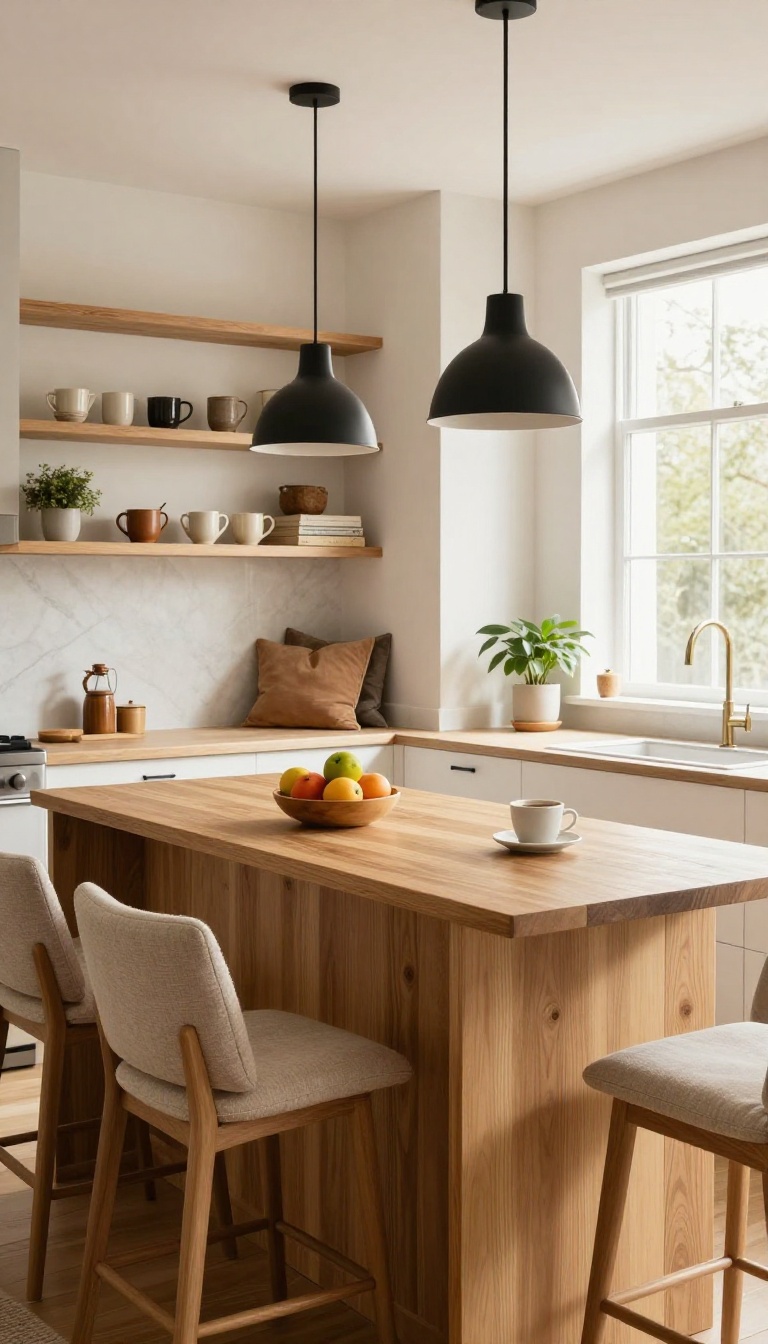
Corners often become catch-all spots for mail, bags, or random clutter. Transforming that awkward nook into an L-shaped breakfast bar gives it a clear purpose and a cozy, built-in feel. The wrap-around design makes the most of limited square footage while creating a natural division between the kitchen and the rest of the room.
An L-shaped breakfast bar tucks neatly into a corner, offering seating on two sides without blocking walkways. It’s a smart choice for smaller kitchens or open-plan layouts where you want to define a dining zone without adding walls. The continuous countertop provides ample space for plates, laptops, or a morning spread, and the corner itself becomes a welcoming perch.
Why An L-shape Works In Tight Spots
The L-shape hugs the corner, so it uses space that might otherwise go unused. It also creates a natural traffic flow, leaving the center of the kitchen open for cooking and moving around. Plus, the angled seating makes conversation easier, whether you’re chatting with the cook or with someone across the bar.
Comfort First: Cushions And Pillows
Hard stools can make a long coffee session uncomfortable. Add a custom cushion that runs along the seating area, and toss on a few throw pillows for back support. Choose fabrics that are durable and easy to wipe down, like outdoor or performance fabrics, so the bar stays pretty without high maintenance.
Styling Ideas For The Corner Bar
Hang a couple of pendant lights directly above the counter to define the space and add warmth. Use the corner wall for open shelving to store mugs, cookbooks, or small plants. A slim console or a few hooks underneath can hold bags or aprons, keeping the area tidy and functional.
9. Breakfast Bar with Hidden Storage Drawers
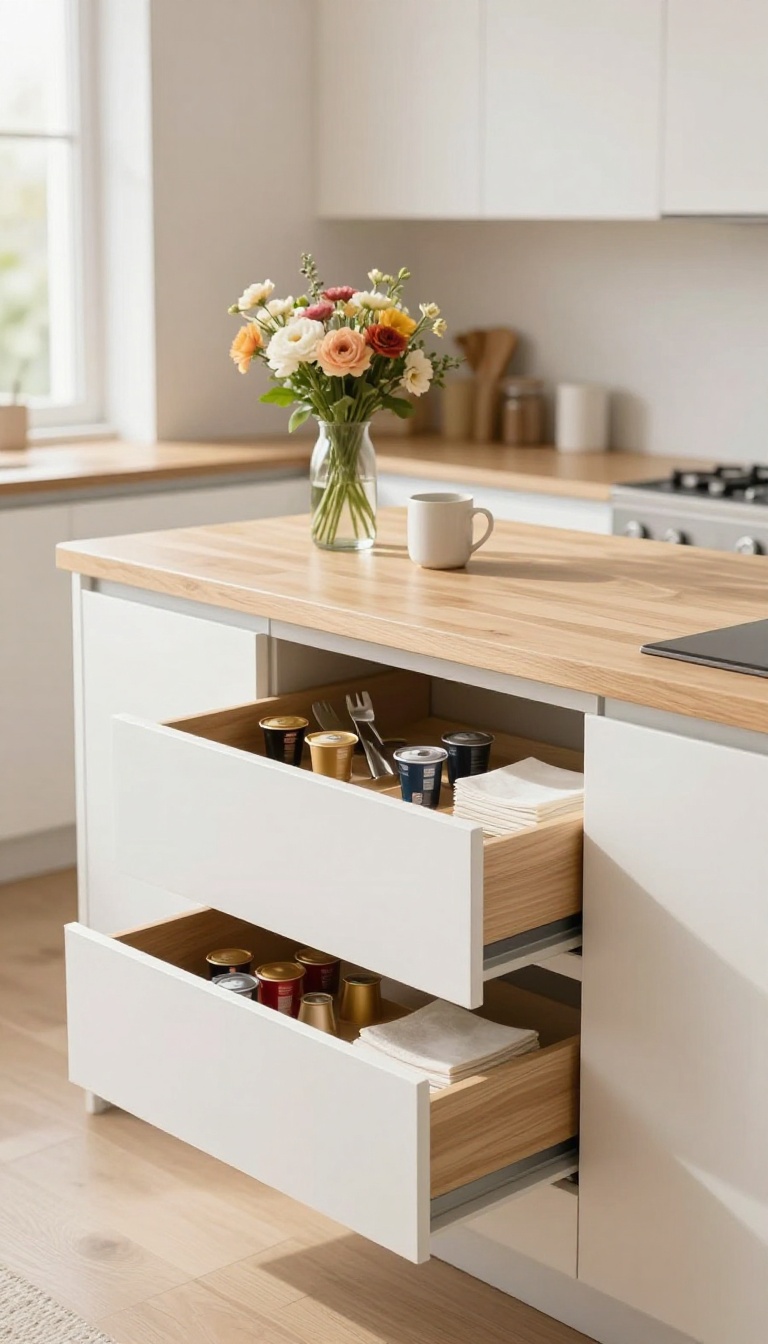
Hidden storage is a game-changer when you want a clean, clutter-free breakfast bar. Instead of piling napkins, cutlery, and small gadgets on the counter, you can tuck them away neatly. This idea keeps everything you need within arm’s reach but completely out of sight, making your kitchen feel more spacious and calm.
A breakfast bar with built-in drawers or cubbies on the side is a smart way to maximize every inch of space. You can store everyday items like coffee pods, tea bags, or even a toaster, freeing up counter space for food prep or decorative touches. The key is to design the storage to match your actual habits—think about what you reach for most often during breakfast and make those items the easiest to grab.
What To Store In Hidden Drawers
Think about the items that tend to pile up on your counter during morning rush: mugs, cereal bowls, spoons, and maybe a blender or juicer. Drawers can hold these neatly, but you can also use them for linens, placemats, or even a small trash bin. The goal is to keep the surface clear so you have room to actually eat and work.
Design Ideas For Drawer Placement
Drawers can slide out from the side of the bar, facing the kitchen or the dining area. If the bar is against a wall, consider pull-out shelves that access from the front. For an island-style bar, you might add drawers on both sides for easy access from either seat.
Just make sure the hardware is sturdy and the slides are smooth—you’ll be using them daily.
Styling Tips To Keep It Pretty
Even with hidden storage, you want the bar to look inviting. Choose drawer fronts that match your cabinetry or contrast nicely with the bar top. Add a small vase of fresh flowers or a bowl of fruit on top to soften the look.
Keep the area around the drawers clear so they open easily, and consider soft-close hinges to avoid slamming during busy mornings.
10. Marble-Topped Breakfast Bar with Gold Accents
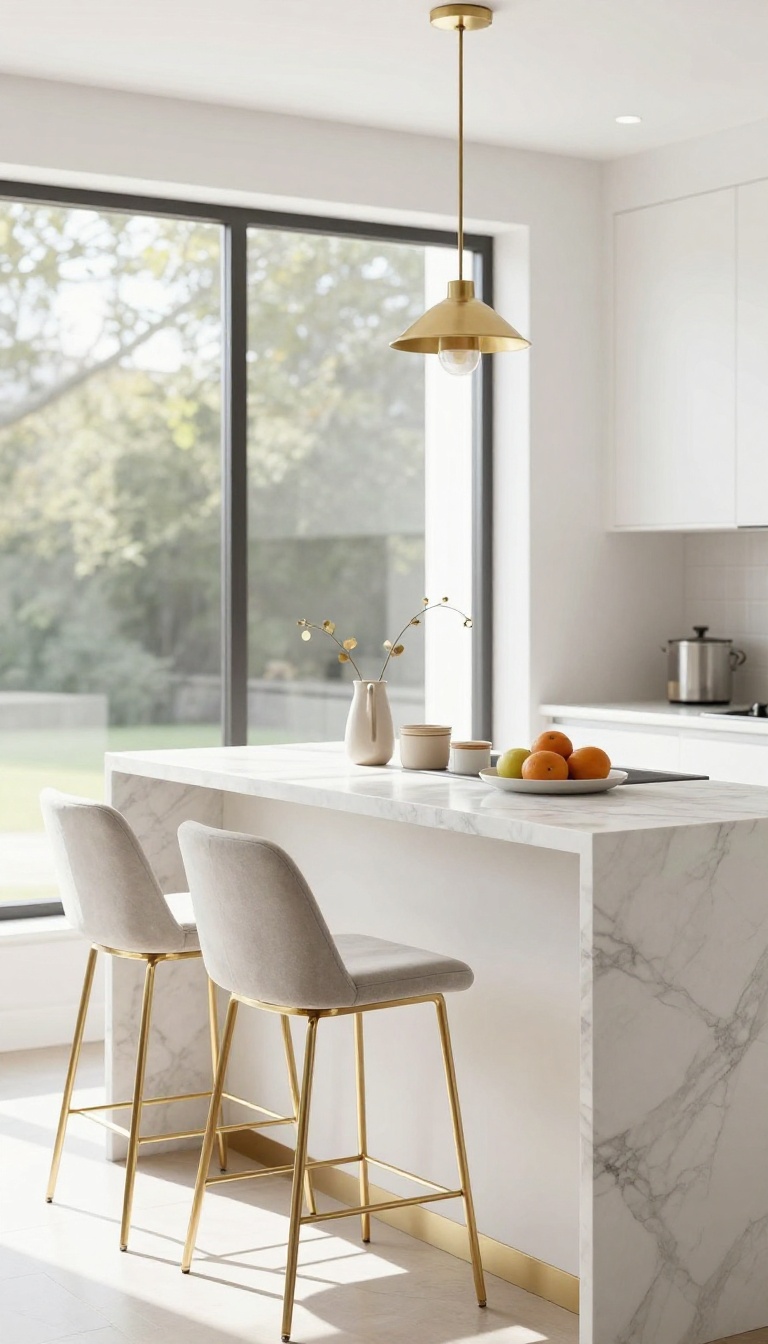
Marble and gold are a timeless duo that instantly elevates a kitchen. If you want a breakfast bar that feels like a piece of jewelry, this combo delivers. The cool, veined stone contrasts beautifully with warm metallic details, creating a space that's both refined and welcoming.
The key is to let the marble shine while using gold as a subtle accent. You don't need to go overboard—a few well-chosen pieces can transform the whole look. This style works especially well in kitchens with white or neutral cabinetry, where the marble becomes the star.
A marble countertop brings a sense of luxury that's hard to beat. But marble isn't just about looks—it's also durable and easy to clean, making it perfect for a busy breakfast bar. Pair it with gold or brass fixtures, and you've got a space that feels both elegant and practical.
Start with the countertop itself. Carrara marble is a classic choice with its soft gray veining, but you could also go for Calacatta for more dramatic contrast. The finish matters too: honed marble has a matte look that's less slippery and more forgiving, while polished marble shines bright.
If you're on a budget, consider marble-look quartz—it gives you the aesthetic without the upkeep. Gold accents can come in many forms. Bar stools with slim gold legs add a touch of glamour without overwhelming the space.
A pendant light with a brass finish above the bar draws the eye and sets the mood. Even simple details like gold drawer pulls or a gold-edged tray for salt and pepper can tie the look together. Don't forget the practical side.
Marble is porous, so sealing it is a must to prevent stains from coffee or juice. Use coasters and cutting boards to protect the surface. And when you're choosing stools, make sure they're the right height for your counter—comfort matters as much as style.
Choosing The Right Marble
Not all marble is created equal. Carrara is the most common and budget-friendly, with soft gray veins on a white background. Calacatta is more dramatic, with thicker, bolder veins and a brighter white base—it's pricier but makes a statement.
If you want something different, consider Nero Marquina for a black marble with white veining, or Crema Marfil for a warm beige tone. Think about your kitchen's overall palette. White marble works with almost anything, but if you have warm wood cabinets, a creamier marble might blend better.
Look at samples in natural light, because the veining can look different depending on the time of day.
Gold Accents That Work
Gold doesn't have to be loud. Brushed brass or antique gold finishes feel more subdued than shiny polished gold. Use them sparingly—maybe on the stool legs, a pendant light, or a few accessories.
A gold faucet if your bar has a sink, or gold cabinet hardware, can also add a subtle touch. Mixing metals is okay, but keep it intentional. If you have stainless steel appliances, you can still use gold accents as long as they're not right next to each other.
The goal is a cohesive look, not a cluttered one.
Styling And Comfort
Make the bar inviting with a few soft touches. Add a couple of cushions to the stools in a neutral tone or a muted color that complements the marble. A small vase with fresh flowers or a bowl of fruit adds life.
Keep the surface clear of clutter—just a coffee mug and a plate are enough. Lighting is crucial. A pendant light with a brass or gold finish not only looks great but also provides task lighting for morning coffee.
Position it about 30 inches above the counter for the best effect. If you have a window nearby, natural light will make the marble sparkle.
11. Breakfast Bar with a Built-In Herb Garden
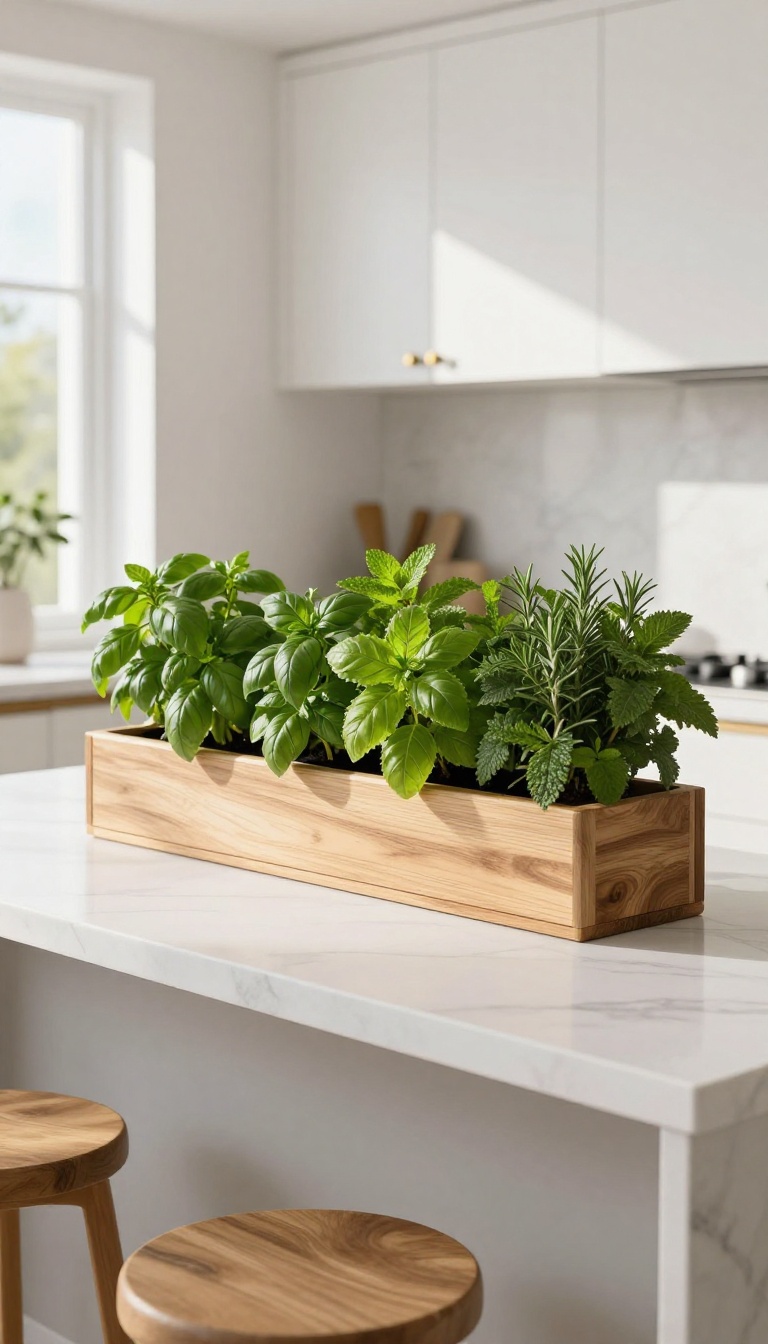
Fresh herbs can transform a meal, but they often end up forgotten in the fridge or wilted on the counter. A built-in herb garden right at your breakfast bar solves that problem in the most charming way. It puts basil, mint, and rosemary within arm's reach while adding a living, breathing element to your kitchen decor.
This idea works especially well if you have a bar that gets plenty of natural light. Even a small planter box along the back edge can make a big difference. You'll love how it brings a touch of nature indoors and makes every dish taste a little brighter.
A built-in herb garden is more than just a pretty feature—it's a functional upgrade that encourages cooking with fresh ingredients. The key is to design it so it doesn't interfere with your dining space or create a mess. With the right setup, you can have a thriving mini-garden that's both practical and beautiful.
Here’s how to make it work in your kitchen, from choosing the right spot to picking herbs that thrive indoors.
Choosing The Right Spot And Planter
The best location for your herb garden is along the back edge of the breakfast bar, where it won't get in the way of plates or elbows. A shallow planter box—about 4 to 6 inches deep—works perfectly for most herbs. You can have it custom-built to match your countertop, or use a sleek, self-watering planter that sits flush with the surface.
Make sure the spot gets at least 6 hours of sunlight a day. If your kitchen is on the darker side, consider adding a small grow light underneath the upper cabinets to keep your herbs happy.
Herbs That Thrive Indoors
Not all herbs are suited for indoor life, so choose ones that are hardy and compact. Basil, parsley, chives, and mint are great starters because they grow quickly and don't need a lot of space. Rosemary and thyme are also good options, but they prefer drier conditions, so be careful not to overwater.
You can mix a few favorites in one planter, but make sure they have similar watering needs. Grouping herbs with similar sunlight and moisture requirements will make maintenance a breeze.
Easy Maintenance Tips
To keep your herb garden thriving, water it regularly but avoid soaking the soil. A good rule of thumb is to check the top inch of soil—if it feels dry, it's time to water. Use a well-draining potting mix and make sure the planter has drainage holes to prevent root rot.
Trim your herbs often to encourage new growth. When you snip a few leaves for your morning omelet or evening cocktail, you're actually helping the plant become bushier. Just don't take more than a third of the plant at once.
12. Breakfast Bar with a Chalkboard Front
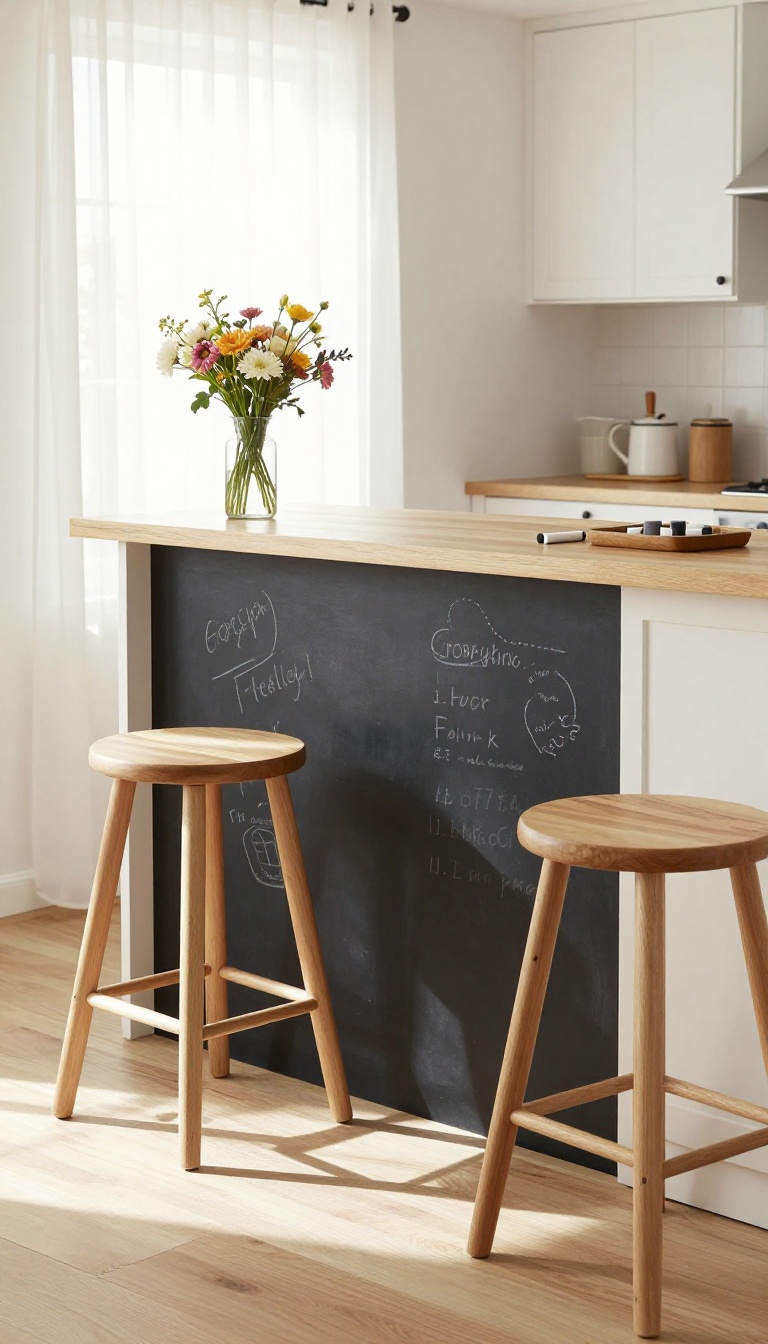
A chalkboard front isn't just a nostalgic throwback—it's a smart, interactive twist on your breakfast bar. It turns a simple piece of furniture into a family communication hub, a menu board, or a canvas for doodles. The best part?
You can change it as often as you like, so it always feels fresh and personal.
Painting the front of your breakfast bar with chalkboard paint adds a playful, functional element that everyone can use. It's perfect for jotting down grocery lists, leaving sweet notes for family members, or sketching out the week's dinner plan. Plus, it's a budget-friendly upgrade you can do in an afternoon.
Why It Works
A chalkboard front gives your breakfast bar a second job. It becomes a visual anchor that draws the eye and invites interaction. Kids love to draw on it, and adults can keep track of appointments or meal ideas.
The matte black finish also adds a nice contrast to lighter kitchen palettes.
How To Pull It Off
Choose a high-quality chalkboard paint and apply it evenly with a roller for a smooth finish. You can cover the entire front or just a section, depending on your style. For a more polished look, frame it with trim or molding.
Use liquid chalk markers for crisp, clean lines that wipe off easily.
Styling And Maintenance
Keep a small tray of chalk and an eraser nearby so it's always ready to use. To prevent ghosting, season the board by rubbing chalk over it and wiping it off before first use. You can also add a shelf below for storing chalk and other essentials, keeping the area tidy.
13. Breakfast Bar with a Built-In Coffee Station
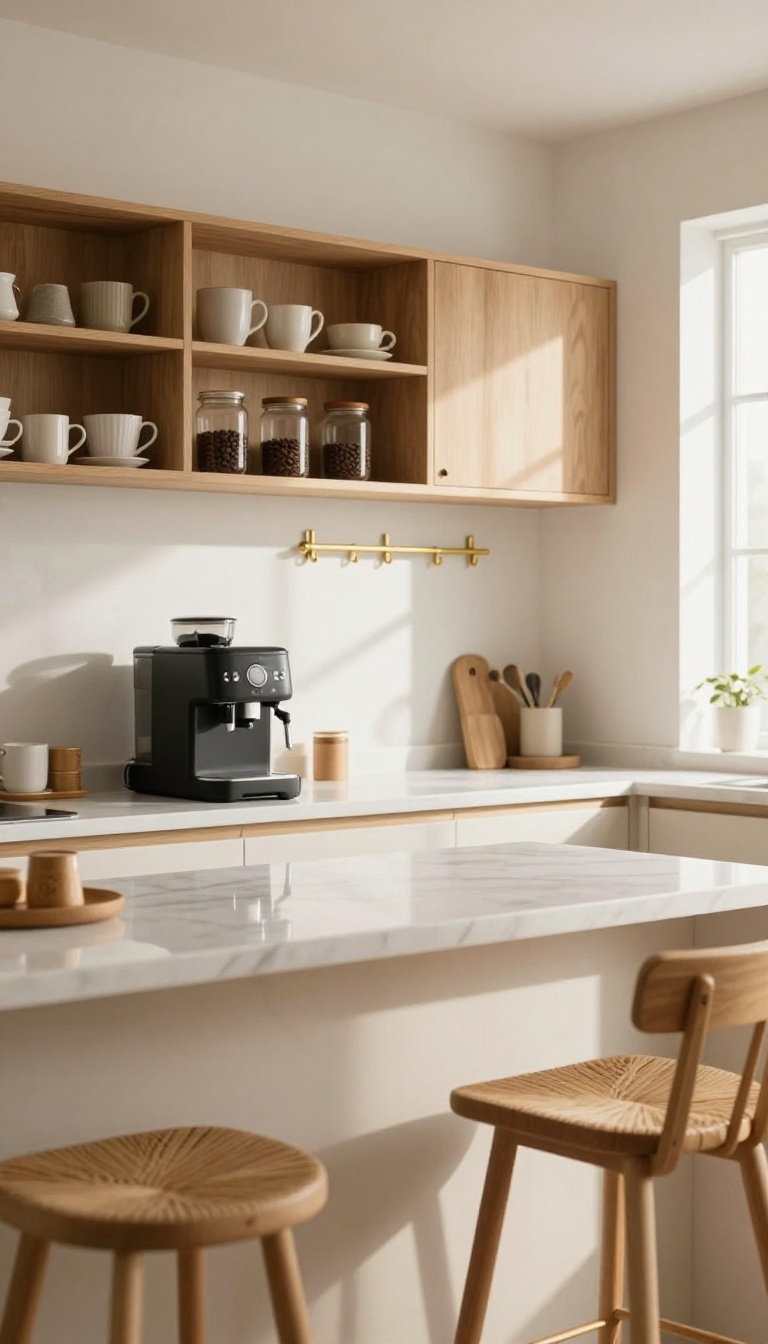
For many of us, the morning coffee ritual is sacred. Why not give it a permanent, dedicated home right at the breakfast bar? A built-in coffee station turns that corner into the most functional spot in your kitchen, saving you steps and counter space.
This isn't just about cramming a machine onto the counter. It's about thoughtful design—mug hooks, a drawer for pods, a spot for your grinder. The result is a streamlined setup that feels intentional and looks great.
When you dedicate one end of your breakfast bar to coffee, you create a morning command center. Everything you need is within arm's reach, and the rest of the bar stays clear for meals and other tasks. It's a practical upgrade that adds serious charm.
Here's how to make it work, from layout to styling.
Plan The Layout
Think about the flow. Place the coffee station at the end of the bar, away from the main seating area, so it doesn't interfere with meals. If you have a built-in espresso machine, measure carefully and plan for plumbing if needed.
For a simpler setup, a countertop machine with a nearby outlet works fine. Consider adding a small sink if you have the space—it makes rinsing carafes and filling the water tank much easier. But even without a sink, a dedicated spot for your machine, mugs, and beans can feel like a luxury.
Maximize Storage
Use every inch. Install a shelf above the bar for mugs, or add hooks underneath for cups. A drawer specifically for pods, beans, or ground coffee keeps everything tidy.
You can also add a small pull-out shelf for your grinder or a tray for syrups and stirrers. If you're working with a tight space, consider a narrow cabinet or open shelving unit next to the bar. This gives you extra storage without making the area feel cramped.
Style It With Intention
Make the coffee station look as good as it functions. Use a small tray to corral your machine, sugar, and other essentials. Add a small plant or a piece of art to soften the look.
Choose mugs that reflect your style—they'll be on display, so pick ones you love. Good lighting is key. A pendant light or under-cabinet lighting can highlight the area and make it feel welcoming, even early in the morning.
FAQ
How much space do I need for a breakfast bar?
You can fit a breakfast bar in as little as 24 inches of depth for seating. For a comfortable overhang, aim for at least 12-15 inches of legroom and about 24 inches of width per stool.
What is the ideal height for a breakfast bar?
Standard breakfast bars are typically 42 inches high, which pairs well with bar stools that are 30 inches tall. If you prefer a lower counter, a 36-inch height works with counter-height stools.
How many stools can I fit at my breakfast bar?
Allow about 24-30 inches of width per stool for comfortable seating. For a 6-foot bar, you can fit three stools, while a 4-foot bar usually accommodates two.
What materials are best for a breakfast bar top?
Durable materials like quartz, granite, butcher block, or solid wood are great choices. They withstand daily use and are easy to clean, while adding warmth or elegance to your kitchen.
Can I add a breakfast bar to a small kitchen?
Yes, consider a fold-down bar, a narrow wall-mounted table, or a pull-out counter that tucks away when not in use. These space-saving options still give you a functional eating area.
Conclusion
A breakfast bar can be more than just a place to eat—it can become the heart of your kitchen. Whether you choose a fold-down design for a small space or a marble-topped beauty for a touch of luxury, the key is to match the style to your daily needs. Think about how you'll use the bar, from quick breakfasts to homework sessions or casual chats.
With the right seating, storage, and materials, you can create a charming and practical spot that you'll love for years. Start with one idea that speaks to you and build from there.