13 Paver Patio Ideas for a Crisp and Durable Makeover
Cracked concrete and uneven slabs can make a patio feel older than it is. Pavers offer a fresh alternative that’s built to last, with a look that fits any backyard. Whether you’re starting from scratch or refreshing an existing space, these ideas will help you create a patio that’s both sharp and sturdy.
The beauty of pavers is their versatility. You can mix shapes, colors, and laying patterns to match your home’s style. Plus, they’re easy to repair—if one paver cracks, you just replace it.
That’s a win for both looks and longevity. Let’s walk through 13 paver patio ideas that bring crisp lines and long-lasting performance to your outdoor living area.
1. Classic Brick Herringbone for Timeless Charm
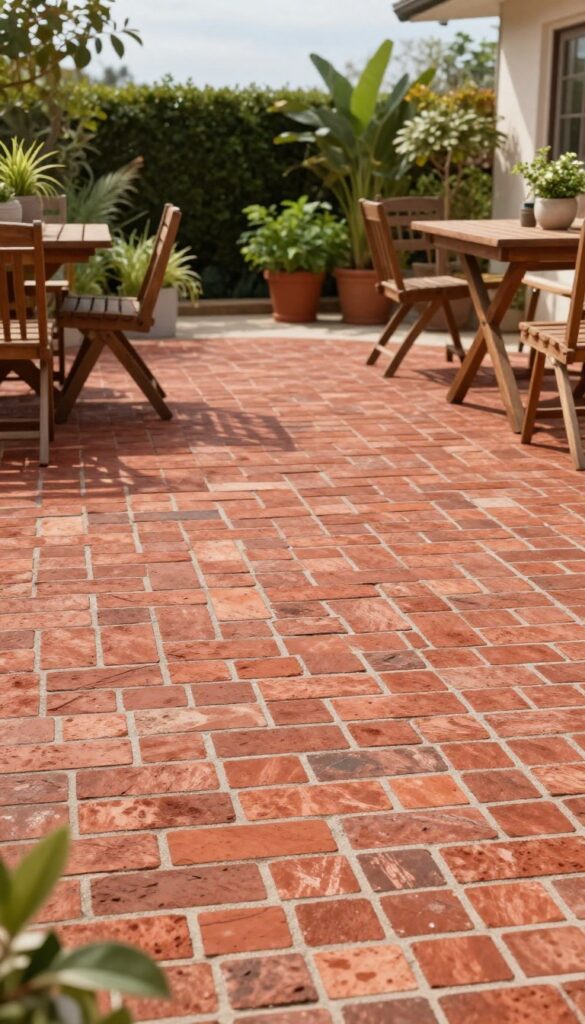
Brick pavers have a way of making a patio feel grounded and established. When you lay them in a herringbone pattern, the effect is even more striking—the zigzag lines draw the eye and add a sense of movement to the space. It’s a classic choice that pairs well with both traditional and modern homes, and it’s surprisingly durable too.
The herringbone pattern is more than just a pretty face. Because the bricks are set at right angles, they lock together tightly, distributing weight evenly. That makes this one of the strongest laying patterns for patios that see a lot of foot traffic or support heavy furniture.
Plus, the pattern naturally hides minor imperfections, so your patio looks crisp even after years of use.
Why Herringbone Works
Herringbone isn’t just about looks—it’s about strength. The interlocking shape prevents shifting and spreading, which is a common issue with other patterns. This makes it a smart pick for high-traffic areas like a patio that connects to a pool or a walkway leading to the front door.
You get a surface that stays flat and stable for decades.
Choosing The Right Brick
When picking bricks for herringbone, think about color and texture. Classic red brick gives that warm, traditional feel, while gray or charcoal bricks offer a more contemporary edge. You can also mix two shades for a subtle checkerboard effect.
Just make sure the bricks are rated for outdoor use and have a slip-resistant surface for safety.
Laying Tips For A Flawless Finish
Start by preparing a solid base of compacted gravel and sand. Then, lay the bricks in a 45-degree or 90-degree herringbone pattern. Use a rubber mallet to tap each brick into place and check for level as you go.
Once all bricks are down, sweep fine sand into the joints and compact the surface to lock everything in.
2. Large-Format Pavers for a Modern Minimalist Look
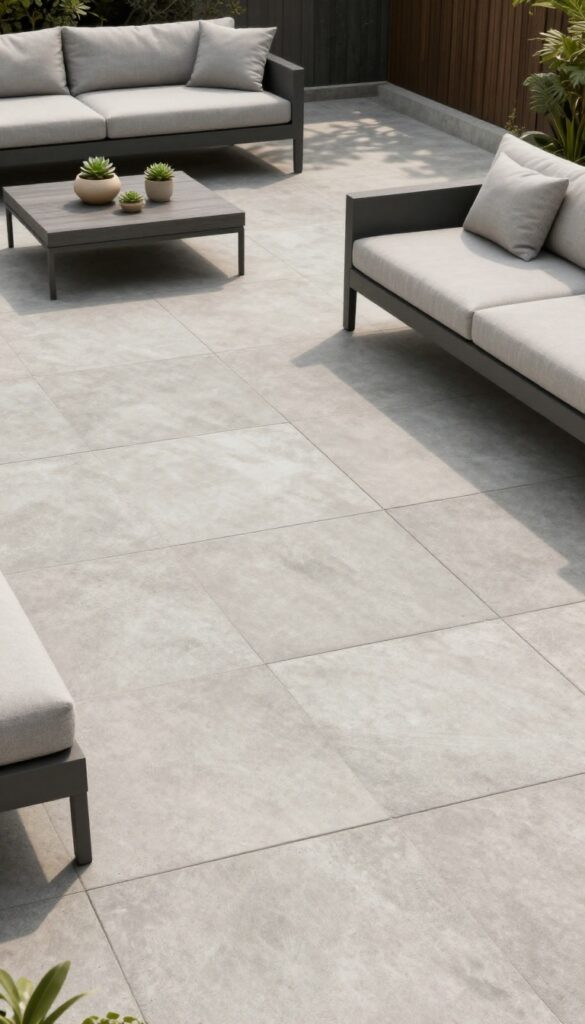
Oversized pavers are having a moment, and for good reason. They bring a clean, uncluttered look that instantly modernizes any outdoor space. With fewer joints, they also mean less maintenance and a smoother surface underfoot.
Large-format pavers, typically 24×24 inches or larger, create a sleek, contemporary aesthetic. The reduced number of joints minimizes weed growth and makes the patio feel more expansive. This style works especially well with modern architecture and minimalist landscaping.
Why Size Matters
Bigger pavers translate to fewer lines and a more seamless surface. That visual continuity opens up the space, making a modest yard feel larger. Plus, fewer joints mean less grout or sand to maintain, so you spend more time enjoying and less time weeding.
Choosing The Right Material
Concrete is the go-to for large-format pavers because it’s affordable and durable. Porcelain is another excellent option—it’s dense, stain-resistant, and available in finishes that mimic natural stone. For a more organic look, consider large-format travertine, which stays cool underfoot.
Installation Tips
Because of their size, large pavers require a perfectly level base to avoid rocking. Use a plate compactor to settle the base thoroughly, and consider hiring a pro if you’re not experienced. Leave a small gap between pavers and fill it with polymeric sand to lock them in place.
Styling Around The Patio
Keep furniture low and streamlined to match the minimalist vibe. Use a neutral color palette—grays, beiges, or charcoal—and let the patio be the star. Add a few potted plants or a simple fire pit to warm up the space without cluttering it.
3. Permeable Pavers for Eco-Friendly Drainage
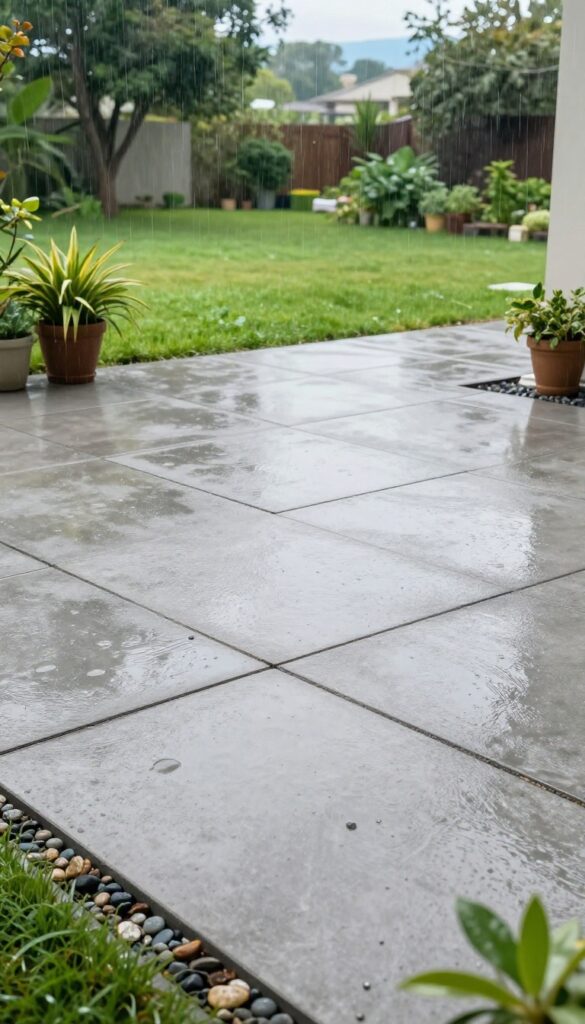
If your patio turns into a mini lake after every rainstorm, permeable pavers might be the fix you need. These pavers are designed with gaps or porous materials that let water seep through and soak into the ground below. That means less runoff, fewer puddles, and a backyard that handles heavy rain like a champ.
The best part? They don't look like a compromise—they come in a bunch of styles, from sleek modern squares to rustic cobblestone.
Permeable pavers are a smart upgrade for any patio, especially if you live in an area with frequent downpours. They help manage stormwater naturally, which is great for the environment and your yard's health. Plus, they're built to last, so you get both durability and drainage in one package.
Here's how to make them work for your space.
How Permeable Pavers Work
Instead of solid concrete or tightly packed bricks, permeable pavers have small gaps filled with gravel or are made from porous materials like porous concrete or plastic grids. Rainwater slips through these openings and filters into a base layer of crushed stone, which stores the water until it slowly absorbs into the soil. This reduces runoff and helps prevent erosion and flooding in your yard.
Best Styles For Your Patio
You don't have to sacrifice style for function. Permeable pavers come in a variety of colors, shapes, and textures. For a modern look, try large concrete slabs with wide gaps filled with pebbles.
If you prefer a rustic feel, clay brick or travertine pavers with a permeable joint system work well. You can also mix materials to create a unique pattern that complements your home's exterior.
Installation Tips
Proper installation is key for permeable pavers to work correctly. You'll need a deeper base layer of crushed stone than regular pavers to allow for water storage. Make sure the ground is properly graded to direct water away from your home's foundation.
It's a good idea to hire a professional who has experience with permeable systems, as they need to be installed with precision to avoid pooling or shifting.
Maintenance And Longevity
Permeable pavers are surprisingly low-maintenance. The gaps may need an occasional refill of gravel, and you might have to sweep away debris that blocks the openings. But overall, they're just as durable as traditional pavers, and they can last for decades with minimal care.
Plus, you'll save money on drainage solutions like French drains or sump pumps.
4. Mixed Materials: Pavers with Gravel or Grass Joints
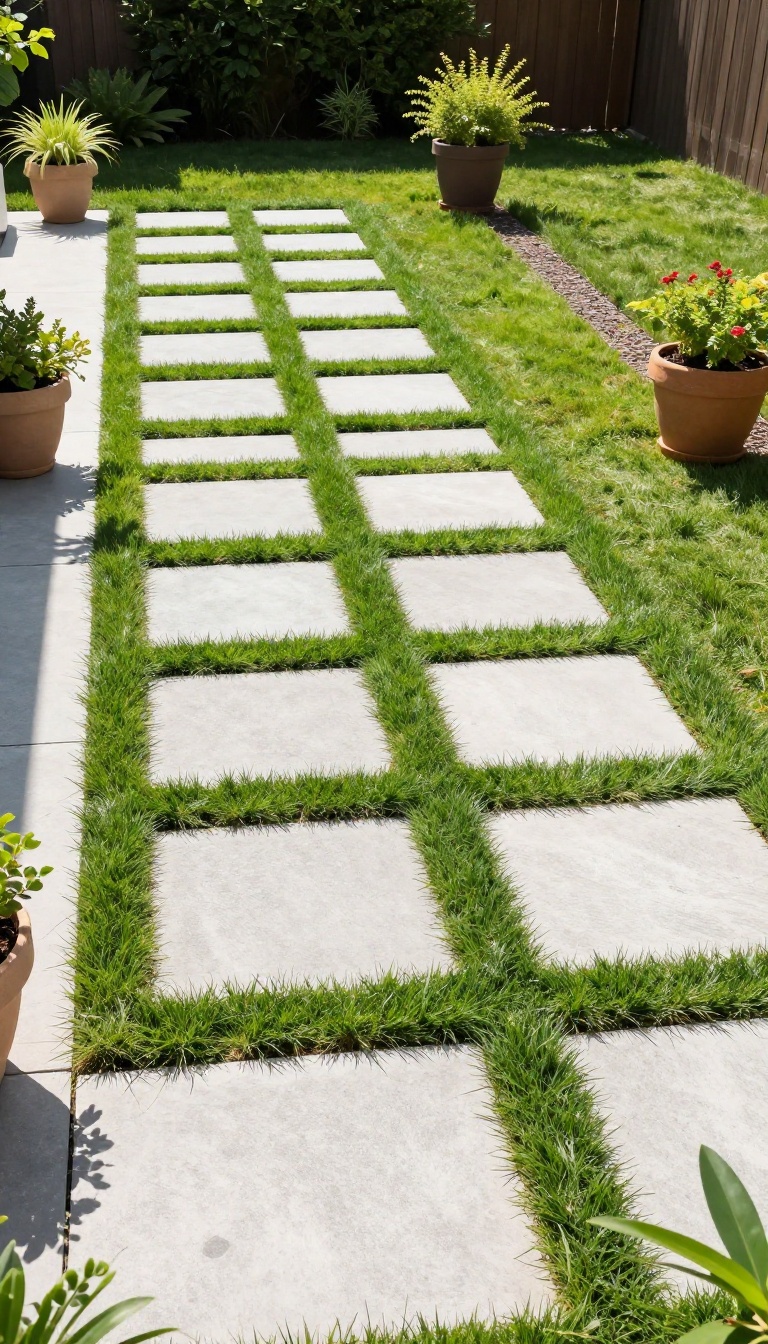
Mixing pavers with gravel or grass joints gives your patio a softer, more organic feel. It’s a simple way to break up large expanses of hard surface and let nature weave through. The result is a textured, inviting space that feels like a natural extension of your yard.
This approach is all about contrast. The clean lines of pavers meet the loose texture of gravel or the lush green of grass. It softens the overall look, making the patio feel less like a construction project and more like a landscape feature.
Plus, the joints help with drainage and reduce heat buildup, which is a bonus on hot summer days.
Why Choose Gravel Or Grass Joints?
Gravel joints are low-maintenance and come in a variety of colors and sizes. They provide excellent drainage and prevent weeds when paired with a weed barrier. Grass joints, on the other hand, create a lush, eco-friendly surface that stays cooler and blends seamlessly with the lawn.
Both options add visual interest and a natural touch that solid concrete can’t match.
Best Paver Styles For This Look
Large rectangular pavers, like concrete or travertine, work well with wide joints. They create a modern, clean grid that lets the filler shine. For a more rustic feel, irregular flagstone with grass joints mimics a meadow path.
Keep the joint width consistent—around 1 to 2 inches—so the filler stays put and the pattern looks intentional.
Installation Tips For Success
Start with a solid base of compacted gravel and sand. For grass joints, leave space between pavers and fill with soil before planting grass seed or plugs. For gravel, use a polymeric sand or small pebbles that won’t wash away.
Edge the patio with a sturdy border to keep the filler contained. Regular maintenance is simple: pull weeds, top up gravel, or mow grass as needed.
5. Circular Paver Pattern as a Focal Point
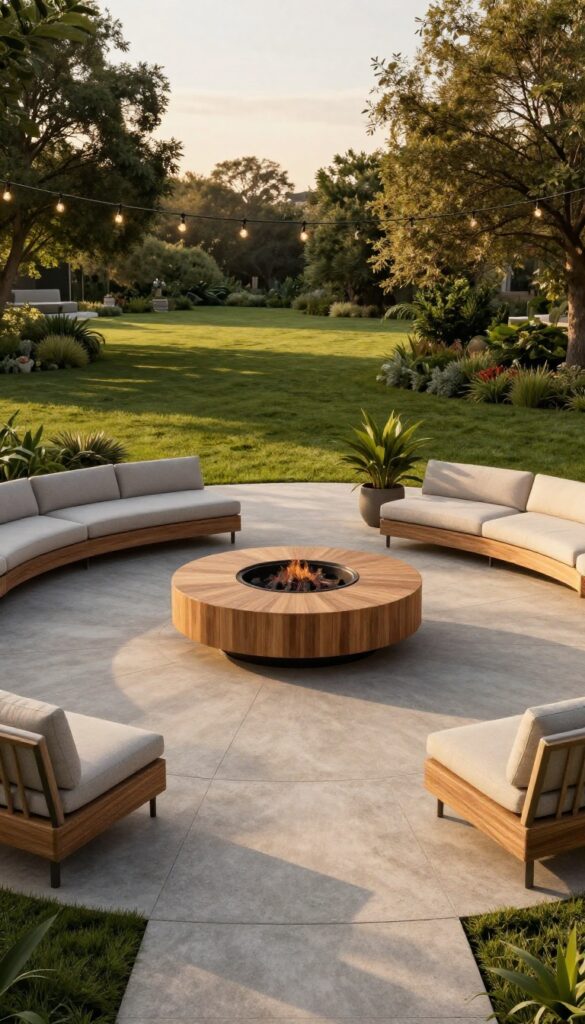
A circular paver pattern, whether it’s a full wheel, a fan, or a simple ring, instantly draws the eye and gives your patio a deliberate, designed feel. It’s not just about looks—this layout naturally defines a central gathering spot, making it ideal for a seating area or a fire pit. The curve softens the hard lines of the patio and adds a touch of elegance that straight patterns can’t match.
Creating a circular pattern doesn’t have to be complicated. You can start with a pre-made circle kit, which includes wedge-shaped pavers that fit together perfectly. Or, if you’re feeling adventurous, you can cut standard pavers to form your own custom circle.
Either way, the result is a stunning centerpiece that anchors your outdoor space.
Choosing The Right Pavers
For a circular pattern, opt for pavers that are uniform in thickness and have a clean, straight edge. Concrete pavers in a classic rectangle or square shape work well, but you can also use natural stone for a more organic look. Stick to a single color or a subtle blend to keep the focus on the circle itself.
Laying Out The Circle
Start by marking the center point of your circle and use a string or hose to outline the circumference. Then, lay the pavers from the center outward, working in rings. Use a rubber mallet to tap each paver into place and check with a level frequently.
For a perfect fit, you may need to cut pavers along the outer edge.
Pairing With A Fire Pit Or Seating
A circular pattern is a natural companion for a fire pit. Place the fire pit in the center and arrange the pavers around it, creating a cohesive gathering area. Alternatively, you can use the circle to define a seating nook with a curved bench or a set of chairs.
The circular layout encourages conversation and makes the space feel inviting.
6. Stamped Concrete Pavers for a High-End Look
Stamped concrete pavers are the chameleons of the paver world. They can pass for slate, cobblestone, or even wood, but they're actually poured concrete with a pattern pressed into the surface. That means you get the upscale appearance of natural stone without the premium price tag.
What's more, they're poured as one continuous slab, so there are no joints where weeds can poke through. That makes them a practical choice for patios that see a lot of foot traffic or furniture movement. If you want a polished look that's also easy to maintain, this might be your best bet.
Why Choose Stamped Concrete?
Stamped concrete gives you the aesthetic of high-end materials at a fraction of the cost. It's also incredibly durable—concrete can handle heavy loads and harsh weather without cracking easily. Plus, because it's seamless, there's no shifting or settling like you might get with individual pavers.
If you're after a clean, uniform look, stamped concrete delivers.
Design Options To Explore
You can pick from a wide range of patterns, from ashlar slate to cobblestone to running bond brick. Colors can be integrated into the mix or applied as a surface stain, giving you endless customization. You can even add a border or accent band to break up the space.
The key is to choose a pattern that complements your home's architecture and your landscape style.
Installation And Maintenance Tips
Proper installation is crucial—the base needs to be well-compacted, and the concrete should be poured and stamped while it's still workable. It's best to hire a professional with experience in stamped concrete. After installation, a sealer will protect the surface and enhance the color.
Reapply sealer every few years to keep it looking fresh. Cleaning is simple: just sweep and occasionally hose it down.
7. Warm Earth Tones to Blend with Nature
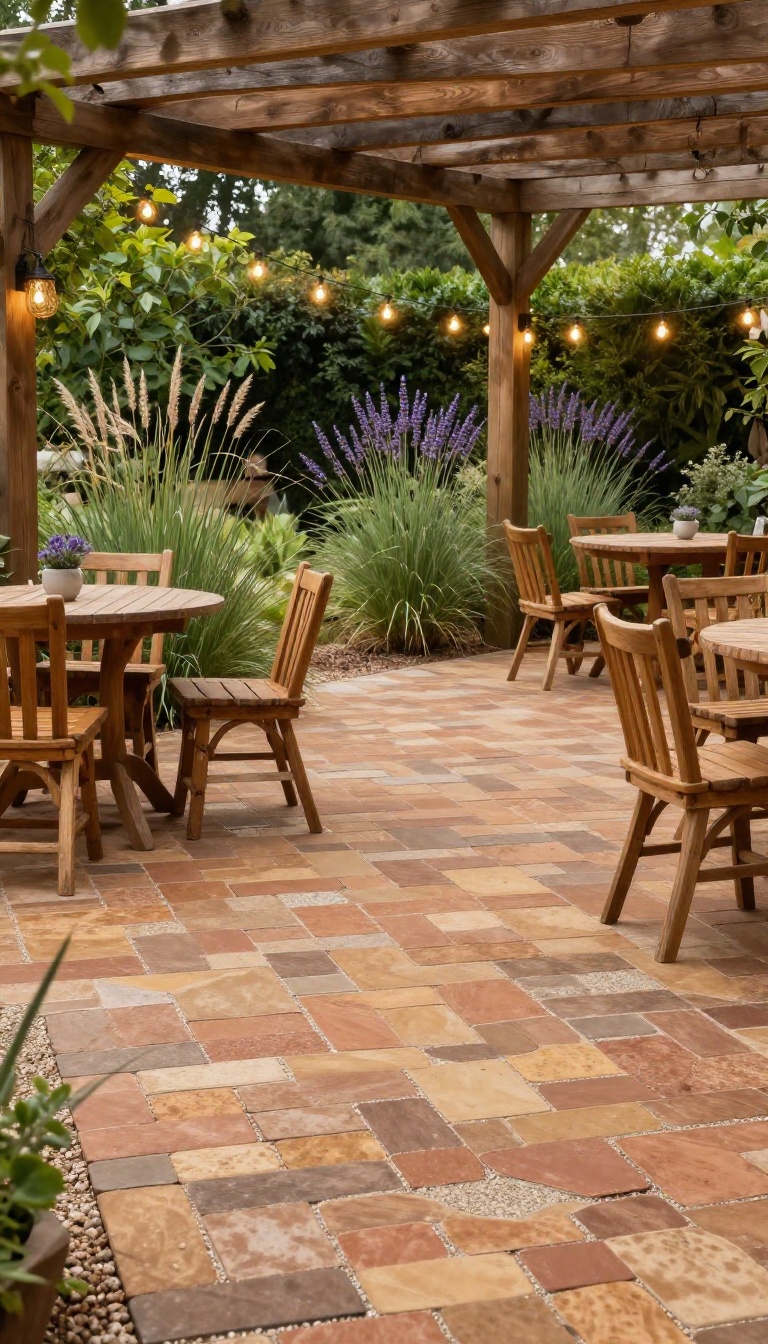
When you want your patio to feel like a natural extension of the garden, warm earth tones are the way to go. Browns, tans, and terracotta bring a grounded, cozy vibe that works beautifully with wood furniture and lush greenery. These colors don’t shout for attention—they blend in, making the whole space feel calm and inviting.
Choosing pavers in earthy hues is about more than just color—it’s about creating a seamless transition from your home to the outdoors. The warm undertones complement the textures of nature, so your patio doesn’t look like a separate slab but a part of the landscape. Plus, these shades are forgiving when it comes to dirt and wear, keeping your patio looking fresh with minimal upkeep.
Mixing Textures For Depth
Pair smooth, tumbled pavers with rougher natural stone or gravel to add visual interest. The contrast in texture makes the warm tones pop without being overpowering. Use a herringbone or running bond pattern to enhance the organic feel, and let the colors do the heavy lifting.
Complementary Landscaping
Warm earth tones pair exceptionally well with plants that have deep green foliage or soft, muted flowers. Think ornamental grasses, hostas, or lavender. Add wooden planters or a pergola with natural timber to tie the whole look together.
The goal is to create a space that feels like it grew there, not like it was dropped in.
Lighting And Accents
To highlight the warmth of your pavers, use warm-toned lighting like amber or soft white. Lanterns, string lights, or low-voltage path lights can make the area glow in the evening. Choose outdoor furniture in wood or wicker with cushions in neutral tones to keep the earthy vibe consistent.
8. Cool Gray and Blue Hues for a Coastal Vibe
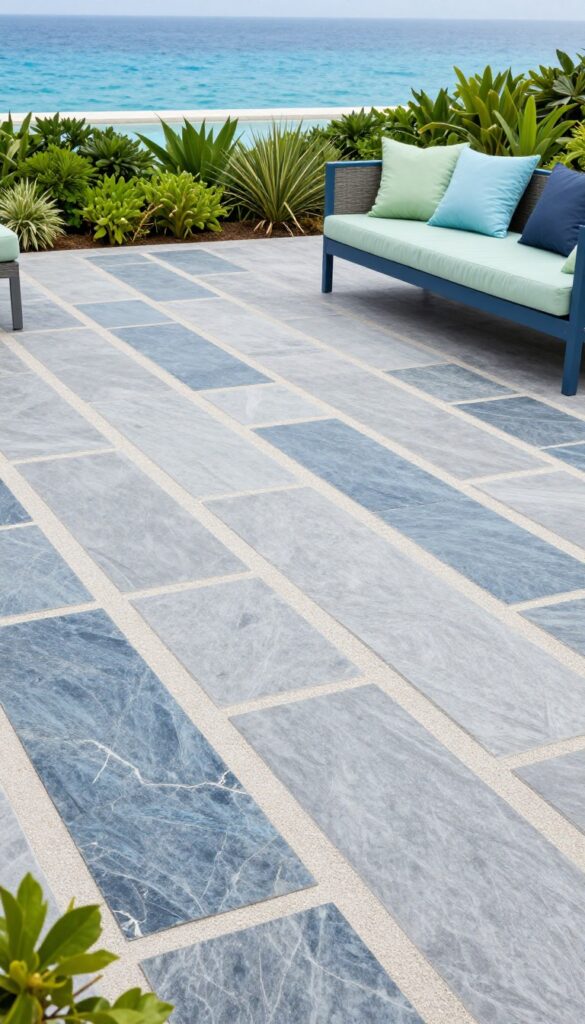
Gray and blue-toned pavers bring a sense of calm that’s hard to beat. They echo the colors of the sea and sky, making any patio feel more relaxed and inviting. These shades work especially well near pools or in yards with a nautical theme, and they have a practical side too—they hide dirt and stains better than lighter colors.
Choosing gray and blue pavers is about more than just color. It’s about setting a mood. The cool tones naturally cool down a space, both visually and literally—they don’t absorb as much heat as darker shades, so they stay more comfortable underfoot on hot days.
Plus, their subtle variations in tone add depth without overwhelming the eye.
Pair With Lighter Joint Sand
To let the cool tones shine, use a light gray or white joint sand. This creates a crisp contrast that highlights the pavers’ color and keeps the overall look airy. It also helps brighten shaded areas, making the patio feel more open and spacious.
Mix In Natural Stone Accents
Blending in a few natural stone pieces, like slate or flagstone, adds texture and breaks up the uniformity. It gives the patio a more organic, coastal feel, as if the stones were carried in by the tide. Just keep the accent pieces in similar cool tones to maintain harmony.
Add Blue-gray Furniture
Complete the coastal vibe with outdoor furniture in shades of blue-gray or navy. Cushions in soft blues or seafoam green tie the whole look together. This creates a cohesive palette that feels pulled from a beachside retreat.
9. Basketweave Pattern for a Vintage Touch
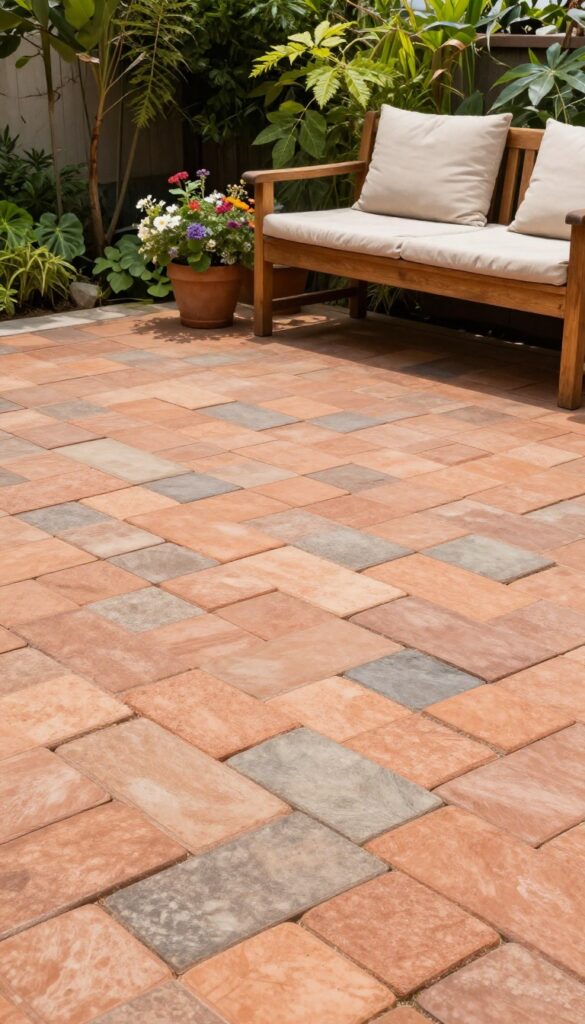
If you're drawn to a patio that feels like it's been there for decades, the basketweave pattern deserves a closer look. It's a classic herringbone-like layout that pairs two pavers side by side, then rotates the next pair 90 degrees. The result is a woven texture that adds a subtle, old-world charm to any backyard.
The basketweave pattern is a timeless choice that works beautifully in cottage-style gardens or any space where you want a softer, more traditional feel. It's also a practical option because it's easy to lay and doesn't require any special cuts if you use square or rectangular pavers. The repeating L-shape creates a visual rhythm that's both orderly and inviting.
Why Basketweave Works So Well
This pattern is a crowd-pleaser because it's neither too busy nor too plain. The alternating orientation of the pavers adds just enough visual interest to make your patio stand out without overwhelming the space. It also pairs nicely with a variety of paver colors, from warm terracotta to cool slate, so you can easily match it to your home's exterior.
Best Paver Shapes And Sizes
For a true basketweave, you'll want rectangular pavers that are twice as long as they are wide—think 4×8 inches or 6×12 inches. This ratio is key to achieving that woven look. You can also use square pavers in pairs, but the rectangular version gives you the classic basketweave effect.
Stick to uniform sizes to keep the pattern crisp and clean.
Installation Tips For A Flawless Finish
Start by laying a solid base of compacted gravel and sand, just like any paver project. When you set the pavers, keep the joints tight and even. Use a rubber mallet to tap each paver into place, and check the level frequently.
After you've laid the entire patio, fill the joints with polymeric sand and mist with water to lock everything in. This pattern is forgiving, but a little attention to detail goes a long way.
10. Paver Borders with Contrasting Colors
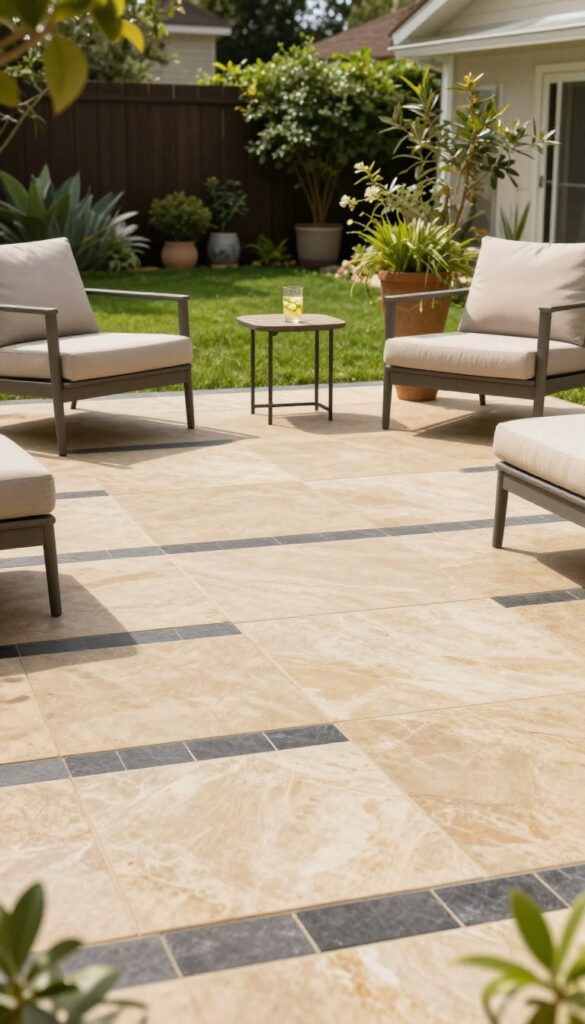
A border might seem like a small detail, but it can completely change how your patio reads. By framing the main field with pavers in a different shade or shape, you give the space a clear edge that feels deliberate and designed. It’s a simple trick that adds depth and makes the whole patio look more polished, without requiring a full redesign.
Choosing a contrasting border is one of the easiest ways to elevate a paver patio. The key is to pick a color that stands out but still harmonizes with the main pavers. For example, if your main field is a warm beige, a deep charcoal border creates a crisp, modern frame.
Or, if you're working with gray tones, a border in a rich brown can add warmth and tie the patio to surrounding landscaping. The shape of the border matters too. You can use the same rectangular pavers rotated 90 degrees for a subtle change, or opt for a completely different shape, like a narrow brick band, to create a distinct edge.
Even a simple soldier course—pavers laid side by side—can give a clean, finished look. The goal is to make the border feel intentional, not accidental. When planning the border, think about the overall layout of your yard.
A straight border works well for formal, geometric patios, while a curved border can soften the look and blend with natural surroundings. If your patio is large, a double border—two rows in contrasting colors—can add even more visual interest. Just be careful not to overdo it; the border should frame the patio, not overpower it.
Choosing The Right Contrast
The contrast between the border and the main field is what makes this idea work. Go too subtle, and the border disappears; go too bold, and it can feel jarring. A good rule of thumb is to choose a color that is one or two shades darker or lighter than the main pavers.
For instance, a light gray border around a medium gray field adds definition without shouting. If you want more drama, pick a complementary color from the color wheel—like a warm terracotta border with cool blue-gray pavers.
Border Patterns To Try
You don't have to stick to a simple straight line. There are several border patterns that can add extra texture and interest. A running bond border, where pavers are laid in a staggered pattern, gives a classic, timeless look.
A basketweave border—two pavers set perpendicular to each other—creates a woven effect that’s both elegant and sturdy. For a more modern feel, try a herringbone border, which adds dynamic diagonal lines. Each pattern brings its own character, so think about what matches your patio's style.
Practical Tips For Installation
When installing a contrasting border, it’s important to plan ahead. Measure your patio area and mark the border lines clearly before you start laying pavers. Use a string line or a straight board to keep the edges straight, especially for long runs.
If you’re working with curves, use a flexible hose or rope to outline the shape. Also, consider the base material—make sure the edge pavers are set firmly in a concrete or gravel base to prevent shifting over time. A well-installed border not only looks good but also helps keep the main pavers in place.
11. Multi-Level Paver Patios for Sloped Yards
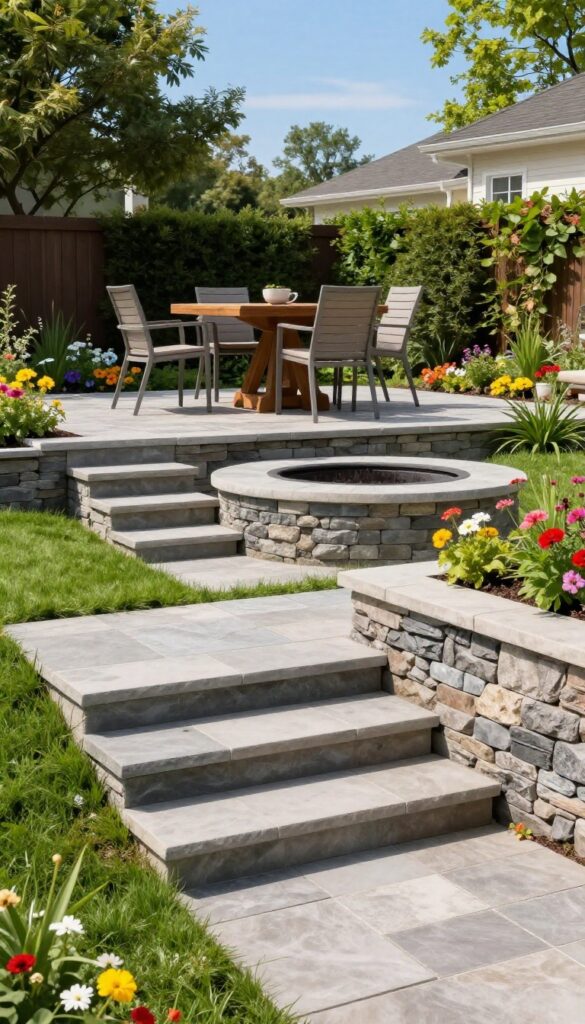
A sloped yard can feel like a design obstacle, but it's actually a chance to add depth and character. Multi-level paver patios turn that tricky grade into separate outdoor rooms, each with its own purpose. Retaining walls hold everything in place, while pavers create a cohesive look across all levels.
Building on a slope requires some planning, but the payoff is a patio that feels custom and intentional. Start by mapping out the different zones you want—maybe a dining area up top and a fire pit lounge below. Retaining walls made from the same pavers or complementary materials tie the levels together visually.
Each level should be level itself, with proper drainage to keep water from pooling. This approach not only solves the slope problem but also gives you more usable space than a single flat patio ever could.
Designing The Levels
Think about how you'll use each area before you start digging. The upper level might catch the afternoon breeze, while the lower one feels more sheltered. Keep the transition between levels smooth with wide steps or a gentle path.
Use the same paver color across all levels to unify the space, or mix in a contrasting border to define each zone.
Retaining Wall Options
Retaining walls don't have to be plain concrete blocks. You can use the same pavers as your patio for a seamless look, or go with natural stone for a more rustic feel. Modular block systems are easy to install and come in a range of textures.
Just make sure the wall is properly engineered to handle the soil pressure behind it—especially if you're going more than a couple of feet high.
Drainage And Stability
Water is the biggest enemy of any sloped patio. Install a perforated drain pipe behind the retaining wall to channel runoff away from the structure. Use a compacted gravel base under each level to prevent shifting.
And always slope the paver surface slightly away from your home to keep water from pooling near the foundation.
12. Textured Pavers for Slip Resistance
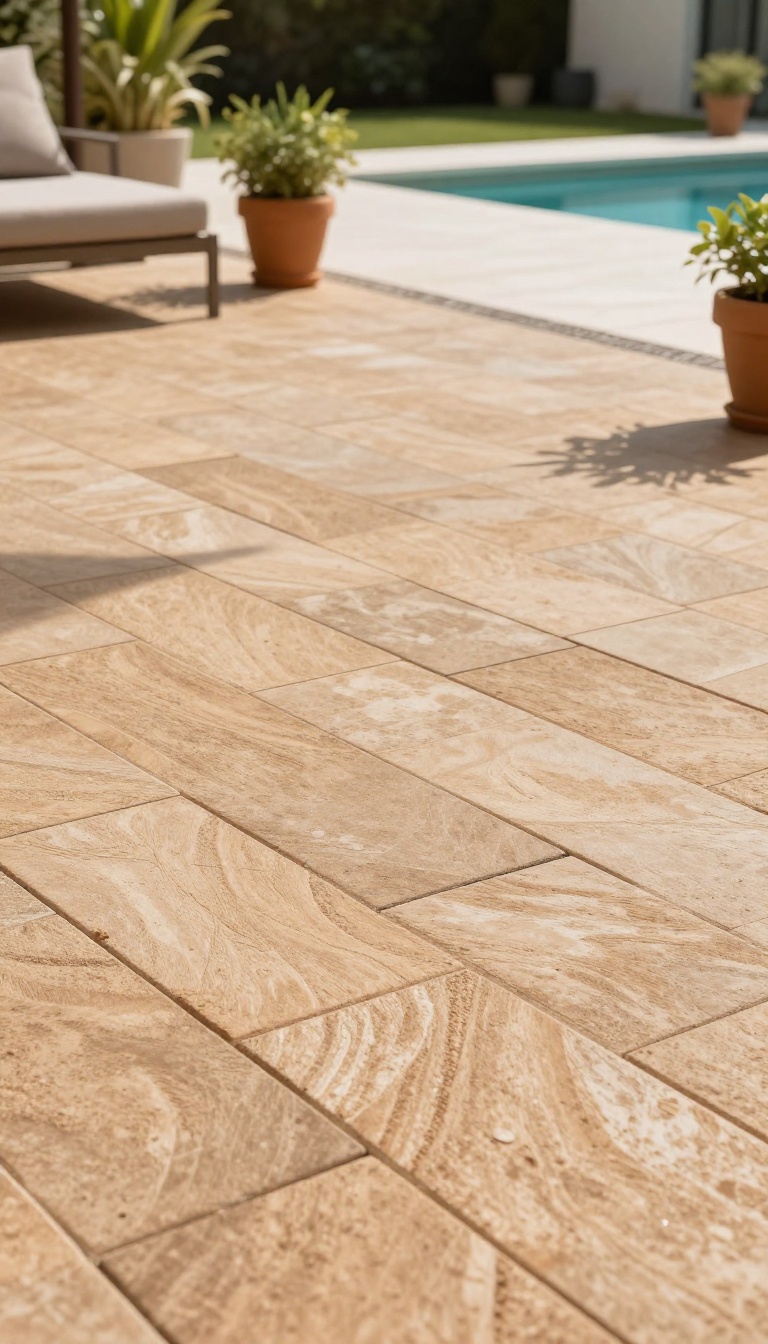
Slippery surfaces can turn a relaxing patio into a hazard, especially after rain or near a pool. Textured pavers solve that problem with surfaces designed to provide better traction underfoot. They don’t sacrifice style either—these pavers come in a range of finishes that add subtle character to your outdoor space.
Choosing the right paver texture is about balancing safety with aesthetics. Tumbled pavers have a worn, rounded edge that gives a rustic feel, while brushed finishes offer a smoother but still slip-resistant surface. Both options are practical for areas that get wet frequently, and they blend well with various design styles.
Where Texture Matters Most
Focus on high-traffic zones and areas prone to moisture. Pool decks, walkways, and steps are prime candidates for textured pavers. Even if your patio is covered, a little extra grip can prevent slips during unexpected rain or morning dew.
Balancing Texture With Style
You don’t have to choose between safety and looks. Textured pavers come in colors and patterns that mimic natural stone or modern concrete. For a cohesive look, pair them with smooth pavers in less critical areas, or use them as an accent border to define spaces.
Maintenance Tips For Textured Surfaces
Textured pavers are just as easy to maintain as smooth ones. Regular sweeping and occasional rinsing keep them clean. Avoid using harsh chemicals that might wear down the texture over time.
Sealing can help protect the surface without making it slippery.
13. Paver Patio with Built-In Lighting
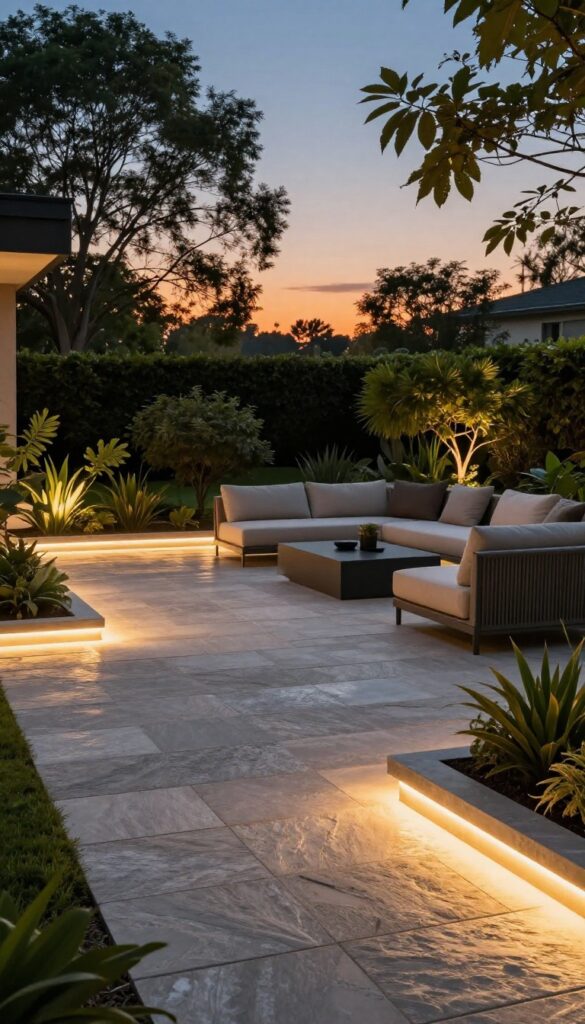
When the sun goes down, most patios just fade into the dark. Adding built-in lighting to your paver design changes that completely. You can embed LED strips between pavers, install small lights along the edges, or even use pavers with integrated fixtures.
The result is a space that feels welcoming and safe after hours, with a dramatic glow that highlights the texture and pattern of your work.
Lighting does more than just illuminate—it sets the mood. With built-in lighting, you can create a warm, inviting atmosphere for evening gatherings or a subtle, modern look for quiet nights outside. It also adds a layer of safety by clearly defining steps, edges, and pathways.
Plus, LED lights are energy-efficient and long-lasting, so you won't be constantly replacing bulbs.
Types Of Paver Lighting
You have several options when it comes to lighting your paver patio. Recessed lights sit flush with the paver surface, perfect for driveways or walkways. Edge lighting runs along the perimeter, outlining the patio and adding a soft glow.
You can also use paver lights that are designed to fit into standard paver openings, making installation a breeze. Each type creates a different effect, so think about the mood you want.
Design Ideas For Built-in Lighting
For a modern look, try linear LED strips between rows of pavers to create a sleek, grid-like pattern. If you prefer a more subtle approach, place small round lights at corners or along the border. You can also highlight specific features like a fire pit or seating wall with uplighting.
Mixing different light placements adds depth and makes your patio feel custom-designed.
Installation Tips And Considerations
Before you start, plan the layout and mark where the lights will go. Low-voltage lighting is safer and easier to install than line voltage, but you'll need a transformer. Waterproof connections are a must, especially if you live in a rainy area.
If you're not comfortable with electrical work, hire a professional. Also, think about how the lights will look during the day—recessed covers and paver-integrated lights blend in seamlessly.
FAQ
What is the best paver material for durability?
Concrete pavers are highly durable and come in many styles. For extreme climates, consider permeable or textured options. Natural stone is also durable but more expensive.
How do I prevent weeds from growing between pavers?
Use polymeric sand in the joints, which hardens and blocks weed growth. Also, ensure a proper base layer and consider a weed barrier fabric underneath.
Can I install pavers over an existing concrete patio?
Yes, you can install pavers over concrete if the surface is in good condition. You'll need to add a layer of sand or gravel and ensure proper drainage.
How often do pavers need to be sealed?
Sealing pavers every 2-3 years helps protect against stains and fading. Use a sealer suitable for your paver type and climate.
What is the cost difference between pavers and poured concrete?
Pavers typically cost more upfront than poured concrete, but they last longer and are easier to repair. Over time, pavers can be more cost-effective.
Conclusion
Choosing the right paver patio idea can completely transform your outdoor space. Whether you prefer classic brick or modern large-format pavers, there’s a style that fits your taste and budget. Remember to consider durability, maintenance, and the overall look you want to achieve.
Take your time to plan the layout and select materials that complement your home. With the right pavers and a little effort, you’ll enjoy a crisp, durable patio for years to come. Happy paving!