15 Rustic Bathroom Ideas on a Budget That Look Expensive
A bathroom that looks expensive usually starts with a problem, not a mood board. Maybe the vanity is dated, the lighting is flat, or the whole room just feels builder-grade and forgettable.
Rustic design fixes those issues with materials that already carry character, so you get warmth and depth without paying designer prices. Reclaimed wood, vintage mirrors, and simple metal accents do a lot of heavy lifting.
Most of these upgrades cost less than a single big-box renovation item, and plenty of them are weekend projects you can handle yourself. You do not need a contractor or a huge budget to make the space feel intentional.
1. Reclaimed Wood Vanity
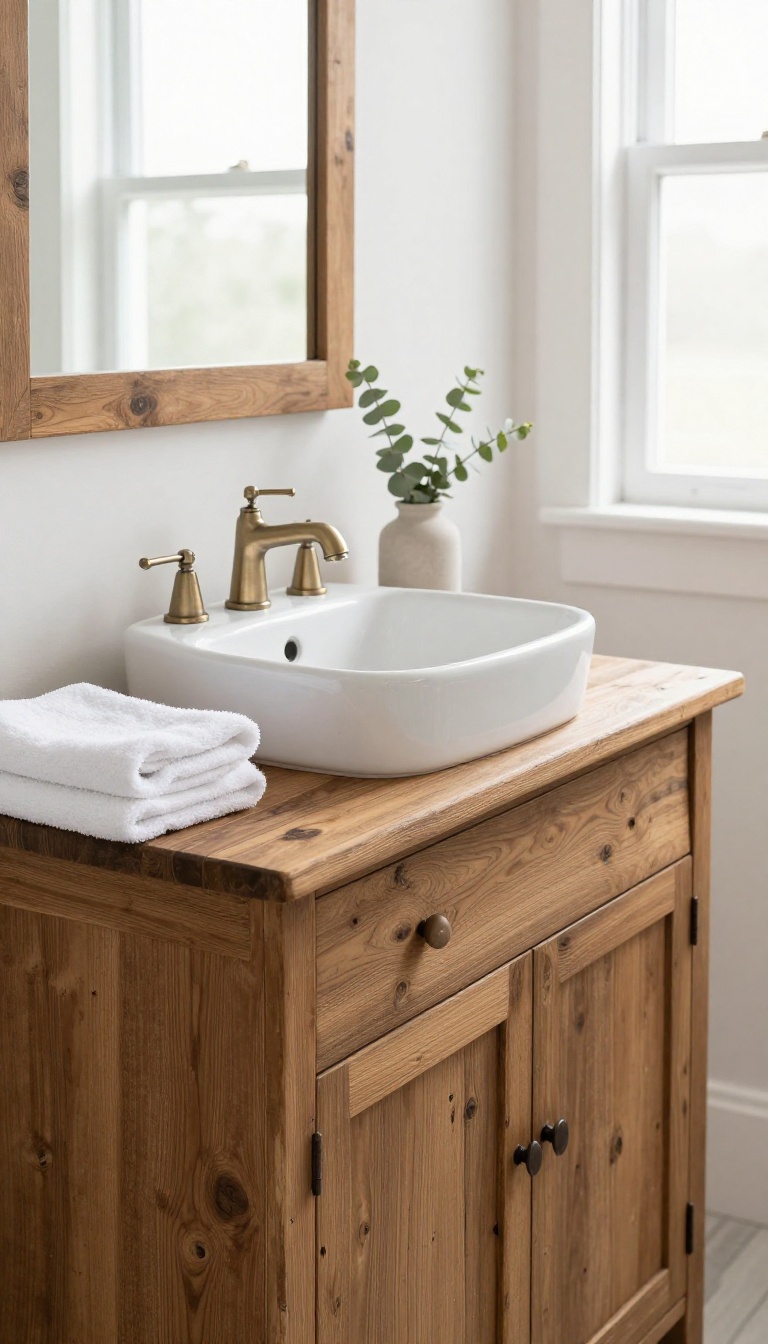
A beat-up dresser from a thrift store or a stack of pallet wood can become the best-looking piece in your bathroom. The goal is to turn something with history into a functional vanity that hides plumbing and holds a sink. You sand, seal, and mount a vessel sink on top, and suddenly the room has a custom feel without the custom price.
Start by finding a solid wood piece that fits your space. Old dressers, console tables, and even sturdy desks work well. Avoid particle board, because it swells when it gets wet.
Solid oak, maple, or pine holds up much better. Once you have your piece, remove the drawers and hardware. Sand everything down to bare wood, starting with medium grit and finishing with fine grit.
Wipe off the dust, then apply a waterproof sealer or marine-grade polyurethane. Two or three coats will protect the wood from steam and splashes. For the sink, a vessel bowl sits on top of the counter, so you do not have to cut a perfect hole.
Just drill a hole for the drain and faucet. If you want a drop-in sink, you will need to cut the countertop, which is doable with a jigsaw and a steady hand. Either way, use plumber's putty and silicone to keep everything watertight.
Mount the vanity to the wall using heavy-duty brackets or a cleat system. Make sure it is level and secure before connecting the plumbing. If you are not comfortable with plumbing, hire a pro for the final hookup.
That is usually a quick, affordable job. Finally, add a stone or quartz remnant on top if you want extra durability. Many counter shops sell small remnants for cheap.
A coat of matte polycrylic on the wood keeps the rustic look while adding protection.
Finding The Right Piece
Look for solid wood furniture with good bones. Check thrift stores, Facebook Marketplace, and estate sales. Measure your space first so you know what will fit.
A piece that is too deep will crowd the room, and one that is too short will look awkward.
Prepping And Sealing
Sand away the old finish and any rough spots. Repair loose joints with wood glue and clamps. Then seal every surface, including the inside of drawers and the underside, to block moisture.
This step is what makes a thrift-store find last in a bathroom.
Sink And Faucet Options
Vessel sinks are the easiest because they sit on top. Drop-in and undermount sinks require cutting the counter, which takes more skill. Choose a faucet that matches the holes you have or are willing to drill.
Brushed nickel and oil-rubbed bronze both look great with reclaimed wood.
Installation Tips
Anchor the vanity to wall studs for safety. Use a level to avoid crooked drawers and a slanted sink. Connect the drain and supply lines carefully, and test for leaks before you load the drawers.
If plumbing feels intimidating, call a plumber for the final connections.
2. Vintage Mirror Makeover
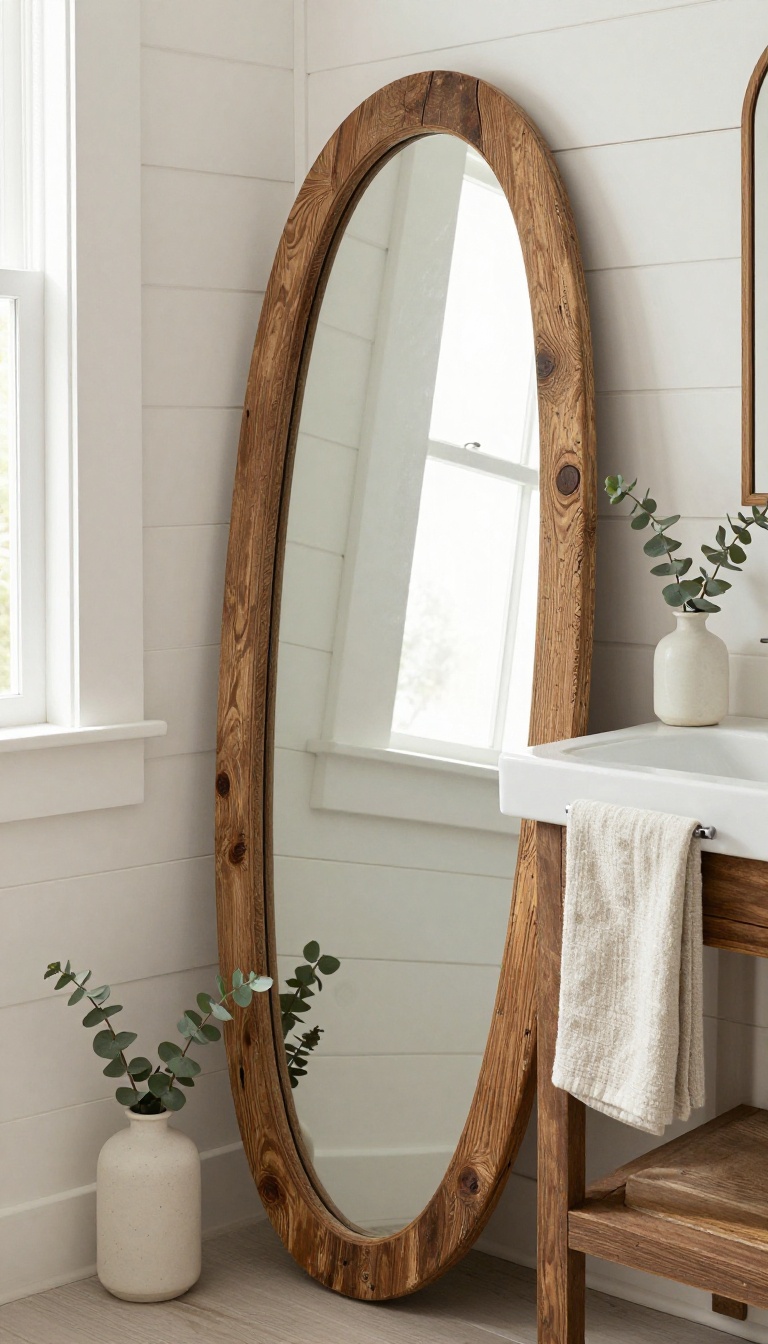
A mirror can make or break a small bathroom, and the right frame does most of the work. Flea markets, estate sales, and even curb alerts turn up solid old mirrors for a few bucks. Give one a rustic frame and you get a custom look that costs less than a new big-box mirror.
The trick is finding a mirror with good glass and a frame you can work with. You are not looking for perfect. You are looking for cheap and sturdy.
Once you have it home, the makeover takes an afternoon. You can wrap the existing frame in reclaimed wood, or sand it down and hit it with chalk paint. Either route hides scratches and gives you that worn, warm finish that fits rustic bathrooms.
Hang it above the sink, or lean it against the wall for a relaxed look. The mirror becomes a focal point without shouting for attention.
What To Look For
Check that the glass is clear and the frame is solid. Small chips or peeling paint are fine. Avoid mirrors with deep cracks in the glass or a frame that feels loose.
A heavy wood or metal frame is a good sign. So is a shape that feels a little unusual. Oval, arched, and rectangle mirrors all work.
You just want something that does not look like it came from a hotel bathroom.
Reclaimed Wood Frame
Cut thin strips of reclaimed wood to fit around the mirror. Nail or glue them in place, then sand the edges lightly. A coat of clear wax or matte poly keeps the wood looking raw.
This works best on mirrors with a plain or damaged frame you want to cover. It also lets you size the frame to the wall, not the other way around.
Chalk Paint Refresh
If the frame is already wood, chalk paint is the fastest upgrade. Wipe it down, then brush on one or two thin coats. Lightly sand the edges to bring back some of the original finish.
Finish with clear wax for a soft, aged look. Pick a color that ties into your other rustic touches, like warm white, sage, or deep charcoal.
Hanging And Styling
Hang the mirror at eye level, or a few inches above the faucet. If you rent or want flexibility, lean it on the counter and anchor it with a small block. Add a simple hook or a strip of leather for a towel.
Keep the area around it clear so the frame stands out. A small plant or a bar of handmade soap nearby finishes the look.
3. DIY Open Shelving
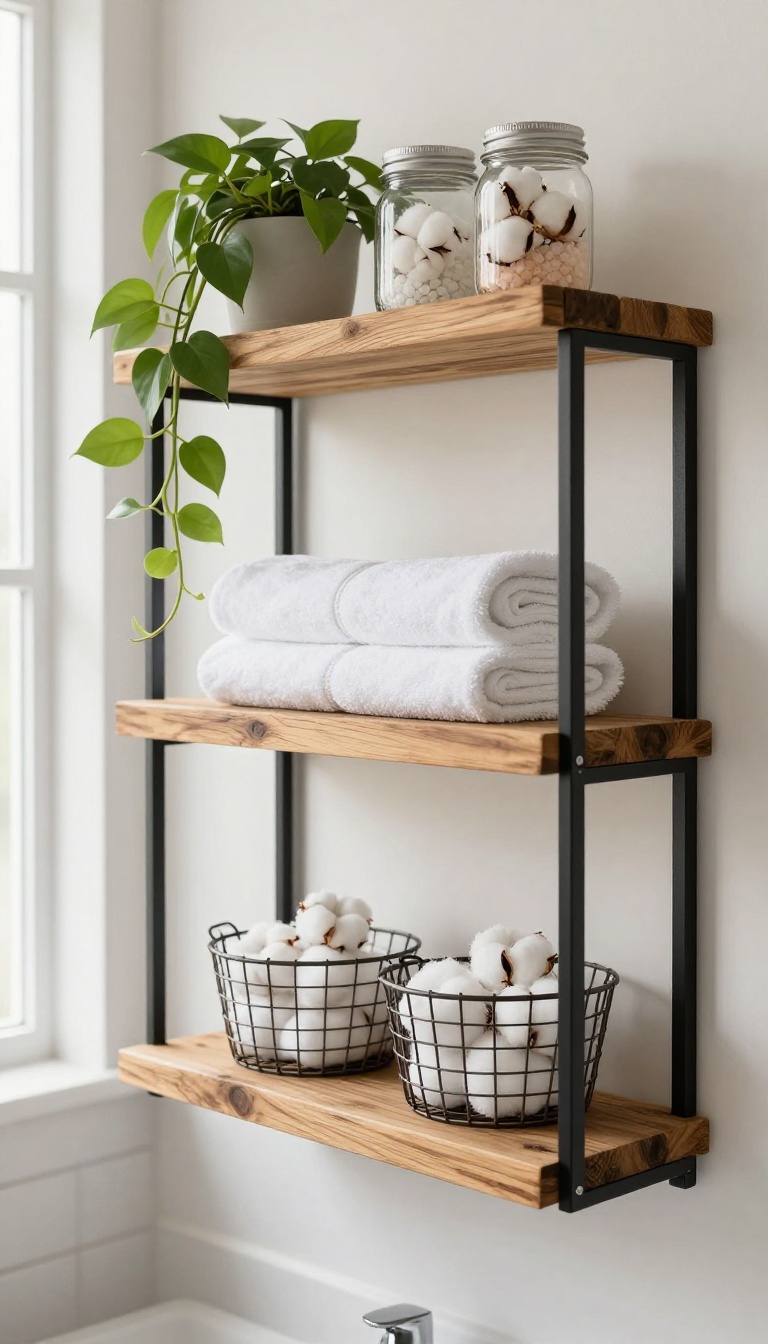
Open shelving brings a relaxed, farmhouse feel to any bathroom, and you can build it without spending much. The secret is using salvaged wood and basic brackets that cost just a few dollars each. Once installed, you have a spot for everyday items that doubles as decor.
This project works in bathrooms of any size because you can customize the length and number of shelves. It also replaces bulky cabinets that make small spaces feel cramped. Best of all, you can finish it in an afternoon with minimal tools.
Start by finding wood with character. Old fence boards, pallet wood, or a discarded tabletop all work great. Look for planks that are at least 1 inch thick and 6 to 8 inches deep so they can hold items securely.
If the wood is rough, give it a light sanding and seal it with a matte polyurethane to protect it from moisture. For brackets, simple L-shaped metal brackets in black or oil-rubbed bronze keep the rustic look. You can also use pipe fittings for an industrial touch.
Mount the brackets into studs whenever possible; if you hit only drywall, use heavy-duty toggle anchors. Space shelves 12 to 15 inches apart so you have room for taller items like mason jars or small plants. Once your shelves are up, style them with a mix of function and charm.
Rolled white towels in a wire basket, mason jars filled with cotton balls or bath salts, and a trailing plant like a pothos add warmth. Keep it uncluttered by sticking to three to five items per shelf. The result feels intentional and expensive, even though you spent very little.
Choosing And Prepping Salvaged Wood
Not all salvaged wood is equal. Avoid pieces with rot, active insect damage, or strong odors. A quick scrub with vinegar and water, followed by a seal, makes old wood safe for a humid bathroom.
If you cannot find free wood, check local ReStores or ask a lumber yard for cull piles.
Mounting Brackets For A Clean Look
Measure twice and mark your drill points with a pencil. Use a level to keep shelves straight. For a seamless look, paint the brackets the same color as your wall or choose a finish that matches your faucet.
Hide screws with small wood plugs or paint them to blend in.
Styling Without Clutter
Open shelves can quickly look messy, so edit your display. Group items by height and color. Use a small tray or basket to corral tiny items.
Leave some empty space so the shelves breathe. Rotate seasonal touches like a mini pumpkin in fall or fresh eucalyptus in spring.
4. Stone or Pebble Floor Accent
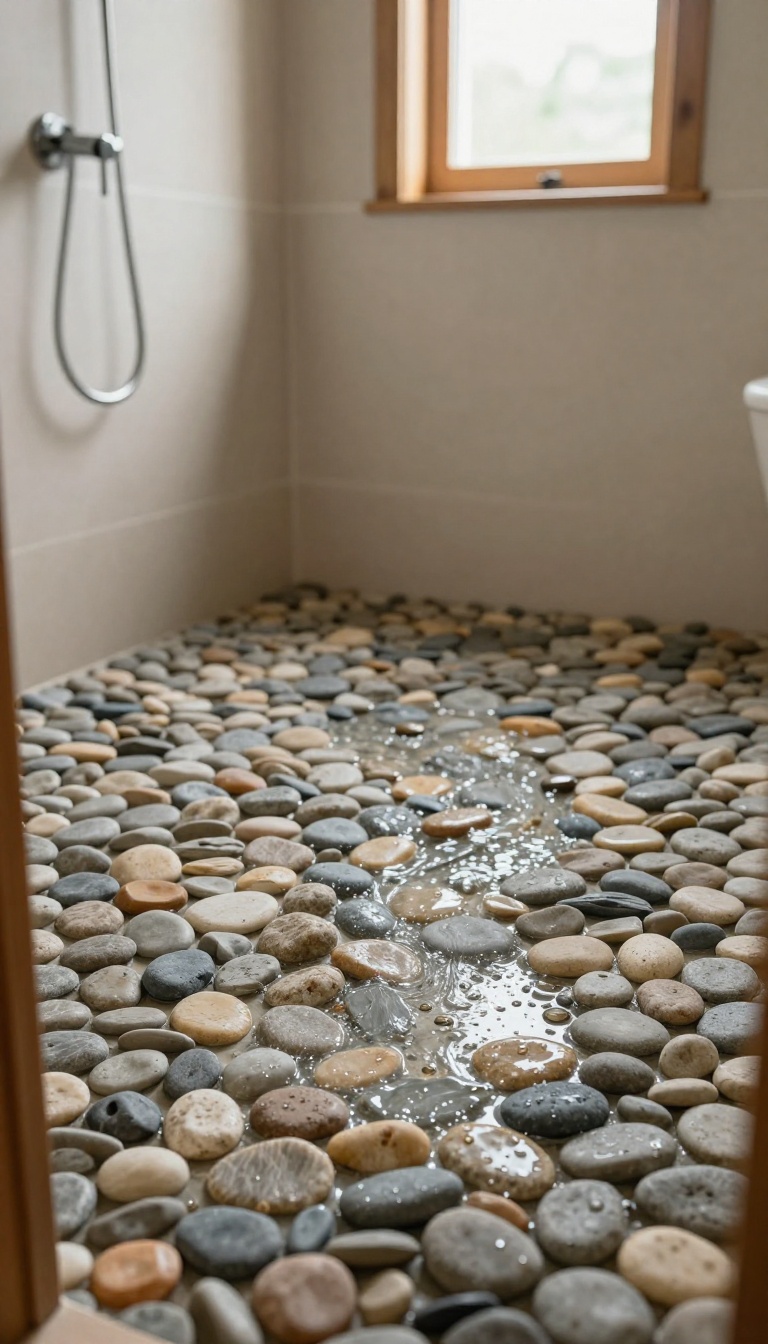
A pebble floor turns a boring shower base into a mini riverbed. You get the look and feel of a spa without the spa price tag. It's one of those upgrades that feels way more expensive than it actually is.
River rock and pebble tiles come in mesh-backed sheets, so installation is simpler than it sounds. You can cover a shower floor or a small backsplash in an afternoon. The texture adds instant rustic charm and hides water spots better than smooth tile.
Where To Use Pebble Tiles
Shower floors are the classic spot because the uneven surface gives you natural grip. A pebble backsplash behind the sink adds texture without overwhelming the room. You can also use them as a border around a plain tile floor to break up the look.
Budget Tips For Pebble Floors
Look for mesh-backed pebble sheets at discount tile stores or online. You can often find remnants or overstock for a fraction of the retail price. If you're handy, install them yourself to save on labor.
Just make sure you seal them properly to keep them looking good.
Caring For Your Pebble Accent
Seal the stones once a year to protect them from moisture and stains. Clean with a mild stone cleaner and a soft brush. Avoid harsh chemicals that can dull the finish.
With a little care, your pebble floor will stay beautiful for years.
5. Galvanized Metal Bucket Sink
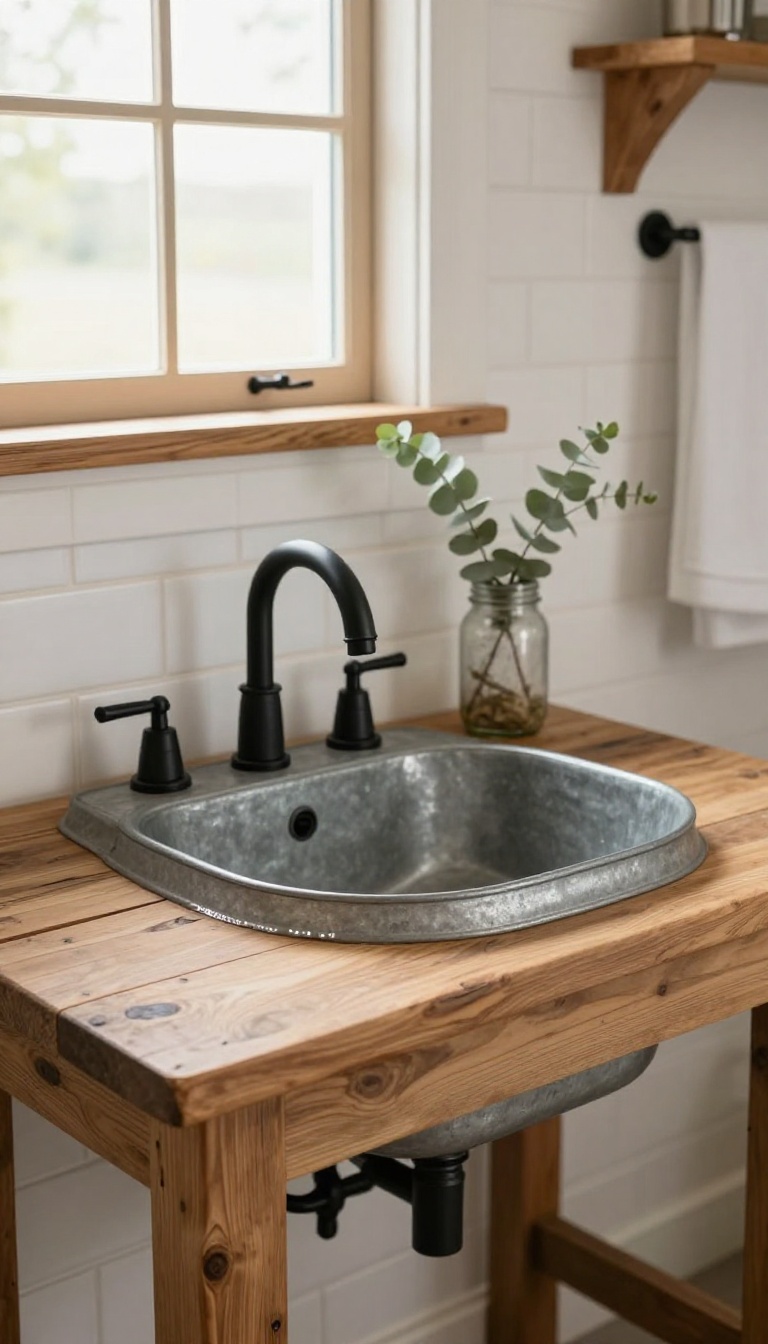
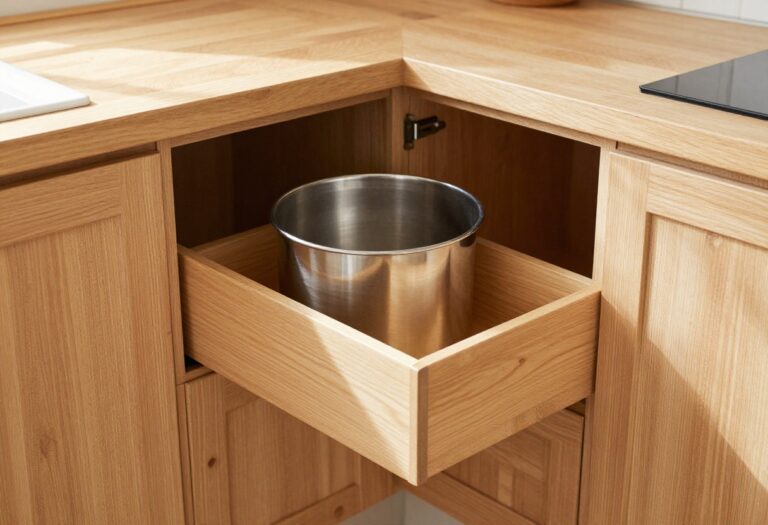
A plain metal bucket sitting on a counter does not sound like a sink, until you see one finished. The shape is already there, the patina is already there, and the price is usually under twenty dollars at a farm supply store or flea market. Pair that bucket with a wood top and a simple drain, and you get a farmhouse basin that looks custom-built.
Galvanized steel has a dull, matte finish that softens a bathroom instead of making it feel cold. That gray-silver tone also plays well with reclaimed wood, white tile, and black hardware, so it fits almost any rustic palette you already have going. The trick is treating the bucket like a real fixture, not a decoration.
Mount it properly, seal it, and give it a working drain, and guests will assume you ordered it from a specialty shop.
Pick The Right Bucket
Look for a bucket or tub that is at least ten to twelve inches wide so there is room to actually wash your hands. Old dairy buckets, horse troughs, and oval wash tubs all work well. Check for rust holes and thin spots before you buy.
A little surface rust is fine and adds character, but a bucket that leaks will not hold water no matter how you seal it.
Set It Into The Counter
The cleanest look comes from dropping the bucket into a cutout in a wood or butcher block top. Trace the rim, cut slightly inside the line, and test the fit before you commit. Leave the rim sitting just above the surface so it reads as a basin, not a hole.
A bead of clear silicone around the edge keeps water from sneaking underneath.
Handle The Drain And Faucet
You need a drain that matches the curve of the bucket bottom, so a standard pop-up assembly often will not seal. A bar sink drain or a small vessel drain usually works better. Drill the hole low and centered, then seal it with plumber's putty.
For the faucet, a wall-mounted or deck-mounted farmhouse tap keeps the look simple and frees up counter space.
Seal It Without Killing The Finish
Bare galvanized metal will spot and dull over time, especially with soap and hard water. A thin coat of clear matte sealer protects the surface while keeping that raw, weathered look. Do not use glossy polyurethane, because it makes the metal look plastic.
Reapply the sealer once a year and the bucket will age gracefully instead of turning chalky.
6. Burlap and Lace Window Treatment
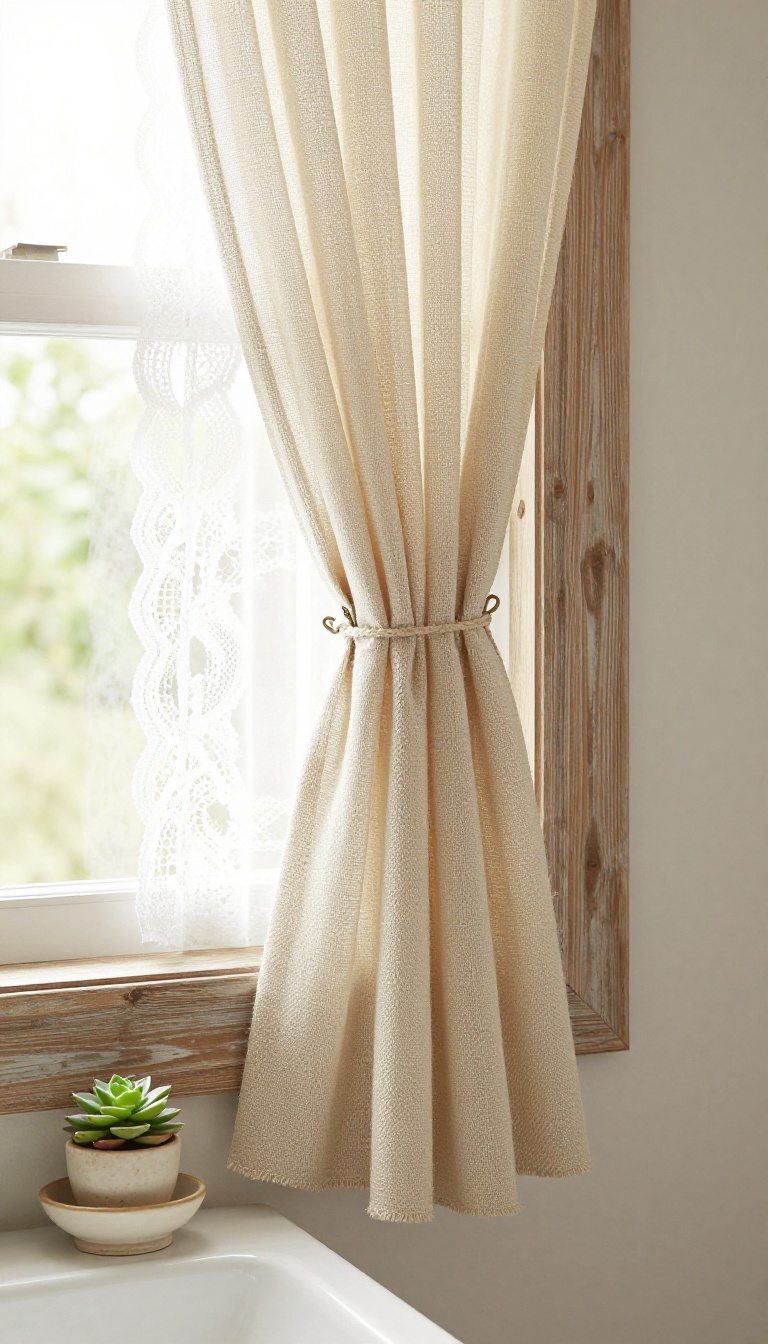
Windows in a rustic bathroom often get ignored, left bare or covered with cheap plastic blinds that kill the vibe. Burlap and lace fix that fast. They add texture, filter light, and give you privacy without blocking the farmhouse feel.
Best of all, you can make them without sewing a single stitch, and the materials cost next to nothing.
Start with burlap fabric, which you can find at craft stores or online for a few dollars a yard. For a standard window, two panels of burlap hung on a simple rod will do the trick. If you want a softer look, layer lace over the burlap or use lace alone as a valance.
Drop cloths from the hardware store also work great here. They are already hemmed, neutral in color, and cheap. Thrifted curtains or tablecloths can be cut down and repurposed too.
The key is to keep the fabric loose and natural, not stiff or perfectly pressed.
No-sew Hanging Tricks
Use curtain clips to attach burlap or lace to a rod. No hemming needed. If you want a cleaner edge, fold the fabric over and iron on hem tape.
That holds up well in a bathroom. For a valance, drape a piece of lace over a tension rod and let the ends hang loose. It takes about five minutes.
Layering For Light And Privacy
Burlap alone can feel heavy and dark. Add a sheer lace panel behind it to let light through while keeping the room private. Hang the lace closest to the glass and the burlap in front.
You can tie the burlap panels back with twine during the day. That gives you an airy, relaxed look.
Where To Save Even More
Check thrift stores for lace tablecloths or curtains you can cut up. Drop cloths come in large sizes, so one package can cover multiple windows. Use a coupon at the craft store for burlap.
And skip fancy rods. A wooden dowel or a piece of copper pipe works fine and costs less.
7. Mason Jar Storage and Lighting
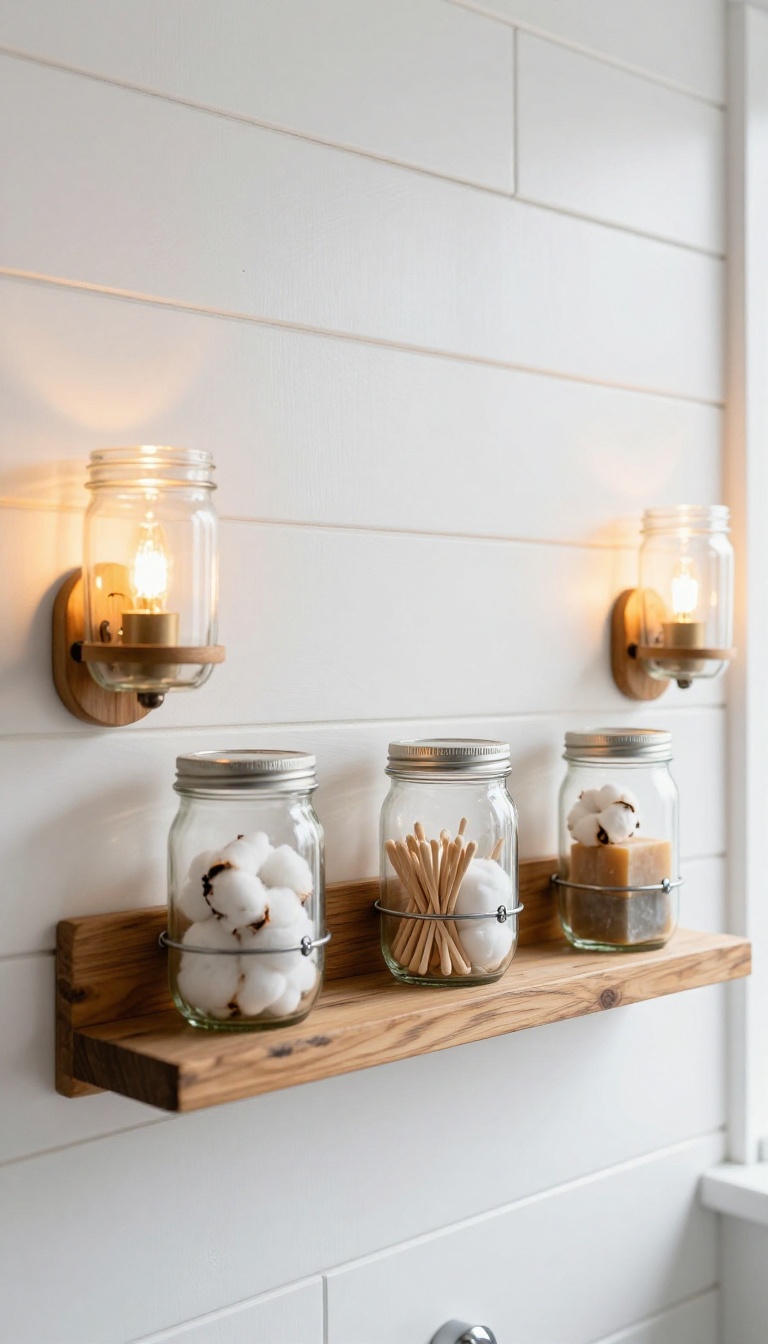
Mason jars might be the most versatile cheap material in rustic decorating. They cost a dollar or two each, they already have that vintage farmhouse look, and you can use them for just about anything in a bathroom. Storage and lighting are where they really shine, though, because both are things every bathroom needs and both are easy to upgrade with a jar and a few basic supplies.
The trick with mason jars is that they look intentional when you group them and cheap when you don't. A single jar sitting alone on a shelf reads as clutter. A row of jars mounted on a stained board reads as a design choice.
So the goal is always to give them a home, whether that's a piece of wood on the wall or a metal band around the lid. Once you do that, nobody guesses you spent pocket change on the whole setup.
Wall-mounted Jar Storage
Grab a 1×4 or 1×6 board, cut it to fit your wall space, and stain or paint it to match your other wood tones. Screw metal hose clamps or jar bands onto the board, then slide the jars in and tighten. Fill them with cotton balls, q-tips, hair ties, bath salts, or small soaps.
Mount the board at eye level near the vanity so everything is reachable without digging through a drawer. Total cost is usually under $20, and you can size the board to fit whatever wall space you have.
Diy Mason Jar Sconces
For a rustic light fixture, mount a jar to the wall with a metal band and drop a battery-operated LED puck light or fairy lights inside. No wiring, no electrician, no permit. The warm glow looks surprisingly close to a real sconce, especially when you use a frosted jar or add a little burlap or twine around the rim.
Put one on each side of the mirror for symmetry, or cluster three at different heights for a more casual look. Battery packs last for weeks if you only run them in the evening.
Styling Tips That Keep It Classy
Stick to clear or lightly tinted jars so the contents stay visible and the look stays airy. Keep the contents coordinated, like all white cotton or all natural bath salts, instead of a rainbow of random stuff. If you use jars for storage, label them with a chalk pen or a small kraft paper tag so guests know what's inside.
And don't overdo it. One storage board and two sconces is plenty for most bathrooms. More than that starts to look like a craft store exploded.
8. Faux Tin Tile Backsplash
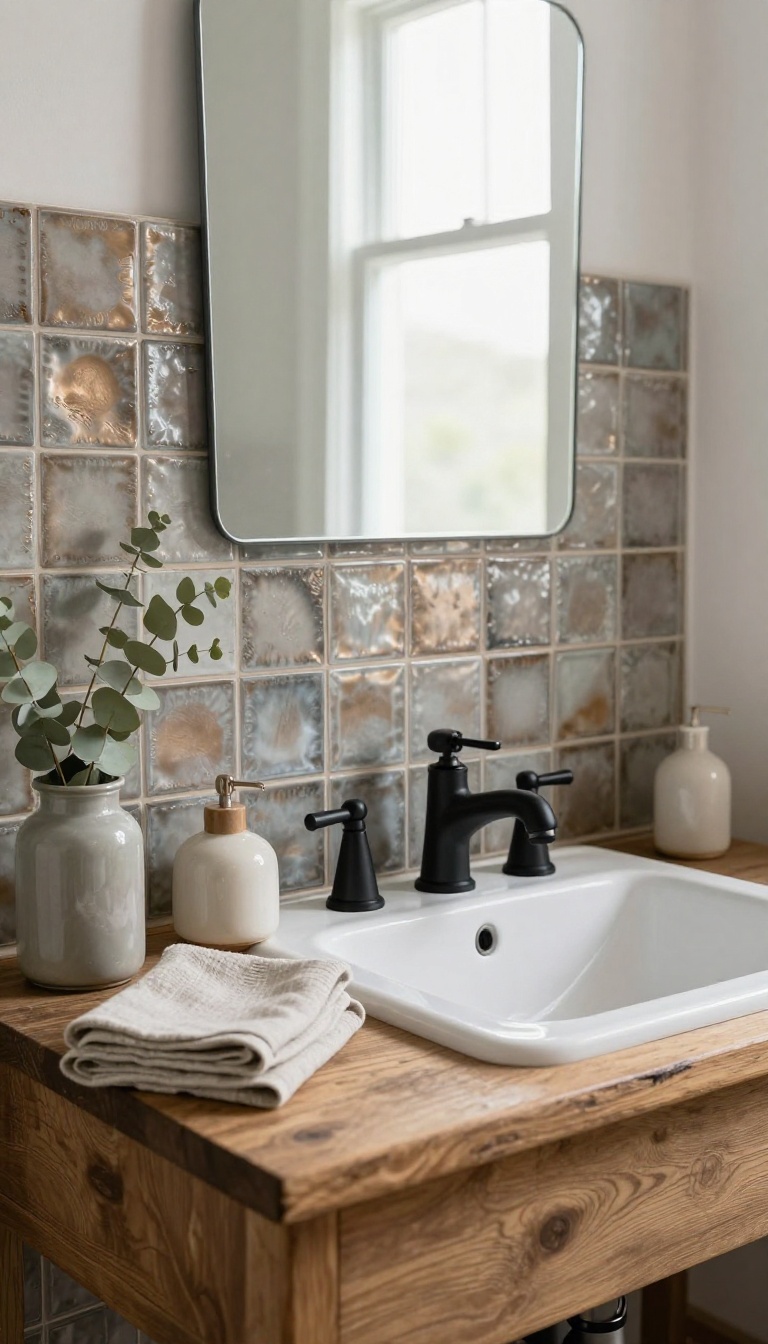
Real tin ceiling tiles look amazing in a rustic bathroom, but the authentic stuff can cost a fortune and installing it is a whole project. Peel-and-stick faux tin tiles give you that same vintage metal look for a fraction of the price, and you can put them up yourself in an afternoon. They add instant character behind a sink or along a wall, and most guests will never guess they are not the real deal.
Faux tin tiles come in lots of patterns, from classic pressed designs to simpler geometric styles, so you can match the vibe of your space. They are made from thin PVC or vinyl with a metallic finish, and the adhesive backing means no special tools or messy grout. Just measure, cut with scissors or a utility knife, peel, and press.
The result is a durable, wipeable surface that handles bathroom humidity better than you might expect.
Where To Use Them
The most common spot is as a backsplash behind the vanity, where they protect the wall from water and add a focal point. You can also run them up a side wall, inside a niche, or even on the ceiling for a dramatic vintage look. Just avoid areas with direct water spray, like inside a shower, unless the tiles are specifically rated for it.
Installation Tips
Start with a clean, smooth surface. If your wall is textured, a quick skim coat or a thin plywood backing will help the tiles stick and look seamless. Plan your layout so you do not end up with tiny slivers at the edges.
Use a roller or a firm press to make sure the adhesive bonds, and consider adding a bead of clear caulk along the bottom edge to keep moisture out.
Style And Maintenance
Faux tin tiles come in finishes like antique copper, brushed nickel, and matte black, so you can warm up a space or go for a moodier feel. They clean up with a damp cloth and mild soap, no polishing required. If you ever want a change, a little heat from a hair dryer can help you peel them off without damaging the wall.
9. Branch Towel Bars and Hooks
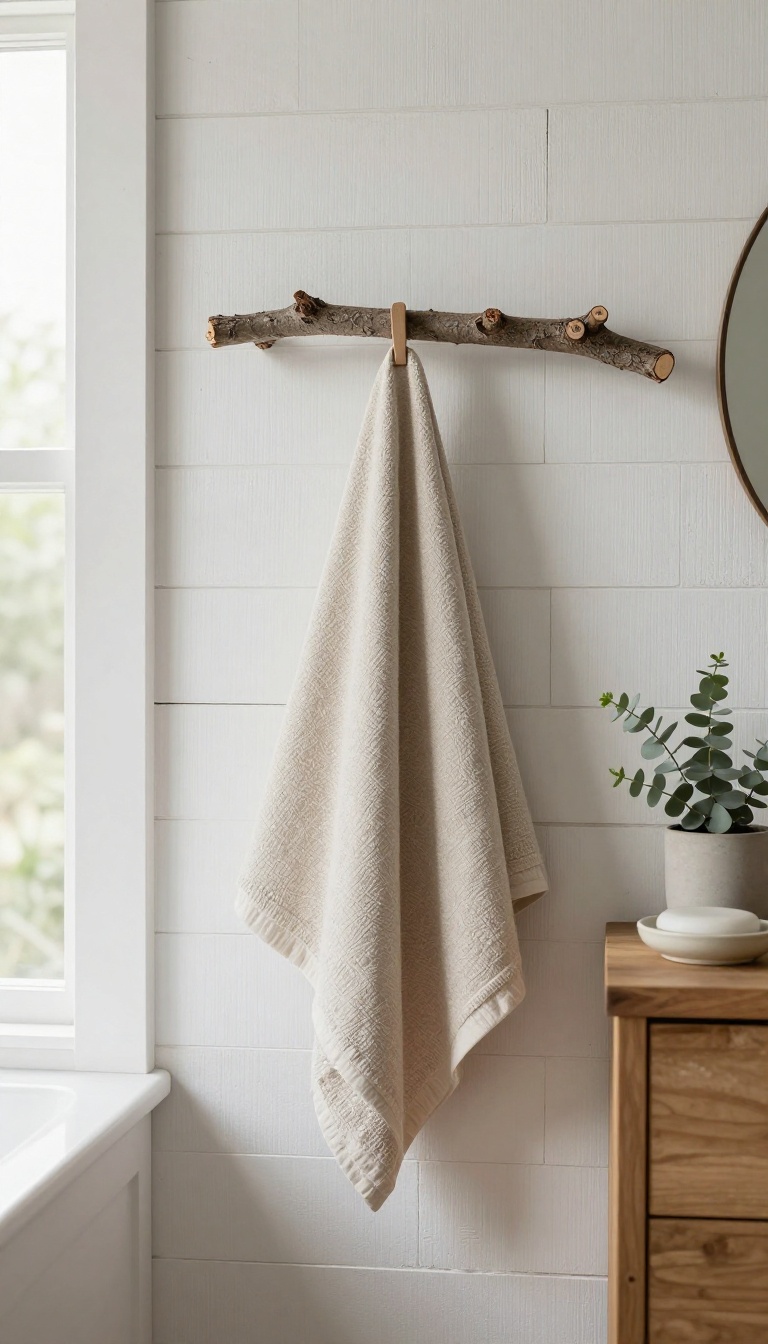
Towel storage in a rustic bathroom usually means a boring chrome bar from the hardware store. Swap that out for a sturdy branch or piece of driftwood and the whole wall changes. You get organic shape, natural texture, and a custom look that costs almost nothing if you find the wood yourself.
The best part is that no two branches are alike, so your towel bar will be one of a kind.
A branch towel bar works because it does two jobs at once. It holds your towels and it adds a sculptural, earthy element to the room. You do not need special tools or woodworking skills.
A good branch, a few screws, and some sandpaper are enough to pull it off. The trick is picking the right wood. You want something dry, straight enough to mount, and thick enough to handle a wet towel without snapping.
Oak, maple, and cedar all work well. Driftwood is great too, especially if you like that weathered, silvery look. Once you have your branch, clean it up.
Sand off any rough spots or loose bark. If you want to keep the natural color, seal it with a clear matte polyurethane or a coat of tung oil. That protects the wood from steam and splashes without making it look plastic.
Mounting is simple. Use heavy-duty screws or a French cleat for longer branches. For smaller hooks, a single screw into a stud or a toggle bolt into drywall will hold fine.
Just make sure the branch sits at least an inch off the wall so towels can dry. You can also cut small branch sections into hooks. Slice a branch into two-inch rounds, drill a hole through the center, and screw them into the wall.
They look like little wooden pegs and they are perfect for hanging hand towels or robes. If you want a more polished look, strip the bark completely and sand the branch smooth. For a rougher feel, leave some bark on and just knock off the loose pieces.
Either way, the result feels intentional and warm. One thing to keep in mind: wood and water are not best friends. So give the branch a good seal, and try to place it away from direct spray.
A spot near the sink or on a side wall works better than inside the shower. You can also mix branch bars with metal or leather accents. A branch bar with simple black iron brackets looks great in a modern rustic space.
A driftwood bar with rope wraps feels more coastal. Pick what fits your room and run with it.
Finding The Right Branch
Look for fallen branches after a storm or check your local park or wooded area. You want a piece that is already dry and free of rot. Avoid green wood because it will crack and shrink as it dries.
A branch about one to two inches thick and two to three feet long is ideal for a towel bar. For hooks, you can use smaller pieces or cut rounds from a thicker branch.
Prepping And Sealing
Give your branch a good scrub with a stiff brush to remove dirt and bugs. Let it dry completely. Sand any rough spots, especially where hands will touch.
Then seal it with a clear finish. Matte polyurethane or tung oil both work well. Two thin coats are better than one thick coat.
Let it cure for a day or two before hanging towels.
Mounting Without A Headache
For a towel bar, use two heavy-duty brackets or a French cleat. Make sure you screw into studs if you can. If not, use toggle bolts rated for the weight.
For hooks, a single screw into a stud is strongest. If you are mounting into drywall only, use a heavy-duty drywall anchor. Always test the branch with a light pull before hanging towels.
And leave a little space between the branch and the wall so air can flow.
10. Weathered Wood Trim and Baseboards
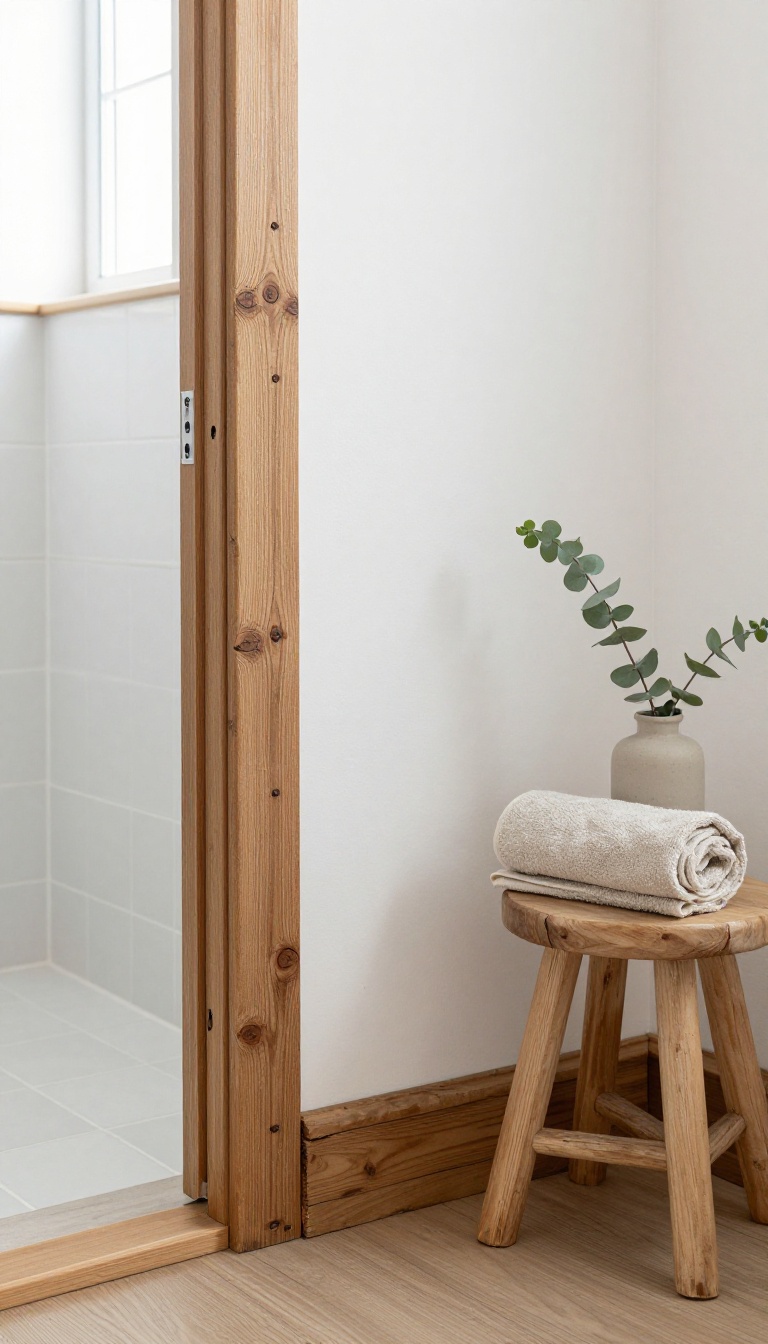
Plain white builder-grade trim is one of the fastest giveaways that a bathroom was done on a budget. It is also one of the easiest things to swap out for something with real character. Reclaimed wood trim and baseboards bring instant warmth, hide imperfections, and make the whole room feel like it has a story.
You do not need to replace every piece of trim at once. Start with the baseboards and the trim around the door, then add more if you have extra wood. The goal is to break up the sterile look of drywall and tile with something that feels organic and aged.
Reclaimed wood is forgiving. Dents, nail holes, and uneven edges just add to the rustic vibe, so you do not have to be a perfectionist with cuts or measurements. That makes it a great project for beginners who want a big visual payoff without a lot of stress.
Where To Find Cheap Reclaimed Wood
Habitat for Humanity ReStores, Facebook Marketplace, and local salvage yards are goldmines for old barn wood, fencing, and pallet boards. You can often get a bundle for under $30. Check for rot or active pests before you buy, and avoid wood that has been painted with lead-based paint if you plan to sand it.
How To Install It Without A Fancy Workshop
A miter saw or even a hand saw and a miter box will get the job done. Cut pieces slightly long, then sand the ends to fit. Nail them in with a hammer and finish nails, or use construction adhesive if you want to avoid holes.
Fill gaps with wood filler that matches the darker tones, then seal with a matte polyurethane to protect against bathroom moisture.
Styling Around Your New Trim
Once the trim is up, keep the rest of the room simple so the wood stands out. A plain white or light gray wall color works well. Add a vintage rug or a couple of dark metal hooks to tie the look together.
The contrast between rough wood and clean surfaces is what makes it feel expensive.
11. Copper or Brass Fixture Updates
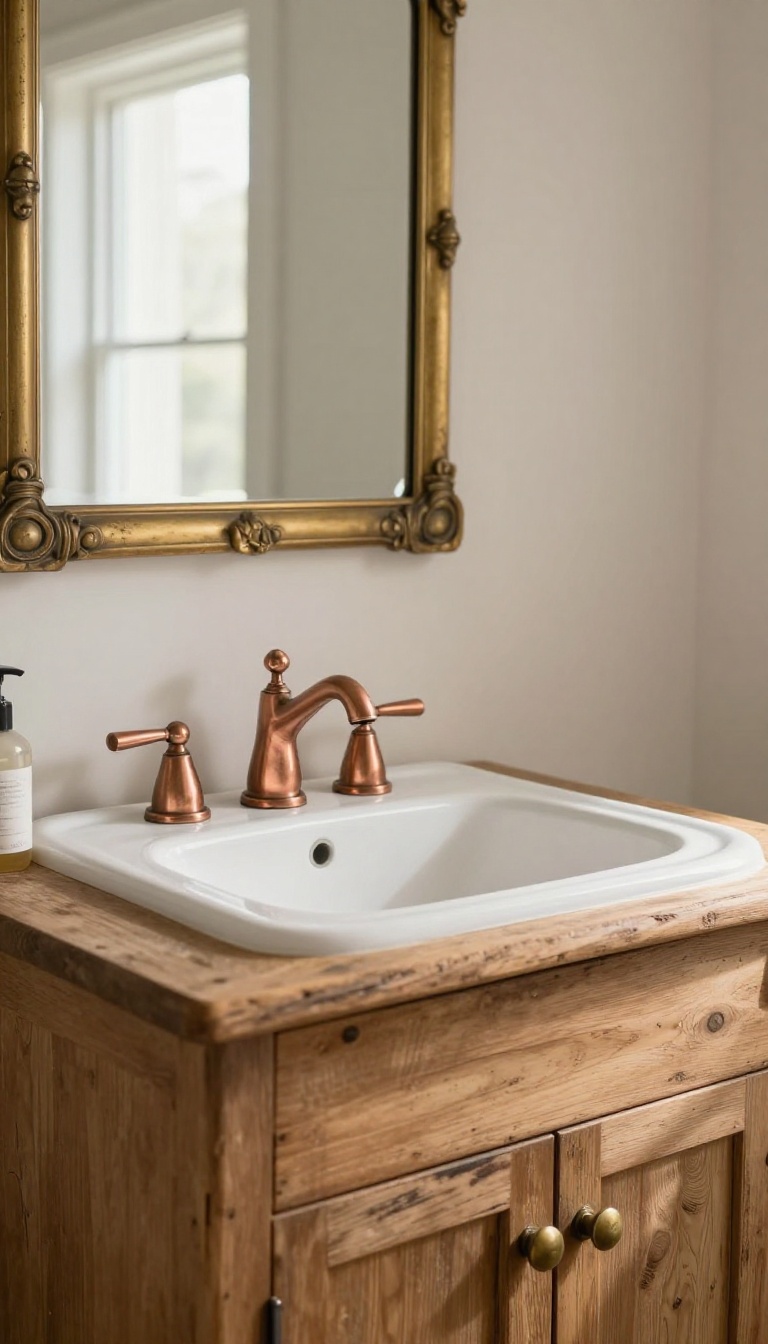
Shiny chrome fixtures scream big-box store. Swap them for copper or brass, and the whole room warms up instantly. These metals cost about the same as basic chrome, but they look like you spent a lot more.
You do not need to replace everything. Start with the faucet and a few cabinet knobs. That small change shifts the entire feel of the vanity area.
Copper and brass also age well, developing a patina that makes them look even more expensive over time.
Where To Spend And Where To Save
Put your money into the main faucet. That is the piece people touch and notice most. For knobs and drawer pulls, affordable brass options from online retailers work great.
Mixing finishes is fine as long as the tones are close.
Embracing The Patina
Unlacquered brass and copper will darken and spot over time. That is the point. It adds character and makes the fixture look like an antique find.
If you want a polished look, choose lacquered versions that stay shiny.
Easy Swaps For Renters
Renting? You can still get the look with peel-and-stick brass contact paper on a plain mirror frame or light switch plate. Or swap out the showerhead for a copper one and keep the original to reinstall later.
Small changes, big impact.
12. Natural Fiber Rugs and Baskets
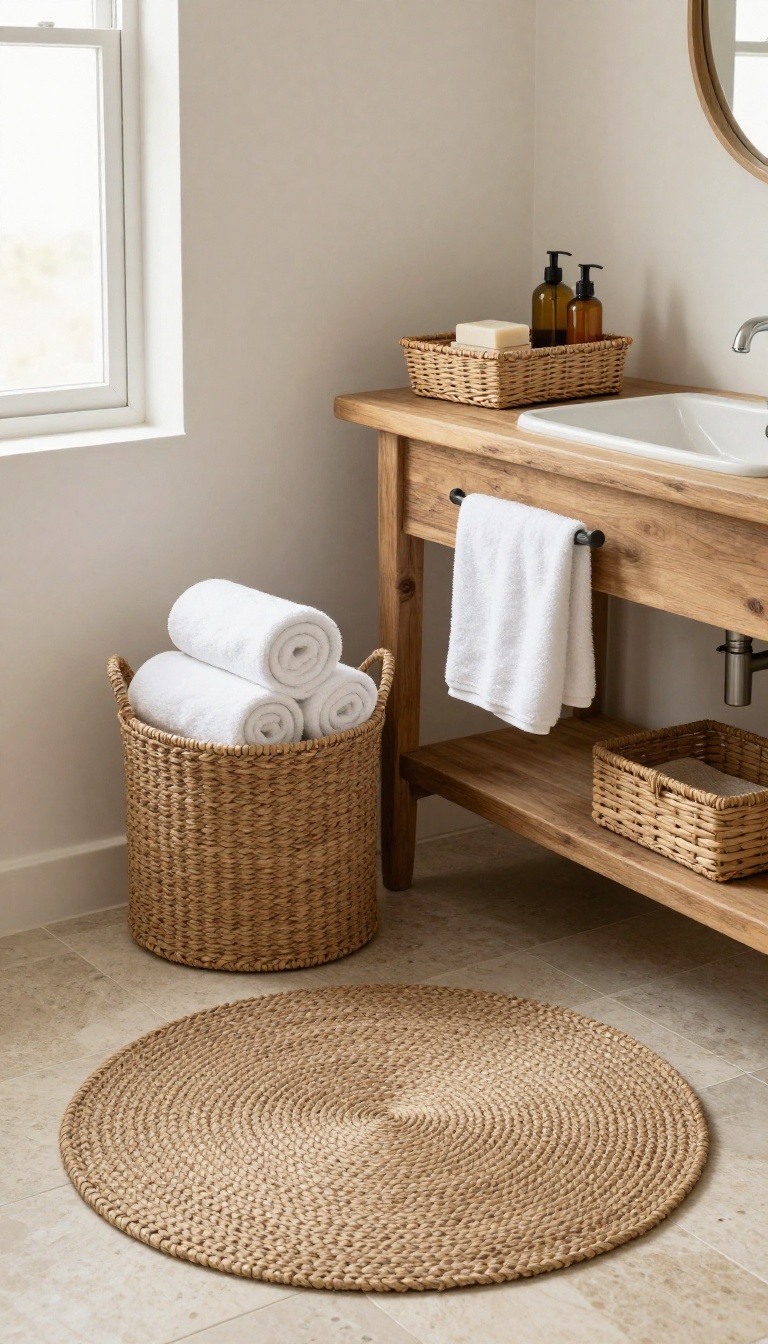
Natural fiber rugs and baskets bring instant warmth to a rustic bathroom without a big price tag. Jute, seagrass, and wicker add texture that breaks up all the hard surfaces, making the room feel cozier and more finished. Even one small rug or a couple of woven baskets can pull the whole look together.
These materials are affordable, easy to find, and they age well. You can use them for function and style, whether that means a soft spot to step or a place to stash extra toilet paper. The key is to mix textures and keep things simple so the space stays rustic, not cluttered.
Choosing The Right Rug
A small jute or seagrass rug in front of the sink or next to the tub adds warmth underfoot. Look for a low-pile option that handles moisture well. Round or rectangular shapes both work; just make sure it fits the space without crowding it.
If you have a larger bathroom, a runner can add a nice touch of texture along the vanity.
Baskets That Work Hard
Woven baskets are perfect for storing towels, toilet paper, or toiletries. A tall wicker basket can hold rolled towels, while a smaller one on the counter can corral soap and lotion. Mix sizes and shapes for visual interest.
Thrift stores and discount retailers often have great options for just a few dollars.
Mixing And Matching
You do not need everything to match perfectly. Combining different natural fibers, like jute with seagrass or wicker with rattan, creates a collected look. Stick to similar tones—browns, tans, and soft grays—so the space feels cohesive.
A little variation keeps it interesting without feeling busy.
13. DIY Soap and Candle Display
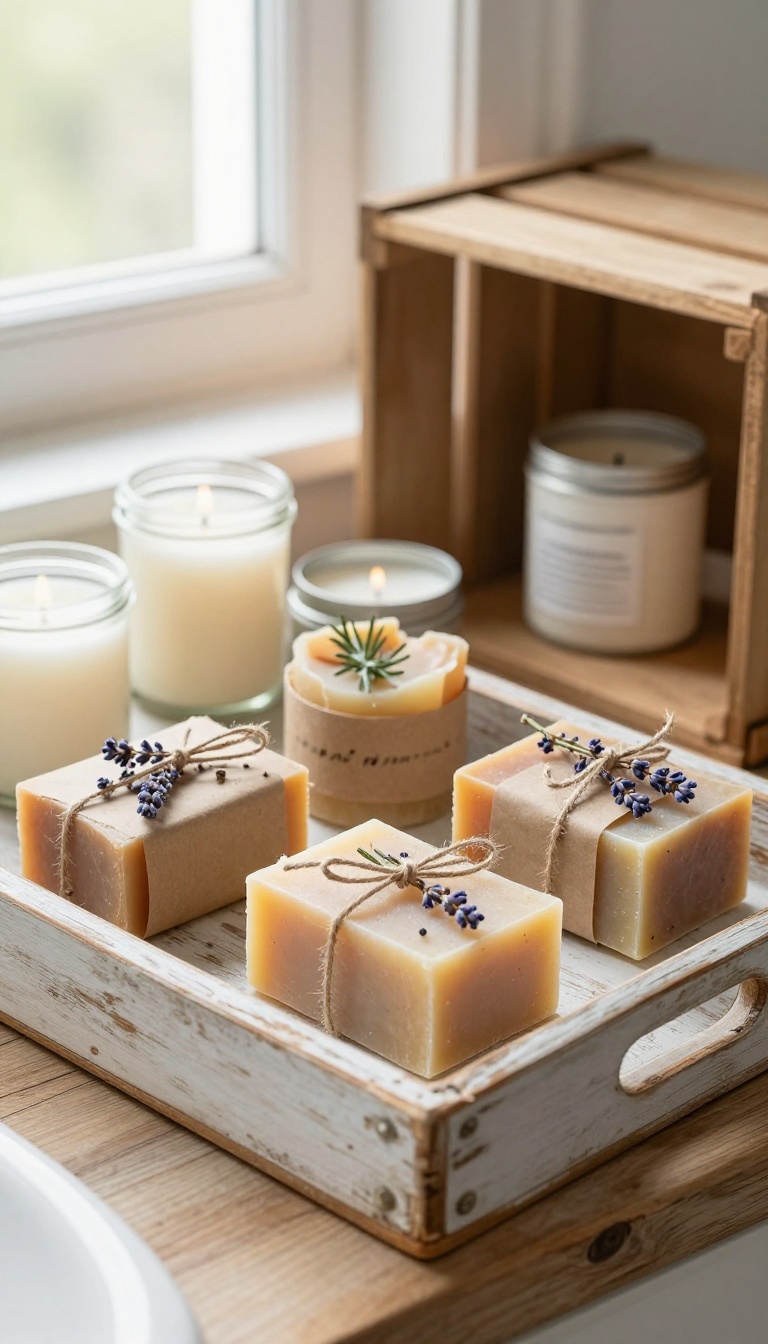
Store-bought soap and candles rarely match a rustic bathroom's mood, and they cost more than you'd expect. Making your own lets you control the scent, color, and texture while spending just a few dollars. A simple wooden crate or vintage tray turns those handmade items into a display that looks curated, not crafty.
You don't need a soap-making lab. A basic melt-and-pour kit, some dried herbs, and a few essential oils are enough to get started. The same goes for candles: soy wax, cotton wicks, and small mason jars or tin cups.
Once you have a batch, arrange them in a thrifted wooden crate or on a distressed tray. The whole setup reads as intentional and personal, and it costs pennies per item compared to boutique prices.
Make Soap That Looks Like It Came From A Farmhouse
Melt-and-pour soap bases come in clear or opaque varieties, and both work well for a rustic look. Add dried lavender, rosemary, or oatmeal for texture and a natural vibe. Pour the mixture into a silicone mold, let it set, and you have bars that look like they belong in a country store.
Wrap them in brown paper and twine for an extra touch.
Candles In Vintage Tins And Jars
Small tin cans, mason jars, or old teacups make perfect candle vessels. Melt soy wax, add a wick, and scent it with cedarwood, vanilla, or orange clove. The imperfect, recycled containers fit the rustic theme better than anything new.
Group a few different heights together for visual interest.
Display It Like You Mean It
A wooden crate turned on its side becomes a shelf for soaps and candles. A vintage silver tray or a slab of reclaimed wood works too. Add a few sprigs of dried eucalyptus or a small jar of bath salts to fill out the arrangement.
Keep it near the sink or on the back of the toilet tank so it's both pretty and practical.
14. Vintage Clawfoot Tub Refresh
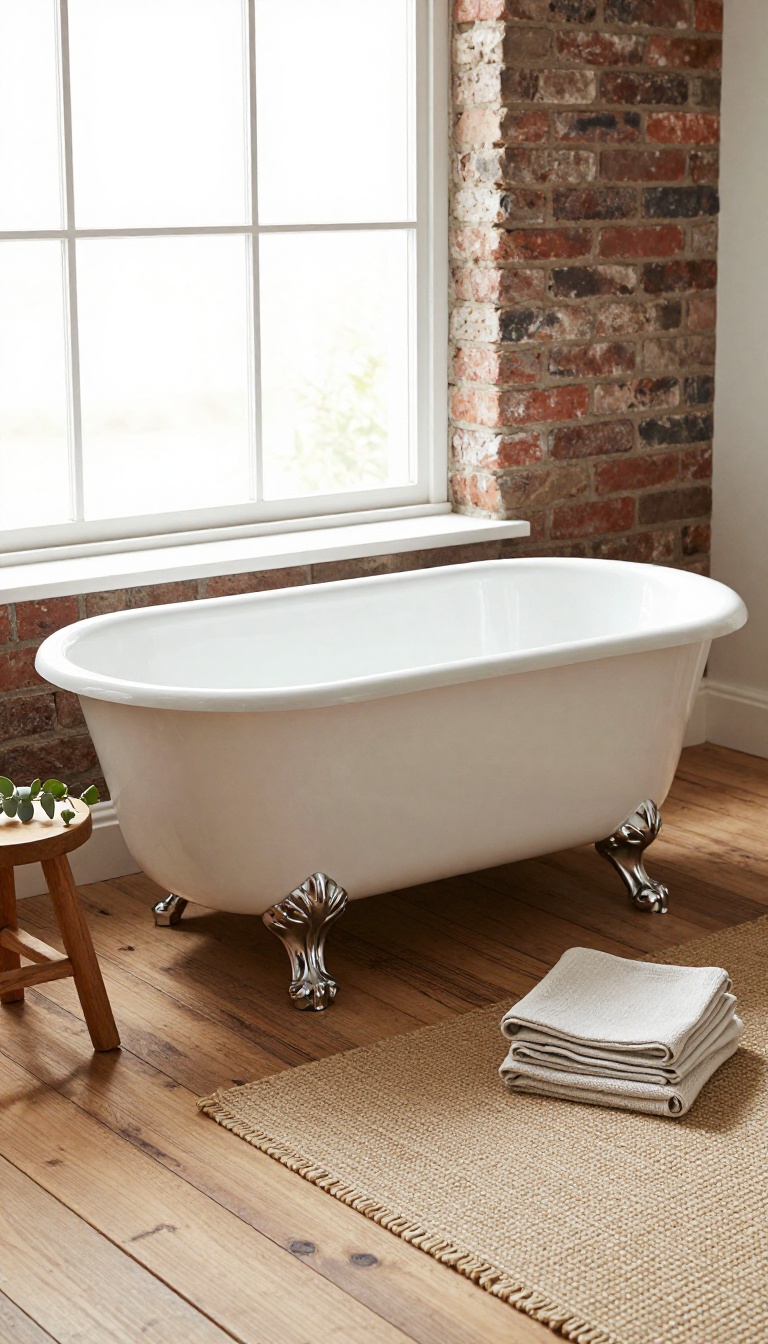
A clawfoot tub is often the centerpiece of a rustic bathroom, but years of use can leave it looking tired and stained. Instead of ripping it out and spending thousands on a new one, you can refinish it yourself with a DIY kit. A fresh coat of paint or epoxy makes it look brand new for a fraction of the cost.
Refinishing a clawfoot tub is a weekend project that yields dramatic results. The process involves cleaning, sanding, and applying a specialized coating that bonds to the old surface. Most kits come with everything you need, including a roller, brush, and detailed instructions.
The key is preparation: any dirt, rust, or soap scum will show through the new finish, so take your time with the prep work.
Why Refinish Instead Of Replace?
A new clawfoot tub can cost $1, 500 or more, plus installation and plumbing changes. Refinishing costs $50 to $150 for a kit and preserves the original character of your tub. Vintage tubs are often made of heavy cast iron, which holds heat better than modern acrylic.
Keeping the original also avoids the hassle of moving a 300-pound fixture through your house.
Choosing The Right Kit
Look for a two-part epoxy or acrylic refinishing kit designed for bathtubs. Epoxy is more durable and resistant to chips, while acrylic is easier to apply but may not last as long. Read reviews and pick a kit with a strong bonding primer.
Some kits include a non-slip additive for the bottom of the tub, which is a smart safety upgrade.
Step-by-step Application
Start by removing the drain and overflow cover, then clean the tub with a heavy-duty cleaner to remove all residue. Sand the entire surface with 400-grit sandpaper to create a profile for the new coating. Fill any chips or cracks with epoxy putty and sand smooth.
Mix the coating according to the instructions and apply two thin coats with a roller, using a brush for edges and curves. Let it cure for at least 48 hours before using the tub.
Finishing Touches For A Rustic Look
Once the tub is refinished, swap out the old faucet for a vintage-style one in oil-rubbed bronze or brushed nickel. Add a simple clawfoot tub caddy for soap and a candle. A chunky knit rug or a small stool with a folded towel next to the tub enhances the cozy, rustic feel.
These small details make the refreshed tub look intentional and high-end.
15. Layered Lighting with Edison Bulbs
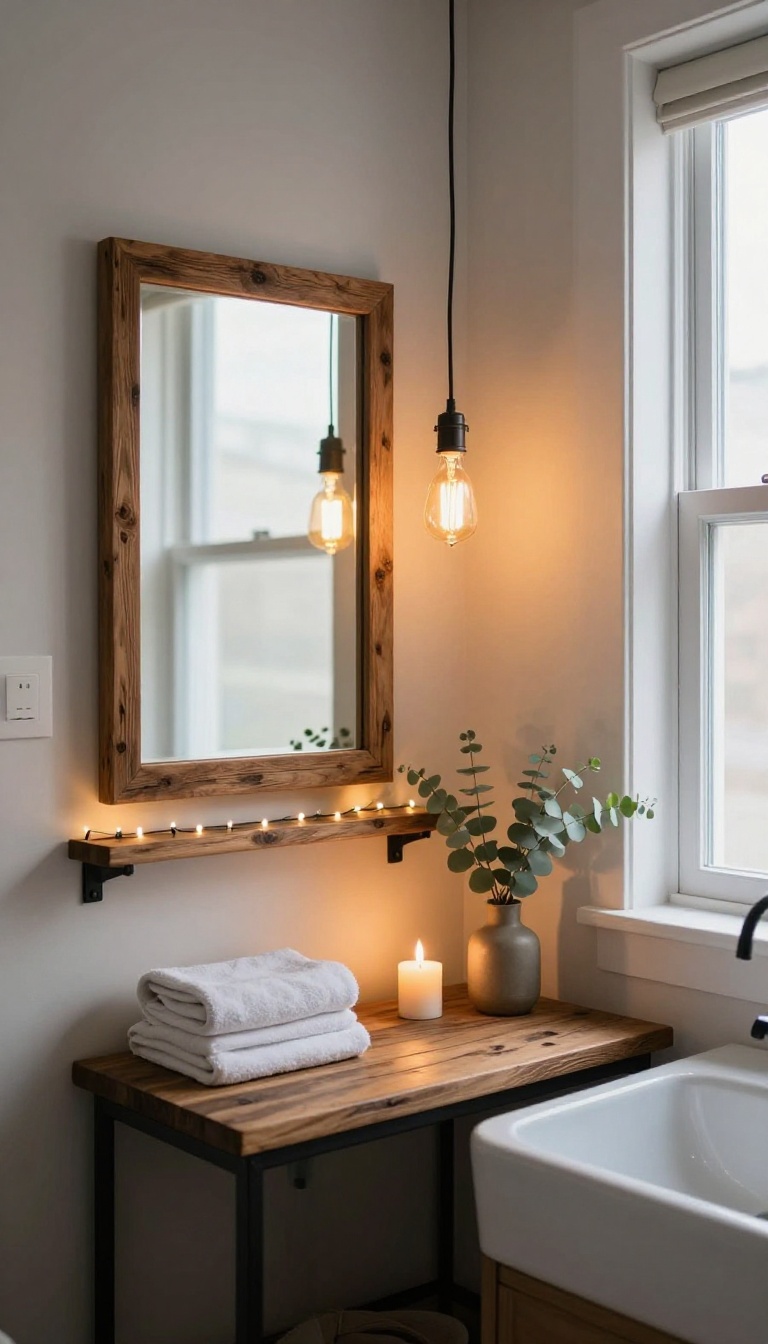
Overhead lighting alone makes a bathroom feel flat and functional. Layering in warm Edison bulbs changes that instantly, casting a soft amber glow that reads as cozy and expensive. The best part?
You can pull it off with basic pendants, string lights, or a simple dimmer switch, spending very little.
Edison bulbs are the workhorse of rustic design. Their visible filaments and warm color temperature (around 2200K) mimic candlelight, which flatters skin tones and makes wood and metal look richer. You do not need a fancy fixture to get the effect.
A single exposed bulb over a mirror or a pair of them flanking a vanity can do more for the mood than a $300 light bar.
Pick The Right Bulb
Look for dimmable LED Edison bulbs in warm white or amber. They run cool, last for years, and cost a few dollars each. Avoid bright white or daylight bulbs, which kill the cozy vibe.
A 40-watt equivalent is usually plenty for accent lighting.
Hang Them Low And Layered
Instead of one central light, use two or three sources at different heights. A pendant over the sink, a string of lights draped along a shelf, and a small table lamp on the counter create depth. Just keep cords tidy and use clips or hooks to avoid a messy look.
Add A Dimmer For Control
A simple plug-in dimmer or a dimmer switch lets you dial the brightness down for evening soaks. That low, warm glow is what makes the room feel expensive. You can find dimmable bulbs and dimmer plugs for under $20 total.
FAQ
What is the cheapest way to make my bathroom look rustic?
Focus on small changes like adding reclaimed wood accents, switching to vintage-style hardware, and using natural fiber rugs and baskets. These cost little but have a big impact.
Can I use real wood in a bathroom?
Yes, but you need to seal it properly to protect against moisture. Use marine-grade sealants or polyurethane and ensure good ventilation.
Where can I find affordable rustic decor?
Thrift stores, flea markets, salvage yards, and online marketplaces are great sources. You can also DIY using pallets, branches, and mason jars.
How do I make a small bathroom look expensive on a budget?
Stick to a cohesive color palette, add texture with natural materials, and use lighting to create warmth. Mirrors and open shelving can also make the space feel larger.
What are some easy DIY rustic bathroom projects?
Try making a branch towel bar, a mason jar light fixture, or a reclaimed wood shelf. These projects require basic tools and minimal spending.
Conclusion
You don't need a big budget to get a bathroom that feels warm and high-end. Rustic style celebrates imperfection, so you can use salvaged materials and thrift finds without worrying about matching sets. Pick a few ideas from this list and start small.
Even one or two changes can transform the whole space. Before you know it, your bathroom will look like a rustic retreat that cost far less than you'd expect.