15 Backyard Kitchen Ideas for Easy Outdoor Entertaining
Hosting outside sounds great until you're running back and forth to the kitchen for every forgotten utensil. A few smart upgrades can fix that without a full renovation.
You don't need a massive built-in island to make outdoor cooking feel easy. The best backyard kitchens solve small problems: where to set a drink, where to chop, where to keep the tongs.
These 15 ideas focus on practical setups that make entertaining feel less like work. Pick the ones that fit your space and budget, and you'll spend more time with guests and less time sprinting indoors.
1. Start With a Rolling Prep Cart
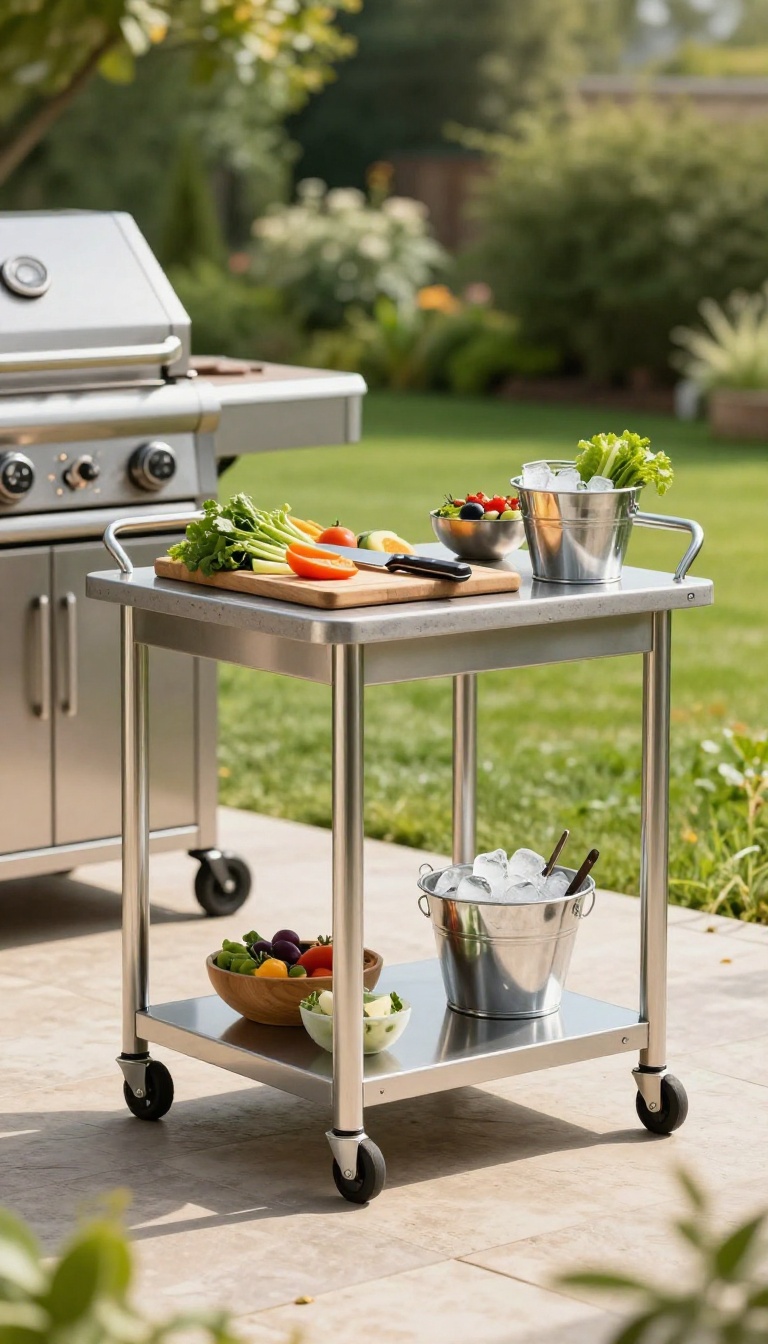
A rolling prep cart solves a problem you might not notice until you're mid-party: your prep space is stuck in one spot. With wheels, your cutting board, knives, and garnishes follow you around the yard. When the fun winds down, it rolls into the garage or pantry, out of sight.
Think of it as a mobile kitchen island that doesn't require a contractor. You can chop veggies next to the grill, then wheel the cart to the patio table for last-minute plating. No more balancing a cutting board on a cooler or using a lawn chair as a makeshift counter.
The best part? It keeps your indoor kitchen from turning into a disaster zone. Everything you need for outdoor prep lives on the cart, so you're not making ten trips through the sliding door.
Guests can even grab their own drinks or utensils without bothering you.
What To Look For
Sturdy wheels are non-negotiable. Cheap casters wobble and catch on patio cracks, sending your salsa flying. Look for locking casters so the cart stays put while you're slicing.
A stainless steel or weather-resistant top handles hot pans and won't warp after a surprise rain shower. Size matters, too. A cart that's too big becomes a hassle to move; too small and it's useless.
Aim for something around 30 inches wide and 36 inches tall—roughly counter height. That way you can work comfortably without hunching over.
Smart Ways To Use It
Set up a dedicated drink station on top: a bucket of ice, a few bottles, and a stack of cups. Or use it as a taco bar where guests build their own plates. During grilling season, keep it next to the barbecue for raw meat prep and cooked food resting.
When not in use, roll it near the door as a landing zone for platters and dirty dishes. Some carts even fold flat, so you can tuck them into a slim closet. The goal is flexibility—one piece that does the job of three.
Budget-friendly Picks
You don't need a restaurant-grade cart. Big-box stores and online retailers sell decent models for under $150. Look for ones with a handle and a bottom shelf for storing extra propane or paper towels.
If you're handy, a simple DIY version using a butcher block top and heavy-duty casters can cost even less. Check thrift stores and restaurant supply auctions for used stainless carts. They're built like tanks and often sell for a fraction of retail.
Just give them a good scrub and a coat of rust-resistant spray where needed.
2. Build a Simple Two-Zone Grill Station
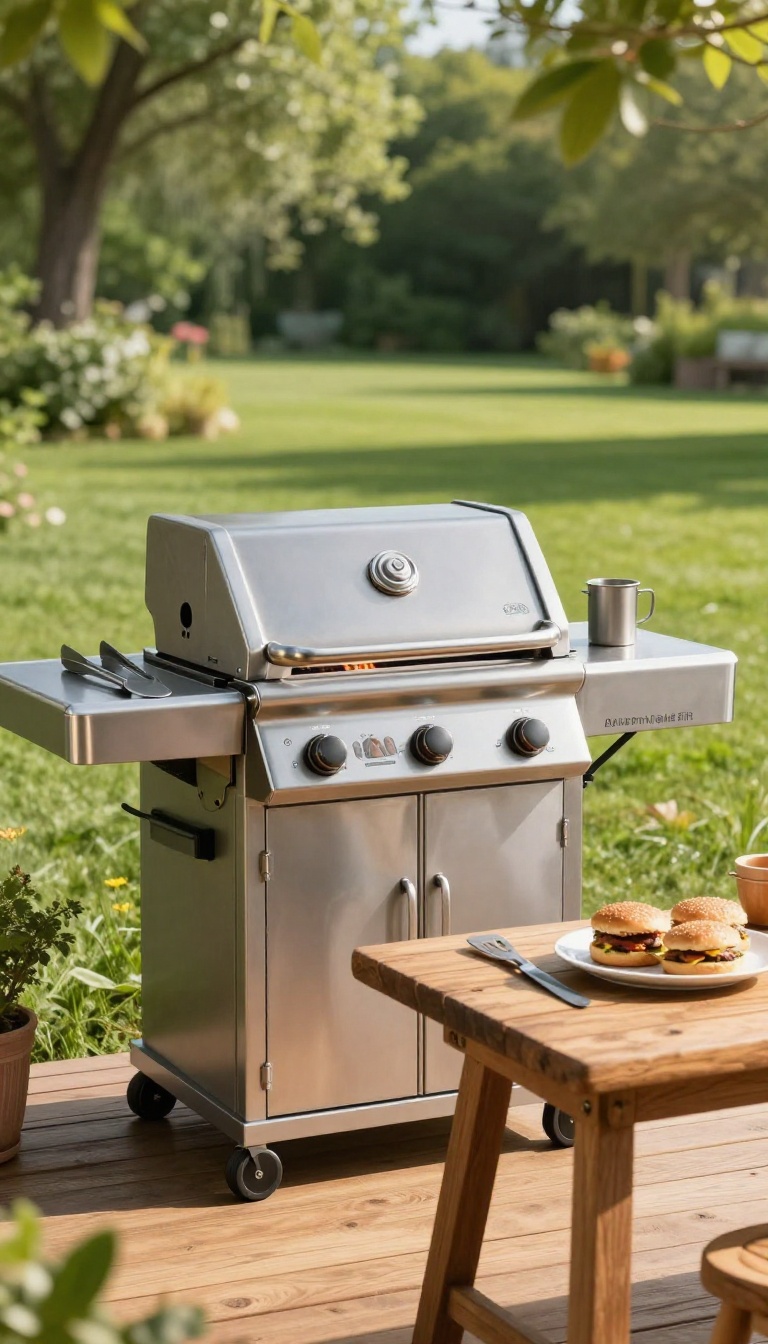
A two-zone grill station gives you a hot side for searing and a cooler side for resting or finishing. It's the difference between frantic flipping and actually enjoying the cookout. You don't need a fancy setup.
A basic grill, a small side table, and a plan for what goes where will do the trick.
The goal is to stop playing musical chairs with your food. One zone handles high heat, the other gives you a safe spot to move things off the flame. Start by designating one side of your grill as the hot zone and the other as the cool zone.
If your grill has multiple burners, this is as easy as turning one side to high and leaving the other off or on low. For charcoal, bank the coals to one side. That leaves an open area where you can rest meat or move things that are cooking too fast.
Next, add a small table or shelf right next to the grill. This becomes your landing pad for tongs, spatulas, and a plate for finished food. It keeps you from balancing everything on the grill lid.
A two-zone setup also makes it easier to cook different foods at once. Sear burgers on the hot side, then slide them over to the cool side to keep warm while you toast buns. You'll use fewer dishes, make fewer trips inside, and look like you know what you're doing—even if you're just winging it.
Set Up Your Zones
On a gas grill, turn one burner to high and leave the adjacent burner off. On charcoal, push all the coals to one half of the grill. That's your hot zone.
The empty side is your cool zone. If you're using a small kettle grill, you can still do this. Just use a chimney starter to light a smaller amount of charcoal and pile it on one side.
Keep Tools Within Reach
Hang a small caddy or bucket on the grill's side shelf for tongs, spatulas, and a meat thermometer. A magnetic strip works too if your grill is metal. A folding side table gives you extra room for a plate or a cutting board.
Look for one that clips onto the grill leg or stands independently.
Cook In Stages
Sear steaks or chicken over the hot zone first, then move them to the cool zone to finish cooking through. This prevents flare-ups and gives you a buffer if guests arrive early. Use the cool zone to hold cooked food at a safe temperature while you grill the next batch.
It's like a warming rack, but right on the grates.
3. Add a Fold-Down Bar Shelf
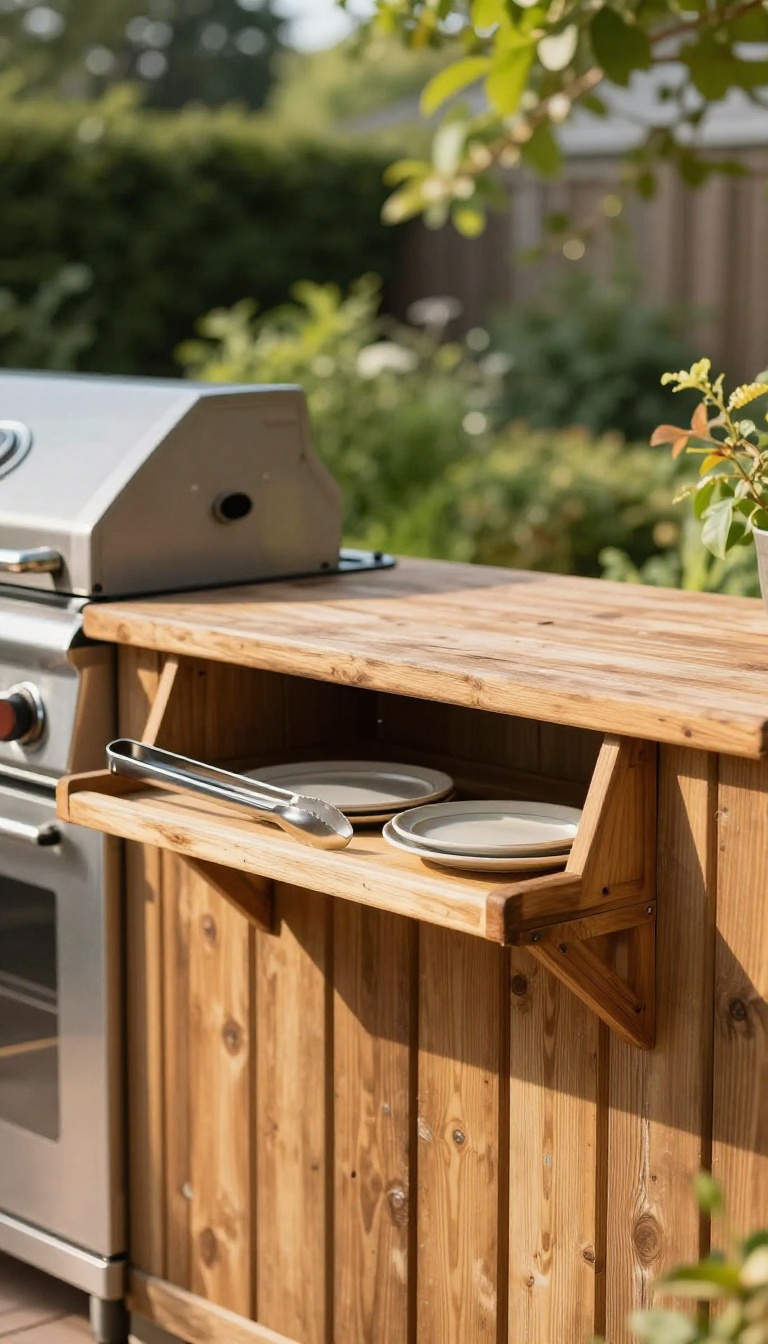
A fold-down bar shelf is one of those upgrades that makes you wonder why you didn't do it sooner. It attaches to a wall, fence, or the side of your grill station and flips up when you need a landing spot for drinks, plates, or prep bowls. When the party's over, it drops flat against the surface and disappears.
No permanent footprint, no clutter, just instant counter space exactly where you need it.
The beauty of a fold-down shelf is its simplicity. You're not building a whole outdoor kitchen—you're adding a hinged surface that solves a specific problem. Most homeowners have a blank wall or fence section near their cooking area that's just begging for a little function.
This idea turns that dead space into a handy bar or prep zone in an afternoon.
Where To Mount It
Look for a spot within arm's reach of your grill or smoker. The side of a shed, a sturdy fence post, or even the exterior wall of your house works well. Make sure the surface behind it is solid enough to hold screws and the weight of whatever you set on the shelf.
If you're mounting to siding, find the studs first. A fence is usually easier because you can drill straight into the posts.
Choosing The Right Hardware
You'll need a sturdy hinge that locks in the up position—friction hinges or folding shelf brackets are ideal. They hold the shelf flat and prevent it from sagging. For the shelf itself, go with a material that can handle the weather: cedar, teak, or a sealed exterior-grade plywood.
A simple coat of outdoor oil or paint will keep it looking good for years. Add a small handle or finger pull so you can lift it easily.
Making It Practical
Think about what you'll actually use it for. If it's a drink ledge, a 10- to 12-inch depth is plenty. For prepping food, go a bit deeper—maybe 14 to 16 inches.
You can also add a few hooks underneath for hanging tongs or a bottle opener. Just keep the underside clear so it folds flat without hitting anything. A small lip on the front edge can stop glasses from sliding off, but it's optional.
Installation Tips
Measure twice, drill once. Attach the brackets to the wall first, then screw the shelf to the brackets. Check that it folds down smoothly and doesn't bind.
If you're not handy, a local handyman can knock this out in an hour. And if you rent, you can build a freestanding version that hangs over a railing or attaches to a portable bar cart. The goal is function without permanent commitment.
4. Use a Weatherproof Storage Bench
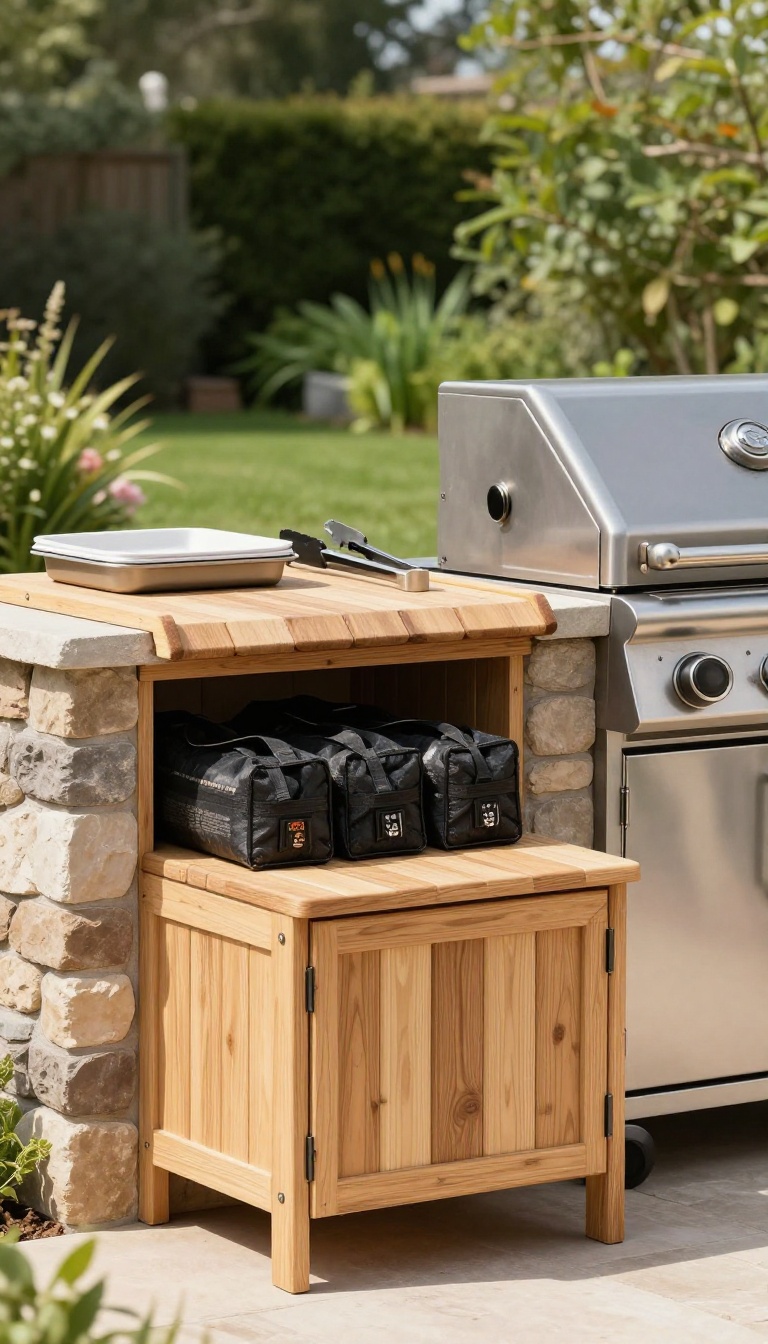
A bench that pulls double duty as a storage box might be the most underrated piece in an outdoor kitchen. It gives you a dry place to stash charcoal, tools, and serving trays, and it gives your guests somewhere to sit. That combination keeps clutter out of sight and people off the ground.
The trick is choosing a bench with a sealed compartment. A simple lid that latches shut and a gasket around the rim will keep rain, dust, and bugs out. Look for weather-resistant materials like cedar, teak, or powder-coated metal.
If you already have a bench, you can add a waterproof storage box underneath or swap it for one with built-in space.
What To Store Inside
Keep the items you reach for most: charcoal, lighter fluid, grill brushes, tongs, and a spare propane tank if it fits. Stackable bins inside the bench make it easy to grab what you need without digging. Serving trays and platters can go on top or in a separate slot.
Just avoid storing anything that attracts moisture, like paper napkins, unless it's in a sealed bag.
Placement That Works
Put the bench within arm's reach of the grill or prep area, but not so close that it blocks traffic. A spot along a wall or railing keeps it out of the way and gives you a natural landing zone for hot lids or dirty plates. If you entertain often, angle it toward the seating area so it doubles as a coffee table or footrest.
Easy Diy Options
You can build a simple storage bench from weather-treated lumber and a waterproof plastic bin. Cut a hole in the bench top for the bin, add hinges, and seal the edges with silicone. Or buy a ready-made deck box and add a cushion on top.
Either way, you get seating and storage for less than the cost of a custom cabinet.
5. Set Up a Sink-Free Rinse Station
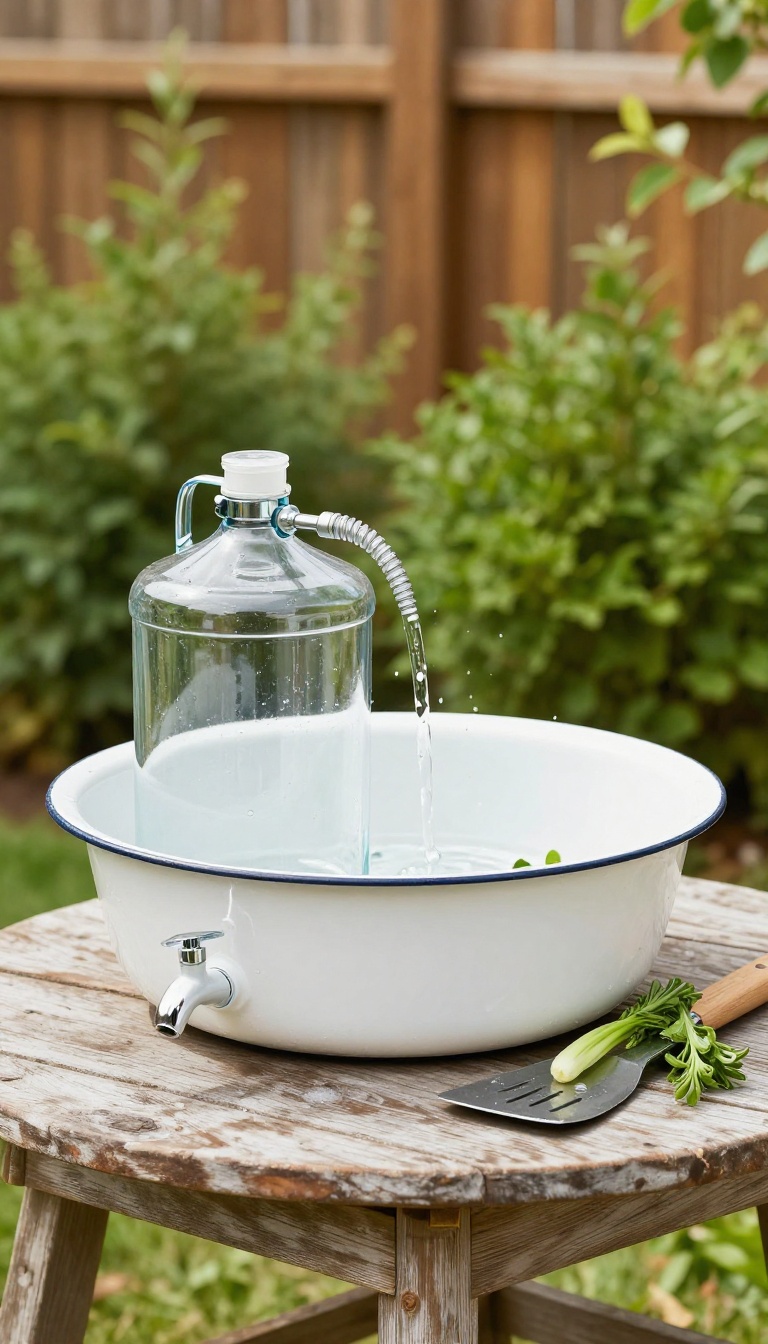
Plumbing a full outdoor sink costs money and permits. A simple rinse station gives you 90% of the function for a fraction of the hassle. It keeps sticky marinade, sandy veggies, and greasy tools from piling up on your prep table.
The setup takes five minutes and works anywhere you have a flat surface.
You only need three things: a wide basin, a jug of clean water, and a spray nozzle that fits the jug. A plastic tub from the hardware store or a vintage enamel pan both work. Fill the jug at your indoor sink before guests arrive, then set it on a small side table or a sturdy stool.
The spray nozzle turns a trickle into a focused rinse, so you use less water and get more pressure. When you're done, dump the greywater on a thirsty shrub and store the basin upside down. No pipes, no plumber, no problem.
Pick The Right Basin
Go wider than you think. A 12- to 16-inch basin lets you dunk tongs, spatulas, and small cutting boards without splashing. Look for one with a flat bottom so it doesn't tip.
A rubbermaid tub is cheap and light; a galvanized bucket is heavier but won't blow away. If you entertain often, keep a dedicated basin stored with your outdoor gear so you never hunt for it.
Water Jug And Nozzle Setup
A 2-gallon jug with a spigot is the sweet spot. It's heavy enough to stay put but light enough to carry. Screw on a flexible spray nozzle that fits the spigot threads.
Test it before party day. You want a steady stream for rinsing plates and a mist for delicate herbs. Keep a second jug of plain water for drinking or hand-washing so you don't cross-contaminate.
Where To Place It
Set the station between your grill and your prep table. That way you can rinse as you cook without walking across the yard. Put it on a surface that can get wet, like a metal cart or a concrete ledge.
If you're on grass, place a rubber mat underneath to catch drips. Keep a small bucket nearby for dirty water so you're not carrying a full basin to the drain.
6. Hang a Magnetic Tool Strip
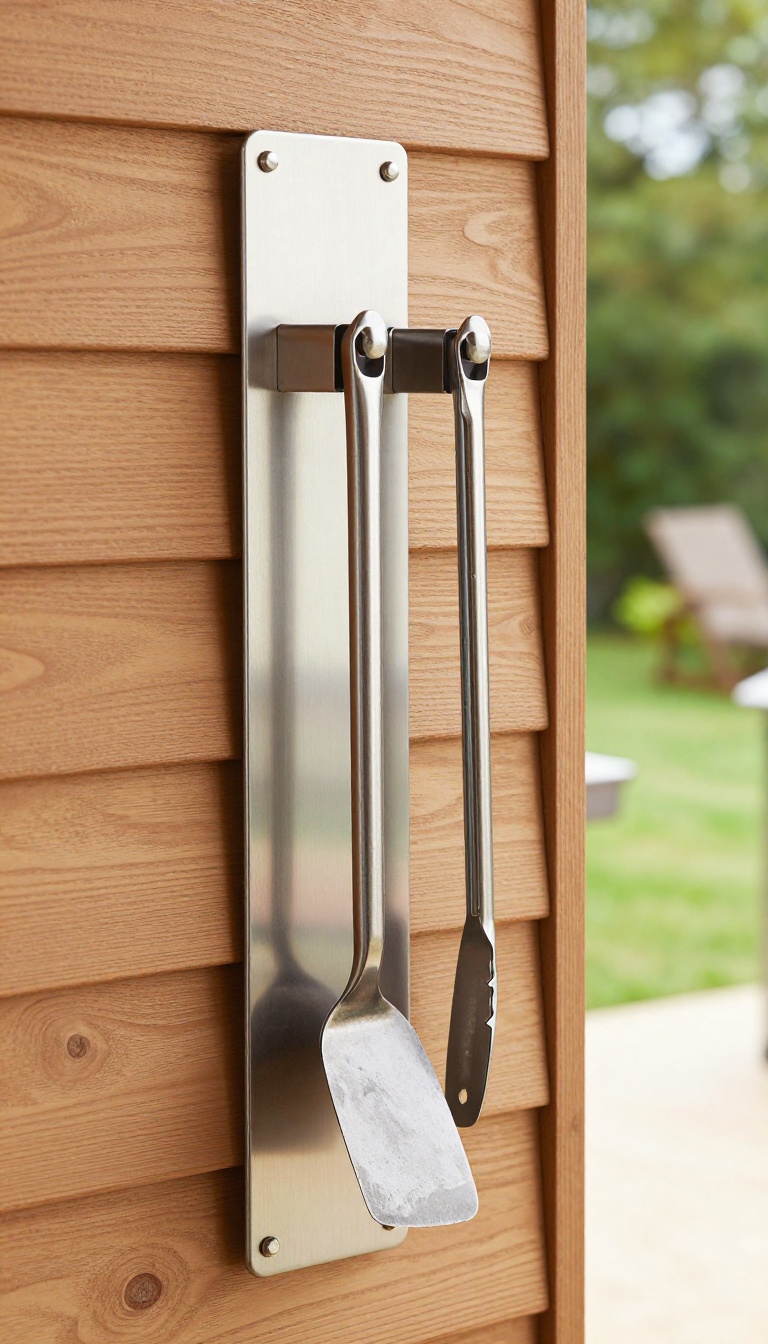
Grill tools have a way of disappearing exactly when you need them. A magnetic tool strip mounts right where you cook and keeps everything visible and grab-ready. It's a small change that cuts down on counter clutter and mid-cook scrambling.
No more digging through drawers with greasy hands while the burgers threaten to burn.
A magnetic strip is basically a wall-mounted home for your most-used tools. You stick it to a wall, a grill side shelf, or the side of a cabinet, and suddenly your spatula, tongs, and bottle opener have a permanent spot. The best part?
You can see everything at a glance, so you're not fumbling around when you're in the middle of flipping chicken. Most strips are made from stainless steel or heavy-duty plastic with a strong magnet inside. They come in different lengths, so you can go small for a few tools or long for a full arsenal.
Installation is usually just a couple of screws or a strong adhesive strip, depending on the model.
Where To Mount It
The ideal spot is within arm's reach of your grill or prep area. Think about your natural cooking zone: if you're right-handed, mount it slightly to the right of the grill so you can grab tools without crossing your body. If you have a side shelf, the wall just above it works great.
Avoid mounting it where it'll get direct spray from a hose or heavy rain unless it's rated for outdoor use. Also, keep it away from open flames. A little distance from the heat source keeps the magnet from weakening over time.
What To Hang On It
Stick to tools you use every time you cook outside. That means a spatula, tongs, a grill brush, and a bottle opener. Maybe a meat thermometer if it has a metal clip.
Anything heavier, like a cast-iron skillet, is a no-go. You can also hang small accessories like a grill glove or a towel using a magnetic hook. Just don't overload it.
The strip works best when it's not crowded, so you can grab what you need without knocking things off.
Keeping It Weatherproof
If your outdoor kitchen is covered, a standard magnetic strip will hold up fine. But if it's exposed to the elements, look for one with a rust-resistant coating or stainless steel construction. Wipe it down every few weeks to keep it looking sharp and to prevent buildup.
In freezing climates, bring the strip inside for winter if you can. The magnet itself is pretty tough, but the adhesive or screws might not love extreme temperature swings.
7. Create a Shaded Prep Corner
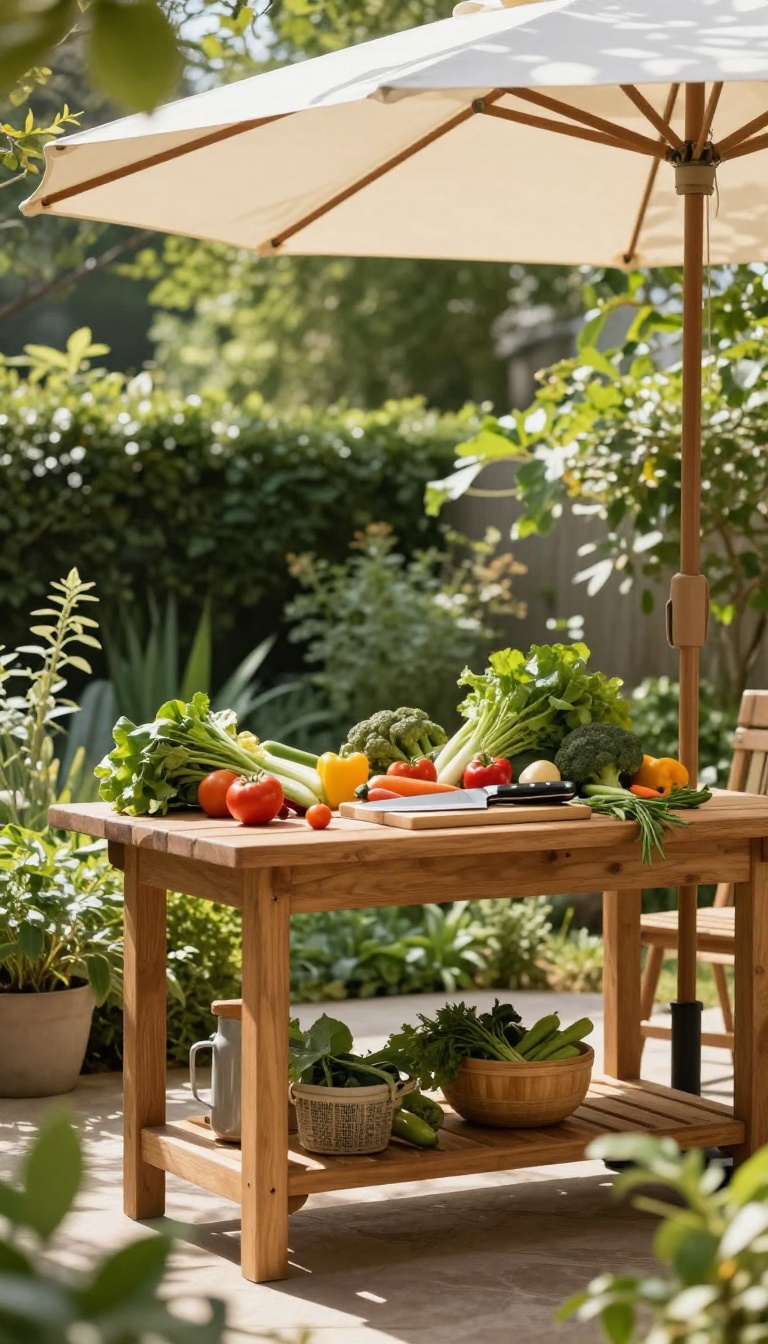
Direct sun turns a prep station into a hot, uncomfortable spot where ingredients wilt and you rush through every chop. A simple shade solution fixes that. You don't need a permanent roof—just something overhead that blocks the worst of the afternoon glare.
A shaded prep corner keeps you cool, protects delicate ingredients, and makes the whole cooking process feel more relaxed. The key is getting shade where you actually stand and work, not just over the grill. That means positioning your prep table, cutting board, or counter in a spot that gets relief during peak sun hours.
You have plenty of options depending on your space and budget. A basic patio umbrella works great if you already have a table. A triangular sail shade adds a modern look and covers more area.
Even a simple cantilever umbrella can be angled to follow the sun as it moves. The goal is flexible shade that doesn't get in your way.
Pick The Right Shade For Your Setup
Umbrellas are the easiest starting point. A 9-foot market umbrella covers a standard prep table and tilts to block low sun. If you want something more permanent, a sail shade anchored between two posts or a wall gives you clean lines and better wind resistance.
Cantilever umbrellas cost more but let you shift the canopy without moving the base, which is handy when your prep zone doubles as a serving area.
Position It For Real Relief
Shade only helps if it lands where you stand. Set your prep table first, then figure out where the sun hits between noon and 4 p. m. That's when you'll be cooking.
Angle your umbrella or sail so the shadow falls across your cutting board and ingredients, not just the grill. If you're using a wall-mounted sail, attach one corner higher than the other to shed rain and direct runoff away from your workspace.
Keep It Stable And Guest-friendly
A weighted base or sandbag keeps umbrellas from tipping in a breeze. For sail shades, use turnbuckles and sturdy anchors—posts should go at least two feet into the ground. Make sure the canopy sits high enough that tall guests don't duck.
And check clearance from your grill; you don't want fabric anywhere near open flames or rising heat.
8. Add a Compact Outdoor Fridge
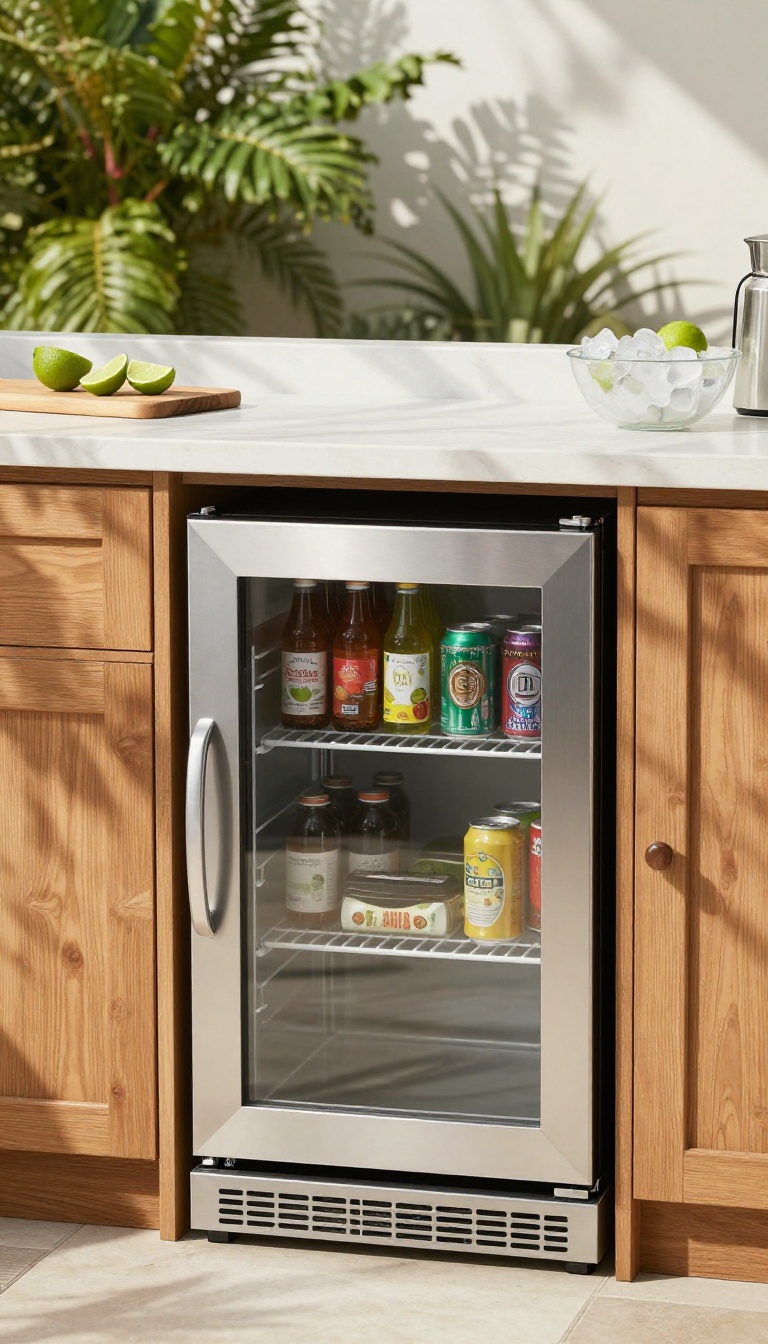
A small fridge tucked under the counter keeps drinks and perishables cold without sending you back inside every five minutes. It’s one of those upgrades that quietly changes how you host—no more coolers full of melted ice or warm beer. You just reach down, grab what you need, and get back to the party.
You don’t need a full-size refrigerator to make this work. A compact model—usually 3 to 5 cubic feet—fits under most standard counter heights and runs on a regular outlet. Look for one rated for outdoor use, since indoor fridges struggle with temperature swings and humidity.
Stainless steel or weather-resistant exteriors hold up better over time. If you live in a cold climate, check whether the fridge can handle winter temps without cracking or losing efficiency. Some models have a heater for that exact reason.
Placement matters more than you think. Put it near your prep area but out of direct sun, because shade keeps the compressor from working overtime. You’ll also want a dedicated circuit if you’re running a grill, lights, and a fridge on the same line.
A quick chat with an electrician saves you from tripped breakers mid-barbecue. Once it’s in, stock it with the basics: water, soda, beer, condiments, and anything that spoils fast. You’ll use it more than you expect.
Pick The Right Size And Rating
Measure your under-counter space before you shop. Leave a couple of inches around the sides and back for airflow, or the fridge will run hot and die early. Look for an Energy Star rating to keep power bills down.
A glass door looks great but shows every smudge—solid doors hide more and often cost less. If you want a freezer compartment, go slightly larger; those tiny ice trays fill up fast.
Keep It Powered And Protected
A GFCI outlet is a must for any outdoor kitchen. It cuts power if water gets where it shouldn’t. Mount the outlet inside a weatherproof box, and keep the cord off the ground.
If your fridge sits under a counter, add a small vent or leave the back open so heat can escape. In freezing months, either unplug and store it or choose a model with a built-in heater. That one feature can double its lifespan.
Stock It For Easy Hosting
Treat the fridge like a mini bar and pantry combined. Keep a bin of cold drinks on the bottom shelf and a caddy of condiments up top. Pre-chill anything you plan to serve so the fridge doesn’t have to work as hard.
A small basket for napkins and bottle openers saves trips inside. Restock after every gathering, so it’s ready the next time friends drop by.
9. Install a Pull-Out Trash and Recycling Bin
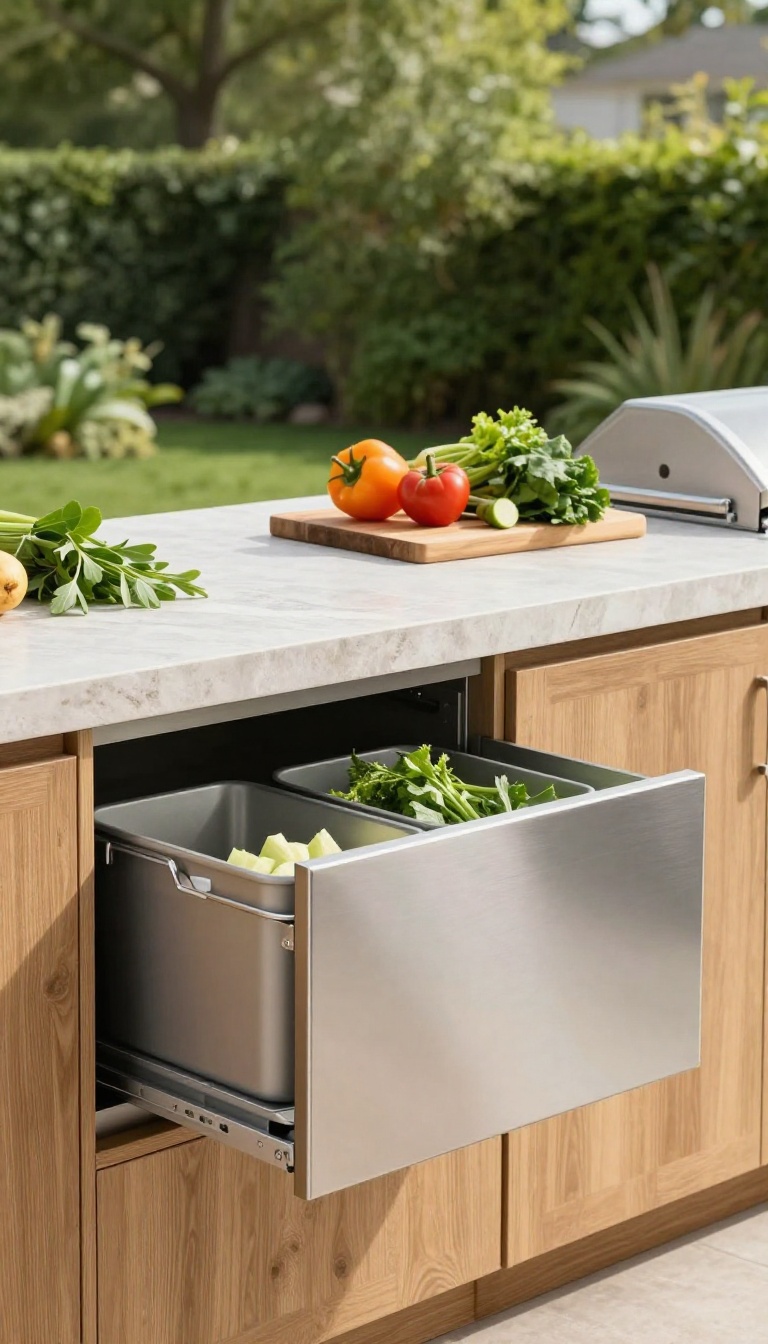
A pull-out trash and recycling bin solves a problem most outdoor kitchens ignore until the party starts: where does the waste go? Without a dedicated spot, you end up with a flimsy bag tied to a chair leg or a pile of cans on the counter. A slide-out bin keeps everything hidden and makes cleanup a quick, one-motion job instead of a scavenger hunt.
The setup is simple. You build a cabinet into your outdoor kitchen—either as a standalone unit or under a counter—and mount a pull-out frame inside. The frame holds two bins: one for trash, one for recycling.
When you need them, you slide the whole thing out. When you don't, it disappears behind a door. This isn't just about tidiness.
It's about keeping the party moving. Guests can toss their own bottles and plates without asking where to put them. You avoid the awkward pile-up of dirty dishes and napkins on every flat surface.
And when the night winds down, you're not making ten trips to the indoor kitchen bin. The best part? You don't need a custom build.
Several companies sell pull-out kits that fit standard cabinet openings. If you're handy, you can install one in an afternoon. If not, a contractor can handle it quickly.
Either way, it's one of the cheapest upgrades that makes your outdoor kitchen feel more like a real kitchen.
Choose The Right Spot
Put the bin near your prep and grill area, but not right next to where people stand to eat. You want it close enough that you can scrape plates without walking far, but out of the main traffic path. A spot at the end of a counter run usually works well.
Pick Bins That Fit Your Habits
If you recycle a lot, go with two equal-size bins. If most of your waste is trash, make the trash bin larger. Some pull-out frames let you swap bin sizes later, so you're not locked in.
Look for bins with handles and lids that seal—outdoor smells are no joke.
Keep It Clean And Functional
Line the trash bin with a heavy-duty bag that won't tear when you pull it out. For recycling, a simple open bin is fine, but rinse cans and bottles before tossing them in to avoid pests. Once a week, wipe down the inside of the cabinet and check for crumbs or spills.
10. Use a Pizza Oven on a Cart
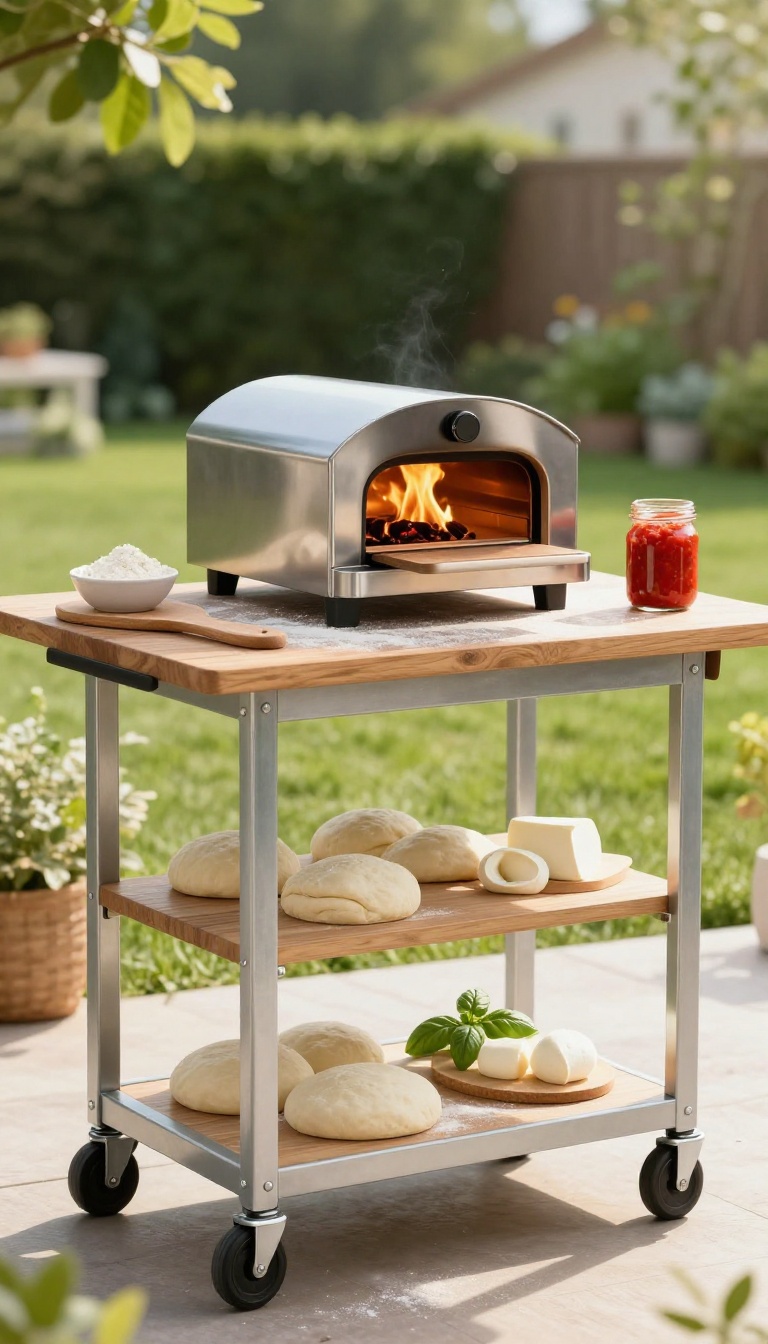
A portable pizza oven on a cart gives you the drama of a wood-fired pie without the commitment of a built-in masonry beast. It rolls out when you want it, tucks away when you don't, and turns any backyard gathering into a watch-the-pizza-cook event. Pair it with a simple prep table and you've got a full outdoor kitchen station that costs a fraction of a permanent setup.
The cart does two jobs: it holds the oven at a comfortable working height and gives you a spot to stash a peel, a bag of flour, and a stack of dough balls. Look for a cart with locking casters so it doesn't wander while you're sliding a pizza in. A stainless-steel top is easy to wipe down, and a lower shelf keeps extra fuel or a spare propane tank out of the way.
Once the oven is on the cart, the prep table becomes your assembly line. Set it up a few feet away so you're not reaching over a hot oven to grab toppings. A folding table works fine, but a small butcher-block cart or a sturdy side table feels more permanent and gives you a better surface for stretching dough.
Keep a small bowl of flour, a jar of sauce, and your toppings within arm's reach, and you can crank out pies while guests build their own.
Pick The Right Cart
You want something sturdy enough to hold 30 to 50 pounds of oven without wobbling. A metal utility cart with a lip around the top keeps the oven from sliding, and locking wheels are a must if your patio isn't perfectly flat. If you go with a wooden cart, make sure the top is sealed so it can handle a little flour and olive oil.
Set Up A Topping Station
A simple prep table next to the oven keeps the flow natural: stretch dough, add toppings, slide it in. Use small bowls or deli containers for cheese, sauce, and sliced veggies so guests can customize their own pie. A cutting board on the table gives you a spot to slice once the pizza comes out, and a roll of paper towels handles the inevitable mess.
Keep Fuel And Tools Handy
Whether you're burning wood pellets or using propane, store extra fuel on the cart's bottom shelf or in a nearby bin. A pizza peel hangs on a hook on the side of the cart, and a small wire brush for cleaning the stone lives in a drawer or a caddy. That way you're not running inside for a lighter or a spare bag of pellets mid-party.
11. Set Up a DIY Beverage Station
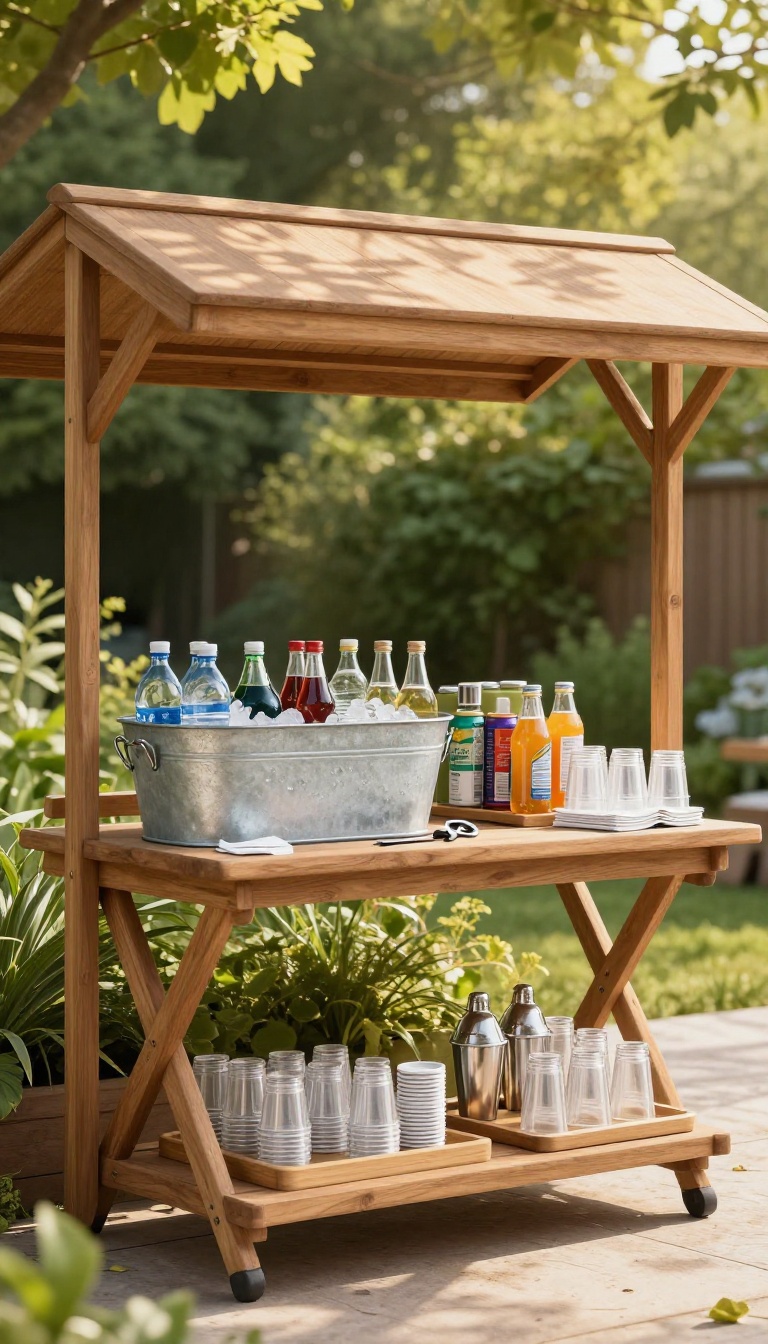
Guests always seem to need a drink refill at the exact moment you're flipping burgers. A dedicated beverage station puts everything they need in one spot, so they can help themselves without crossing into your cooking zone. It's a simple setup that keeps the party flowing and your focus on the food.
You don't need a fancy bar cart or a built-in kegerator to make this work. A sturdy folding table, a small rolling cart, or even a cleared-off shelf on the patio can become the drink hub. The key is to keep it separate from where you're prepping and grilling, so people aren't reaching over hot coals for a soda.
Stock The Essentials
Start with a large cooler or an ice bucket filled with ice, bottled water, and canned drinks. Add a stack of cups, a bottle opener, and a few koozies. If you're serving cocktails, set out a shaker, jigger, and a couple of mixers so guests can play bartender.
Keep It Cold And Clean
Place the station in a shady spot if possible, and keep a small trash bag or bin nearby for empties. A tray for used cups and a roll of paper towels for spills will save you from sticky messes. If you have a small outdoor fridge, even better—but a well-packed cooler works just fine.
Make It Self-serve
Write a simple sign with drink options, or just arrange everything in a logical order: ice, then drinks, then cups, then napkins. Guests will figure it out fast. This little bit of setup means you're not playing waiter all night, and you can actually enjoy your own party.
12. Add Lighting That Works After Dark
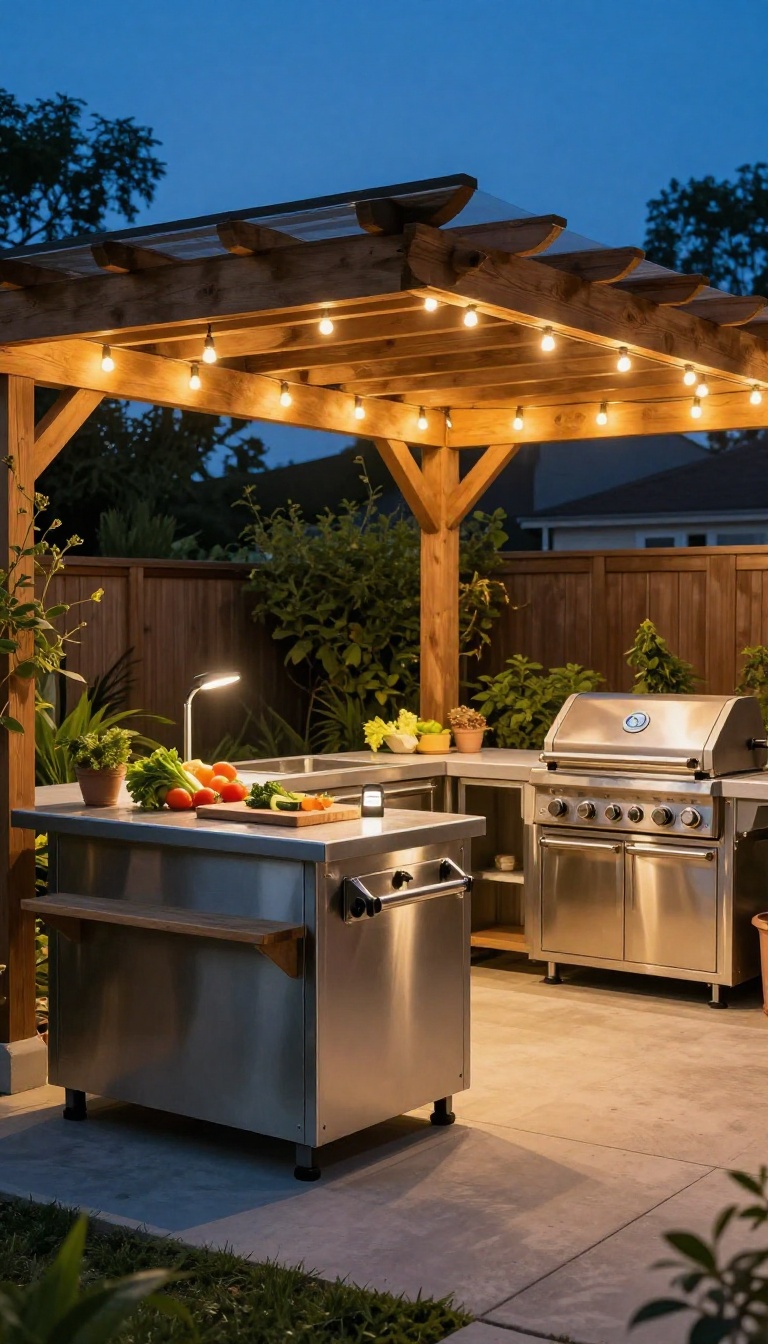
The party rarely ends when the sun goes down, but your kitchen stops functioning if you can't see what you're doing. Good lighting keeps the grill station usable, the prep counter safe, and the whole yard feeling like a place people want to stay. You don't need a professional electrician to pull this off.
A mix of plug-in, battery, and solar options covers almost every setup, whether you have outlets nearby or you're working with an extension cord and a dream.
Think about lighting in layers: overhead light so you can actually cook, task light where you chop and plate, and ambient light so the space feels warm instead of like a parking lot.
String Lights For Instant Atmosphere
String lights are the easiest win because they do double duty. Hang them overhead and you get soft ambient glow that makes the whole yard feel intentional, not to mention enough light to see your guests' faces. Go with warm-white bulbs rather than cool white, which reads harsh and clinical outside.
Run them along a fence, across pergola beams, or between two posts, and use a dimmer plug so you can dial them down once the food is done.
Task Lighting Where You Actually Cook
Ambient glow is nice, but you still need to see the grill grate and the cutting board. Clip-on LED lamps attach to a shelf, a cart handle, or the edge of a table and throw light exactly where you're working. Battery-powered puck lights work the same way and stick almost anywhere with adhesive or a magnet.
Keep one near the prep area and one near the grill so you're never squinting at a half-cooked burger.
Solar Path Lights And Motion Options
Solar path lights along the walkway keep guests from tripping on the way to the cooler, and they cost nothing to run. Stake a few around the perimeter and along any steps or uneven ground. Motion-sensor lights are handy for the grill area, since they kick on when you walk up with a full tray and shut off when you leave.
Just check the sensor range so they don't flicker every time a guest walks past.
13. Build a Simple Concrete Countertop
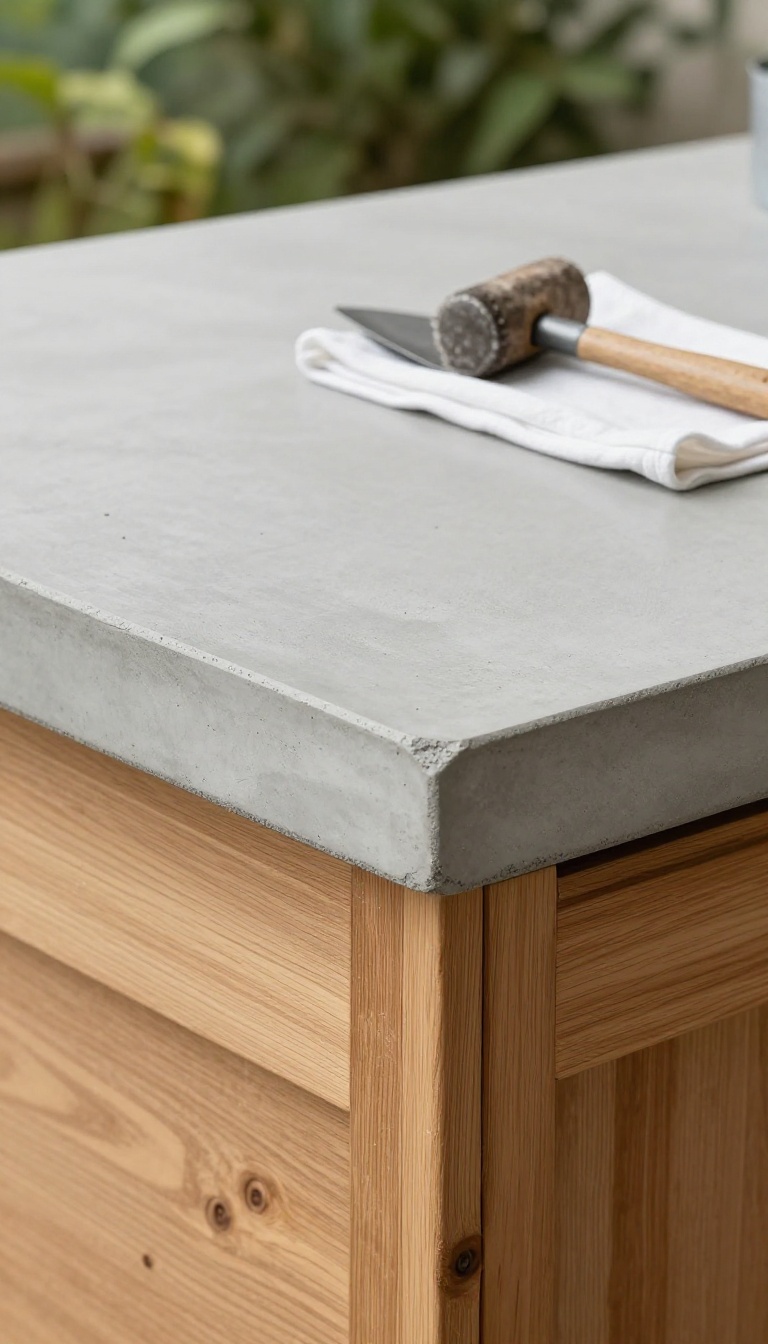
Concrete counters look custom and cost a fraction of granite or quartz. You can pour one over a basic frame in a weekend, and it stands up to weather, heat, and whatever guests set down on it. The process is forgiving, too—small imperfections read as character, not mistakes.
Start with a sturdy base. A simple frame of pressure-treated 2x4s or a metal cart works fine. Build it level and solid, because concrete is heavy and any wobble will show up in the finished top.
For the counter itself, use a melamine or plywood form with smooth sides. Mix a bag of countertop concrete—not the quick-set stuff—and pour it in one go. Tap the sides to release air bubbles, then let it cure for at least 48 hours before you touch it.
Once it's cured, flip it over and sand the edges. A random-orbit sander with a diamond pad smooths things out fast. Seal it with a food-safe concrete sealer, and you're done.
Why Concrete Works Outdoors
Concrete handles sun, rain, and hot pans without flinching. It won't warp like wood or crack under a hot skillet like some tile. And because you're pouring it yourself, you can size it to your exact space—no cutting around odd corners.
Tools And Materials You'll Need
Gather a mixing tub, a drill with a paddle mixer, a trowel, and a sander. For materials, pick up countertop concrete mix, a melamine form, silicone caulk, and a concrete sealer. A cheap plastic drop cloth keeps the mess contained.
Pouring And Finishing Tips
Mix small batches to keep the color consistent. Pour slowly and vibrate the form by tapping it with a rubber mallet. After it sets, sand from 50 grit up to 200 for a smooth feel.
Seal it twice for extra protection.
14. Use a Vertical Herb and Tool Wall
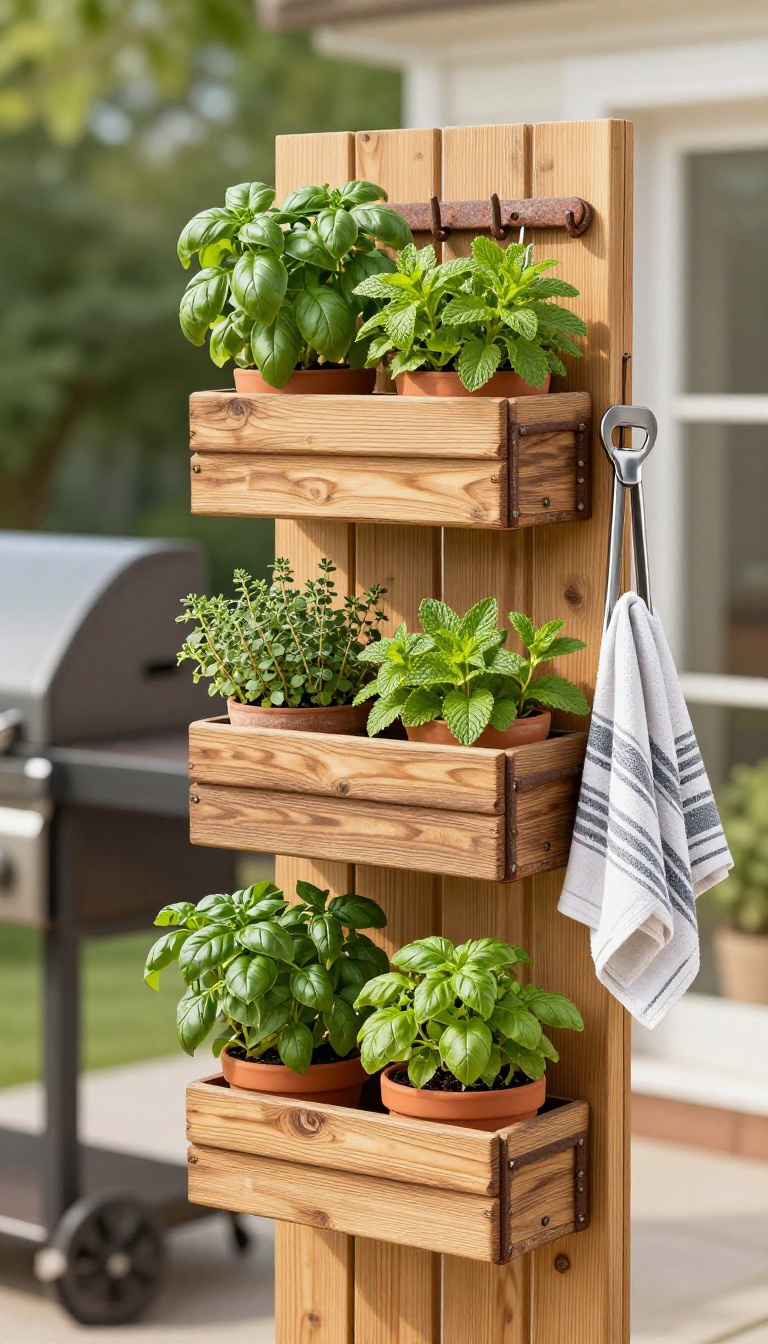
Floor space disappears fast in a backyard kitchen, especially when you're working with a compact patio or a corner of a deck. A vertical wall setup fixes that by moving your herbs and tools up and out of the way. You get fresh basil within arm's reach and a place for tongs, towels, and bottle openers that doesn't eat up your prep area.
The idea is simple: mount a planter system and a hook rail on the same wall, usually the one closest to your grill or prep station. That way you're not crossing the yard every time you need a sprig of rosemary or a spatula. It works on wood, stucco, brick, or even a fence panel with the right anchors.
Pick The Right Wall And Height
Choose a wall that gets decent sun if you're growing herbs like basil, thyme, or mint. Morning light is usually gentler than harsh afternoon sun, especially in hot climates. Mount the planters at chest height so you can reach them without bending or stretching.
The hook rail goes just below or beside the planters, wherever your hand naturally falls when you're cooking.
Mix Planters And Hooks On One System
You don't need matching pieces. A few wall-mounted pots, a trough planter, and a simple rail with S-hooks do the job. Use rust-proof hooks and powder-coated metal or cedar planters so they survive rain and heat.
Keep heavy tools on sturdier hooks and lighter stuff like twine or a grill brush on the smaller ones.
Keep It Useful, Not Cluttered
Only hang what you actually use outside. A pair of tongs, a spatula, a towel, and a bottle opener cover most of it. Rotate herbs by season so you're not staring at dead stems in October.
If the wall starts looking like a yard sale, pull a few things off and store them in a nearby bin.
15. Create a Fold-Away Serving Table
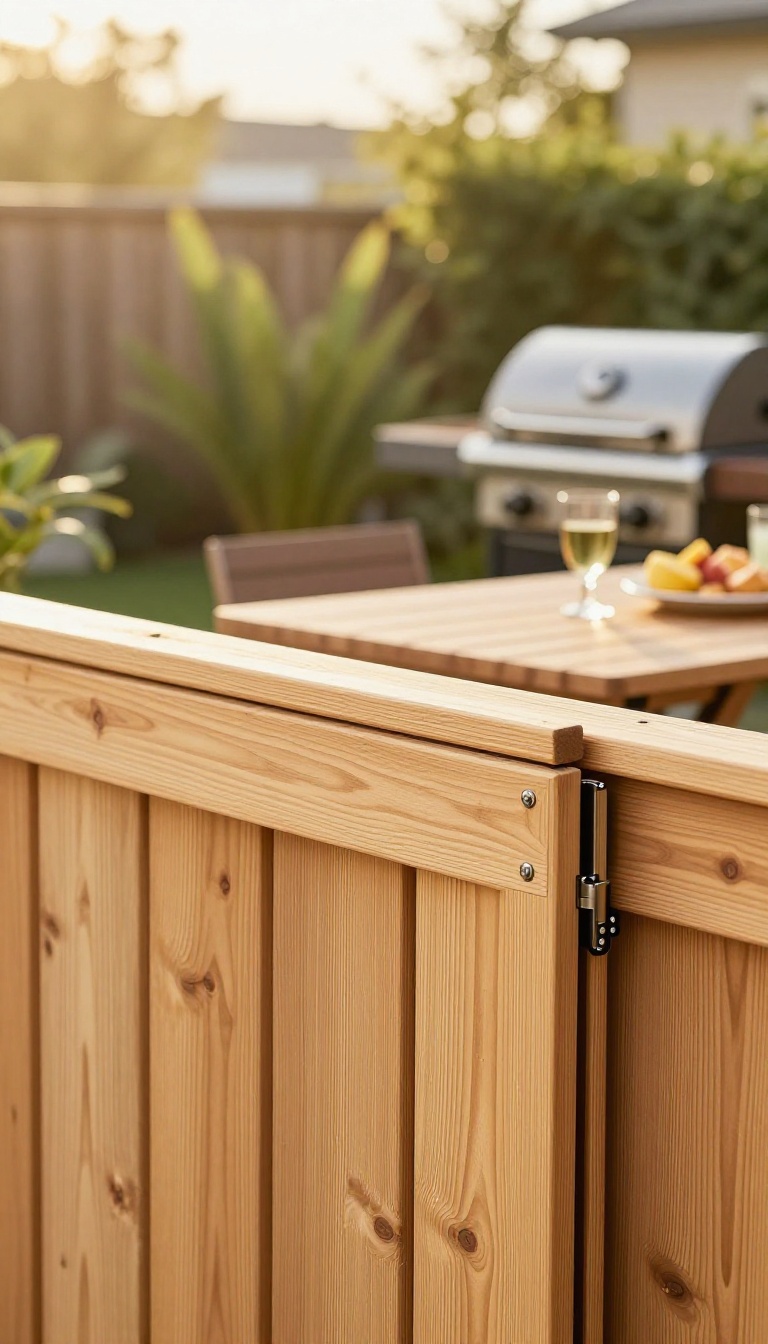
A wall-mounted table that drops down for parties and tucks away afterward keeps your yard flexible. It gives you a sturdy spot for drinks, plates, or a prep station without permanently eating up patio space. When the party's over, it folds flat against the wall or fence, and your yard goes back to normal.
You don't need a full outdoor kitchen to get the function of one. A fold-away serving table is a simple build that solves the classic problem of having nowhere to set things down. It's especially handy in small yards, on narrow decks, or anywhere you want to keep the floor plan open.
The table mounts to a wall, fence, or even a sturdy post, and it swings or flips down only when you need it. That means you get a real surface for entertaining without giving up permanent square footage.
Pick The Right Spot
Mount it near your grill, bar area, or wherever guests tend to gather. You want it close enough to be useful but not blocking a walkway. A spot beside the back door works well because it becomes a natural landing zone for plates and platters.
If you have a fence, that's often the easiest surface to attach to. Just make sure the wall or post can handle some weight and that the table won't hit anything when it folds down.
Build It Sturdy And Simple
Use exterior-grade wood or plywood for the tabletop, and seal it against the weather. A basic design uses a piano hinge along the wall edge and folding legs or support brackets underneath. You can also buy ready-made drop-leaf brackets that lock in place when open.
Keep the size modest—about two feet deep and three to four feet wide is plenty for drinks and serving dishes. Sand the edges, add a coat of paint or stain, and you're done.
Make It Work For You
Add a few hooks underneath for tongs, towels, or a bottle opener. A small lip or raised edge keeps glasses from sliding off in the wind. If you want extra function, mount a magnetic strip for knives or a small shelf for condiments.
You can also paint it to match your fence or house so it blends in when folded up. The goal is a surface that feels like part of your yard, not an afterthought.
FAQ
Do I need a built-in outdoor kitchen to entertain well?
No. A rolling cart, a sturdy table, and a good grill cover most entertaining needs. Built-ins are nice but not required.
What's the cheapest way to add outdoor counter space?
A fold-down shelf or a rolling cart is usually the cheapest. Both give you usable surface without construction.
How do I keep food safe outside?
Keep cold items in a cooler or outdoor fridge, don't leave perishables out over two hours, and use covered trays when possible.
Can I set up an outdoor kitchen in a rental?
Yes. Freestanding carts, portable grills, and clamp-on lights come down easily and leave no permanent marks.
What should I buy first for a backyard kitchen?
Start with a grill you like and a rolling prep cart. Those two items handle most of the cooking and serving work.
Conclusion
You don't need a contractor or a huge budget to make outdoor entertaining feel effortless. A cart, a shelf, and a good light setup solve most of the hassle. Start with one or two ideas that fit your space and see how much smoother the next cookout goes.
Add more over time as you figure out what you actually use. The goal is simple: less running around, more hanging out.