25 Bathroom Cleaning Hacks for Faster Weekly Results
Bathroom cleaning doesn't have to eat up your whole morning. With a few smart shortcuts, you can cut your weekly scrub time in half and still get that fresh, clean look. These 25 hacks focus on real-world efficiency—no fancy products or expensive tools required.
Most of these tricks use items you already have at home, like vinegar, baking soda, and old toothbrushes. The goal is to work smarter, not harder, so you can spend less time cleaning and more time doing what you enjoy.
From preventing soap scum buildup to tackling grout stains, each hack targets a common bathroom pain point. Pick the ones that fit your routine and watch your cleaning time shrink.
1. Use a Dish Wand for Quick Shower Cleaning
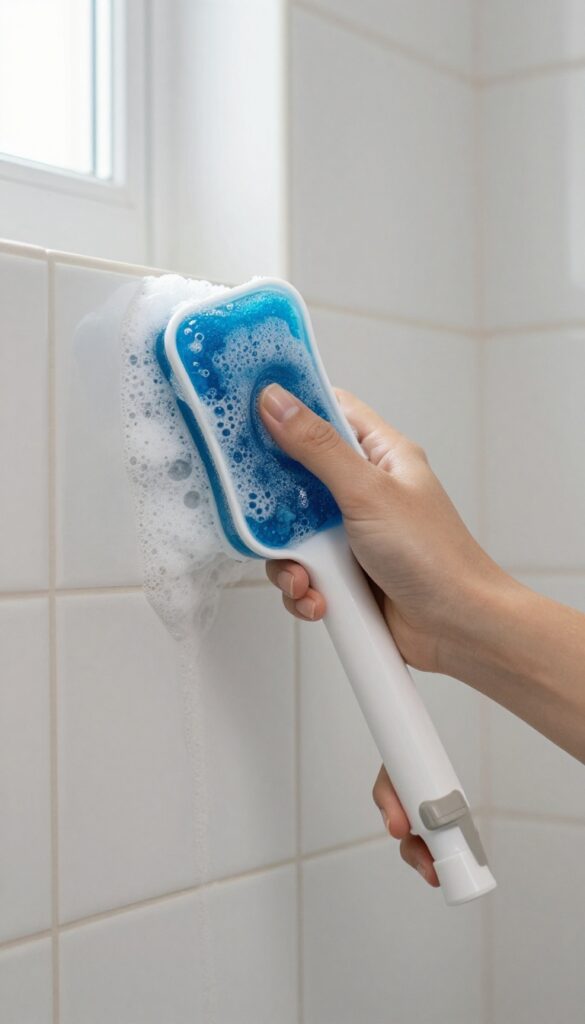
You know that satisfying feeling when you squeeze the handle of a dish wand and soapy water comes out? That same tool can revolutionize your shower cleaning routine. Instead of reaching for a spray bottle and a scrub brush, combine them into one step.
Fill a dish wand with a mixture of dish soap and vinegar, and keep it in your shower caddy.
After each shower, give the walls and tub a quick scrub with the wand. The built-in scrubber head tackles soap scum and grime while the solution dispenses evenly. Rinse with the showerhead, and you're done.
This daily habit prevents buildup, so your weekly deep clean becomes a breeze. Plus, it takes less than a minute.
Why It Works
The dish wand's scrubber head is gentle enough for tile and fiberglass but tough on residue. The vinegar cuts through hard water stains, while dish soap breaks down oils and body wash film. Together, they create a cleaning powerhouse that works in seconds.
How To Make The Solution
Mix equal parts white vinegar and blue Dawn dish soap in a bowl. Use a funnel to pour it into the dish wand's handle. Shake gently to combine.
The blue color helps you see where you've scrubbed, and the ratio ensures it's strong enough to clean without being harsh.
Pro Tips For Best Results
Replace the solution every two weeks to keep it fresh. If your shower has glass doors, use a squeegee afterward to prevent water spots. For extra sparkle, add a few drops of lemon essential oil to the mixture—it smells amazing and boosts cleaning power.
2. Squeegee the Shower Doors After Every Shower
That quick swipe with a squeegee takes less than 30 seconds, but it saves you from scrubbing hard water stains later. Glass shower doors are magnets for mineral deposits and soap residue, and once those spots bake on, they're a pain to remove. A daily squeegee habit keeps the glass clear and your weekly cleaning routine much lighter.
The key is making it effortless. Hang a squeegee inside the shower or attach a hook to the door so it's always within reach. After you turn off the water, give the glass a quick once-over while you're still in the shower.
No need to dry it perfectly—just remove the bulk of the water. This simple step prevents water spots from forming and stops soap scum from clinging to the surface.
Choose The Right Squeegee
Not all squeegees are created equal. Look for one with a soft rubber blade that won't scratch the glass. A squeegee with a built-in hook or suction cup makes storage easy.
If you have large shower doors, a wider blade (12 to 14 inches) covers more area faster.
Make It A Family Habit
Get everyone in the household on board. Keep the squeegee visible and remind family members to use it after their shower. Before long, it becomes automatic.
You can even keep a small microfiber cloth nearby to wipe the blade dry after each use—this extends the life of the rubber.
Pair With A Weekly Spray
For extra protection, spray the glass with a daily shower cleaner once a week. A simple mix of water and white vinegar in a spray bottle works wonders. Spritz it on, let it sit for a minute, then squeegee off.
This combo keeps doors spotless with minimal effort.
3. Clean the Toilet Bowl with Baking Soda and Vinegar
Forget harsh bleach tablets that can damage your toilet's internal parts. A simple duo of baking soda and vinegar tackles stains and odors naturally. This fizzing reaction lifts grime without scrubbing your lungs raw.
Why This Combo Works
Baking soda is a mild abrasive that scrubs away stains. Vinegar's acidity dissolves mineral deposits and kills bacteria. When they mix, the carbon dioxide bubbles help lift dirt from the porcelain.
Step-by-step Method
Sprinkle about 1 cup of baking soda evenly around the bowl. Pour 1 cup of white vinegar slowly over it. Let it fizz for 10 minutes.
Scrub with a toilet brush, focusing on under the rim. Flush to rinse.
Extra Stain-fighting Tips
For stubborn rings, make a paste with baking soda and a few drops of water. Apply it to the stain and let it sit for 30 minutes before scrubbing. For hard water deposits, use a pumice stone gently on wet porcelain.
4. Use a Pumice Stone on Hard Water Stains
Hard water stains can make even a clean bathroom look grimy. Those stubborn white rings around the toilet bowl or mineral deposits on porcelain sinks are tough to remove with regular cleaners. A pumice stone offers a simple, scratch-free solution that works like magic.
Wet the pumice stone thoroughly before use—this is key to preventing scratches. Gently rub the stone on the hard water stain using light pressure. The stone's abrasive texture erodes the mineral deposits without damaging the porcelain finish.
Rinse the area and wipe dry to reveal a clean surface.
Where to Use It
Pumice stones are ideal for toilet bowls, sinks, and even ceramic tiles. Avoid using them on acrylic, fiberglass, or any glossy finish that scratches easily. Stick to hard, non-porous surfaces like vitreous china or glazed porcelain.
Pro Tips For Best Results
Always keep the stone wet while scrubbing. If it starts to dry out, dip it in water again. For tough stains, you can add a little baking soda paste to boost cleaning power.
Rinse the stone after each use and let it air dry to prevent bacterial growth.
Why It Beats Chemical Cleaners
Unlike harsh chemical descalers, a pumice stone is non-toxic and reusable. It's also more effective on thick, layered stains that liquids struggle to dissolve. Plus, it costs just a few dollars and lasts for months.
5. Clean Grout with a Toothbrush and Hydrogen Peroxide
Grout lines tend to trap dirt and moisture, turning that dull gray or even moldy over time. But you don't need harsh chemicals or a steam cleaner to bring them back to life. A simple paste made from hydrogen peroxide and baking soda does the job with minimal effort.
Why Hydrogen Peroxide Works
Hydrogen peroxide is a mild bleach that kills mold and mildew without the strong fumes of chlorine bleach. It also lifts stains naturally. When mixed with baking soda, it creates a gentle abrasive paste that scrubs away grime without scratching tiles.
How To Apply The Paste
Mix equal parts hydrogen peroxide and baking soda until you have a thick paste. Spread it over the grout lines using an old toothbrush or a small brush. Let it sit for 10 minutes to break down the dirt.
Then scrub in a circular motion and rinse with warm water.
Pro Tips For Best Results
For stubborn stains, let the paste sit longer—up to 30 minutes. If your grout is really dirty, add a few drops of dish soap to the mix. Always test on a small hidden area first, especially if you have colored grout.
And remember to seal the grout after cleaning to keep it looking fresh longer.
6. Use a Dryer Sheet to Dust Baseboards and Blinds
Baseboards and blinds are notorious dust magnets, and wiping them down every week can feel like a chore. But there's a simple trick that makes this task way more effective: grab a used dryer sheet. The anti-static properties in the sheet actually help repel dust, so those surfaces stay cleaner for longer.
After you've dried a load of laundry, don't toss that used dryer sheet. Instead, run it along your baseboards, blinds, and bathroom vents. The sheet picks up dust easily without scratching surfaces, and the anti-static coating leaves a microscopic layer that prevents dust from settling as quickly.
It's a zero-cost hack that saves you from having to dust those areas as often.
Why Anti-static Works
Dryer sheets contain cationic surfactants that neutralize static charge. When you wipe a surface, these compounds transfer over and create a temporary barrier. Dust particles, which are often attracted by static, are less likely to cling.
This means your baseboards and blinds stay dust-free for days longer than with a dry cloth.
Best Surfaces For This Hack
Stick to smooth, non-porous surfaces like painted baseboards, vinyl blinds, and metal vents. Avoid using dryer sheets on glass shower doors or mirrors, as they can leave a waxy residue that causes streaking. For those, stick with a microfiber cloth and glass cleaner.
Pro Tip: Keep A Sheet Handy
Tuck a used dryer sheet behind your bathroom trash can or under the sink. That way, when you spot dust on the baseboards during your weekly clean, you can grab it and do a quick pass. No need to hunt for a cleaning cloth or spray—just wipe and toss.
7. Clean the Showerhead with a Vinegar Bag
A clogged showerhead can ruin your morning with weak, uneven spray. Mineral deposits from hard water build up over time, blocking the nozzles and reducing water flow. Instead of scrubbing each tiny hole, let a simple vinegar soak do the work for you.
Fill a plastic bag with white vinegar, tie it around the showerhead, and let it soak overnight. Remove the bag and run the water for a few minutes to clear out mineral deposits.
Why Vinegar Works So Well
White vinegar is mildly acidic, which dissolves calcium and lime scale without harsh chemicals. It's cheap, non-toxic, and safe for most metal and plastic showerheads. The long soak gives it time to break down stubborn buildup deep inside the nozzles.
Step-by-step Instructions
First, fill a sturdy plastic bag about halfway with white vinegar. Carefully place the bag over the showerhead so the nozzles are submerged. Secure it with a rubber band or twist tie, making sure it doesn't leak.
Let it sit for at least 6 hours or overnight. In the morning, remove the bag and turn on the water to flush out loosened deposits. A quick wipe with a cloth finishes the job.
When To Repeat This Hack
If your water is hard, do this treatment every 1 to 3 months. You'll notice improved water pressure and a more consistent spray. For extra-stubborn buildup, soak for 12 hours or add a tablespoon of baking soda to the vinegar for extra fizzing action.
8. Use a Magic Eraser on Scuff Marks and Stains
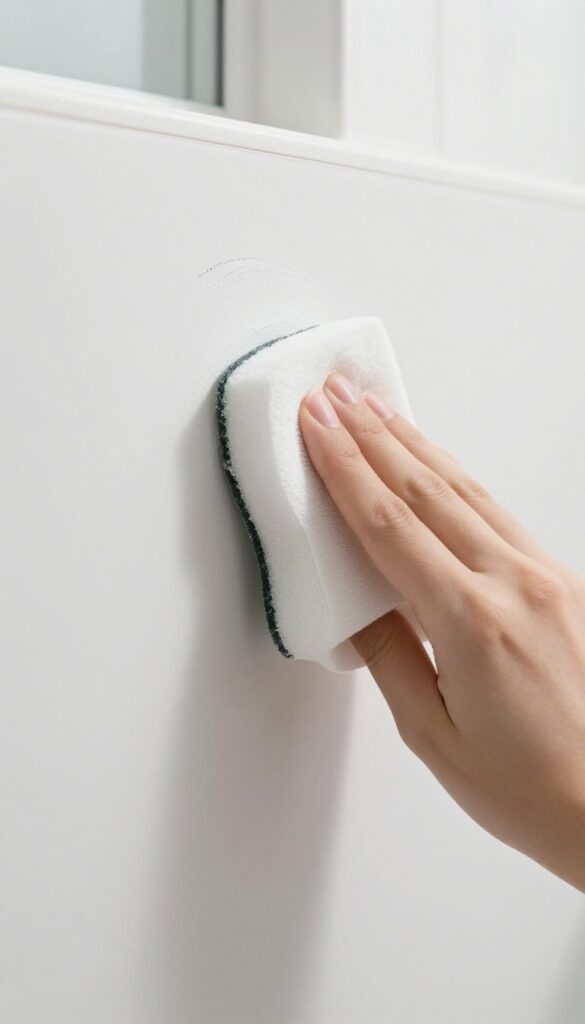
Scuff marks from shoes, stray crayon doodles, or mystery smudges on walls and baseboards can make a clean bathroom look messy. A melamine sponge—often sold as Magic Eraser—handles these blemishes with almost no effort. Just dampen it slightly and rub gently; the foam acts like ultra-fine sandpaper to lift marks without damaging most surfaces.
Keep a Magic Eraser in your cleaning caddy for quick touch-ups. It works on painted walls, tile, fiberglass, and even some plastic fixtures. No extra sprays or scrubbing needed—just a few passes and the mark disappears.
Because it's slightly abrasive, test on an inconspicuous spot first, especially on glossy or delicate finishes.
Which Marks It Handles Best
Magic Erasers excel on scuff marks from shoes or furniture, pencil and crayon marks, and stubborn soap scum buildup on shower doors. They also lift dried toothpaste splatters and light rust stains from sinks or tubs. For tougher stains like permanent marker, you may need a bit more pressure or a second pass.
How To Use It Without Damaging Surfaces
Always start with a damp—not soaking—sponge. Gently rub the mark in a circular motion, checking frequently to avoid removing paint or finish. On textured surfaces like matte walls, use light pressure.
Rinse the area with water afterward to remove any residue. Don't use it on stainless steel, as it can leave fine scratches.
Extending The Life Of Your Sponge
Cut the sponge into smaller pieces to get more uses out of one block. Store it dry between uses to prevent bacteria growth. When it starts crumbling or loses its cleaning power, toss it.
A single sponge can handle multiple bathrooms before wearing out.
9. Keep a Spray Bottle of Rubbing Alcohol for Mirrors
Mirrors can be tricky. One minute they look clean, the next they're covered in streaks. Rubbing alcohol cuts through grime and dries fast, leaving a flawless finish.
Mix it with a little dish soap, and you have a powerful glass cleaner that also disinfects.
Fill a spray bottle with rubbing alcohol and a few drops of dish soap. Spray on mirrors and wipe with a microfiber cloth for a streak-free shine that also disinfects.
Why It Works
Rubbing alcohol evaporates quickly, so it doesn't leave water spots. The dish soap breaks down oils and fingerprints. Together, they create a solution that cleans and shines without the need for paper towels or expensive sprays.
How To Use It
Mix 1 cup of rubbing alcohol with 1 tablespoon of dish soap in a spray bottle. Shake gently. Spray the mirror lightly, then wipe with a clean, dry microfiber cloth in a circular motion.
For large mirrors, work from top to bottom to avoid drips.
Pro Tips For Best Results
Use a fresh microfiber cloth each time to prevent lint. If the mirror is very dirty, pre-wipe with a damp cloth first. Store the spray bottle in a cool, dark place to maintain the alcohol's effectiveness.
10. Use a Toilet Bowl Tablet for Continuous Cleaning
A toilet bowl tablet might seem like a small addition, but it can make a big difference in how often you need to scrub. Drop one into the tank, and it releases cleaning agents with every flush, helping to prevent stains and buildup. This simple trick keeps the bowl fresher between deep cleans, cutting down on your weekly effort.
Toilet cleaning is one of those tasks that can feel constant, but a tablet automates part of the job. You still need to scrub occasionally, but the tablet reduces the frequency and intensity of cleaning sessions.
How It Works
The tablet sits in the tank and dissolves slowly, releasing bleach or other cleaning agents into the bowl with each flush. This helps break down stains, kill bacteria, and prevent mineral deposits from forming. Most tablets last about a month, so you only need to replace them monthly.
Choosing The Right Tablet
Look for tablets that are safe for your toilet's internal parts, especially if you have a newer model. Some tablets can damage rubber seals or gaskets over time, so check the label for compatibility. Brands like Clorox or Scrubbing Bubbles offer options that are gentle on components.
Pro Tips For Best Results
Drop the tablet in the tank away from the fill valve to avoid interference. If you notice any discoloration or damage, switch to a different brand. Also, give the bowl a quick manual scrub once a week to keep the rim and under-rim areas clean, as the tablet mainly targets the water surface.
11. Clean the Bathroom Fan Cover with a Vacuum
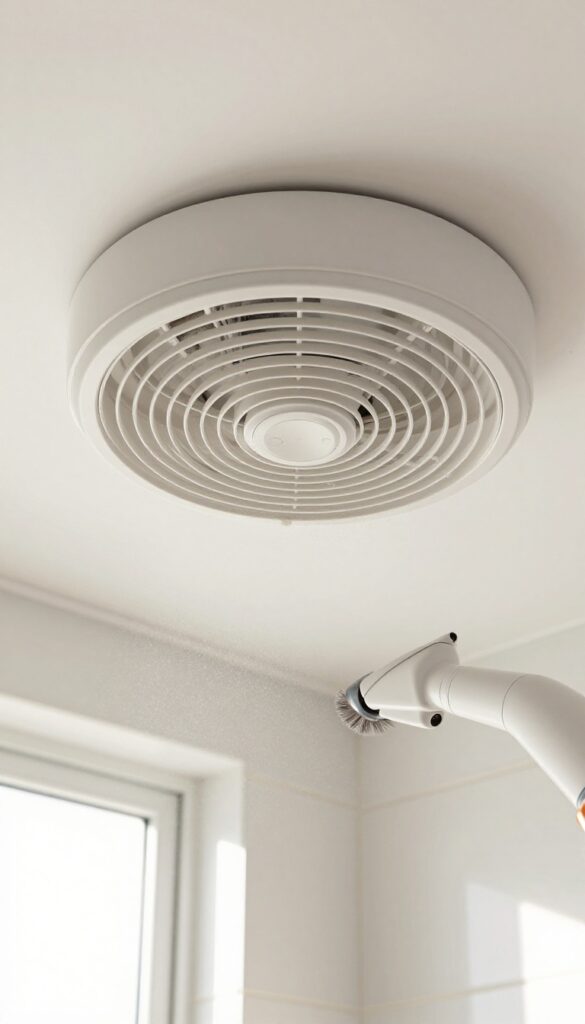
That bathroom fan might be working harder than you think—pulling out moisture and odors every single day. But if the cover is caked with dust, it can't do its job properly. A quick vacuum with the brush attachment clears surface dust in seconds, keeping airflow strong and your fan running efficiently.
For a deeper clean, pop off the cover (most just snap or twist off) and wash it in warm, soapy water every few months. Let it dry completely before snapping it back on. This simple routine prevents dust buildup that can strain the motor and even become a fire hazard.
Why It Matters
A dusty fan cover reduces airflow, making your bathroom more humid and prone to mold. It also forces the motor to work harder, which can shorten its lifespan. Regular cleaning keeps the fan efficient and your bathroom healthier.
How Often To Clean
Vacuum the cover every week or two during your regular cleaning. For a deep wash, aim for every three months—or more often if you notice dust returning quickly. Set a reminder on your phone so you don't forget.
Pro Tip
Use a microfiber cloth or a soft brush to gently wipe the fan blades inside after removing the cover. Be careful not to bend them. This extra step removes hidden dust and keeps the fan balanced and quiet.
12. Use a Lint Roller for Hair and Dust on Floors
Hair and dust tend to gather in bathroom corners and on rugs, making mopping less effective. A lint roller is a quick fix that picks up debris before you wet the floor. This simple step prevents clogs and leaves your mop working on grime instead of hair.
Why It Works
Lint rollers have adhesive sheets that grab hair, lint, and dust from fabric and hard surfaces. They're designed for quick pickup without pushing debris around. Using one before mopping means less gunk in your mop water and fewer trips to rinse the mop head.
How To Use It
Roll the lint roller over bathroom rugs, focusing on areas where hair collects. Then run it along baseboards, corners, and under the vanity. For larger floor areas, a wide lint roller or a sticky floor sweeper works faster.
Replace the sheet when it loses stickiness.
Extra Tips
Keep a lint roller in your bathroom caddy for quick touch-ups between deep cleans. It's also great for picking up stray hairs on toilet seats and bathroom counters. For pet hair, use a heavy-duty roller with stronger adhesive.
13. Clean the Toilet Brush Holder with Bleach
The toilet brush holder is one of those things we forget until it starts to smell. All that moisture and bacteria buildup can make the holder itself a source of odors. A quick bleach soak keeps it fresh and sanitary without much effort.
Why The Holder Gets Gross
After each use, the brush drips water into the holder, creating a damp environment perfect for bacteria and mold. Over time, that can lead to a musty smell that spreads into the bathroom. Cleaning the holder regularly prevents this.
How To Do The Bleach Soak
First, remove the brush and rinse it. Pour about a cup of bleach directly into the holder, then add enough water to fill it. Let it sit for 15 minutes.
The bleach kills germs and breaks down residue. Then dump the solution, rinse the holder with water, and let it air dry.
Safety Tips
Never mix bleach with other cleaners, especially ammonia or vinegar, as that creates toxic fumes. Make sure the bathroom is well-ventilated during the process. Wear gloves to protect your skin, and keep the bleach away from fabric or colored surfaces.
14. Use a Dishwasher Tablet to Clean the Sink Drain
Sink drains can get funky fast, especially in the bathroom where hair, toothpaste, and soap residue collect. Instead of reaching for harsh chemical drain cleaners, grab a dishwasher tablet—it’s a surprisingly effective alternative. The tablet’s enzymes and surfactants break down organic buildup and leave the drain smelling fresh without any toxic fumes.
This hack is almost too easy: drop one dishwasher tablet into the sink drain, then run hot water for a few minutes. The tablet fizzes and dissolves, scrubbing away soap scum and deodorizing as it goes. It’s a gentle but powerful way to maintain a clear drain between deep cleanings.
Why It Works
Dishwasher tablets contain enzymes that target food grease and starches, but they also tackle soap scum and organic matter. When combined with hot water, they create a fizzy cleaning action that loosens grime from the pipe walls. Plus, they’re much safer for your plumbing than caustic drain openers.
How To Do It Right
Start by removing any visible hair or debris from the drain opening. Drop one tablet directly into the drain, then turn on the hot water full blast. Let it run for two to three minutes, allowing the tablet to dissolve completely.
For extra cleaning power, let the water run for five minutes.
When To Use This Hack
Use this method once a month to keep drains fresh and slow-moving drains from getting worse. It’s also a great quick fix if you notice a musty smell coming from the sink. Just avoid using it right after pouring any other chemicals down the drain—stick to one treatment at a time.
15. Clean Faucets with a Vinegar-Soaked Cloth
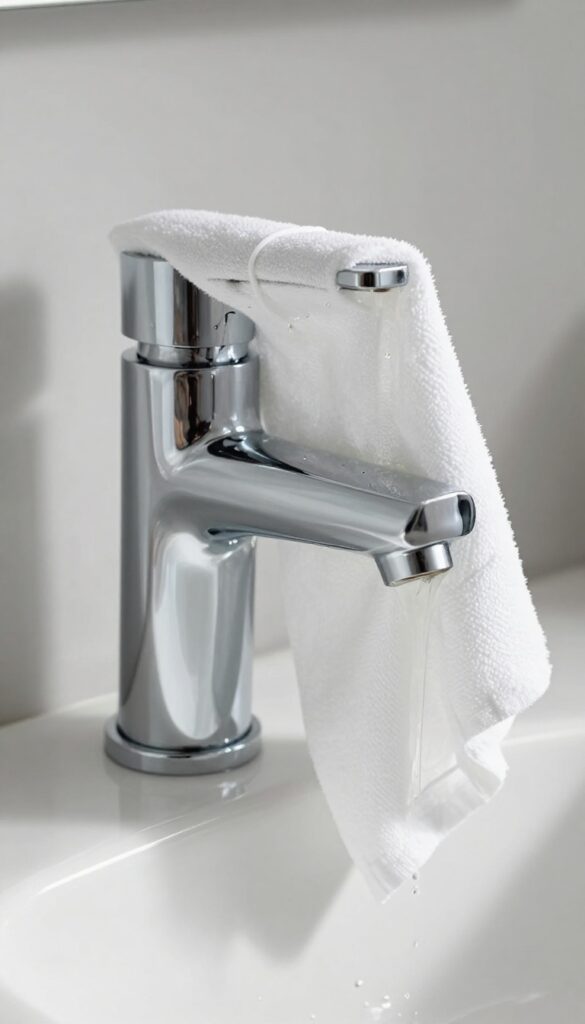
Faucets take a beating from hard water, toothpaste splatter, and soap scum. That cloudy buildup isn't just ugly—it can make even a clean bathroom feel grimy. Instead of scrubbing endlessly, let vinegar do the heavy lifting.
Soak a cloth in white vinegar and wrap it around the faucet base and spout. Leave for 30 minutes, then wipe clean. This removes hard water deposits and restores shine.
Why Vinegar Works So Well
White vinegar is mildly acidic, which dissolves mineral deposits like calcium and lime without harsh scrubbing. It's also safe for most faucet finishes, including chrome and stainless steel. Just avoid using it on unsealed brass or natural stone.
How To Wrap For Best Results
Use an old washcloth or paper towel fully soaked (not dripping) and wrap it snugly around the faucet. Secure with a rubber band or twist tie. Make sure the cloth contacts all the buildup areas, especially around the base where water sits.
Aftercare And Maintenance
After 30 minutes, remove the cloth and wipe the faucet with a damp microfiber cloth. Buff dry to prevent water spots. For stubborn deposits, gently scrub with a soft toothbrush.
Repeat once a month to keep faucets gleaming.
16. Use a Toothbrush to Clean Around Faucet Bases
Faucet bases and handles are magnets for grime, especially in hard-water areas. That narrow gap where metal meets countertop is a prime spot for gunk buildup. A toothbrush is the perfect tool to reach those tight spaces without scratching the finish.
Mix a tablespoon of baking soda with enough water to form a thick paste. Dip an old toothbrush into the paste and scrub around the base of the faucet, paying extra attention to the back where grime hides. Work the bristles into the crevices between the faucet and the counter.
Wipe away the paste with a damp cloth, then dry with a soft towel to prevent water spots.
Why A Toothbrush Works Best
The small, firm bristles of a toothbrush can get into nooks and crannies that sponges and cloths miss. The angled handle gives you better control, and the compact size lets you work precisely without overscrubbing. Plus, it's gentle enough for chrome, brass, or stainless steel.
Where Else To Use This Trick
Don't stop at faucets. Use the same toothbrush and baking soda paste on showerhead arms, soap dispenser nozzles, and the edges of sink drains. You can also tackle the tiny crevices around towel bars and toilet paper holders.
How Often To Do This
A quick scrub once a week keeps buildup from becoming stubborn. If you have hard water, you might need to do it every few days. For deep cleaning, add a drop of dish soap to the paste for extra grease-cutting power.
17. Clean the Toilet Seat with Disinfecting Wipes
The toilet seat is one of the most frequently touched surfaces in your home, but it's also one of the easiest to keep clean if you make it a daily habit. Instead of waiting for a weekly deep scrub, grab a disinfecting wipe and give the seat, lid, and hinges a quick once-over. This small step prevents grime from building up and keeps your bathroom feeling fresher between major cleanings.
Keep a container of disinfecting wipes near the toilet so they're always within reach. After using the bathroom, take a few seconds to wipe down the seat and lid. Don't forget the hinges—grime loves to collect there.
Doing this daily means you'll rarely need to scrub the toilet seat heavily, and it helps maintain a more hygienic bathroom overall.
Choose The Right Wipes
Not all wipes are created equal. Look for disinfecting wipes that are safe for your toilet seat material—most are fine for plastic, but check if you have a wooden or painted seat. Avoid bleach-based wipes if your seat has a finish that could be damaged.
Alcohol-based wipes are usually a safe bet and evaporate quickly.
Make It A Habit
Place the wipe container somewhere visible, like on the back of the toilet or on a nearby shelf. The easier it is to grab, the more likely you'll use it. Pair the habit with something you already do, like washing your hands—wipe the seat while the sink water warms up.
Don't Forget The Hinges
Hinges are a hotspot for grime because they're often overlooked. When you wipe the seat, lift it and run the wipe along the hinge area. This prevents buildup that can become tough to remove later.
A quick daily swipe keeps them looking clean and functioning smoothly.
18. Use a Steam Cleaner for Deep Grout and Tile Cleaning
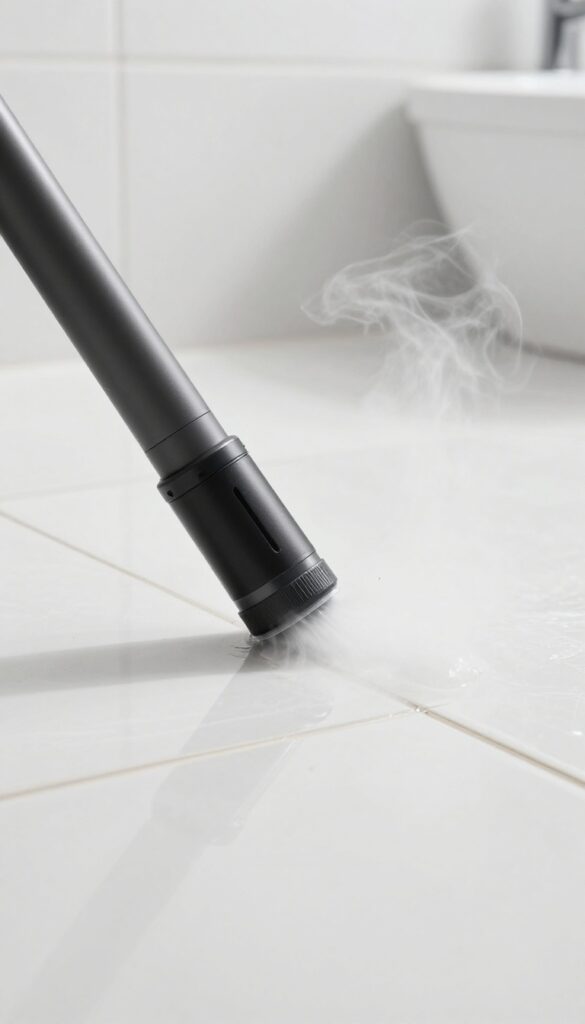
If you already own a steam cleaner, your bathroom grout and tiles are about to get a serious upgrade. The high-temperature steam loosens embedded dirt and kills bacteria without any chemicals—perfect for weekly maintenance. This method works especially well on shower walls, floor tiles, and those tricky corners where mold likes to hide.
Steam cleaning is a game-changer for bathroom surfaces. It sanitizes as it cleans, meaning you can skip the bleach and still get a deep clean. Plus, it's fast: a quick pass over grout lines with the right attachment lifts grime that scrubbing alone would miss.
For best results, use the small brush attachment and work in sections.
Which Attachment To Use
Most steam cleaners come with a small nylon brush head—that's your go-to for grout. For larger tile surfaces, switch to the squeegee or microfiber pad attachment. The brush concentrates heat and steam into the grout lines, while flat attachments cover more area on smooth tiles.
Technique For Grout Lines
Hold the steam nozzle at a slight angle and move slowly along the grout line. Let the steam sit for a second or two before moving. You'll see dirt and soap scum dissolve almost instantly.
Wipe away the residue with a clean cloth or microfiber towel. For stubborn spots, repeat or use a stiff brush after steaming.
Safety And Maintenance Tips
Always test on a small hidden area first, especially if your tiles are older or have any cracks. Avoid using steam on loose or damaged grout—it could worsen the issue. After cleaning, let surfaces dry completely to prevent mold regrowth.
Regular weekly steaming keeps grout looking fresh and reduces the need for deep scrubbing.
19. Clean the Shower Curtain and Liner in the Washing Machine
Your shower curtain and liner collect soap scum, mildew, and hard water stains over time. Scrubbing them by hand is tedious and often ineffective. Instead, let your washing machine do the heavy lifting—it's faster and delivers a deeper clean.
Remove the curtain and liner from the hooks and toss them into the washing machine. Add a cup of white vinegar to the rinse cycle and a small amount of your regular detergent. Use a gentle or delicate cycle with warm water.
Once done, hang them back up immediately to air dry. The vinegar kills mildew spores and breaks down soap residue without damaging the fabric. Avoid using bleach, as it can weaken the material and cause yellowing.
For plastic liners, add a few towels to the load to provide gentle abrasion and prevent tearing.
Why This Works
The agitation and water flow in the washing machine reach every part of the curtain, dislodging grime that hand scrubbing misses. Vinegar is a natural disinfectant and deodorizer, so it tackles both stains and smells. Hanging the curtain to dry immediately prevents new mildew from forming.
Tips For Best Results
Check the care label first—some delicate curtains may require a gentle cycle. Use warm water, not hot, to avoid shrinking or melting plastic liners. If your curtain has heavy buildup, pre-soak it in a vinegar-water solution for 30 minutes before washing.
Wash curtains every 1-2 months to keep them fresh.
20. Use a Squeegee to Clean the Floor After Mopping
Mopping a bathroom floor often leaves behind a thin layer of water that takes forever to dry. You end up with water spots, streaks, and a slippery floor for hours. A squeegee can fix that in seconds.
After you finish mopping, grab a clean squeegee and start at the far corner of the room. Pull it toward the drain in long, steady strokes. The squeegee collects excess water and pushes it right where it needs to go.
This cuts drying time by more than half and leaves the floor spot-free. It's especially useful for tile or vinyl floors that show every water mark.
Choose The Right Squeegee
A floor squeegee with a long handle is easiest on your back. Look for one with a rubber blade that's at least 18 inches wide. A smaller handheld squeegee works too, but you'll have to bend over more.
Make sure the blade is soft and flexible to avoid scratching the floor.
Work In Sections
If your bathroom is large, mop one half first, then squeegee that section before moving to the next. This prevents the water from drying before you get to it. Overlap each stroke slightly to catch all the moisture.
Rinse The Blade Often
Dirt and soap residue build up on the squeegee blade as you go. Rinse it under the faucet every few strokes to keep it clean. A dirty blade will just smear water around instead of removing it.
21. Clean the Bathroom Exhaust Fan with Compressed Air
Your bathroom exhaust fan works hard to remove moisture and odors, but it also collects dust like crazy. Over time, that dust buildup can make the fan less effective and even noisy. Compressed air gives you a quick fix without any disassembly.
Grab a can of compressed air (the kind you use for keyboards) and aim the nozzle at the fan vents. Give it several short bursts from different angles to dislodge dust. The air pressure pushes debris out without you having to remove the cover.
Do this monthly to keep airflow strong and prevent motor strain.
Why Compressed Air Works Best
Unlike vacuuming, which can miss fine particles, compressed air reaches deep into the fan housing. It also avoids the risk of sucking up loose screws or damaging delicate components. The method is dry, so there's no moisture risk.
When To Use This Hack
If you notice the fan taking longer to clear steam or making a humming sound, it's time for a blast. For best results, do this right before a deep clean so any falling dust gets wiped away afterward.
22. Use a Microfiber Cloth for All Surfaces
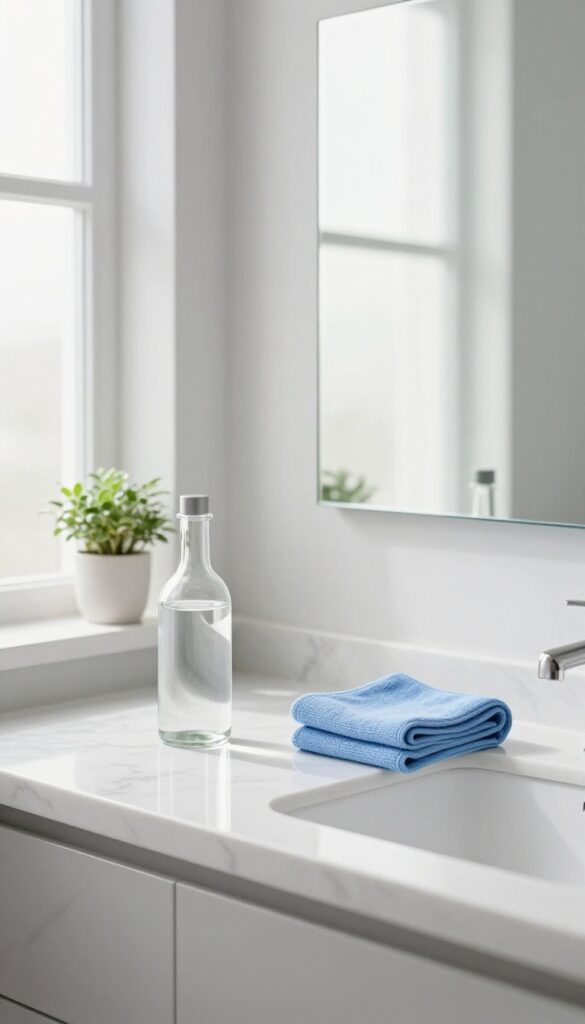
If you're still using paper towels or old cotton rags to wipe down your bathroom, you're making the job harder than it needs to be. Microfiber cloths are a game changer for cleaning counters, mirrors, and fixtures because they trap dust and grime instead of pushing it around. They're reusable, washable, and way more absorbent than traditional cloths.
The key to microfiber success is using the right cloth for the job. A general-purpose 300 GSM cloth works for most surfaces, while a higher GSM (like 400 or 500) is better for drying and polishing. Always use a clean, dry microfiber cloth for mirrors and glass to avoid streaks.
For mirrors, wipe in a zigzag or S-pattern to prevent leaving lint behind. For counters and fixtures, a slightly damp cloth picks up soap scum and toothpaste residue without needing harsh chemicals. After use, toss them in the laundry—avoid fabric softener, which clogs the fibers and reduces effectiveness.
With proper care, a good microfiber cloth can last for hundreds of washes.
Why Microfiber Works Better
Microfiber is made of ultra-fine polyester and polyamide fibers that are split to create tiny hooks. These hooks grab dust, bacteria, and grime like a magnet, holding them until you rinse the cloth. Cotton cloths just smear dirt around, and paper towels leave lint.
Microfiber also lifts and removes 99% of bacteria from surfaces when used with water alone.
Best Practices For Bathroom Use
Keep a dedicated set of microfiber cloths for the bathroom—label them or use a different color to avoid cross-contamination. Use a dry cloth for dusting and a damp one for wet cleaning. For glass and mirrors, use a fresh, dry cloth after cleaning to buff away any streaks.
Wash cloths separately from lint-producing items like towels.
How To Care For Microfiber Cloths
Wash microfiber in warm water with a mild detergent—no bleach or fabric softener. Bleach destroys the fibers, and fabric softener coats them, reducing their cleaning power. Air dry or tumble dry on low heat.
Over time, the cloths may lose their grip; replace them when they stop picking up dust effectively.
23. Clean the Toilet Tank with Vinegar
The toilet tank often gets ignored because it's out of sight, but mineral deposits and grime can build up inside over time. This not only affects water quality but can also cause your toilet to run inefficiently. Luckily, cleaning it is almost effortless with a common pantry staple.
Pour a cup of white vinegar into the toilet tank overflow tube. Let it sit for an hour, then flush. This removes mineral deposits and keeps the tank clean without scrubbing.
Why The Overflow Tube?
The overflow tube is the vertical pipe in the center of the tank. Pouring vinegar there ensures it mixes with the water and reaches all internal surfaces, including the flush valve and rim holes. It's the most effective way to distribute the cleaning solution without taking anything apart.
When To Do This
Aim to clean the tank every three to six months, depending on your water hardness. If you notice slow refills, weak flushes, or visible brown residue, it's time for a vinegar treatment. Doing it monthly can prevent buildup altogether.
Extra Tips For Stubborn Deposits
For heavy mineral crust, let the vinegar sit overnight. You can also add a quarter cup of baking soda to the tank before the vinegar for a fizzy boost. After flushing, wipe down the inside of the tank lid and rim with a cloth to remove any loosened grime.
24. Use a Baking Soda Paste for Stainless Steel Fixtures
Stainless steel fixtures can look amazing when they're clean, but water spots and fingerprints often ruin the effect. A simple baking soda paste cuts through grime without scratching the surface, leaving a streak-free shine. This hack is cheap, quick, and uses ingredients you probably already have under your sink.
Mix about two tablespoons of baking soda with just enough water to form a thick paste. Apply the paste to your faucet, handles, or showerhead using a soft cloth or sponge. Gently rub in circular motions, focusing on areas with water spots or residue.
Rinse thoroughly with warm water and dry immediately with a clean, lint-free cloth. The result is a brilliant shine without any harsh chemicals.
Why Baking Soda Works
Baking soda is mildly abrasive, so it physically lifts mineral deposits and soap scum without scratching stainless steel. It also neutralizes odors and leaves no toxic residue, making it safe for kitchens and bathrooms alike.
Pro Tips For Best Results
Always test on a small hidden area first, especially if your fixtures have a protective coating. Use a microfiber cloth for drying to avoid lint. For stubborn spots, let the paste sit for 5 minutes before scrubbing.
Avoid using too much water—you want a paste, not a slurry.
When To Avoid This Hack
Don't use baking soda on fixtures with brushed or matte finishes, as it could dull the surface. Also skip this method if your fixtures are coated with a colored finish—stick to manufacturer-recommended cleaners instead.
25. Keep a Cleaning Caddy for Quick Grab-and-Go
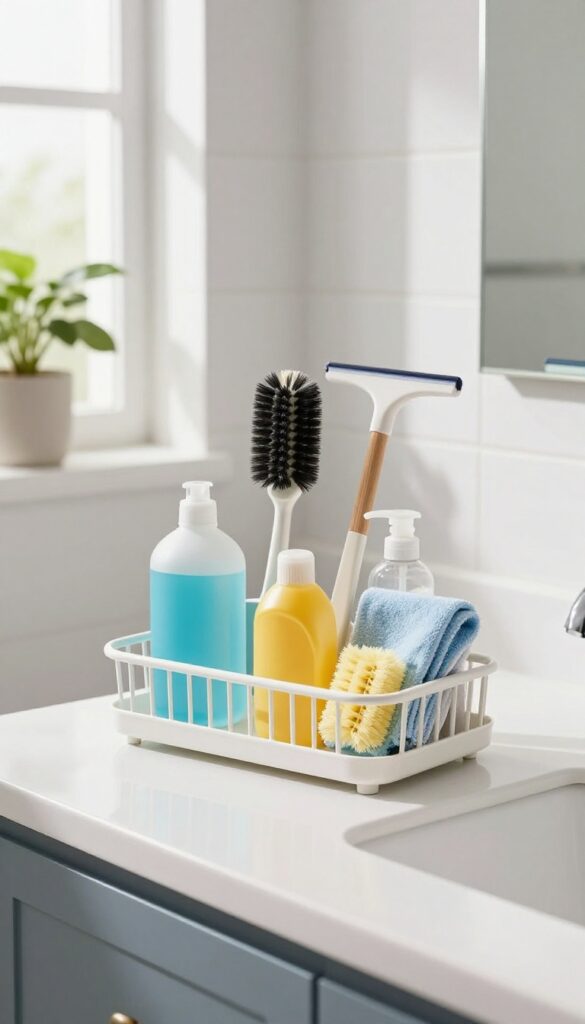
Ever find yourself making multiple trips back and forth to gather supplies while cleaning the bathroom? A portable caddy solves that by keeping everything you need in one spot. This simple tool can shave minutes off your routine and makes tackling multiple bathrooms a breeze.
The idea is straightforward: load a caddy with your go-to cleaners, brushes, sponges, and microfiber cloths. When it's time to clean, you grab the caddy and move from room to room without stopping. No hunting under sinks or digging through cabinets.
This small change can cut your prep time in half and keep you in a steady workflow.
Choose The Right Caddy
Look for a sturdy caddy with a handle and compartments. Plastic or metal both work, but make sure it's easy to carry and won't tip over. A divided caddy keeps bottles upright and separates tools from cloths.
Stock It Smartly
Include only the essentials: all-purpose cleaner, glass cleaner, a scrub brush, a toilet brush, microfiber cloths, and a squeegee. Avoid overfilling—stick to what you actually use each week. Refill as needed so you're never caught without a key item.
Keep It Accessible
Store the caddy in a central spot like a hall closet or under the bathroom sink. If you have multiple bathrooms, consider keeping one caddy per floor. The goal is to make starting your cleaning routine as frictionless as possible.
FAQ
How often should I deep clean my bathroom?
Aim for a deep clean once a week, but daily quick wipes and squeegeeing can reduce the effort needed. High-traffic bathrooms may need more frequent attention.
Can I use vinegar on all bathroom surfaces?
Vinegar is safe for most surfaces like glass, porcelain, and metal, but avoid using it on natural stone (e. g. , marble or granite) as the acid can etch the surface.
What is the best way to remove mold from grout?
Mix hydrogen peroxide with baking soda to form a paste, apply it to the moldy grout, let it sit for 10 minutes, then scrub with a toothbrush. Rinse thoroughly.
How can I prevent soap scum buildup?
Use a squeegee on shower walls after each use, and consider switching to liquid soap instead of bar soap, which creates less scum. Regular cleaning with vinegar also helps.
Is it safe to mix bleach and vinegar?
No, never mix bleach and vinegar. The combination produces toxic chlorine gas. Use them separately and ensure proper ventilation when cleaning with either product.
Conclusion
These 25 hacks prove you don't need expensive products or hours of scrubbing to keep your bathroom spotless. Most use items you already have, so you can start saving time right away. Pick a few that fit your routine and stick with them.
Consistency matters more than perfection. A quick daily wipe-down prevents buildup and makes your weekly deep clean much faster. Your bathroom will stay fresh with less effort, leaving you more time for the things that actually matter.