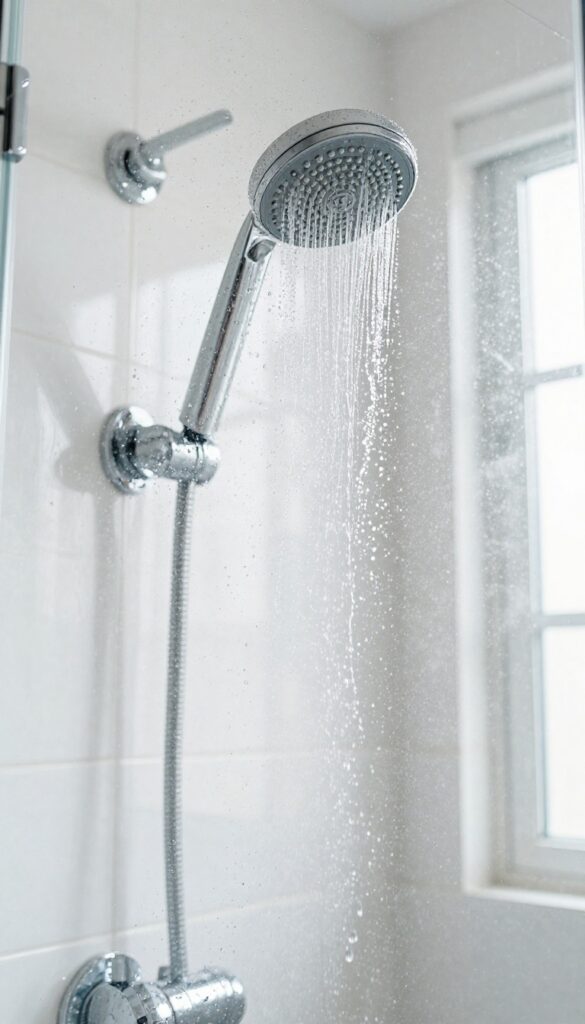
How to Clean Shower Glass Doors in 13 Clear Shine Steps
Cloudy shower doors don't have to stay that way. You can get them sparkling without spending a fortune on specialty cleaners. With a few pantry staples and a smart sequence, each step builds on the last for real results.
Hard water and soap scum are stubborn, but they're no match for the right technique. This 13-step plan tackles everything from loose debris to tough mineral deposits, ending with a protective layer that keeps glass clear longer. No fluff, no gimmicks—just practical moves that save you time and elbow grease.
Ready to see your reflection again? Let's dive in.
1. Gather Your Supplies Without Overspending
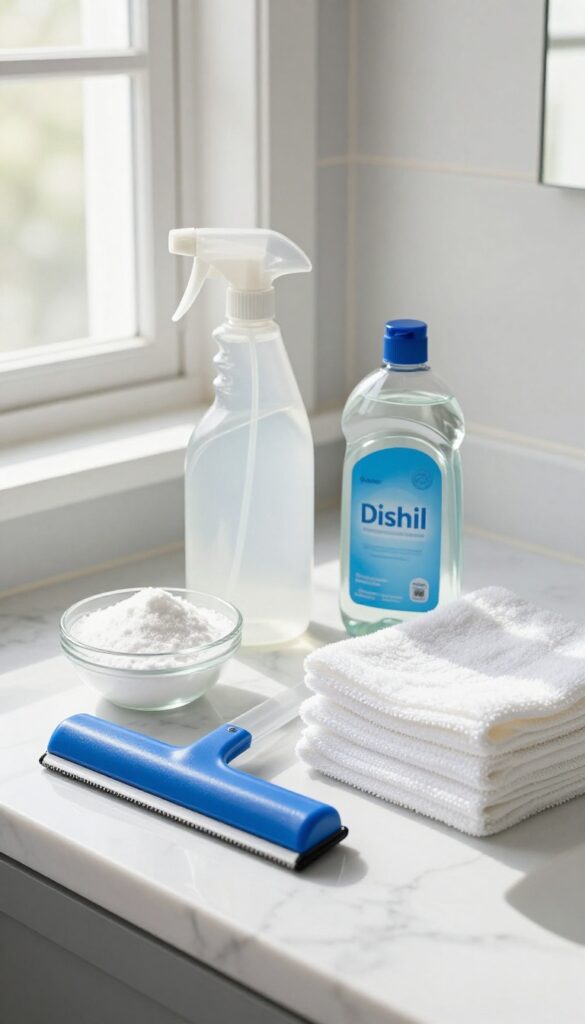
Before you start scrubbing, take a quick inventory of what you already own. The best part about cleaning shower glass is that you don't need fancy, expensive products. Most of the heavy lifters are probably sitting in your kitchen right now.
You'll need white vinegar, dish soap, baking soda, a squeegee, microfiber cloths, and a spray bottle. That's it. No need for specialty sprays or pricey kits.
Vinegar cuts through hard water stains, dish soap tackles soap scum, and baking soda gives you gentle abrasion for stubborn spots. A squeegee prevents streaks, and microfiber cloths trap grime without scratching. You likely have all of these already, so you're saving money before you even start.
Vinegar: Your Main Weapon
Distilled white vinegar is a powerhouse cleaner. Its acidity dissolves mineral deposits and soap residue without harsh chemicals. You'll use it in multiple steps, so grab a big bottle.
It's cheap, effective, and safe for glass.
Dish Soap And Baking Soda: The Dynamic Duo
Dish soap breaks down grease and grime, while baking soda provides mild scrubbing power. Together, they form a paste that tackles tough spots without scratching the glass. Both are pantry staples, so no extra trips to the store.
Tools That Make A Difference
A squeegee is non-negotiable for streak-free drying. Microfiber cloths are lint-free and absorbent, perfect for buffing. A spray bottle lets you apply solutions evenly.
These items are inexpensive and reusable, making them a smart investment.
2. Start With a Dry Wipe to Remove Loose Debris
You might be tempted to grab a spray bottle first, but that's a mistake. Starting with a dry wipe removes the loose stuff that can turn into scratches when you start scrubbing. It takes thirty seconds and makes everything that follows more effective.
A dry microfiber cloth is your best friend here. It picks up dust, hair, and lint without pushing them around. Work from top to bottom so debris falls onto already-cleaned areas.
This simple step prevents the gritty particles from embedding into the glass and causing micro-scratches. Once you've done a thorough dry pass, you're ready for wet cleaning.
Why Dry First Matters
When you apply cleaner directly to a dusty surface, the liquid just moves the debris around. As you wipe, those particles act like sandpaper against the glass. A dry wipe lifts them away cleanly, protecting the glass finish and keeping it smooth.
Best Cloth For The Job
Microfiber is ideal because its fibers trap dust instead of spreading it. Avoid paper towels or old rags—they can leave lint behind. Use a fresh, clean microfiber cloth for the dry wipe, and save a second one for later steps.
Don't Forget The Corners And Edges
Loose debris often collects in the bottom track and corners of the shower door. Use a dry cloth or a soft brush to sweep those areas before moving on. This keeps debris from getting wet and turning into a pasty mess.
3. Mix a Vinegar and Dish Soap Solution

A simple homemade cleaner can outperform many store-bought options. White vinegar cuts through grease and mineral deposits, while dish soap breaks down soap scum. Together, they make a powerful yet gentle solution that won't harm your glass.
Why This Combo Works
Vinegar's acetic acid dissolves hard water minerals and soap residue. Dish soap, a surfactant, lifts grime so it rinses away easily. The mixture is safe for most glass types and avoids harsh chemicals found in commercial cleaners.
How To Mix It Right
Fill a spray bottle with equal parts white vinegar and warm water—about one cup each. Add a few drops of liquid dish soap (Dawn or similar). Screw the cap on and shake gently to combine.
Avoid shaking too hard; you don't want a lot of foam.
Application Tips
Spray the solution generously onto the glass, covering all cloudy areas. Let it sit for 5–10 minutes to break down buildup. For heavy deposits, re-spray after a few minutes.
Work in small sections to keep the solution wet and active.
4. Spray the Glass Generously and Let It Sit
Now that your cleaner is mixed and ready, it's time to apply it. Don't hold back—this step is all about saturation and dwell time. A light mist won't cut it against baked-on minerals and soap scum.
You want the solution to cling to the glass and start breaking down the grime on contact.
Grab your spray bottle and start at the top of the door. Work your way down in overlapping passes so every inch is coated. The cleaner should be visibly dripping—that's how you know you've used enough.
If it dries before you finish, you're being too stingy. After the full surface is wet, set a timer for 5 to 10 minutes. Use this time to clean other parts of the bathroom or just let the chemistry do its job.
The longer you let it sit, the easier the scrubbing will be. But don't let it dry completely—if you see it starting to evaporate, give it another light spritz.
Why Dwell Time Matters
Hard water deposits and soap scum are alkaline and mineral-based. Your vinegar or citric acid solution needs time to react and dissolve those bonds. A quick spray-and-wipe might remove surface dust, but it won't touch the stubborn film.
Letting it sit for a full 5–10 minutes makes the next steps almost effortless.
Work In Sections For Large Doors
If your shower door is wide or has multiple panels, treat each section separately. Spray the left panel, let it sit, then move to the right. This prevents the solution from drying out before you get to scrub.
For sliding doors, do one side at a time—close the door and spray the inside, then open and do the outside.
Don't Forget The Edges And Corners
Grime loves to hide in the corners and along the bottom edge where water pools. Make a point to spray these areas extra well. You might even tilt the bottle nozzle to a stream setting and squirt directly into the track or corner crevices.
Those spots often need the most dwell time.
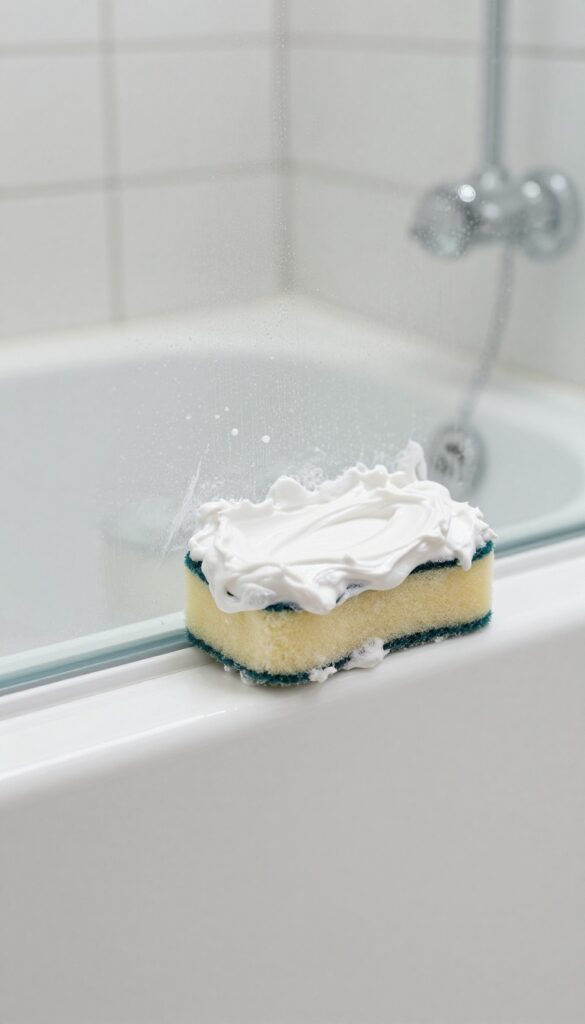
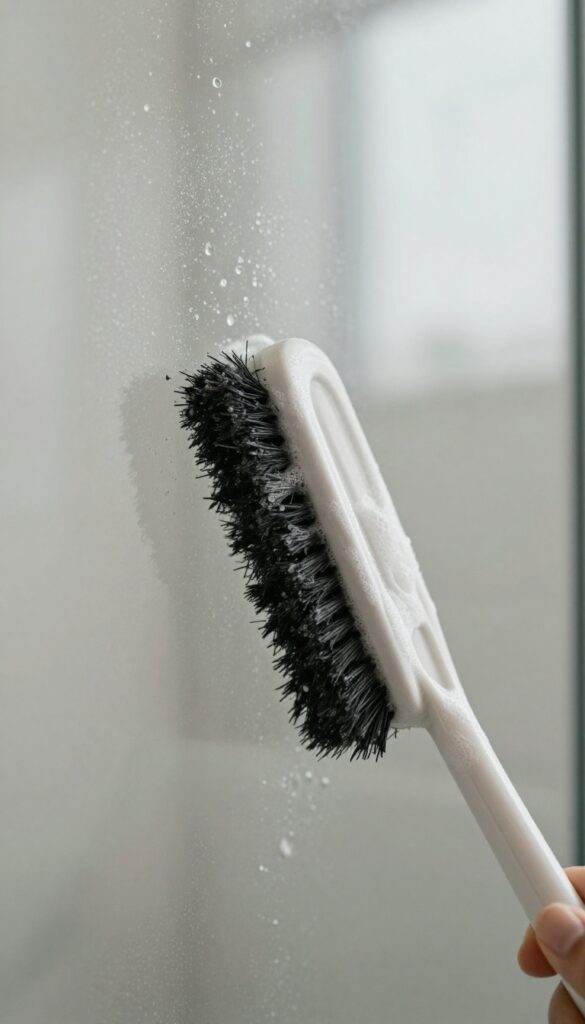
5. Scrub With a Non-Abrasive Sponge or Pad
Scrubbing is where the real magic happens, but the tool you choose matters more than you think. A rough scrubber might seem efficient, but it can leave permanent scratches that make glass look even worse. Stick with soft materials that lift grime without damaging the surface.
Use a soft sponge or a microfiber cloth to scrub in circular motions. Avoid steel wool or harsh scrubbers that can scratch the glass. Work in small sections, applying gentle pressure, and watch the scum dissolve as you go.
Why Softness Wins
Hard scrubbers like steel wool or abrasive pads create micro-scratches that trap soap and minerals, making future cleaning harder. A non-abrasive sponge or microfiber cloth is tough on grime but gentle on glass, preserving that smooth, clear finish.
Circular Motions Work Best
Scrubbing in circles helps break up soap scum and hard water spots more evenly than back-and-forth strokes. It also prevents streaks and ensures you cover every inch without missing spots. Just keep the motion consistent and light.
Don't Forget The Edges
The corners and edges of shower doors collect the most buildup because water pools there. Use the tip of your sponge or a soft toothbrush to reach into crevices. A little extra attention here prevents stubborn rings from forming.
6. Tackle Stubborn Hard Water Spots With Baking Soda
Sometimes the usual spray-and-wipe routine just isn't enough. Those white, crusty spots that won't budge? That's hard water buildup, and it needs a little extra muscle.
Baking soda steps in as a gentle abrasive that cuts through mineral deposits without scratching the glass.
Make The Right Paste
Mix about three parts baking soda with one part water in a small bowl. You want a thick, spreadable paste—not too runny, not too stiff. If it drips, add more baking soda.
If it crumbles, add a drop more water.
Apply And Let It Sit
Use a soft sponge or your fingers to dab the paste directly onto the hard water spots. Don't rub it in yet. Let the paste sit for 5–10 minutes so the baking soda can start breaking down the mineral bonds.
Scrub Gently, Then Rinse
After the wait, scrub the spots with a damp non-abrasive sponge or microfiber cloth using small circular motions. You'll see the white haze lift away. Rinse thoroughly with warm water and dry the glass with a clean towel to prevent new spots.
7. Rinse Thoroughly With Warm Water
Rinsing might seem like the easiest step, but it's also the one most likely to be rushed. If any cleaner residue stays on the glass, it will dry into streaks or attract new grime. Warm water works best because it dissolves leftover soap and vinegar more effectively than cold water, leaving the surface truly clean.
Use a handheld showerhead or a large cup to pour warm water over every inch of the glass. Start at the top and work your way down, making sure to hit the edges and corners where suds like to hide. Don't forget the frame and the track—residue collects there too and can drip onto the glass later.
Spend at least a full minute rinsing; you want to see the water running clear with no bubbles or slippery feel. If you notice any remaining suds, give those spots another pass. A thorough rinse now saves you from having to re-clean streaks later.
Check For Streaks
After rinsing, step back and look at the glass from different angles. Natural light is best for spotting streaks or cloudy patches. If you see any, it means you missed a spot—rinse that area again and dry it right away.
A quick inspection now prevents disappointment when the doors dry.
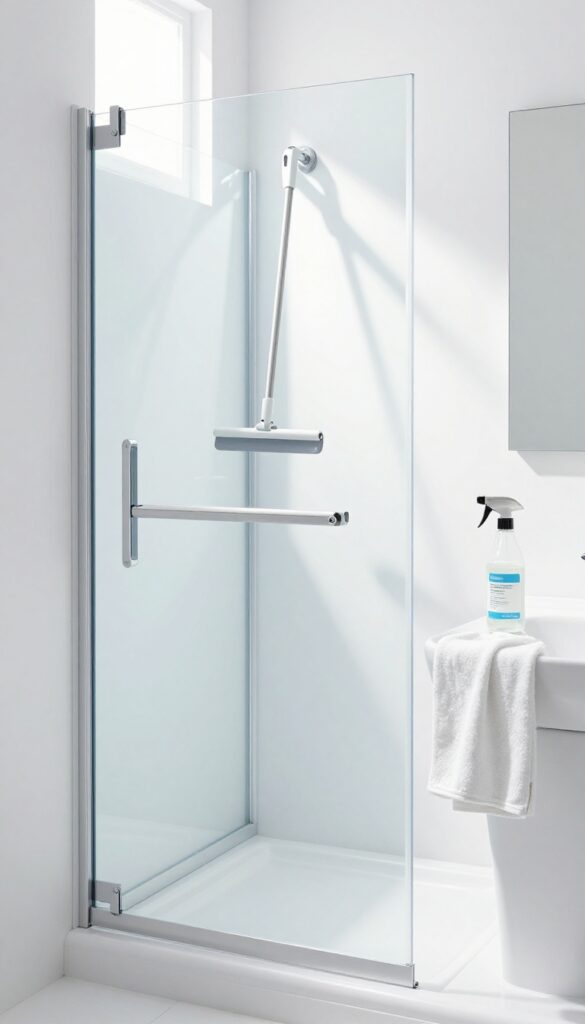
Use A Squeegee Immediately
Once the glass is fully rinsed, grab a clean squeegee and remove the water before it dries. Start at the top and pull down in a straight line, wiping the blade with a microfiber cloth after each pass. This prevents water spots and gives the glass a streak-free shine that lasts.
8. Squeegee Immediately for a Streak-Free Finish
That satisfying rinse is done, but the glass is still wet. If you let it air-dry, water spots will form within minutes. Grabbing a squeegee right away locks in your hard work and leaves the glass crystal clear.
Squeegeeing is the simplest way to prevent mineral deposits and soap scum from redepositing. It takes just 30 seconds and makes future cleanings easier. Here’s how to do it right.
Choose The Right Squeegee
Not all squeegees are equal. Look for one with a rubber blade that’s at least as wide as your shower door. A 12-inch blade works well for standard doors.
Avoid cheap plastic blades that skip or leave streaks. Replace the rubber when it gets nicked or hard.
Start At The Top
Begin at the top corner of the glass and pull the squeegee horizontally across, overlapping each stroke slightly. Wipe the blade with a dry microfiber cloth after every pass to remove excess water. This prevents drips from running back down.
Don’t Forget The Edges
Water collects along the edges and bottom track. After the main surface is dry, use a small towel or a corner of the squeegee to wick away moisture from the frame and threshold. This stops mildew from forming in the crevices.
9. Buff With a Dry Microfiber Cloth
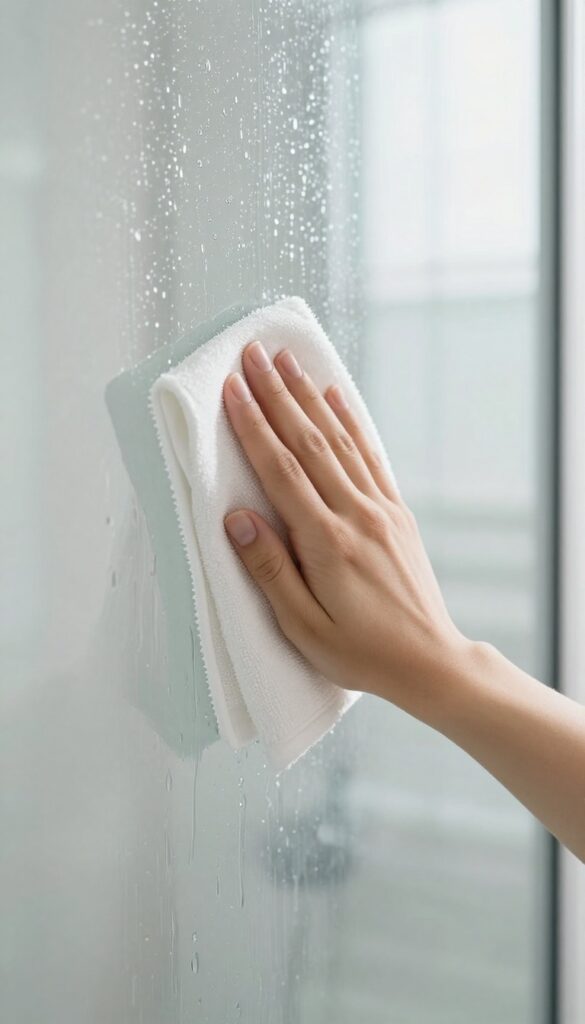
You might think the job is done after rinsing, but a quick buff with a dry microfiber cloth takes the shine from clean to brilliant. This final polish removes any lingering moisture and leaves the glass streak-free and crystal clear. It’s a small step that makes a big visual difference.
Once you’ve rinsed away all the cleaning solution, grab a fresh, dry microfiber cloth. Fold it into quarters so you have multiple clean surfaces to work with. Start at the top of the glass and wipe in overlapping horizontal or vertical strokes.
Flip the cloth as it picks up moisture to avoid redepositing water spots. The key is to use a light touch—pressing too hard can leave lint or smears. Finish by wiping the edges and corners where water tends to collect.
This step also reveals any missed spots you can quickly re-wet and polish.
Why Microfiber Works Best
Microfiber cloths have split fibers that trap dust, moisture, and mineral residue rather than pushing them around. Unlike paper towels or old rags, they won't leave lint or scratches on glass. For best results, use a dedicated glass-polishing cloth that hasn’t been washed with fabric softener, which can clog the fibers and reduce absorbency.
The Right Technique For A Streak-free Finish
Start at the top and work your way down so drips don’t undo your work. Use a consistent direction—either side-to-side or top-to-bottom—to avoid cross-hatch streaks. If you see any haze, lightly mist the glass with distilled water and buff again.
For large doors, work in sections to keep the cloth dry and effective.
When To Replace Your Cloth
A worn or dirty microfiber cloth can actually cause streaks. Replace it once it feels rough, loses absorbency, or leaves visible lint. Wash reusable cloths separately with mild detergent and no fabric softener.
Having a few clean cloths on hand makes the buffing step quick and satisfying.
10. Clean the Tracks and Edges
The glass might look spotless, but grime loves to hide in the tracks and edges. Those narrow channels collect soap scum, hair, and mystery gunk that can make your doors feel dirty even after a deep clean. Don't skip this step—it's the difference between a quick fix and a truly thorough job.
Grab an old toothbrush or a small detailing brush and dip it into your vinegar solution. Scrub along the bottom track, the side channels, and the top edge where the door slides. Pay extra attention to corners and crevices where buildup is thickest.
Rinse thoroughly with warm water, then dry with a microfiber cloth to prevent water spots. For stubborn deposits, let the vinegar solution sit for a few minutes before scrubbing.
Why Tracks Harbor Grime
Tracks are low points where water pools and debris collects. Soap scum and minerals settle there, and without regular cleaning, they harden into a crust that can even affect the door's glide. A quick scrub every few weeks prevents that buildup from becoming a major chore.
Best Tools For Tight Spaces
An old toothbrush is a classic for a reason—it's small, firm, and fits into narrow gaps. For extra reach, try a pipe cleaner or a specialized track brush. Avoid metal tools that could scratch the finish.
A spray bottle filled with vinegar solution helps you target the area without oversaturating.
Drying After Cleaning
After scrubbing and rinsing, use a dry cloth to absorb any leftover moisture in the tracks. This step is crucial to prevent new water spots and mildew. A quick wipe with a microfiber cloth works wonders, and you can even use a hairdryer on low heat for hard-to-reach spots.
11. Apply a Protective Coating or Wax
You've scrubbed, rinsed, and dried—now it's time to make that clean last. Applying a protective barrier helps repel water, soap scum, and hard water spots, so future cleanings are faster and easier. It's an optional step, but once you see how much longer your doors stay clear, you'll wonder why you didn't try it sooner.
A protective coating creates a hydrophobic surface that makes water bead up and roll off, carrying grime with it. You can use a commercial glass protectant (like Rain‑X or a dedicated shower guard) or a simple car wax. Both work well, but application differs slightly.
For wax, use a small amount on a soft cloth, rub it on in circular motions, let it haze, then buff off with a clean microfiber towel. For spray protectants, follow the bottle's instructions—usually spray on, spread evenly, and wipe off before it dries. Either way, you'll get a slick finish that fights future buildup.
Choose Your Protector
Commercial glass protectants are formulated for shower use and often last several weeks. Car wax is cheaper and equally effective, but make sure it's a pure carnauba or synthetic wax without abrasives. Avoid any product with cleaners or polishes—you want a pure sealant.
Application Tips
Work in small sections to avoid the product drying before you buff it. Use a microfiber applicator pad for even coverage. For wax, less is more—a thin layer is all you need.
Let it dry to a haze, then buff with a clean, dry microfiber cloth until the glass is crystal clear.
How Often To Reapply
Depending on your water hardness and shower frequency, reapply every two to four weeks. You'll know it's time when water stops beading and starts sheeting again. A quick touch‑up after each deep clean keeps the protection consistent.
12. Maintain With a Daily or Weekly Routine
Getting your shower doors crystal clear is satisfying, but keeping them that way is the real win. A simple maintenance routine stops soap scum and hard water deposits from building back up. You'll spend less time scrubbing and more time enjoying that streak-free shine.
Daily Squeegee Habit
A quick squeegee after every shower takes just 30 seconds but makes a huge difference. It removes water droplets before they dry into mineral spots. Keep a squeegee hooked inside the shower so it's always ready.
Start at the top and pull down in overlapping strokes. Wipe the blade dry after each pass for best results.
Weekly Vinegar Spritz
Once a week, mix equal parts white vinegar and water in a spray bottle. Mist the glass lightly after your shower, let it sit for a minute, then rinse with warm water. No scrubbing needed.
The mild acid dissolves early soap scum before it hardens. This step alone can cut your deep-cleaning frequency in half.
Keep Towels And Tools Handy
Storing a microfiber cloth or a dedicated drying towel near the shower makes it easy to wipe down glass after the squeegee. A quick buff removes any missed droplets and prevents water spots. Replace the cloth weekly to avoid transferring grime back onto the glass.
13. Know When to Call for Professional Help

Sometimes, despite your best efforts, the glass just won't cooperate. If you've tried every method and the haze or etching remains, it might be time to bring in the pros. Professional cleaning services have industrial-strength tools and techniques that can tackle what household products can't.
Etching happens when hard water minerals actually eat into the glass surface over time. No amount of scrubbing can reverse that damage. Severe mineral deposits that have built up for years may also resist even the strongest vinegar or commercial cleaners.
In these cases, a professional can assess whether restoration is possible or if replacement is the better option.
When Diy Isn't Enough
If you've gone through the full 13-step process and still see stubborn white spots or a cloudy film that won't budge, you're likely dealing with etching or calcified deposits. Professionals use specialized compounds and polishing pads to grind down the surface layer, which can restore clarity to mildly etched glass.
What Professionals Offer
Cleaning services often use high-pressure steam, diamond polishing pads, or acid-based removers that are too harsh for home use. They can also reseal the glass after cleaning to provide long-lasting protection. Expect to pay between $100 and $300 depending on the size and condition of your doors.
When Replacement Makes Sense
If the glass is deeply etched or cracked, replacement may be more cost-effective than restoration. A professional can give you an honest opinion. Sometimes a new door is the simplest path to a clear shower.
FAQ
Can I use bleach to clean shower glass doors?
Bleach is not recommended for glass doors because it can damage seals and cause discoloration. Stick to vinegar and dish soap for safe, effective cleaning.
How often should I clean my shower glass doors?
For best results, squeegee after every shower and do a thorough cleaning with vinegar solution once a week. This prevents hard water stains and soap scum buildup.
What is the best homemade cleaner for shower glass?
A mixture of equal parts white vinegar and warm water with a few drops of dish soap works great. For tough spots, add baking soda to make a paste.
Why does my shower glass look cloudy even after cleaning?
Cloudiness is often caused by hard water etching or mineral deposits that have bonded to the glass. A vinegar soak or professional restoration may be needed.
Can I use a razor blade to remove hard water stains?
Yes, but only on flat glass and with extreme care. Use a new blade at a shallow angle, and keep the glass wet to avoid scratching. Test in an inconspicuous area first.
Conclusion
Once you get the hang of these 13 steps, keeping your shower glass crystal clear becomes almost effortless. The real trick is consistency—a quick daily squeegee and a weekly deep clean will stop soap scum and hard water stains from ever taking hold. Pick the methods that suit your schedule and stick with them.
You don't need expensive products or hours of scrubbing to maintain that fresh, streak-free look. Just a few simple habits and the right tools make all the difference. Your shower doors will stay sparkling with minimal ongoing effort.