13 Small Bathroom Shower Ideas That Maximize Every Inch
A cramped shower can make your morning routine feel like a wrestling match. But with the right design choices, even the smallest shower can feel open and efficient. You don't need a full renovation to make a big difference—just a few smart tweaks.
Think about how you move in your shower. Every inch counts when space is tight. The goal is to reduce clutter, improve flow, and add storage without making things feel smaller.
These 13 ideas focus on real solutions for real bathrooms. Whether you're planning a remodel or just want to refresh your current setup, you'll find practical ways to maximize every inch of your shower.
1. Corner Shower Caddies That Don't Bulge
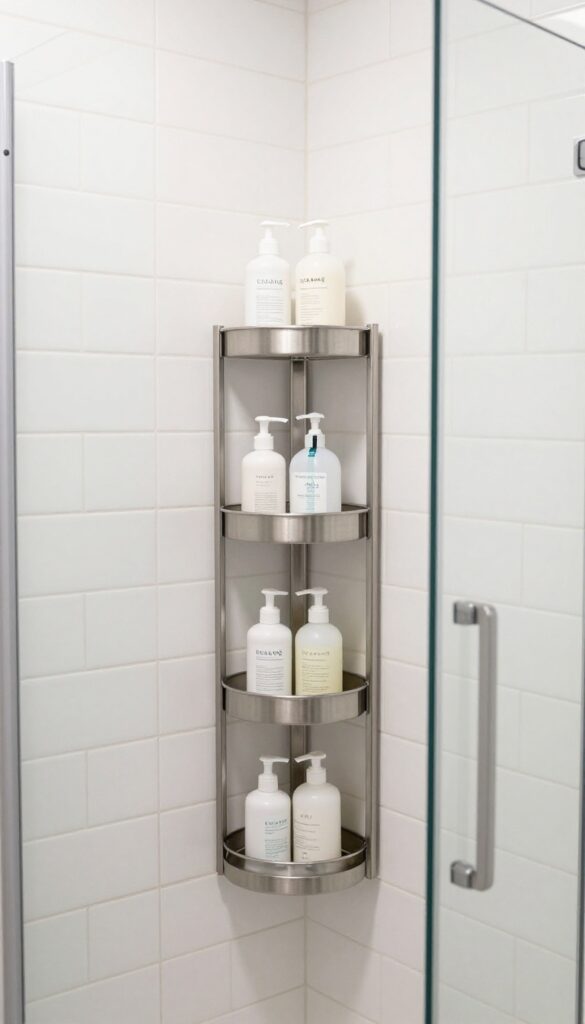
Tension rods and hanging baskets can make a small shower feel even more cramped. They stick out into your space, catch your elbows, and often sag under the weight of full bottles. A better approach is to use the vertical corner space that usually goes to waste.
Corner caddies are designed to fit right into the angle where two walls meet. They sit flush against the tile, so nothing protrudes into your showering area. Most models are made of rust-resistant materials like stainless steel or coated aluminum, and they install with adhesive or suction cups—no drilling required.
You can store shampoo, conditioner, and body wash without sacrificing precious floor or shelf space.
Why Corners Work Best
Corners are often dead zones in a shower. They're too narrow for a shelf and too awkward for a hook. A corner caddy turns that unused triangle into prime real estate.
Because it's tucked away, it won't interfere with your movement or make the shower feel smaller.
What To Look For
Choose a caddy with adjustable tiers so you can customize the height between shelves. Look for models with drainage slots or a slight tilt to prevent water pooling. Adhesive mounts are ideal for renters, but if you own your home, a screw-mounted caddy is more secure for heavy bottles.
Placement Tips
Install the caddy at shoulder height or slightly lower so everything is easy to reach. Avoid placing it directly under the showerhead—that just creates a clutter zone. Instead, put it on the wall opposite the showerhead or in the corner next to the controls.
2. Sliding or Folding Shower Doors
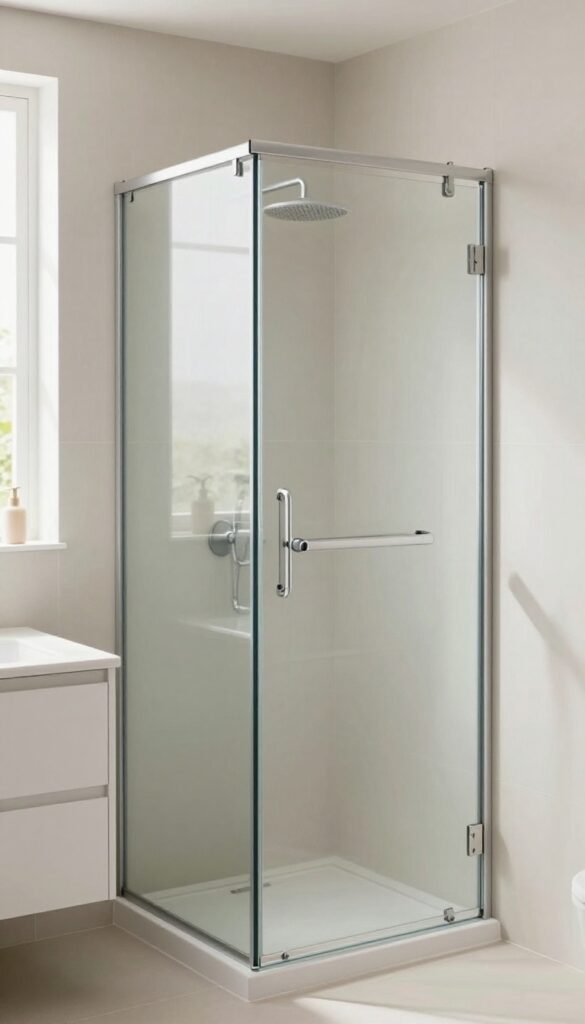
Standard hinged doors need a lot of clearance to swing open, which can eat up precious floor space in a small bathroom. Sliding or folding doors glide along a track instead of swinging out, so you can place a shower right next to a toilet or vanity without worrying about door clearance. This simple swap can instantly make your bathroom feel more open and functional.
Sliding doors are a classic space-saver. They slide horizontally on a track, requiring no extra floor space. Folding doors, also called bi-fold doors, fold in on themselves, which is great for very tight spots.
Both options are available in framed or frameless styles. Frameless gives a sleek, modern look, while framed is more budget-friendly. Consider the track material—stainless steel or aluminum resist rust better in humid conditions.
Also, think about the glass: clear glass keeps the shower visible and the room feeling larger, while frosted or textured glass offers more privacy.
Track Types And Maintenance
Sliding doors typically have a bottom track that can collect soap scum and grime. Look for doors with a low-profile or recessed track to make cleaning easier. Some high-end models have a top-hung system with no bottom track, which is even easier to clean.
Folding doors often have a bottom track too, but some pivot on hinges without a track. Whichever you choose, regular cleaning with a squeegee and mild cleaner will keep the track working smoothly.
Glass Options For Small Spaces
Clear glass is the top choice for making a small shower feel larger because it doesn't block the line of sight. However, it shows water spots easily. Consider a water-repellent coating to reduce spotting.
If you want more privacy without sacrificing openness, try light textured glass or a subtle frosted pattern. Avoid heavy patterns or dark tints, as they can make the space feel closed in.
3. Built-In Niches for Shower Storage
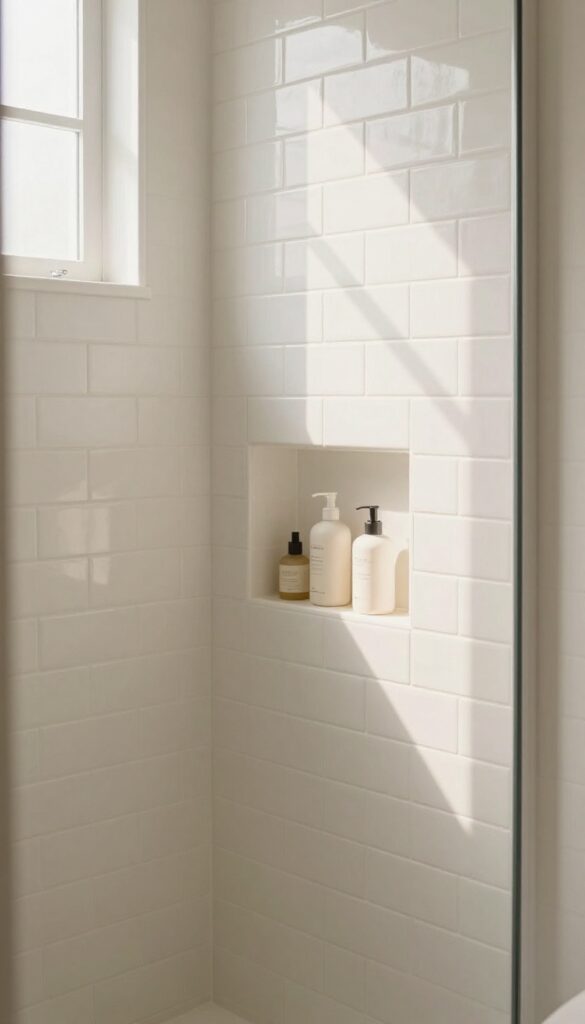
Nothing kills a sleek shower vibe like a plastic caddy hanging from the showerhead. Built-in niches offer a permanent, flush storage solution that keeps bottles off the floor and out of the way. They're carved right into the wall between studs, so they don't steal any precious space inside the shower.
A recessed niche is essentially a small shelf built into the wall. During a remodel or new build, you frame it between two studs, then tile it to match the rest of the shower. The result is a seamless pocket that holds shampoo, soap, and razors without protruding an inch.
It's the ultimate space-saver because it uses dead space inside the wall.
Where To Place It
The best spot is on a wall that's not directly hit by the shower spray—usually the side wall opposite the showerhead. That keeps your products dry and prevents soap scum buildup. If you have a long wall, consider two niches at different heights: one for tall bottles, one for smaller items.
Sizing And Depth
Standard niches are about 12 to 14 inches wide and 3. 5 inches deep (the depth of a 2×4 stud). That's enough for most full-size bottles.
For a double niche, you can go wider—up to 24 inches—but keep depth consistent. If you need more depth, you might need to fur out the wall, which eats into room space, so stick with standard depth when possible.
Tiling Tips
Use the same tile as your shower walls for a cohesive look. A sloped bottom (about 1/8 inch per foot) helps water drain out. And don't forget a waterproof membrane behind the niche—moisture can seep through grout over time.
For a clean finish, use bullnose tile or a metal trim edge around the opening.
4. Curbless Shower Entry
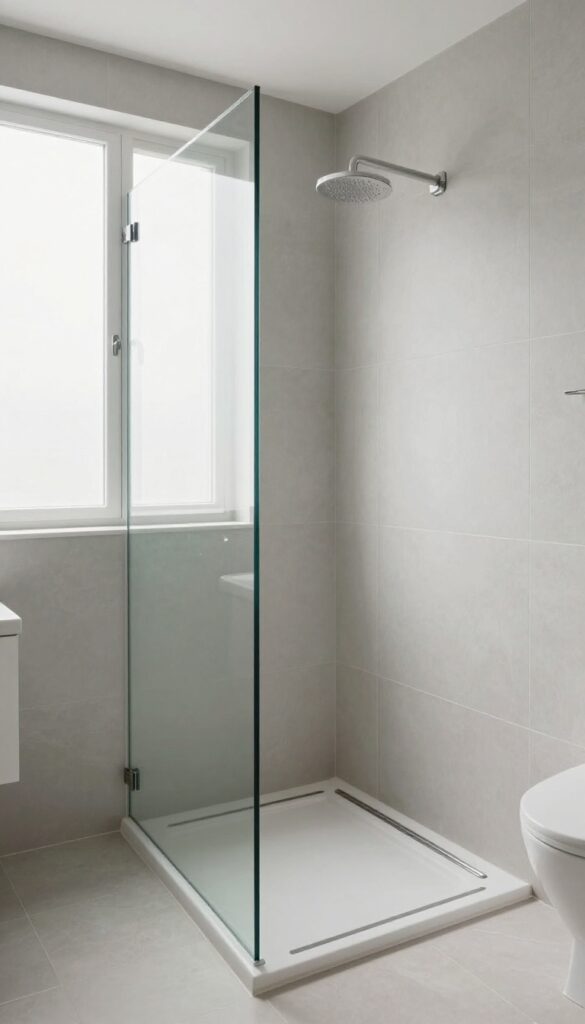
A curbless shower entry does more than just remove a physical barrier—it transforms how the whole bathroom feels. By eliminating the step-over, you create a seamless transition from the bathroom floor into the shower. This simple change makes the space look larger and more open, plus it's a game-changer for accessibility.
A curbless shower is essentially a shower with no raised threshold. The floor slopes gently toward the drain, so water stays where it belongs. This design works especially well in small bathrooms because it removes the visual break that a curb creates.
Without that line, the eye travels freely across the room, making the shower feel like a natural extension of the bathroom rather than a separate, cramped compartment.
Why It Makes A Small Bathroom Look Bigger
The absence of a curb creates an uninterrupted visual line from wall to wall. This tricks the eye into perceiving more space. In a small bathroom, every inch of visual continuity matters.
A curbless entry also allows you to use larger floor tiles throughout, which further expands the sense of openness.
Installation Considerations
A curbless shower requires careful planning for drainage. The floor needs to slope properly—usually about 1/4 inch per foot—toward the drain. This may involve recessing the shower pan or raising the rest of the bathroom floor slightly.
It's a job best left to a professional, but the payoff is a sleek, modern look that maximizes every inch.
Accessibility Bonus
No curb means no tripping hazard and easy access for wheelchairs or walkers. This is a smart long-term investment if you plan to age in place. Even if accessibility isn't a current concern, a curbless entry adds future-proofing value to your home.
5. Large-Format Tiles for Fewer Grout Lines
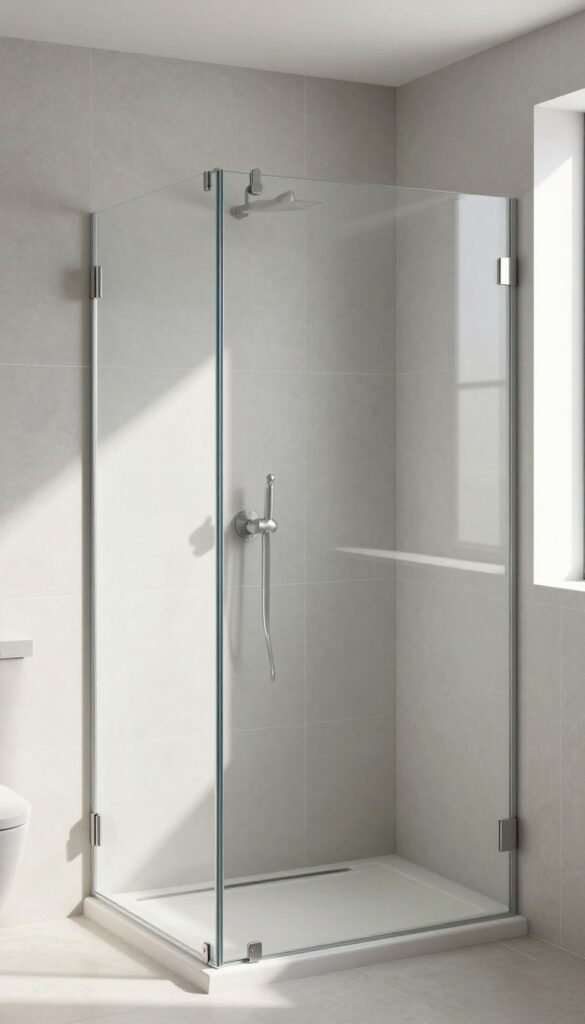
Grout lines can make a small shower feel busy and cramped. Every extra line breaks up the visual space, making walls look chopped and smaller than they are. Large-format tiles solve this by covering more area with fewer interruptions, creating a seamless, expansive look.
Why Fewer Grout Lines Matter
In a small shower, every visual break shrinks the perceived space. Grout lines act as visual boundaries that segment the wall into smaller pieces. By using large tiles, you reduce those boundaries, allowing the eye to travel smoothly across the surface.
This makes the shower feel larger and less cluttered.
Best Tile Sizes And Layouts
Go for tiles at least 12×24 inches. Rectangular tiles laid in a staggered pattern (like brickwork) or stacked vertically can elongate the walls, adding height. For a truly seamless look, consider 24×48-inch porcelain slabs or large-format panels.
Just ensure your walls are flat enough to avoid lippage.
Color And Finish Tips
Light colors like white, beige, or soft gray enhance the spacious effect. A matte or satin finish reduces glare and hides water spots better than high gloss. For a subtle texture, choose tiles with a slight stone or concrete look—they add depth without overwhelming the space.
Installation Considerations
Large tiles require a perfectly level substrate. Hire an experienced installer who knows how to handle big formats. Use leveling clips to keep tiles flush.
Also, plan the layout so that cut pieces are minimized and placed in less visible areas, like behind the shower door.
6. Wall-Mounted Shower Bench
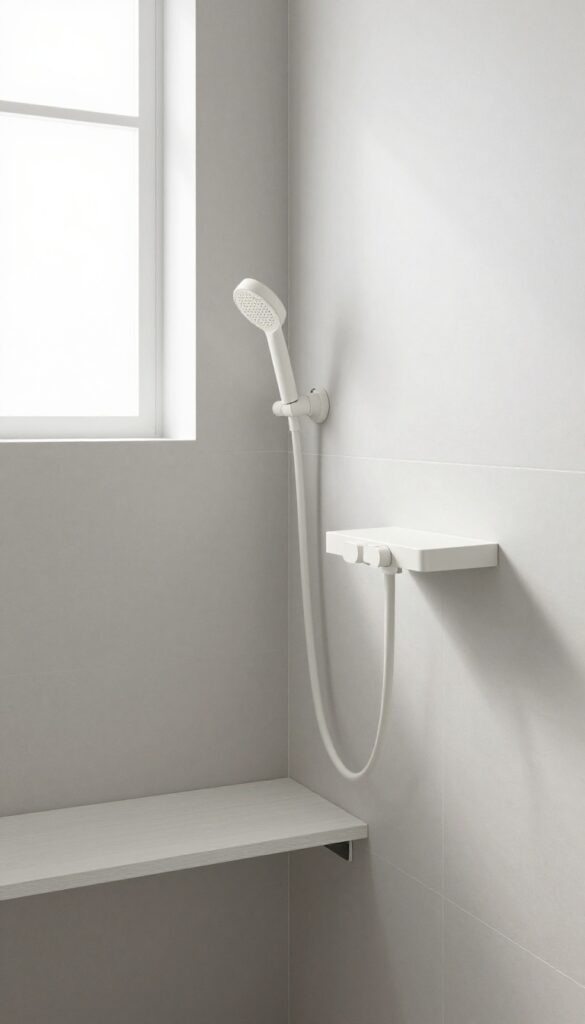
Seating in a small shower can be a game-changer, but floor space is precious. A wall-mounted bench gives you a place to sit or rest a foot while shaving, without eating into your limited square footage. The key is choosing a design that tucks away when not in use or stays out of the main traffic path.
Wall-mounted benches come in two main styles: fold-down and fixed. Fold-down models are ideal for the tightest spaces—they flip up against the wall when you don't need them, leaving the shower floor completely open. Fixed benches are more permanent but can double as a shelf for toiletries.
Either way, you avoid the bulky footprint of a freestanding stool or corner caddy that takes up valuable standing room.
Fold-down Benches
Fold-down benches are a smart choice for tiny showers. They attach securely to wall studs and fold flat when not in use. Look for teak or marine-grade polymer that resists moisture.
Installation is straightforward, but make sure you mount it at a comfortable height—typically 17 to 19 inches from the floor.
Fixed Wall Benches
If you prefer a permanent seat, a fixed wall-mounted bench can be a sleek addition. Choose a length that fits your shower width—usually 12 to 16 inches deep. A shorter bench (around 18 inches wide) still offers seating without overwhelming the space.
Pair it with a handheld showerhead for easy rinsing.
Material Matters
Teak is a classic choice because it's water-resistant and warm underfoot. For a modern look, consider solid surface materials like Corian or engineered stone—they're non-porous and easy to clean. Avoid wood that isn't sealed properly, as it can warp or grow mold in a wet environment.
7. Handheld Showerhead with Slide Bar
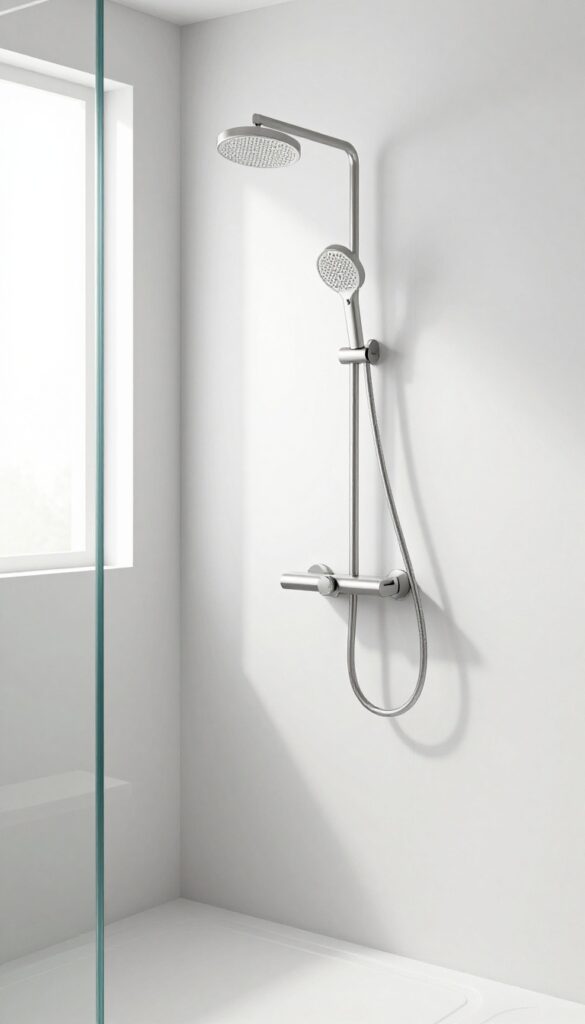
A fixed showerhead can feel limiting, especially in a small shower where you need to rinse every corner without drenching your hair. A handheld showerhead mounted on a vertical slide bar solves that problem. It gives you the freedom to direct water exactly where you need it, and when you're done, it slides up and out of the way.
This simple swap adds serious flexibility without taking up any extra space.
The slide bar lets you adjust the height, so it works for everyone in the household—kids, adults, and even pets. Plus, it makes cleaning the shower walls and floor a breeze. No more awkward bending or spraying water everywhere.
The handheld unit also helps reduce clutter because you can ditch the separate sprayer or bucket. It's a small change that makes a big difference in how you use your shower every day.
Why A Slide Bar Works In Tight Spaces
Unlike a fixed showerhead, a slide bar mounts directly to the wall and takes up almost zero floor space. The vertical track is slim and unobtrusive, and the handheld head clicks into place at any height. This means you can rinse off without bumping elbows into walls or fighting with a bulky showerhead.
It's especially useful in corner showers where reaching the far wall is a stretch.
Choosing The Right Slide Bar
Look for a model with a sturdy metal bracket and smooth sliding mechanism. A longer bar (around 24 to 30 inches) gives you more range, but make sure it fits within your shower's dimensions. Some slide bars also come with a diverter that lets you switch between the handheld and an overhead rain showerhead—perfect if you want both options without extra plumbing.
Installation Tips For Small Showers
Most slide bars attach with just a few screws into wall studs or tile anchors. If you're renting, look for a clamp-on model that attaches to the existing shower arm. Position the bar so the lowest setting is within easy reach of children or seated users, and the highest setting clears your head when standing.
Keep the bar on the side wall opposite the shower entrance to avoid interfering with the door or curtain.
8. Glass Shower Enclosure (Frameless)
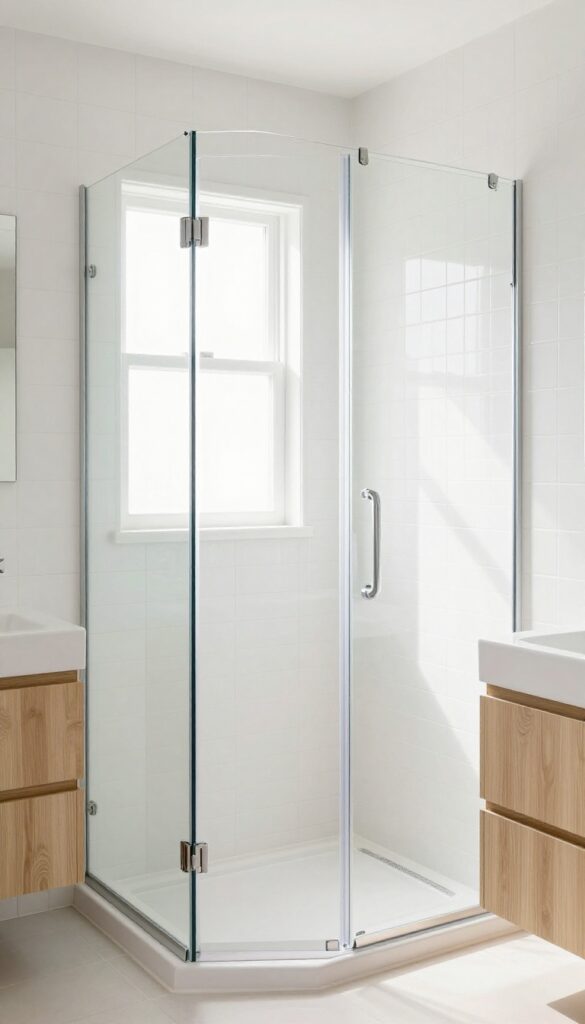
Swapping a bulky shower curtain or framed door for frameless glass changes the whole feel of a small bathroom. Without thick metal frames or opaque fabric, the eye can travel freely, making the space look larger than it is. Plus, glass lets natural and artificial light bounce around, brightening every corner.
Frameless glass enclosures use thick tempered glass panels held together by minimal hardware—usually just hinges and a handle. The lack of a frame means less visual clutter and fewer places for soap scum and mildew to hide. Cleaning is easier because there are no tracks or crevices.
The open design also makes the shower feel more like part of the room, not a cramped box.
Maximizing Light Flow
In a small bathroom, light is everything. A frameless enclosure doesn't block light from reaching the rest of the room. If your shower is near a window, the glass lets daylight stream through.
Even with artificial lighting, the transparency helps the space feel brighter and more open.
Choosing The Right Glass
Go with 3/8-inch or 1/2-inch tempered glass for safety and stability. Clear glass is the best choice for an unobstructed view, but you can opt for a slight tint or frosted band for privacy. Avoid heavy patterns or textures that can make the glass look busy.
Installation Tips For Small Spaces
A hinged door that swings outward can save interior space, but make sure there's enough clearance outside. Sliding doors are another option, but they require a track at the top and bottom—choose a low-profile design. For the tightest spots, a fixed panel with a small opening might work best.
9. Vertical Storage Towers
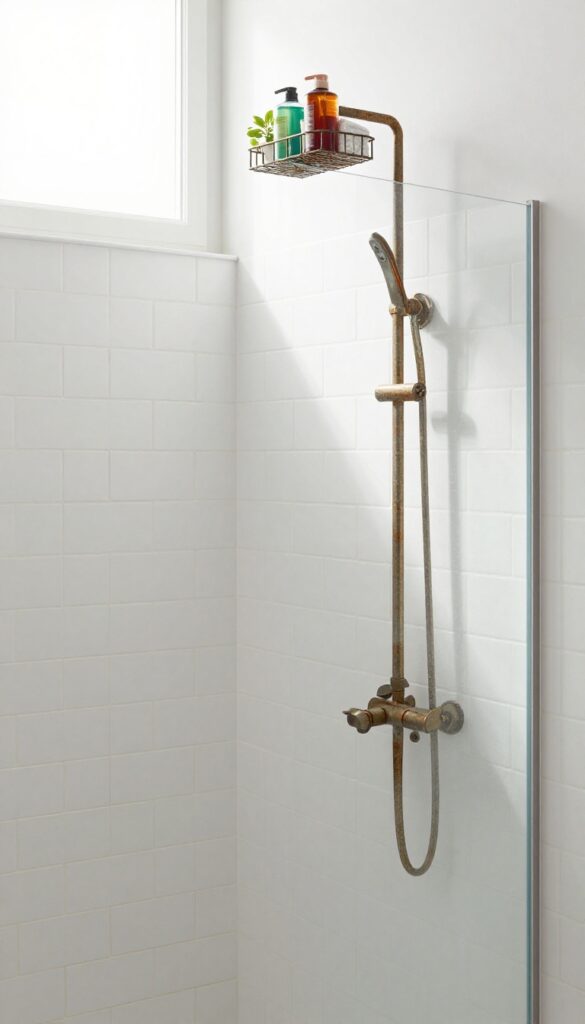
When floor space is at a premium, the only way to go is up. Vertical storage towers make use of the empty wall space that often goes wasted in small showers. A tall, narrow unit or a tension rod with multiple tiers can hold everything from shampoo bottles to folded towels, keeping them off the floor and within easy reach.
Vertical storage is about thinking in three dimensions. Instead of spreading your toiletries across a cramped corner caddy, stack them upward. This approach clears floor space, reduces visual clutter, and makes your shower feel larger because your eyes are drawn upward rather than to a crowded ledge.
Choose The Right Tower
Look for a tower that fits your shower's dimensions. Measure the height from floor to ceiling and the depth available. Slim towers with adjustable shelves work best—they can be tucked into corners or against a wall without protruding into your showering space.
Materials like rust-proof aluminum or treated bamboo hold up well in humid conditions.
Tension Rod Caddies
If you don't want to drill into tile, a tension rod system is a great alternative. These use spring tension to stay in place between the floor and ceiling or between two walls. Multiple tiers let you organize items by frequency of use—shampoo and conditioner on the top, body wash and razors below.
Just make sure the rod is sturdy enough to hold your items without slipping.
Maximize Every Shelf
Once you have your vertical storage, use it wisely. Group similar items together and keep daily essentials at eye level. Use small baskets or trays on each tier to prevent bottles from toppling.
Consider adding hooks on the sides for loofahs or washcloths. The goal is to create a place for everything so nothing ends up on the shower floor.
10. Shower Curtain with a Curved Rod
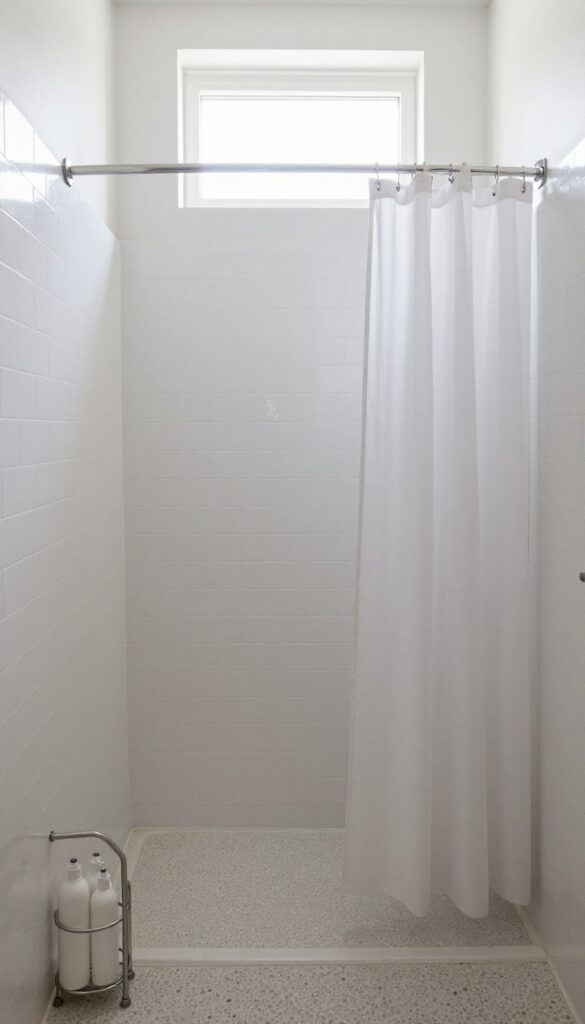
Standard shower rods are straight, which means the curtain hangs right at the edge of the tub or shower pan. That leaves you with less room to move around. A curved rod bows outward, giving you extra elbow room without taking up more floor space.
It's one of the simplest and most affordable ways to make a small shower feel bigger.
A curved shower rod can add up to 6 inches of extra space inside the shower. That might not sound like much, but it makes a real difference when you're washing your hair or shaving your legs. The rod creates a gentle arc that pushes the curtain away from your body, so you don't accidentally stick to the cold plastic.
Installation is straightforward—most curved rods mount the same way as a straight rod, and tension-mounted options work for renters. Just make sure to measure your shower width and choose a rod with the right curve depth. Pair it with a lightweight, mildew-resistant curtain and use a liner to keep water inside.
The result is a shower that feels more spacious and comfortable, all for under $30.
Extra Room Where You Need It
The biggest advantage of a curved rod is the added shoulder and arm space. When you're washing your face or reaching for a loofah, that few inches of extra room prevents you from bumping into the curtain. It also reduces the chance of the curtain clinging to your body, which can be annoying and cold.
Easy Installation For Any Setup
Curved rods come in tension-mount and permanent-mount styles. Tension rods are ideal for renters or anyone who doesn't want to drill holes. They simply twist to lock into place.
Permanent rods require screws but offer more stability, especially for heavier curtains. Both types are widely available and take less than 30 minutes to install.
Choosing The Right Curtain
For a small shower, go with a lightweight fabric curtain that doesn't billow inward. A clear or semi-sheer curtain keeps the space feeling open. Add a fabric or plastic liner on the inside to protect the curtain from water.
Look for mildew-resistant materials to keep maintenance low.
11. Pocket Door for Shower Entry
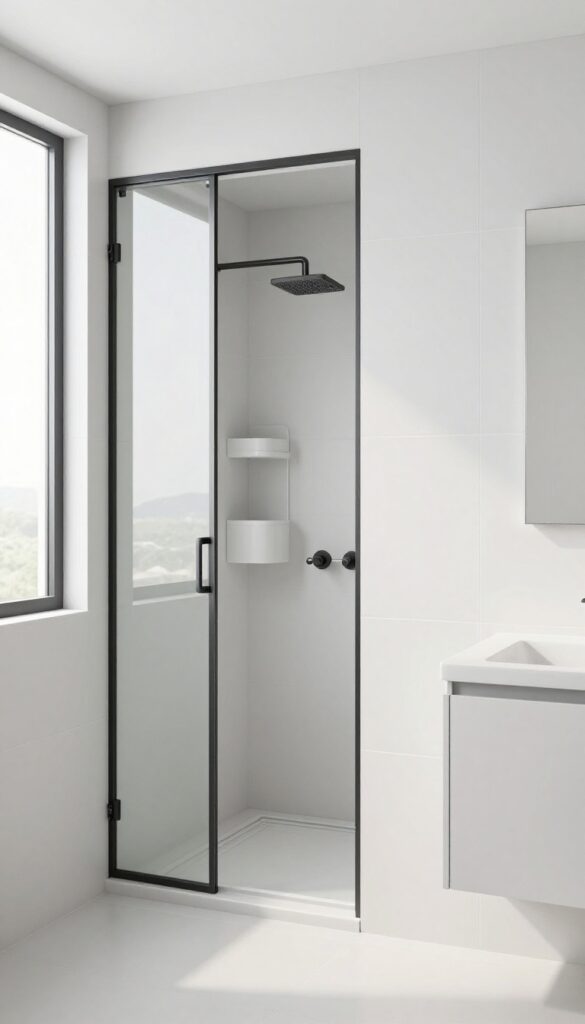
A swinging door eats up precious floor space in a small shower room. Pocket doors slide neatly into the wall, freeing up every inch for movement and storage. This simple swap can make a tight shower feel instantly more spacious.
Pocket doors are a brilliant solution for separate shower rooms where every square foot counts. Instead of a door that swings inward or outward, a pocket door glides into a cavity in the wall. This means you can place fixtures, shelves, or even a small bench right where the door would have swung.
Installation requires some wall modification, but the payoff in usable space is huge. Choose a frosted glass pocket door for privacy without blocking light, or a solid panel for a seamless look.
Space Savings
A standard swinging door needs about 3 feet of clearance. A pocket door uses zero floor space, letting you install a corner caddy or a fold-down seat right next to the entrance. That extra room can make a 3×3 shower feel like a 4×4.
Installation Tips
Pocket doors require a pocket kit and a stud-free wall cavity. If you're renovating, plan for this during framing. For existing walls, a contractor can cut into the wall and add support.
Use a soft-close mechanism to prevent slamming.
Design Options
Match the door style to your bathroom. A frameless glass pocket door keeps the space open and airy. A wood or painted solid door adds warmth and can double as a towel rack with a mounted bar.
Consider a barn-style pocket door for a rustic touch.
12. Recessed Shelving in Awkward Corners
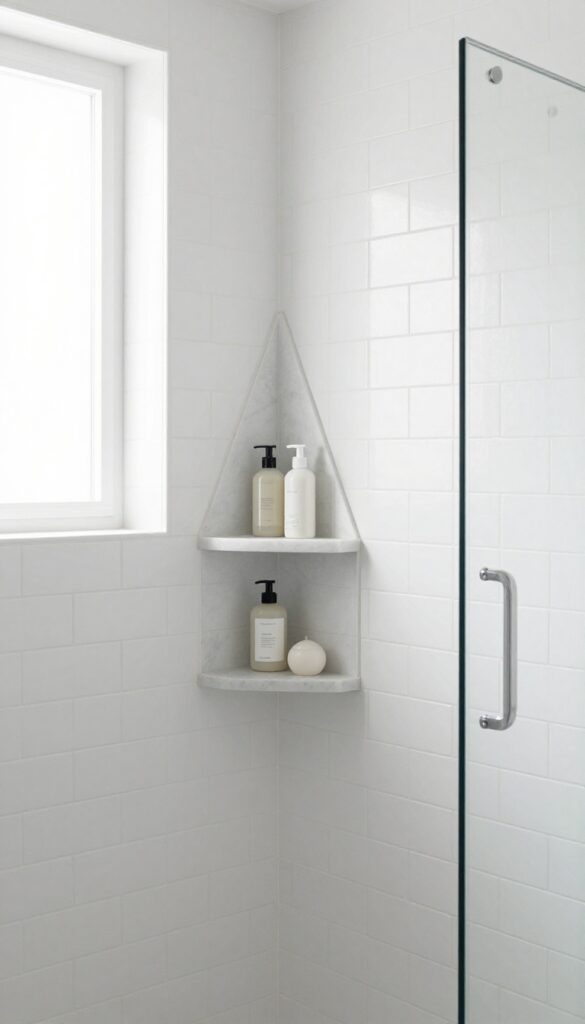
Dead corners in a shower are often wasted space. You might have a narrow alcove or a tricky angle that seems impossible to use. Instead of leaving it empty, turn that awkward spot into a storage asset with custom recessed shelving.
Recessed shelves are built into the wall, so they don't protrude into your shower area. This keeps items off the floor and out of the way, making your shower feel more open. They're perfect for holding shampoo, soap, and razors without cluttering the space.
Choosing The Right Location
Look for corners or narrow wall sections that aren't used for plumbing or structural support. Common spots include the wall opposite the showerhead or beside the niche where you store bottles. Mark the area and check for studs or pipes before cutting.
Sizing And Depth Matters
Standard recessed shelves are about 3. 5 to 4 inches deep, which fits most bottles. For corners, consider triangular or curved shelves to maximize the space.
Make sure the shelves are slightly tilted downward so water doesn't pool.
Materials And Waterproofing
Use waterproof materials like tile, stone, or solid surface panels. Ensure the niche is properly waterproofed with a membrane behind the tile. This prevents moisture from seeping into the wall and causing mold or damage.
13. Light Color Palette and Strategic Lighting
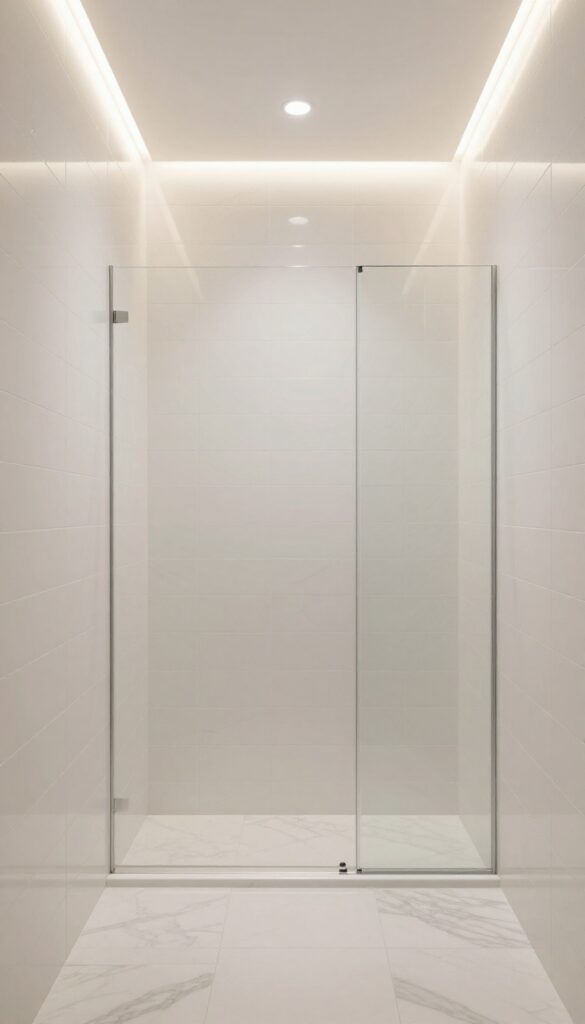
Color and light work together to trick the eye into seeing more space than there is. In a small shower, a light color palette paired with smart lighting can make the enclosure feel airy and open rather than cramped and dark. You don't need to spend a lot—just choose the right shades and place lights where they count.
The combination of pale surfaces and well-placed light sources creates an illusion of depth and cleanliness. Light colors reflect light, while dark colors absorb it, so sticking with whites, creams, soft grays, or pastels on walls and floors instantly makes the shower feel larger. But color alone isn't enough—you need lighting that eliminates shadows and brightens every corner.
Choose Light-reflecting Tiles
Glossy or matte tiles in light shades bounce light around the shower. Large-format tiles with minimal grout lines reduce visual clutter and make the walls feel seamless. Consider white subway tile, pale marble-look porcelain, or soft beige glass tiles.
Avoid busy patterns or dark mosaics that can make the space feel smaller.
Layer Your Lighting
Overhead lighting alone can leave shadows on your face and in corners. Add a recessed LED light in the shower ceiling, plus a waterproof strip light along the ceiling edge or behind a niche. For a natural touch, a skylight or tubular daylight device floods the space with soft, even light during the day.
Use Light To Define Depth
A backlit mirror or a light panel behind a frosted glass wall adds a sense of depth. LED strips installed vertically in corners draw the eye upward, making the shower feel taller. Even a simple glowing niche for shampoo bottles can create a focal point that distracts from the limited square footage.
FAQ
What is the best way to add storage to a small shower without making it feel cramped?
Built-in niches and corner caddies are great options because they use vertical or recessed space rather than protruding into the shower area.
How do I make a small shower look bigger?
Use large-format tiles, frameless glass enclosures, and light colors. Good lighting also helps create an open feel.
Is a curbless shower worth the extra cost?
Curbless showers can be more expensive due to waterproofing and slope requirements, but they make the space feel larger and improve accessibility.
What type of showerhead is best for a small shower?
A handheld showerhead on a slide bar offers flexibility and can be positioned to save space. Rain showerheads can also work if mounted centrally.
Conclusion
Small bathrooms don't have to feel cramped. With the right shower ideas—like corner shelves, sliding doors, or vertical tile patterns—you can make every inch count.
Start with one change that solves your biggest pain point. A few smart tweaks can turn your tiny shower into a space that feels open, organized, and surprisingly spacious.