10 Backyard Ideas for Small Yards with Smart Space Planning
A small backyard can feel twice as big with the right plan. The secret isn't square footage—it's how you use it. These ten ideas focus on smart space planning that turns cramped corners into comfortable, useful zones.
You don't need a huge budget or a professional designer. Simple shifts in layout, furniture choice, and vertical thinking can open up your yard without major construction. Each idea here is practical and designed for real yards with real limits.
Whether you're starting from scratch or tweaking an existing space, you'll find options that fit your lifestyle. Let's make every inch work harder so you can actually enjoy being outside.
1. Zone Your Yard for Multiple Uses
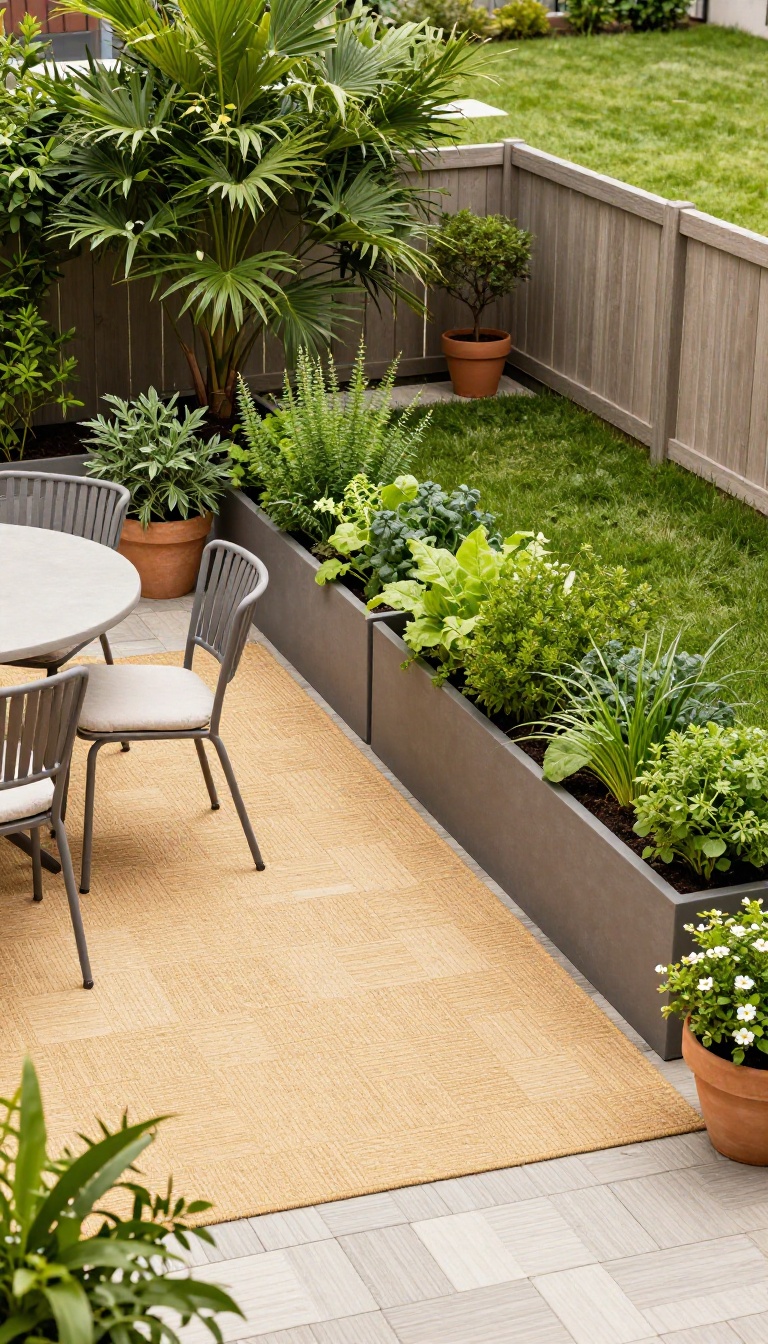
A small yard can wear many hats if you give each activity its own spot. Zoning turns a single open space into separate areas for dining, lounging, and gardening without adding walls or square footage. The trick is to define each zone visually and physically, so your brain reads them as distinct rooms.
Start by thinking about how you actually use your yard. Do you eat outside often, or do you mostly want a quiet corner to read? Once you know your top two or three activities, you can assign each one a dedicated patch.
Even a 10×10 space can hold a bistro table, a lounge chair, and a few planter boxes if you plan the layout carefully. The key is to create clear boundaries. You don't need fences or walls—just visual cues that tell you where one zone ends and another begins.
That could be a change in flooring, a rug, a row of tall plants, or a small step. These markers help the space feel intentional rather than cluttered.
Use Rugs And Flooring Changes
An outdoor rug instantly defines a seating or dining area. Choose a weather-resistant material like polypropylene, and pick a color that contrasts with your patio or grass. If you have a deck, you can also use interlocking tiles or a different decking material to mark a zone.
The shift in texture underfoot makes the separation feel real, even in a tiny yard.
Let Planters Do The Dividing
Tall planters or raised beds work as living walls. Place them in a line to separate a dining zone from a play area, or use a single large planter to anchor a corner. They add greenery and privacy without blocking light.
Just make sure they're heavy enough to stay put and have drainage holes so your plants thrive.
Keep Pathways Clear
Zones need breathing room, so leave at least 18 inches for walkways between them. That might mean using a narrow bench instead of a full dining set, or mounting lights on the fence to save floor space. Clear paths make the yard feel larger and prevent the zones from feeling cramped.
2. Go Vertical with Wall Planters and Shelves
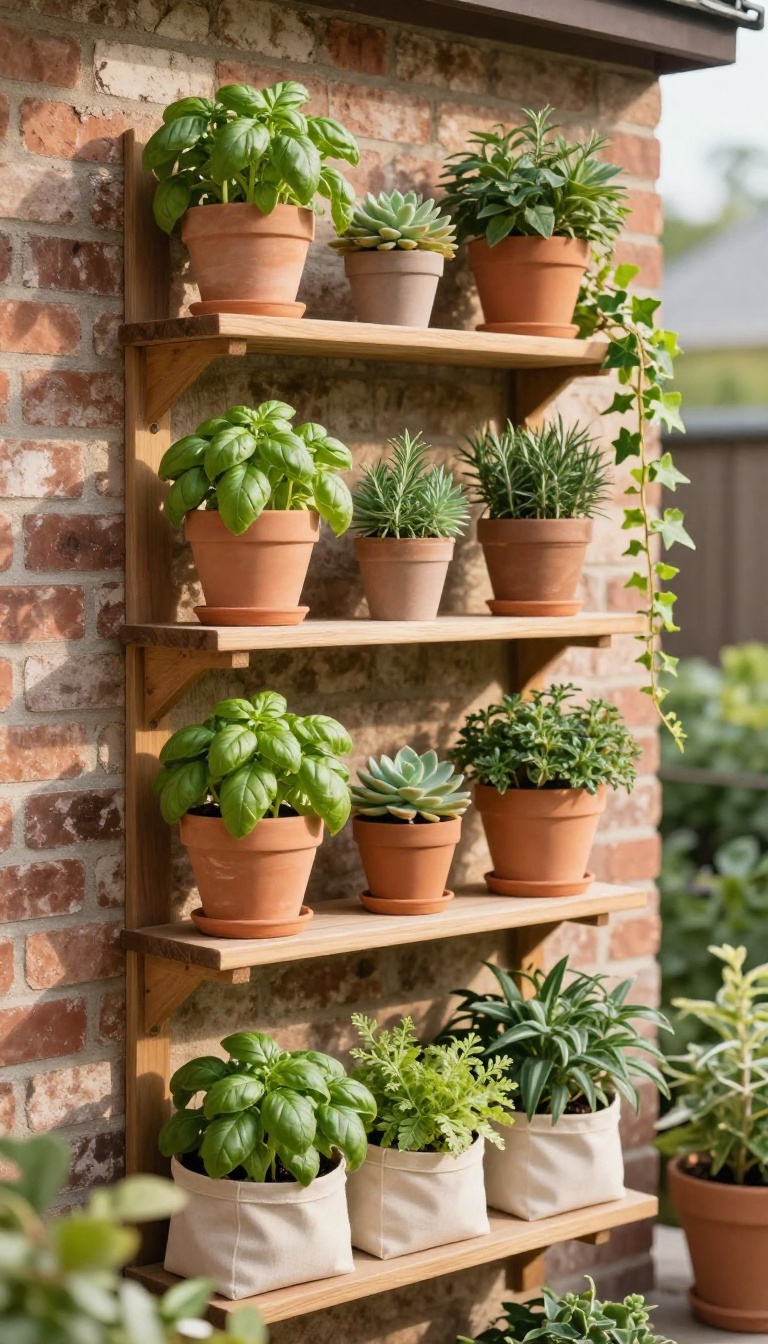
When floor space is tight, the walls become your best real estate. Wall planters and tiered shelves let you grow herbs, flowers, and succulents without sacrificing an inch of patio. This vertical approach adds lush greenery and a bit of privacy, all while keeping your ground area open for seating or play.
Vertical gardening isn't just a trend—it's a smart way to make a small yard feel intentional and full. You can mount planters directly on a fence, brick wall, or even a shed. Shelves work similarly, stacking pots at different heights to create a living wall.
The result is a burst of color and texture that draws the eye upward, making the space feel taller and more expansive. Plus, you get to enjoy fresh herbs right outside your door without giving up valuable square footage.
Pick The Right Wall
Not all walls are equal when it comes to vertical planters. A sunny south- or west-facing wall is ideal for herbs like basil, rosemary, and thyme. If your wall gets mostly shade, go for leafy greens or ferns.
Make sure the surface is sturdy enough to hold the weight of wet soil and plants. Brick and concrete are great; wood fences may need extra reinforcement.
Choose Your Planters
You have plenty of options: fabric pocket planters, modular plastic panels, or simple wooden crates attached to the wall. For a cleaner look, try a tiered metal shelf with uniform pots. Succulents and trailing plants like ivy or creeping jenny work beautifully in vertical setups.
Just remember to check watering needs—vertical planters dry out faster than ground beds.
Add A Shelf For Extra Storage
A narrow shelf mounted above your planters can hold gardening tools, a small watering can, or even a few decorative items. It keeps everything within reach and adds another layer of interest. Just don't overload it—keep the look airy and uncluttered.
This small addition makes your vertical garden both pretty and practical.
3. Choose Multi-Functional Furniture
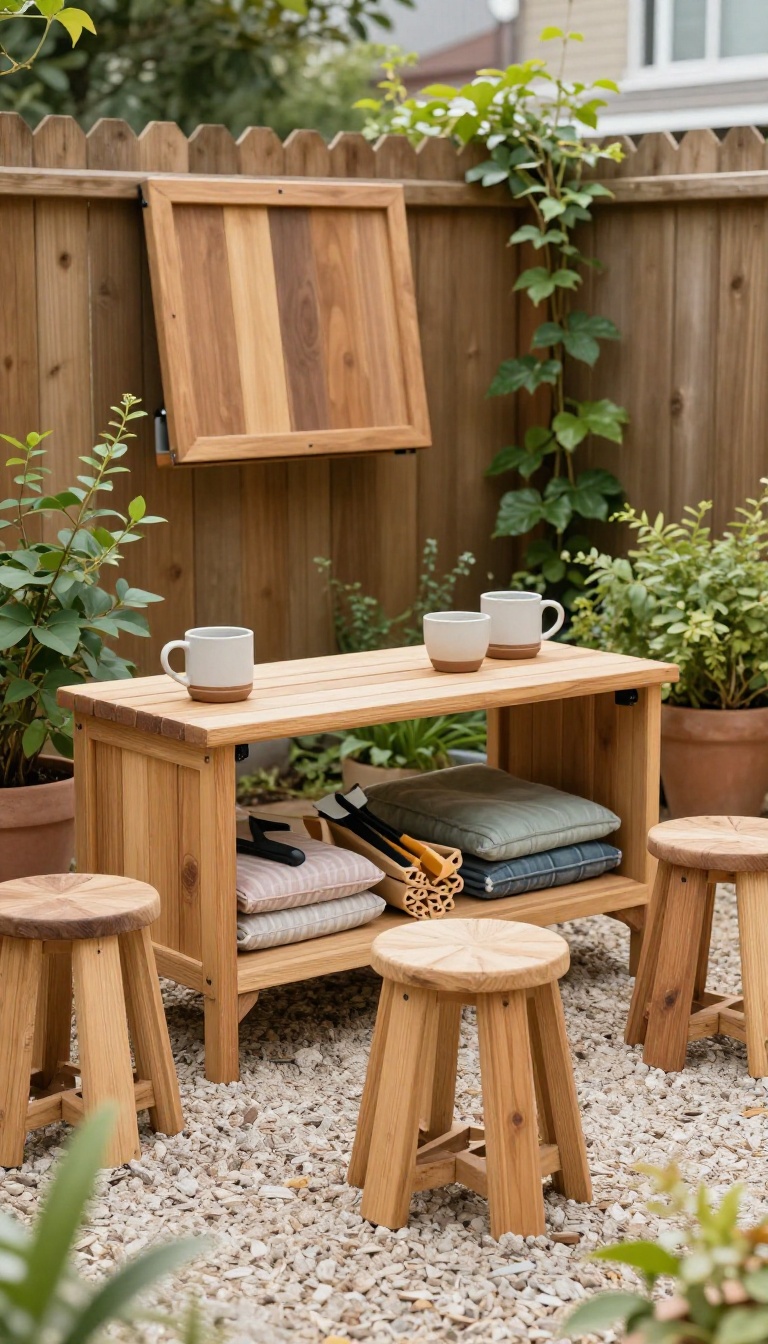
In a small yard, every piece of furniture should earn its keep. Multi-functional pieces like storage benches, fold-down tables, and nesting stools give you flexibility without eating up floor space. They let your yard shift from morning coffee spot to evening dinner party without missing a beat.
Think of multi-functional furniture as the Swiss Army knife of your backyard. It solves two problems at once: where to sit and where to stash your stuff. When you're working with limited square footage, that double duty keeps things tidy and adaptable.
Storage Benches That Pull Double Duty
A storage bench gives you seating and a hidden spot for cushions, gardening tools, or kids' toys. Look for weather-resistant materials like teak or resin wicker. Some models even have backrests that fold down, turning them into a low table.
Fold-down Tables For Flexible Dining
Wall-mounted or railing-hinged tables stay out of the way when you don't need them. Flip them up for a meal or a laptop session, then drop them flat against the fence. They're perfect for narrow patios where a full table would block traffic.
Nesting Stools And Stackable Seating
Nesting stools tuck under each other, so you can store four seats in the footprint of one. Use them as extra seating, side tables, or even plant stands. When the party's over, they stack neatly in a corner or shed.
4. Use Mirrors and Light Colors to Expand Space
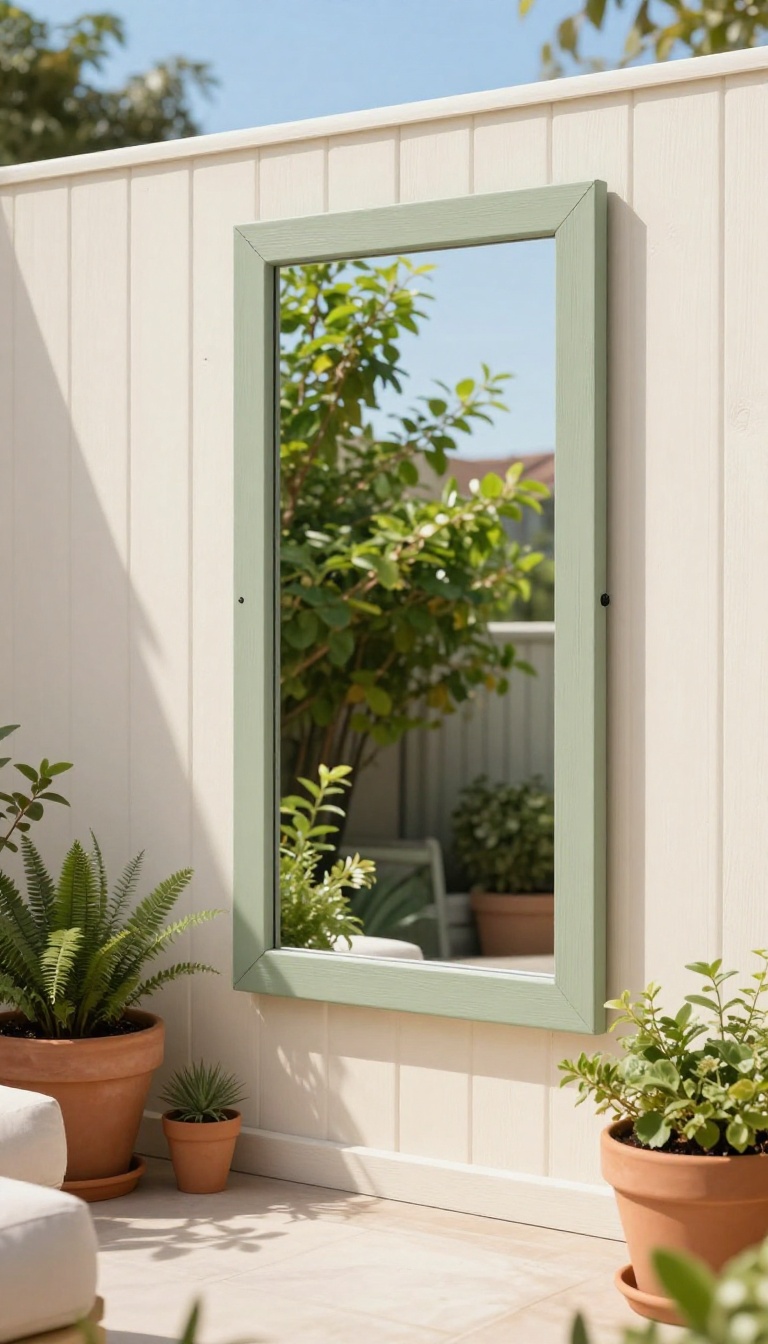
Mirrors aren't just for hallways and bathrooms. Placed outside, they bounce light around and trick the eye into seeing more depth than your yard actually has. Pair that with light-colored walls or fences, and the whole space opens up without moving a single fence post.
The trick works because dark surfaces absorb light and make boundaries feel close. Light surfaces reflect it, so the edges of your yard seem farther away. Mirrors take that a step further by duplicating whatever they face—greenery, sky, or a pretty patio—so your brain reads the reflection as extra space.
Pick The Right Spot For An Outdoor Mirror
Mount a mirror on a side fence or wall where it reflects something worth looking at, like a tree, a planter, or an open stretch of sky. Avoid aiming it at a blank wall or your neighbor's garbage cans. A vertical mirror works well on a narrow side yard because it makes the corridor feel wider.
Just make sure it's secured for wind and made for outdoor use.
Choose Light Colors That Actually Work Outside
Soft whites, warm creams, pale grays, and light sage all reflect daylight without glaring. Paint a fence, a shed wall, or a privacy screen in one of these shades and watch the yard brighten. If you love color, use it on accents like cushions or pots, and keep the big surfaces light.
That balance keeps things from feeling washed out.
Combine Mirrors With Lighting For Evening Impact
Mirrors lose their magic after sunset unless you give them something to reflect. String lights, lanterns, or a small spotlight aimed at a mirror can double the glow and make the yard feel alive at night. Keep the light warm and soft so it feels cozy, not like a parking lot.
A little reflection goes a long way after dark.
5. Create a Focal Point with a Small Water Feature
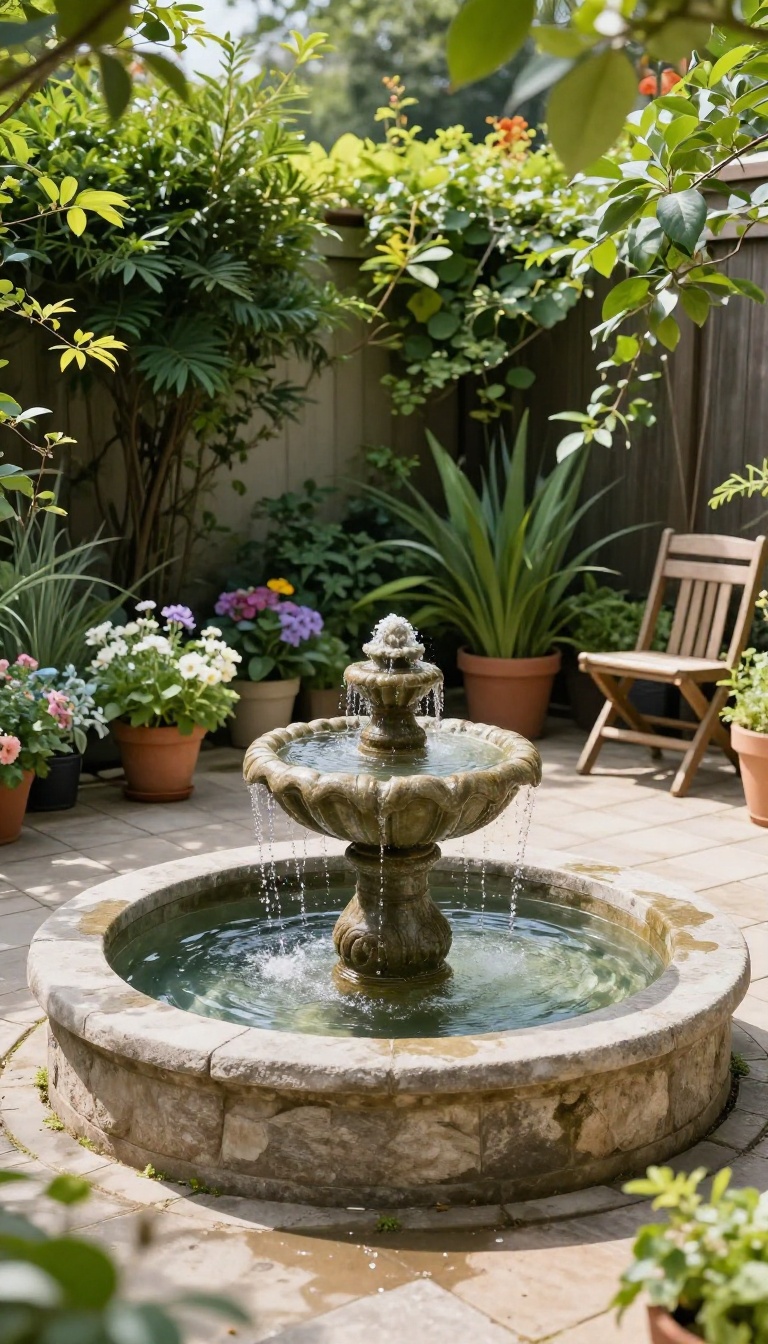
A small yard needs something for the eye to land on. Without a focal point, the space can feel like a random collection of furniture and plants. A compact water feature—like a fountain, birdbath, or tiny pond—gives your yard a clear center of attention.
It also adds a soothing sound that masks traffic noise and makes the space feel more peaceful. Best of all, placing it at the far end of the yard creates a sense of depth, making your small space feel longer and more intentional.
Water features come in all shapes and sizes, so you don't need a huge budget or a lot of space. The key is to choose something that fits your yard's scale and your lifestyle. A simple recirculating fountain can be plugged in and ready in minutes, while a birdbath requires almost no maintenance.
Even a small container pond with a few aquatic plants can work wonders. The goal is to draw the eye and create a calming atmosphere without overwhelming the space.
Choosing The Right Feature For Your Space
Think about the size of your yard and how you want to use it. If you have a tiny patio, a wall-mounted fountain or a tabletop model might be perfect. For a bit more room, a freestanding fountain or a small birdbath on a pedestal can anchor a corner.
If you have young kids or pets, avoid deep ponds and opt for a shallow basin or a fountain with a covered reservoir. Also consider the sound—some people love a gentle trickle, while others prefer a soft splash. Visit a local nursery or listen to online videos to find the sound that relaxes you.
Placement Tips For Maximum Impact
Where you put your water feature matters as much as what you choose. Placing it at the far end of the yard draws the eye outward, making the space feel deeper. If your yard is narrow, put it at the end of a path or sightline.
In a corner, it can soften hard edges and become a cozy destination. Make sure it's visible from your main seating area so you can enjoy it even when you're not right next to it. And keep it away from bedrooms if the sound might keep you up at night.
Low-maintenance Options That Still Look Great
You don't need to spend hours cleaning to enjoy water in your yard. Solar-powered fountains run on sunlight and require no wiring. Birdbaths just need a quick scrub and refill every few days.
Container ponds with a small pump and a few hardy plants like water lilies or iris can stay clear with minimal effort. If you're worried about mosquitoes, add a few mosquito dunks or keep the water moving with a bubbler. These small touches keep your feature looking fresh without turning into a chore.
6. Install a Fold-Down or Wall-Mounted Bar
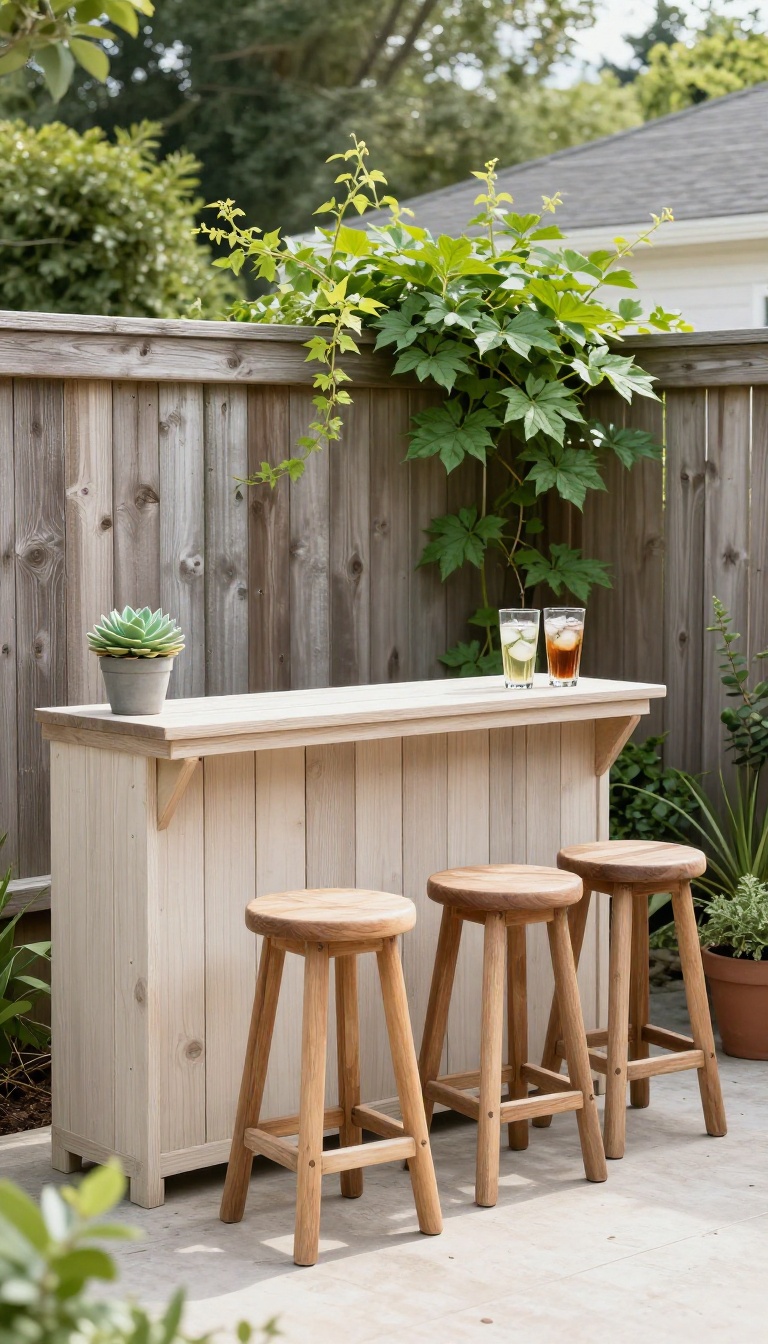
A bar counter doesn't need permanent floor space. A fold-down or wall-mounted version gives you a spot for drinks or a quick bite, then disappears when you're done. Mount it on a fence, shed wall, or the side of your house to keep the ground clear.
It's one of those small-yard moves that feels like a luxury without eating up your patio.
The trick is treating the bar as a vertical feature, not a piece of furniture. When it's down, you get a solid surface for two or three people. When it's up, you get your yard back.
That flip between open and closed is what makes it work in a tight space.
Pick The Right Wall
Look for a flat, sturdy surface that's already part of your yard's structure. A fence panel, the back of a shed, or an exterior house wall all work. Avoid spots that get direct afternoon sun if you plan to use it often.
A little shade makes the bar more comfortable and keeps drinks cooler.
Choose A Simple Mechanism
You don't need a custom build. Basic fold-down brackets from a hardware store can support a wooden or composite countertop. Wall-mounted drop-leaf tables work too, and some come with pre-drilled holes for easy installation.
Just make sure the bracket locks securely when open and folds flat when closed.
Add Seating That Tucks Away
Backless stools or folding chairs slide under the counter when it's not in use. If you want to keep things even tighter, use wall hooks to hang the stools when the bar is folded up. That way, nothing sits on the ground unless you're actually using it.
Keep It Weather-ready
Outdoor-rated wood, composite, or metal will hold up better than standard indoor materials. A quick coat of sealant on wood surfaces helps too. If your bar is mounted on a fence, check that the fence can handle the weight and add a brace if needed.
7. Layer Lighting for Ambiance and Depth
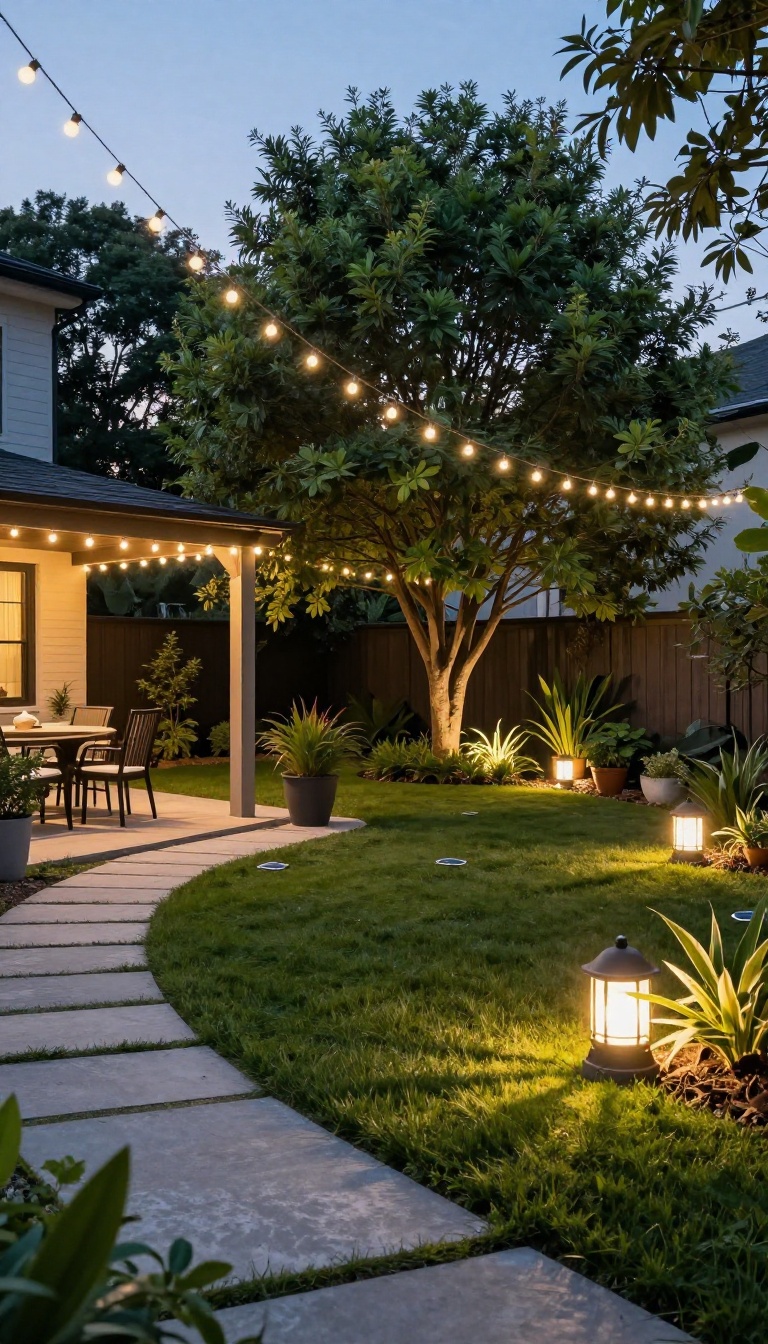
As the sun goes down, your small yard can either disappear into darkness or transform into a cozy retreat. Layering different types of light is the trick. It adds depth, makes the space feel larger, and lets you enjoy your yard well into the evening.
Think of lighting in three layers: ambient, task, and accent. Ambient light gives overall illumination, task light helps you see what you're doing, and accent light highlights features. In a small yard, you don't need many fixtures—just the right mix.
The goal is to avoid a single bright light that flattens the space. Instead, use multiple soft sources at different heights and intensities. This creates shadows and highlights that add dimension, making your yard feel intimate rather than cramped.
Start With String Lights For A Soft Glow
String lights are a small-yard favorite for good reason. They're affordable, easy to install, and instantly add a warm, inviting glow. Hang them overhead in a zigzag pattern across your patio or from a pergola to create a ceiling of light.
Choose warm white bulbs (around 2700K) for a cozy feel. Avoid cool white, which can feel harsh. If you have trees, drape lights through branches for a magical effect.
Just make sure to use outdoor-rated lights and secure them properly.
Guide The Way With Path Lights
Path lights do double duty: they light up walkways and define different zones in your yard. Solar-powered options are great for small spaces because they don't require wiring and automatically turn on at dusk. Place them along the edge of a patio or along a garden path to create a sense of direction.
Space them 6 to 8 feet apart for even lighting. For a softer look, choose fixtures that cast light downward rather than outward.
Add Depth With Uplights And Accent Lights
Uplights are small fixtures placed at the base of a tree, wall, or architectural feature. They cast light upward, creating dramatic shadows and making the space feel taller. In a small yard, even one or two uplights can add a lot of visual interest.
Use them to highlight a favorite plant, a water feature, or a textured wall. Battery-operated LED uplights are easy to place anywhere without cords. Just angle them slightly toward the feature you want to showcase.
Mix And Control For Maximum Impact
The real magic happens when you combine all three layers. Use string lights for ambient glow, path lights for safety and guidance, and uplights for drama. Then, put them on separate switches or smart plugs so you can control the mood.
For example, keep path lights on for safety, but dim or turn off string lights when you want a more intimate setting. Smart plugs let you schedule lights or control them from your phone. This flexibility makes your small yard work for any occasion.
8. Add a Vertical Garden for Privacy and Produce
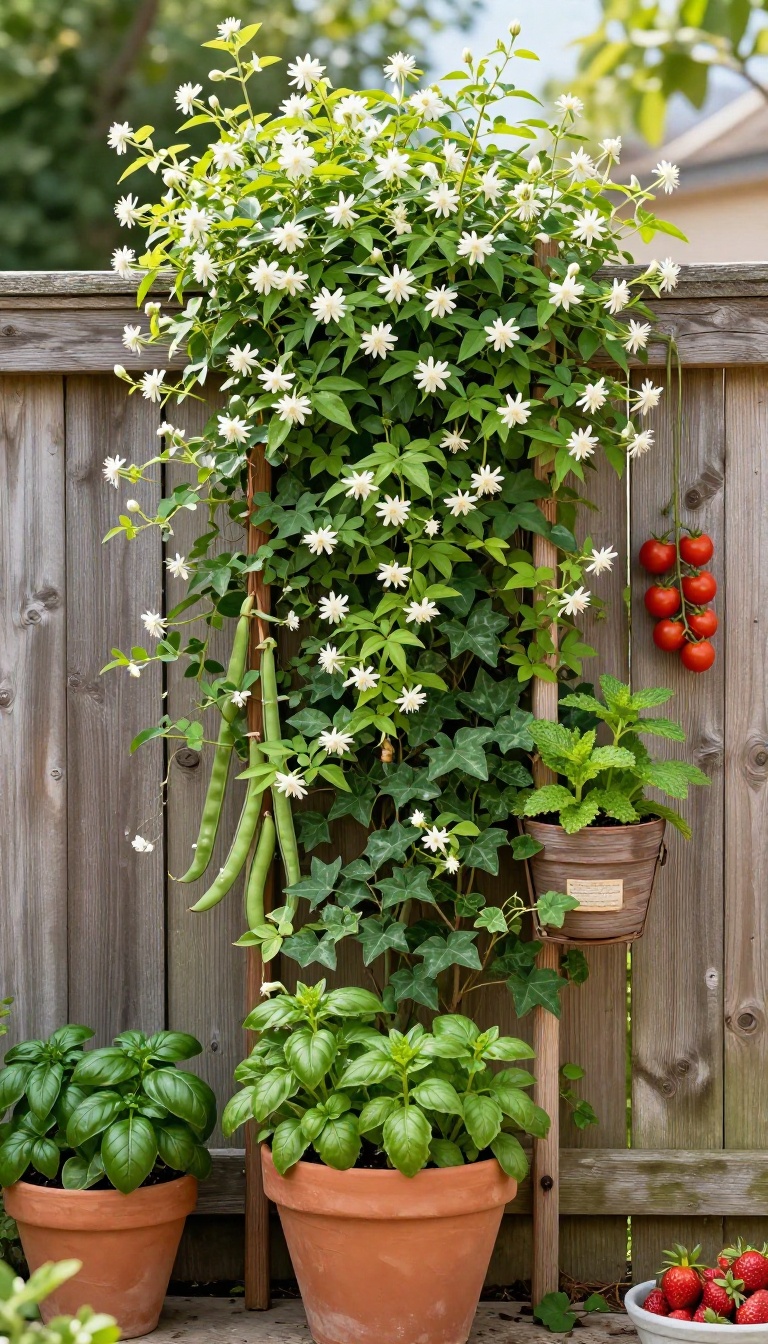
When floor space is tight, look up. A vertical garden turns a blank wall or fence into a living screen that blocks prying eyes and gives you fresh herbs, greens, or tomatoes. You get privacy and a harvest from the same footprint—no extra square footage required.
Start by choosing a structure that fits your style and budget. A simple trellis, a pallet, or a wall-mounted pocket planter all work. The key is to match the support to the plants you want to grow, then place it where it gets the right light.
Pick The Right Structure
Trellises are the classic choice for climbing plants like jasmine, clematis, or beans. They're affordable, easy to install, and come in wood, metal, or expandable styles. Pallet gardens are another option—just sand and seal a pallet, attach landscape fabric, and fill with soil.
For a cleaner look, try a modular wall planter with individual pockets. Each structure has trade-offs: trellises are light but need a sturdy anchor; pallets are heavy but offer more growing space.
Choose Plants That Work Double Duty
For privacy, go for dense, fast-growing climbers like ivy, hops, or climbing roses. They'll create a green wall in a season or two. For produce, mix in edibles that also look good: cherry tomatoes, pole beans, cucumbers, or herbs like basil and mint.
In small yards, combine both—use a trellis for beans and tuck lettuce or strawberries into a pallet's lower tiers. Just remember that edibles need more sun and water than ornamentals, so group accordingly.
Install And Maintain Without Headaches
Anchor your structure securely—especially in windy areas. If you're renting, use removable hooks or freestanding trellises. Watering is the biggest challenge with vertical gardens because they dry out faster.
Drip irrigation or self-watering planters can save you time. Prune regularly to keep plants from getting top-heavy, and check for pests behind leaves. A little upkeep keeps your living wall lush and productive.
9. Incorporate Built-In Seating with Storage
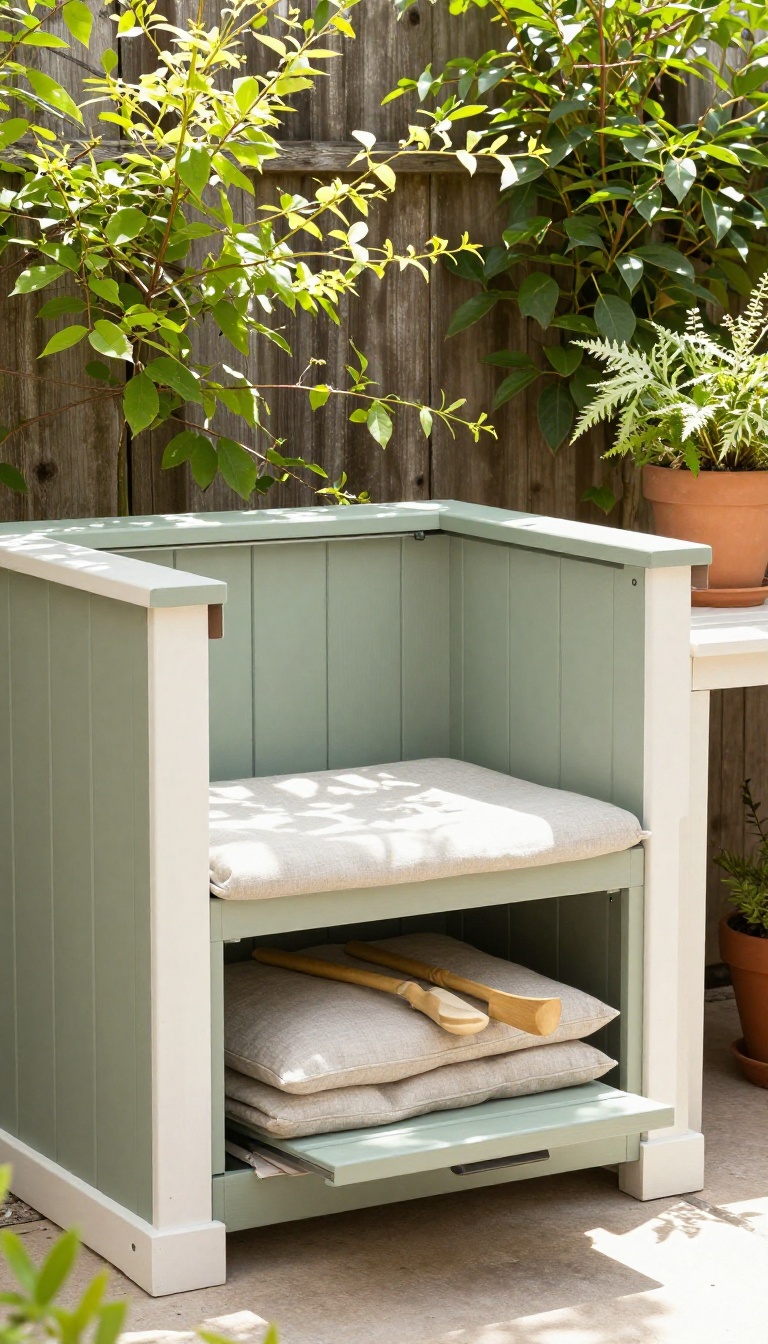
Built-in seating solves two problems at once: it gives you a place to sit without eating up floor space, and it hides the stuff that usually clutters a small yard. Benches that run along a fence or sit under a window turn dead zones into useful spots. Lift the seat and you've got instant storage for cushions, garden tools, or kids' toys.
No more dragging plastic bins out of the garage every time you want to relax outside.
The key is to build the bench where you already have a wall or fence. That way, the seating doesn't stick out into your limited patio area. It just blends into the background until you need it.
You can go as simple or as custom as you want. A basic plywood box with a hinged lid works fine. Or you can dress it up with trim and paint to match your house.
Either way, you're adding function without adding footprint.
Pick The Right Spot
Look for a stretch of fence that gets good shade or a blank wall under a window. That's your sweet spot. Avoid areas where the ground stays wet or where you need clear access to a gate.
Measure the length and depth you can spare. A bench that's 18 to 20 inches deep gives comfortable seating without blocking walkways. If you have a corner, an L-shaped bench can wrap around and create a cozy nook.
Build For Easy Access
Hinged lids are the simplest option. Use piano hinges for a clean look and add a small handle or finger hole to lift the seat. Gas struts can hold the lid open if you plan to store heavy items.
If you don't want to lift a whole bench top, try drawers that pull out from the front. They work great for smaller items and keep you from bending over as much.
Keep It Weather-ready
Use exterior-grade wood like cedar or pressure-treated pine, and seal it every year or two. For the inside, line the storage area with a plastic liner or use weatherproof bins to keep moisture out. Add a few drainage holes in the bottom if you live in a rainy area.
That way, any water that sneaks in won't turn your storage into a swamp.
10. Keep a Flexible Layout with Movable Pieces
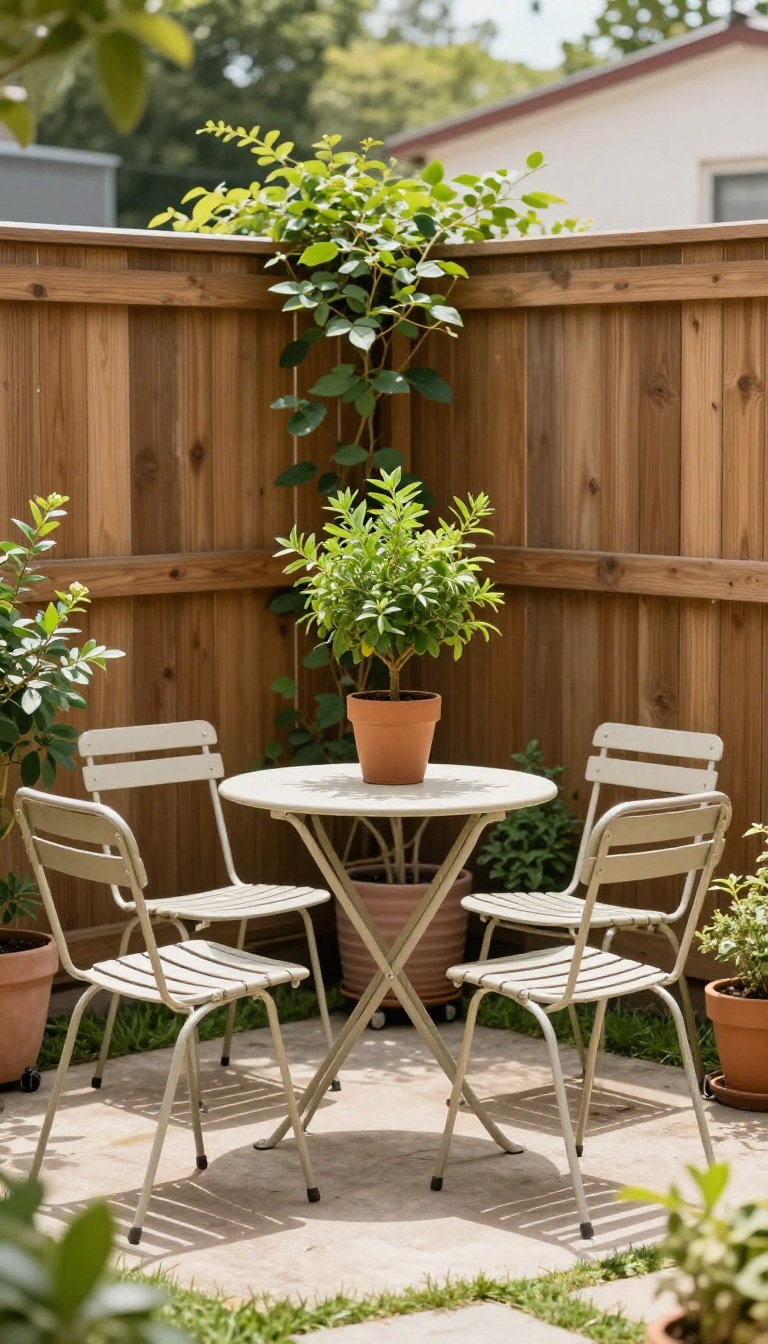
A small yard rarely serves just one purpose. You might want a quiet morning coffee spot, a play area for the kids in the afternoon, and a dinner setup for friends in the evening. Fixed furniture locks you into a single layout, which wastes space when your needs change.
Movable pieces let you reshape the yard in minutes. Lightweight chairs, folding tables, and rolling planters can be shifted, stacked, or tucked away as needed. That kind of flexibility turns a cramped space into a multi-purpose outdoor room.
The goal isn't to fill every corner with furniture. It's to choose pieces that earn their keep by adapting to whatever you're doing that day.
Flexibility starts with what you bring into the yard. If a piece is heavy, awkward to move, or only works in one spot, it's probably not pulling its weight in a small space. Look for items you can lift with one hand or roll with a gentle push.
Think of your yard as a stage. The fixed elements—fence, patio, trees—are your backdrop. Everything else is a prop you can move to set the scene.
That mindset makes it easier to buy smart and avoid clutter. Start by identifying the activities you do most often. Then pick furniture that supports those activities without blocking the others.
A few well-chosen movable pieces will outperform a full set of rigid furniture every time.
Choose Pieces That Move Easily
Lightweight materials make all the difference. Aluminum, resin, and teak are easier to shift than cast iron or concrete. Look for chairs with handles or cutouts, and tables that fold flat or have wheels.
Rolling planters are a game-changer. You can move them to create a privacy screen, open up a play area, or follow the sun throughout the day. Just make sure the casters are sturdy enough for your patio surface.
Avoid anything that requires two people to move. If you can't rearrange it on a whim, you probably won't.
Create Zones That Shift
Instead of permanent zones, think in terms of overlapping uses. A single patio can be a dining area, a lounging spot, and a workspace—just not all at once. Movable furniture lets you switch between these roles without remodeling.
Use a rolling cart as a portable bar or prep station. When it's not in use, roll it against the wall or into a shed. Folding chairs can stack in a corner and come out only when guests arrive.
The key is to keep the floor plan open when you're not using a zone. That openness makes the yard feel larger and more inviting.
Store Smart So You Actually Use It
Flexible furniture only works if it's easy to access. If you have to dig through a crowded garage every time you want a chair, you'll stop bothering. Keep a dedicated spot near the yard for your most-used pieces.
A small weatherproof deck box can hold cushions, folding chairs, and table accessories. Wall hooks or a slim vertical shed can store items without eating floor space. The easier it is to grab and go, the more often you'll reconfigure your yard.
At the end of the day, a quick reset takes five minutes. Stack the chairs, fold the table, roll the planters back into place. You're left with a clean, open space that's ready for whatever comes next.
FAQ
How can I make my small backyard feel bigger?
Use vertical space, light colors, mirrors, and multi-functional furniture. Also, keep a clear line of sight to the back of the yard to create depth.
What are the best plants for a small backyard?
Choose compact or dwarf varieties, herbs, and climbing plants. Vertical gardens and container gardening work well in tight spaces.
How do I zone a small backyard without walls?
Use outdoor rugs, planters, changes in flooring, or low dividers like trellises. These create visual separation without closing off the space.
What furniture works best in a small yard?
Foldable, stackable, or storage-integrated pieces are ideal. Look for benches with storage, nesting tables, and wall-mounted options.
Can I add a water feature to a small yard?
Yes, small fountains, birdbaths, or tabletop water features add ambiance without taking up much room. Just ensure they fit your space and maintenance level.
Conclusion
The payoff shows up fast when you plan for the space you actually have. A small yard stops feeling tight once every corner earns its keep, and you notice it the first evening you sit outside without tripping over anything. Pick one idea that solves your biggest squeeze, live with it for a week, then add the next.
Small yards reward slow, deliberate tweaks, not a rushed weekend. Each small win makes the next one obvious.