11 Small Backyard Design Ideas That Maximize Every Corner
Stand at the edge of a narrow backyard and it is easy to see only what is missing. The lawn is thin, the fence is close, and the patio barely fits a chair and a grill. Then you notice the bare wall behind the shed, the strip of gravel nobody uses, and the corner that collects leaves all winter.
Those overlooked spots are where small yards get interesting. A little planning turns dead space into seating, storage, or a place to grow something.
You do not need a crew or a big budget, just a few smart moves that match how you actually live outside. Below are eleven ideas that squeeze real function out of every corner.
1. Go Vertical with a Living Wall
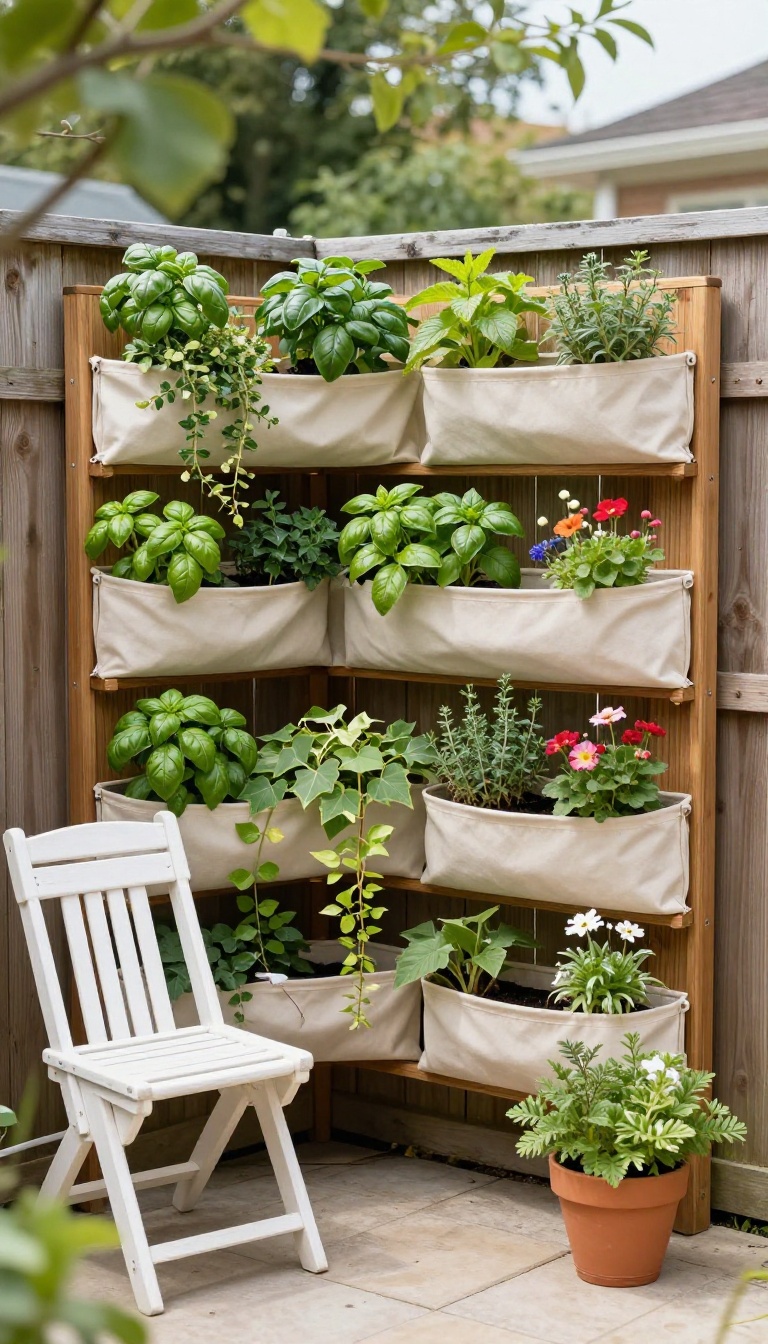
A bare fence or garage wall is wasted square footage. When the ground is spoken for, the smartest move is to build upward. A living wall turns that blank surface into a growing space that costs you nothing in floor area.
The idea is simple. Mount planters, pockets, or a trellis directly to the wall, then fill them with herbs, flowers, or trailing greenery. You get the lush look of a full garden without giving up a single inch of patio or lawn.
It also softens hard edges. A wall of green hides ugly fencing, blocks a bit of noise, and makes a tight yard feel intentional instead of cramped.
Pick Your System
Wall-mounted options range from cheap to custom. Fabric pocket planters hang fast and hold moisture well, while modular plastic or metal panels let you rearrange as plants grow. For a more permanent look, build a simple wooden frame and attach rows of troughs.
If you rent, lean toward freestanding trellises or hook-mounted pots you can take with you. No drilling required. Whatever you choose, check how much weight the wall can handle.
Soil gets heavy once it is wet, so anchor into studs or masonry, not just siding.
Choose The Right Plants
Not everything loves a vertical life. Herbs like basil, mint, and thyme thrive in wall pockets and stay within reach of the kitchen. Trailing plants such as ivy, creeping Jenny, or sweet potato vine spill over the edges and fill gaps fast.
Mix textures so the wall does not look flat. Pair upright growers with cascading ones, and tuck in a few flowers for color. In shady spots, go with ferns, pothos, or hostas.
Group plants by water needs so you are not overwatering one row to reach another.
Keep It Alive
Vertical gardens dry out faster than ground beds because air moves around every pocket. Water more often, or run a simple drip line with a timer so you are not hauling a can up a ladder. Feed lightly every few weeks during the growing season.
Trim anything that starts to block light or crowd its neighbors. A quick monthly check keeps the whole wall looking full instead of patchy.
2. Create a Cozy Corner Nook
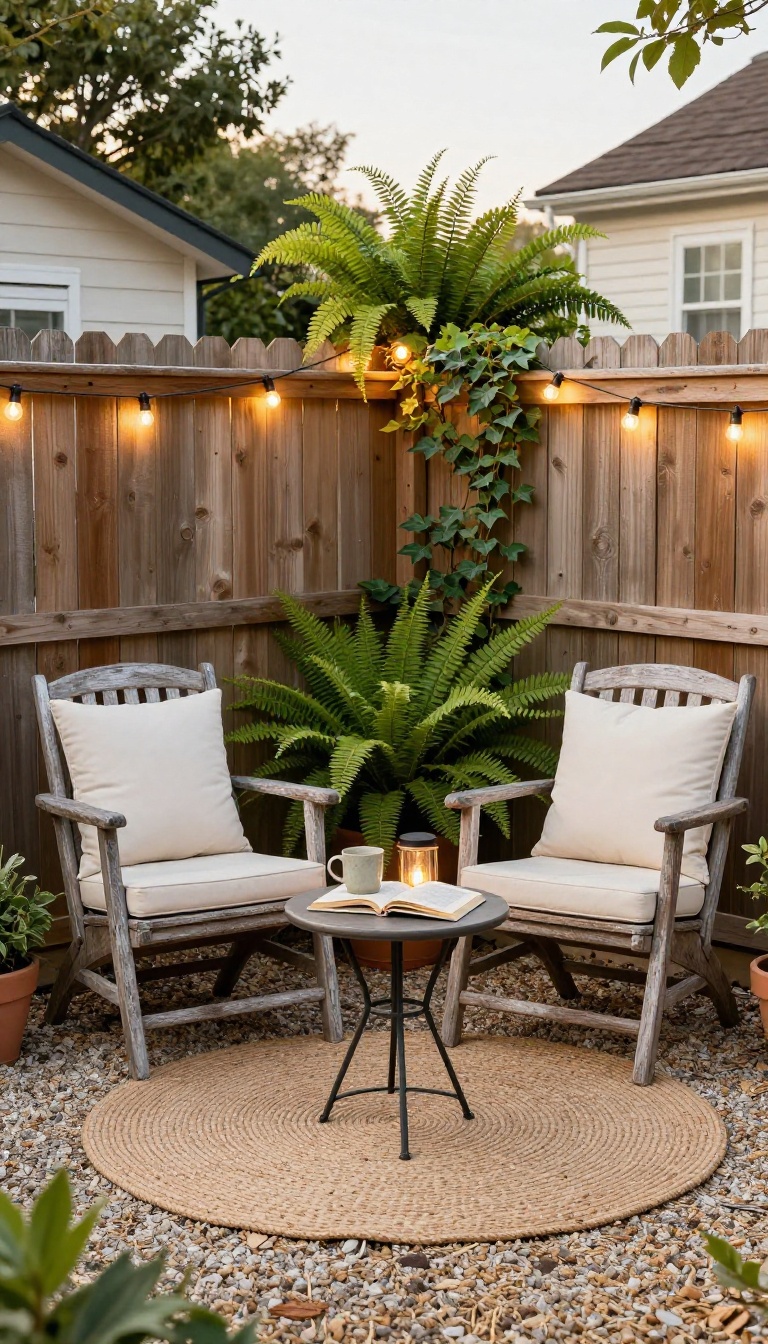
That awkward corner where two fences meet or the side of a shed often becomes a catch-all for dead leaves and forgotten tools. With a little intention, it can transform into the most inviting spot in your yard. A bench or a pair of chairs, a small table, and soft lighting turn unused square footage into a destination you'll actually use.
The key is to treat the corner as a room, not a leftover space. Start by clearing it out and defining the footprint with a small rug, gravel, or pavers. Then layer in seating, a surface for drinks, and lighting that makes it glow after sunset.
Keep the scale tight so it feels cozy, not cramped.
Pick The Right Seating
A built-in bench maximizes space because it hugs the corner and can double as storage. If you prefer flexibility, two lightweight chairs you can move for parties work just as well. Look for weather-resistant materials like teak, powder-coated steel, or all-weather wicker.
Add A Tiny Table
You need just enough room for a cup of coffee and a book. A small bistro table, a ceramic stool, or even a wall-mounted shelf keeps things functional without eating up floor space. If the corner is tight, go vertical with a fold-down table.
Layer In Soft Lighting
String lights zigzagged overhead or a single solar pendant can make the nook feel magical at night. Add a lantern on the table or a few stake lights in the ground for a warm, low glow. Battery-operated candles are a safe, renter-friendly option.
3. Install a Fold-Down Bar or Table
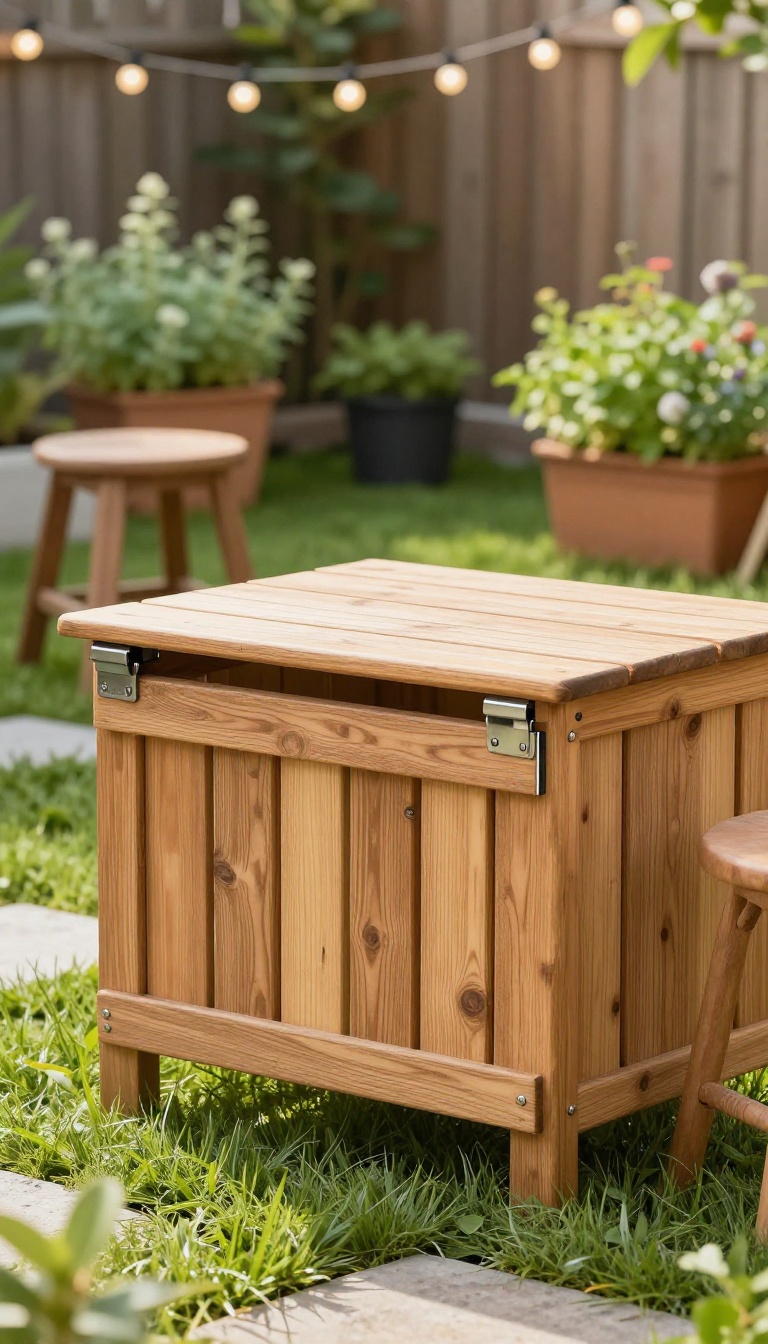
A permanent table eats up floor space even when you're not using it. A fold-down version gives you a spot for drinks, dinner, or laptop work, then disappears against the wall. That means you get the function of a bar or dining surface without sacrificing a single square foot of your yard when it's not needed.
The concept is simple: a hinged tabletop mounts to a wall, fence, or sturdy post, and a pair of folding brackets holds it up when in use. When you're done, you unlatch it and let it drop flat. Most versions stick out just a few inches when folded, so they won't block walkways or bump into your grill.
You can buy a ready-made kit or build one from a piece of exterior-grade wood and heavy-duty hinges. Either way, the footprint stays tiny until you actually need it.
Pick The Right Spot
Look for a wall or fence section that gets used for nothing else. The side of a garage, the back of a shed, or a privacy fence near your seating area all work well. Make sure the surface is solid enough to hold screws and the weight of whatever you'll set on the table.
Avoid spots where the table would block a gate, a hose bib, or a path people walk through daily.
Choose Your Hardware
Folding shelf brackets come in different weight ratings, so match them to your planned use. For drinks and small plates, a basic pair rated for 50 to 100 pounds is plenty. If you want to serve full meals or lean on it, step up to heavier brackets and anchor them into studs or masonry.
Stainless steel or powder-coated steel holds up best outdoors. Add a simple latch or magnetic catch to keep the table from flapping in the wind when it's folded down.
Make It Comfortable
A fold-down table only works if you can actually sit at it. Pair it with two backless stools or a bench that tucks under when not in use. Keep the height around 28 to 30 inches for dining, or 42 inches if you want a standing bar.
Add a small hook nearby for a towel or bottle opener, and you've got a full outdoor bar in a space that looked useless an hour ago.
4. Use Mirrors to Fake More Space
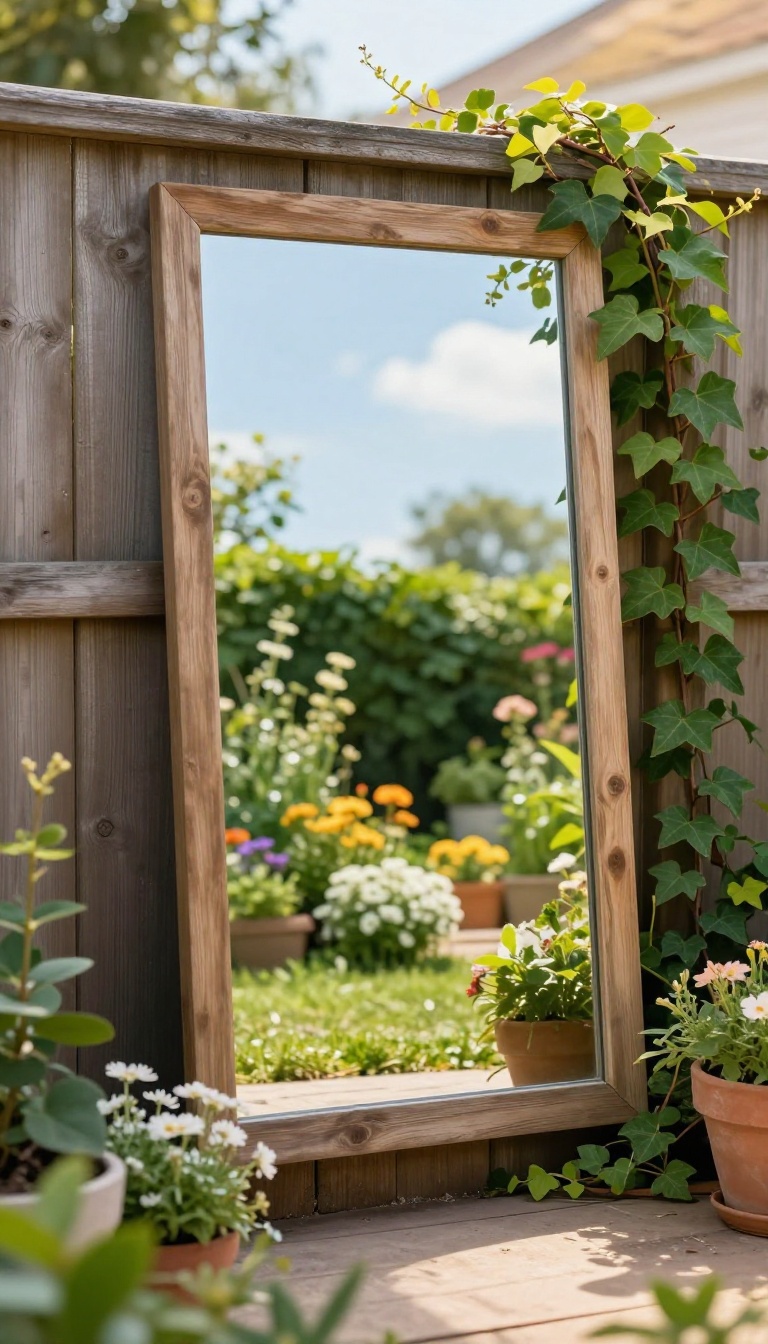
Mirrors do more than check your hair before guests arrive. In a small backyard, they trick the eye into seeing depth that isn't really there. Hang one on a fence or wall, and suddenly the garden looks twice as deep and twice as bright.
The trick works because mirrors reflect light and greenery, two things that make any space feel larger. A well-placed mirror can turn a dark corner into a glowing focal point. It can also bounce a view of your favorite plants around the yard, so you see them from multiple angles.
The result is a yard that feels open and airy, even if it's the size of a postage stamp.
Pick The Right Spot
Place mirrors where they'll catch the most light and reflect something worth looking at. A wall opposite a flower bed works well, as does a fence panel that faces the sun. Avoid spots where the mirror will reflect a plain wall or your neighbor's garbage cans.
You want the reflection to add beauty, not clutter.
Choose Weatherproof Mirrors
Regular indoor mirrors won't survive outside for long. Look for outdoor-rated mirrors made from acrylic or glass with a protective backing. Acrylic is lighter and safer, especially if kids play nearby.
Glass gives a clearer reflection but needs a sturdy frame. Either way, make sure the mirror is sealed against moisture.
Mount Them Safely
A mirror that falls and shatters is a hazard. Attach it securely to a fence, wall, or freestanding frame. Use rust-proof screws and brackets, and consider adding a backing board for extra support.
If you're renting, try a lean-to style that you can move or take with you. Just check that it won't blow over in a storm.
Style It Like Decor
A bare mirror can look odd, so treat it like any other outdoor decoration. Frame it with wood or metal that matches your patio furniture. Hang it at eye level so it reflects the garden, not the sky.
You can even group two or three smaller mirrors for a gallery wall effect. Just avoid placing them where they'll reflect the sun directly into your eyes.
5. Add a Small Water Feature
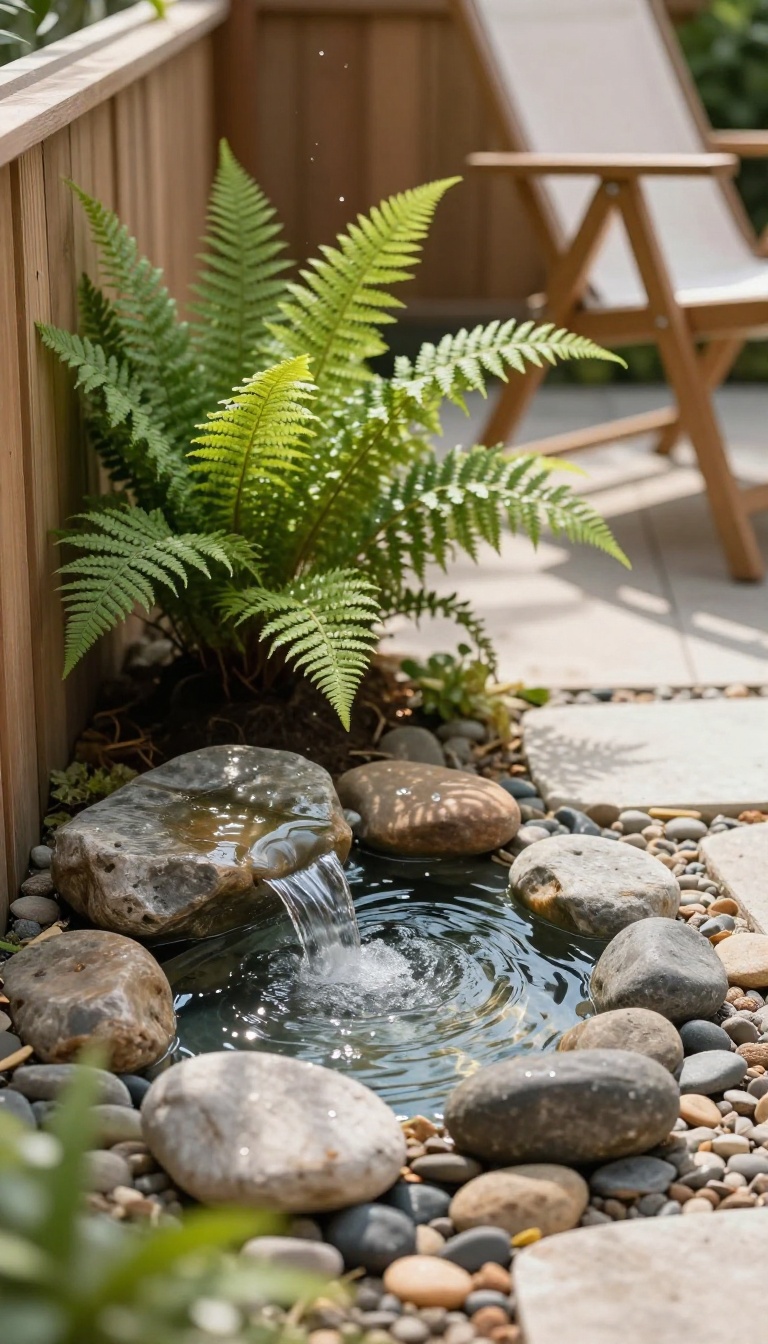
Water changes the way a small yard feels. A tiny fountain or bubbling rock adds a soft, soothing sound that masks traffic noise and makes even a cramped corner feel like a retreat. It also catches the light, drawing the eye exactly where you want it.
The best part? You do not need a pond or a plumber to pull it off. A compact, self-contained feature can sit on a patio, tuck into a flower bed, or fill that odd nook by the fence.
The key is to think small and self-contained. Look for fountains that recirculate their own water, so you only need to top them off every few days. Solar models skip the outlet entirely, while plug-in versions run reliably even on cloudy days.
Place your feature where you can see and hear it from your favorite seat, and where a power source is within reach if needed. A little splash is all it takes to turn a forgotten corner into the spot everyone gravitates toward.
Pick The Right Spot
Corners and dead-end spots work best because the sound bounces off nearby walls and fences, making the feature feel bigger than it is. Keep it close to a seating area so you actually enjoy it, but not so close that the splash lands on your lap. If you have a bare wall, a wall-mounted fountain saves floor space and adds vertical interest.
Just make sure the surface is level and sturdy enough to hold the weight.
Choose A Style That Fits
Bubbling rocks blend into rock gardens and gravel beds, while tiered fountains bring a classic touch to a patio. For a modern look, go with a simple cylinder or sphere that recirculates water over a smooth surface. Ceramic and resin options come in colors that match almost any palette, and they are light enough to move if you change your mind.
Whatever you pick, keep the scale in check—a giant fountain in a tiny yard feels crowded, not calming.
Keep It Running Smoothly
A small feature needs very little upkeep. Top off the water every few days, especially in summer, and clean the pump intake monthly to prevent clogs. If algae becomes a problem, add a few drops of fountain treatment or place the feature in partial shade.
During freezing months, drain the water and store the pump indoors. With that simple routine, your fountain will hum along for years.
6. Choose Multi-Functional Furniture
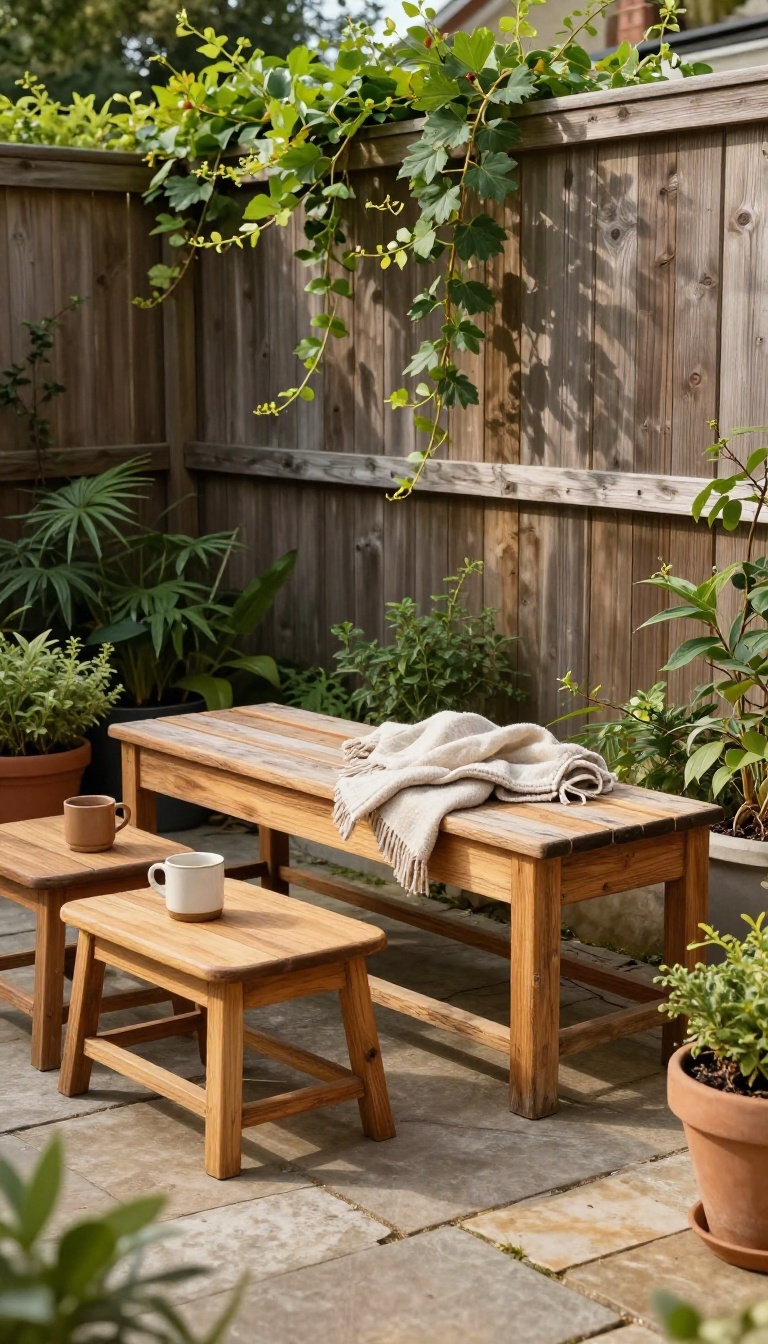
Every piece of furniture in a small yard should earn its keep. If a bench only seats people, it's taking up space that could also store cushions or hold drinks. Multi-functional pieces solve that problem by doing two or three jobs at once, so you get more use from every square foot without adding clutter.
Think about how you actually use your yard. You might need seating for a party one day, a quiet spot for coffee the next, and a place to stash gardening tools all week. Instead of buying separate items for each scenario, look for furniture that shifts with you.
The right picks can turn a tight patio into a flexible outdoor room.
Storage Benches That Pull Double Duty
A storage bench gives you a place to sit and a hidden spot for things you don't want lying around. Look for one with a lift-up lid or drawers underneath. Fill it with throw blankets, grill tools, or kids' toys, then close it up and enjoy a clean-looking patio.
Weather-resistant resin or teak holds up best outdoors.
Nesting Tables For Flexible Surfaces
Nesting tables tuck together when you're not using them, then pull apart when guests arrive. Use one as a side table for your morning coffee, then separate them to create a drink station or a spot for snacks. They're lightweight, so you can move them around the yard as the sun shifts.
Choose a material that matches your other outdoor pieces.
Chairs That Convert To Loungers
A chair that reclines or flips into a lounger replaces two pieces of furniture with one. During the day, lay it flat for sunbathing or reading. In the evening, sit it upright for dinner or conversation.
Folding styles store easily against a wall or in a shed when the season ends. Just check the weight limit and cushion thickness before you buy.
7. Lay a Diagonal Path
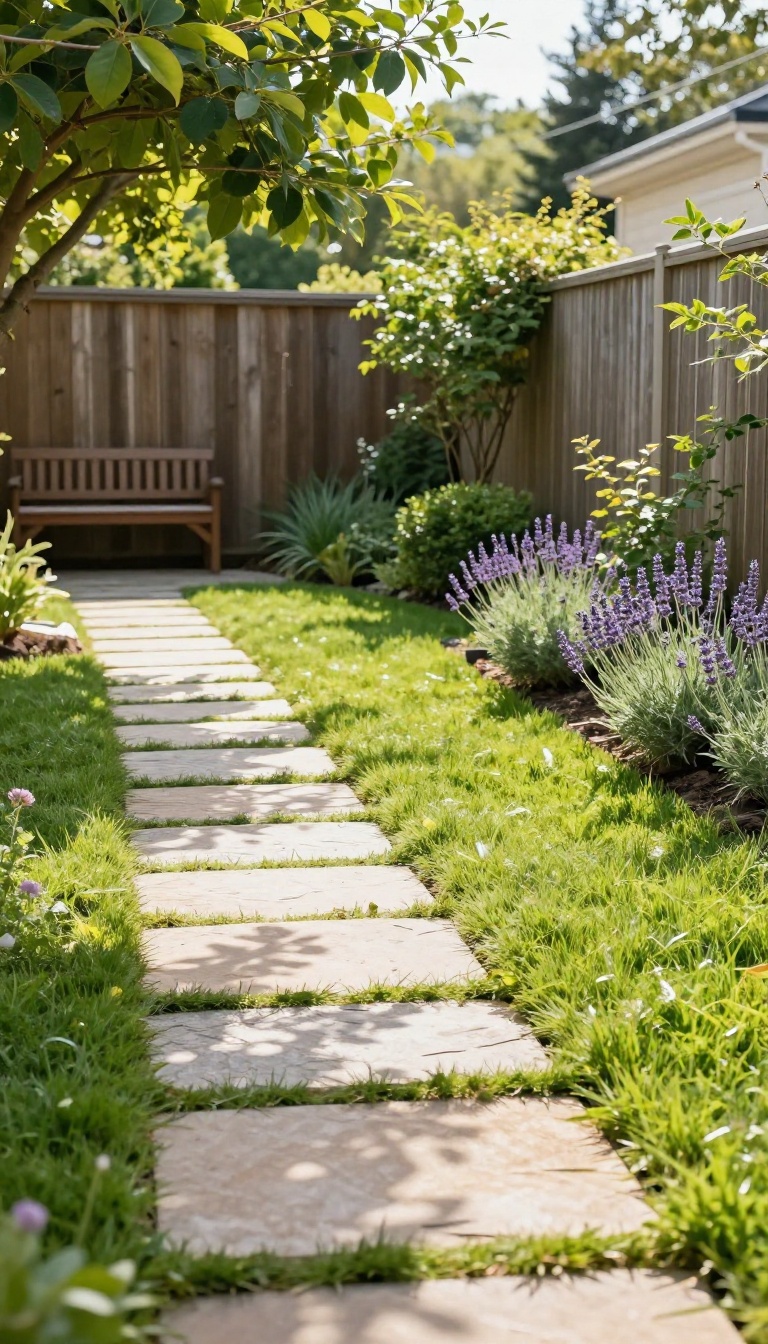
A straight path from the back door to the fence tells your eye exactly how short the yard is. Turn that same path on an angle and the view stretches across the space instead of dead-ending. The trick costs almost nothing and works in yards of any shape.
Diagonal lines read as longer than they are because your eye travels corner to corner rather than straight ahead. That extra split second of travel is what makes a tight yard feel deeper. You are not adding square footage, just borrowing the illusion of it.
This is one of the few design moves that pays off the moment you finish it. No waiting for plants to fill in, no maintenance routine. Lay it once and the yard reads bigger every time you step outside.
The best diagonal paths start where you already walk. Watch how you cross the yard for a week before you dig anything up. Most people cut a soft curve from the door to the grill or the gate without thinking about it.
That worn line is your path, you just have not paved it yet. Once you know the route, angle it toward the farthest visible corner. A path that ends at a fence panel stops the eye cold.
A path that points at a tree, a bench, or an opening keeps the eye moving. That movement is the whole trick. Width matters more than most people expect.
Eighteen inches works for a single walker, but thirty-six inches lets two people pass and makes the path feel like a real feature. If space is tight, keep it narrow and lean on the angle for impact.
Pick Your Material
Stepping stones set on the diagonal are the cheapest version and the easiest to adjust later. Space them so your natural stride lands on each one, roughly two feet apart for most adults. Gravel works too, but it migrates into grass and beds over time.
If you want a hard edge, concrete pavers or brick give you a crisp line that holds up through winter. Whatever you choose, keep the joints tight so weeds do not turn your path into a project.
Make The Angle Do The Work
A path running corner to corner can double the apparent depth of a narrow yard. Aim it at the longest sightline available, even if that means starting a few feet off the door. A slight curve reads more natural than a hard diagonal and hides the fact that you are manipulating the view.
If your yard is wider than it is deep, run the path across the width instead and let the eye travel sideways.
Tie It To The Rest Of The Yard
A diagonal path looks intentional when it connects two real destinations, like the patio and the compost bin. Plant low groundcover along the edges so the line stays visible without looking bare. Keep taller plants at the ends of the diagonal, not the middle, or they will block the view you worked to create.
A small light or a single piece of art at the far end gives the eye somewhere to land.
8. Plant in Layers
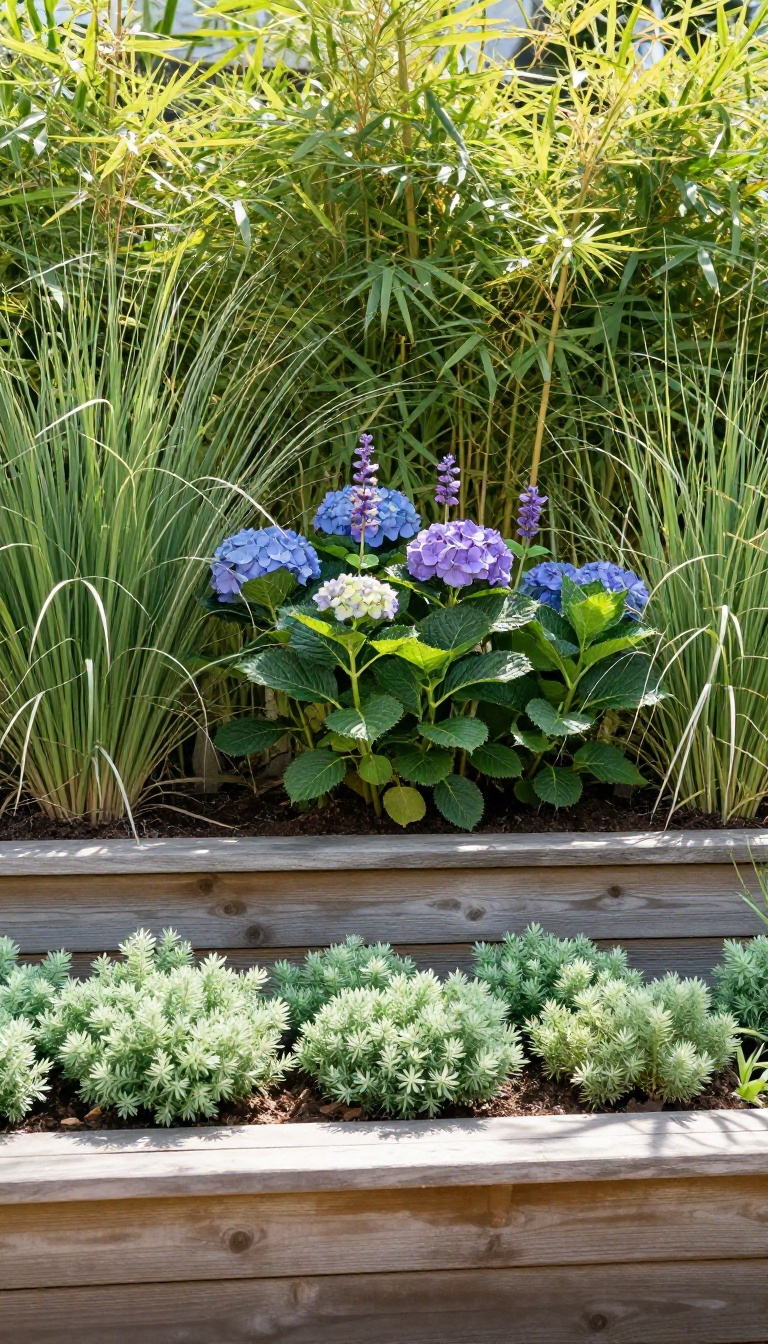
Layering plants is like stacking a good sandwich—each level adds flavor and substance without spreading out. In a small yard, you don't have the luxury of wide beds, so you go vertical. Tall plants form a backdrop, medium ones fill the middle, and low growers carpet the front.
This trio creates depth, blocks nosy neighbors, and makes your space feel lush, not cramped.
The trick is to think in tiers, not rows. Start with the tallest plants against a fence or wall—they set the stage. Then add mid-size plants that bridge the gap.
Finally, tuck low spreaders at the base to cover bare soil. This approach works in any climate and fits even a two-foot-wide strip.
Pick Your Tall Backdrop
Go for vertical interest with plants that reach six feet or more. Clumping bamboo, arborvitae, or tall grasses like miscanthus work well. They screen out the world and give your yard a green wall.
Just check the mature width—some spread wide, so choose narrow varieties for tight spots.
Fill The Middle Ground
Medium plants, around two to four feet tall, add body. Think hydrangeas, salvia, or ornamental peppers. They soften the transition between tall and low.
Plant them in loose drifts, not single file, so they look natural. This tier is also where you can sneak in edibles like blueberries or rosemary.
Carpet The Front
Low growers—under a foot—knit everything together. Creeping thyme, sedum, or sweet alyssum spill over edges and suppress weeds. They also keep soil cool and moist.
Use them to edge a path or fill gaps between stepping stones. Bonus: many are fragrant or attract pollinators.
9. Hang String Lights for Ambiance
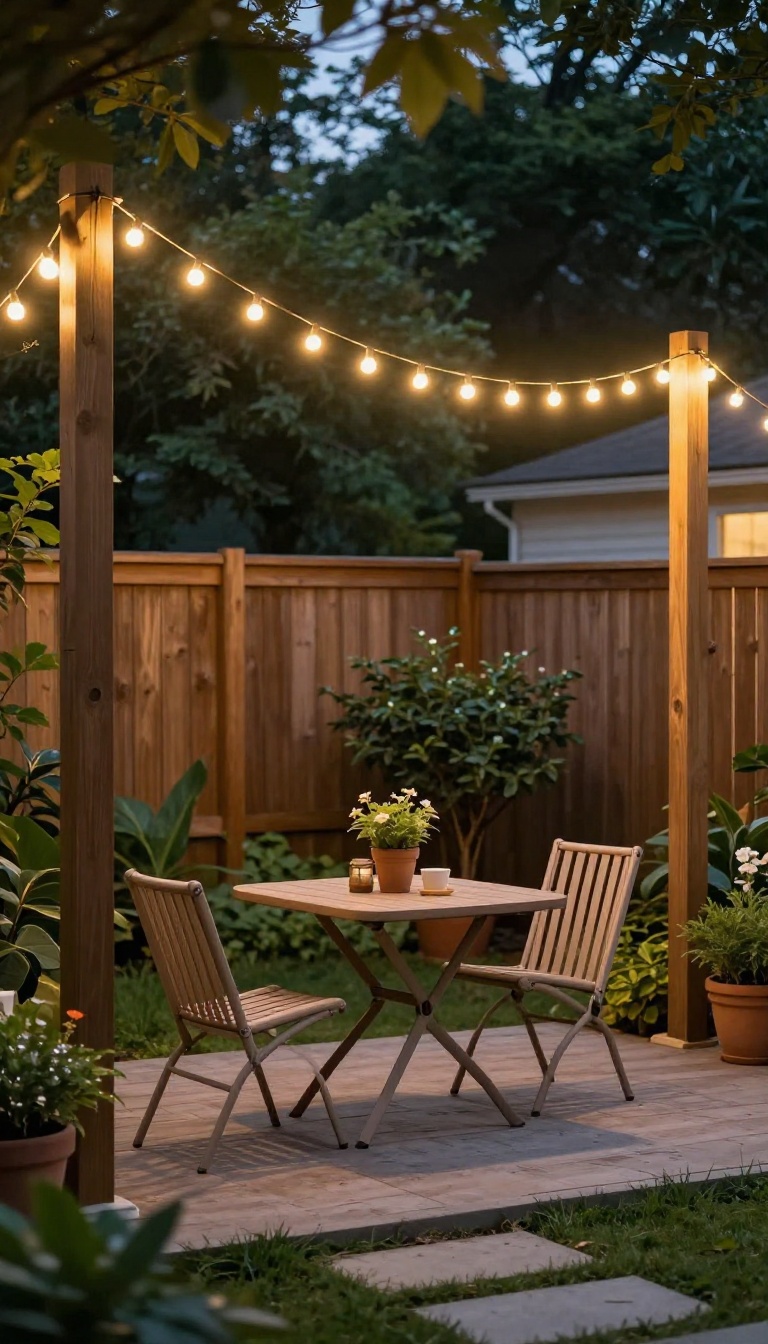
String lights do more than make a backyard look pretty. They pull the eye upward, soften hard edges, and turn a cramped patio into a room you actually want to sit in after sunset. In a small yard, that overhead glow can double your usable hours without adding a single square foot of floor space.
The trick is to treat lights as part of the structure, not an afterthought. Run them along the fence, across the top of a pergola, or zigzag them between two posts. The pattern you choose changes how the space feels, so it is worth a few minutes of planning before you climb a ladder.
Pick The Right Bulbs
Warm white bulbs in the 2200K to 2700K range give that soft, golden glow most people want. Avoid cool white or bright daylight bulbs, which make a small yard feel like a parking lot. If you want a playful touch, mix in a few round globe bulbs or vintage Edison-style ones, but keep the overall color consistent.
Map Your Anchors First
Before you buy anything, walk the yard and find your anchor points. Fence posts, tree branches, pergola beams, and the edge of a shed all work. Measure the distances so you know how many strands you need.
A simple zigzag between two opposite corners creates the illusion of a wider space, while a single straight line along one fence feels cleaner and more modern.
Hang Them Safely And Simply
Use outdoor-rated lights and extension cords, and keep connections off the ground where water can pool. Cup hooks or screw-in eye hooks are cheap and easy to install on wood or vinyl. For a renter-friendly option, try adhesive clips made for outdoor use.
Leave a little slack between anchors so the lights can sway without pulling tight.
Layer With Other Light
String lights alone can leave the ground level too dark. Add a few solar path lights or a small lantern on the table to fill in the lower half of the space. A dimmable plug or smart plug lets you soften the glow as the evening goes on, which keeps the mood relaxed instead of harsh.
10. Incorporate a Tiny Deck or Platform
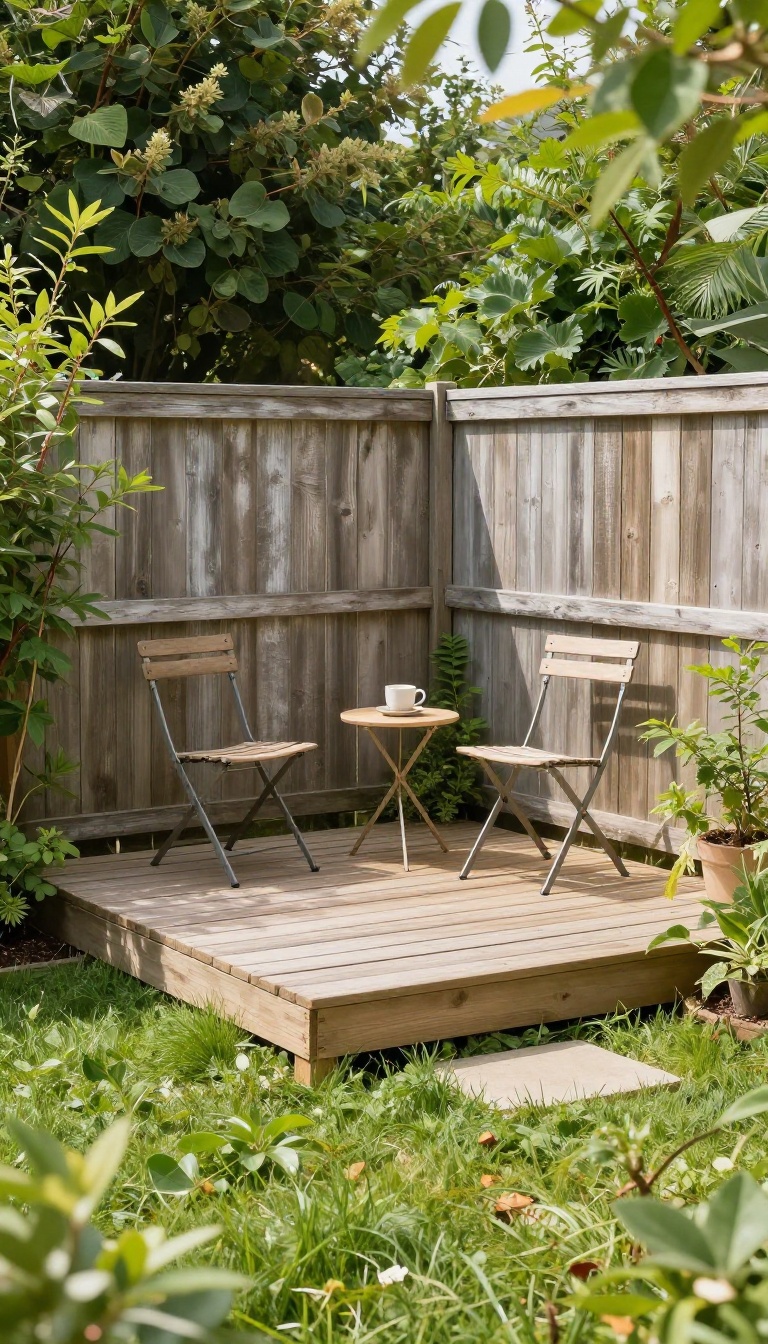
A tiny deck or platform can turn an awkward corner into a destination. It gives you a defined spot to sit, sip coffee, or read a book without sprawling furniture. Best of all, the space underneath doesn't have to go to waste.
Think of a small raised deck as a stage for your backyard. It lifts you slightly above the ground, which adds a sense of separation from the rest of the yard. That subtle height difference makes even a compact area feel intentional.
You don't need a lot of square footage. A platform that's just big enough for two chairs and a side table can work wonders. And because it's raised, you can use the space below for storage or even a hidden cooler.
Pick The Right Spot
Look for a corner that's flat and gets decent light. A spot next to a fence or under a tree often works well. Avoid low areas that stay wet after rain, since moisture can rot wood over time.
Size It For Real Life
Measure how you'll use it. If it's just for morning coffee, a 4×4-foot platform is plenty. For lounging with a friend, aim for at least 6×6 feet.
Keep it proportional to your yard so it doesn't overwhelm the space.
Use The Space Below
Build the deck high enough to slide storage bins underneath. You can stash cushions, gardening tools, or kids' toys out of sight. Just leave a small access panel or use removable boards for easy reach.
Materials That Last
Pressure-treated wood is affordable and tough. Composite decking costs more but needs less upkeep. For a budget-friendly option, consider cedar or redwood, which naturally resist rot and insects.
11. Use Containers as Design Elements
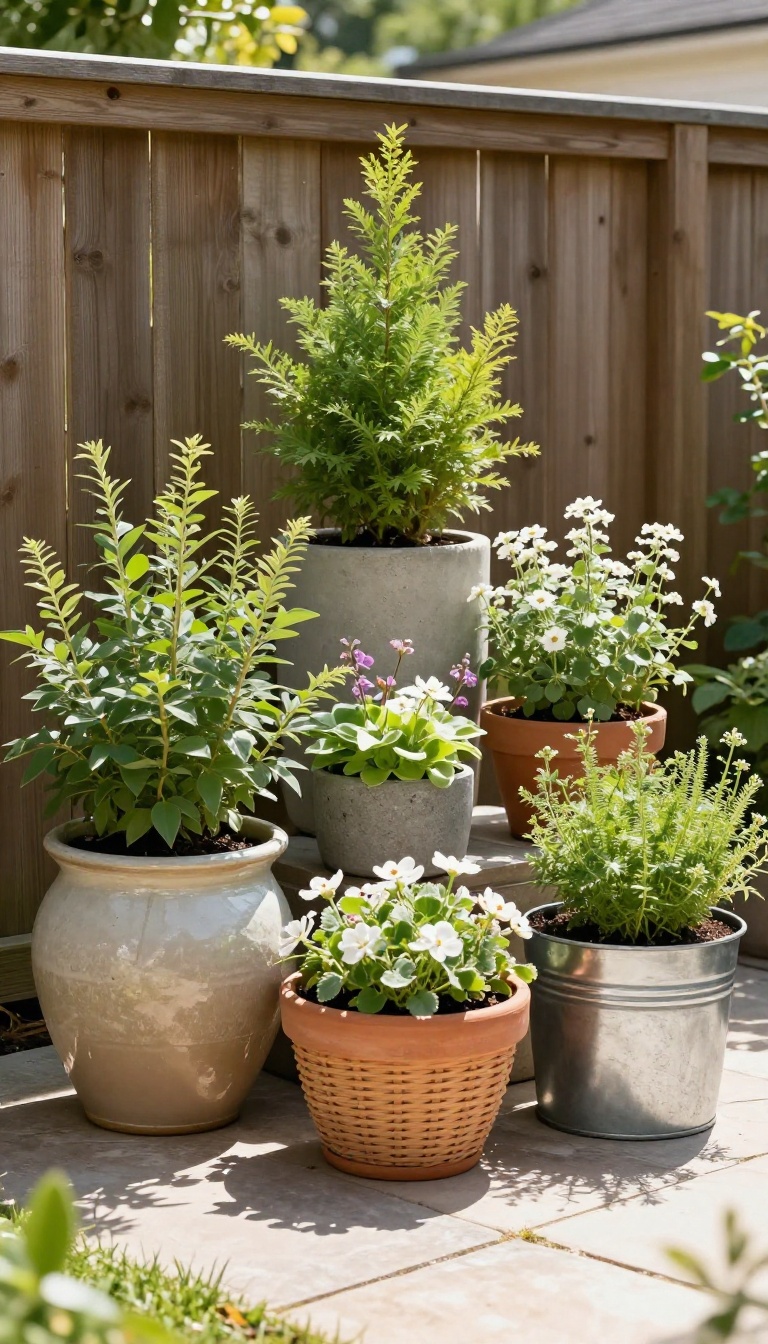
Pots and planters often get treated as afterthoughts—something to fill a gap or hold a plant you bought on a whim. But in a small backyard, containers can be the main event. They add color, texture, and height without touching the ground, and you can rearrange them whenever the mood strikes.
Grouping containers is where the magic happens. A single pot looks lonely, but three or five clustered together create a focal point that draws the eye and makes the space feel intentional. Mix heights, sizes, and materials—a tall ceramic, a low bowl, a woven basket—so the group has rhythm.
You can move them around to block a view, define a seating area, or follow the sun. And when the seasons change, swap out the plants without digging up the yard.
Play With Height And Scale
A tall planter can act like a column, adding vertical interest without a tree. Pair it with lower pots to create a staircase effect. This works especially well in corners where a single flat pot would disappear.
Just make sure the tallest pot is stable and not so big it overwhelms the space.
Mix Materials For Texture
Terracotta, glazed ceramic, concrete, metal, and wood all bring different vibes. Combining a few materials keeps the grouping from looking like a matching set from the big-box store. A shiny glazed pot next to a rough concrete one creates contrast that feels collected over time, not bought in one trip.
Move Them Around
The best part of containers is flexibility. Roll a heavy pot on a plant caddy or keep lightweight ones handy to shift. Move a blooming pot to the patio when you're entertaining, then tuck it back by the fence.
This lets you change the look of your yard without spending a dime.
FAQ
How can I make my small backyard feel bigger?
Use vertical space, mirrors, and diagonal lines to create depth. Light colors and multi-functional furniture also help reduce visual clutter.
What are the best plants for a small backyard?
Choose compact or dwarf varieties, herbs, and climbers. They thrive in containers and take up little ground space.
How do I add privacy to a small backyard?
Vertical gardens, tall planters, and trellises with climbing plants provide privacy without sacrificing space.
Can I have a seating area in a tiny backyard?
Yes, use fold-down benches, small bistro sets, or corner nooks to create a comfortable spot without overcrowding.
What lighting works best for small backyards?
String lights, solar path lights, and lanterns add ambiance without needing outlets. They also make the space feel larger at night.
Conclusion
You don't have to tackle every idea on this list. Pick the one that fixes your most obvious headache, whether that's a bare fence line, a dead corner by the shed, or a patio that never gets used. Try it this weekend and see how the space feels.
Then wait.
Live with it for a week or two before adding the next piece. Small yards reward slow, deliberate moves, not a frantic Saturday of drilling and planting. Each fix tells you what's still missing, and that's how a cramped backyard turns into one that actually works.