15 Backyard Party Ideas for Adults with Stylish Details
Throwing a backyard party for adults shouldn't require a second mortgage or a team of event planners. With a few smart tweaks, you can make your outdoor space feel intentional and inviting.
The key is focusing on details that do double duty: they look good and make the party easier to run. Below are 15 ideas that blend style with real-world practicality.
Each one is designed to work in a typical backyard, whether you have a tiny patio or a sprawling lawn. Pick a few that fit your vibe and budget, and you're set for a gathering that feels effortlessly cool.
1. String Lights and Lanterns for a Warm Glow
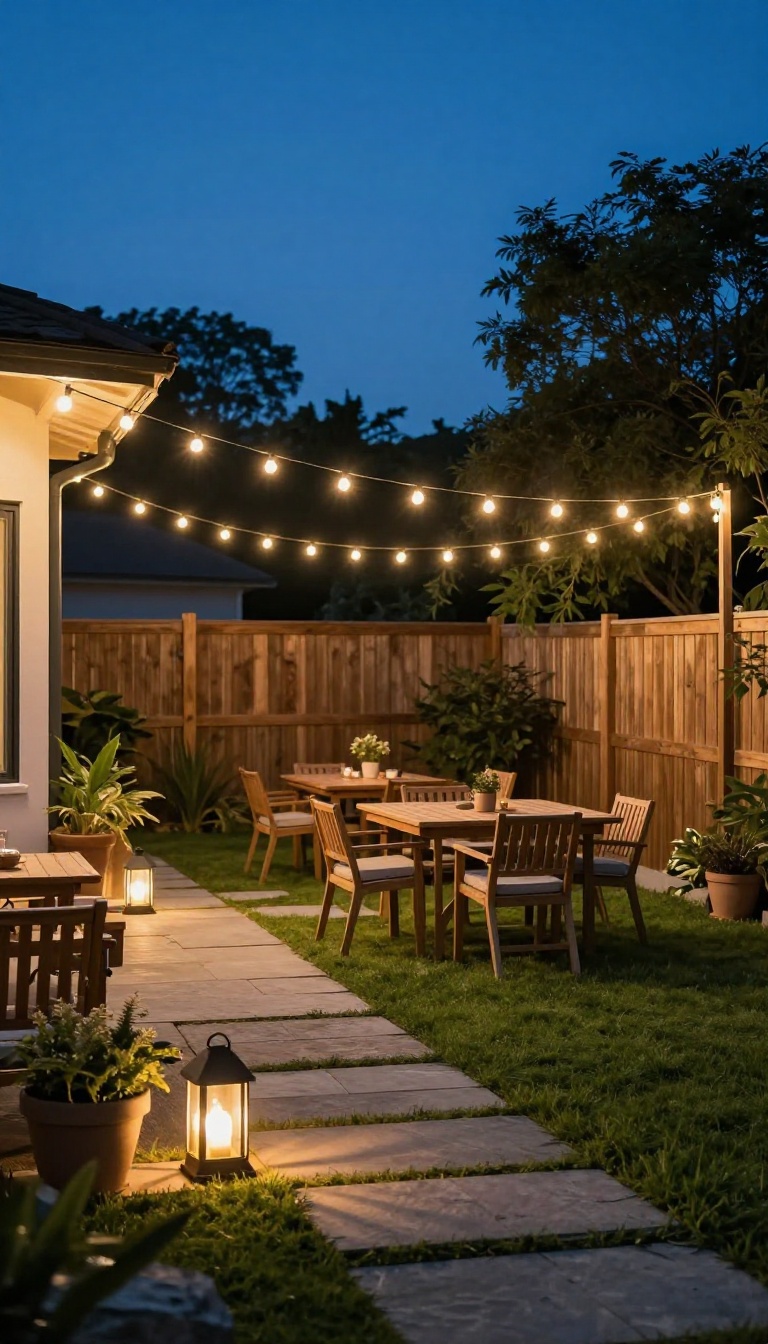
Lighting sets the mood before anyone takes a bite of food or grabs a drink. Overhead string lights turn a plain patio into something that feels intentional, and a few lanterns on the ground add depth without much effort. The best part is how low-maintenance this setup is.
Hang the strands once, plug them in, and the whole yard stays inviting from the first guest to the last.
Warm-white bulbs beat harsh white ones every time. They flatter skin tones, make food look better, and give the space a soft, golden feel that cool LEDs just can't match. You don't need a professional rig either.
A couple of tall hooks, some zip ties, and a free afternoon are usually enough to get a clean, even look across most backyards.
Hanging Without The Headache
Run lights from the house to a tree, then across to a fence post, creating a loose canopy over the main gathering area. Keep strands about eight to ten feet high so tall guests clear them easily. Use tension wire or heavy-duty hooks for long spans, and leave a little slack so the line doesn't sag awkwardly in the middle.
A dimmer plug lets you dial the brightness down as the night goes on.
Lanterns That Pull It Together
Scatter a few floor lanterns along walkways, near the drink station, and beside seating clusters. Varying heights keeps it from looking like a store display. Battery-powered or solar lanterns save you from hunting for outlets.
Stick to warm bulbs and simple shapes so they read as classy rather than cluttered.
Timing And Practical Touches
Turn the lights on about thirty minutes before guests arrive so your eyes adjust and you can fix any dark spots. Add a few citronella candles nearby to keep bugs from crashing the party. Wrap the cords in outdoor-safe tape or run them along fences to avoid tripping hazards.
A small power strip near the outlet keeps everything on one switch.
2. A DIY Sangria or Cocktail Station
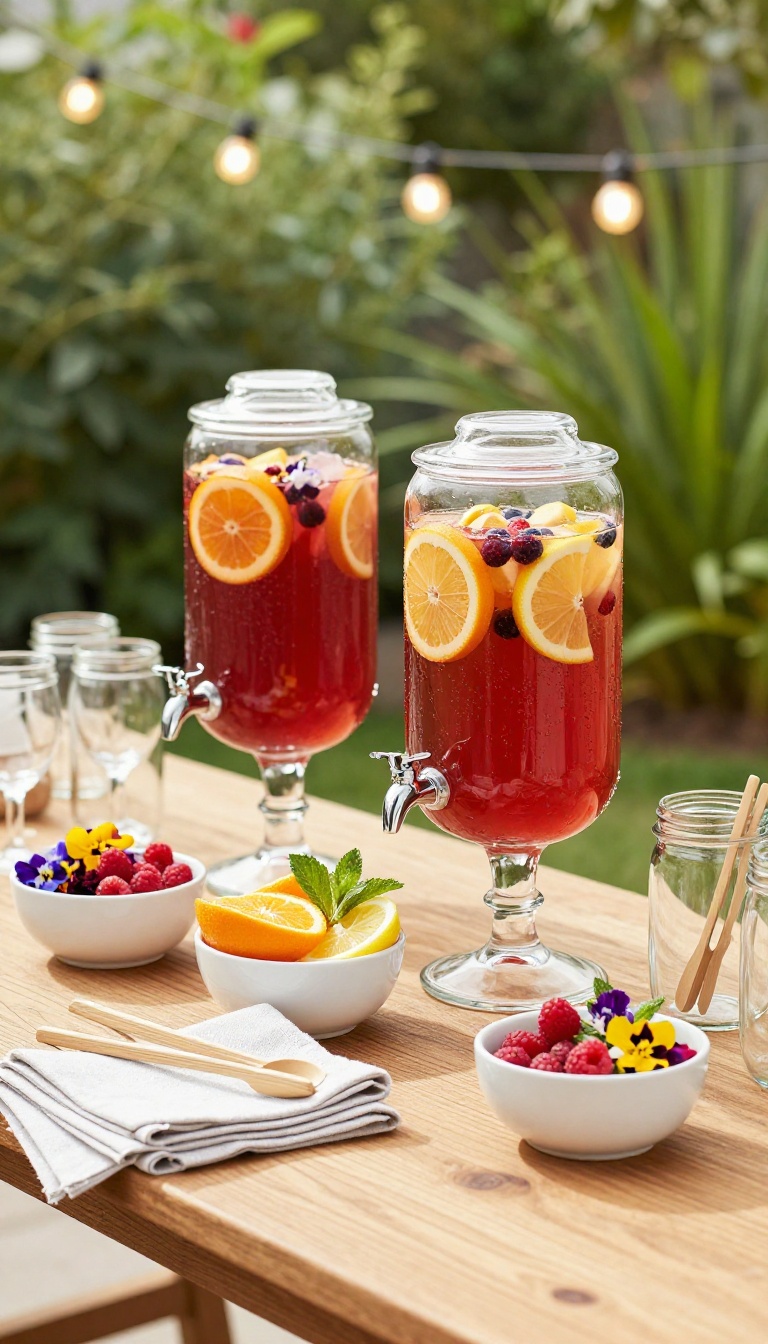
A self-serve drink station takes you out of bartending duty and gives guests something to gather around. Set out a big batch of sangria or a signature cocktail, plus fresh fruit and garnishes, and let people build their own glass. It looks intentional, feels generous, and keeps the party moving without you stuck behind a table.
The setup doesn't need to be complicated. A sturdy table, a couple of large glass dispensers, and a few bowls of fruit are enough to make it feel curated. The trick is choosing a base drink that holds up well over ice and doesn't require shaking or measuring.
Sangria and batch cocktails are perfect because you can mix them ahead of time and refill as needed.
Pick A Base That Scales
Go with a red or white sangria, a big pitcher of margaritas, or a simple rum punch. Anything that tastes good cold and can sit for an hour without separating works. Mix it in a large drink dispenser with a spigot so guests can pour themselves.
Add a ladle for fruit chunks and a small sign with the ingredients so people know what they're drinking.
Set Up A Garnish Bar
Fresh fruit does double duty: it flavors the drink and makes the station look styled. Fill small bowls with citrus wheels, berries, mint sprigs, and maybe some edible flowers. Add a few cocktail picks or small tongs so people can grab what they want without making a mess.
A stack of cloth napkins nearby keeps things tidy.
Choose Glassware That Fits The Vibe
Skip the red solo cups if you want a polished look. Mason jars, stemless wine glasses, or coupe glasses are affordable and easy to find. Set them on a tray with a small bucket of ice and a few bottles of sparkling water for mixing.
A galvanized tub or vintage crate works as a stylish cooler for extra drinks.
Keep It Self-serve And Stress-free
Print a simple menu card with the drink name and ingredients. Place a small trash bowl for used fruit and napkins. If you're worried about guests over-pouring, pre-batch the cocktails in individual dispensers or use a measured pour spout.
The goal is for you to enjoy the party too, not play bartender all night.
3. Mix-and-Match Outdoor Seating
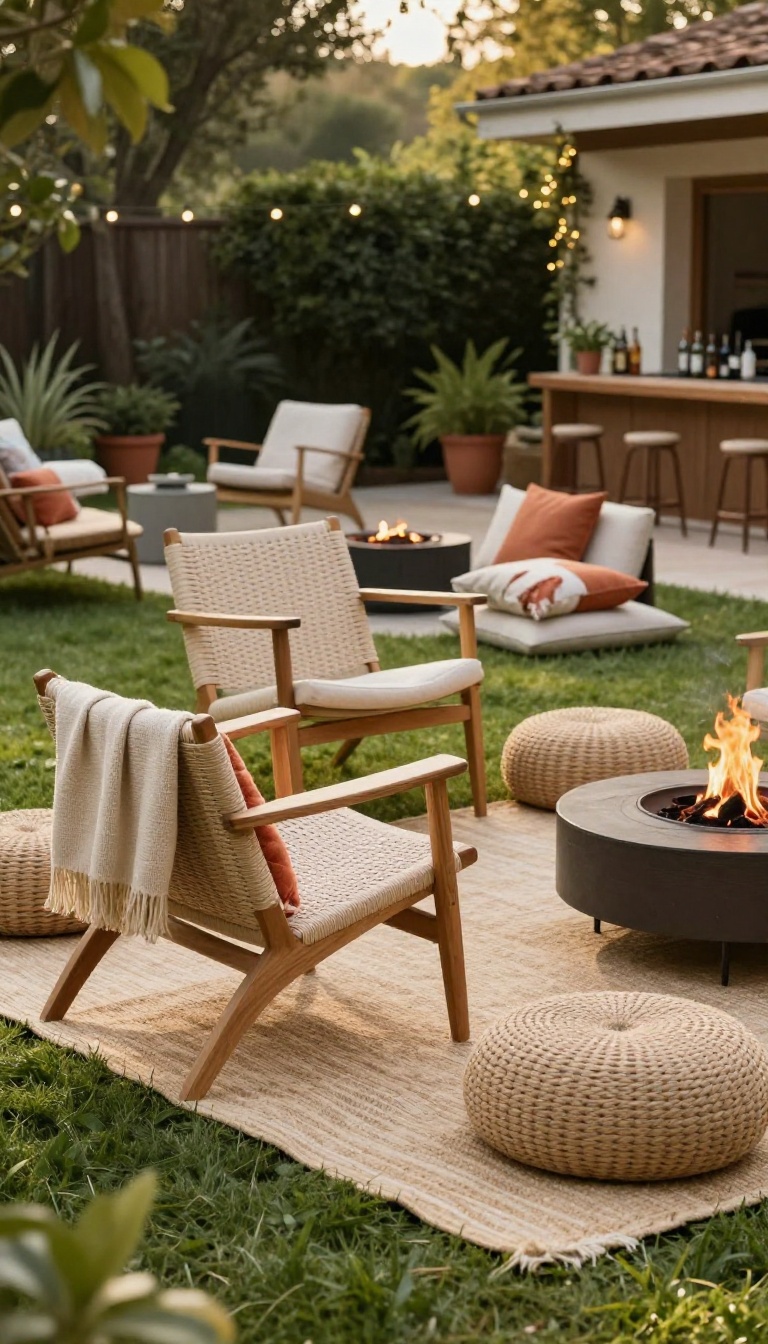
A single circle of folding chairs can make even a great backyard feel like a waiting room. Mixing different seats, poufs, and blankets breaks that up and gives people permission to drift between groups. The result is a relaxed, lived-in look that actually encourages conversation instead of forcing it.
You don't need a matching patio set to make this work. In fact, the mismatched look is the point. Pull out what you already have—dining chairs, benches, camp stools, floor cushions—and arrange them in a few loose clusters instead of one big ring.
That way guests can hop between conversations without feeling stuck. Add a couple of throws over the backs of chairs so people can grab one if the evening cools off. The whole setup should feel like you raided your own garage in the best way.
Create Lounge Zones, Not Rows
Think of your yard as a few small living rooms. Put two or three chairs near the fire pit, a bench and a pouf by the drinks, and a blanket on the grass for the folks who like to sit low. This keeps people moving and makes the space feel bigger.
It also solves the awkwardness of a single giant circle where someone always ends up talking to the back of a head.
Use What You Have (and Hide The Ugly Stuff)
No one expects a showroom. If a chair is wobbly or faded, drape a blanket or a flat-weave rug over it. Stack extra cushions in a basket near the seating so guests can grab one.
Mismatched wood tones and fabrics look intentional when you repeat a color or two across the yard. A little consistency—like all neutral throws or all warm-toned pillows—ties the eclectic mix together.
Make It Easy To Rearrange
Lightweight chairs and poufs are your friends. Skip heavy wrought-iron pieces that no one can move. When guests want to shift from the food table to the fire, they should be able to pick up their seat and go.
That flexibility keeps the party flowing and saves you from directing traffic all night.
4. A Themed Food Bar with Stylish Signage
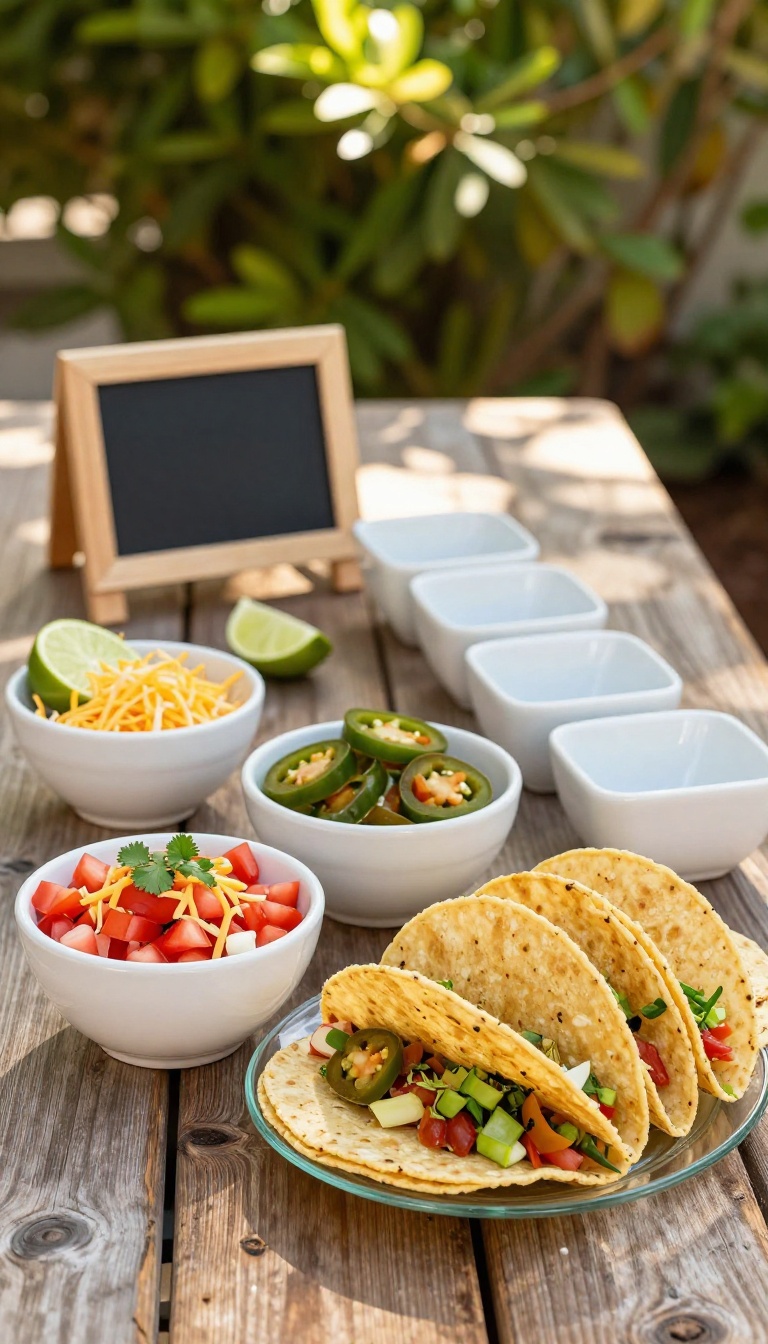
A themed food bar turns dinner into an activity. Guests build their own plate, which takes pressure off you and gives everyone something to talk about. The trick is picking a theme that's easy to execute and then making it look polished with simple signage and matching dishes.
Choose a theme that fits your crowd and your cooking comfort zone. Tacos, sliders, and baked potatoes all work because they're forgiving, scalable, and fun to customize. Once you've picked the theme, commit to it with your signage and serving pieces so the whole setup feels intentional.
Pick A Theme That Scales
Tacos are the gold standard for a reason: you can prep everything ahead, and guests assemble their own. Sliders offer the same flexibility with less mess, especially if you set out small buns and pre-cooked patties. A baked potato bar is the sleeper hit for fall parties—cheap, filling, and surprisingly elegant when you use white ceramic bowls for toppings.
Signage That Looks Intentional
Chalkboard signs are classic for a reason, but you can also use small framed cards or acrylic stands. Write the theme name at the top and list toppings or steps below. Keep the font simple and the wording short—guests should be able to read it from a few feet away.
A single sign per station beats a cluttered wall of instructions.
Uniform Serving Dishes
Matching bowls and platters make even a simple spread look curated. Stick to one material—white ceramic, clear glass, or matte black—and repeat it across every topping. Avoid mixing plastic and porcelain unless you're going for a deliberately eclectic look.
If you're short on dishes, borrow from friends or use mason jars for utensils and napkins.
Keep It Instagram-ready
Arrange toppings in rainbow order or group similar colors together. Add a small plant or a stack of napkins in a complementary color to break up the food. Natural light is your best friend, so set the bar up in a shaded spot that still gets good ambient light.
A clean, well-lit setup photographs well without any extra effort.
5. Citronella Torches with a Designer Twist
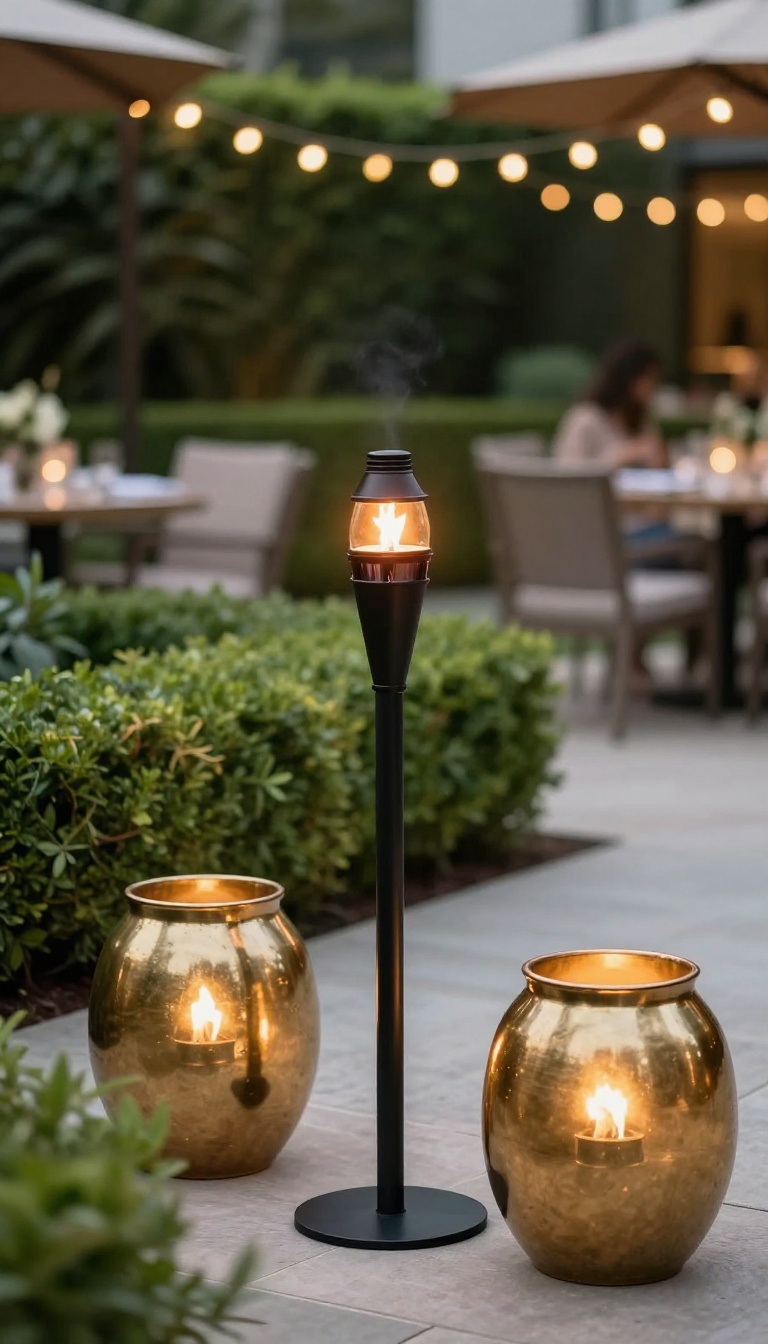
Citronella torches have a bad reputation for looking like they belong at a campsite, not a cocktail party. But swap the bamboo sticks for sleek metal or ceramic holders, and suddenly you have a functional piece of decor that pulls double duty. These upgraded torches keep mosquitoes at bay while casting a warm, flickering glow that makes your backyard feel intentional.
It's the rare party detail that works as hard as you do.
The secret is in the vessel. Basic torches are an eyesore, but a well-chosen holder turns bug repellent into ambient lighting. You can find modern designs in matte black, brushed brass, or glazed ceramic that look like they came from a boutique hotel.
Place them around the perimeter of your party zone to create a natural boundary. Guests get the hint without you having to rope off areas. Plus, the soft light adds depth and warmth that string lights alone can't match.
Pick A Style That Matches Your Space
Your torch holders should feel like an extension of your existing decor. If your patio leans modern, go with cylindrical stainless steel or concrete bases. For a bohemian vibe, try hammered copper or terracotta.
The goal is for them to look like they belong, not like a last-minute purchase. A quick tip: buy them in odd numbers and vary the heights for a more curated look.
Placement That Works Double Duty
Don't just stick torches in the ground wherever. Think about traffic flow and seating areas. Put a few near the food station to keep bugs off the spread, and a couple near the bar so guests can see what they're pouring.
Line a walkway to guide people safely after dark. Just keep them at least a few feet away from anything flammable, and never leave them burning unattended.
Fuel And Maintenance Tips
Not all citronella fuels are created equal. Look for ones with a high concentration of citronella oil and avoid those with harsh chemicals. You can also find paraffin-free options that burn cleaner.
Before the party, trim the wicks and fill the reservoirs. During the event, check them every hour or so. A little maintenance keeps the flame steady and the mosquitoes confused.
6. A Cozy Fire Pit Lounge
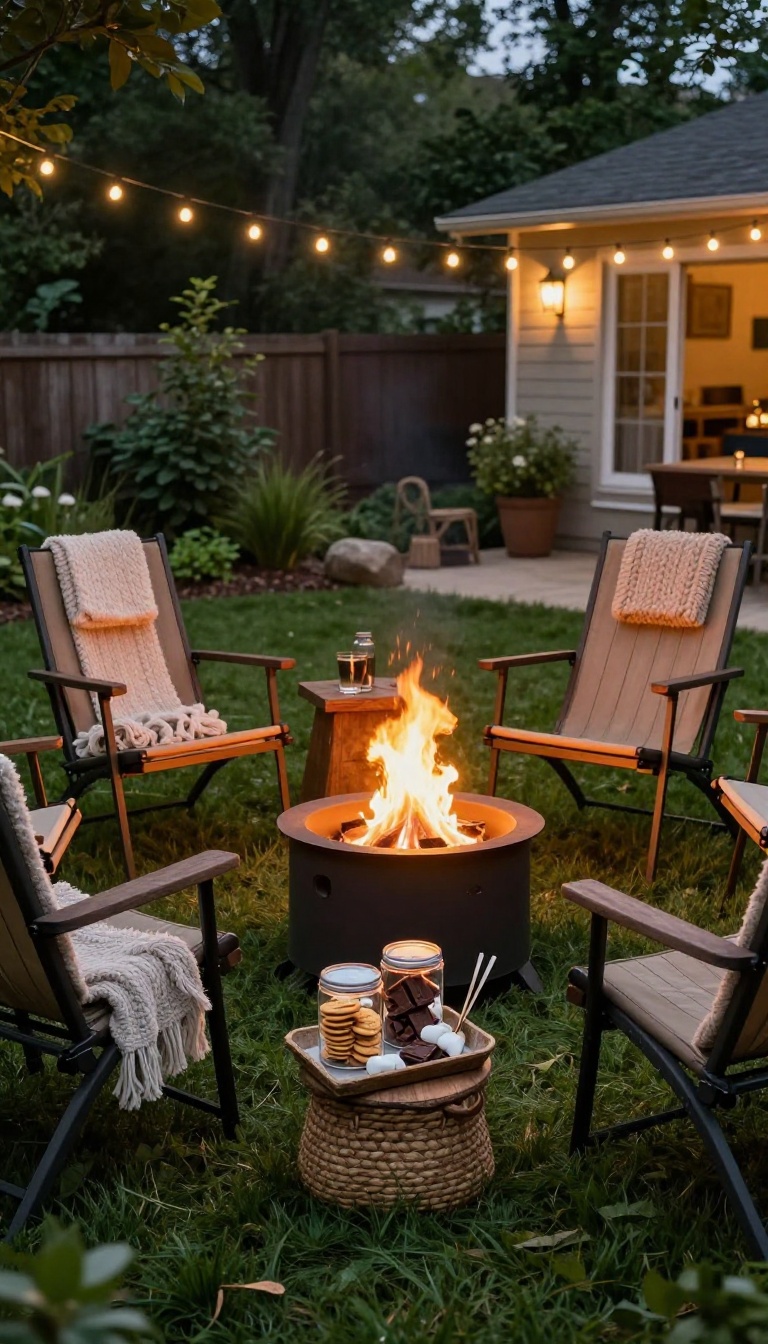
A fire pit turns a plain yard into a destination the moment the sun goes down. Guests drift toward it without being asked, and they stay longer than they planned. The trick is making the space around it feel like a room, not just a circle of dirt.
Start by defining the lounge zone with seating that encourages conversation. You don't need matching furniture, but you do need enough chairs for everyone to sit without squeezing. Mix low-profile camp chairs with a bench or two, and add a small side table between pairs of seats.
That table gives people a place to set a drink, which means they'll stay put instead of hovering near the cooler. Soft throws are the detail that makes the whole thing feel intentional. Drape a few over chair backs or stack them in a basket nearby.
When the temperature dips, guests grab one and settle in instead of heading inside. It's a small touch that extends the party by an hour or more. S'mores are the activity that keeps the fire pit from becoming just a decoration.
Set up a station with graham crackers, chocolate, and marshmallows in separate containers. Add long roasting forks and a damp towel for sticky fingers. People who haven't made a s'more since childhood will suddenly become very interested in getting the marshmallow just right.
Finally, think about the fire itself. A clean-burning pit or a small wood stove keeps smoke to a minimum, which matters when people are sitting close. Have a bucket of water or a fire extinguisher within reach, and keep the flames modest.
A calm fire is a safe fire, and it keeps the focus on the company rather than the sparks.
Set The Scene With Layered Lighting
String lights overhead or a few lanterns on the ground can guide people to the fire pit without making it feel like a runway. Solar path lights work well for edges, and a couple of citronella candles keep bugs at bay. The goal is enough light to see faces, not so much that it kills the mood.
Keep The S'mores Station Simple
Use a tray or a small table to hold everything in one spot. Pre-break the graham crackers so people aren't fumbling with a whole sleeve. A jar of wooden skewers works in a pinch if you don't have metal forks, but metal ones feel more special.
Make It Comfortable For A Crowd
If you're expecting more than eight people, consider a second fire pit or a smaller tabletop version. That way, no one feels left out of the circle. A few extra blankets in a basket near the door signal that the party continues outside, even after dark.
7. Upscale Yard Games with a Vintage Feel
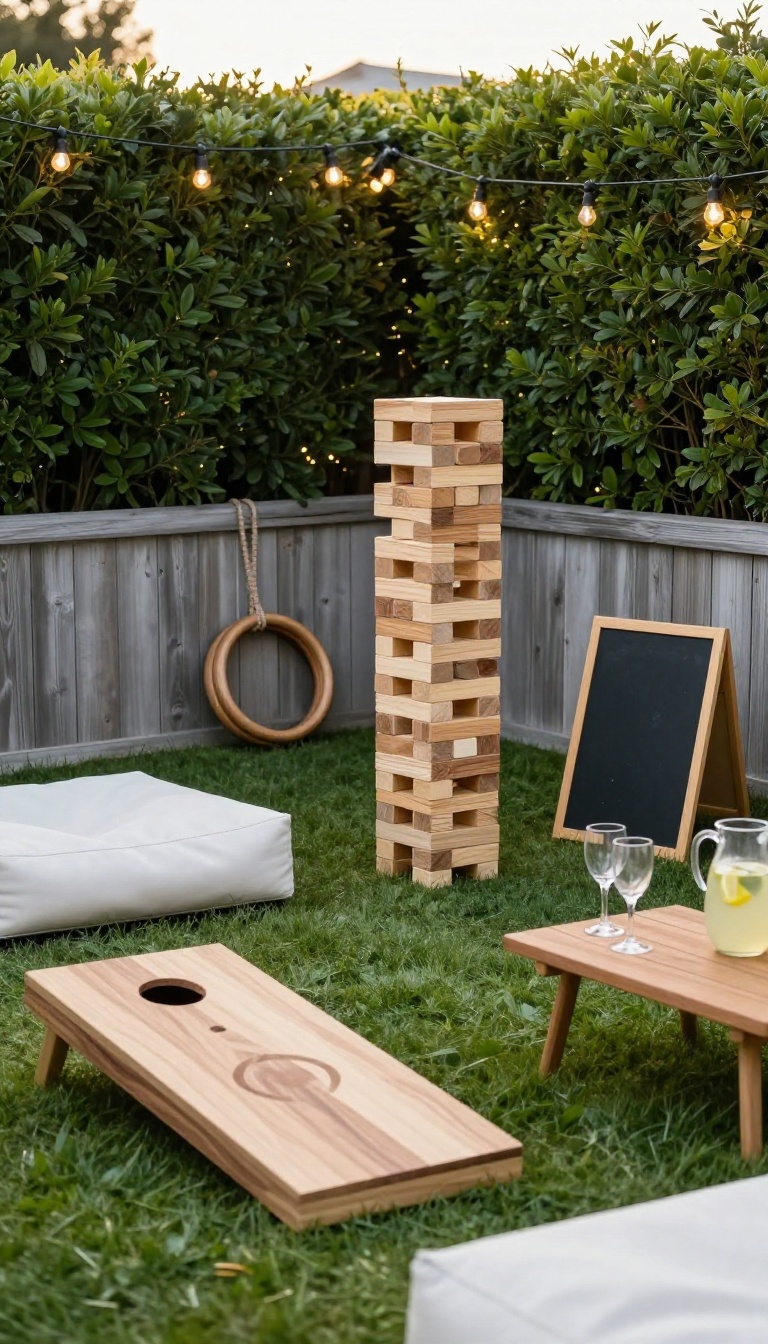
Plastic cornhole boards and neon beanbag toss sets scream "college tailgate, " not "adult backyard soirée. " Swap them for wooden games with a vintage vibe, and suddenly the competition corner looks like it belongs at a country club. The upgrade isn't just about looks.
Wooden sets feel better in your hands, hold up season after season, and give guests a natural reason to mingle without forced small talk. A little friendly rivalry does more for party energy than any playlist.
You don't need a lawn the size of a park. A single wooden cornhole set, a giant Jenga tower, or a vintage ring toss fits almost anywhere and instantly adds charm. The key is choosing pieces that look intentional, not like leftovers from a garage sale.
Place them near seating and drinks so people can drift in and out of play. Add a small chalkboard sign with simple rules, and you're done. The games become a backdrop, not the main event, which is exactly what you want.
Wooden Cornhole With Character
Skip the vinyl-wrapped boards. Look for solid wood sets with a stained finish or a subtle painted design. A dark walnut or weathered gray board with white bags looks sharp against green grass.
If you're handy, you can build a set for under $60 and customize the stain to match your outdoor furniture. Otherwise, Etsy and local makers sell beautiful options that double as decor when not in use.
Giant Jenga That Doubles As Decor
A oversized Jenga set made from cedar or pine looks like a sculpture when stacked. Guests can't resist pulling a block, and the crash at the end always gets a laugh. Keep the blocks natural or lightly stained.
Avoid bright paint, which can look childish. Store the set in a canvas bag or wooden crate near the game area so it stays tidy.
Vintage Ring Toss And Horseshoes
A wooden ring toss with rope rings feels nostalgic without being kitschy. Set it up on a patch of grass or even a gravel corner. For a more classic vibe, try a polished horseshoe set with a wooden stake.
These games work best with a clear throwing line. Use a piece of twine or a small painted stripe to mark it. That small detail keeps things fair and looks deliberate.
Styling The Game Zone
Don't just dump the games in a corner. Group them on a vintage rug or a few hay bales for a relaxed, curated look. A small side table with a pitcher of water and cups keeps players hydrated.
At night, add a few battery-operated lanterns or string lights overhead. The warm glow makes even a simple ring toss feel like part of the party design.
8. A Shade Sail or Umbrella Canopy
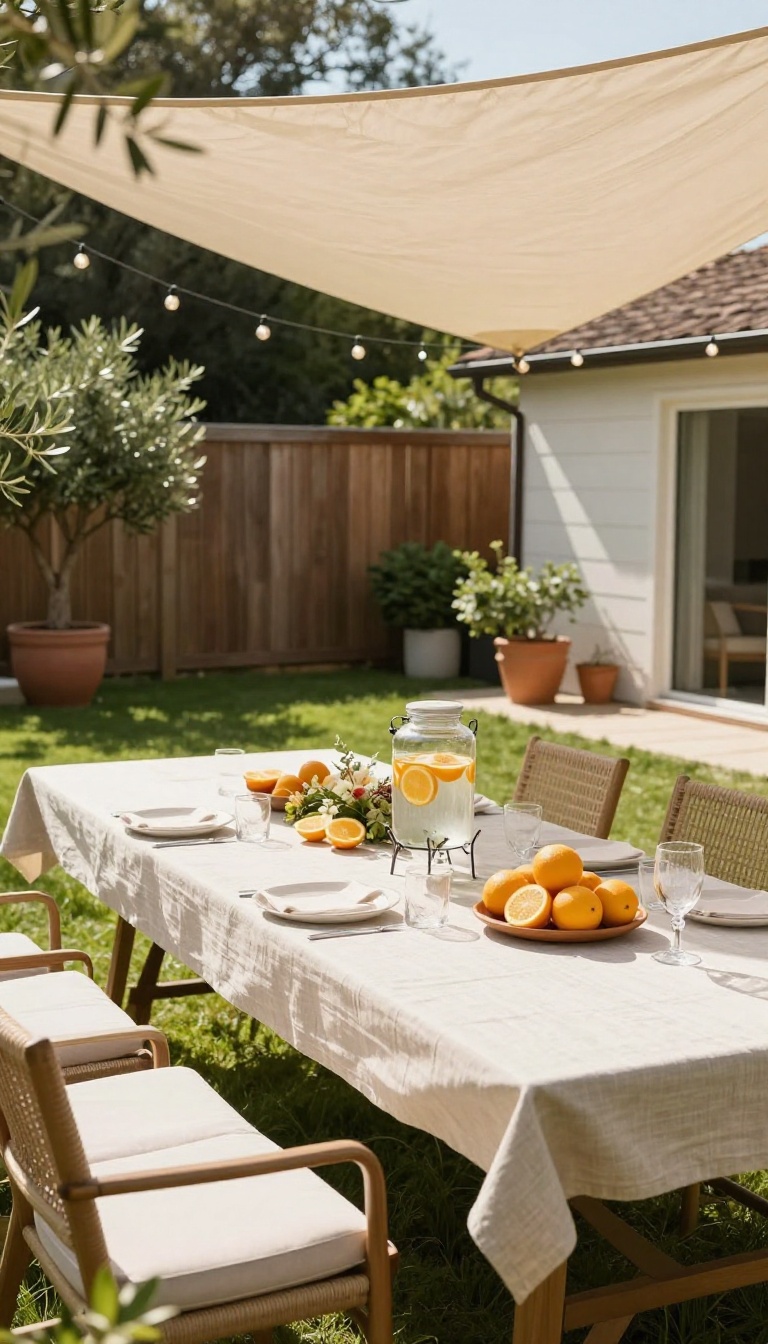
Sun beating down on an open patio sends guests scrambling for the one sliver of shadow near the house. A shade sail or a big patio umbrella fixes that in an afternoon, and it instantly makes the yard feel more like a resort than a driveway. The shade does the practical work, but the shape and fabric are what give the space its style.
You do not need a permanent pergola to get real relief from the heat. A triangular or square shade sail stretched between a couple of posts, a fence, and the house creates a soft, architectural canopy that looks intentional. A large cantilever umbrella does the same job with zero hardware, and you can crank it closed when the party is over.
Either option keeps the food table cooler, protects older guests from glare, and gives people a reason to linger instead of retreating indoors. The trick is treating shade as a design feature, not an afterthought. Pick a fabric color that ties into your table linens or string lights, and set the height so people can walk under it without ducking.
Once the shade is up, the area underneath becomes the natural heart of the party, so put your drinks station or seating there.
Choosing Between A Sail And An Umbrella
Shade sails work best when you have two or three anchor points and want something that stays up all season. They come in triangles, squares, and rectangles, and the tensioned curves look modern without trying too hard. Cantilever umbrellas are the easier call for renters or anyone who wants to move the shade as the sun shifts.
A standard market umbrella on a weighted base is the budget option, but it only covers a small table, so size up if you can.
Fabric And Color That Look Grown-up
Skip the faded beach umbrella from the garage and choose a fabric with a bit of weight, like solution-dyed acrylic. Neutral tones such as sand, charcoal, or olive blend into greenery and let your table settings pop. If you want a little drama, a deep teal or terracotta sail adds a resort feel without turning the yard into a theme park.
Whatever you pick, make sure it is water-resistant and UV-rated so it survives a full summer.
Setup Tips That Keep It Safe
Angle the sail so rain runs off instead of pooling in the middle. Leave at least a foot of clearance between the fabric and any string lights or torches, and check the tension after the first windy day. For umbrellas, use a heavy base or a sandbag, and close them when gusts pick up.
A little planning here means you are not chasing a tumbling canopy across the lawn mid-toast.
9. A Photo Backdrop with Greenery
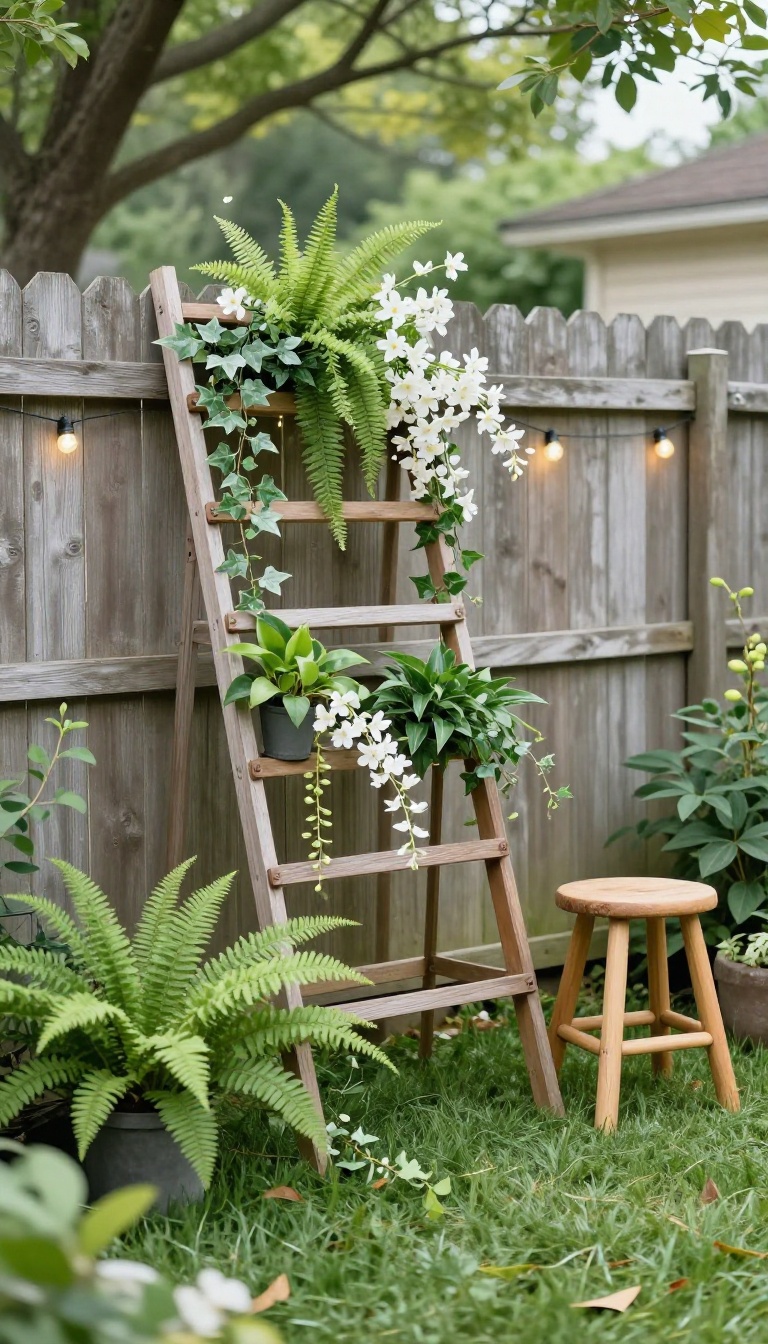
A photo backdrop gives guests a natural spot to gather and snap pictures without feeling staged. It also fills an empty wall or fence line with texture and color. The best part?
You can build one in under an hour with things you might already own.
Start with a simple frame. A wooden trellis, a ladder, or even a curtain rod between two posts works fine. Drape fabric, hang small potted plants, or weave in faux vines.
The goal is a layered, organic look that feels intentional but not fussy. Place the backdrop where light is soft—near a shaded wall or under a tree. That way, photos won't have harsh shadows or squinting faces.
Add a small stool or bench nearby so people can sit or prop a foot up. Keep the greenery low-maintenance. Real plants like pothos, ferns, or ivy are forgiving.
If you'd rather not water anything, high-quality faux greenery looks great and lasts all season. Mix in a few flowers or string lights for a touch of warmth. This setup does double duty.
When no one's taking photos, it's just another pretty corner of your yard. It fills space, adds privacy, and gives the party a cohesive look.
Pick A Frame That Fits Your Space
A trellis leans against a fence or wall with zero hardware. A folding screen or room divider works if you're renting or want something portable. For a wider backdrop, use a wooden pallet or a simple PVC frame.
Choose based on your yard's size and your storage space.
Layer Greenery For Depth
Don't just hang one plant. Mix tall, trailing, and bushy varieties. Start with a base of faux ivy or a fern, then add hanging plants like string of pearls.
Tuck in a few real blooms or dried grasses for contrast. The layers make photos look rich, not flat.
Light It Right
If your party goes into the evening, add warm string lights or a clip-on spotlight. Avoid cool white bulbs—they make skin tones look off. A simple strand of Edison bulbs woven through the greenery gives a soft, flattering glow.
Make It Interactive
Set out a basket of props: silly sunglasses, a sign with a fun phrase, or a Polaroid camera. Guests will start taking photos on their own. You can also hang a small chalkboard for people to write messages.
It turns the backdrop into a party activity.
10. Individual Picnic Baskets or Boxes
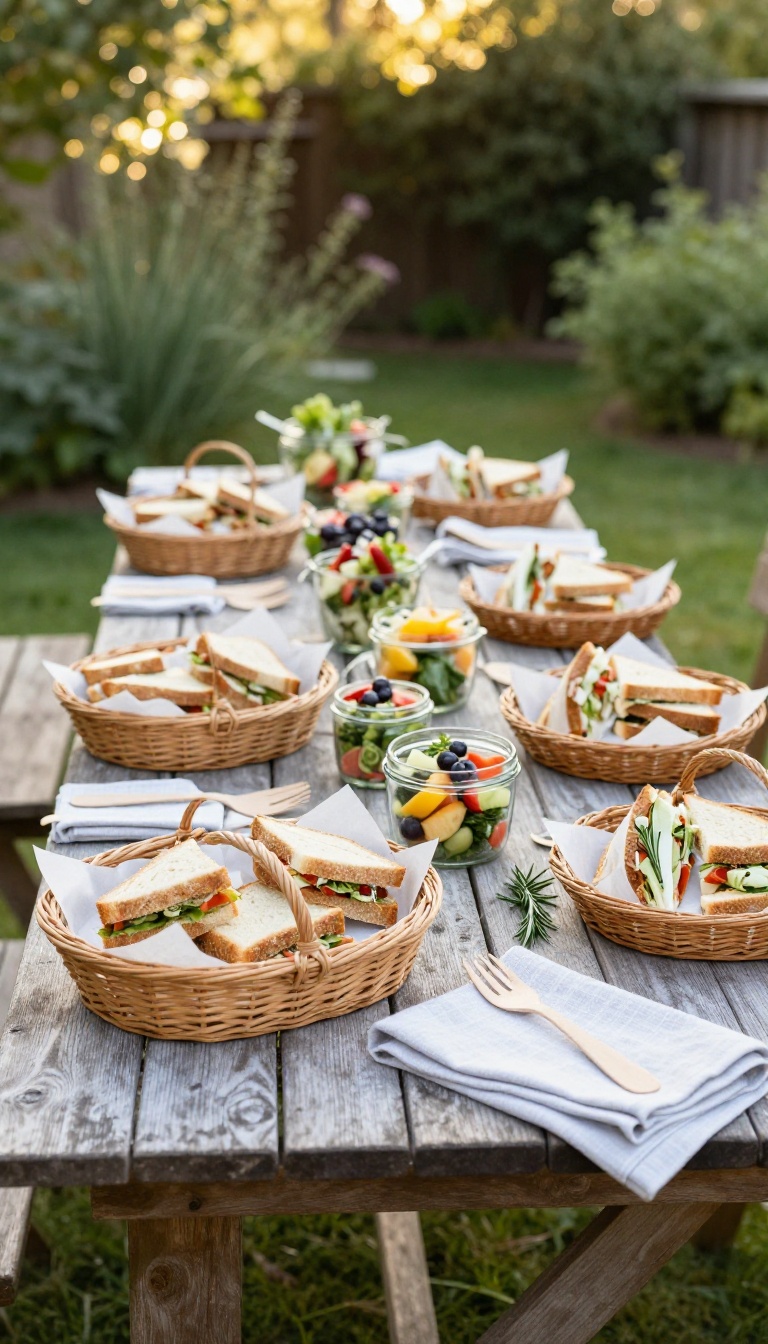
Serving dinner buffet-style often means long lines and guests juggling plates while balancing drinks. Individual picnic baskets solve that problem by giving each person their own pre-packed meal. It’s a practical approach that also adds a charming, personal touch to your backyard party.
When you hand someone a basket with their name on it, they immediately feel taken care of. No waiting, no awkward balancing acts, just grab a spot and dig in. This setup works especially well for seated dinners where you want guests to relax and mingle without the hassle of a buffet.
Plus, baskets or boxes look great as part of your decor. They add texture and a sense of occasion that paper plates and plastic cutlery can’t match. You can style them to fit your party’s theme, whether that’s rustic, modern, or something in between.
What To Pack
Think of each basket as a mini meal kit. Include the main dish, sides, and a small dessert. Wrap items in parchment paper or beeswax wraps for a neat look.
Add a napkin, utensils, and a small drink. If you’re serving something messy, include a wet wipe or two. Keep dietary restrictions in mind and label baskets accordingly.
Styling Your Baskets
Choose baskets or boxes that match your party’s vibe. Wicker baskets feel classic and warm, while kraft paper boxes give a modern, minimalist look. Line them with a cloth napkin or tea towel in your color scheme.
Tie a simple tag with the guest’s name using twine or ribbon. A small sprig of herbs or a single flower tucked in adds a fresh touch.
Logistics Made Easy
Assemble baskets ahead of time and store them in a cool place until guests arrive. Set up a designated pickup station near the entrance or seating area. If you’re serving drinks separately, have a beverage station nearby so guests can grab a glass after picking up their basket.
This keeps the flow smooth and avoids congestion.
11. A S'mores or Dessert Bar
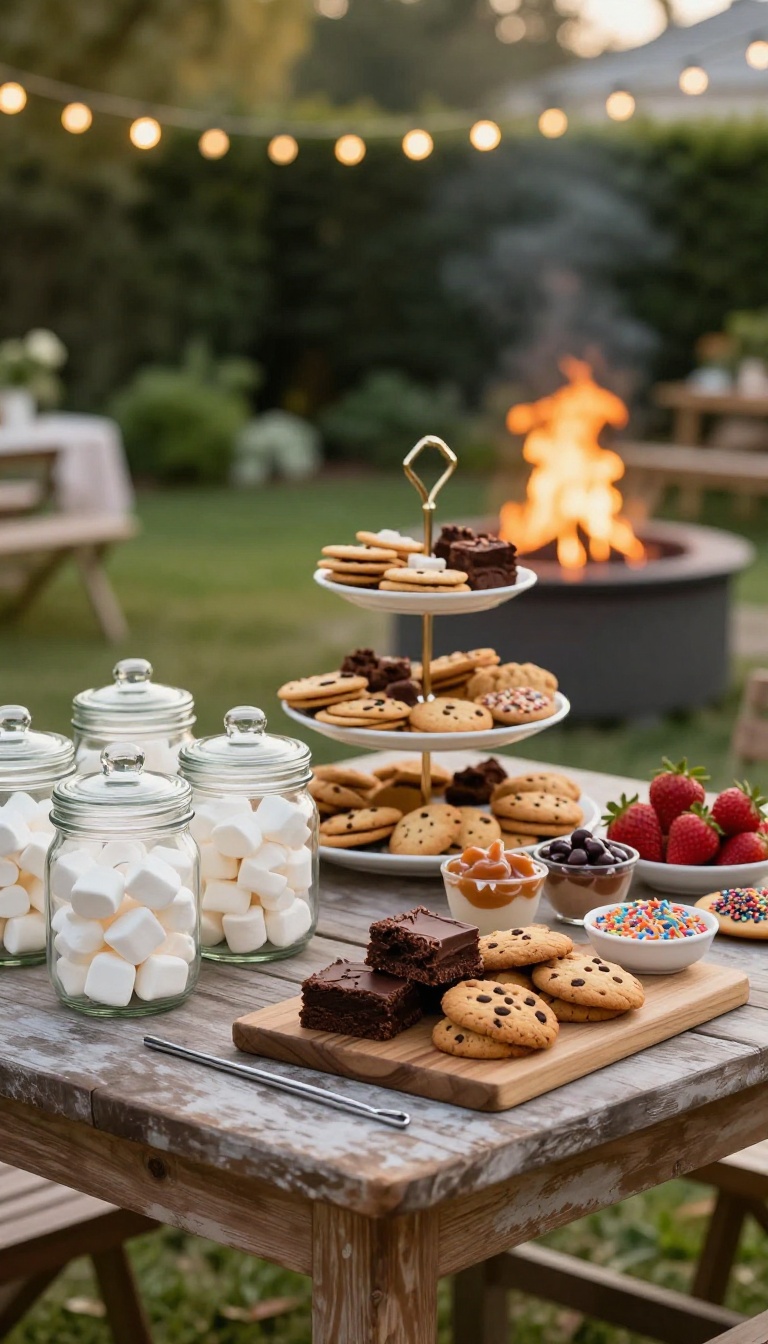
A dessert bar lets guests play with their food in the best way. Instead of slicing a cake and hoping everyone gets a piece, you set out a spread of sweets and let people build exactly what they want. It’s interactive, it’s Instagram-friendly, and it satisfies every sweet tooth without any formal fuss.
The setup is simple: a table with a few key ingredients, some skewers, and a heat source. You can go classic s’mores with marshmallows, chocolate bars, and graham crackers, or branch out into a full dessert bar with cookies, brownies, fruit, and dips. The goal is to make it easy for guests to grab, assemble, and enjoy without hovering over a single dessert plate.
Stylish details come from how you present everything. Use glass jars for marshmallows, wooden boards for cookies, and small chalkboard signs to label each item. A tiered stand adds height and makes the table look curated.
If you’re doing s’mores, a small fire pit or tabletop s’more maker keeps things safe and contained. This station works for any adult party because it taps into nostalgia without feeling childish. Guests can make a simple treat or go all out with layers.
It also doubles as a late-night snack, so you don’t need to worry about a separate dessert course.
Set Up A Build-your-own Station
Arrange ingredients in a logical order: base first, then toppings, then sauces. For s’mores, that means graham crackers, marshmallows, chocolate, and maybe caramel or peanut butter cups. For a broader dessert bar, start with cookies or brownies, then add ice cream, whipped cream, sprinkles, and fruit.
Use small bowls and jars so everything is visible and easy to reach. Keep a stack of plates and napkins at the end of the line.
Choose The Right Heat Source
If you’re toasting marshmallows, a small fire pit or chiminea adds ambiance. Just make sure it’s in a clear area away from foot traffic and that you have a bucket of water nearby. For a safer, smoke-free option, use a tabletop s’more maker or a small grill with skewers.
Always provide long-handled skewers and show guests where to stand.
Add Stylish Touches
Skip the plastic tubs and use glass jars, wooden crates, and slate boards. A simple linen tablecloth or runner ties the look together. Label each item with a small chalkboard sign or a handwritten card.
Add a few fresh flowers or a string of fairy lights overhead to make the station feel intentional. Keep it tidy by having a small trash bowl for wrappers and used skewers.
12. Potted Plants as Natural Dividers
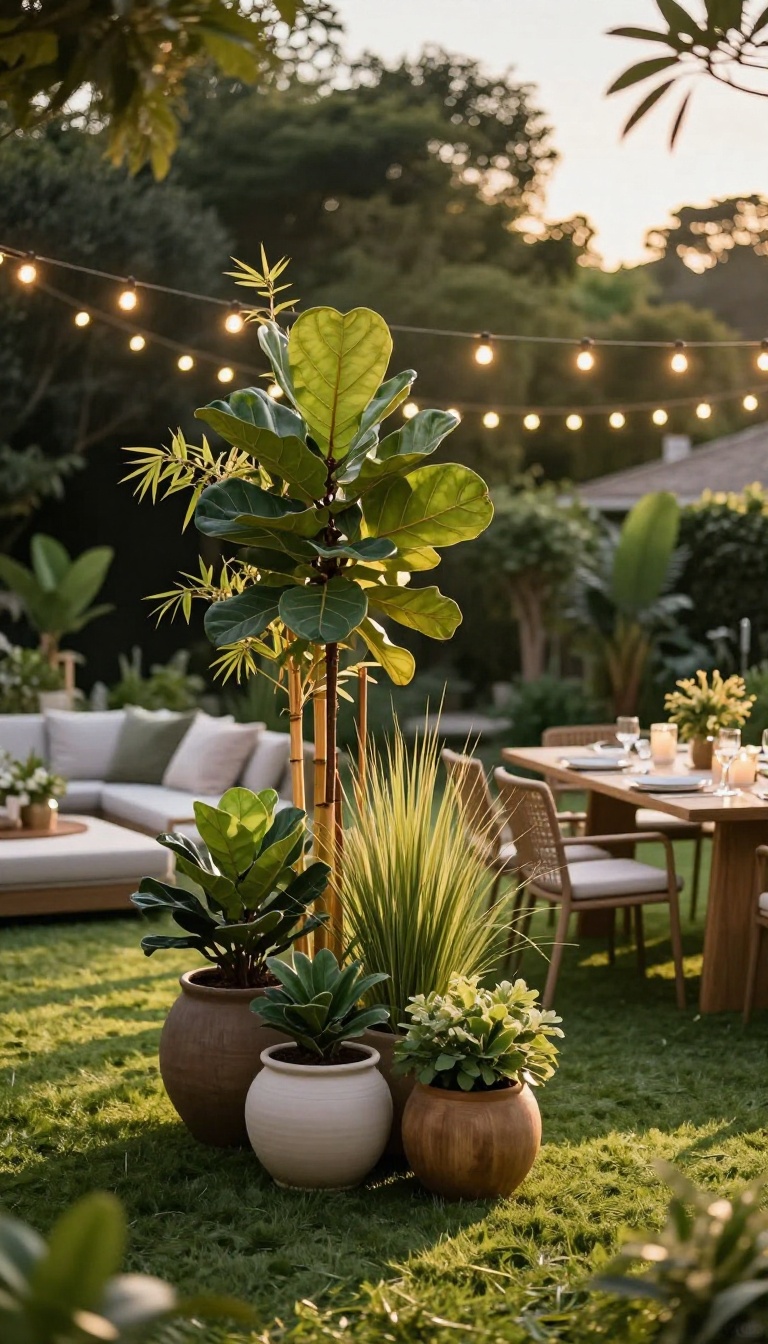
Potted plants do more than add a pop of green. They create soft boundaries between different party zones without building a single fence. You can separate the dining area from the lounge, or the bar from the dance floor, just by rearranging a few large planters.
It's a flexible, stylish solution that works in any size yard.
The best part? You can move them around as the party flows. Start with a few oversized pots or planter boxes and place them where you want a gentle division.
Guests will instinctively respect the space, and you get a more organized layout without feeling boxed in.
Choosing The Right Plants
Go for tall, leafy varieties like fiddle leaf figs, bamboo, or ornamental grasses. They provide height and privacy without blocking conversation. If your party is at night, consider plants with light-colored leaves that catch ambient lighting.
Stylish Planter Options
Match your planters to your party's vibe. Sleek ceramic pots look modern, while wooden crates or galvanized metal add a rustic touch. You can even paint them to coordinate with your color scheme.
Just make sure they're heavy enough to stay put if someone bumps them.
Arranging For Flow
Place planters to guide guests naturally. Create a walkway between the food station and seating, or use a row of pots to separate the bar from the mingling area. Leave enough space for people to move freely—about three feet between pots is a good rule.
13. A Playlist and Hidden Speaker Setup
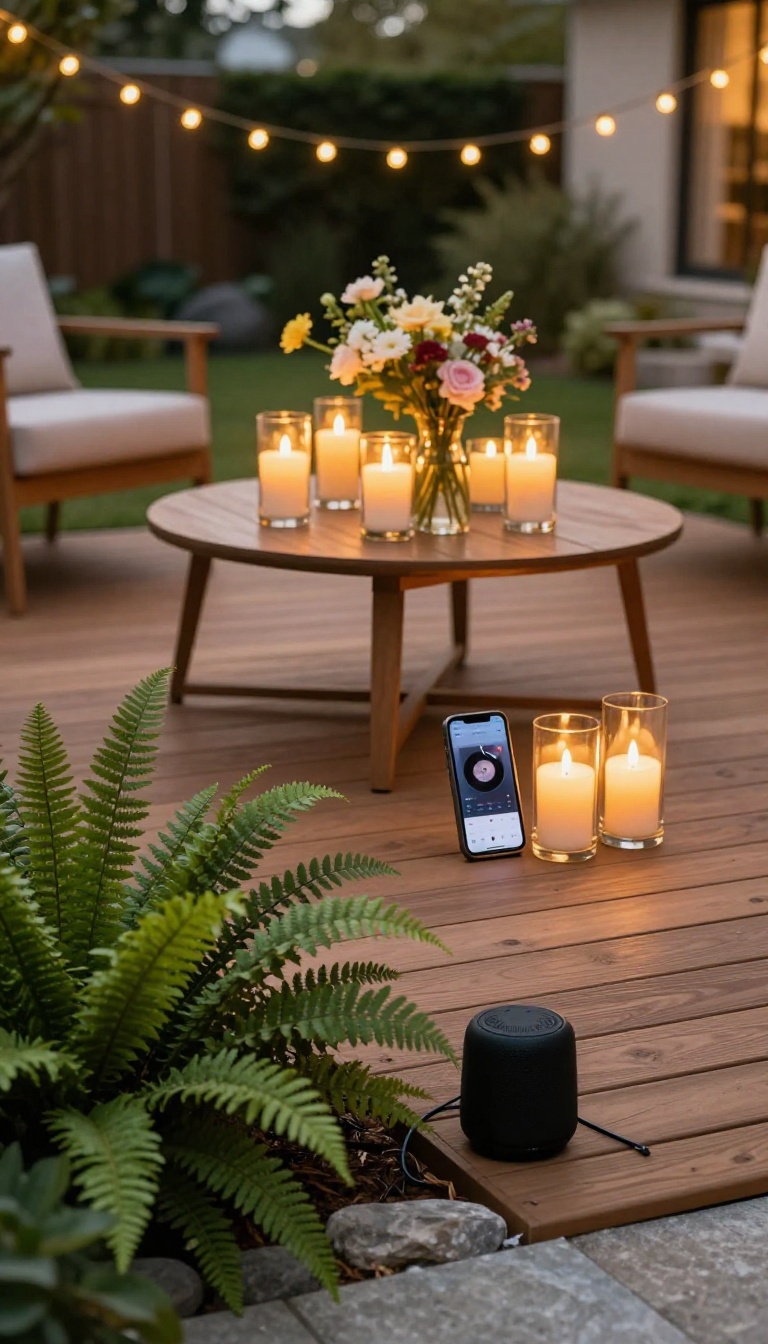
Music can make or break the mood at any party, and in a backyard, it’s even more important. A well-curated playlist keeps energy up without being intrusive, while a hidden speaker setup ensures the focus stays on your stylish decor and your guests. The goal is to create a seamless soundscape that feels like it’s part of the environment, not an afterthought.
Start by thinking about the flow of your party. You want upbeat tunes for the early arrivals, some mid-tempo grooves during dinner, and maybe a little nostalgia for late-night chats. Build a playlist that transitions smoothly, and don’t be afraid to mix genres—just keep the energy consistent.
Once you have your soundtrack, it’s time to hide the hardware.
Curating The Perfect Playlist
Begin with a vibe. Are you going for a relaxed tropical feel, a sophisticated cocktail hour, or a lively dance party? Let that guide your song choices.
Use a streaming service to create a playlist in advance, and test it out while you’re setting up. Pay attention to volume levels—you want background music, not a concert. Also, consider your guests’ ages and tastes; a mix of classics and current hits usually works well.
Add a few songs that encourage conversation or dancing, but avoid anything too aggressive or explicit. And don’t forget to include some instrumental tracks for when you want people to mingle without shouting.
Choosing The Right Speakers
Wireless speakers are your best friend here. They’re easy to place and don’t require running cables across the yard. Look for models that are weather-resistant if you’re leaving them outside.
A multi-room system or Bluetooth speakers that can be paired together will let you create a surround-sound effect. Place one near the food area, another by the seating, and maybe a third near the bar. Keep them at a low volume so they blend in.
If you have a lot of space, consider a portable PA system, but only if you need to cover a large area. For most backyards, two or three well-placed speakers are plenty.
Hiding The Gear In Plain Sight
The trick is to make the speakers invisible. Tuck them behind potted plants, under a bench, or inside a decorative basket. You can also use speaker covers that look like rocks or planters.
If you have a pergola or a fence, mount small speakers to the posts and paint them to match. Just make sure the sound isn’t muffled. Test the placement before the party starts.
And keep the wires out of sight—use cable ties or run them along the base of walls. A little camouflage goes a long way.
14. A Welcome Table with Essentials
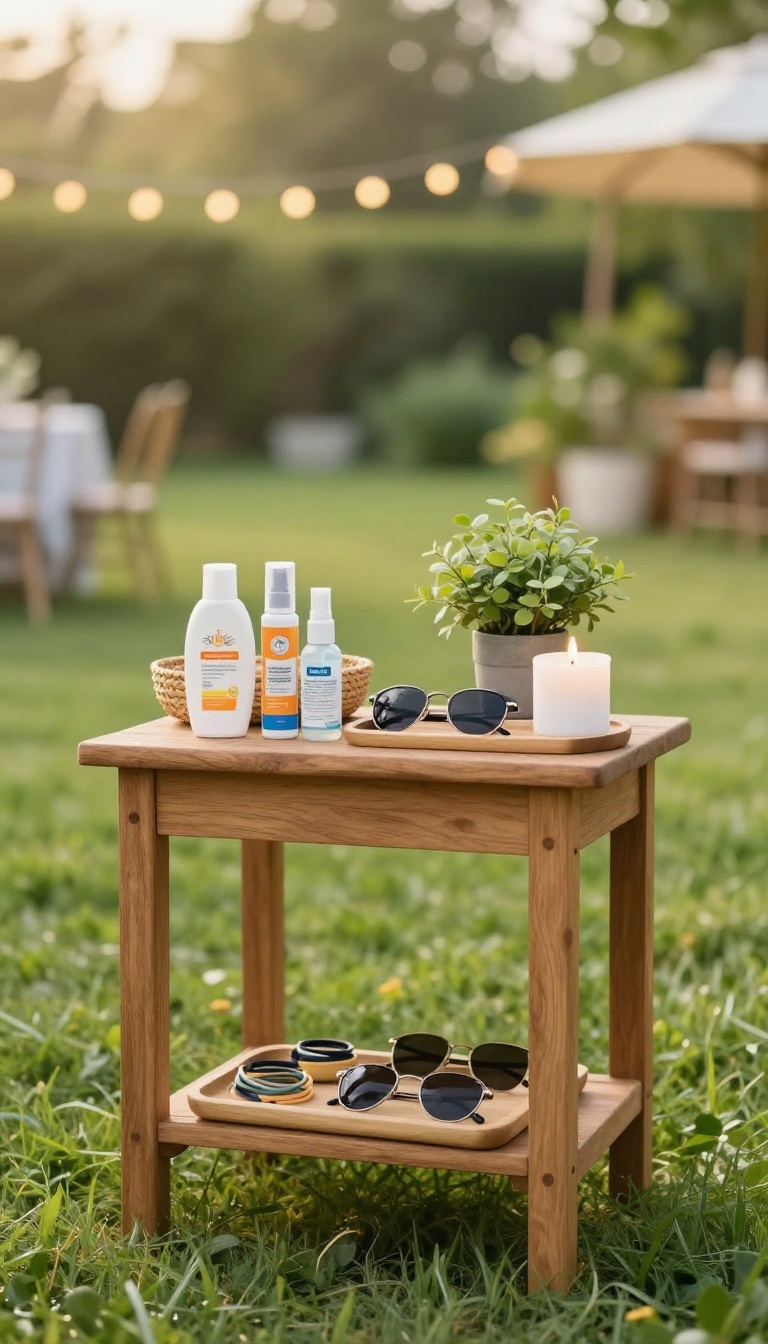
A small table near the entrance can make a big difference in how guests feel when they arrive. Stock it with practical items like sunscreen, bug spray, and a friendly sign. It shows you thought ahead without spending much.
Think of this as a mini concierge station for your party. It doesn't need to be fancy—just a sturdy side table or even a crate turned on its end. The goal is to help guests settle in fast so they can relax and enjoy themselves.
What To Put On The Table
Start with the basics: a bottle of sunscreen, a can of bug spray, and a few hand sanitizers. Add a small basket of ponytail holders or hair ties for anyone who needs to tie back their hair. A couple of cheap sunglasses from the dollar store can be a fun bonus.
Keep everything in plain sight so people don't have to ask.
Make It Look Intentional
Use a tray or a shallow basket to corral the items so the table doesn't look cluttered. A small potted plant or a candle can add a stylish touch. Print a simple sign that says 'Help Yourself' or 'Party Essentials' in a cute font.
This turns a utilitarian setup into a deliberate design detail.
Why It Works
Guests often arrive not knowing what to expect, especially if your backyard has bugs or strong sun. Having these items ready removes small stressors and shows you care. It also cuts down on interruptions while you're busy hosting.
Plus, it's a conversation starter—people will appreciate the thought.
15. A Late-Night Glow Zone
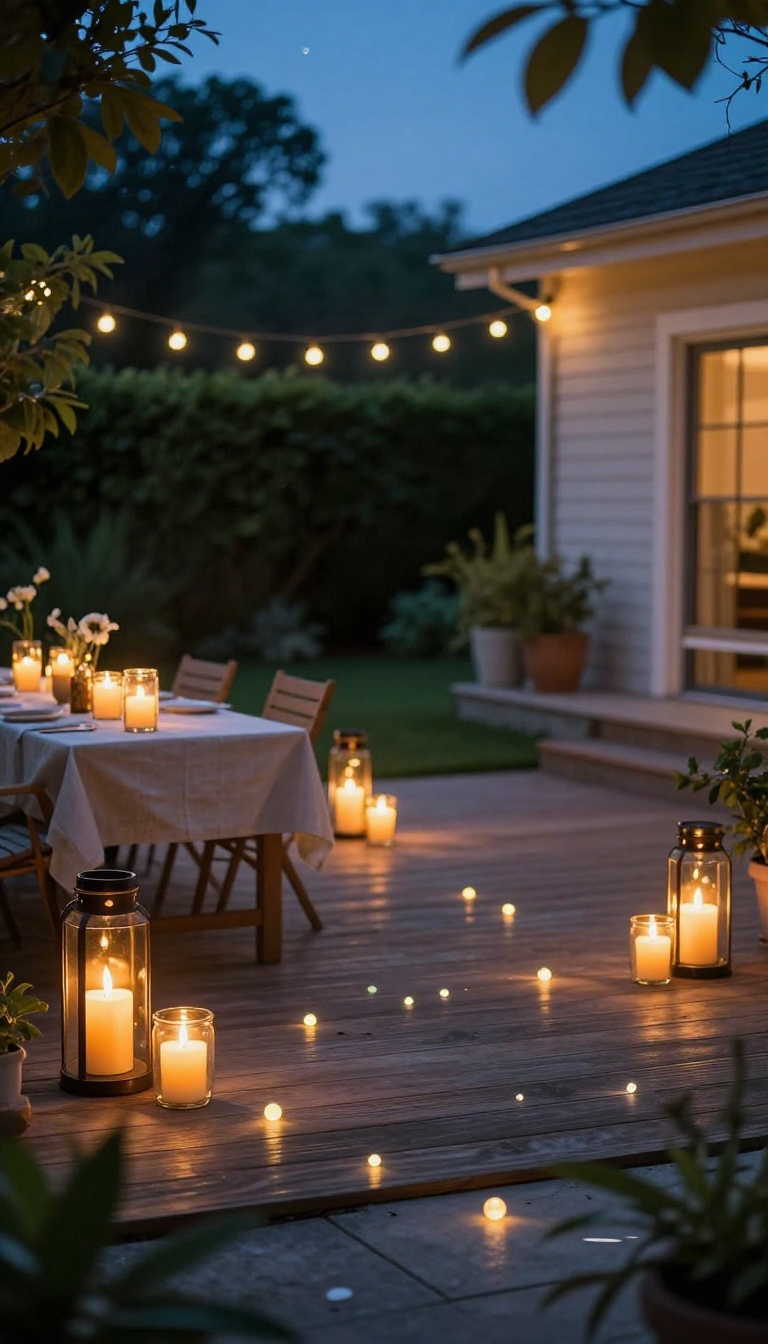
As the sun sets, your backyard can transform into a magical glow zone with minimal effort. Battery-operated candles, glow sticks, and LED balloons create a soft, festive ambiance that keeps the party going without harsh overhead lights. This idea is perfect for extending the evening and adding a playful touch that adults will love.
When the natural light fades, don't let the party wind down. A few strategic glow elements can shift the mood from casual afternoon to intimate evening gathering. The key is to layer different types of lighting so the space feels warm and inviting, not like a rave.
Start by replacing any bright porch lights with battery-operated candles in lanterns or mason jars. Scatter them on tables, along the deck railing, and even on the ground to create a soft, flickering glow. Then add interactive elements like glow sticks or LED balloons that guests can wear or carry.
This not only lights up the space but also gives people something fun to play with. The best part? No outlets or extension cords required, so you can place them anywhere.
Set The Mood With Battery Candles
Battery-operated candles are a game-changer for outdoor parties. They give you the cozy vibe of real candles without the worry of wind blowing them out or accidentally starting a fire. Look for ones with a realistic flicker and remote control so you can adjust the brightness as the night goes on.
Place them in groups of three or five for maximum impact. You can also use them to line a walkway or define different zones, like the bar area or the dance floor. For a stylish touch, choose candles with a metallic finish or wrap them in decorative tape.
They'll look great even when they're not lit.
Glow Sticks And Led Balloons For Playful Light
Glow sticks aren't just for kids. Give them a grown-up twist by offering them in a single color scheme, like all white or all blue, to match your party's palette. You can put them in a clear vase as a centerpiece or hand them out as guests arrive.
LED balloons are another fun option. They have a small light inside that makes them glow from within. Float them in a pool or tie them to chairs for a whimsical effect.
Just be sure to secure them so they don't fly away. These small touches encourage guests to interact and take photos, which keeps the energy up.
Create Zones With String Lights And Lanterns
To make your glow zone feel intentional, use light to define different areas. String lights are a classic choice, but you can also hang lanterns from trees or pergolas. Solar-powered lanterns are great because they charge during the day and automatically turn on at dusk.
Place them along the perimeter of your party space to create a cozy enclosure. If you have a fire pit, use it as a focal point and surround it with seating. The combination of firelight and soft LED lights will make the space feel warm and inviting.
Just avoid using too many bright white lights, as they can kill the ambiance.
FAQ
How do I keep bugs away without ruining the vibe?
Use citronella torches in stylish holders, set up a fan, and offer bug spray at a welcome table. You can also plant citronella grass or lavender around the party area.
What's a simple way to make my backyard look more upscale?
Focus on lighting and seating. Warm string lights, a few floor lanterns, and mixed seating with throws instantly elevate the space without a big spend.
How can I save money on drinks for a backyard party?
Make one or two batch cocktails or a sangria station instead of a full bar. Buy glassware at thrift stores and use fresh fruit as garnish for a stylish look.
What if my backyard is small?
Use vertical space with hanging lights and planters, and create cozy zones with a few chairs and a small table. A shade sail can define the area without taking up floor space.
How do I handle parking and noise for a backyard party?
Let neighbors know in advance, keep music at a reasonable volume, and suggest carpooling or nearby parking. A polite heads-up goes a long way.
Conclusion
Stylish backyard parties don't require a huge budget or a team of helpers. Pick two or three ideas that fit your space and your crowd, then build from there. A few thoughtful details go further than a long to-do list.
Start with the upgrade you'll actually use, whether that's better lighting or a signature drink. Test it at your next gathering and tweak as you go. The best setup is the one you look forward to hosting again.