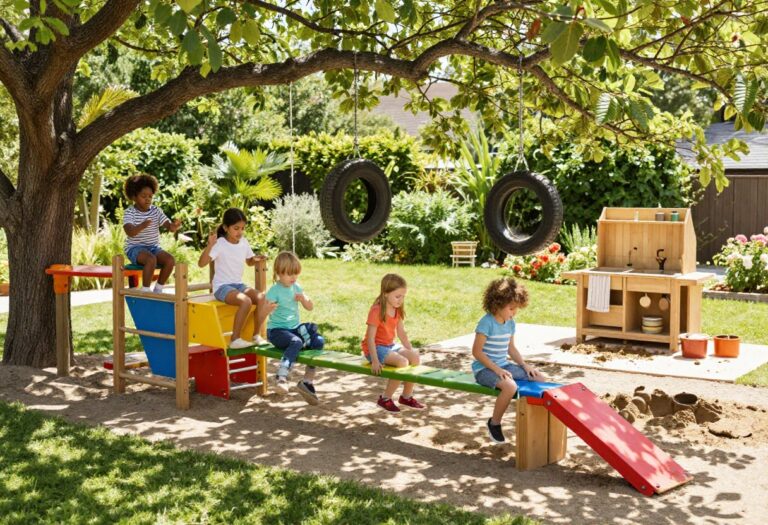
13 Kid Backyard Ideas for Fun Family-Friendly Outdoor Play
A plain patch of grass can become the busiest room in your house with a few smart additions. Kids don't need expensive playsets to stay outside for hours; they need a little structure and permission to get messy. The right setup turns a boring yard into a daily adventure zone.
The best backyard ideas grow with your kids and your budget. You can start with a mud kitchen or chalk wall this weekend, then add a climbing dome or swing once you see what they love.
Nothing here requires a contractor or a second mortgage. Below are 13 kid-friendly projects that mix active play, sensory fun, and quiet corners.
1. Build a Mud Kitchen for Messy Sensory Play
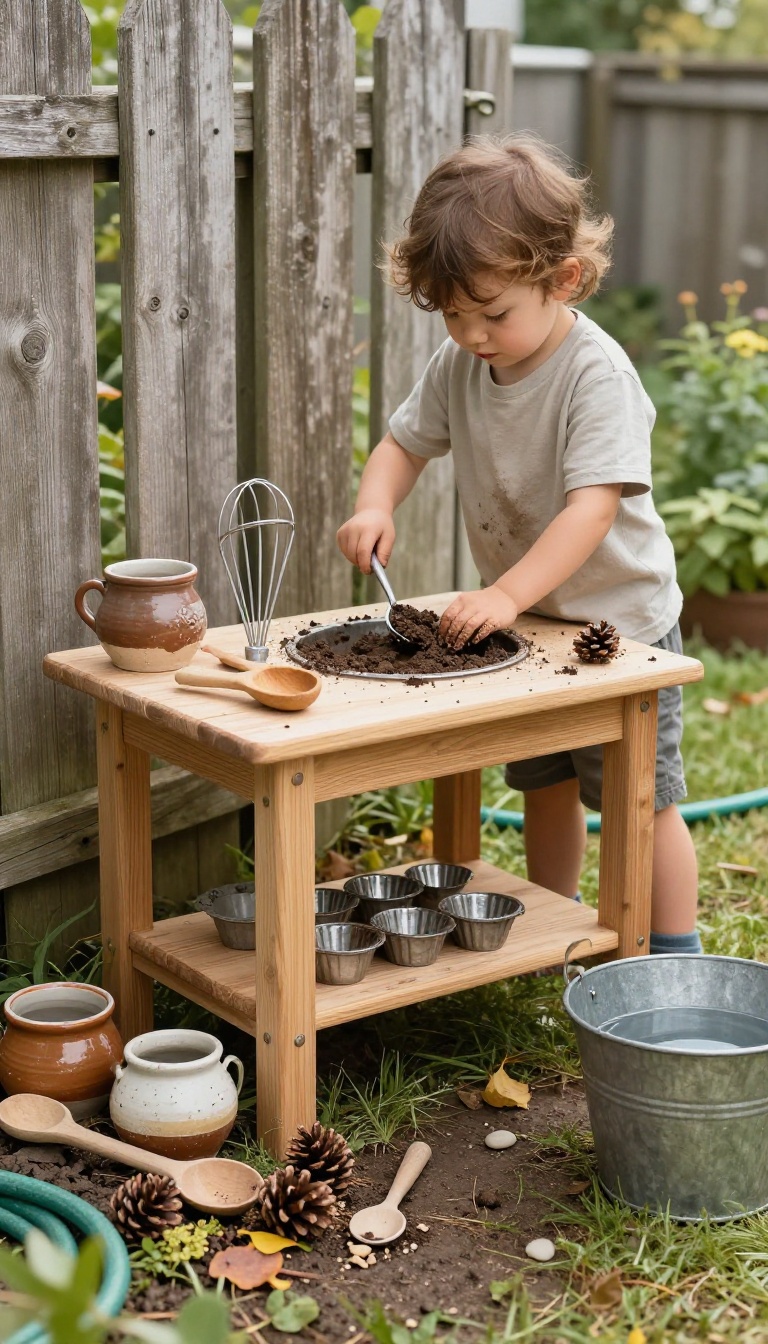
A mud kitchen gives kids a real workspace for the kind of play they already want to do: scooping, stirring, pouring, and squishing. You set it up outside, so the mess stays where it belongs instead of on your floors and furniture. It's one of the cheapest backyard projects you can pull off, and it tends to hold their attention longer than most toys.
The magic here is simple. Kids get real tools, real water, and real dirt, then they decide what to make. That combination hits sensory play, pretend play, and fine motor practice all at once.
You don't need a fancy setup. A low table, a few shelves, and a spot near a hose or bucket will do the job. The goal is easy access, not a showroom look.
Start with what you already have in the kitchen junk drawer, then add pieces as you notice what they reach for. Most families spend under $50 on this, and plenty spend nothing at all.
Pick A Spot That Can Get Destroyed
Choose a corner of the yard where mud, water, and dropped bowls won't matter. Somewhere near a fence or garden bed works well because it hides the mess and gives kids a natural boundary. You want it close to a water source.
A hose bib, rain barrel, or even a large jug you refill keeps the play going without constant trips inside. Avoid placing it on a slope. Flat ground keeps bowls from sliding and puddles from forming where kids stand.
Gather The Right Loose Parts
Old pots, muffin tins, wooden spoons, whisks, and measuring cups are the core kit. Thrift stores and dollar aisles are goldmines for this stuff. Add natural materials too: pinecones, leaves, pebbles, and flower petals.
These become ingredients, garnishes, and decorations. Skip anything glass or sharp. Durable plastic, metal, and silicone hold up best through repeated mud sessions.
Set Up Simple Storage
A crate, bucket, or repurposed shelf keeps tools from disappearing into the grass. Kids can grab what they need and put it back when they're done. Drill a few holes in the bottom of any container that holds water.
That way rain won't turn it into a swamp between play sessions. Hang a small broom or brush nearby. A quick sweep at the end of the day keeps the area from turning into a permanent mud pit.
Make Cleanup Part Of The Fun
Keep a towel, a rinse bucket, and a change of clothes near the back door. Kids can hose off hands and feet before they come in. Turn cleanup into a game.
A two-minute tidy race works better than nagging, and it teaches them to close out the activity. If mud ends up on the patio, a bucket of soapy water and a stiff brush handle it fast. Let them help scrub, then call it done.
2. Create a DIY Obstacle Course with Everyday Items
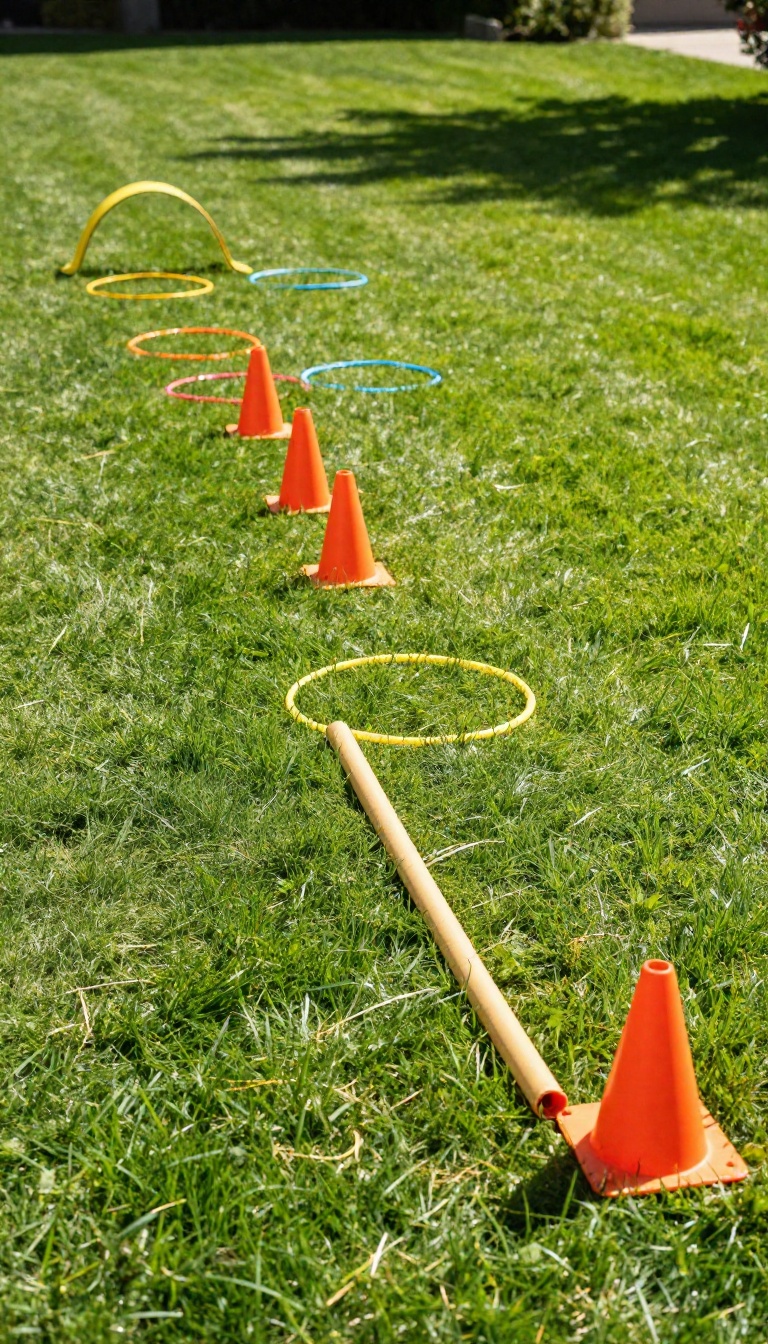
You don't need fancy equipment to turn your yard into a ninja warrior zone. With a few pool noodles, hula hoops, and cones, you can build a rearrangeable obstacle course that keeps kids moving. The best part?
You can change it up every week to match their growing skills.
The key is to use what you already have and keep it flexible. Start with a simple layout: a cone slalom, a hula hoop hop, and a pool noodle balance beam. Then let your kids help design new challenges.
This keeps the course fresh and encourages creativity.
Gather Your Gear
Round up pool noodles, hula hoops, cones, and maybe a few buckets or ropes. These items are cheap, lightweight, and easy to store. You can often find them at dollar stores or already in your garage.
Build The Course
Set up stations in a loop. For example: weave through cones, jump through hoops laid flat, balance along a pool noodle laid on the grass, and crawl under a noodle arch. Space them out so kids can run between stations.
Switch It Up
Every few days, rearrange the stations or add a new twist, like carrying a ball while balancing. This keeps kids engaged and lets them practice different skills. You can also time them for a friendly challenge.
Safety First
Make sure the ground is even and free of rocks. Keep the course away from fences or hard surfaces. Always supervise, especially with younger kids, and remind them to take turns.
3. Install a Sandbox with a Built-In Cover
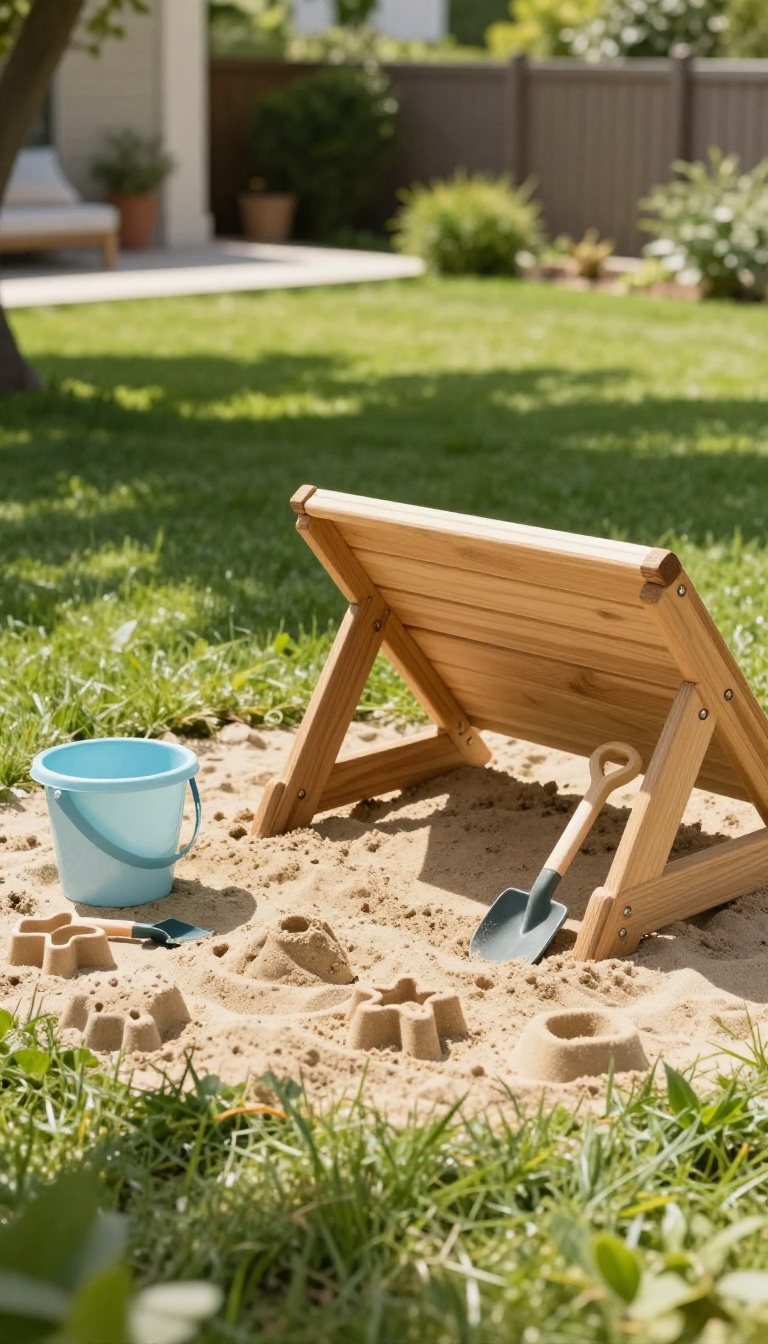
A sandbox might seem like a classic, but there's a reason it never goes out of style. It gives younger kids a dedicated spot to dig, build, and explore without turning your entire yard into a construction site. The built-in cover is the game-changer: it keeps rain, leaves, and neighborhood cats out, so the sand stays clean and ready for play.
You don't need a huge sandbox to make this work. A simple wooden box with a lid that doubles as a bench is enough. It contains the mess, protects little hands from sharp edges, and gives kids a sense of ownership over their own little plot of land.
When choosing a spot, look for partial shade so the sand doesn't get scorching hot in summer. And make sure you can see it from the kitchen window or patio, so you can keep an eye on things while they play.
Pick The Right Sand
Not all sand is created equal. Play sand is fine-grained, washed, and free of silica dust, which makes it safer for kids. Avoid construction sand, which can be rough and irritating.
A 50-pound bag or two is usually enough for a small box, but you can always add more as needed.
Build Or Buy A Cover That Works
A cover that's too heavy or awkward won't get used. Look for a lightweight lid that's easy for you to lift but sturdy enough to keep critters out. Some sandboxes come with a cover that folds into a bench, which saves space and gives kids a place to sit while they dig.
Keep It Fun And Fresh
Rotate toys every few weeks to keep the sandbox exciting. Add measuring cups, small shovels, and molds for endless digging and building. Once a month, rake the sand and remove debris.
If it gets damp, leave the cover off for a sunny afternoon to dry it out.
4. Set Up a Backyard Water Play Station
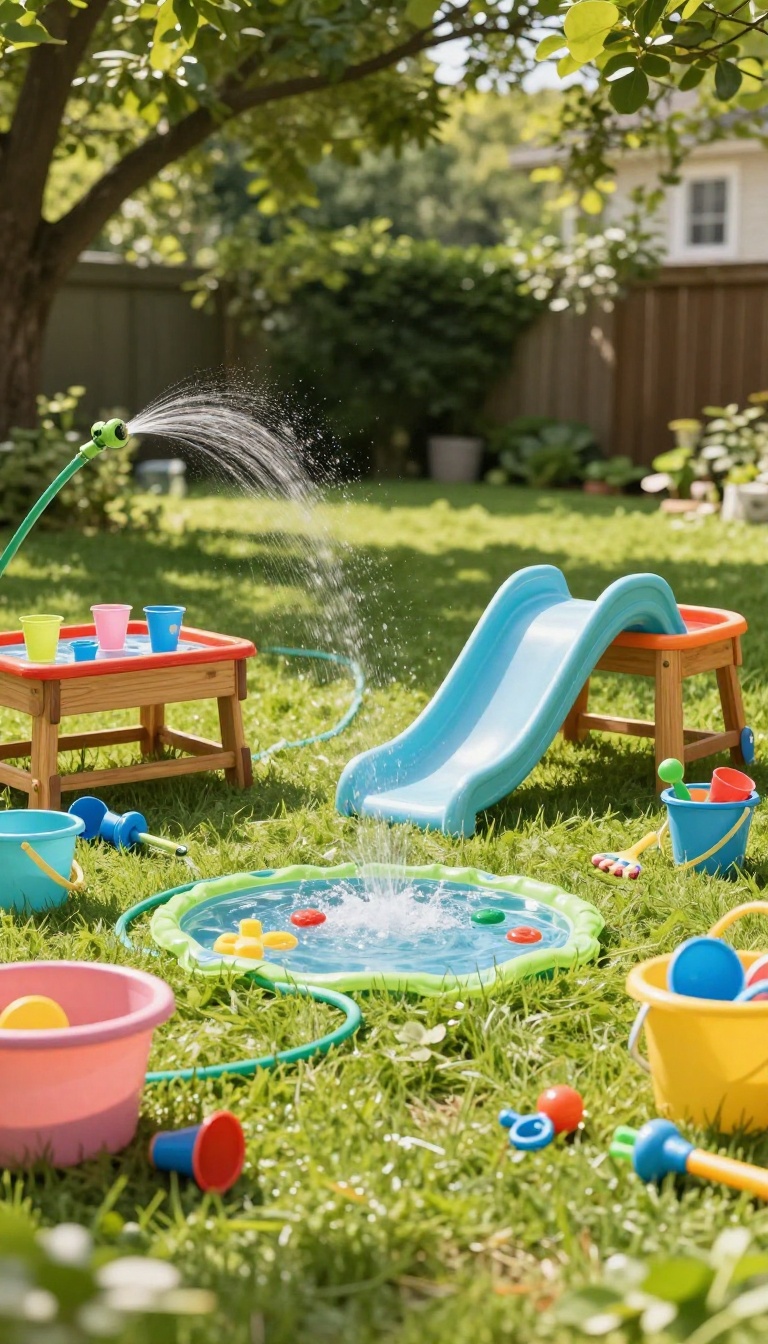
A dedicated water zone keeps kids cool and busy without the cost and upkeep of a full pool. It can be as simple as a sprinkler and a few buckets or as involved as a small splash pad with multiple stations. The key is giving water a home in your yard so it's always ready for hot afternoons.
Start by picking a spot that can get wet without causing problems. A flat area near a hose spigot works best, and a little shade helps kids last longer. You don't need a permanent setup; most of these ideas take minutes to assemble and pack away.
Sprinklers And Sprayers
A classic oscillating sprinkler is still one of the easiest wins. Set it to a low arc so kids can run through without getting blasted in the face. For something more interactive, try a wand-style sprayer or a hose attachment with different spray patterns.
These let kids aim and control the water themselves, which turns simple spraying into a game.
Water Tables And Sensory Bins
Water tables are perfect for toddlers and preschoolers who aren't ready for full-on running play. Fill one with cups, funnels, and floating toys, and you've got a self-contained activity that keeps little hands busy. You can also use a shallow plastic bin on a low table for the same effect at a fraction of the cost.
Diy Splash Pad And Slide
For older kids, a homemade splash pad adds real excitement. Lay a tarp on a gentle slope, poke a few small holes in a hose, and let water run down for a slippery slide. Always put a soft landing at the bottom and supervise closely.
A plastic kiddie pool at the end catches the water and adds another layer of fun.
Keeping It Safe And Easy
Empty water toys and tables after each use to avoid mosquitoes and algae. Store everything in a bin near the spigot so setup takes seconds. Sunscreen and a towel station nearby make it easy for kids to dry off and head back inside when they're done.
5. Hang a Tire Swing or Rope Swing from a Sturdy Tree
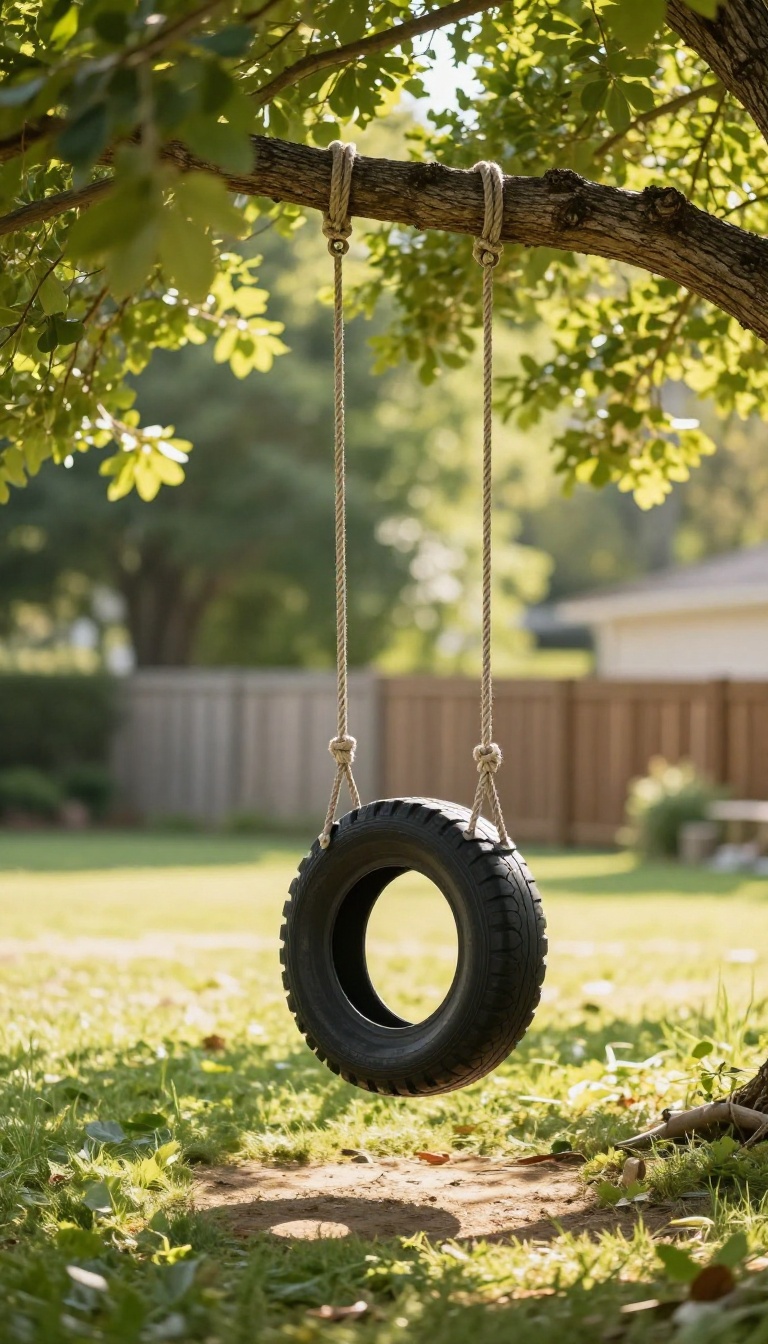
A swing hanging from a thick branch turns any backyard into a destination. It's one of those rare additions that costs almost nothing but delivers hours of giggles and gentle exercise. Kids naturally want to pump their legs, twist, and see how high they can go.
Beyond the fun, swinging helps with balance, coordination, and even sensory regulation. The back-and-forth motion is calming for some kids and exhilarating for others. Either way, it gets them outside and moving without any screens or batteries.
You don't need a perfect tree or a fancy kit. A strong branch, a sturdy rope or chain, and a safe seat are enough to create a swing that lasts for years.
Pick The Right Tree And Branch
Look for a hardwood tree like oak, maple, or hickory with a horizontal branch at least 8 inches in diameter. The branch should be at least 10 feet off the ground and free of cracks or dead wood. Avoid trees with weak wood, like willow or poplar, and never use a branch that's too close to a fence or driveway.
Choose Your Swing Style
A classic tire swing offers a bouncy, multi-directional ride that works for one or two kids. A rope swing with a disc seat is simpler and easier to install. For younger kids, a traditional belt swing gives more back support.
Whatever you pick, make sure the seat is smooth and free of sharp edges.
Install It Safely
Use a heavy-duty rope or chain rated for at least 500 pounds, and attach it with a sturdy knot or a swivel snap. Wrap the branch with a rubber sleeve or old hose to protect the bark. Hang the swing so the seat is 2 to 3 feet off the ground, and clear the area underneath of rocks, roots, or toys.
Teach Safe Swinging Habits
Show kids how to hold on with both hands and never stand on the seat. Set a rule that only one child swings at a time unless it's a tire built for two. Check the rope and attachment points every few weeks for wear, and replace anything that looks frayed or rusty.
6. Make a Fairy Garden in a Shady Corner
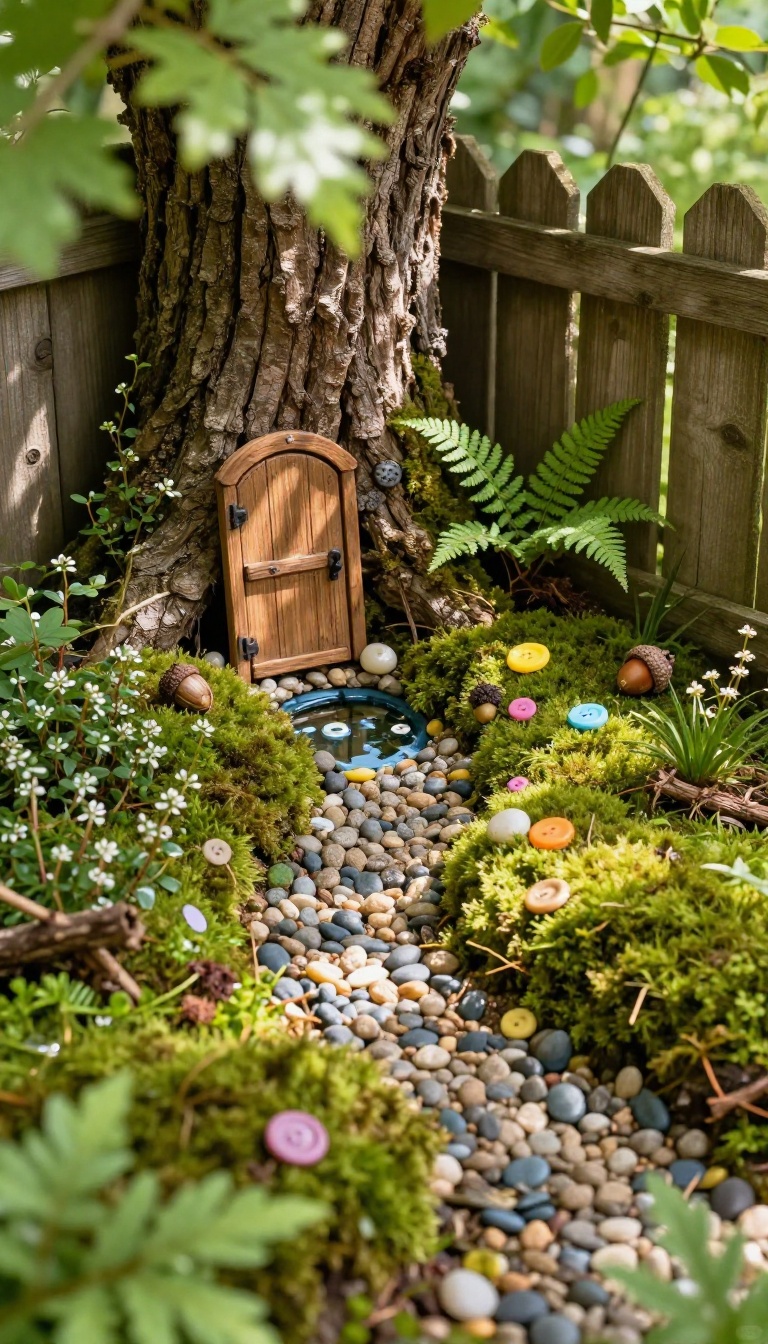
Shady spots often get ignored, but they're perfect for a tiny world that thrives without direct sun. A fairy garden turns that forgotten corner into a miniature landscape where kids can let their imaginations run wild. It's a quiet activity that balances out the running and shouting of the rest of the yard.
You don't need a lot of space or money to pull this off. A small patch of dirt, some moss, and a few tiny accessories are enough to get started. The real magic happens when kids take ownership of the design and story.
Pick The Right Spot
Look for an area that gets partial to full shade, since most fairy garden plants prefer cooler conditions. A spot near a tree trunk, under a bush, or beside a fence works well. Make sure the ground is level enough to hold small items without them rolling away.
Gather Plants And Tiny Treasures
Use low-growing plants like moss, creeping thyme, or small ferns to create a lush base. Add pebbles, twigs, and miniature furniture from a craft store or made from natural materials. Kids can also repurpose old toys, buttons, or beads as decorations.
Build And Play
Let kids arrange the plants and accessories however they like. They might create a winding path, a tiny pond, or a secret hideout. Encourage them to invent stories about who lives there and what happens each day.
The garden becomes a backdrop for hours of quiet storytelling.
Keep It Going
Check the garden after heavy rain and tidy up any fallen leaves. Replace plants if they outgrow the space or dry out. Kids can add new elements over time, like a seasonal decoration or a small sign.
This keeps the project fresh and gives them a reason to return.
7. Build a Simple Climbing Dome or Play Structure
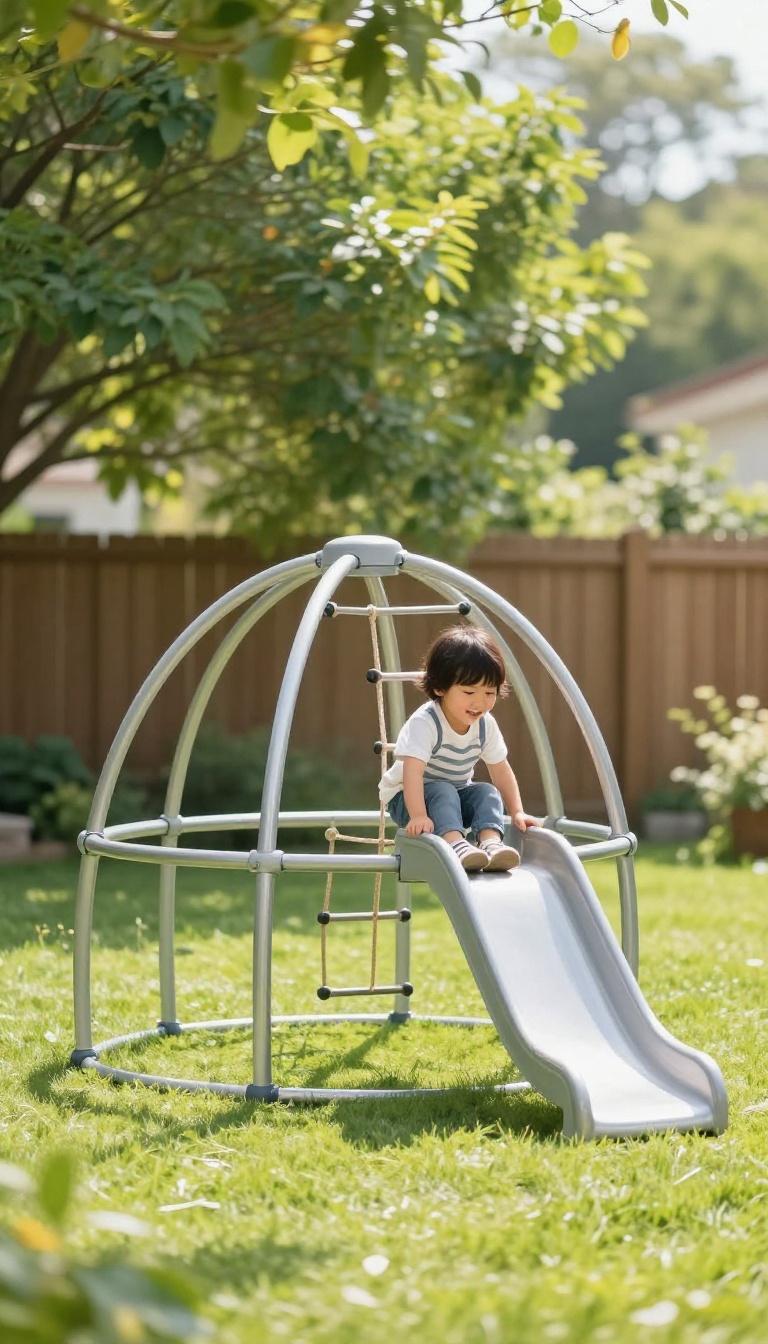
A climbing dome gives kids a jungle gym without the jungle-sized price tag. It's a compact, sturdy frame that invites climbing, hanging, and balancing in a safe, contained space. You can also build a simple wooden play structure if you're handy, or buy a kit that snaps together in an afternoon.
Climbing helps kids build strength, coordination, and confidence. A dome or small play set offers just enough challenge to keep them engaged without overwhelming them. It's a great way to add active play to a backyard that doesn't have room for a full swing set.
Choosing The Right Structure
Climbing domes come in metal or plastic, and they're usually 4 to 6 feet wide. Metal ones last longer and handle weather better, while plastic ones are cheaper and easier to move. For a wooden play structure, look for kits with pre-drilled holes and clear instructions.
Cedar and redwood resist rot naturally, so you won't need to treat them as often.
Safety And Installation Tips
Set the structure on a level surface, ideally on grass or a shock-absorbing surface like rubber mulch or wood chips. Leave at least 6 feet of clear space around it so kids don't crash into fences or trees. Check for sharp edges and tighten bolts regularly.
If you're building from scratch, anchor the posts in concrete for stability.
Making It More Fun
Add a few accessories to keep the structure interesting. Hang a rope ladder, attach a small slide, or drape a canopy over one side for shade. You can also paint the dome in bright colors or add climbing holds to a wooden set.
Rotate toys and challenges every few weeks to keep kids coming back.
8. Create a Chalk and Art Wall on the Fence
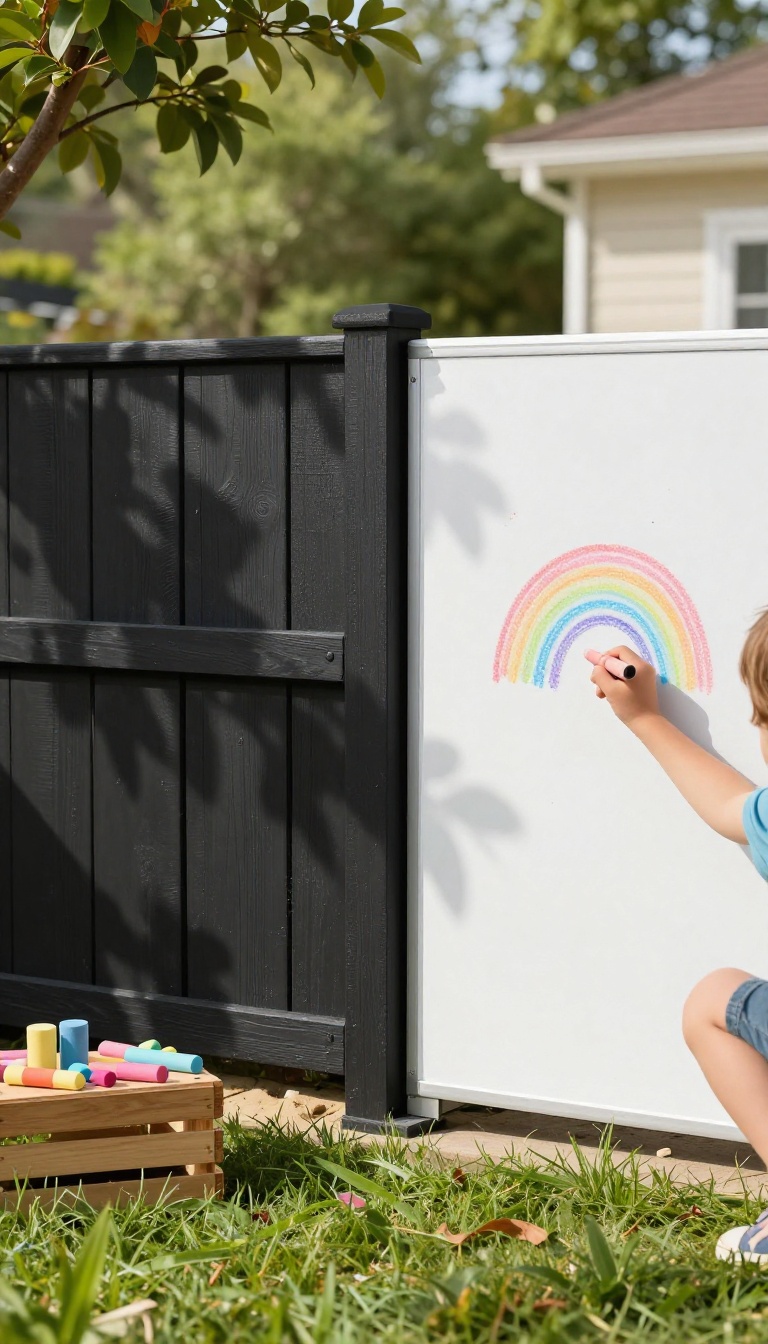
A plain fence does more than mark your property line. With a little prep, it becomes a giant canvas that kids can draw on, erase, and start over whenever they want. No more fighting over paper or hunting for sidewalk space.
You get a reusable art station that lives outside and never runs out of room. It works for toddlers scribbling shapes and big kids designing obstacle courses or scoreboards. Best of all, it takes an afternoon to set up and costs far less than a playhouse.
The fence is already there, so you're just changing its job. You can paint a section with chalkboard paint, screw on a whiteboard panel, or do both side by side. That gives kids a choice between dusty chalk and smooth markers.
Pick a stretch of fence that gets shade part of the day. Direct sun makes chalkboard paint too hot to touch and dries out markers fast. A spot near a patio or sandbox keeps the art zone in the middle of the action.
Before you start, clean the fence boards and let them dry completely. Rough or dirty wood makes paint peel. A quick sanding on splinters saves little hands later.
Pick Your Surface
Chalkboard paint is the classic choice. It rolls on like regular paint and turns any flat fence into a black or green chalkboard. You can buy it in a can or make your own with unsanded grout and flat paint.
A whiteboard panel gives you bright colors and no dust. Look for a large sheet of melamine or shower board from a hardware store. Screw it directly to the fence rails and seal the edges with trim.
If you have the space, do both. One section for chalk, one for markers. Kids can switch when they get bored.
Prep And Paint The Right Way
Chalkboard paint needs a few coats. Two or three thin layers work better than one thick one. Let each coat dry fully before adding the next.
After the final coat, let it cure for at least three days. Then rub the whole surface with chalk sideways and wipe it off. This 'seasoning' step keeps future drawings from leaving ghost marks.
For whiteboard panels, just wipe them down with a damp cloth. No curing needed.
Stock It And Keep It Fun
Hang a small bucket or mesh bag on a hook nearby. Fill it with thick sidewalk chalk, a couple of erasers, and washable markers. A spray bottle of water makes cleanup a game.
Add a few stencils or shape templates for younger kids. Older ones might like a chalk holder or a scoreboard section for backyard games. Rotate the supplies every few weeks.
New colors or a pack of glitter chalk keeps the wall feeling fresh.
9. Set Up a Backyard Camping and Storytelling Spot
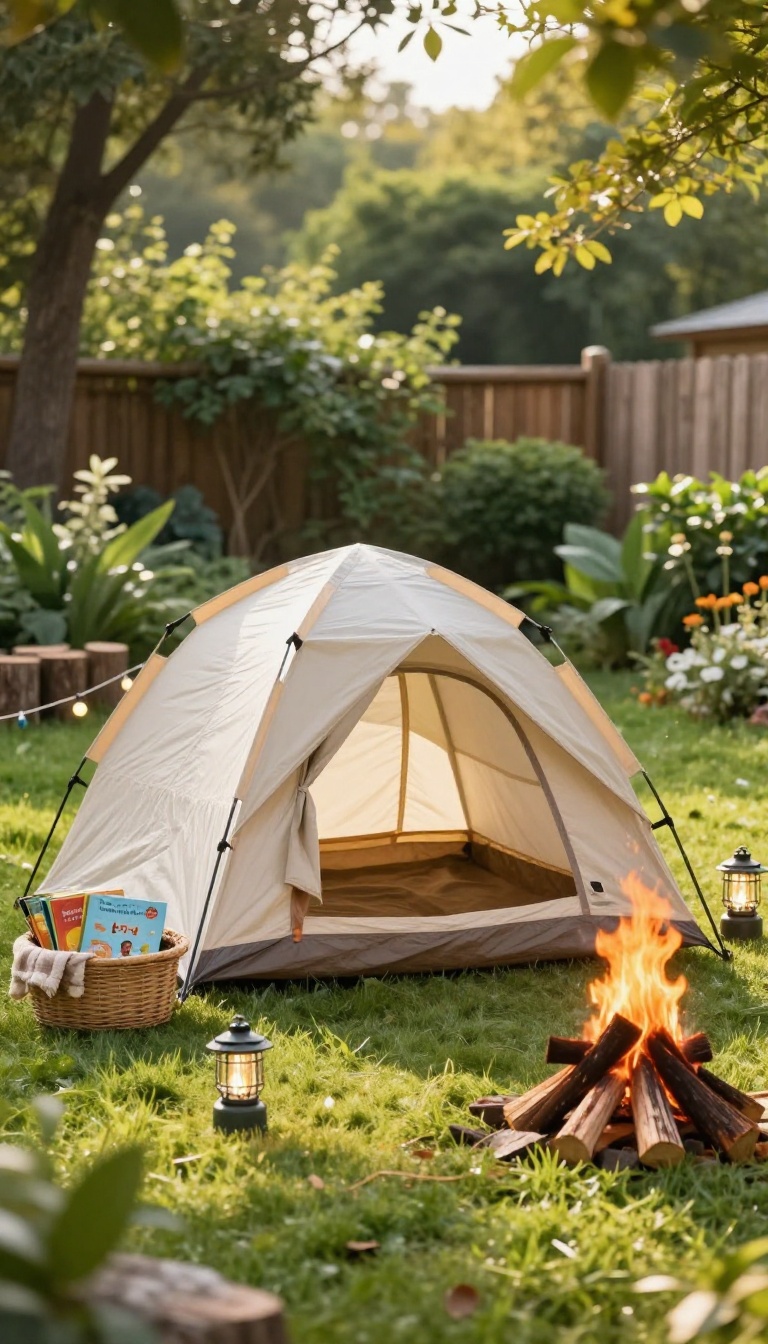
Camping doesn't have to mean packing the car and driving for hours. A small tent, some log seats, and a pretend fire can turn a corner of your yard into a cozy campsite any night of the week. It's a simple setup that invites hours of pretend play and quiet evening stories.
Kids love the feeling of having their own little hideaway, and a backyard campsite delivers exactly that. You don't need much space or fancy gear. A patch of grass or a corner near a fence works just fine.
The goal is to create a spot that feels separate from the rest of the yard, even if it's only a few feet away.
Pick The Right Spot
Look for a flat area away from the main play zones. You want enough room for a small tent and a few seats. If you have a tree or a fence, use it as a natural boundary.
That helps the campsite feel like its own little world.
Gather The Gear
A two-person tent is plenty. Add a couple of log stumps or small folding chairs for seating. For the fire, you can use a real fire pit with adult supervision, or go with a faux fire made from logs and orange fabric.
A battery-operated lantern or string lights finish the look.
Make It Story-ready
Keep a basket of books or a few story cards near the tent. Blankets and pillows make the space comfortable for reading aloud. At night, the faux fire and lanterns create a warm glow that sets the mood for tales and giggles.
10. Plant a Kid-Friendly Garden They Can Tend
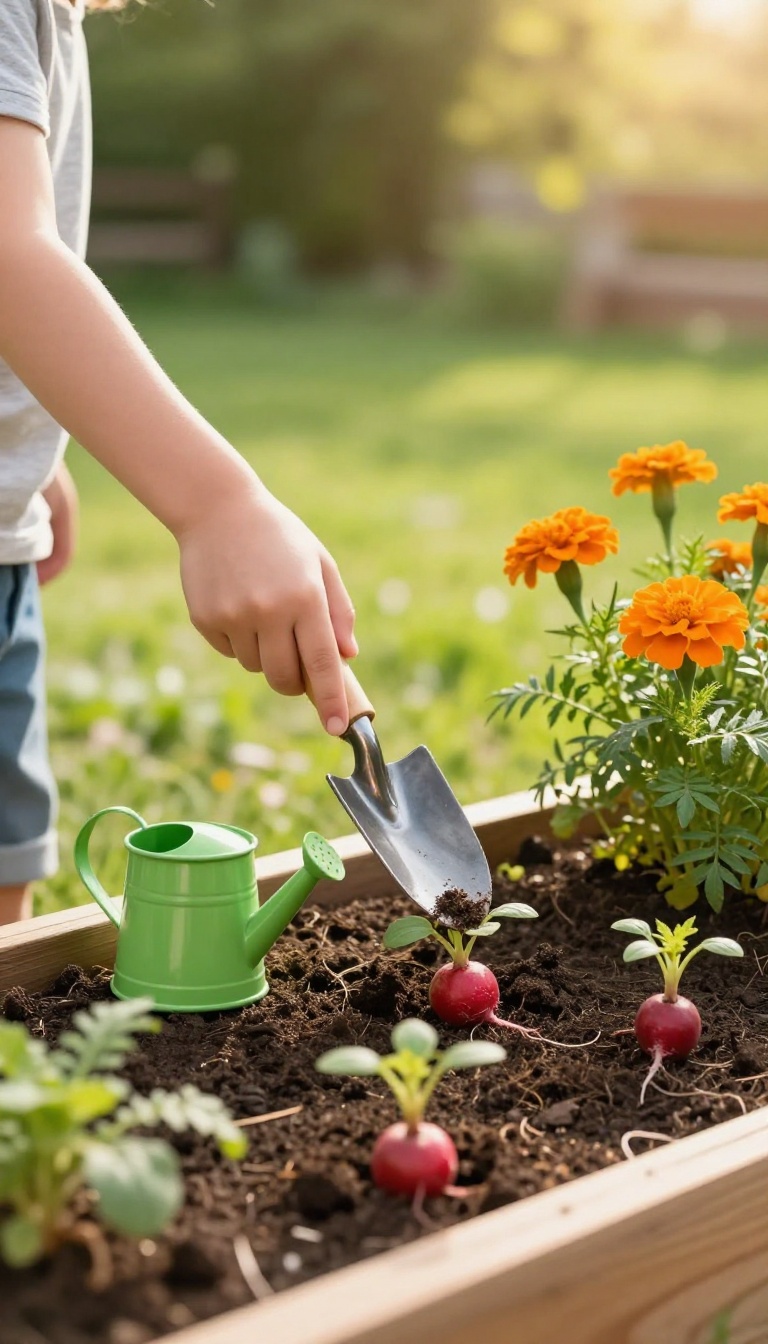
Handing a kid a trowel and a patch of dirt does more than fill an afternoon. It gives them a living project that changes every week and a reason to check on something besides a screen. A small garden they own from seed to harvest builds patience, responsibility, and a little bit of pride.
You don't need a full vegetable plot to make this work. A few containers, a raised bed, or even a corner of an existing flower bed can become their territory. The key is giving them real choices and real tasks, not just letting them watch you do the work.
Pick Plants That Forgive Mistakes
Kids water too much, too little, or directly on the leaves. Choose tough, fast-growing plants that bounce back. Cherry tomatoes, bush beans, sunflowers, radishes, and marigolds all handle imperfect care and give quick results.
Radishes sprout in days, which keeps short attention spans hooked.
Give Them Their Own Tools And Space
A small trowel, a watering can, and a labeled section of the yard send the message that this is theirs. Let them decorate a wooden stake with their name or paint a pot. When they have ownership, they show up to water without being asked.
Turn Chores Into Rituals
Make watering and weeding part of a daily or weekly routine, like right after breakfast or before dinner. Keep a small chart or calendar where they can mark off tasks. The routine matters more than perfection, and the habit sticks when it feels like a normal part of the day.
Let Them Eat What They Grow
The payoff is the best part. Let kids harvest cherry tomatoes for a snack or cut flowers for the kitchen table. Even a single radish they pulled themselves tastes better to them.
That connection between dirt and dinner is the whole point.
11. Build a Balance Beam and Stepping Stone Path
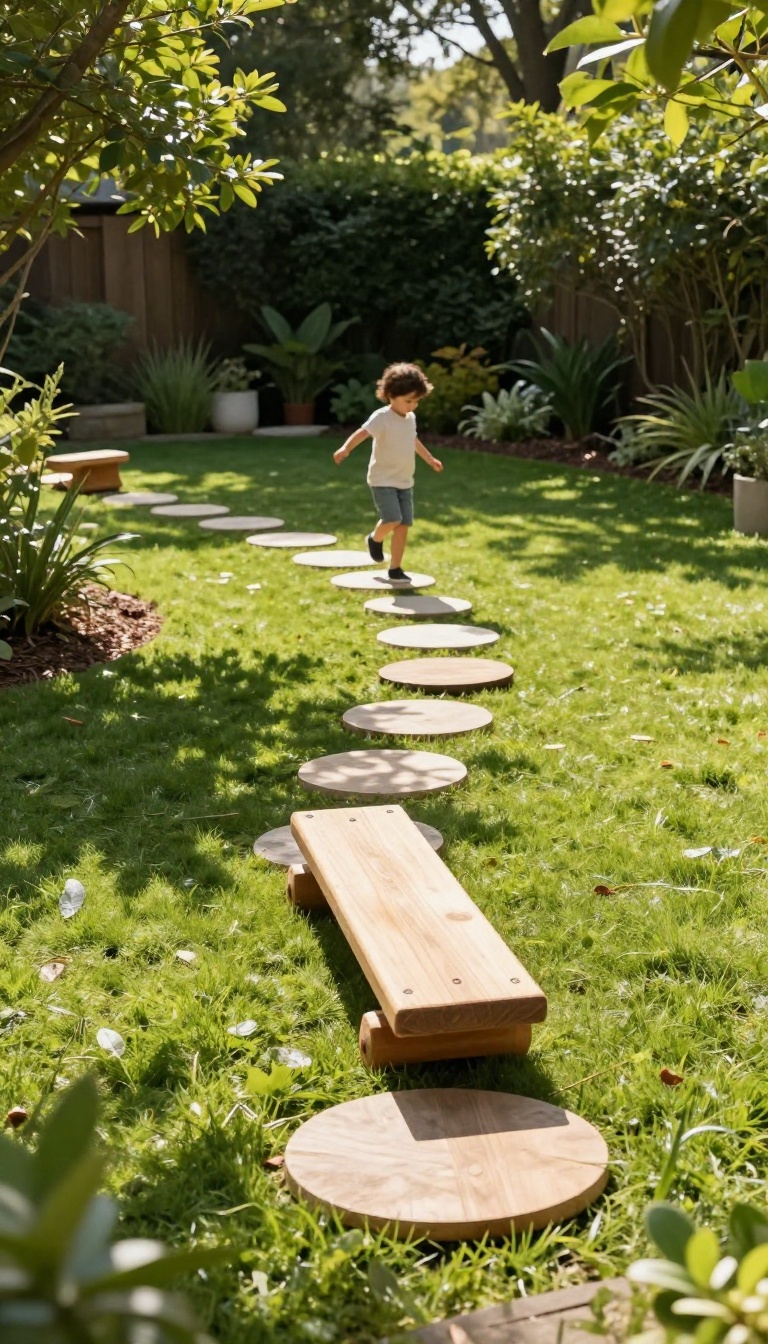
A balance beam and stepping stone path turn your yard into a playful obstacle course that kids can tackle again and again. These simple additions build coordination, focus, and confidence without costing much. The best part?
You can rearrange them whenever the challenge starts to feel too easy. All you need are a few low beams and some flat stones or pavers. Set them up in a line, a curve, or a zigzag, and watch your kids spend hours testing their balance.
It's a project you can put together in an afternoon and tweak all season long.
Start by choosing a spot with soft ground, like grass or mulch, to cushion any tumbles. You can use a single 4×4 beam laid on the ground, or create a series of beams at different heights for more variety. For stepping stones, look for flat rocks, wooden rounds, or concrete pavers.
Space them so kids have to stretch a little, but not so far that it feels impossible. The setup encourages kids to slow down and think about their movements, which is great for building body awareness. Younger kids might just enjoy walking along a single beam, while older ones can try hopping from stone to stone or balancing while carrying a small object.
You can also time them for a friendly challenge, but keep it low-pressure. One of the best things about this idea is how easy it is to change. Move the stones closer together for beginners or farther apart for a bigger test.
Add a curve or a turn to keep things interesting. You can even incorporate other elements like a small log to step over or a hoop to jump through. The constant tweaking keeps kids engaged and excited to come back.
Safety is simple: check that beams are stable and stones don't wobble. Avoid placing them near hard surfaces like concrete patios. If you have very young children, keep the beam low to the ground and supervise closely.
With a little common sense, this becomes a safe and endlessly fun activity.
Choosing Your Materials
You don't need fancy equipment. A couple of 4×4 posts or landscape timbers work great for beams. For stepping stones, flat rocks from your yard, wooden slices, or inexpensive pavers from a home store are perfect.
Just make sure they're stable and not too slippery when wet.
Setting It Up
Lay your beam on level ground. If it rocks, dig a shallow trench or add a bit of sand to stabilize it. For stepping stones, arrange them in a pattern that suits your kids' ages.
Start with small gaps and increase the distance as they get better. You can also create a starting and ending point with a small flag or cone.
Keeping It Fresh
Change the layout every few weeks. Add a balance challenge like carrying a beanbag or walking backward. You can also combine the beam and stones with other backyard elements, like a tunnel or a hoop, to make a full obstacle course.
The variety keeps kids coming back for more.
12. Create a Music and Sound Wall with Recycled Items
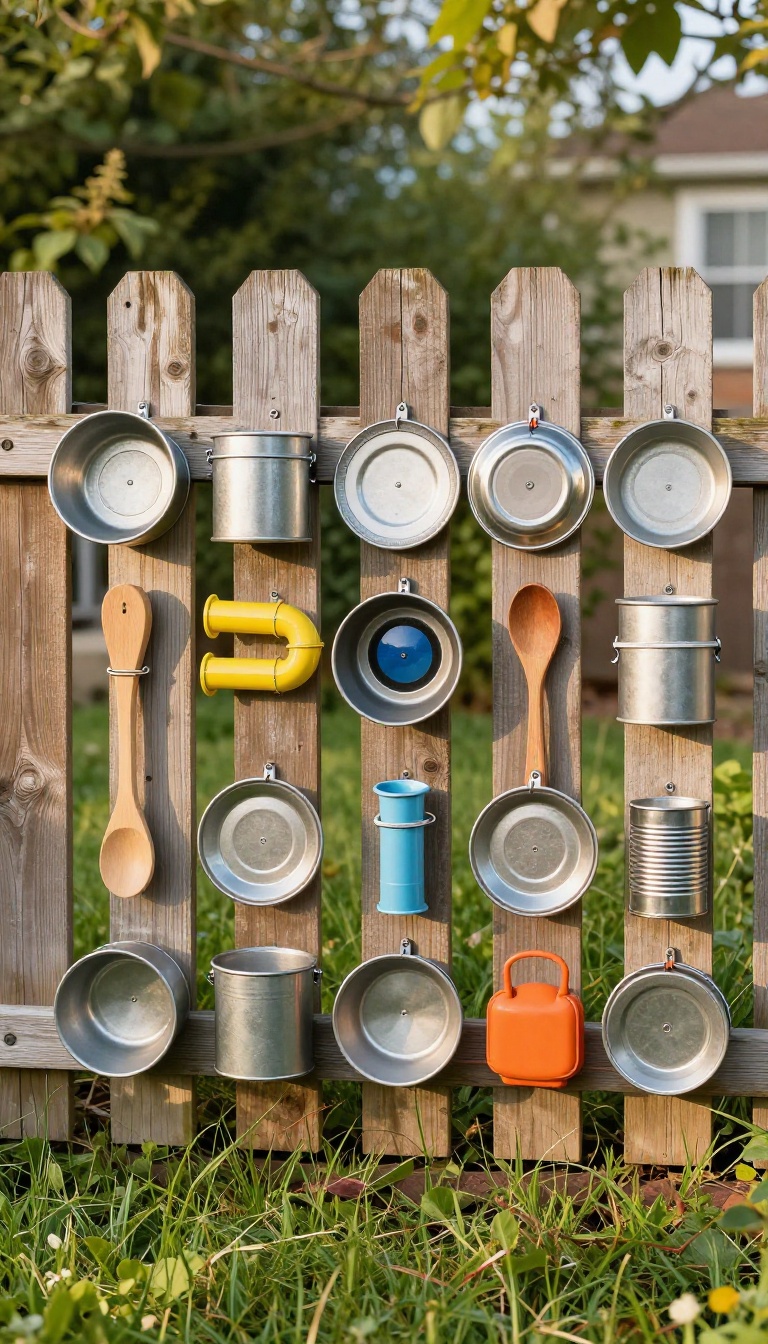
Turn your fence or shed wall into a percussion playground using stuff you'd otherwise toss. Old pots, PVC pipes, and wooden spoons become instruments that kids can bang, tap, and strum. It's loud, hands-on, and weirdly satisfying for all ages.
The best part? You can build it in an afternoon with a drill and a few screws. Kids learn rhythm, cause and effect, and how to make music without a single screen.
A sound wall isn't about playing songs perfectly. It's about experimenting with tone, volume, and rhythm. You're giving kids a vertical canvas for noise, and they'll figure out the rest.
Start by collecting items from your garage or recycling bin. Think metal pots, baking sheets, plastic tubs, and lengths of pipe. The more variety, the richer the soundscape.
Mount everything securely so it can take a beating. Then hand over some spoons and let the jam session begin.
Gather Your Recycled Instruments
Raid the kitchen for dented pots, muffin tins, and wooden spoons. Hit the hardware store for PVC pipes in different diameters—they make great marimba-like tones. Old license plates, coffee cans, and metal bowls add clang and ring.
Just avoid anything with sharp edges or rust.
Mount And Arrange For Maximum Play
Attach items to a fence or wall using screws, zip ties, or heavy-duty hooks. Space them so kids can reach comfortably. Group similar sounds together or mix them up for surprise.
Leave some items loose so they can be taken down and played like handheld instruments.
Add Weatherproof Touches
Metal will rust, so give pots and pans a coat of outdoor spray paint if you want them to last. Wooden spoons can be sealed with food-safe oil. Plastic items hold up well but may fade in the sun.
Check screws and ties every few months to keep everything safe.
Turn Noise Into Games
Challenge kids to copy a rhythm you clap out. Have them find the highest and lowest sounds on the wall. Or let them compose a 'rainstorm' using soft taps and loud bangs.
These games build listening skills and keep the wall fresh.
13. Set Up a Shaded Reading and Relaxation Nook
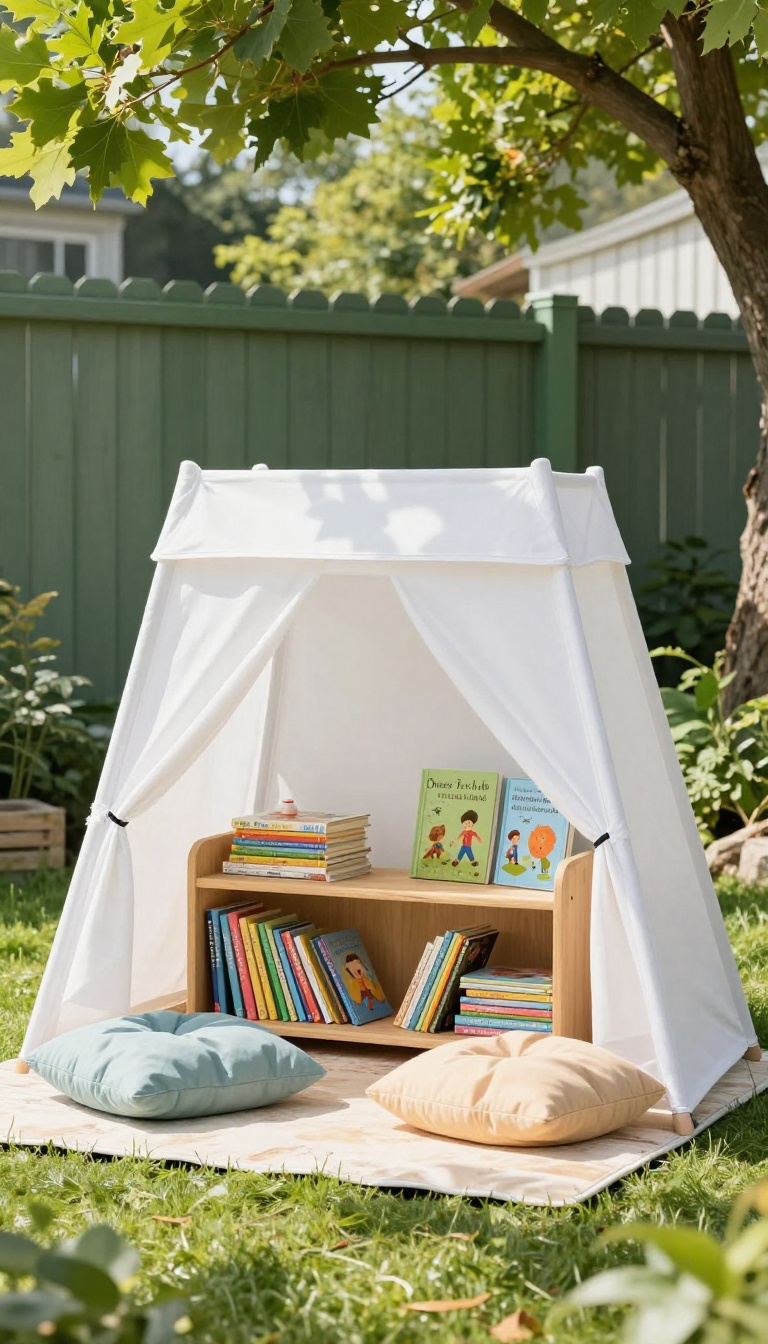
Every active backyard needs a quiet counterpoint, a spot where kids can catch their breath and let their imaginations slow down. A shaded reading nook gives them that pause without sending them inside. It's a simple setup: a small canopy for shade, a few soft cushions, and a low bookshelf stocked with favorites.
The result is a calm retreat they'll use between tag, swings, and water fights.
Kids naturally drift toward cozy corners, especially when the sun is high and they've been running for an hour. A dedicated nook signals that it's okay to rest, read, or just lie back and watch the clouds. You don't need much space; a corner of the yard or the shady side of a shed works fine.
The key is making it feel intentional and inviting, not like an afterthought.
Pick A Spot With Natural Shade
Look for a tree that casts dappled light or a spot beside a fence that gets shade in the afternoon. If you don't have either, a pop-up canopy or a simple shade sail will do the job. Position it so it blocks the harshest sun but still lets in a breeze.
A little trial and error on a sunny day will show you the best angle.
Layer In Comfort
Start with a waterproof outdoor rug or a thick blanket to define the space. Add cushions, beanbags, or a small foam mat that kids can move around. A low plastic crate or a small wooden box works as a table for drinks and snacks.
Keep everything easy to wipe down or toss in the wash.
Stock It With Books And Art Supplies
A small bookshelf or a weatherproof bin keeps reading material organized and dry. Rotate books every couple of weeks to keep things fresh. Add a caddy with sketchpads, colored pencils, and a few quiet toys.
The goal is to make it easy for kids to grab something and settle in without asking for help.
Make It Their Own
Let kids choose a few decorations, like a string of solar lights or a small flag. A clipboard with paper invites impromptu drawing or nature journaling. If they want to bring out a stuffed animal or a special pillow, let them.
When they feel ownership, they'll use the nook more often and keep it tidy.
FAQ
What are the best backyard ideas for small spaces?
Focus on vertical play like a climbing wall or hanging swing, and use multi-purpose items like a sandbox with a lid that doubles as a bench. Water tables and chalk walls also work well in tight areas.
How can I keep backyard play safe for young kids?
Set clear boundaries, use soft ground cover under climbing equipment, and always supervise water play. Check for sharp edges and secure any heavy items that could tip.
What backyard ideas work for multiple ages?
Obstacle courses, sandboxes, and art walls can be adapted for different skill levels. A climbing dome or swing set often appeals to a wide age range with simple adjustments.
Do I need a big budget to create a fun backyard?
Not at all. Many ideas use recycled or inexpensive materials like tires, pallets, and pool noodles. Start with one or two projects and add more over time.
How do I encourage kids to play outside more?
Make the backyard inviting with a mix of active and quiet zones, and rotate toys or activities to keep things fresh. Joining them for a game or project also boosts excitement.
Conclusion
Turning a plain patch of grass into a kid-friendly playground doesn't happen overnight, and it shouldn't. Start with one or two ideas that match your kids' ages and your available space, then let the yard grow with them. A sandbox today might become a climbing wall in two years.
The real win isn't a perfectly designed backyard.
It's hearing your kids beg to stay outside five more minutes. Pick something from this list, try it this weekend, and adjust as you go. Your future self, the one sipping coffee while they play, will thank you.