15 Unlevel Backyard Ideas for Smarter Sloped Yard Design
A sloped backyard can feel like a problem you inherited rather than a space you get to enjoy. Water runs toward the house, the mower fights you the whole way up, and flat-ground furniture never quite sits right.
The good news is that a grade change is actually an opportunity. Hillsides give you natural drama, better views, and room for features a flat lot could never pull off.
The trick is working with the slope instead of fighting it. These 15 ideas cover terraces, retaining walls, pathways, and water features that turn an awkward incline into the best part of your property.
1. Terraced Garden Beds
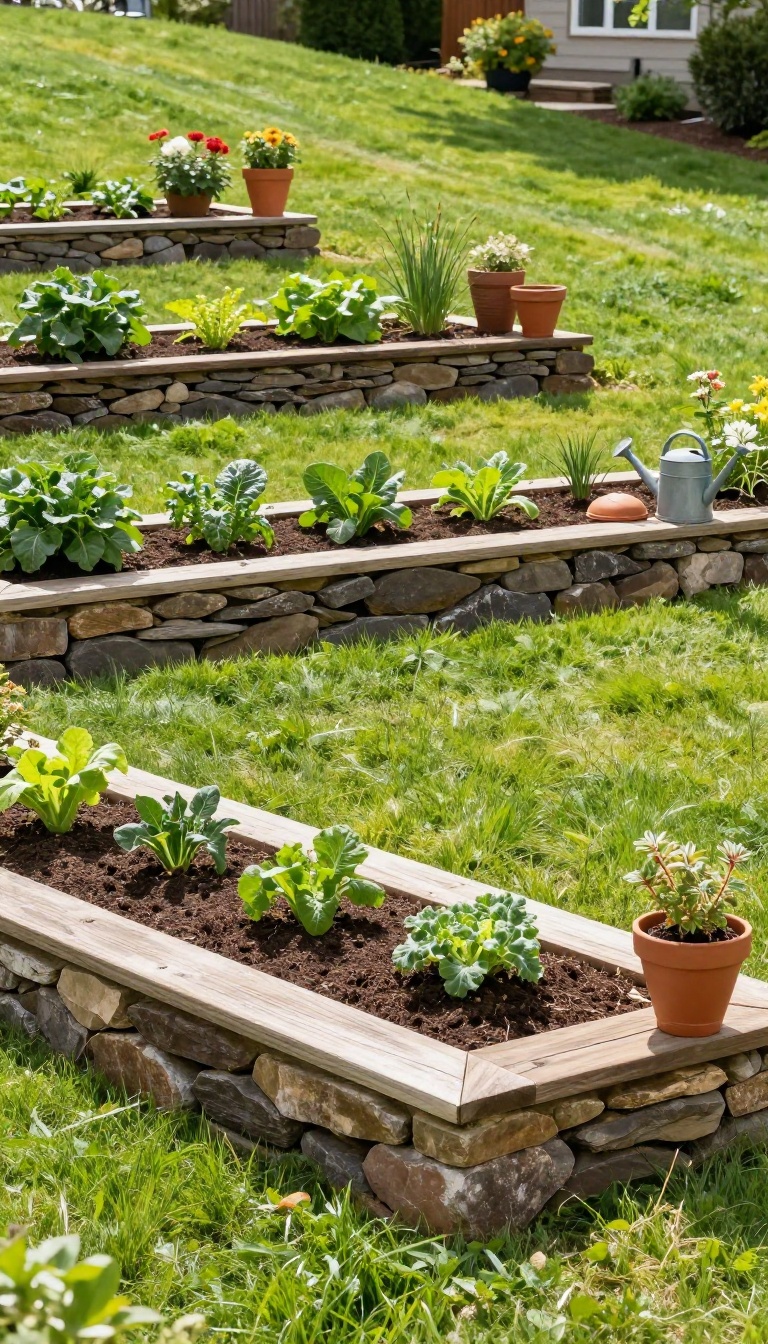
Terraced beds turn a steep, unusable hillside into a series of flat planting spaces that actually work. Instead of one long slope where soil washes away with every storm, you get level pockets that hold water, nutrients, and roots in place. It's one of the oldest tricks in farming, and it works just as well in a suburban backyard.
Each step gives you a stable surface for vegetables, flowers, or shrubs, and the whole thing reads as intentional design rather than a graded mess.
The basic move is simple: cut level shelves into the hill and hold each one with a short retaining wall. The walls do the heavy lifting, stopping soil from sliding downhill, while the flat beds give plants a fair shot at growing. You don't need heavy machinery or an engineering degree.
Most residential slopes can be terraced with stacked blocks, timber, or natural stone, and you can build it in stages over a few weekends. Start at the bottom and work your way up. That way each finished tier supports the one above it, and you're never trying to build on loose, unstable ground. ### Sizing Your Tiers Keep each terrace bed between 4 and 8 feet deep.
That's wide enough to plant two rows of vegetables or a layered mix of perennials, but narrow enough that you're not moving mountains of soil. Wall height matters too. Stay under 3 feet per tier unless you bring in an engineer, since taller walls need proper footings and drainage.
If your slope is steep, use more short tiers instead of one tall wall. ### Picking Wall Materials Segmental block is the easiest DIY option. It stacks dry, locks together, and comes in colors that blend with most landscapes. Timber is cheaper but rots over time, especially in wet climates.
Natural stone looks the best on a rustic hillside, though it takes more patience to fit. Whatever you choose, add a gravel backfill behind the wall so water drains instead of pushing the wall out. ### Planting the Levels Treat each terrace like its own garden bed. Put thirsty crops like lettuce and beans on the lower tiers where water collects, and drought-tolerant herbs or succulents up top.
Tall plants go at the back of each bed so they don't shade the row below. Trailing plants like creeping thyme can spill over the wall faces, softening the hard edges and hiding small gaps. ### Handling Water and Access Water is the whole reason terracing works, so give it a path. Add a slight backward tilt to each bed so rain soaks in rather than running off, and run a French drain or gravel trench behind the top wall.
For access, leave a few gaps in the walls for steps or a narrow path. You'll thank yourself at harvest time when you're carrying baskets up and down instead of climbing over blocks.
Sizing Your Tiers
Keep each terrace bed between 4 and 8 feet deep. That's wide enough to plant two rows of vegetables or a layered mix of perennials, but narrow enough that you're not moving mountains of soil. Wall height matters too.
Stay under 3 feet per tier unless you bring in an engineer, since taller walls need proper footings and drainage. If your slope is steep, use more short tiers instead of one tall wall.
Picking Wall Materials
Segmental block is the easiest DIY option. It stacks dry, locks together, and comes in colors that blend with most landscapes. Timber is cheaper but rots over time, especially in wet climates.
Natural stone looks the best on a rustic hillside, though it takes more patience to fit. Whatever you choose, add a gravel backfill behind the wall so water drains instead of pushing the wall out.
Planting The Levels
Treat each terrace like its own garden bed. Put thirsty crops like lettuce and beans on the lower tiers where water collects, and drought-tolerant herbs or succulents up top. Tall plants go at the back of each bed so they don't shade the row below.
Trailing plants like creeping thyme can spill over the wall faces, softening the hard edges and hiding small gaps.
Handling Water And Access
Water is the whole reason terracing works, so give it a path. Add a slight backward tilt to each bed so rain soaks in rather than running off, and run a French drain or gravel trench behind the top wall. For access, leave a few gaps in the walls for steps or a narrow path.
You'll thank yourself at harvest time when you're carrying baskets up and down instead of climbing over blocks.
2. Retaining Walls with Built-in Seating
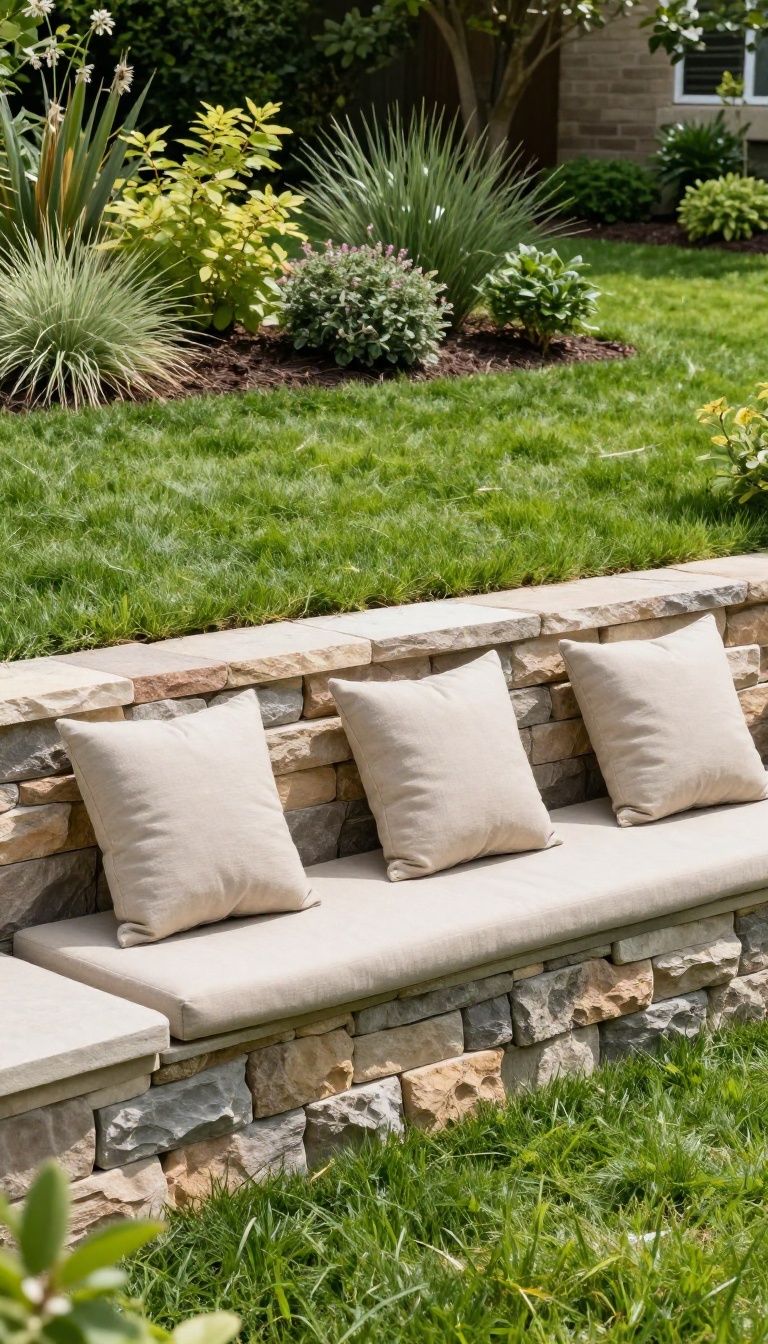
A retaining wall does the heavy lifting on a slope, holding back soil so you get flat, usable ground. But when you add seating to that same wall, you double its value without eating up extra space. It becomes a spot to sit, gather, and actually enjoy the yard instead of just looking at it.
On a sloped lot, every square foot counts. A plain retaining wall solves the grade problem but leaves you with a vertical surface that just sits there. Built-in seating turns that surface into a functional feature.
You get structure and a place to perch, all in one footprint.
Choosing The Right Height And Depth
Seat height should land around 16 to 18 inches above the patio or lawn level. That's comfortable for most adults and keeps the wall from feeling like a barrier. Depth matters too.
Aim for at least 15 inches of seat surface so people can sit back without feeling perched. If your wall needs to be taller for soil retention, add a separate seat ledge at the right height and let the wall rise behind it.
Materials That Handle Weather And Weight
Concrete blocks, natural stone, and timber are the usual choices. Concrete and stone hold up best over time and need almost no maintenance. Timber costs less upfront but can rot in damp soil.
Whatever you pick, make sure the wall itself is engineered to hold back the earth. The seating is just the cap. Don't skip drainage gravel or weep holes behind the wall, or you'll be fixing it in a few years.
Making It Comfortable And Social
A bare stone or concrete seat gets cold and hard fast. Add cushions, a few outdoor pillows, or a thin pad to make it inviting. If you want a fire pit or a small table nearby, plan the wall layout so seating wraps around the gathering zone.
That turns a simple retaining wall into the backbone of an outdoor room.
3. Switchback Pathways
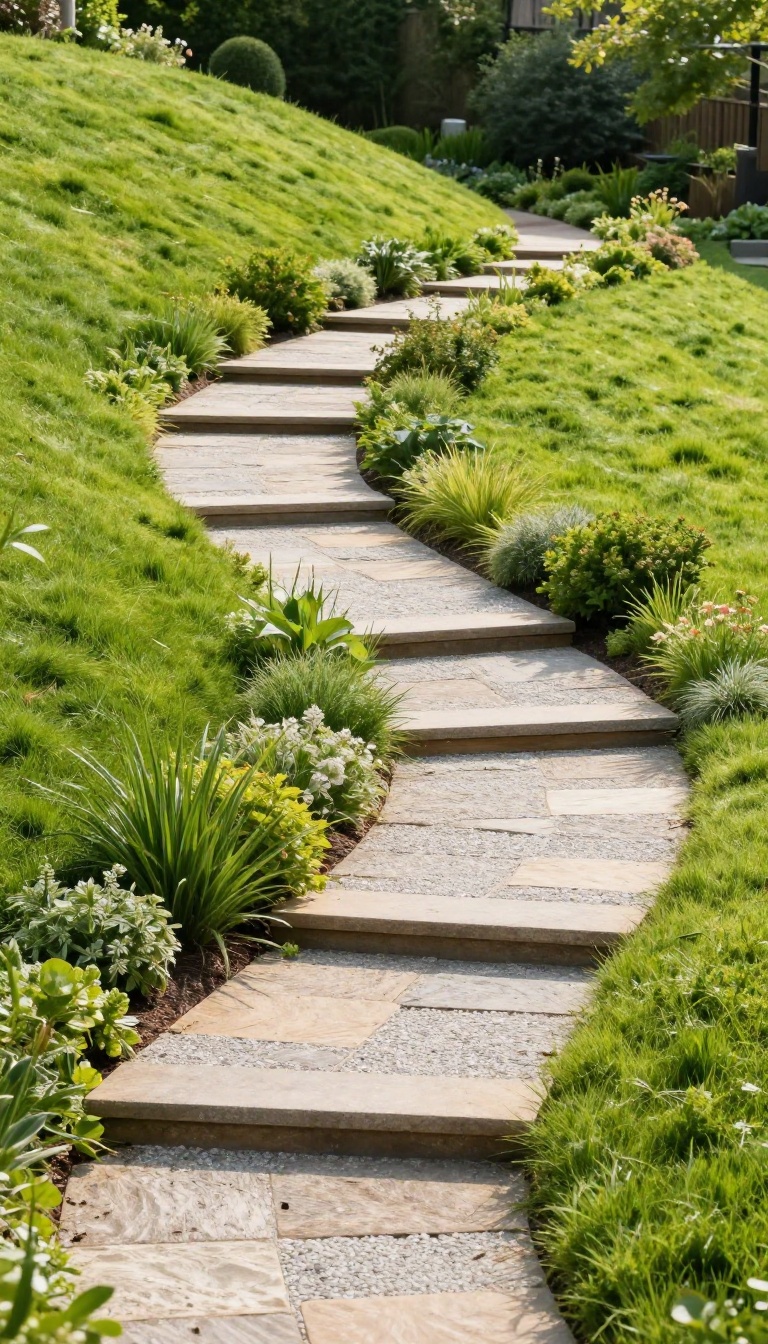
A straight path up a steep slope is a workout you didn't sign up for. Switchbacks break that climb into gentler, shorter bursts by zigzagging across the hill instead of charging straight up it. The result is a route that feels easier underfoot and a lot safer when the ground is wet or loose.
Switchbacks work because they trade steepness for distance. Instead of a 30-degree climb, you get a series of mild grades that almost anyone can walk without grabbing for a handrail. That matters on a backyard slope where kids, guests, and older family members all need to get from the patio to the upper lawn.
The zigzag pattern also slows water down. Each turn acts like a small speed bump, so runoff has less chance to carve a channel and wash out your path. You can build switchbacks with gravel, pavers, stone, or even timber steps, depending on your budget and how the hill sits.
The key is planning the turns before you dig, because a bad switchback layout feels like a maze instead of a shortcut.
Plan The Turns Around Your Slope
Walk your hill at different times of day and note where it feels steepest. Those spots need the most turns. A good rule is to keep each straight run between 8 and 12 feet long, then turn back the other way.
If your slope is short and sharp, two or three switchbacks may be enough. For a long, gradual hill, you might need four or five to keep the grade comfortable. Mark the path with stakes and string before you commit to digging.
It's much easier to adjust a string line than to rebuild a stone path.
Build For Drainage And Grip
Switchbacks and water don't always get along, so give runoff somewhere to go. Add a slight outward tilt to each run so water sheets off the path instead of pooling at the turns. At every corner, set a small drain or gravel-filled pit to catch what collects.
For the surface, choose something with texture. Decomposed granite, flagstone, and rough pavers all offer better traction than smooth concrete. If your slope gets icy in winter, consider a path that gets morning sun so it thaws faster.
Make The Landings Work For You
The flat spots at each turn aren't just functional. They're free real estate. Widen a landing and you've got room for a bench, a planter, or a small grouping of pots.
A landing halfway up is a natural place to pause and enjoy the view you worked for. You can also use landings to break up a long path visually, so the whole route feels like a series of small gardens instead of one big staircase. Just keep the landing wide enough to stand comfortably and turn around without stepping off the edge.
4. Deck with Multi-Level Platforms
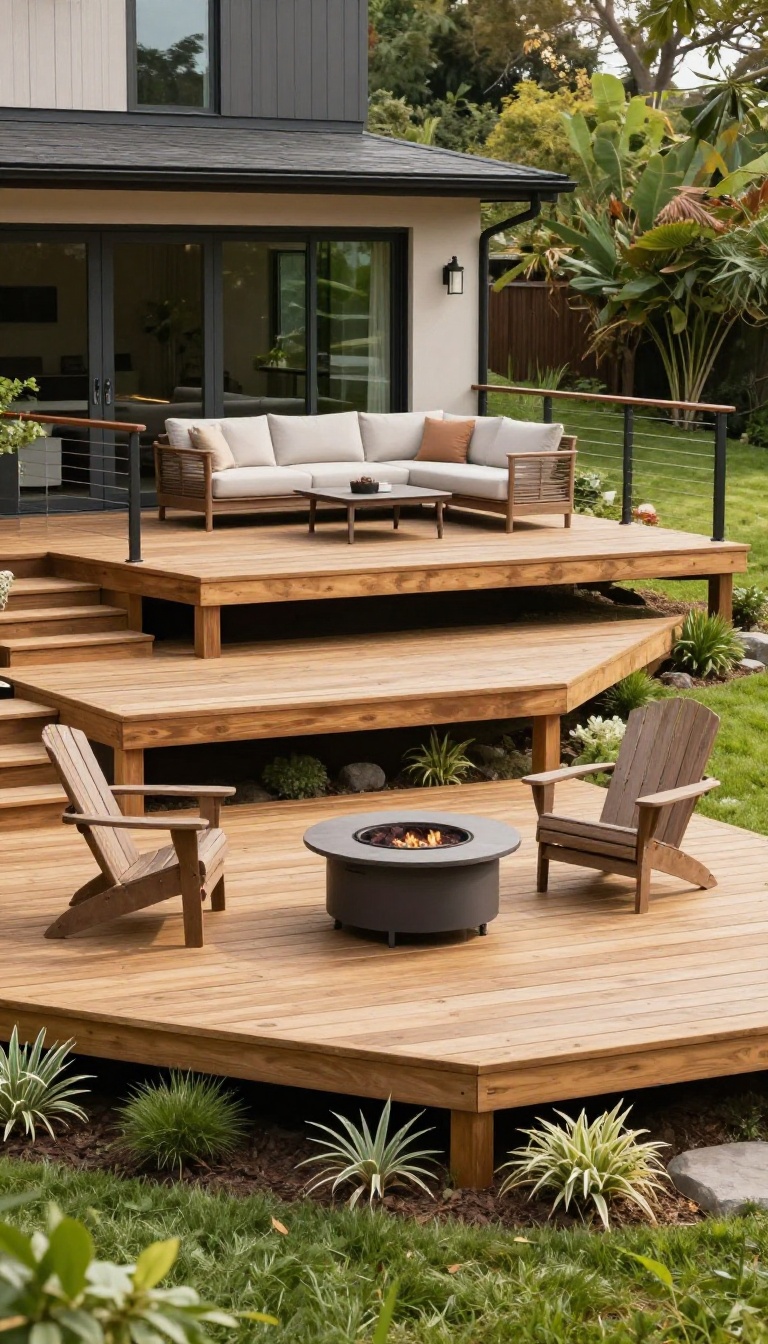
A single-level deck on a slope means either a massive retaining wall or a steep drop-off at the edge. Multi-level platforms solve both problems by stepping down with the grade. Each tier becomes its own zone, so you get more usable outdoor space without flattening the entire yard.
Think of the deck as a staircase you can hang out on. The upper level usually sits closest to the house, where the ground is highest. From there, you step down to a mid-level for lounging, then maybe a lower platform near the yard or a fire pit.
The structure follows the hill instead of fighting it, which means less excavation and a more natural look.
Planning Your Levels
Start by marking how much drop you have from the house to the lowest point you want to deck. A common rule is to keep each step-down between 12 and 18 inches, which feels comfortable underfoot and keeps the railing heights safe. Sketch your zones first: dining near the kitchen door, lounging in the middle, and maybe a lower spot for a hot tub or fire table.
That way, the deck works like three separate rooms stacked on a hill.
Materials That Handle The Slope
Composite decking is a popular pick because it resists moisture and won't splinter, which matters when part of the deck sits close to the ground. For the framing, pressure-treated lumber or steel posts give you the strength to span uneven ground. If you want a more natural look, cedar or ipe weathers beautifully, but plan on sealing it every couple of years.
Whatever you choose, make sure the lower levels have proper drainage so water doesn't pool underneath.
Building Tips For Stability
On a slope, your footings need to go deep enough to hit stable soil or bedrock. That often means concrete piers rather than simple deck blocks. Bracing between posts becomes critical, especially on the downhill side where the deck is tallest.
And don't skip the railing on any level that's more than 30 inches off the ground. A pro can help you size the beams and joists so the whole structure feels solid, not bouncy.
5. Dry Creek Beds for Drainage
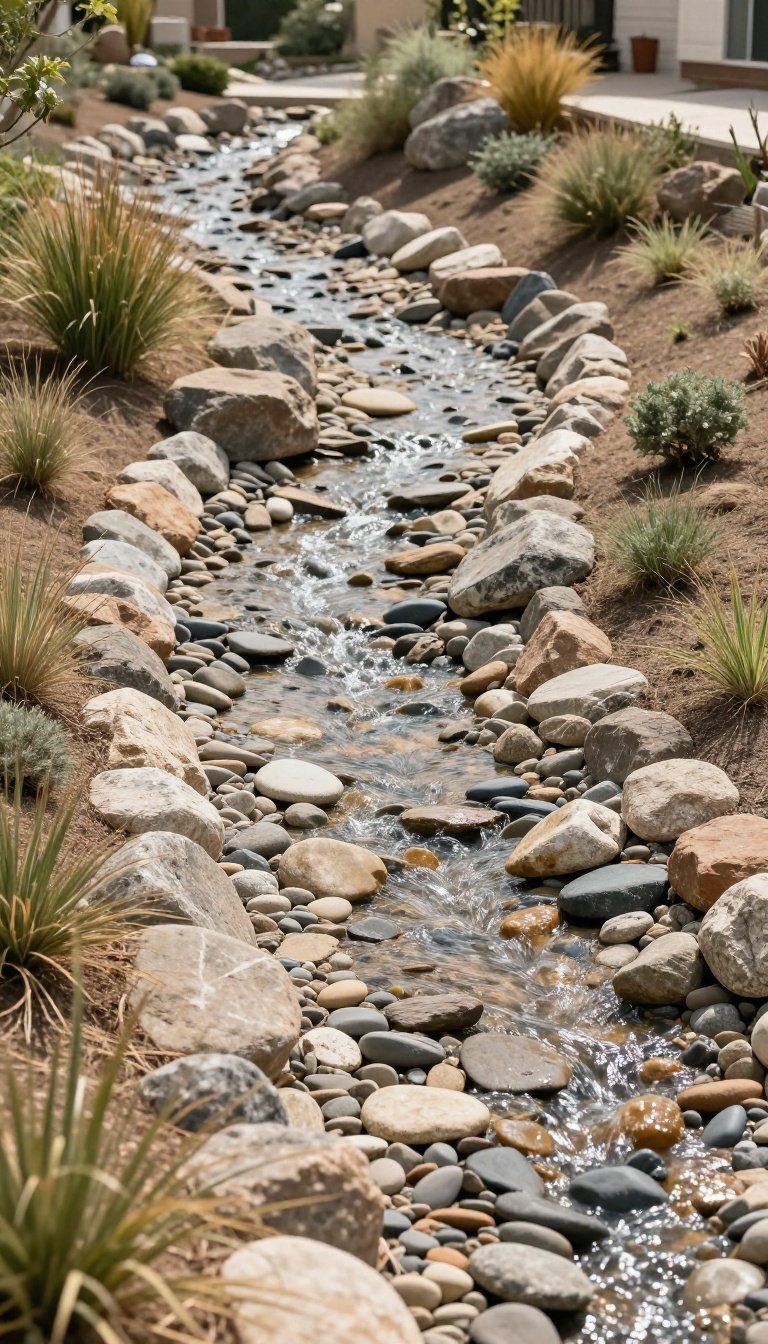
A dry creek bed looks like a natural stream that dried up, but it's really a drainage system in disguise. It gives runoff a clear path to follow, so water moves across your slope instead of carving gullies or pooling against your foundation. The best part?
It adds texture and a focal point without needing a single drop of water.
On a sloped yard, water always finds the lowest route, and that route is usually straight toward your house or your neighbor's fence. A dry creek bed interrupts that path and redirects the flow exactly where you want it. You're basically building a decorative channel that says, "This way, water.
"
Planning The Path
Start by watching where water actually travels during a heavy rain. That's your creek's natural route, and fighting it costs more effort than following it. Sketch a gentle, meandering line from the high point to a safe exit point, like a storm drain, a rain garden, or a planted swale.
Keep the slope of the channel consistent, about two percent, so water keeps moving instead of stalling.
Building The Bed
Dig a shallow trench along your marked path, roughly twelve to eighteen inches deep and wide enough to look intentional. Line it with landscape fabric to keep weeds down and soil from washing into the rocks. Then fill it with a mix of rounded river rock and larger stones, placing the bigger ones along the edges to mimic a real stream bank.
Making It Look Natural
Group stones in odd numbers and vary the sizes to avoid a uniform, man-made look. Add a few boulders as focal points where the creek curves, and tuck in low-growing plants like creeping thyme or sedum along the edges. A dry creek bed should feel like it belongs there, not like a pile of rocks dropped on your lawn.
Keeping It Working
Check the bed after big storms and clear out leaves, twigs, or silt that block the flow. If water starts pooling, you may need to adjust the grade or add a few more rocks to guide it along. A quick seasonal cleanup keeps the system doing its job for years.
6. Amphitheater-Style Seating
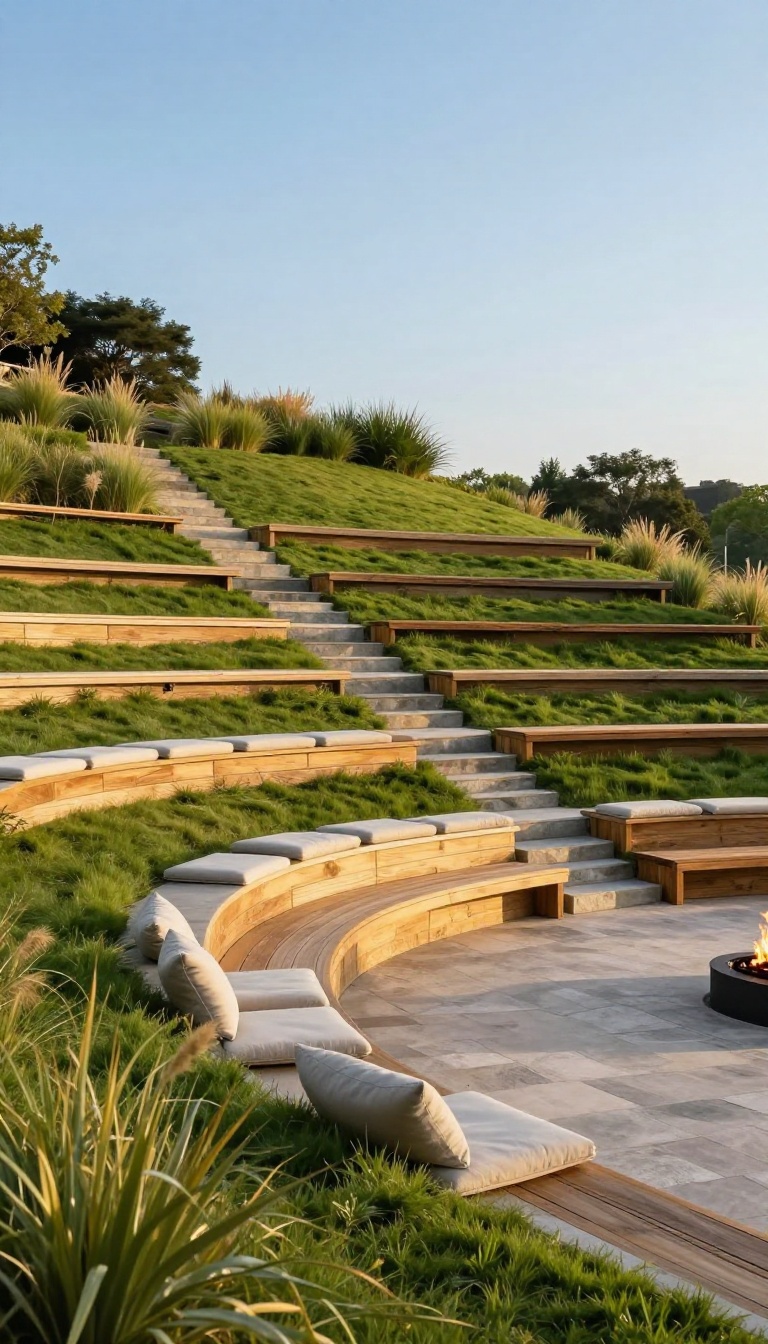
Imagine turning your sloped backyard into a cozy outdoor theater or performance space. Amphitheater-style seating does exactly that by carving tiers into the hill, giving you comfortable, elevated spots to sit and enjoy the show. It's a clever way to make the slope work for you instead of against you.
Whether you're hosting movie nights, small concerts, or just gathering around a fire pit, this setup creates a natural focal point. The tiered design also improves sightlines and sound, so everyone gets a great experience. Plus, it adds a unique architectural feature that turns heads.
Building an amphitheater on a slope might sound like a big project, but it can be as simple or elaborate as you want. The basic idea is to cut level steps into the hillside, creating rows of seating that face a central stage area. You can use materials like timber, stone, or even concrete to form the tiers, and then add cushions or built-in benches for comfort.
The stage can be a simple patio, a deck, or just a flat area at the bottom of the slope. This design works well for both small and large yards, and it's a fantastic way to make the most of a steep grade. One of the best things about amphitheater seating is its versatility.
You can use it for movie nights with a projector and screen, live music performances, or even as a gathering spot for storytelling and s'mores. The tiers also help with drainage, as water can flow down the steps and away from your seating area. And because the seating is built into the hill, you don't need to haul in a ton of fill dirt or build a massive retaining wall.
It's a smart, space-efficient solution. Of course, you'll want to plan carefully to ensure stability and safety. Proper drainage, retaining walls where needed, and sturdy construction are key.
But once it's done, you'll have a one-of-a-kind entertainment space that friends and family will love. So if you're ready to turn your slope into a showstopper, amphitheater seating is a brilliant choice.
Designing Your Tiers
Start by deciding how many rows you need and how wide each one should be. A good rule of thumb is to make each tier at least 18 inches deep for comfortable seating, with a rise of 6 to 12 inches between rows. Use a level to ensure each tier is flat, and consider adding a low retaining wall at the back of each row to hold soil in place.
For materials, pressure-treated lumber, natural stone, or concrete blocks all work well. If you want a more polished look, you can face the tiers with stone veneer or tile.
Choosing A Stage Area
The stage is the focal point, so pick a spot at the bottom of the slope that's easily visible from all seats. A flat patio or deck works great, but you can also use a simple gravel or grass area. If you plan to host movies, make sure there's a spot for a screen—either a permanent outdoor screen or a white wall.
For performances, leave enough space for performers and any equipment. Add lighting to highlight the stage and create ambience.
Adding Comfort And Style
Built-in benches are practical, but you can also use weather-resistant cushions or portable chairs. Consider adding a fire pit at the center or off to the side for warmth and ambiance. Plantings like ornamental grasses or low shrubs between tiers can soften the hardscape and add color.
For a cohesive look, repeat materials and colors throughout the space. And don't forget storage for cushions and electronics—a small shed or bench with hidden compartments keeps things tidy.
7. Slope-Side Fire Pit Area
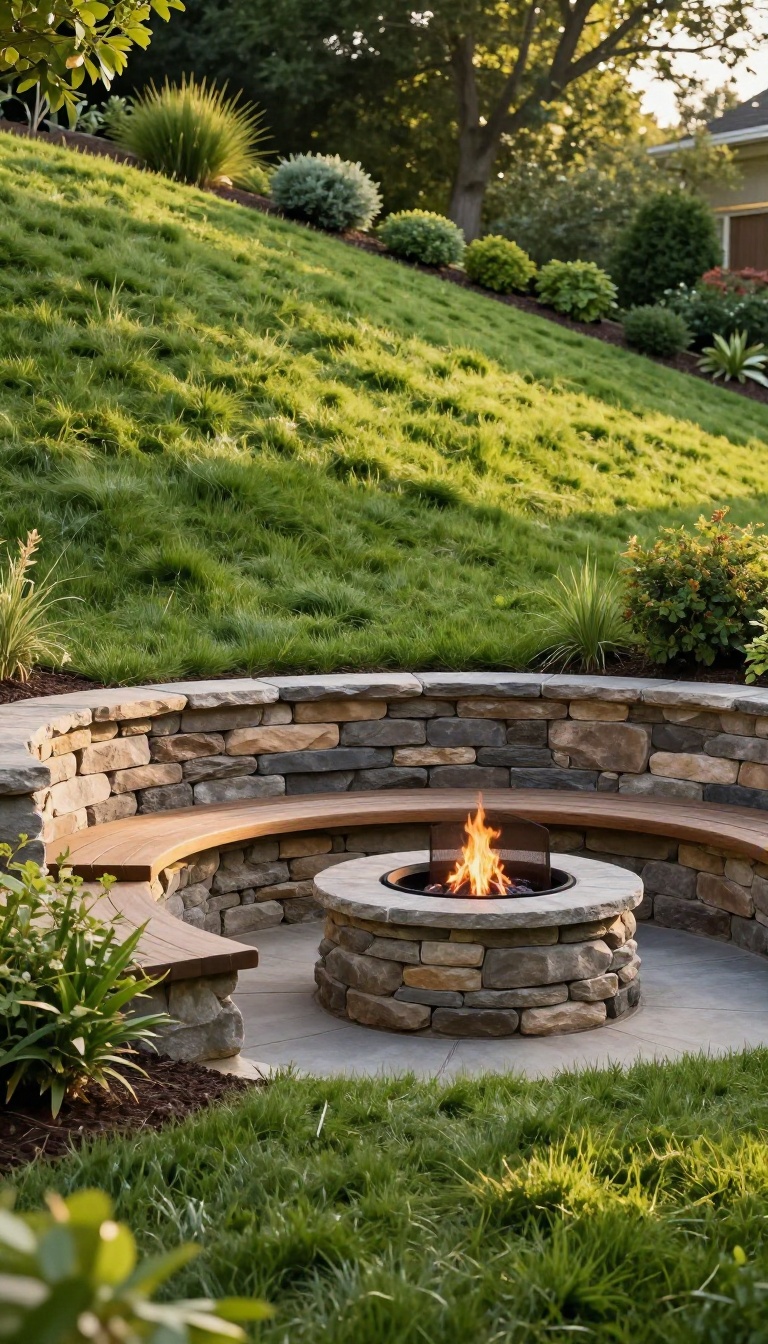
A fire pit on a slope sounds like a bad idea until you carve out a flat pocket for it. Excavate a level spot into the hillside, then hold the soil back with retaining walls or built-in benches. The result is a cozy gathering zone that feels intentional, not improvised.
The key is to work with the slope instead of fighting it. Dig into the hill to create a flat pad, then use the excavated dirt to build up the downhill side. That way you get a level area without hauling in extra fill.
Once the base is set, add retaining walls or benches to define the space and provide seating. A fire pit becomes the natural centerpiece, and the surrounding slope acts like a windbreak.
Excavation And Leveling
Start by marking a circle or square where the fire pit will sit. Dig down until you hit level ground, typically 12 to 18 inches into the slope. Use a string level or laser level to check your work.
Pack the soil with a tamper to create a solid base. If the slope is steep, you may need to terrace in steps to avoid a tall retaining wall.
Retaining Walls And Benches
Use landscape blocks, timber, or natural stone to build a low retaining wall on the downhill side. Cap the wall with flat stones to create a bench. On the uphill side, you can build a taller wall that doubles as a backrest.
Leave gaps in the wall for drainage, or install a French drain behind it to handle runoff.
Fire Pit And Safety
Choose a fire pit kit or build one from brick or stone. Keep it at least 10 feet away from any slope or flammable material. Line the pit with fire-rated materials and add a spark screen.
Check local codes for burn bans and setback requirements. Always keep a bucket of water or a hose nearby.
8. Cascading Water Feature
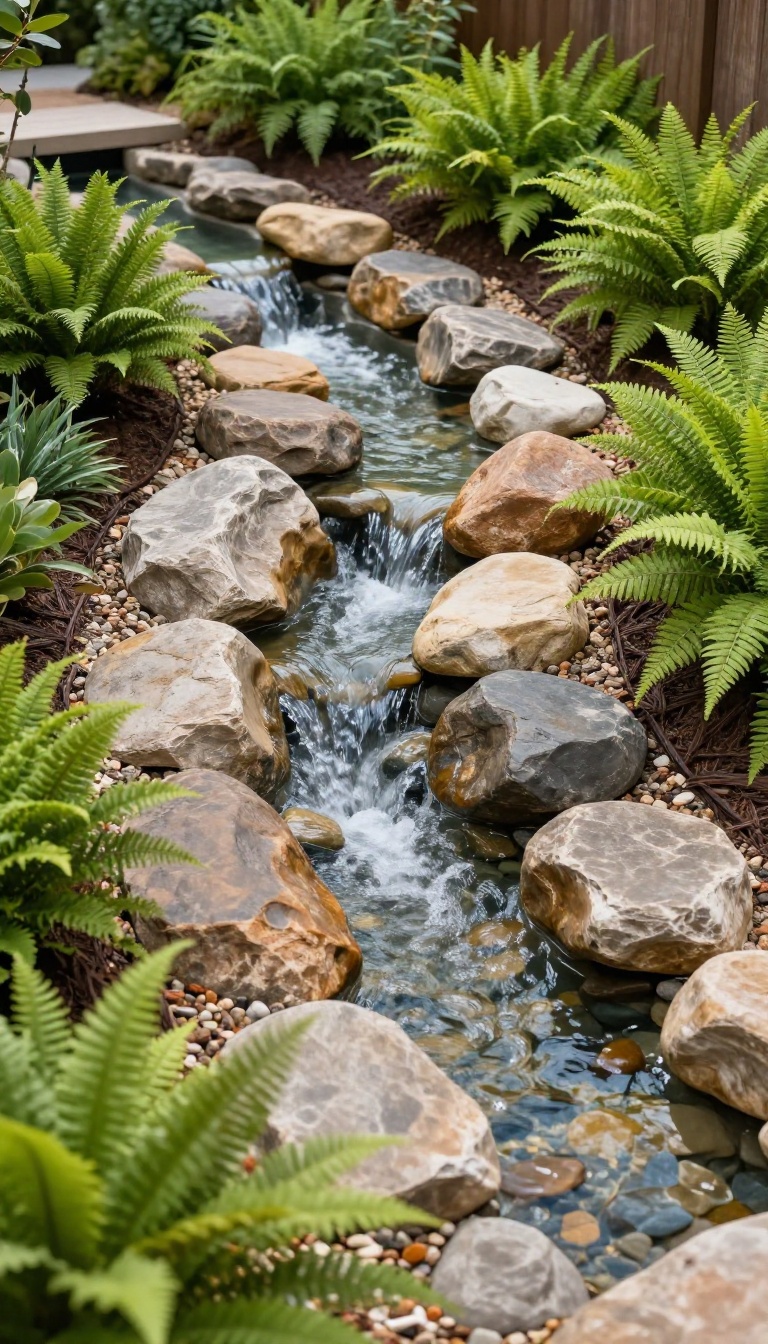
Water already wants to move downhill on your property. Give it a beautiful route to follow, and that erosion problem becomes the best-looking part of the yard. A cascading waterfall or stream turns a plain slope into a focal point you can hear from the patio.
The drop does the heavy lifting here. You just shape the channel, set the stones, and let gravity handle the drama. It works on almost any grade, from a gentle roll to a steep hillside.
The basic build is simpler than most people expect. You need a hidden reservoir at the bottom, a pump to push water back up, and a lined path for it to spill down. The slope gives you free elevation, which is exactly what a waterfall needs to look natural.
Start by watching where water already flows during a hard rain. That's your best route. Fighting the existing drainage usually means leaks, washouts, and a feature that never quite sits right.
From there, you can go as small as a single spill stone or as big as a multi-tier cascade with a pond at the base. The size of your slope and your budget set the limits, not the concept.
Choosing Your Style
A naturalistic stream uses irregular boulders, gravel, and planted edges to mimic a woodland creek. It blends into the landscape and hides the liner well. A formal cascade uses stacked, cut stone and clean lines.
It suits modern yards and pairs nicely with a rectangular basin. Boulder-heavy waterfalls feel rugged and loud. Sheet-style spills are quieter and more minimalist.
Pick the one that matches your home and how you want the space to feel.
Pump And Reservoir Basics
The pump lives in a buried basin at the lowest point. It pushes water back to the top through a hidden pipe, and the cycle repeats. Size the pump to the height of the drop and the width of the spill.
Too small and you get a trickle; too big and it splashes everywhere. A gravel-filled basin hides the hardware and gives the pump a clean water supply. Check it monthly and top off the water in hot weather.
Making It Look Natural
Bury the edges of the liner with soil, moss, and small plants. Exposed plastic kills the illusion fast. Vary your spill heights and stone sizes.
Perfect symmetry reads as fake, so let the water find a slightly different path at each level. Add ferns, hostas, and creeping groundcovers along the banks. They soften the rock and tie the feature into the rest of the yard.
Maintenance And Winter
Skim leaves and debris weekly during fall. A clogged pump burns out fast and costs more than a five-minute cleanup. In freezing climates, drain the line and store the pump indoors before the first hard freeze.
Leave the basin in place and cover it. Check the water level every few days in summer. Evaporation is real, and a low reservoir strains the pump.
9. Play Area with Safety Surfacing
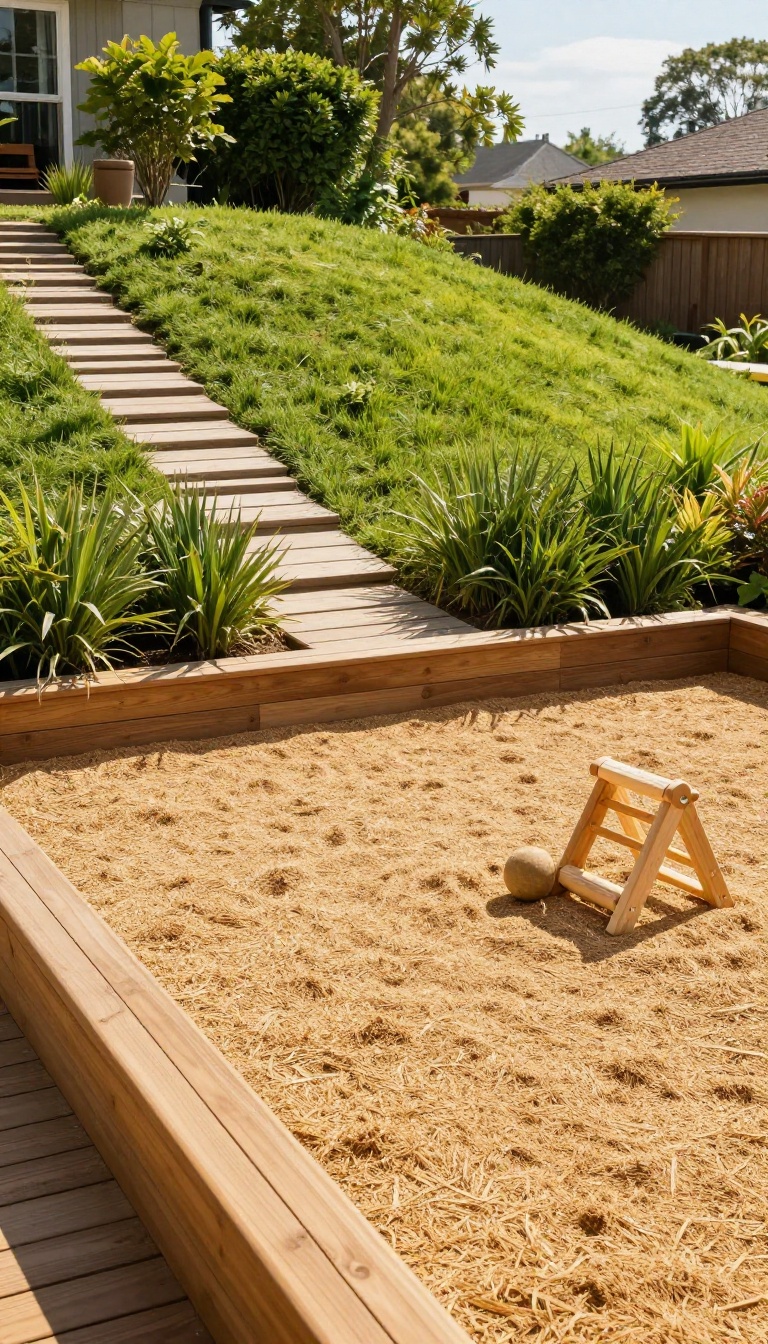
A sloped yard doesn't have to be off-limits for kids. You can carve out a flat, safe play zone that feels intentional and fun. The key is giving it a solid surface and clear borders so it works with the hill instead of against it.
Start by finding a spot where the slope is gentle enough to cut and fill without a massive retaining wall. You'll need a level area at least 10 by 10 feet for younger kids, or larger for swings and climbing structures. Use the excavated soil to build up the downhill side, and hold it back with a low wall or a planted berm.
Then top it with a shock-absorbing surface like rubber mulch or artificial turf. These materials cushion falls better than grass or dirt, and they stay put on a slope. Border the play zone with low seat walls or dense shrubs to define the space and stop balls from rolling away.
Add a simple path or steps from the house so kids can get there safely.
Choosing The Right Surfacing
Rubber mulch is affordable, easy to install, and drains well. It comes in colors that blend with landscaping. Artificial turf costs more upfront but gives you a clean, mud-free surface that works for bikes and toys.
Both meet safety standards for residential play areas when installed at the right depth. Avoid wood chips if you have very young kids—they break down and need topping up. Pea gravel is a no-go because it shifts and doesn't cushion falls.
Building The Flat Zone
You don't need a giant excavator. For a modest slope, a compact utility tractor or even a few strong weekends with shovels can do the job. Cut into the hill on the uphill side and use that dirt to fill the downhill side.
Compact the fill in layers to prevent settling. A low retaining wall—concrete block, timber, or stacked stone—holds the edge. Make sure the flat area has a slight slope (1-2%) for drainage, but not enough to notice.
Borders That Work
Low walls double as seating for parents and a boundary for kids. Keep them under 18 inches so they don't need a railing. Plantings like boxwood, ornamental grasses, or low junipers soften the look and add a natural barrier.
If you want a more open feel, use a simple timber edge and let the lawn flow into the play area. Either way, leave a clear entrance so kids don't trip.
10. Vegetable Garden on Contour

Planting on contour means following the natural elevation lines of your slope instead of fighting them with straight rows. When you dig shallow swales along those lines, each one catches rainwater and lets it soak in rather than sheeting downhill. The result is a garden that needs less watering and holds its soil through heavy storms.
You don't need a perfectly flat plot to grow food. In fact, a contoured garden often outperforms a flat one because water spreads evenly instead of pooling in low spots. The key is to mark your contour lines first, then build your beds and swales right on top of them.
Finding Your Contour Lines
A simple line level and a string will get you started. Pound two stakes into the ground about ten feet apart, tie a string between them, and adjust until the line level reads true. That string is your contour line.
Walk it across the slope and mark it with flour or small flags. Repeat every few feet down the hill until you have a series of parallel curves. These guide everything else you plant.
Digging Swales That Actually Work
A swale is just a shallow trench dug along your contour line. Make it about a foot deep and a foot wide, with the soil piled on the downhill side to form a berm. Don't dig it perfectly level—give it a slight downward tilt so overflow can escape during a gully-washer.
Plant your vegetables on the berm, where roots stay above the standing water. The swale itself can be mulched or left bare to slow runoff.
What To Grow And Where
Deep-rooted crops like tomatoes, peppers, and kale love the berm because they get consistent moisture without soggy feet. Shallow-rooted greens and herbs do fine just uphill of the swale, where water wicks sideways. Avoid root crops like carrots in the swale itself—they'll rot if water sits too long.
Rotate your plant families each season to keep the soil healthy and pests guessing.
11. Native Plantings for Erosion Control

Bare dirt on a steep slope doesn't stay put for long. Every hard rain takes a little more topsoil with it, and before you know it, you're looking at exposed roots and gullies. Native plants solve that problem at the source by locking soil in place with roots that go deep instead of just spreading wide.
The magic here is in the root systems. Turf grass roots barely scratch the surface, but many native perennials, grasses, and shrubs send roots down several feet. That deep network acts like a living grid that holds the hillside together through storms and dry spells alike.
Once they're established, most natives need almost no watering, fertilizing, or mowing. That makes them a smart pick for steep areas where dragging equipment up and down is a genuine hassle. You plant them once, and they basically run the show from there.
Pick Deep-rooted Workhorses
Look for species with fibrous or taproot systems that grip soil hard. Native grasses like switchgrass and little bluestem are solid choices, along with flowering perennials such as black-eyed Susan and coneflower. Shrubs like ninebark and sumac add deeper anchoring on bigger slopes.
Match Plants To Your Conditions
A sunny south-facing hill and a shady north slope need very different plant lists. Check your light, soil type, and moisture before you buy anything. Your local native plant society or extension office can point you toward species that actually thrive where you live.
Plant In Layers For Real Coverage
A single row of plants won't stop erosion on its own. Mix groundcovers, mid-size perennials, and taller shrubs so roots occupy different depths. That layered approach covers more soil and looks far more natural than a uniform planting.
Give New Plants A Strong Start
Young natives need help before their roots take hold. Add a light mulch layer to hold moisture, and water regularly through the first growing season. After that, back off and let them fend for themselves.
12. Stairs with Integrated Lighting
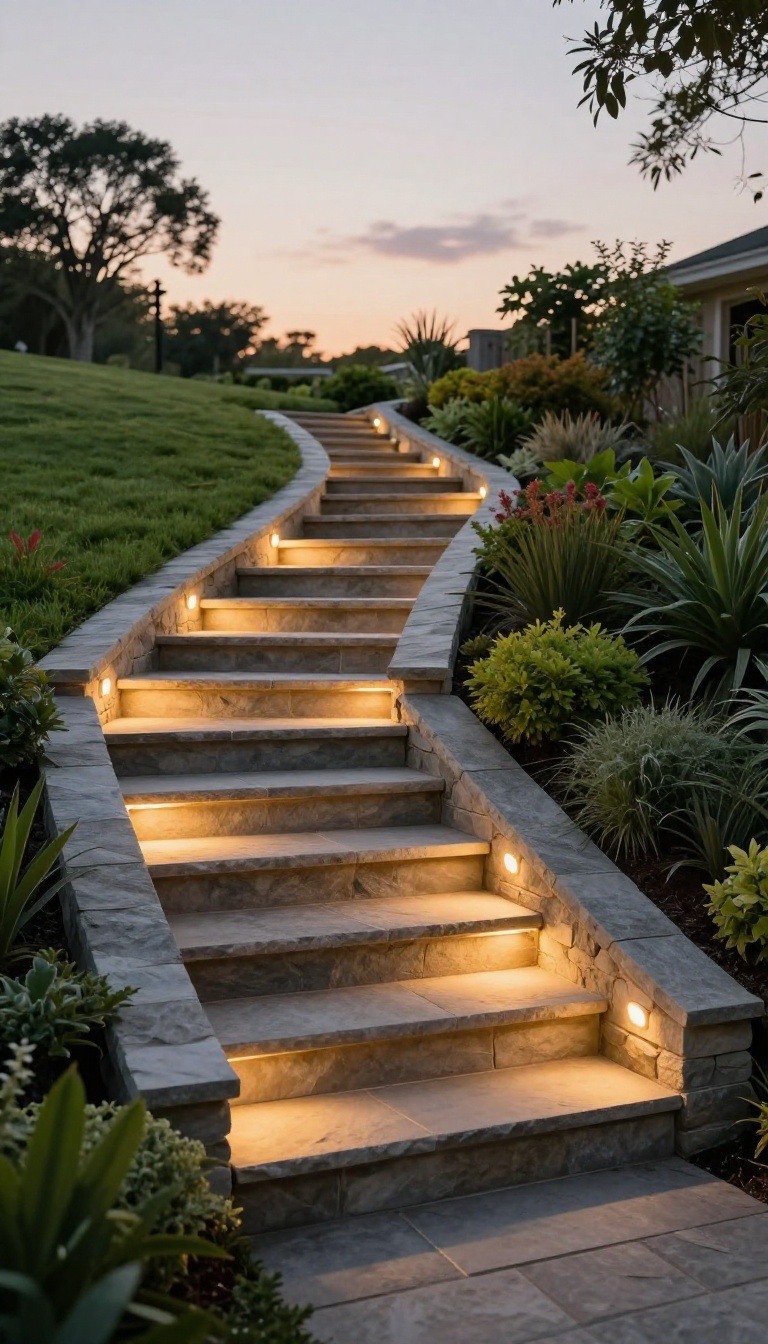
Steps are the obvious answer for moving people up and down a slope, but most outdoor staircases get built for daylight only. Once the sun drops, that same flight turns into a dark, uneven gauntlet that nobody wants to use. Integrated lighting fixes that by turning the stairs into a safe, guided path that works day and night.
It also happens to look great, which is a nice bonus.
The goal here isn't to flood your yard with light. It's to place small, low-glare fixtures where they help the most: along the edges of each tread, tucked into the risers, or set into the retaining wall beside the stairs. Done right, the lighting disappears into the landscape during the day and quietly takes over at night.
You have more options than you might think. Hardwired low-voltage systems are the most reliable, while solar step lights and rechargeable LED strips are the easiest to install on a slope where trenching is a pain. Either way, the point is the same: mark the edges, light the path, and keep the glow soft enough that it doesn't wash out the view.
Light The Treads, Not The Sky
The best stair lighting aims down and sideways, not up into your eyes. Recessed riser lights throw a small pool of light onto each tread so you can see exactly where your foot lands. Deck-mounted or flush step lights along the outer edge do the same job while adding a clean line of light that follows the staircase.
Skip floodlights and bright path lamps here. They create glare, kill your night vision, and make the stairs feel like a runway instead of a garden feature.
Match The Fixtures To The Build
If your stairs are wood, composite, or concrete, recessed riser lights are simple to install during the build and nearly invisible afterward. Stone and paver steps work better with low-profile fixtures set into the tread or tucked into the wall beside the flight. For a more natural look, small bollard lights at the top and bottom landings can frame the whole run without cutting into the steps themselves.
Pick the fixtures after you decide on materials, not before.
Wire It So You Only Do It Once
Running low-voltage cable before you pour concrete or set stone saves a massive headache later. If you're building new stairs, bury conduit under the flight and leave pull lines for future fixtures. If the stairs already exist, solar and battery-powered step lights are a legit shortcut, especially on a slope where trenching is miserable.
Whichever route you take, put the whole system on a timer, a photocell, or a smart switch so the lights come on when you need them and stay off when you don't.
13. Hillside Hot Tub Retreat
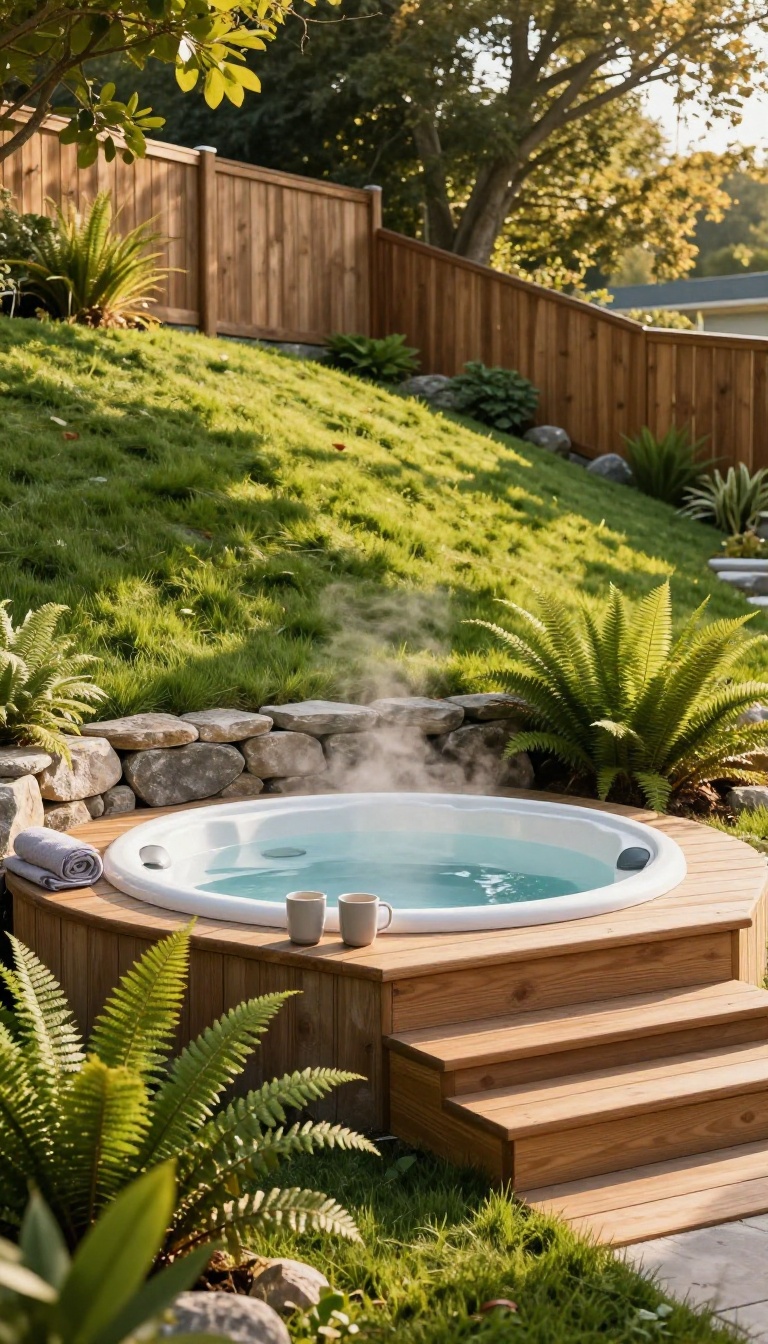
A hot tub on a slope sounds like a logistical headache, but it's actually one of the smartest ways to use a hillside. Instead of fighting the grade, you sink the tub into it, letting the earth do the heavy lifting. The result is a built-in, spa-like escape that feels intentional, private, and way more expensive than it actually is.
The key is to create a level pocket in the slope, then frame it with a deck that blends into the surrounding landscape. This setup gives you easy access, a comfortable place to step out, and a natural barrier that blocks wind and prying eyes. It's the kind of feature that turns an awkward incline into the best seat in the house.
A hot tub is heavy, especially when it's full of water and people. That's why setting it into the slope is often easier than building a freestanding deck to hold it. You're using the hillside as a natural retaining structure, which means less lumber, less engineering, and a lower profile that sits quietly in the landscape.
The deck surround does more than look good. It gives you a safe, flat surface for climbing in and out, a spot for towels and drinks, and a transition zone that keeps dirt and debris out of the water. It also lets you customize the shape and size so the whole thing feels custom-built for your yard.
Privacy is another big win. When the tub sits below the surrounding grade, you're naturally shielded from neighbors and street noise. Add a few plantings or a screen on the uphill side, and you've got a secluded retreat that feels miles away from everything.
Site Selection And Excavation
Pick a spot with a gentle slope, ideally one that's already somewhat sheltered. You'll need to excavate a level pad that's slightly larger than the tub, plus room for the deck framing. Check local codes for setback requirements and call 811 before you dig.
Drainage matters here. Make sure the excavated area has a way for water to escape, either through a French drain or by tying into existing drainage. The last thing you want is a hot tub sitting in a mud puddle after a storm.
Deck Framing And Access
Build a deck that wraps around at least two sides of the tub for easy access and a clean look. Use pressure-treated lumber or composite decking rated for ground contact, and set posts on concrete footings that extend below the frost line. Leave a small gap between the deck and the tub cabinet for ventilation and to prevent rubbing.
Add steps on the downhill side if the deck sits more than a foot or two above grade, and consider a built-in bench or shelf for towels and drinks.
Screening And Finishing Touches
Plant evergreen shrubs or ornamental grasses along the uphill edge to soften the transition and add privacy. A simple privacy screen made from cedar slats or bamboo rolls works well if you need a quicker solution. Lighting makes a huge difference.
String lights overhead, LED step lights, or a few lanterns create a warm, spa-like glow without harsh glare. Finish with a small side table, a weatherproof rug, and maybe a robe hook or two, and you've got a retreat that feels intentional and inviting.
14. Zoned Outdoor Kitchen
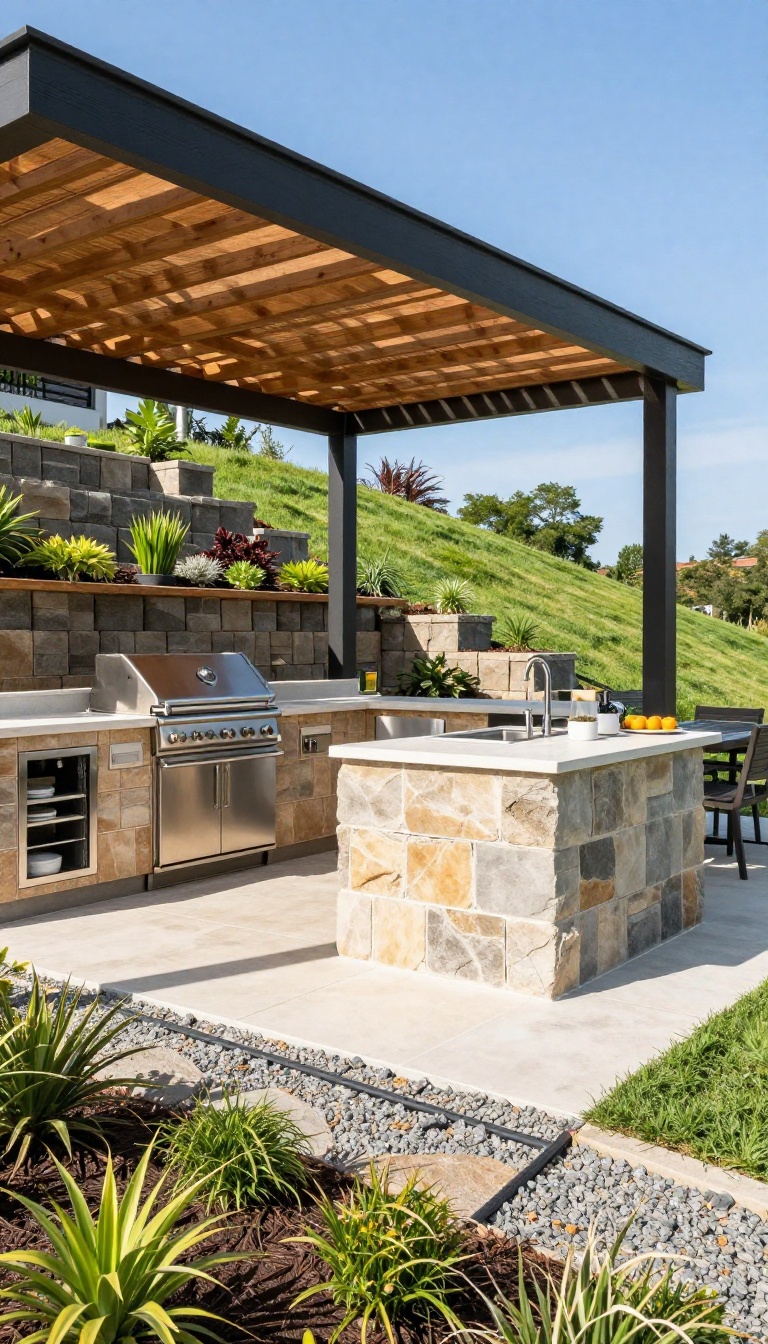
Cooking on a slope usually means hauling gear to a flat spot or balancing a grill on uneven ground. A zoned outdoor kitchen solves that by carving out a dedicated level pad for prep, cooking, and eating. Retaining walls hold the grade, and a pergola adds shade so you can actually enjoy the space.
The key is to separate the kitchen into distinct zones: a prep area, a cooking station, and a dining space. Each zone sits on the same level pad, so you're not walking up and down while carrying hot pans. Build the pad into the hill with a retaining wall on the downhill side, and use the excavated soil to backfill behind an upper wall.
This creates a stable, flat surface that won't shift. For the pergola, anchor posts into concrete footings set below the frost line. Add a slatted roof to let some sun through while blocking the harshest midday rays.
Run utilities—gas, water, and electrical—before you pour the pad, because retrofitting later is a pain. A simple L-shaped counter gives you room for a grill, a small fridge, and a sink, with bar seating on the outer edge. Keep the dining table close but separate, so the cook isn't dodging chairs.
Building A Stable Base
Start with a retaining wall that's engineered for the load. A segmental block wall with proper drainage gravel and a perforated pipe behind it will handle the soil pressure. Compact the pad in lifts, then top it with pavers or poured concrete.
If the slope is steep, consider a two-tier wall to break up the height and add planting pockets.
Shade That Works
A pergola does more than look good—it defines the kitchen zone and keeps you cool. Set the posts at least 8 feet apart for comfortable movement. Use adjustable louvers if you want to control sun and rain, or go with a simple grid and add a shade sail in summer.
Attach string lights or a ceiling fan to the beams for evening use.
Layout And Flow
Keep the grill on the downhill side so smoke drifts away from the dining area. Leave 36 to 42 inches of clear space between the counter and any wall or railing. Put the fridge and storage near the prep sink to minimize steps.
If you have room, add a small herb garden in a retaining wall pocket—it's handy and looks intentional.
15. Low-Maintenance Ground Cover
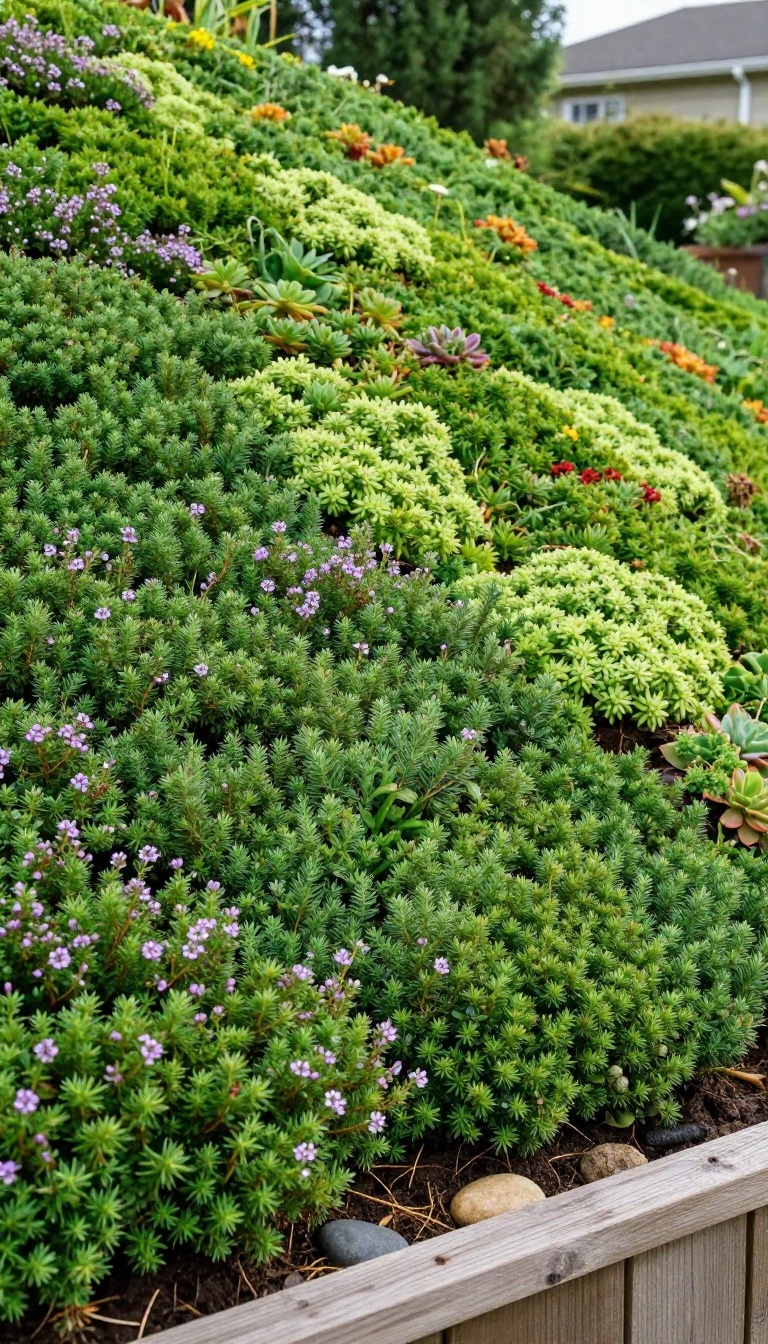
Mowing a steep slope is a special kind of punishment. The ground cover approach replaces that weekly chore with plants that spread on their own and barely need a drink once they're settled. You get a green, finished look without the gas, noise, or risk of a mower tipping sideways.
The trick is picking plants that actually want to live on a hill. Most turf grasses need sun, water, and regular cutting, which is exactly what a slope makes difficult. Ground covers evolved to hold soil in place, so they do the erosion control work for you while looking intentional instead of overgrown.
Best Plants For Slopes
Creeping thyme, creeping juniper, and vinca minor are the workhorses here. They root as they spread, forming a dense mat that shrugs off drought and never needs mowing. For shady slopes, try pachysandra or sweet woodruff.
In full sun with poor soil, sedum and ice plant thrive where grass gives up.
Planting And Establishment
Start at the top of the slope and work down, spacing plants closer than you would on flat ground. A layer of biodegradable erosion blanket holds everything in place until roots take hold. Water deeply for the first season, then back off almost entirely.
Most covers fill in within two growing seasons.
Keeping It Tidy Without Mowing
Once established, maintenance is mostly annual. Trim back anything that creeps into walkways or onto steps, and pull the occasional weed before it seeds. A spring feeding with compost is plenty.
If a patch dies out, plug in a few new starts and it'll knit back together on its own.
FAQ
How do I prevent soil erosion on a sloped yard?
Use retaining walls, terraces, and deep-rooted plants. Also, install drainage solutions like dry creek beds or French drains to manage water flow.
What's the cheapest way to level a sloped backyard?
Terraces with timber or concrete blocks are cost-effective. You can also use raised beds or a deck with adjustable footings to create flat areas without major excavation.
Can I build a deck on a sloped yard?
Yes, decks are ideal for slopes. You can build multi-level decks that follow the contour, using piers or helical piles for support.
How do I make a sloped yard safe for kids?
Add non-slip paths, railings on stairs, and soft landing surfaces like mulch or rubber tiles under play areas. Avoid steep drops by terracing.
What plants work best on a slope?
Choose native, drought-tolerant plants with deep roots, such as creeping juniper, cotoneaster, or ornamental grasses. They help stabilize soil.
Conclusion
A sloped yard stops being a problem the moment you treat it like a feature instead of a flaw. Pick one idea that solves your biggest headache right now, whether that is erosion, wasted space, or nowhere to sit. Get that working, then add the next piece when you have time and budget.
You will probably tweak the layout after living with it for a season, and that is normal. Terraces, paths, and plantings rarely land perfectly on the first try.