17 Cleaning Grout Tips for Brighter Bathroom Lines
Grout lines can quickly turn from bright white to dingy gray, making even a clean bathroom look tired. But you don't need expensive products or hours of scrubbing to restore them. These 17 tips focus on practical, everyday solutions that actually work.
Each tip targets a specific grout problem—whether it's mold, stains, or general dullness. You'll find methods using common household items and a few specialized tools. The goal is to make your bathroom lines look cleaner with less effort.
No need to tackle every tip at once. Pick the ones that match your current grout condition and give them a try. Small changes can make a big difference in how your bathroom feels.
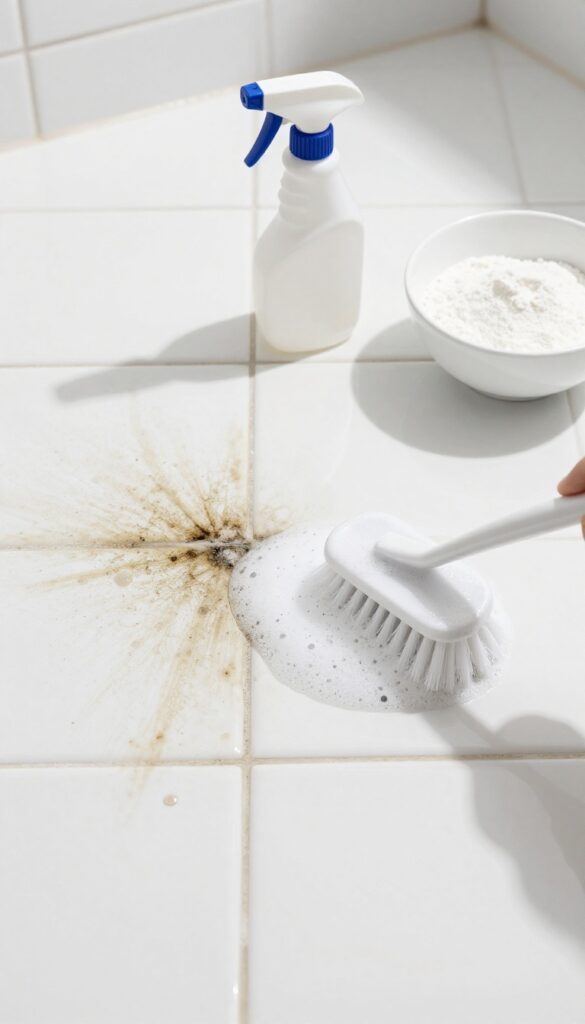
1. Start with a Baking Soda Paste
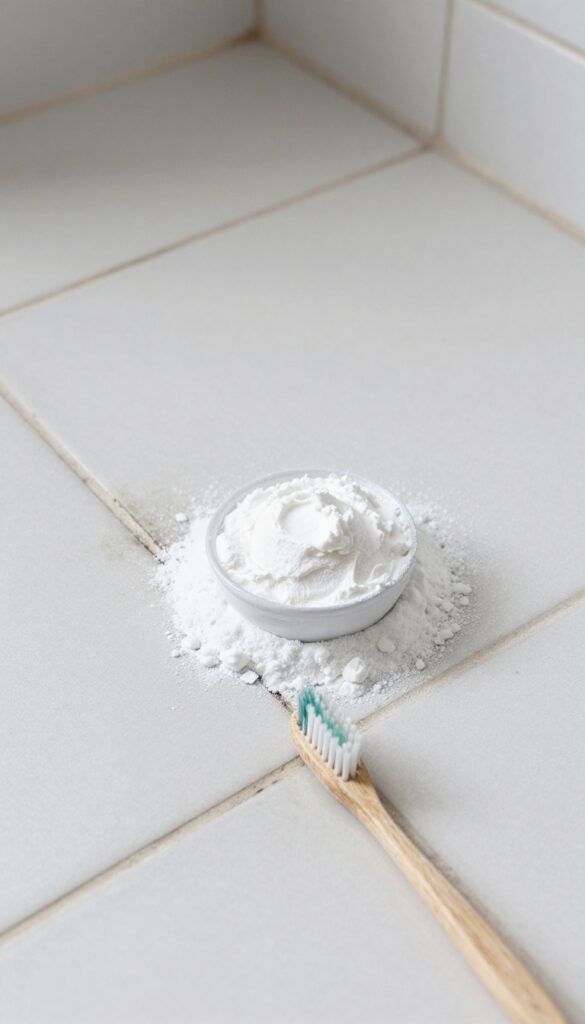
Baking soda is a gentle abrasive that can lift dirt and grime from grout without scratching tiles. Mixed with water, it forms a paste that clings to vertical surfaces and gets into the porous grout lines. This method is safe for all tile types and is often the first step in any grout cleaning routine.
To make the paste, combine three parts baking soda with one part water in a small bowl. Stir until it reaches a thick, spreadable consistency. Apply the paste to the grout lines using an old toothbrush or a small spatula, making sure to work it into the grooves.
Let it sit for about 10 minutes to loosen embedded dirt. Then scrub vigorously with the toothbrush, using circular motions. Rinse with warm water and wipe away residue with a damp cloth.
For stubborn stains, add a few drops of white vinegar to the paste before applying.
Why Baking Soda Works
Baking soda has a mild alkaline pH that helps break down acidic dirt and grease. Its fine crystalline structure provides gentle abrasion, so it scrubs away grime without damaging the tile surface or the grout itself. Unlike harsh chemical cleaners, baking soda is non-toxic and safe for use around children and pets.
Tips For Best Results
Use a dedicated grout brush or an old toothbrush with firm bristles for effective scrubbing. If the paste dries out during application, spritz it lightly with water to reactivate. For heavily soiled lines, let the paste sit longer—up to 20 minutes—before scrubbing.
Rinse thoroughly to avoid leaving a white residue behind.
2. Use White Vinegar for Tough Stains
When grout stains are too stubborn for baking soda, reach for white vinegar. This pantry staple cuts through mineral deposits and soap scum without harsh chemicals. The acidity works fast, but it's not for every surface.
How It Works
White vinegar is acidic enough to dissolve alkaline buildup like hard water stains and soap residue. When sprayed on grout, it reacts with mineral deposits, creating a fizzing action that loosens dirt. Let it sit for 5 minutes to penetrate, then scrub with a stiff brush.
Application Tips
Use undiluted white vinegar for maximum strength. Pour it into a spray bottle and saturate the grout lines. Avoid overspray onto natural stone tiles like marble or granite, as the acid can etch them.
Work in small sections to keep the vinegar wet while it works.
Safety And Precautions
Never mix vinegar with bleach or other cleaners, as it creates toxic chlorine gas. Rinse the area thoroughly with water after scrubbing to remove any residue. Test on an inconspicuous spot first if you're unsure about your tile type.
3. Try Hydrogen Peroxide for Whitening
If your grout is looking dingy but you don't want to use harsh bleach, hydrogen peroxide is a great alternative. It's a mild bleaching agent that lifts stains and kills mold without the strong fumes. Best of all, it's probably already in your medicine cabinet.
Hydrogen peroxide works by releasing oxygen bubbles that break down organic stains and kill mold spores. It's safe for most tile types, including ceramic and porcelain, but avoid using it on natural stone like marble or granite, as it can etch the surface. Always test in an inconspicuous area first.
How To Apply It
Pour 3% hydrogen peroxide directly onto the grout lines. Use a small brush, like an old toothbrush or a grout brush, to work it into the pores. Let it sit for 15 minutes—you'll see it bubble as it lifts dirt.
Then rinse thoroughly with water and wipe dry.
Boosting The Power
For extra stubborn stains, mix hydrogen peroxide with baking soda to form a paste. Apply the paste to the grout, let it sit for 15 minutes, then scrub and rinse. The combination adds gentle abrasion while the peroxide whitens.
Safety And Precautions
Wear gloves to protect your skin, and keep the area ventilated. Hydrogen peroxide can bleach fabrics, so avoid splashing on clothes or towels. Rinse well to prevent any residue that could attract dirt later.
4. Steam Clean for Deep Dirt
Sometimes grout needs more than a scrub—it needs a blast of heat. A handheld steam cleaner shoots hot vapor deep into porous grout lines, loosening years of embedded dirt and grime. It works fast, sanitizes without chemicals, and is ideal for tackling large bathroom areas.
Steam cleaning is a game-changer for grout that looks permanently stained. The high temperature breaks down oily residues and kills mold spores, leaving lines noticeably brighter. Best of all, you avoid harsh fumes and rinsing.
Choose The Right Steamer
Not all steam cleaners are grout-friendly. Look for a handheld model with a brush attachment and adjustable steam output. A concentrated nozzle helps direct heat into narrow lines without soaking the surrounding tile.
Work In Small Sections
Steam evaporates quickly, so focus on a 2×2 foot area at a time. Glide the brush along grout lines slowly, letting the vapor penetrate. Wipe away loosened dirt with a microfiber cloth before it dries.
Follow Up With A Scrub
For stubborn spots, steam alone might not lift everything. After steaming, give those lines a quick scrub with a stiff nylon brush. The heat will have softened the grime, making it much easier to remove.
5. Use a Grout Brush with Extendable Handle
Kneeling on the bathroom floor to scrub grout is hard on your body. A grout brush with an extendable handle lets you stand up while you work, saving your knees and back. The stiff bristles and angled head are designed to dig into grout lines without much effort.
Why A Dedicated Grout Brush Works Better
Toothbrushes are too soft and too small for large areas. A grout brush has stiffer bristles that fit perfectly into the grooves. The longer handle gives you more leverage, so you scrub harder without straining your wrist.
Pair It With The Right Cleaner
For best results, dip the brush into a baking soda paste or a vinegar solution before scrubbing. The mechanical action of the bristles combined with the cleaner lifts embedded dirt. Rinse the brush often to avoid redepositing grime.
Tips For Reaching Tight Spots
The angled head on most grout brushes gets into corners and along edges where tile meets the wall. You can also use it on vertical grout lines in the shower. Just be careful not to press too hard on delicate tiles.
6. Apply a Bleach Pen for Spot Treatment
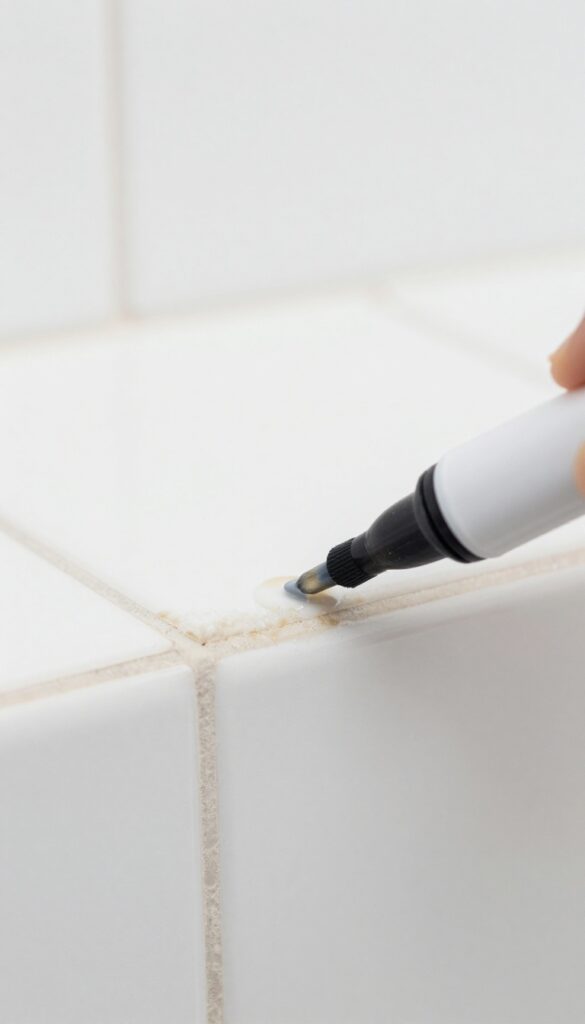
Gel bleach pens are one of the most convenient tools for tackling stained grout lines without making a mess. They allow you to apply bleach precisely where it's needed, so you don't accidentally lighten your tile or create uneven spots. This method is perfect for quick touch-ups between deep cleans.
Bleach pens work best on individual stained lines or small sections of grout. The gel formula clings to vertical surfaces, so it won't drip or run. After application, let the bleach sit for about 10 minutes to break down the stain, then wipe away with a damp cloth.
Rinse thoroughly to remove any residue.
Why Bleach Pens Work So Well
The thick gel stays put on grout lines, unlike liquid bleach that can spread. This precision means you can treat only the discolored areas, preserving the rest of your bathroom's finish. Plus, the pen applicator makes it easy to apply without getting bleach on your hands.
Step-by-step Application
Start by cleaning the grout surface with a dry cloth to remove loose dirt. Squeeze the pen to release a thin line of gel directly onto the stain. Let it sit for 10 minutes—longer for stubborn spots—then scrub gently with a soft brush if needed.
Wipe away the gel with a damp cloth and rinse with water.
Safety Tips For Best Results
Always test the bleach pen on a hidden area first to ensure it doesn't discolor your tile. Work in a well-ventilated space and wear gloves to protect your skin. Avoid using bleach pens on colored grout, as they can cause fading.
7. Make a Lemon and Salt Scrub
Sometimes the best grout cleaners are already sitting in your kitchen. A lemon and salt scrub is a simple, natural way to brighten grout lines without harsh chemicals. The citric acid in lemon helps break down soap scum and mineral deposits, while the salt provides gentle abrasion to lift dirt.
Plus, the fresh citrus scent leaves your bathroom smelling clean.
This method works best on light-colored grout that needs a quick refresh. It's especially effective for tackling mild stains and general dullness. The combination of acid and abrasion is surprisingly powerful, yet gentle enough for regular use.
How To Make And Apply The Scrub
Cut a lemon in half and dip the cut side into a small dish of salt. You can use table salt or kosher salt—both work fine. Scrub the lemon directly along your grout lines, applying moderate pressure.
The salt acts as a scrubber, while the lemon juice seeps into the grout. Work in small sections so the juice doesn't dry before you rinse.
Rinsing And Finishing
After scrubbing, let the lemon juice sit for about 5 minutes. Then rinse the area thoroughly with warm water. Use a damp cloth or sponge to wipe away any residue.
This step is important because leftover lemon juice can become sticky as it dries. Once rinsed, dry the grout with a clean towel to prevent new stains.
When To Use This Method
This scrub is ideal for routine maintenance between deep cleans. It's not strong enough for heavy mold or deep-set stains, but it works wonders for light discoloration. Use it once a month to keep your grout looking fresh.
Avoid using it on unsealed grout, as the acid can weaken it over time.
8. Use a Magic Eraser for Light Marks
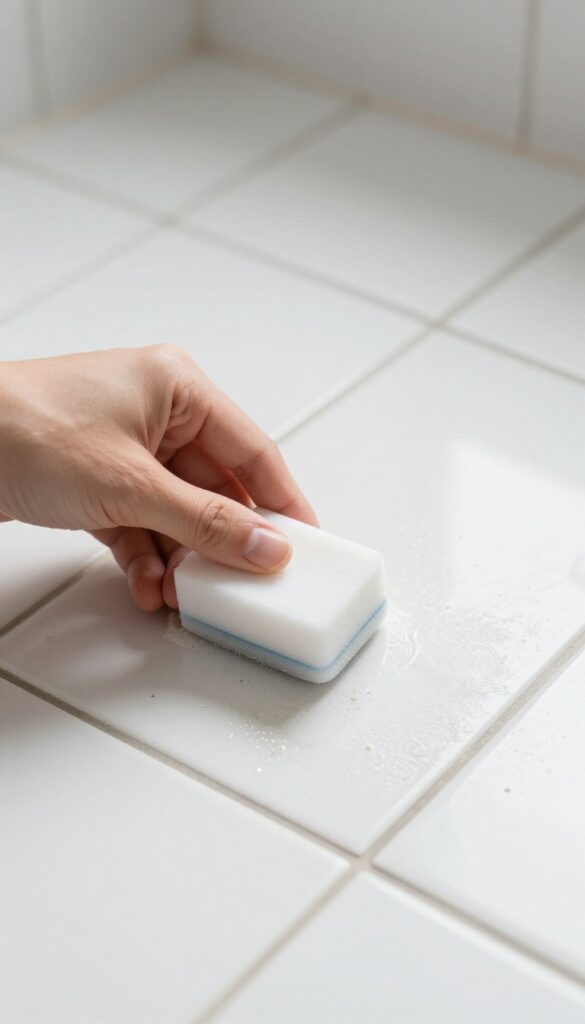
Melamine foam erasers, often sold as Magic Erasers, are surprisingly effective for light grout cleaning. They work by micro-abrasion, lifting surface stains and scuffs without the need for harsh chemicals. This makes them a great option for quick touch-ups between deeper cleans.
For best results, dampen the eraser with water and wring out excess moisture. Gently rub it over the grout lines in short, even strokes. You'll see the foam start to crumble as it picks up dirt.
Rinse the area with water afterward to remove any residue. This method works well on lightly soiled grout but won't penetrate deep stains or mold. It's ideal for maintenance cleaning after a few days of use.
How It Works
The eraser's porous structure acts like ultra-fine sandpaper. When damp, it creates a gentle abrasive action that lifts dirt from the grout's surface. It's safe for most sealed grout but test on an inconspicuous area first.
When To Use It
Reach for the Magic Eraser when you notice light scuffs from shoes, minor soap scum, or everyday grime. It's perfect for a quick refresh before guests arrive or as a weekly maintenance step.
Pro Tips
Cut the eraser into smaller pieces to make it last longer. Use a light touch—pressing too hard can wear down the grout. Avoid using it on unsealed grout, as the abrasion may cause damage.
9. Seal Grout After Cleaning
You've scrubbed, rinsed, and dried your grout until it looks almost new. Now comes the step that keeps it that way: sealing. A good sealer locks out moisture, soap scum, and dirt so your grout stays bright for months instead of days.
It's a small effort that pays off every time you step into the shower.
Sealing is the final touch that turns a deep clean into long-lasting results. Without it, even the cleanest grout will start absorbing grime again within weeks. A penetrating sealer soaks into the porous grout and forms an invisible shield.
Water beads up on the surface instead of soaking in, and dirt wipes away more easily during regular cleaning. Most sealers take just a few minutes to apply and dry within an hour. Plan to reseal once a year, or more often in heavy-use areas like the shower floor.
Choose The Right Sealer
Not all sealers are the same. For bathroom grout, pick a penetrating sealer (not a topical one that can peel). Look for a water-based formula that's safe for indoor use and won't yellow over time.
Some sealers also include a mild antimicrobial additive to help prevent mold growth. Read the label to make sure it's suitable for your type of grout—sanded or unsanded.
Apply It Correctly
Make sure grout is completely dry before sealing—wait at least 24 hours after cleaning. Apply the sealer with a small brush or foam applicator, working it into the grout lines. Wipe away any excess from the tile surface immediately with a clean cloth.
Let it dry for the time recommended on the bottle, usually 1–2 hours. For best results, apply a second coat after the first dries.
Test Before You Commit
If you're unsure whether your grout needs sealing, do a simple water test. Sprinkle a few drops of water onto the grout. If the water beads up, the sealer is still working.
If it soaks in and darkens the grout, it's time to reseal. This test takes seconds and prevents over-sealing, which can leave a hazy residue.
10. Try Oxygen Bleach for Organic Stains
Oxygen bleach is a gentler alternative to chlorine bleach that still packs a punch against organic stains like mold, mildew, and food spills. It works by releasing oxygen bubbles that lift dirt and kill microbes without the harsh fumes or discoloration risks. This method is especially good for porous grout that soaks up stains over time.
To use oxygen bleach, mix the powder with warm water according to package directions—usually about 1 tablespoon per cup of water. Apply the solution to your grout lines using a spray bottle or a sponge, making sure the grout is fully saturated. Let it sit for 30 minutes to allow the oxygen to break down the stains.
For stubborn spots, you can scrub gently with a soft brush after the wait time. Rinse thoroughly with water and dry with a clean cloth. The result is brighter grout without the chemical smell.
Why Oxygen Bleach Works
Unlike chlorine bleach, which can weaken grout over time and release toxic fumes, oxygen bleach is non-toxic and safe for most surfaces. It's also effective at killing mold spores and mildew roots, preventing regrowth. The bubbling action helps dislodge dirt from deep within the grout pores, making it a thorough cleaner.
Best Practices For Application
Always test oxygen bleach on a small, hidden area first to ensure it doesn't discolor your grout or tiles. Apply it in a well-ventilated area and avoid letting it dry on the surface—cover the treated area with plastic wrap if needed to keep it moist during the 30-minute dwell time. For vertical grout lines, use a thicker paste (less water) so it sticks better.
When To Use This Method
Oxygen bleach is ideal for organic stains like those from soap scum, food, or mildew. It's less effective on mineral deposits or rust, so pair it with a different cleaner for those issues. Use this method once a month to maintain bright grout and prevent heavy buildup.
11. Use a Toothbrush and Toothpaste
White toothpaste isn't just for your teeth—it's a mild abrasive that can polish grout lines back to brightness. The paste is gentle enough not to damage the grout but effective for lifting everyday dirt and light stains. It's one of the quickest fixes for small areas, especially when you need a spot treatment without pulling out heavy cleaners.
Toothpaste works best on fresh or light stains. Squeeze a small amount of white paste onto an old toothbrush, scrub the grout lines in a circular motion, then rinse with water. Avoid gel toothpastes, as they lack the abrasive particles needed for scrubbing.
This method is ideal for touch-ups around sinks, showers, or anywhere you notice a few dingy lines.
Why White Toothpaste Works
White toothpaste contains mild abrasives like calcium carbonate or silica. These particles help physically scrub away surface stains without scratching the grout. The paste also includes detergents that break down grease and soap scum, making it a two-in-one cleaner for quick jobs.
Best Areas For Toothpaste Cleaning
This trick shines on small, visible grout sections—like the lines around a bathroom mirror, the edge of a sink, or a few tiles near the showerhead. It's not meant for large floors or heavily soiled grout, but it's perfect for spot cleaning when you want instant results.
Step-by-step Quick Clean
- Wet the toothbrush slightly. 2.
Squeeze a pea-sized amount of white toothpaste onto the bristles. 3. Scrub the grout lines using small circular motions for about 30 seconds per section.
- Wipe away the paste with a damp cloth or rinse with water. 5.
Repeat if needed. That's it—no waiting, no harsh fumes.
12. Wipe Down After Every Shower
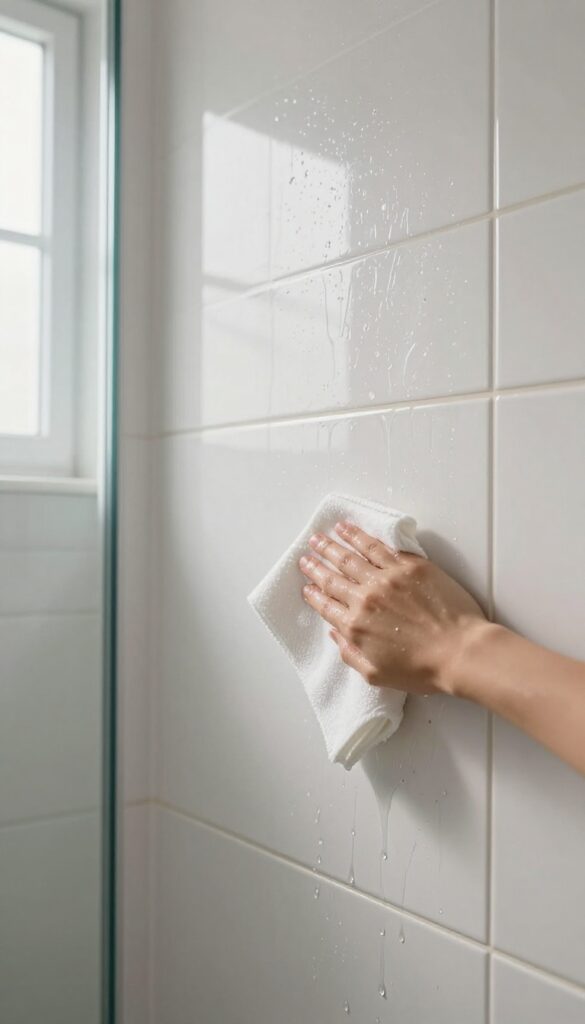
This is the simplest habit you can adopt, and it pays off fast. After you shower, a quick wipe-down removes the soap scum, body oils, and hard water that settle on tiles and grout. Letting that residue dry on the surface gives stains and mold a foothold.
A few seconds with a squeegee or cloth keeps grout lines brighter and reduces the need for deep cleaning.
The key is consistency. Make wiping part of your post-shower routine, and you'll notice less buildup over time. It's especially effective in bathrooms with poor ventilation, where moisture lingers.
What To Use
A squeegee works great for large tile areas. For grout lines, a microfiber cloth is better because it absorbs moisture and traps residue. Keep one hanging in the shower or on a nearby hook so it's always ready.
Quick Wipe Technique
Start at the top and work your way down. Use horizontal strokes on tiles, then run the cloth along grout lines. Focus on corners and edges where water pools.
A single pass is usually enough—no need to scrub.
When To Do It
Right after you step out, while the surfaces are still wet. If you wait, water spots start to form. Doing it daily takes less than a minute and prevents soap scum from hardening.
13. Use a Grout Cleaner Machine
If your bathroom sees heavy use or you're tired of scrubbing by hand, an electric grout cleaner can be a game-changer. These machines spin brushes at high speed to lift dirt and grime from deep within the grout lines. They're especially useful for large bathrooms or when you need to refresh multiple rooms.
Electric grout cleaners come with interchangeable brush heads for different tasks. The main brush tackles wide grout lines, while smaller attachments handle corners and edges. Most models also have a water spray feature to keep the area wet and reduce dust.
The result is a deep clean that manual scrubbing often misses.
What To Look For
Focus on models with variable speed settings and a comfortable grip. Cordless options offer more freedom, but corded ones provide consistent power. Check that replacement brushes are easy to find and affordable.
How To Use It Effectively
Start by wetting the grout with a mild cleaner or water. Work in small sections, letting the brush do the work—no need to press hard. Keep the machine moving to avoid damaging the grout.
Rinse with clean water and dry with a microfiber cloth.
When It's Worth The Investment
If you have a large tiled area or plan to clean grout regularly, a machine pays for itself in time saved. For a one-time deep clean, consider renting one from a home improvement store before buying.
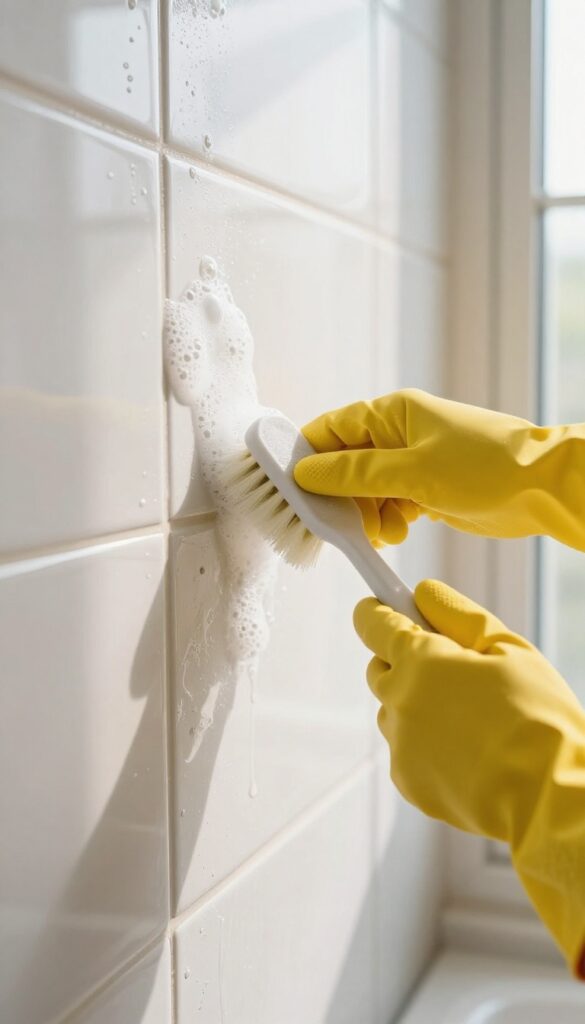
14. Apply a DIY Vinegar and Dish Soap Spray
Sometimes the best cleaner is already sitting in your kitchen cabinet. A simple mix of vinegar, water, and dish soap cuts through grime without harsh chemicals. It's cheap, effective, and safe for most grout types.
This homemade spray tackles two common grout enemies at once: grease and mineral deposits. Dish soap breaks down soap scum and body oils, while vinegar dissolves hard water stains and alkaline buildup. Together, they lift dirt that plain cleaners leave behind.
Use it weekly to maintain bright lines or as a spot treatment for stubborn areas.
How To Mix It Right
Combine equal parts white vinegar and warm water in a spray bottle. Add a few drops of liquid dish soap—about a teaspoon per cup of liquid. Swirl gently to avoid too many suds.
Don't shake, or you'll end up with foam instead of spray.
Application Tips
Spray the mixture directly onto grout lines until they're wet but not dripping. Let it sit for 5–10 minutes so the vinegar can work on mineral deposits. Scrub with a stiff brush or old toothbrush, then rinse with warm water.
For tough stains, let the solution sit longer and scrub again.
When To Skip This Method
Avoid vinegar on natural stone tiles like marble, travertine, or limestone. The acid can etch and dull the surface. Also, don't use it on unsealed grout if you've recently applied a sealer—vinegar can wear it down faster.
Test on a small hidden area first.
15. Use a Pumice Stone for Hardened Deposits
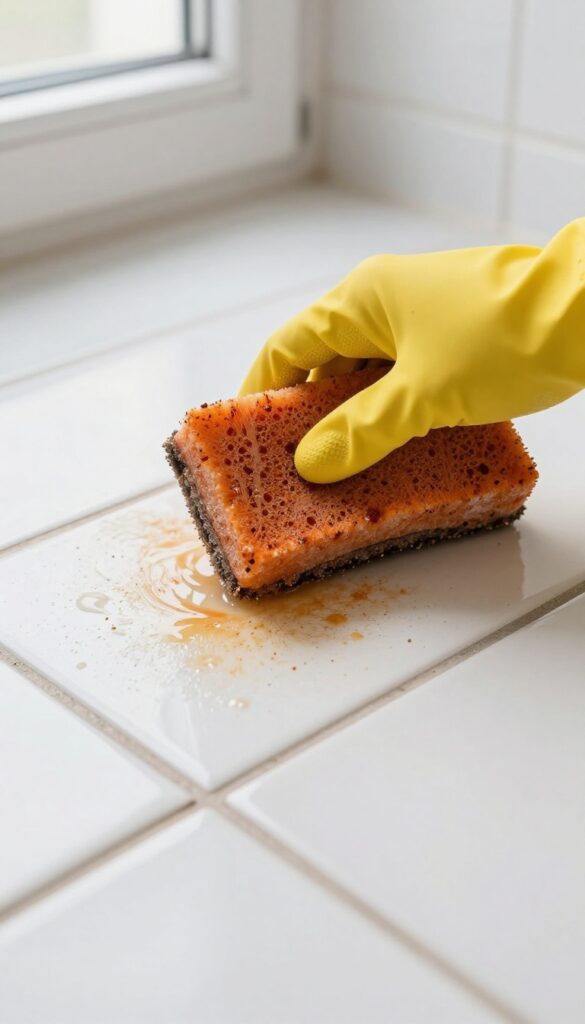
Hard water stains and rust deposits can turn grout lines orange or brown, and they often resist regular cleaners. A pumice stone offers a mechanical solution that's surprisingly gentle on tile when used correctly. The key is to keep the stone wet and apply light pressure—let the abrasive texture do the work.
Pumice stones are porous volcanic rocks that act as a fine abrasive. They're ideal for removing stubborn calcium, lime, and rust buildup that won't budge with chemicals. Always wet the stone and the grout surface before starting.
Gently rub the stain in a circular motion, rinsing frequently to check progress. Avoid scrubbing too hard or using a dry stone, as that can scratch glazed tile. For unglazed or natural stone tiles, test on an inconspicuous area first.
Why Pumice Works On Grout
The stone's abrasive particles are softer than ceramic or porcelain tile but harder than dried mineral deposits. This means it can scrape away buildup without damaging the tile's surface. The porous nature also helps lift particles away as you rub.
Step-by-step Technique
Soak the pumice stone in water for a few minutes. Wet the stained grout line. Rub the stone gently back and forth over the deposit.
Rinse the area and stone frequently. Repeat until the stain is gone. Finish by wiping the area clean with a damp cloth.
Safety Precautions
Never use a dry pumice stone—it can scratch. Avoid using on polished marble, limestone, or other soft stones. Always test in a hidden spot.
Wear gloves to protect your hands from friction. Dispose of the stone after heavy use, as it can harbor bacteria.
16. Try Commercial Grout Cleaner for Stubborn Grime
Sometimes household remedies just won't cut it. When grout stains have set in deep or you're dealing with years of buildup, a commercial grout cleaner can save the day. Products like Zep or Clorox Grout Cleaner contain stronger chemicals that break down tough stains quickly.
Choose The Right Product
Look for a cleaner specifically designed for grout, not a general bathroom spray. Zep and Clorox are popular options, but brands like Goo Gone also offer grout-specific formulas. Check the label to ensure it's safe for your tile type.
Safety First
These cleaners are potent, so ventilation is key. Open a window or turn on the exhaust fan. Wear rubber gloves to protect your skin, and avoid mixing with other chemicals.
Follow the instructions on the bottle—usually a few minutes of dwell time before scrubbing.
Apply Sparingly
A little goes a long way. Apply the cleaner directly to the grout lines using the bottle's nozzle or a small brush. Let it sit, then scrub with a stiff brush.
Rinse thoroughly with water to remove any residue.
17. Regrout as a Last Resort
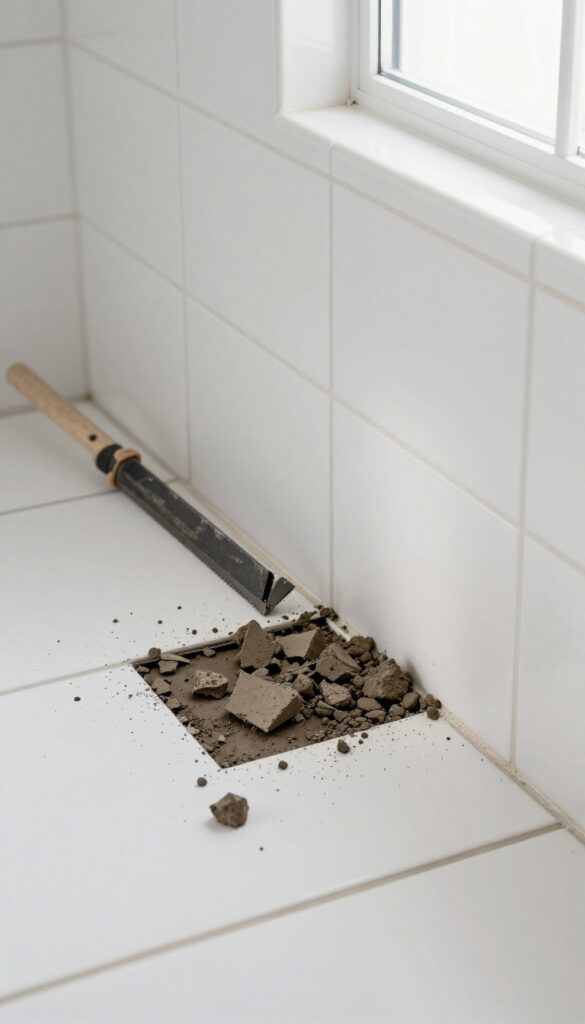
Sometimes no amount of scrubbing or chemical treatments can bring old grout back to life. When the grout is crumbling, deeply stained, or just beyond repair, the best solution is to start fresh. Regrouting may sound intimidating, but with the right approach, it's a manageable weekend project that completely transforms your bathroom.
When To Call It Quits
If your grout is cracked, missing in spots, or still looks terrible after deep cleaning, it's time to remove it. Also, if you notice recurring mold that returns even after bleaching, the grout may be porous or damaged beyond saving. Regrouting gives you a clean slate.
Tools And Materials
You'll need a grout saw or an oscillating tool with a grout removal blade, new grout (sanded for joints wider than 1/8 inch, unsanded for narrower), a grout float, a sponge, and a bucket of water. For a professional finish, pick a color that complements your tile.
The Regrouting Process
First, remove the old grout carefully to avoid chipping tiles. Vacuum out dust, then mix your grout according to the package instructions. Apply it with a float, pressing firmly into the joints.
Wipe off excess with a damp sponge, working diagonally to avoid pulling grout out. Let it cure, then seal it to protect against future stains.
FAQ
How often should I clean bathroom grout?
For maintenance, wipe grout after each shower and do a deep clean every 1-2 months. If you see mold or stains, clean them immediately to prevent spreading.
Can I use bleach on colored grout?
Bleach can discolor or lighten colored grout. Test in an inconspicuous area first. For colored grout, use a pH-neutral cleaner or a paste of baking soda and water.
What is the best homemade grout cleaner?
A paste of baking soda and water works well for general cleaning. For tougher stains, add hydrogen peroxide or white vinegar. Avoid mixing bleach with vinegar or ammonia.
How do I prevent grout from getting dirty?
Seal grout after cleaning and reapply sealer annually. Use a squeegee on tiles after showers, and keep the bathroom ventilated to reduce moisture.
Is steam cleaning safe for all grout?
Steam cleaning is safe for most sealed grout and ceramic tiles. Avoid on unsealed natural stone grout, as the moisture can penetrate and cause damage.
Conclusion
Bright grout isn't about perfection—it's about consistency. Pick two or three of these tips that fit your routine and stick with them. A quick weekly wipe-down beats a frantic deep clean every time.
Your bathroom lines will stay fresher longer, and you'll spend less time scrubbing. That's a win you can see.