20 Grout Cleaning Tips for Tile Floors and Showers
Grout might be the hardest-working part of your tile, but it's also the first to show grime. Between soap scum, hard water, and daily foot traffic, those porous lines can go from bright to dingy fast. The good news?
You don't need a professional or a cabinet full of harsh chemicals to get them clean again. This list covers 20 realistic, budget-aware methods that tackle everything from light discoloration to stubborn mold.
Some tips use pantry staples, others rely on tools you probably already own. A few require a small investment, but they'll save you hours of scrubbing down the road.
1. Start with a Simple Baking Soda Paste
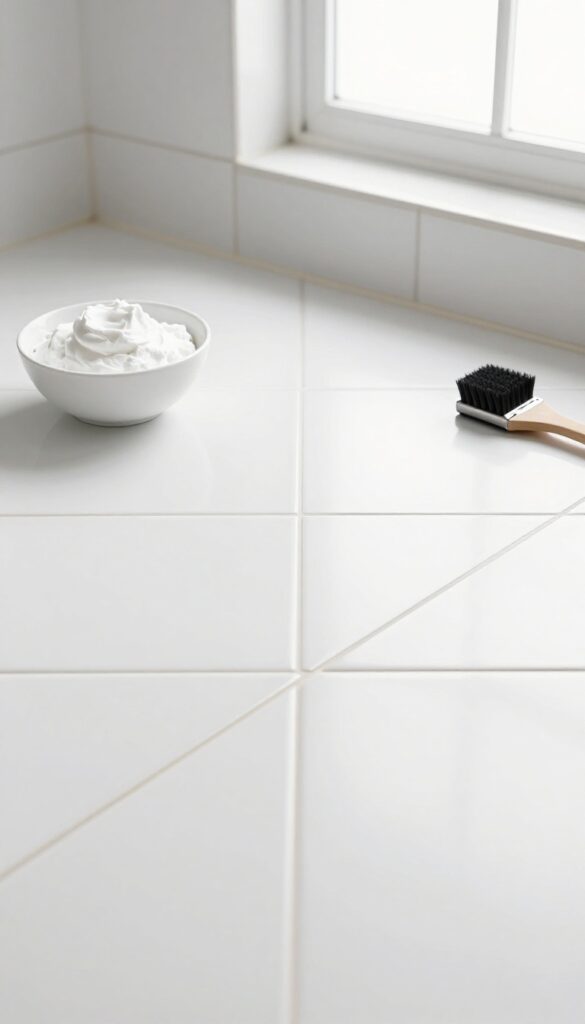
Before you reach for bleach or expensive sprays, try the gentle power of baking soda. This pantry staple is slightly abrasive, so it lifts dirt from porous grout without scratching tile. It's also safe for colored grout, unlike harsh chemicals that can cause fading.
Mix three parts baking soda with one part water to form a thick, spreadable paste. Apply it directly to the grout lines using an old toothbrush or your finger. Let it sit for 10 minutes to loosen embedded grime.
Then scrub with a stiff-bristled brush—a grout brush or even a clean toothbrush works well. Rinse with water and wipe dry with a cloth. For extra stubborn spots, add a splash of white vinegar to the paste, but test on a hidden area first, as vinegar can etch some natural stone tiles.
Why Baking Soda Works So Well
Baking soda is a mild alkali with a pH of around 8. It reacts with acidic dirt and grease, helping to break them down. Its fine crystalline structure provides gentle scrubbing power that won't damage glazed tile or grout sealant.
When To Skip The Vinegar
Avoid adding vinegar to the paste if your grout is unsealed or if you have natural stone tiles like marble or travertine. The acid can eat away at the surface. Stick to a plain baking soda paste for routine cleaning.
Pro Tip For Extra Grime
For heavily soiled grout, let the paste sit for 20 minutes and cover it with plastic wrap to keep it moist. This prevents the paste from drying out and gives it more time to work.
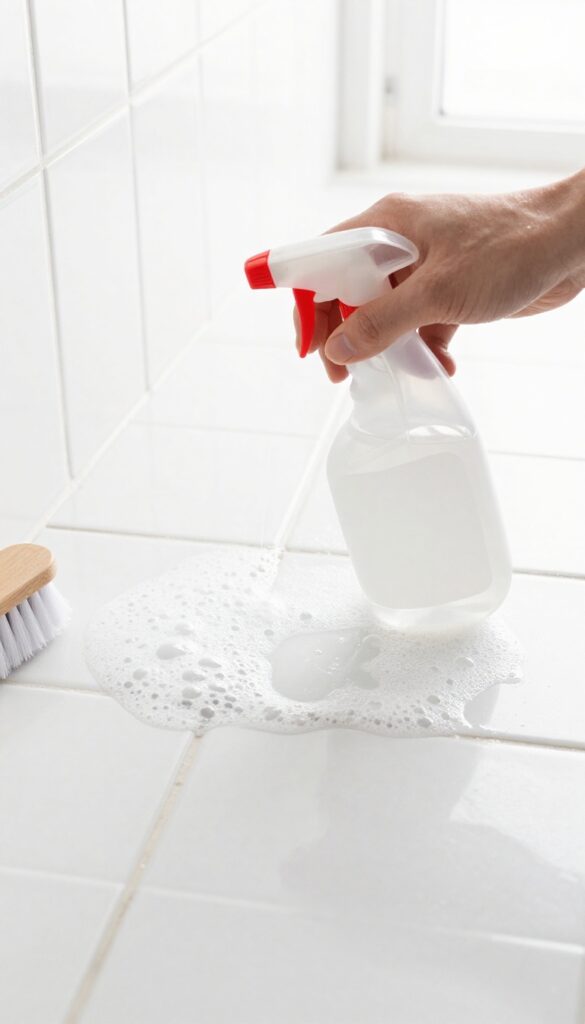
2. Use Vinegar and Water for Light Stains
When grout starts looking a little dingy but hasn't crossed into mold territory, a simple vinegar solution often does the trick. White vinegar is mildly acidic, which helps break down soap scum and mineral deposits without the need for harsh chemicals. It's a go-to for regular maintenance and light discoloration.
Mix equal parts white vinegar and water in a spray bottle. Spray the solution directly onto the grout lines and let it sit for about 5 minutes—you'll see it fizz as it works. Then scrub with a stiff brush (an old toothbrush works great) and rinse with water.
This method is effective on light stains and helps restore brightness. Just remember: vinegar is acidic, so avoid using it on natural stone tiles like marble or travertine, as it can etch the surface.
Why Vinegar Works On Grout
Vinegar's acidity cuts through alkaline residues like soap scum and hard water deposits. The fizzing action helps lift dirt from porous grout, making it easier to scrub away. It's a gentle yet effective cleaner for routine upkeep.
Best Practices For Application
Always test on a small, hidden area first. Apply the solution generously, but avoid letting it pool. Use a brush with firm bristles to work the mixture into the grout.
Rinse thoroughly with water afterward to remove any vinegar residue, which can attract dirt if left behind.
When To Skip This Method
Skip vinegar on natural stone tiles—it can cause etching and dullness. Also, if the grout is heavily stained or has mold, vinegar alone won't be strong enough. In those cases, consider a stronger cleaner or a baking soda paste.
3. Try Hydrogen Peroxide for Tougher Grime
When standard cleaners aren't cutting it, hydrogen peroxide steps in as a gentle but effective alternative to bleach. It's a go-to for whitening grout and tackling mold without the harsh fumes. Best of all, you probably already have a bottle in your medicine cabinet.
Hydrogen peroxide works by releasing oxygen bubbles that lift dirt and kill mold spores on contact. It's especially good for light-colored grout that's turned gray or developed dark spots. Unlike bleach, it won't yellow over time or create harmful fumes when mixed with other cleaners.
Just apply it directly to the grout lines, let it sit for about 15 minutes, then scrub with a stiff brush. Rinse thoroughly with water afterward. For extra stubborn areas, mix hydrogen peroxide with baking soda to form a paste—let it sit for 10 minutes before scrubbing.
How To Apply Hydrogen Peroxide To Grout
Pour 3% hydrogen peroxide into a spray bottle or apply it directly with a sponge. Saturate the grout lines and let the solution bubble away for 15 minutes. Then scrub with a grout brush or an old toothbrush.
Rinse with warm water and wipe dry. For vertical surfaces like shower walls, use a spray bottle to avoid runoff.
Hydrogen Peroxide Vs. Bleach For Grout
Hydrogen peroxide is safer for colored grout because it doesn't contain chlorine, which can strip dye. It's also less irritating to your lungs and skin. While bleach whitens effectively, it can weaken grout over time and cause yellowing.
Hydrogen peroxide offers similar whitening power without those downsides, making it a better choice for regular maintenance.
When To Use A Hydrogen Peroxide Paste
For deep-set stains or mold spots, mix hydrogen peroxide with baking soda until it forms a thick paste. Spread it over the grout lines and let it sit for 10–15 minutes. Scrub with a brush, then rinse.
The paste clings better to vertical surfaces and gives the peroxide more time to work. This method is especially effective on shower floors and backsplashes.
4. Make a Lemon and Cream of Tartar Paste
If your grout is stained from hard water or general grime, a paste made from lemon juice and cream of tartar can work wonders. The citric acid in the lemon helps dissolve mineral deposits, while the cream of tartar acts as a gentle abrasive to polish the surface. This combination is especially effective on light-colored grout that has yellowed over time.
To make the paste, mix equal parts lemon juice and cream of tartar until you have a thick, spreadable consistency. Apply it directly to the grout lines using an old toothbrush or a small spatula. Let it sit for about 10–15 minutes—don't let it dry completely, or it will be harder to rinse.
Scrub gently with a brush, then rinse thoroughly with warm water. You may need to repeat the process for heavily stained areas.
Why This Combo Works
Lemon juice contains citric acid, which breaks down calcium and lime deposits left by hard water. Cream of tartar is a mild abrasive that helps lift dirt without scratching the tile. Together, they create a non-toxic cleaner that’s safe for most grout types.
Application Tips
Always test the paste on a small, hidden area first, especially if your grout is dark or painted. Apply the paste with a toothbrush for precision, and avoid getting it on unsealed natural stone tiles, as the acid can etch them. Rinse well to prevent any sticky residue.
When To Use This Method
This paste is ideal for light to moderate staining from hard water or everyday dirt. For deep-set mold or mildew, you may need a stronger cleaner like hydrogen peroxide. Use it as a monthly maintenance treatment to keep grout looking fresh.
5. Use a Steam Cleaner for Deep Cleaning
If you're dealing with years of grime lodged deep in the grout lines, a steam cleaner can be a game-changer. These devices blast hot vapor at high pressure, which loosens dirt and kills bacteria without any chemicals. It's especially effective for large shower floors or kitchen backsplashes where scrubbing by hand would take forever.
Why Steam Works So Well
Steam penetrates the porous surface of grout better than liquid cleaners. The heat expands the grout slightly, releasing trapped dirt. Plus, the high temperature kills mold spores and bacteria on contact.
It's a deep clean without the need for scrubbing or rinsing.
Choosing The Right Steam Cleaner
For grout, a handheld steam cleaner with a brush attachment is ideal. Look for one that heats up quickly and has a continuous steam feature. Avoid models that require you to pump constantly.
A good option has at least a 10-ounce water tank to cover multiple tile lines without refilling.
How To Steam Clean Grout Safely
Start by sweeping or vacuuming the tile to remove loose debris. Then, hold the steam nozzle about an inch from the grout and move slowly along the lines. Let the steam sit for a few seconds before wiping with a microfiber cloth.
Work in small sections to avoid moisture sitting too long. Afterward, open a window or run a fan to dry the area quickly.
6. Apply a Grout Pen for Instant Refresh
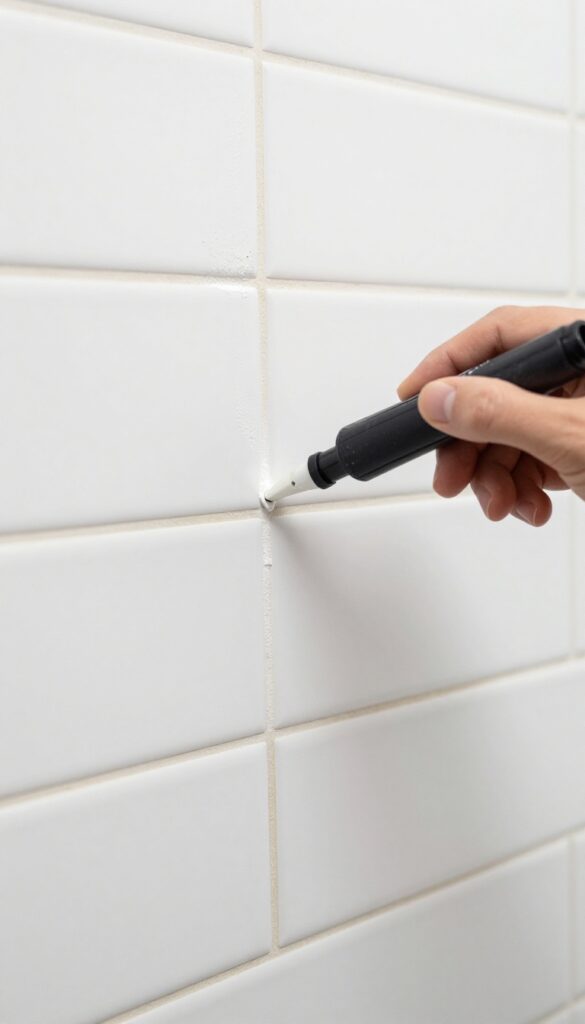
Sometimes you just want a quick cosmetic upgrade without the elbow grease. That's where grout pens come in. These markers are designed to recolor the grout lines, covering stains and discoloration in minutes.
They're not a deep clean—they paint over the problem—but they can make your tile look fresh again fast.
How Grout Pens Work
Grout pens contain a water-based or acrylic paint that soaks into the porous grout. You simply run the tip along the grout lines, and the color deposits evenly. Most pens come with a fine tip for precision and a wider side for thicker lines.
The effect is like coloring inside the lines, but on your floor or shower.
When To Use A Grout Pen
Grout pens are best for maintenance between deep cleans. If your grout is structurally sound but just looks tired, a pen can buy you months of visual appeal. They work well on light stains, yellowing, or uneven color.
But if you have mold or mildew growth, clean that first with a proper cleaner—otherwise you'll just seal the problem under paint.
Tips For A Smooth Application
Start with clean, dry grout. Shake the pen well and test on an inconspicuous spot. Apply steady pressure and try to stay inside the lines—paint on the tile can be wiped off quickly with a damp cloth, but it's easier to avoid.
Let the first coat dry for about an hour, then apply a second if needed. Seal the grout afterward to extend the life of the color.
7. Scrub with an Old Toothbrush for Detail Work
For tight corners and narrow lines, a toothbrush gives you precision. Dip it in your cleaning solution and scrub in small circles. It's tedious but effective for spot cleaning.
When a sponge or cloth can't reach into the crevices, a toothbrush becomes your best friend. The bristles are stiff enough to dislodge grime but soft enough not to damage the grout. This method is perfect for tackling small areas like the edges of a shower niche or around a toilet base.
It's also great for cleaning along the transition between tile and a bathtub. For best results, use a dedicated toothbrush that you don't plan to use for brushing your teeth again. You can even mark the handle with a permanent marker to keep it separate from your bathroom supplies.
Choose The Right Brush
Not all toothbrushes are created equal for grout cleaning. Look for one with medium to firm bristles. Soft bristles won't have enough scrubbing power, while extra-firm ones might scratch softer tile surfaces.
If you have a lot of detail work, consider a brush with a slightly angled head to reach tight spots more easily. An old electric toothbrush head can also work if you attach it to the handle and use it manually.
Pair With A Paste For Stubborn Stains
For grout that's really discolored, dip the toothbrush into a baking soda and water paste. The paste clings to the brush and the grout line, giving you more scrubbing time. Scrub in small circles, focusing on the darkest areas.
Rinse the brush frequently and reapply paste as needed. This combination is especially effective on shower floor grout where soap scum and mildew build up.
Work In Sections And Rinse Often
Don't try to scrub the entire floor or wall at once. Divide the area into small sections, about a square foot at a time. Scrub thoroughly, then rinse the area with a damp cloth or spray bottle before moving on.
This prevents the loosened grime from drying back onto the grout. It might take a little longer, but the results are worth the effort.
8. Use a Grout Brush with a Long Handle
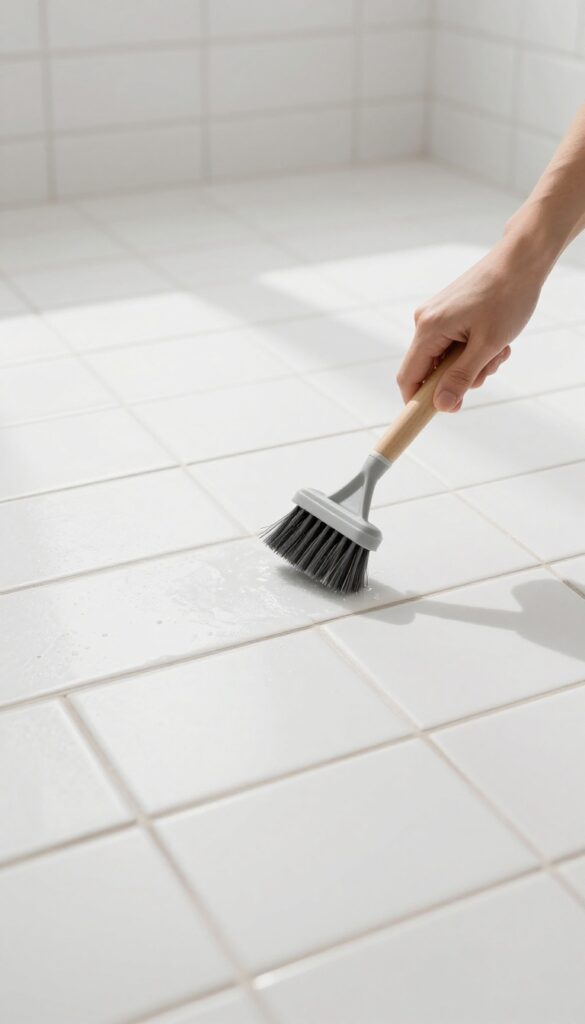
Kneeling on the bathroom floor with a toothbrush in hand gets old fast. Your knees ache, your back protests, and you barely cover any ground. A grout brush with a long handle changes that completely.
A dedicated grout brush has stiff bristles designed to dig into the porous lines without damaging the tile. The long handle lets you stand upright while scrubbing, saving your joints and giving you more leverage. It covers a wider area than a toothbrush, so you finish faster.
Pair it with any cleaning paste—baking soda and vinegar, hydrogen peroxide, or a commercial cleaner—and work the mixture into the grout with firm, back-and-forth strokes. Rinse with water and wipe away residue. For best results, use the brush weekly on high-traffic areas to prevent buildup from settling in.
Why A Long Handle Matters
Scrubbing grout by hand on your knees puts strain on your lower back and knees. A long-handled brush lets you apply more pressure from a standing position, which means less fatigue and better cleaning. You can also reach the floor grout in showers without bending over awkwardly.
Choosing The Right Brush
Look for a brush with stiff, angled bristles that can get into the grout lines. A handle length of at least 30 inches works well for most people. Some brushes come with interchangeable heads for different grout widths.
Avoid brushes with bristles that are too soft—they won't remove stubborn grime.
Technique For Best Results
Apply your cleaning paste to the grout lines first, let it sit for 5–10 minutes, then scrub with the brush using short, firm strokes. Work in sections to keep the paste from drying out. Rinse thoroughly with water and wipe the tile surface with a microfiber cloth to prevent streaks.
9. Try Oxygen Bleach (OxiClean) for Set-In Stains
For stains that have settled deep into the grout, chlorine bleach can be too harsh and leave behind a strong smell. Oxygen bleach offers a gentler but equally effective alternative. It works by releasing oxygen bubbles that lift organic stains like coffee, wine, or mildew without damaging the grout or your lungs.
Oxygen bleach powder is easy to find and mix. Combine it with warm water to form a thick paste, then apply it directly to the grout lines. Let it sit for about 20 minutes so the bubbles can penetrate and break down the stain.
After that, scrub with a stiff brush and rinse thoroughly. The results are often surprising, especially on older stains that other cleaners couldn't touch.
Why Oxygen Bleach Works Better
Unlike chlorine bleach, oxygen bleach doesn't produce toxic fumes or discolor colored grout. It's also safer for the environment and your skin. The paste consistency keeps the cleaner in contact with the stain longer, giving it time to work.
How To Make The Paste
Mix about 2 parts oxygen bleach powder with 1 part warm water. Stir until it forms a spreadable paste. If it's too runny, add more powder.
Too thick, add a little more water. Apply with an old toothbrush or a small spatula.
Tips For Best Results
Work in small sections so the paste doesn't dry out before you scrub. For tough stains, cover the paste with plastic wrap to keep it moist. Rinse well with clean water after scrubbing to avoid any residue.
10. Use a Magic Eraser for Light Marks
Sometimes a quick touch-up is all you need. A melamine sponge—commonly sold as Magic Eraser—can buff away surface scuffs and light stains on grout without any liquid cleaner. It's a great tool for maintenance between deeper cleanings.
Magic Erasers work like ultra-fine sandpaper, gently abrading the top layer of dirt. They're ideal for small areas like a patch near the sink or a few discolored lines. Just dampen the sponge slightly, wring it out, and rub the grout gently.
You'll see results almost instantly.
When To Reach For A Magic Eraser
This method shines for fresh marks, scuffs from shoes, or light soap scum. It's not meant for deep-set stains or mold. If you have years of buildup, skip this and use a stronger cleaner first.
But for quick fixes, it's hard to beat.
How To Use It Without Damaging Grout
Always test on an inconspicuous spot first. Use a light touch—you're not scrubbing a pan. The sponge will crumble as it wears, which is normal.
Rinse the area afterward to remove any residue. Avoid using it on unsealed grout too often, as it can wear down the surface over time.
Pro Tip: Cut The Sponge Into Small Pieces
A full Magic Eraser is overkill for grout lines. Cut it into thin strips or small squares to fit between tiles. This gives you better control and makes each piece last longer.
You'll also get into tight corners more easily.
11. Seal Grout After Cleaning to Prevent Future Stains
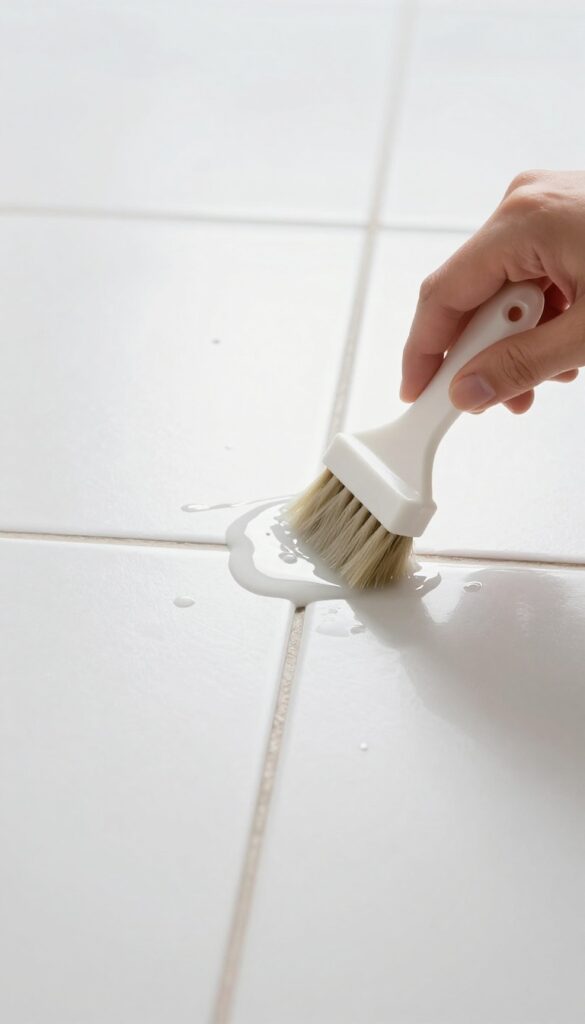
You've put in the work to get your grout looking fresh again. Now the smart move is to keep it that way without repeating the whole ordeal next month. Sealing grout creates a protective barrier that repels moisture and dirt, so stains don't stand a chance.
It's a simple step that pays off big time.
Sealing is not as complicated as it sounds. Once your grout is thoroughly clean and completely dry, you apply a penetrating sealer. This sealer soaks into the porous grout and forms an invisible shield.
Water, soap scum, and grime bead up on the surface instead of sinking in. The result is grout that stays cleaner longer and is much easier to wipe down. Most sealers require reapplication every 6 to 12 months, depending on traffic and moisture exposure.
It's a small time investment for months of easier cleaning.
Choose The Right Sealer
Not all sealers are the same. For tile floors and showers, look for a penetrating, water-based sealer. Avoid film-forming sealers that can peel or discolor over time.
Penetrating sealers bond with the grout and allow it to breathe, which is important in wet areas. Check the label to make sure it's suitable for your specific grout type and tile material.
Application Tips For Best Results
Apply sealer with a small brush or a foam applicator, working it into the grout lines. Wipe off any excess from the tile surface immediately before it dries. Let the sealer cure according to the manufacturer's instructions—usually 24 to 48 hours.
Keep the area dry during that time. For showers, wait a few days before using it to ensure full protection.
When To Reapply
Test your seal regularly by sprinkling a few drops of water on the grout. If the water beads up, the seal is still working. If it soaks in and darkens the grout, it's time to reseal.
High-traffic areas and frequently wet showers may need sealing every 6 months, while less-used floors can go a year or more. Mark your calendar so you don't forget.
12. Use a Commercial Grout Cleaner for Stubborn Spots
Sometimes homemade solutions just don't cut it, especially if your grout has years of buildup or deep-set stains. That's when it's time to bring in the heavy lifters: commercial grout cleaners. Products like Zep Grout Cleaner and Grout-Eez are specifically formulated to break down the grime that regular cleaners leave behind.
They can save you a ton of elbow grease and deliver results that look almost like new grout.
Choose The Right Product
Not all commercial grout cleaners are the same. Some are designed for light maintenance, while others tackle heavy-duty stains like rust or mold. Read labels carefully and pick one that matches your specific issue.
For example, Zep is great for general grime, while Grout-Eez works well on colored grout without fading it.
Safety First
These products often contain strong chemicals, so always wear gloves and work in a well-ventilated area. Open a window or turn on a fan to avoid inhaling fumes. If you're sensitive to smells, consider wearing a mask.
Test Before You Commit
Before going all in, test the cleaner on a small, hidden area of grout. Apply it, scrub a little, and rinse. Wait a day to see if any discoloration or damage occurs.
This step is crucial for colored or delicate grout.
Follow Instructions To The Letter
Each product has its own application method—some need to sit for a few minutes, others require scrubbing immediately. Don't wing it. Follow the directions for the best results and to avoid damaging your tile or grout.
13. Try a Bleach Pen for Mold in Shower Grout
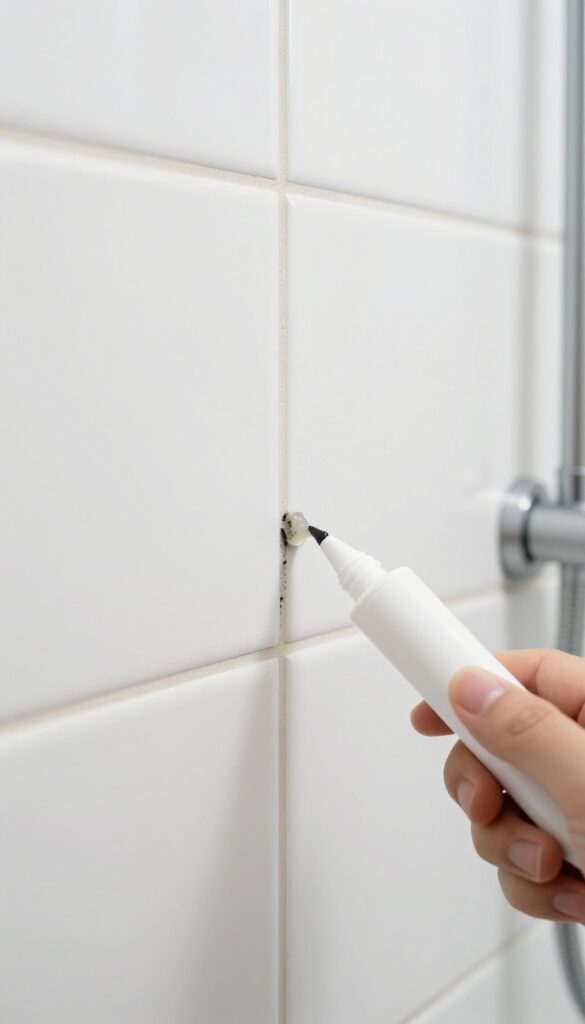
Mold in shower grout is stubborn, but a bleach pen offers a surgical approach. Unlike pouring bleach or spraying a solution, a bleach pen lets you apply gel directly to the moldy lines without affecting surrounding tile. It's ideal for small, isolated outbreaks that keep coming back.
Bleach pens are a targeted tool for killing mold in shower grout. The thick gel clings to vertical surfaces and stays put, allowing the bleach to penetrate the porous grout and kill mold spores at the root. After letting it sit for 10 minutes, simply rinse with warm water.
This method is quick, precise, and avoids the mess of liquid bleach. However, bleach can discolor colored grout, so test in an inconspicuous spot first. For white or light grout, it's a game-changer.
How Bleach Pens Work On Mold
The gel consistency is key. It won't drip or run like liquid bleach, so you can apply it exactly where mold is visible. The bleach concentration is strong enough to kill mold and mildew, but the gel carrier keeps it from evaporating too fast.
This gives the active ingredient time to work into the grout's pores. After 10 minutes, a quick rinse with warm water removes both the gel and the dead mold. You might need to repeat for heavy growth, but one session usually makes a visible difference.
When To Use A Bleach Pen Vs. Other Methods
Bleach pens are best for small, localized mold spots—think a few grout lines in the corner of the shower or around the drain. If you have widespread mold covering large areas, a stronger cleaner or professional treatment might be needed. Also, avoid bleach pens on colored or dark grout, as the bleach can strip the color and leave uneven patches.
For white grout, though, it's one of the easiest and most effective spot treatments you can do.
Safety Tips For Using Bleach Pens
Always ventilate your bathroom when using any bleach product. Open a window or turn on the exhaust fan. Wear gloves to protect your hands, and avoid getting the gel on your skin or clothes.
Rinse the area thoroughly after the dwell time to remove all residue. Never mix bleach with other cleaners, especially ammonia, as that creates toxic fumes. Store the pen out of reach of kids and pets.
14. Use a Pressure Washer for Outdoor Tile Grout
Outdoor tile patios and pool decks take a beating from dirt, algae, and weather. Grout lines can get so embedded with grime that scrubbing feels pointless. That's where a pressure washer steps in—it's the fastest way to blast years of buildup out of those porous lines without breaking your back.
A pressure washer can make short work of grimy outdoor grout, but you have to use it carefully. Stick with a wide fan tip (25 to 40 degrees) and keep the nozzle moving at a steady pace. Hold it about 12 to 18 inches from the surface and test an inconspicuous spot first.
The goal is to clean the grout, not etch the tile. If you see water spraying back with debris, you're on the right track.
Choose The Right Pressure
Not all pressure washers are the same. For grout cleaning, aim for 1, 200 to 1, 900 PSI. Anything higher can chip tile or blow out grout joints.
If your machine has adjustable pressure, start low and work up until you see results. Electric models are usually safer than gas ones for this job.
Use A Surface Cleaner Attachment
A rotating surface cleaner attachment distributes pressure evenly and prevents streaking. It also keeps you from accidentally focusing on one spot too long. For large patios, this tool cuts cleaning time in half and reduces the risk of tile damage.
Protect Surrounding Areas
Pressure washing can splash dirt and cleaning solution onto walls, plants, or furniture. Cover nearby plants with plastic sheeting and move furniture out of the way. If you're using a detergent, choose one labeled safe for plants and rinse thoroughly.
15. Clean Grout with Dish Soap and Warm Water
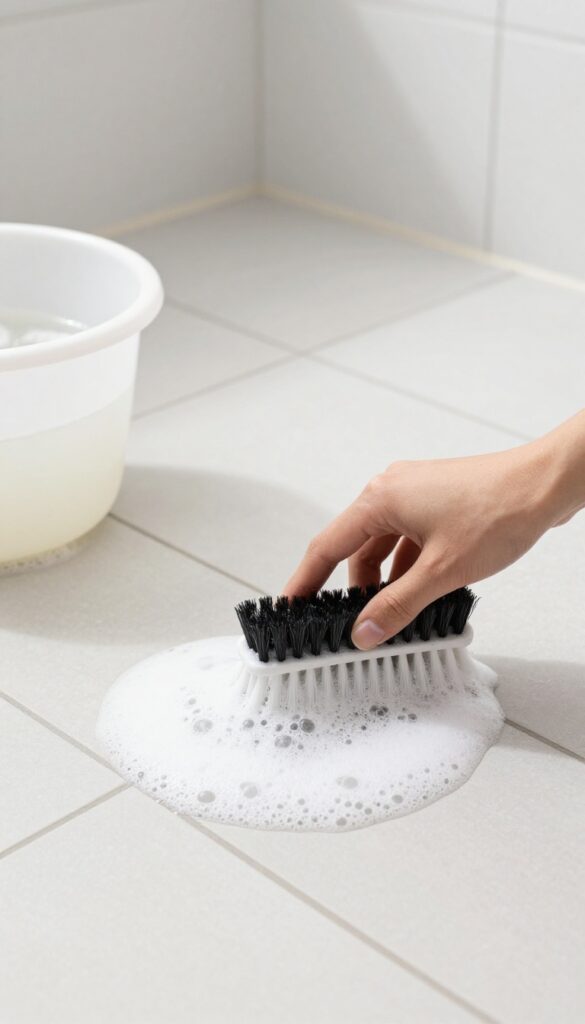
Not every grout cleaning session needs heavy artillery. For routine upkeep, a simple mix of dish soap and warm water does the trick. It's gentle, cheap, and always on hand.
This method won't erase years of neglect, but it's perfect for keeping grout looking decent between deep cleans.
Why Dish Soap Works
Dish soap is designed to cut through grease and grime without being harsh. When diluted with warm water, it loosens daily dirt and soap scum from grout pores. It's also safe for all tile types and won't damage sealants.
Just make sure you use a mild brand without bleach or abrasive additives.
How To Do It Right
Fill a bucket with warm water and add a few drops of dish soap. Dip a stiff-bristled brush (a grout brush or old toothbrush works) into the solution and scrub along the grout lines. Work in small sections, then rinse with clean water.
For vertical surfaces like shower walls, use a spray bottle with the same mixture.
When To Use This Method
This is a maintenance clean, not a stain remover. Use it weekly or bi-weekly to prevent buildup. If your grout is already stained or moldy, you'll need something stronger.
But for keeping fresh grout fresh, dish soap and water is all you need.
16. Use a Pumice Stone for Hard Water Deposits
Hard water stains can turn light grout into a crusty, discolored mess, especially around faucets and showerheads. A pumice stone—yes, the same one you might use on your feet—can gently abrade those mineral deposits without harsh chemicals. The trick is to keep the stone wet and use light pressure so you don't scratch the tile or erode the grout.
Hard water deposits are essentially calcium and magnesium salts that bond to grout over time. A pumice stone is porous and abrasive enough to wear away these deposits without damaging the grout itself, as long as you're careful. This method is ideal for spot treatments on stubborn rings or crusty lines that resist regular cleaners.
How To Use A Pumice Stone Safely
Start by wetting both the pumice stone and the grout area thoroughly. Gently rub the stone back and forth over the hard water deposit using light pressure. You'll see a fine white powder form as the stone wears down the mineral layer.
Rinse frequently to check your progress and avoid over-scrubbing. Never use a dry stone—it can scratch ceramic or porcelain tile.
Best Areas For Pumice Stone Treatment
This tool shines on vertical surfaces like shower walls and around fixtures where water splashes and evaporates, leaving behind rings. It's also great for cleaning the grout line where the tile meets the tub or sink. Avoid using it on polished or glossy tile, as the abrasive action can dull the finish.
Stick to matte or textured tiles for best results.
When To Choose A Pumice Stone Over Chemicals
If you've tried acidic cleaners like vinegar or commercial descalers without success, a pumice stone offers a mechanical alternative that doesn't introduce more chemicals into your home. It's also useful for small, isolated spots where you don't want to mix up a batch of cleaner. Plus, it's reusable—just rinse and let it dry between uses.
17. Try a DIY Vinegar and Baking Soda Fizz
Sometimes the simplest solutions are the most effective. Vinegar and baking soda are kitchen staples that double as powerful cleaners. When combined, they create a fizzy reaction that helps lift dirt and grime from porous grout lines.
This method is especially good for light to moderate buildup and works well in both floor and shower applications.
This classic combo works well for light to moderate grime. The fizzing action helps dislodge dirt from the porous surface of the grout, making it easier to scrub away. It's a budget-friendly and non-toxic option that's safe for most tile types.
How To Apply The Fizz
Start by sprinkling a generous layer of baking soda directly onto the grout lines. Use a spray bottle to mist white vinegar over the baking soda until it's damp and starts to fizz. Let the mixture sit for about 5 to 10 minutes to allow the reaction to work.
Then scrub with a stiff brush or an old toothbrush, working the paste into the grout. Rinse with water and wipe away residue.
When To Use This Method
This technique is ideal for routine cleaning or when grout is looking dull but not heavily stained. It's also a great option if you prefer natural cleaners over chemical ones. However, for deep-set stains or mold, you may need a stronger solution like hydrogen peroxide or a commercial grout cleaner.
Tips For Best Results
Use a small brush to work the fizz into tight corners and along edges. For vertical surfaces like shower walls, apply the mixture in sections to prevent it from drying out. Rinse thoroughly to avoid leaving a sticky residue that can attract more dirt.
18. Use a Carpet Cleaner or Upholstery Tool
If you already own a carpet cleaner, you're sitting on a grout-cleaning secret weapon. Many machines come with a handheld attachment that sprays solution and immediately vacuums it back up. Fill the tank with warm water and a mild cleaner, then run the tool directly over the grout lines.
It's surprisingly effective at pulling deep dirt from the pores without any elbow grease.
This method works best on floor tile where you can move the tool freely. The suction action lifts grime that scrubbing alone can't reach. Plus, it's fast—you can cover a whole bathroom floor in minutes.
Just be sure to use a cleaner that's safe for your machine and won't leave residue.
Choose The Right Attachment
Most carpet cleaners include a small upholstery nozzle or a crevice tool. That's the one you want. It's narrow enough to focus on the grout lines and has a built-in sprayer and suction port.
If you don't have one, check online for compatible attachments—they're often inexpensive.
Mix A Gentle Cleaning Solution
Plain warm water works for light dirt, but for deeper cleaning, add a few drops of dish soap or a splash of white vinegar. Avoid bleach or harsh chemicals that could damage the machine's internal parts. Test the solution on a hidden spot first to make sure it doesn't discolor the grout.
Work In Small Sections
Spray the solution onto a 2-foot section of grout, let it sit for 30 seconds, then run the tool over it with slow, even passes. Empty the dirty water tank frequently so you're not redepositing grime. You'll see the water turn brown—that's the proof it's working.
19. Apply a Grout Colorant for a Uniform Look
If your grout is unevenly colored or just plain stained beyond scrubbing, a grout colorant can be a game changer. It's a paint-like product that covers stains and seals in one step, giving your tile a fresh, uniform appearance. Unlike a grout pen, which can wear off quickly, colorant is more durable and bonds to the grout surface.
Choose The Right Product
Look for a water-based acrylic grout colorant that matches your original grout color closely. Some brands offer a wide range of shades, and you can even mix colors to get an exact match. Avoid oil-based products; they can yellow over time and are harder to clean up.
Prep The Grout Lines
Clean the grout thoroughly before applying colorant. Use a grout cleaner or a baking soda paste to remove any dirt, grease, or mildew. Rinse well and let it dry completely—at least 24 hours.
Any moisture trapped under the colorant can cause peeling.
Application Tips
Apply the colorant with a small brush or a foam applicator, working it into the grout lines. Wipe off any excess from the tile surface immediately with a damp sponge. Work in small sections to avoid drying before you can clean up.
Most colorants require two coats for full coverage.
Seal For Longevity
After the colorant dries, apply a grout sealer to protect the finish. This step is optional but recommended, especially in high-moisture areas like showers. Reapply sealer annually to keep the colorant looking fresh.
20. Prevent Grime with a Daily Squeegee Routine
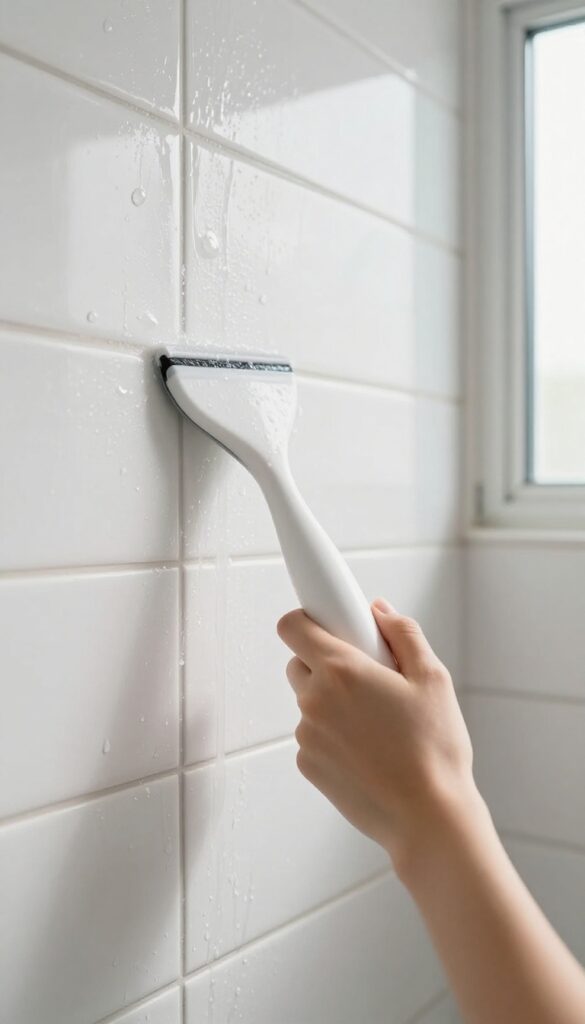
A daily squeegee habit is the simplest way to keep shower grout looking fresh. After every shower, a quick pass over the tiles removes standing water, which is the main culprit behind mold, mildew, and soap scum buildup. This 30-second routine can dramatically extend the time between deep cleans, saving you hours of scrubbing later.
It's easy to overlook, but water left on tile and grout creates a breeding ground for grime. By making a squeegee part of your post-shower ritual, you cut off the moisture that mold and soap scum need to thrive. Plus, it helps prevent hard water stains, keeping your shower looking cleaner day to day.
Why It Works So Well
Grout is porous, so it absorbs moisture quickly. Standing water seeps in, carrying soap residue and minerals that lead to discoloration and mold. A squeegee removes the bulk of that water before it has a chance to soak in.
Over time, this simple step reduces the frequency of deep cleaning sessions and keeps grout looking brighter.
Best Squeegee For The Job
Look for a squeegee with a soft rubber blade and a comfortable handle. A 10- to 12-inch blade covers more area quickly. Keep it hung inside the shower so it's always handy.
For glass doors, a smaller squeegee works well; for large tile walls, a wider one saves time.
Making It A Habit
Store the squeegee where you'll see it immediately after turning off the water. Some people keep a small hook on the shower caddy or a suction cup on the wall. After your shower, take 30 seconds to squeegee from top to bottom.
That's it. No extra scrubbing, no chemicals. Just a quick swipe that pays off in the long run.
FAQ
What is the best homemade grout cleaner?
A baking soda and vinegar paste is a popular and effective homemade cleaner for light to moderate grout stains. For tougher stains, hydrogen peroxide or oxygen bleach works better.
Can I use bleach on grout?
Yes, but with caution. Bleach can whiten and kill mold, but it may also discolor colored grout and weaken it over time. Use a bleach pen for spot treatment and rinse thoroughly.
How often should I clean grout?
For maintenance, clean grout every 2-4 weeks with a mild soap solution. Deep clean every 3-6 months, depending on traffic and moisture. Sealing grout reduces the frequency.
Does steam cleaning damage grout?
No, steam cleaning is safe for most grout types. The high heat and pressure effectively remove dirt without chemicals. Avoid using steam on cracked or loose grout.
How do I prevent grout from getting dirty quickly?
Seal grout after cleaning to create a protective barrier. In showers, use a squeegee daily. In kitchens, wipe spills immediately.
Regular sweeping and mopping also help.
Conclusion
Grout cleaning doesn't have to be a dreaded chore. With the right approach and a little consistency, you can keep your tile floors and showers looking fresh without spending a fortune on products or services. Start with the methods that match your current level of grime, then build a simple maintenance routine.
A few minutes of prevention—like sealing or squeegeeing—will save you hours of scrubbing later. Your grout will thank you.