20 Cleaning Floors Tips for a Brighter Spotless Home
Hardwood scratches, tile grout stains, and dull vinyl—each floor type has its own nemesis. You don't need a closet full of specialty products to tackle them all.
These 20 cleaning floor tips target specific surfaces and common messes, from daily grit to set-in scuffs. Simple swaps like microfiber mops and doormats can prevent damage before it starts.
Ready to bring back that spotless shine without the guesswork? Let's walk through practical fixes that actually work for your home.
1. Sweep or Vacuum Daily to Prevent Grit Scratches
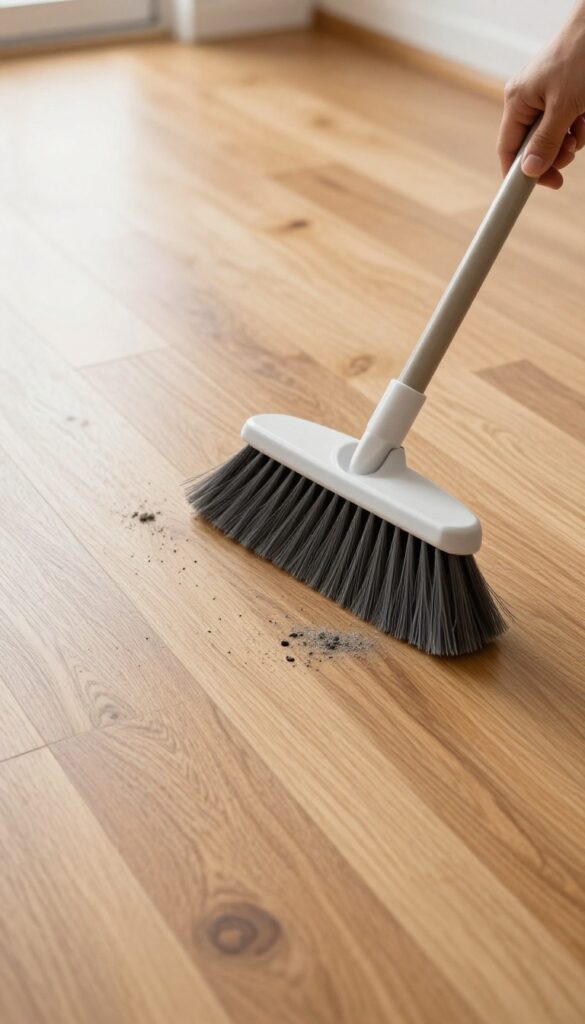
Dirt and grit are the biggest enemies of beautiful floors. Every time you walk through your home, tiny particles of sand, dust, and debris get ground into the surface. Over time, this creates micro-scratches that dull the finish and make floors look worn.
A quick daily sweep or vacuum with a soft brush attachment removes that abrasive layer before it can do damage. It takes less than five minutes and can double the life of your floor's appearance.
Why Grit Is Like Sandpaper
Think about what happens when you rub sandpaper across wood. That's exactly what dirt does to your floors on a microscopic level. Hard particles from shoes, pet paws, and outdoor debris embed themselves in the finish.
Each step grinds them deeper, creating tiny grooves that catch light and look like scratches. Hard floors like hardwood, laminate, and tile are especially vulnerable because the particles have nowhere to go but across the surface.
Choose The Right Tool For Your Floor Type
Not all vacuums are floor-friendly. For hardwood and laminate, use a vacuum with a soft bristle brush or a hard floor setting to avoid scratching. Canister vacuums with a floor nozzle work great.
For tile and stone, a stiff broom can handle grout lines, but a vacuum with a crevice tool gets into corners. Avoid vacuums with rotating beater bars on delicate surfaces—they can leave marks. A microfiber dust mop is also a gentle option for quick daily touch-ups.
Make It A Habit That Sticks
The easiest way to remember daily sweeping is to tie it to an existing routine. Do it right after dinner or while your morning coffee brews. Keep a lightweight cordless vacuum or a dust mop in a convenient spot so you don't have to haul out heavy equipment.
Even 60 seconds in high-traffic areas makes a difference. Over a week, that adds up to significantly less grit grinding into your floors.
2. Use Microfiber Mops for Streak-Free Shine
Switching to a microfiber mop is one of the simplest upgrades you can make for your floors. Unlike traditional cotton mops that just push dirty water around, microfiber traps dust, dirt, and grime deep in its fibers. It also absorbs liquid more effectively, leaving surfaces dry and streak-free—especially on hardwood and tile.
Microfiber mops work because of their electrostatic charge, which attracts dust like a magnet. They also require less water and cleaning solution, reducing the risk of warping wood or leaving soapy residue on tile. For best results, dampen the mop slightly rather than soaking it; wring it out until it's just barely moist.
This prevents standing water and ensures a quick-drying, shiny finish.
Why Microfiber Beats Cotton
Cotton mops tend to shed lint and leave behind a thin film of dirty water. Microfiber, on the other hand, holds up to eight times its weight in liquid and releases it only when you apply pressure. That means you pick up grime instead of spreading it.
Plus, microfiber is reusable and machine washable, making it eco-friendly and cost-effective.
How To Use A Microfiber Mop Correctly
Start by sweeping or vacuuming loose debris to avoid scratching. Then, dampen the mop head with water or a pH-neutral cleaner—avoid harsh chemicals that can break down the fibers. Mop in a figure-eight pattern to trap dirt, and rinse the mop head frequently.
For large areas, flip the mop head to a fresh side when it gets dirty.
Best Practices For Different Floor Types
On hardwood, use a dry or barely damp microfiber mop to prevent moisture damage. For tile and vinyl, a slightly damp mop works well to remove sticky spots. Avoid using fabric softener when washing microfiber pads, as it clogs the fibers and reduces their effectiveness.
Replace pads when they start to smell or lose their grip.
3. Match Your Cleaner to Your Floor Type
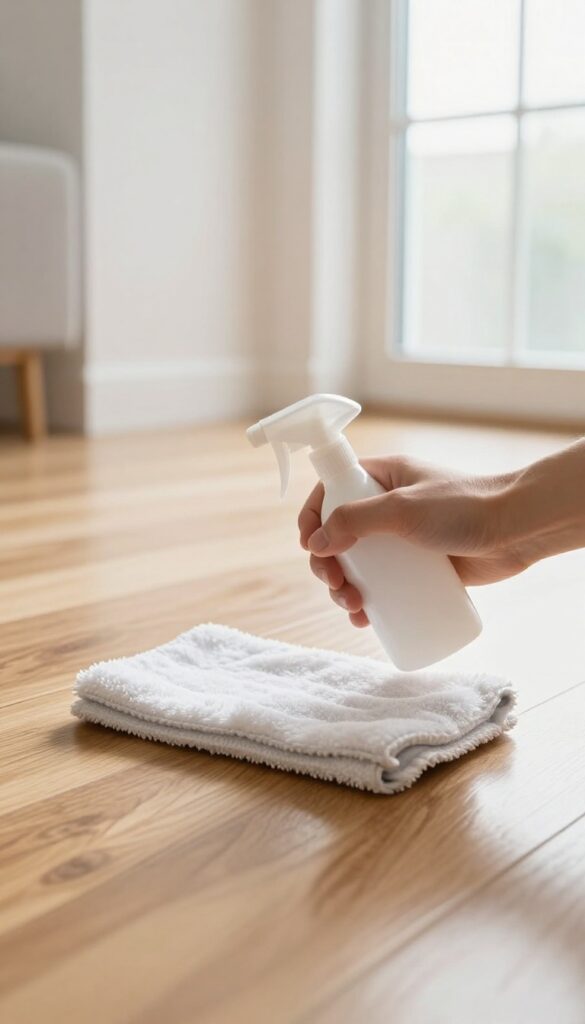
Not all floor cleaners are created equal. Using the wrong product can strip finishes, leave residue, or even cause permanent damage. The golden rule is simple: know your flooring before you pour anything on it.
Hardwood, tile, laminate, vinyl, and stone each have unique needs. A cleaner that works wonders on ceramic tile can ruin a hardwood seal. Always check the manufacturer's recommendations—they know their product best.
When in doubt, test a small, hidden area first.
Hardwood: Gentle And Ph-balanced
Hardwood floors hate excess water and harsh chemicals. Use a cleaner specifically formulated for hardwood, or a mild soap-and-water solution (with a well-wrung mop). Avoid vinegar, ammonia, or steam mops—they can dull the finish over time.
Tile And Grout: Alkaline Or Acidic?
For ceramic or porcelain tile, a mild alkaline cleaner works well for daily grime. For stubborn grout stains, a diluted vinegar solution (1: 1 with water) can help. But never use vinegar on natural stone tile—it etches the surface.
Always rinse thoroughly to avoid residue buildup.
Laminate And Vinyl: Low-moisture Approach
Laminate and vinyl are water-resistant but not waterproof. Excess moisture can seep into seams and cause warping or peeling. Use a damp (not wet) microfiber mop with a cleaner designed for these surfaces.
Avoid wax-based products—they leave a dull film.
4. Tackle Spills Immediately to Avoid Stains
A spill that sits for even a few minutes can turn into a permanent stain. The key is acting fast and using the right technique. Blotting—not rubbing—lifts liquid without grinding it into the fibers or pores of your floor.
Spills happen, but how you respond makes all the difference. Whether it's red wine on hardwood or coffee on tile, quick action prevents discoloration and damage. Keep a clean cloth or paper towels handy in every room so you're never scrambling.
For sticky spills, a damp microfiber cloth followed by a dry one works wonders. And always check your floor manufacturer's guidelines for specific cleaners.
Blot, Don’t Rub
Rubbing spreads the spill and pushes it deeper into the flooring. Instead, place a clean cloth over the spill and press gently to absorb as much liquid as possible. Repeat with a fresh section of cloth until no more moisture transfers.
For thick spills like sauce, scrape off the excess with a spatula first, then blot.
Use The Right Cleaner For The Floor Type
Not all floor cleaners are safe for all surfaces. On hardwood, use a pH-neutral cleaner or a vinegar-water mix (diluted). For tile, a mild dish soap solution works.
Laminate and vinyl need gentle, non-abrasive cleaners to avoid dulling the finish. Always test a new cleaner on an inconspicuous spot first.
Treat Stubborn Stains Immediately
For spills that have already started to set, apply a small amount of cleaner directly to the stain and let it sit for a minute before blotting. For grease or oil, sprinkle baking soda or cornstarch to absorb, then vacuum and clean. Avoid harsh scrubbing pads that can scratch the surface.
5. Place Doormats at Every Entrance
Doormats are your floor's first line of defense against dirt, mud, and moisture. They catch debris before it gets tracked onto your surfaces, saving you from extra scrubbing. A simple two-mat system can cut your cleaning time in half.
This tip works for every floor type, from hardwood to vinyl. The key is using the right mat in the right spot.
The Two-mat Strategy
Place a rough, scrape-style mat outside the door to remove large debris like mud and gravel. Inside, use a soft, absorbent mat to catch finer dust and moisture. This combo stops dirt at the door and protects your floors all day.
Where To Put Them
Every entrance counts—front door, back door, garage entry, and even the door to your patio. High-traffic areas like the kitchen and bathroom also benefit from small mats. Don't forget to shake or vacuum them weekly to keep them effective.
Choosing The Right Material
For outdoor mats, look for coir or rubber that can handle weather and scraping. Indoor mats should be absorbent—cotton, microfiber, or chenille work well. Avoid rubber-backed mats on hardwood or laminate, as they can trap moisture and cause damage.
6. Use Felt Pads Under Furniture Legs
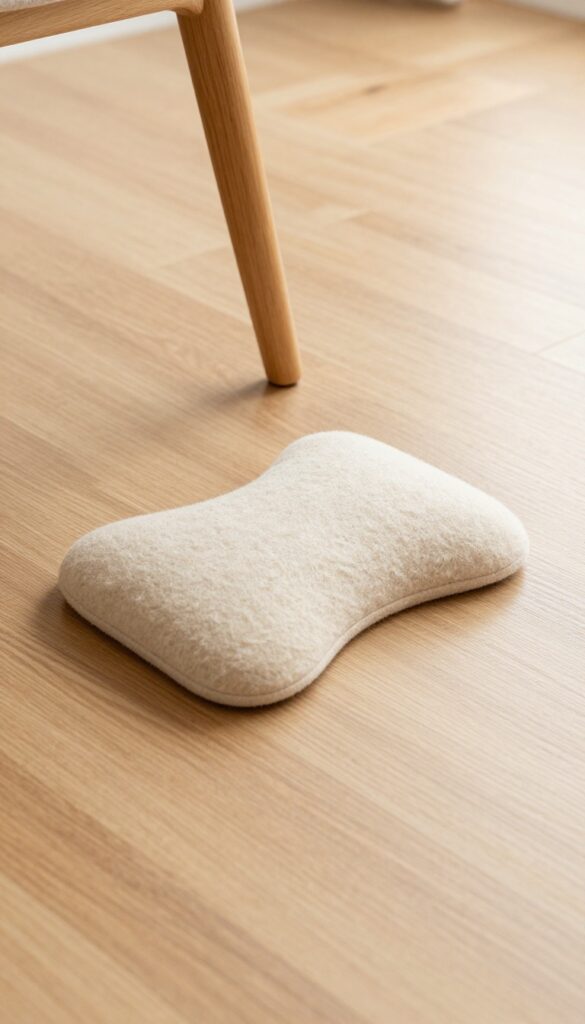
Furniture movement is a hidden culprit behind many floor scratches and scuffs. Even sliding a chair a few inches can leave marks that dull your floor's finish over time. Felt pads offer a simple, low-cost solution that lets furniture glide smoothly without damaging the surface.
These adhesive pads attach to the bottom of chair legs, table legs, and sofa feet. They create a soft buffer between the furniture and the floor, reducing friction and preventing scratches. Plus, they make moving furniture much easier—no more lifting heavy pieces just to rearrange a room.
Felt pads aren't a set-it-and-forget-it fix, though. They wear down with use and need replacing periodically. But when maintained, they're one of the most effective ways to protect your floors from everyday wear and tear.
Choosing The Right Felt Pads
Not all felt pads are created equal. Look for pads made from dense, high-quality felt that won't flatten or disintegrate quickly. Thicker pads (around 3-4 mm) offer better cushioning and last longer than thin ones.
Also consider the adhesive—self-adhesive pads are convenient, but some may leave residue when removed. For a more permanent solution, try screw-in felt glides that attach directly to furniture legs. They stay put and don't rely on adhesive.
How To Apply Felt Pads Correctly
Clean the furniture leg thoroughly before applying the pad. Any dust or grease will weaken the adhesive bond. Wipe with a damp cloth and let it dry completely.
Peel the backing and press the pad firmly onto the leg, holding for a few seconds. For uneven or curved legs, use pads with a flexible backing that conforms to the shape. Apply pads to all legs of a piece—even if some legs seem stable, uneven wear can still cause scratches.
When To Replace Felt Pads
Felt pads wear out over time, especially on chairs that move frequently. Check them every few months. If the felt is matted, thin, or torn, it's time for a replacement.
Also watch for dirt or grit embedded in the pad—this can actually scratch the floor. Replace pads if they become dirty or lose their smooth surface. Keeping a few spare pads on hand makes it easy to swap them out as needed.
7. Deep Clean Hardwood with a Damp (Not Wet) Mop
Hardwood floors add warmth and elegance to any room, but they hate standing water. A soaking wet mop can seep into the seams and cause the wood to swell, cup, or even rot over time. The trick is to use as little moisture as possible while still lifting dirt effectively.
Start by sweeping or vacuuming thoroughly to remove loose grit. Then fill a bucket with a hardwood-safe cleaner mixed according to the label. Dip your microfiber mop, wring it until no water drips out, and mop in sections.
Follow up immediately with a dry microfiber cloth or towel to soak up any leftover moisture. This two-step process leaves your floors clean and dry, protecting the finish and the wood underneath.
Why Damp Beats Wet
Hardwood is porous. When you use a wet mop, water seeps into the grain and the gaps between planks. Over time, this causes warping, discoloration, and even mold growth.
A damp mop lifts dirt without saturating the wood, keeping the floor stable and beautiful.
The Right Mop And Cleaner
A microfiber flat mop with a removable head is ideal because it holds less water than a string mop. For cleaner, avoid anything with wax, oil, or harsh chemicals. Stick to a pH-neutral hardwood floor cleaner or a simple solution of water and a few drops of dish soap.
Drying: The Crucial Step
Even with a damp mop, moisture lingers on the surface. Grab a clean, dry microfiber cloth or towel and wipe the floor dry as you go. This prevents water spots and ensures no moisture sits long enough to damage the wood.
It takes an extra minute but saves your floors for years.
8. Remove Scuff Marks with a Tennis Ball or Baking Soda
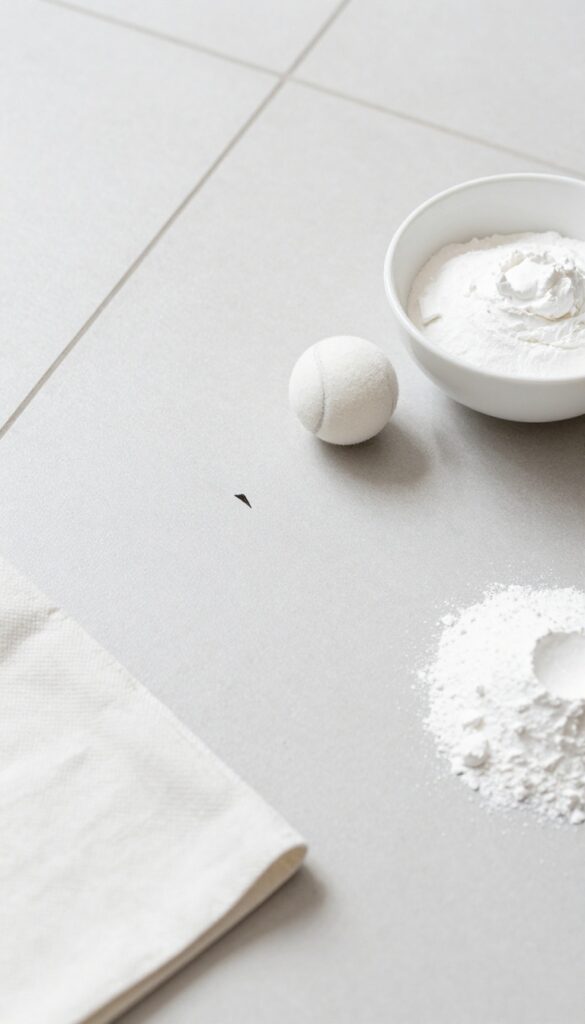
Scuff marks from shoes or furniture can make even a freshly cleaned floor look dirty. The good news is you don’t need harsh chemicals to erase them. A simple tennis ball or a pantry staple like baking soda can do the trick without damaging the surface.
The Tennis Ball Trick For Tile And Vinyl
Cut a small slit in a clean tennis ball and slip it onto the end of a broom or mop handle. Rub the ball firmly over the scuff marks. The rubber gently abrades the mark without scratching the floor.
Wipe away any residue with a damp cloth.
Baking Soda Paste For Stubborn Marks
Mix three parts baking soda with one part water to form a thick paste. Apply it to the scuff mark and let it sit for a minute. Gently scrub with a soft cloth or sponge in a circular motion.
Rinse clean and dry the area. This works well on linoleum, laminate, and sealed hardwood.
Prevention Tips To Reduce Future Scuffs
Place felt pads under furniture legs and encourage family and guests to remove shoes at the door. Regularly sweep or vacuum to remove grit that can cause scuffs when walked on. A quick daily routine keeps your floors looking newer longer.
9. Steam Clean Tile and Grout for a Deep Refresh
Tile floors look great when they're clean, but grout lines tend to trap dirt and grime that mopping alone can't remove. Steam cleaning offers a chemical-free way to blast away that buildup and sanitize the surface at the same time. It's a deep refresh that leaves your tile looking almost new.
A steam cleaner uses high-temperature vapor to loosen dirt and kill bacteria without harsh chemicals. For tile floors, this is especially useful because grout is porous and absorbs spills. The steam penetrates those tiny pores and lifts out embedded grime.
Just make sure your tile is sealed—steam can damage unsealed grout or cause it to crack over time. Also, avoid using steam on laminate or engineered wood, as the moisture can warp the material.
Why Steam Works On Grout
Grout is like a sponge—it soaks up everything from spilled coffee to tracked-in mud. A mop only wipes the surface, but steam forces moisture and heat deep into the grout lines. This loosens dirt and kills mold spores and bacteria.
It's a one-two punch for a deeper clean.
Best Practices For Steam Cleaning Tile
Always check if your tile is sealed before using steam. Apply a small amount of water to the grout—if it beads up, it's sealed and safe. If it absorbs quickly, skip the steam or seal it first.
Move the steamer slowly over grout lines and use a brush attachment for stubborn spots. Wipe away excess moisture afterward to prevent residue.
When To Avoid Steam Cleaning
Steam is not for every floor. Avoid it on unsealed grout, laminate, vinyl, or hardwood. The heat and moisture can cause swelling, warping, or discoloration.
Stick to tile and natural stone that are sealed. If you're unsure, test in an inconspicuous area first.
10. Polish Laminate with a Vinegar and Water Solution
Laminate flooring is durable and budget-friendly, but it can be tricky to clean without causing damage. Many store-bought cleaners leave a dull film or even warp the surface over time. A simple vinegar and water solution is all you need to keep laminate looking fresh and streak-free.
Mixing your own cleaner is easy and safe for laminate floors. Combine 1 cup of white vinegar with 1 gallon of warm water in a bucket. This solution cuts through grease and grime without leaving residue.
Avoid using wax, polish, or oil-based soaps—they can create a cloudy buildup that's hard to remove.
Why Vinegar Works Best
Vinegar is mildly acidic, which helps dissolve dirt and disinfect without harsh chemicals. It evaporates quickly, so there's less risk of moisture seeping into the seams of your laminate. Plus, it's inexpensive and non-toxic, making it a safe choice for homes with kids or pets.
Application Tips For Best Results
Dampen a microfiber mop in the solution, then wring it out until it's barely moist. Excess water is laminate's enemy—standing water can cause swelling or warping. Mop in the direction of the planks to avoid streaks, and let the floor air dry completely before walking on it.
What To Avoid On Laminate
Steer clear of abrasive scrubbers, steam mops, and ammonia-based cleaners. Steam and excess moisture can damage the core layer, while harsh chemicals may strip the protective finish. Stick to gentle, pH-neutral solutions like vinegar and water for routine cleaning.
11. Use a Squeegee on Hard Floors for Pet Hair
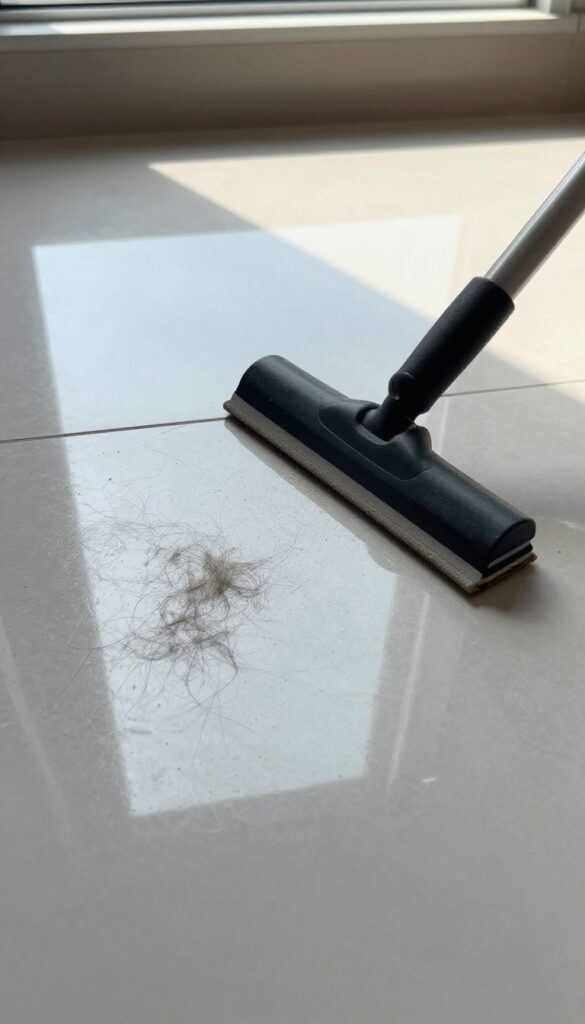
Pet hair on hard floors can feel like a never-ending battle. Brooms often scatter it, and vacuums can be noisy or miss the fine stuff. A simple rubber squeegee—the kind you use on windows—works like magic for gathering fur into tidy piles.
Why A Squeegee Works So Well
The rubber blade creates static electricity that attracts pet hair, while the flat edge glides over the floor without scratching. It grabs hair that brooms leave behind and doesn't kick dust into the air. Plus, it's cheap and easy to clean—just rinse or wipe the blade.
How To Use It Step By Step
Start at one end of the room and pull the squeegee toward you in long, overlapping strokes. The hair will bunch up in front of the blade. Once you have a few piles, sweep them up with a dustpan or vacuum them away.
For large areas, work in sections so the piles don't get too big.
Best Floor Types For This Trick
Squeegees work beautifully on tile, vinyl, laminate, and sealed hardwood. Avoid using them on unsealed wood or delicate surfaces that might scratch. If you have textured tile, test a small area first—the blade might catch on rough spots.
12. Brighten Dull Vinyl with Ammonia
Vinyl flooring can lose its luster over time, especially in high-traffic areas. Before you consider replacing it, try a simple ammonia solution to restore that original shine. It's an old-school trick that works wonders on dull, hazy vinyl.
Why Ammonia Works
Ammonia is a mild alkaline cleaner that cuts through grease and grime without damaging vinyl's protective layer. Unlike harsh chemicals, it gently removes the cloudy film that builds up from wax, soap residue, and foot traffic. Just be sure to use clear ammonia, not the sudsy kind.
How To Mix And Apply
Combine 1/2 cup of clear ammonia with one gallon of warm water. Mop the floor with this solution, working in small sections. Let it sit for a minute or two, then go over it again with a clean mop to pick up the loosened dirt.
Don't let the solution dry on the floor.
Rinse And Ventilate
After mopping, rinse the floor thoroughly with plain water to remove any ammonia residue. Open windows and doors to ventilate the area while you work. The smell dissipates quickly once the floor dries, leaving a bright, streak-free shine.
13. Remove Carpet Stains with Club Soda and Salt
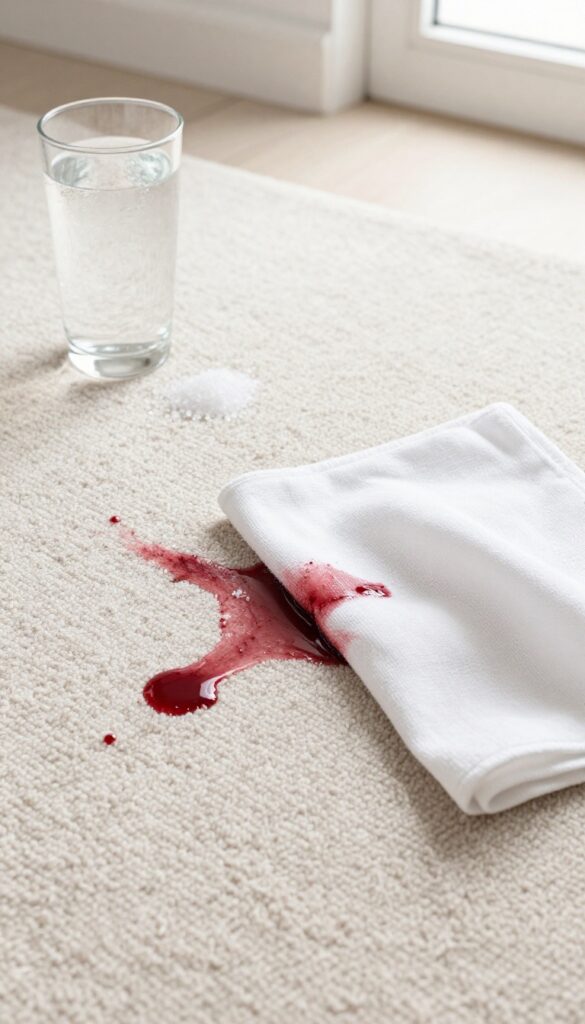
Carpet stains are inevitable, but you don't need harsh chemicals to tackle them. Club soda and salt make a surprisingly effective duo for fresh spills and set-in spots alike. The carbonation in club soda helps lift dirt from fibers, while salt absorbs moisture and pulls the stain out.
This simple method works on most water-based stains, like wine, coffee, or juice.
Start by blotting the stain with a clean cloth to remove as much liquid as possible. Pour club soda directly onto the stain until it's saturated, then blot again. Sprinkle a generous layer of salt over the area and let it sit for a few hours or overnight.
The salt will absorb the club soda and any dissolved residue. Vacuum up the dried salt, and the stain should be noticeably lighter or gone. For stubborn stains, repeat the process or gently scrub with a soft brush before vacuuming.
Why Club Soda Works
Club soda contains carbonic acid, which creates bubbles that help break down and lift dirt from carpet fibers. The salt acts as an absorbent, drawing the moisture and stain into itself. Together, they form a gentle but effective cleaning paste that's safe for most carpet types.
Step-by-step Application
Blot the stain gently with a paper towel to remove excess liquid. Pour club soda over the stain, covering it completely. Let it fizz for a minute, then blot again.
Sprinkle a thick layer of table salt or kosher salt over the damp area. Allow it to dry completely—this may take several hours. Vacuum the salt residue.
If the stain remains, repeat or use a soft brush to work the solution into the fibers before drying.
Tips For Best Results
Always test on an inconspicuous area first to ensure colorfastness. For older stains, pre-treat with club soda and let it sit for 10 minutes before adding salt. Avoid rubbing the stain, as it can spread and damage fibers.
Use this method on synthetic carpets; for wool or delicate fibers, consult a professional.
14. Deodorize Carpets with Baking Soda and Essential Oils
Carpets trap odors from pets, cooking, and daily life. Even after vacuuming, a musty or stale smell can linger. Luckily, you can refresh your carpets with a simple, natural deodorizer that costs pennies and smells amazing.
Mix one cup of baking soda with 10–15 drops of your favorite essential oil—lavender for relaxation or lemon for a fresh, clean scent. Sprinkle the mixture evenly over your carpet, focusing on high-traffic areas or spots where odors are strongest. Let it sit for at least 15 minutes (longer for stubborn smells).
Then vacuum thoroughly. The baking soda absorbs odors while the oil leaves a light, natural fragrance. Repeat monthly to keep carpets smelling fresh.
Why Baking Soda Works
Baking soda is a natural odor absorber. It neutralizes acidic and alkaline odor molecules, trapping them until vacuumed away. Unlike chemical sprays that mask smells, baking soda actually removes them.
Choosing The Right Essential Oil
Lavender promotes calm and is great for bedrooms. Lemon or orange oils give an energizing, clean scent for living areas. Tea tree oil has antibacterial properties and works well in homes with pets (but avoid if pets are sensitive).
Tips For Best Results
Vacuum the carpet first to remove surface dirt. Use a fine-mesh strainer or old spice shaker to distribute the mixture evenly. Don't oversaturate—too much oil can stain.
Test a small area first if you have light-colored carpet.
15. Protect Floors During Painting or DIY Projects
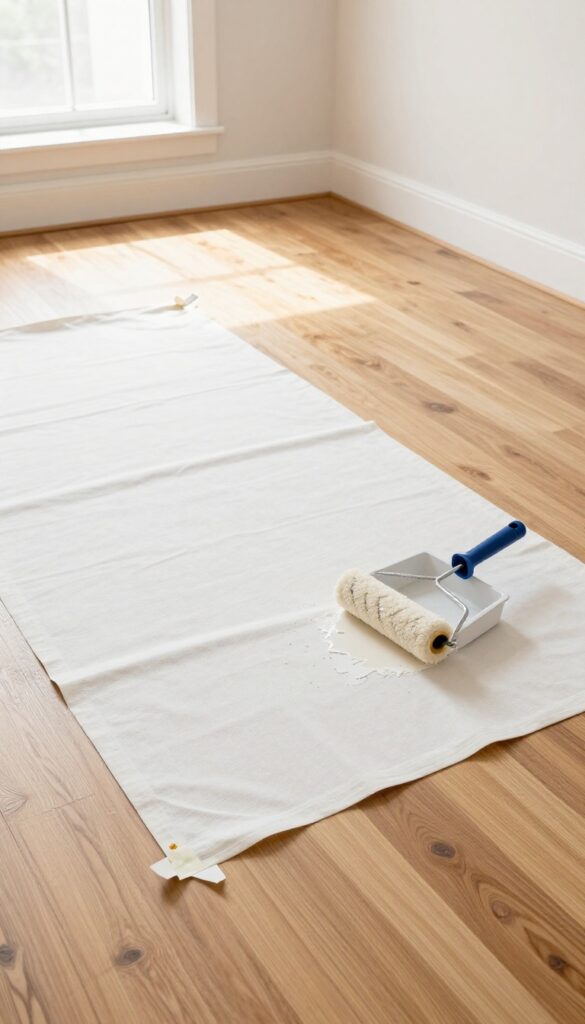
Painting a room or tackling a DIY project can quickly turn into a floor disaster. Drips, spills, and dropped tools leave marks that are tough to remove. The right protection saves you from extra scrubbing later.
Canvas drop cloths are your best friend here. Unlike plastic, they absorb spills and provide a non-slip surface. Tape down the edges with painter's tape to keep them from shifting as you move around.
Why Canvas Beats Plastic
Plastic sheeting might seem cheaper, but it's slippery and lets paint pool on top. If you step in it, you track paint everywhere. Canvas absorbs liquid, so spills dry in place.
It also stays put on most floors without sliding around.
Taping Tricks For Full Coverage
Use wide painter's tape to secure drop cloths along baseboards and door thresholds. Overlap cloths by at least 6 inches to prevent paint from seeping through gaps. For furniture, cover legs with plastic wrap or old socks before moving them.
Quick Cleanup If Accidents Happen
If paint drips onto an uncovered area, act fast. For latex paint, wipe with a damp cloth immediately. For oil-based paint, use mineral spirits on a rag.
Test in an inconspicuous spot first to avoid damaging the floor finish.
16. Clean Grout with Hydrogen Peroxide and Baking Soda
Grout lines can turn dingy and dark even when the rest of the floor looks clean. Instead of reaching for bleach or harsh chemicals, try a gentler DIY paste that lifts stains without the strong fumes. Hydrogen peroxide and baking soda work together to whiten and brighten grout naturally.
Mix baking soda and hydrogen peroxide into a thick paste—about 2 parts baking soda to 1 part peroxide. Apply the paste directly onto the grout lines using an old toothbrush or a small brush. Let it sit for 10 minutes so the peroxide can penetrate and lift embedded dirt.
Then scrub the grout lines with the toothbrush in a circular motion. Rinse thoroughly with water and wipe away any residue. The result is noticeably whiter grout without the harsh smell of bleach.
Why This Paste Works
Hydrogen peroxide is a mild bleaching agent that breaks down organic stains and kills mold spores. Baking soda is a gentle abrasive that helps scrub away grime without scratching the tile. Together they create a fizzing action that lifts dirt from porous grout.
Tips For Best Results
Test the paste on a small hidden area first to ensure your tile is colorfast. For stubborn stains, let the paste sit longer—up to 20 minutes. Use a stiff-bristled brush for deeper cleaning.
Rinse with warm water and dry the area with a clean cloth to prevent new stains.
When To Avoid This Method
If your grout is unsealed, the peroxide can lighten it unevenly. Always seal grout after deep cleaning to protect it. Avoid this method on natural stone tiles like marble or travertine, as peroxide can etch the surface.
17. Use a Robot Vacuum for Daily Maintenance
Let a robot vacuum handle the daily grind so you don't have to. These little devices are perfect for high-traffic areas like kitchens, hallways, and living rooms where crumbs and dust accumulate fast. Set it to run once a day, and you'll cut down on manual sweeping significantly.
A robot vacuum won't replace a deep clean, but it keeps surface debris in check. That means less dirt tracked around and fewer scratches from grit. Over time, this daily maintenance preserves your floors' finish and reduces the frequency of heavy cleaning sessions.
Choose The Right Model For Your Floor Type
Not all robot vacuums work well on every surface. For hardwood or laminate, look for one with soft rubber brushes and a suction-only mode to avoid scratching. On carpets, a model with a brush roll and strong suction lifts embedded dirt.
Many modern robots automatically adjust suction when transitioning between surfaces.
Set A Schedule That Matches Your Routine
Consistency is key. Program your robot to run while you're at work or asleep so it doesn't interfere with daily life. Focus on high-traffic zones first—you can always add more rooms later.
Most apps let you set no-go zones to keep the robot away from pet bowls or delicate rugs.
Keep The Robot Itself Clean
A dirty robot won't clean well. Empty the dustbin after every run and clean the brushes and sensors weekly. Hair and string can wrap around the brush roll, so check it regularly.
Wipe the charging contacts and sensors with a dry cloth to maintain navigation accuracy.
18. Avoid Wax on No-Wax Floors
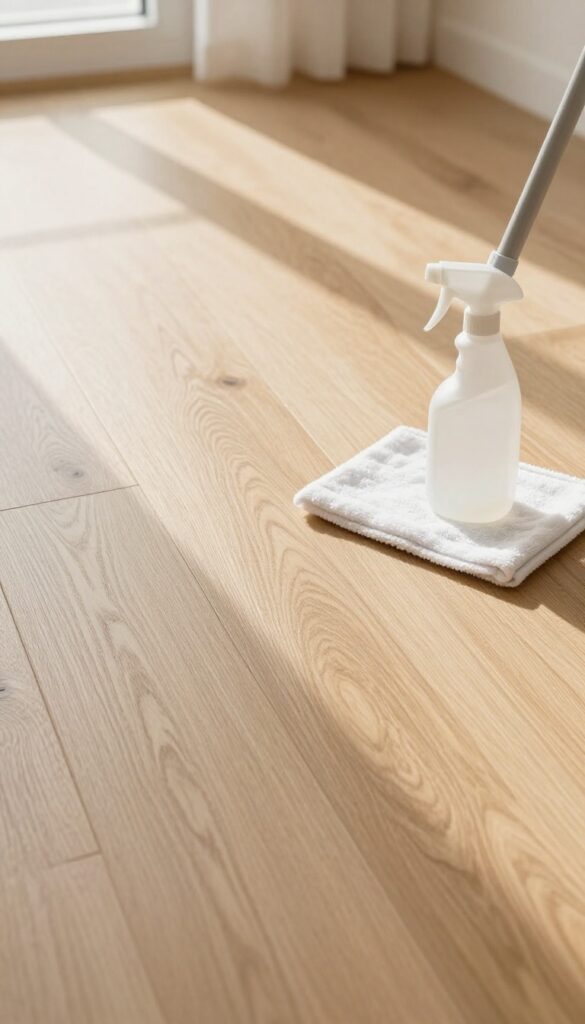
No-wax floors, like many vinyl and laminate options, are designed to be low-maintenance. They come with a factory-applied protective layer that doesn't need—and shouldn't get—any wax. Applying wax to these surfaces can lead to a cloudy buildup that's tough to remove and actually attracts more dirt and grime.
Why No-wax Means No Wax
No-wax floors have a sealed top layer that provides shine and protection. Wax can't bond properly to this surface, so it sits on top and creates a sticky film. Over time, that film traps dirt, making the floor look dull and feel tacky.
Once buildup occurs, stripping it off requires harsh chemicals or vigorous scrubbing, which can damage the floor's finish.
The Right Cleaners For No-wax Floors
Stick to pH-neutral cleaners specifically labeled for no-wax floors. Avoid anything with oils, silicones, or wax additives. A simple mix of warm water and a few drops of mild dish soap works well for regular cleaning.
For deeper cleans, use a manufacturer-recommended product. Always test a small hidden area first.
How To Fix Accidental Wax Buildup
If you've already applied wax, you can remove it with a solution of warm water and white vinegar (1 cup vinegar per gallon of water). Mop the floor with the solution, let it sit for a few minutes, then scrub gently with a soft brush. Rinse thoroughly with clean water and dry with a microfiber mop.
For stubborn buildup, use a commercial wax remover designed for no-wax floors, following the instructions carefully.
19. Dry Mop Stone Floors to Prevent Etching
Stone floors bring natural beauty into your home, but they also come with a catch: they’re surprisingly delicate. Acidic spills and harsh cleaners can permanently etch the surface, leaving dull marks that are tough to fix. The good news is that daily maintenance is simple if you stick to dry methods.
The key to keeping stone floors looking their best is to avoid moisture and acidic cleaners during routine cleaning. A dry microfiber mop picks up dust and grit without scratching or dulling the finish. For deeper cleans, use a pH-neutral stone cleaner and a damp mop, then dry immediately.
Why Dry Mopping Works Best
Stone is porous, so water and cleaning solutions can seep in and cause damage over time. Dry mopping removes abrasive particles that scratch the surface when walked on. It also prevents streaks and residue that make stone look cloudy.
Choosing The Right Mop
Opt for a flat microfiber mop with a washable pad. Avoid string mops that hold excess water and can leave puddles. Microfiber attracts dust like a magnet and won't shed lint, making it ideal for stone.
When To Use A Damp Mop
For sticky spots or high-traffic areas, lightly dampen your microfiber mop with a pH-neutral stone cleaner. Never use vinegar, lemon, or all-purpose cleaners—they’re too acidic. Wipe the floor and immediately dry with a clean cloth to prevent water spots.
20. Schedule a Seasonal Deep Clean for All Floors
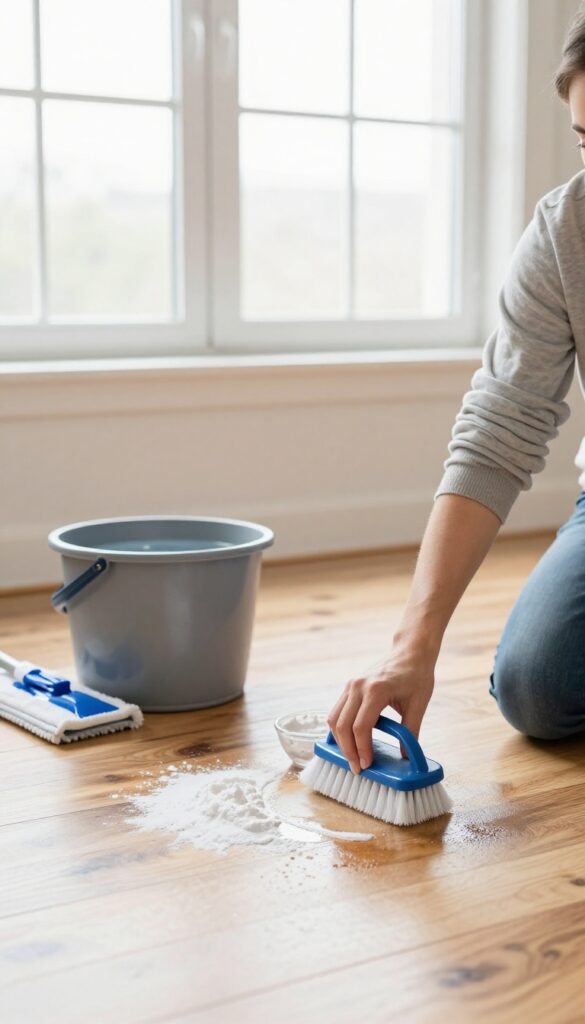
Daily sweeping and spot cleaning keep floors looking decent, but they don't tackle the grime that builds up over months. A seasonal deep clean resets every surface, removing embedded dirt, sticky residue, and dulling film that regular maintenance misses. Set a calendar reminder for every three months.
Move furniture, clear rugs, and give each floor type the treatment it needs. This habit not only restores shine but also extends the life of your flooring by preventing long-term damage.
Prep The Room Like A Pro
Before you start scrubbing, remove all furniture, area rugs, and small items. Vacuum or sweep thoroughly to pick up loose dirt and debris. Check corners and under baseboards for hidden dust bunnies.
This step ensures you're not just pushing grime around when you start wet cleaning.
Tailor Your Cleaning Method To Each Floor
Hardwood needs gentle cleaning with a pH-neutral hardwood cleaner and a slightly damp mop. Tile and grout benefit from a stiff brush and a baking soda paste for deep stains. Vinyl and laminate can handle a mild all-purpose cleaner, but avoid excess water that can seep into seams.
Stone floors require a stone-safe cleaner—never vinegar or acidic products that etch the surface.
Don't Forget The Details
After the main cleaning, wipe down baseboards, door thresholds, and corners where dust accumulates. Use a microfiber cloth to buff away any streaks or residue. Let floors dry completely before moving furniture back.
Place felt pads under furniture legs to prevent scratches and make future cleaning easier.
FAQ
How often should I mop my floors?
High-traffic areas like kitchens and entryways benefit from mopping once a week. Less-used rooms can be mopped every two weeks. Always sweep or vacuum first to remove loose dirt.
Can I use vinegar on all floor types?
No. Vinegar is safe for tile, vinyl, and laminate but can damage hardwood and stone because of its acidity. Always test in an inconspicuous area first.
What's the best way to remove pet urine from carpets?
Blot up as much as possible, then apply an enzymatic cleaner specifically designed for pet stains. Avoid steam cleaning until the stain is fully removed, as heat can set the odor.
How do I prevent scratches on hardwood floors?
Place felt pads under furniture, avoid walking on hardwood with high heels or cleats, and keep pet nails trimmed. Sweep daily to remove grit that can cause scratches.
Is steam cleaning safe for laminate floors?
No. Steam can seep into laminate seams and cause warping or swelling. Stick to damp mopping with a laminate-safe cleaner.
Conclusion
Keeping your floors spotless doesn't have to be a chore. By adopting a few simple habits—like daily sweeping, using the right cleaner, and tackling spills fast—you can maintain that just-cleaned look with minimal effort. Remember, prevention is just as important as cleaning.
Doormats, felt pads, and regular maintenance will save you time and keep your floors beautiful for years. Try these tips and enjoy a brighter, cleaner home every day.